|
|
|
38:54 |
|
|
transcript
|
5:45 |
Hello and welcome to Mastering PyCharm.
In this course, we're going to look at all the different features of one of the very best Python IDEs— PyCharm, and see how you can make the most of this super powerful editor.
Let's jump right into what we're going to cover.
First thing we are going to talk about is why do we want to use an IDE, what value does some large, heavyweight application like PyCharm bring and why would we want to use it.
You'll see there's many reasons and you'll definitely want to use many of the features that are there, but let's talk about the various types of editors we can use and what the trade-offs are there.
When we're working with PyCharm, we're focused on this idea called projects, this is like a group of Python files and associated other static and data files that all work together, there's many of the features in PyCharm that work at this level.
We're going to start by focusing on creating new projects and working with all the files and you'll see there's a bunch of configuration switches we can set to make it be a little more effective.
Then we're going to jump right into what I would say is the star of the show— the editor.
If you're writing code you need an editor, you want to be typing and manipulating text, of course, the editor has to be awesome, we're going to focus on all the cool features that the PyCharm editor offers.
We'll see that source control in particular, git and subversion are really deeply integrated into PyCharm, there's all sorts of powerful things we can do including actual github integration, not just git but github integration into github issues and things like that.
We were going to focus on source control and the features right inside the IDE that we can use for git and github and things like that.
We're going to see that PyCharm is great at refactoring this is changing our code to restructure it to maybe be structured in a different way, to use a slightly different algorithm, but not actually changing the behavior of the code; we'll see there are many powerful techniques in PyCharm that you can use to do this and because it understands all of your files at once, it can safely do this, it will even do this out in doc strings and things like that, so we'll see how the tools that are working that's really quite amazing.
There is some really interesting database tooling and database integration in PyCharm, so you'll be able to interact with databases, SQLite, MySQL, whatever, you can connect all the different types of databases, these relational databases and edit the data, edit the schemes and things like that, and you'll even see that there's one really amazing feature that makes its way back into the editor when you're working with SQL strings in your Python code.
PyCharm is great at building web applications, typically, this would be something like Django or Pyramid, or Flask or something like that, but it also builds other types of web things, it has a full Javascript editor and environment in there, it could do TypeScript or CoffeeScript, it could even do things like Electron js, so lots of really cool stuff in here.
Then we'll talk about all the both server side and client side features, on the web in PyCharm.
You will see that it has a great visual debugger so we are going to look at all the different features that we can use to debug and understand our application including some really powerful breakpoint operations that typically editors don't have.
In Python, we use the concept of packaging to bundle up and share and reuse our libraries, we'll see that PyCharm has a ton of features to make and understand these packages, so it understands the file structure of packages, how to do automatic imports, they also do things like automatically generate you a setup.py so people can install and configure your package and not just copy the files over; so all sorts of good stuff there, we'll talk about that.
Profiling is really important if you want to understand how your code is running, if your application is slow and you want it to go faster, you really shouldn't guess, you'll see that it's easy to look at code and think that this is the slow part and that's the fast part but sometimes that's just not the case, and our intuition is often bad and so we use tooling, profiling in particular, to understand the performance, you will see that PyCharm has some really great built-in visual types of tools for us to basically understand the performance of our app.
It has great built-in test runners for pytest, for the built-in unit test and a number of others that we're going to see, so if you are doing any sort of unit testing or integration testing, that's built in and we'll explore some of the really cool features, like for example, there is one feature you can turn on for auto test running and so if it knows that you are changing certain parts of your code it will automatically re-run the test, just as you type in the background and tell you basically, on the side continuously, "Your code is good" or, "Your code is bad." We'll see how to do that and a bunch of other cool stuff in the testing realm.
They've integrated Jupyter notebooks and a special data science view with really cool documentation and all sorts of stuff to help you explore your data, we're going to talk about the data science tools and how those appear in PyCharm.
There is a couple of additional tools that don't really land in any of these other categories that I have defined here, so I just made a "Here is the stuff that didn't fit in any of the boxes I created" I threw this at the end, additional tools, so there's a few other really cool, handy things that don't really classify themselves as fitting in with the others, so we'll talk about those.
Last but not least, there's hundreds of plugins that you can get for PyCharm to make it do other things, like for example do you want it to have like Vim key bindings— great, go get the Vim plugin and plug it in and you've got Vim bindings for your editor, things like that.
|
|
|
transcript
|
0:58 |
If this is the first course you've taken from me, you might be wondering who is this disembodied voice speaking to you through this microphone, through the screen here.
Well, there I am, hi, my name is Michael, nice to meet you.
You can find me on Twitter at @mkennedy and I'm super excited to be writing this course for you.
I'm really excited about PyCharm, I've been using it for many years and I just think it's a great editor and I want to highlight all the ways in which it can make your life better as you write software.
Some other things I've been up to, you might know about the Talk Python To Me podcast, this is the most popular Python podcast out there and I've been hosting this for a couple of years, talking to many of the experts including a couple of folks on the team that built PyCharm itself, so there is some interesting looks inside PyCharm and I'll try to share that information with you as well.
And of course, I founded Talk Python Training which is probably where you're taking this course.
So, nice to meet you, and I'm looking forward to sharing this whole course and PyCharm experience with you.
|
|
|
transcript
|
3:14 |
Of course, there's an entire spectrum of editors.
On one hand, we have things like Emacs or Vim that are super fast to start, they can run anywhere because they'll run in a terminal or a command prompt, something like this, and you can use them if you're ssh-ed into a server, you can use them wherever, and these are powerful editors, but they're very much focused on, "I'm going to edit a single file," and while they are powerful and people who are really master of these things can make them sing— they are not as powerful as PyCharm, they do not bring all the tooling together in one place and understand all of the project, all the different files and pieces fitting together.
For example, if I was working on an HTML file or an HTML template that was rendered to a Jinja 2 or Chameleon template, rendering static files that were also being passed like some sort of model data from like a web framework, it's unlikely that Emacs is going to be able to understand the static file structure, the CSS files, the Javascript files the data being passed from the web server, all those sorts of things.
It doesn't have a totally great understanding and it's really focused on editing a single file which does lead to certain types of programming styles and an organization for Python projects namely putting a lot of code into a single file.
Somewhere in the middle of the spectrum I would put things like Sublime Text and Atom and to maybe a little lesser degree Visual Studio Code these are the more lightweight editors but they are GUIs, as you can see this is a Mac application, this Sublime Text right here, but of course it runs on other platforms as well, but this is a GUI application right, you wouldn't run this on the server when you are ssh-ed in.
So, there are limitations to using it, but it does understand more files, it does have this little folder thing on the left, there is lots of plugins, it does a lot of cool things and it's nice, I would say this is a little more heavyweight than things like Emacs, a little more restricted in where it runs but not as holistically understanding of what you're up to as an IDE.
Speaking of which, there's PyCharm, and it's one of the various IDEs that we can use for Python.
It understands a lots of stuff about our code, you can see we've got our project structure, it has a little runner down here, up in the top right it has the database.
Now this app doesn't actually talk to the database but if it did, it would have a database view, I could generate UML diagrams from my data, or I could have a query window with auto completion pop-up.
It's more heavyweight, it takes more to start, more to install and things like that, but it's definitely worth it in my opinion.
What we should be optimizing for is programmer productivity, not rapidness of tools or efficiency of memory or something silly like that when memory is cheap and our computers are fast.
So, I would say you should want to think about where PyCharm lands on the spectrum and I would put it at the far right, on the IDE of big heavyweight tool but I think it's also a big, powerful tool that is worth it.
|
|
|
transcript
|
6:33 |
Let's expand on this idea of why an IDE generally makes developers much more productive.
I'm going to give you 12 reasons why I think that's the case.
First of all, the entire project, all of the files and all of the different languages are brought together in an IDE like PyCharm.
We could be working on a web application, it could have a Javascript file and in that Javascript file, there might be some functions or even classes that we're going to use in say a script block in our Chamelon templates, and PyCharm knows about all those different things, it can give you completion, even re-factoring help across all these different languages, across hundreds of Python files, across different languages, it's really great.
So this ability to understand the whole project, not just a single file, as not just keywords, but actually as an abstract syntax tree understanding the structure of all these different pieces of code and putting them together, this is super important and allows you to write small code and navigate between them, between different files instead of jamming everything into one huge Python file.
That leads to really high developer productivity if you can navigate and understand code really well, you type "something." and then boom, here's a list of all the things that it does even if it happens to be defined somewhere else or somewhere not entirely clear where it comes from that is super helpful, so you'll see the IDE really helps you write faster code by leading to better understanding of the structure of the code.
I kind of touched on this little bit, but you'll have smaller files which means fewer merge conflicts it's easier to know like over here, the purpose of this file is to do this one or two things, not jam it all together, so I think the fact that we can navigate and understand across these files really well is super important.
In PyCharm you have this concept of run configuration so for example, on the project that runs the training website it has, of course, a configuration that will run the Pyramid web application that starts up, that is the website.
It also has unit tests, that it will run, it can do code coverage and things like that, that's another configuration that it knows about.
There's a bunch of little utility scripts and stuff that do various things like back up data or transform data or things like this in the web application, and those have their own configurations, maybe with builtin command line arguments already passed to them so this ability to configure all of these different ways to run and analyze your code are really powerful.
Because PyCharm understands the whole project, it can re-factor across a whole bunch of files and re-factor even things like docstrings and comments, if I rename a function and there's a comment that talks about the function name, I can have it rename that function name in the comment, that's really cool.
Similarly, because it understands everything it gives you much more realistic and complete autocomplete or intellisense that is try to go call a function, it goes boom, here's what all the functions that are available say on this class, or for this given function, here's what the arguments are, this one takes a thing called URL and that's a string, it takes a date and that's a datetime, something like this.
It has good understanding of virtual environments, so we can create a number of different virtual environments tie these to our run configurations and have clean, reproducible isolated applications every time we open up our project to make it go.
There is a really nice package management UI so this is like pip, but there's also a UI version it shows you all the various versions of what you have, it will show you whether they're up to date or if there is an update for it, it'll let you search for things that are related to what you're doing.
I find I don't use that that much these days, because I am pretty comfortable with pip and just finding things, but when I was new I found that really helpful still every now and then it's kind of nice to just go pull it up and search through what's available.
One of the really great things with the PyCharm is that it has, there is probably an official term for it but I call these "helper fixes," it's a little light bulb that'll come up saying "You know, you called random.choice, but you didn't import random at the top, so your code is going to fail, but don't worry, I know that if I put import random at the top, then your code is going to run, so just hit a key stroke and I'll fix it for you." There is all these little fixes like this, like, "You're trying to call this function on a module, it doesn't exist, would you like me to write the function for you, and then you go fill out the details?" Or, "I see that you are using some external library in a file but it's not in your requirements.txt, shall I add it?" All these cool little "helper fixes" are super awesome even if you know what you're doing, the fact that you don't have to spend time thinking about it it's just a single keystroke as you type means you can stay in flow and keep on writing.
All right, great, source code integration, right, get github and various other source control systems as we'll see when we get into that, this is really great if you don't want to leave your environment to just do source control you have a visual source control as we'll see, in the editor, in the project space all sorts of stuff.
The database tooling is super cool in PyCharm, so it's really easy to understand various relational databases and if you're even working with something like SQLAlchemy that generates the database, there is still really great tools to help you understand and explore and even change the database once the table is being created.
We talked about package support, this is the ability to create new packages to create the setup infrastructure or scaffolding so that you can install and register your package and things like that.
And finally, the unit testing component is really great if you're doing unit tests or even integration tests you can write either pytest or a regular unit test tests for those and then run them in PyCharm and get things like code coverage and all sorts of stuff.
There is tons and tons more, and that's what we are going to cover in this course it's all the things that I haven't even talked about yet, including these, of course.
So, why wouldn't you want all of this stuff at your fingertips?
I honestly don't know, I think you probably do, that's why you're in this PyCharm class and we're going to talk about how you make all of these things sing, and do exactly what you want and way more.
|
|
|
transcript
|
3:24 |
Before we get into the details of PyCharm, I want to dispel what I consider to be a myth— that IDEs are slow.
Now, yes, Emacs does technically start faster than PyCharm or even maybe faster than Sublime Text, but it definitely starts faster than PyCharm.
However, what are we optimizing for?
What is the most important thing— how fast your program comes to life, or how fast you get your work done?
In fact, I would say that working with an IDE as you'll see, actually lets you work much faster.
So, while yeah, it might take a second longer to start, it's going to let you work a lot faster throughout the day and you're just going to start up PyCharm and just leave it going all day anyway, so once it's up and running, it doesn't really go any slower.
All right, so I would say these IDEs are actually faster and they make you faster, which is the most important thing you want to optimize for.
You also might say, "Well these use a lot of battery," because they take a lot of power, they're doing a lot of analysis and it runs out the battery or something like this.
So let's go and actually look at these two things on my Mac here.
Here's PyCharm, it's already been started but I don't have any projects open, here you can see this is a project I have previously worked on from my MongoDB course, it's just sitting there, it's been opened before, so this is like a recent file list, it just happens to be only one thing that I recently did on this profile here, in this PyCharm.
Let's see how long it takes to open this, just thinking about timing like, "I want my editor be fast," so let's how quick this is.
Now, remember, I'm recording my screen which puts a serious hurting on the performance, so this probably is a little underspeed, but let's go ahead and it will be hard to hear the clicks, I'll count down for you.
3, 2, 1 go.
Oh, that was fast enough, what would you say like a 150 milliseconds or something like that?
We'll do it one more time.
1, 2, 3, go.
Yeah, so I wouldn't say I'd really worry too much about this dragging you down, that is super fast and yeah, it was actually already running if I were to quit it and start it from scratch, it'll take— who knows, 5 seconds, something like this.
It feels like maybe 5 or 6, and then it's up and running.
Like I said, that's 5 seconds in the beginning of the day and then you have— I don't know, the entire rest of the day, the 7 hours 59 minutes and 55 seconds to be super productive.
So I would not worry too much about the time it takes to open one of these things.
Now, if we go over and you look here, the other thing I want to talk to you about or show you really quick is PyCharm does do a lot of analysis and indexing and stuff, it's fine most the time, but if you're down to your last 10% percent of battery and you are on an airplane and you just don't want it to drag you down, you can come over here and actually type power mode you're going to see a ton of features as we go, but this one doesn't fit anywhere, so let's talk about it here; this power mode lets you actually turn off some of the real time analysis and intellisense type things that will make it use less energy.
So if for some reason you need it to run in like a super wimpy environment, you could turn on power save mode and it should run more efficiently or if you're down to the last 10% of your battery you can flip this on and stretch it a little bit farther.
|
|
|
transcript
|
2:21 |
Something that is not immediately obvious, and I know a couple of people in fact, I think even myself when I first got started didn't realize exactly how the building blocks are all put together to make PyCharm.
PyCharm is obviously a Python editor.
But as I've hinted, it also does other things like the database tooling that I talked about, or the fact that it does TypeScript and ElectronJS which is really doing Node and things like that.
There's actually a bunch of other tools that are put together to make up PyCharm.
So, across JetBrains, they have all these different IDEs, they have PyCharm, they have something called WebStorm which is for Javascript and HTML, they have something called AppCode which is for building IOS apps and things like Swift, and so on.
But all of these IDEs are built upon this common platform called IntelliJ.
IntelliJ originally comes from just the Java IDE, but it's very extensible and configurable and they've made it so it can be the foundation of all these different things, so anything that IntelliJ does pretty much is something that PyCharm or these other editors can do.
But it also has WebStorm, so WebStorm is really awesome, my favorite straight Javascript, TypeScript editor if you're doing something like TypeScript, let's say AngularJS, Ionic, Cordova, something like that, it's a really great place to work or like I said, ElectronJS, something like that, it really understands Javascript, CSS, HTML super well, and in fact, the pro version of PyCharm has all the features of WebStorm in it.
That's just part of what it does, it will do all the things that WebStorm does plus all the Python things.
It also has this thing called DataGrip, as its foundation, so DataGrip is a standalone database IDE from JetBrains, on IntelliJ, this is all plugged in, all the database functionality comes from there.
So when you think of PyCharm, you should really think of PyCharm the Python editor plus WebStorm plus DataGrip as this sort of holistic, full stack tool that you can use for anything to do with web development, but also just databases, or the data science tools that plug in as well, but you can think of WebStorm and DataGrip as a subset of PyCharm.
|
|
|
transcript
|
0:49 |
One of the really nice features is you can use PyCharm no matter what operating system you use.
If you use Windows, if you use Mac, if you use Ubuntu or some form of Linux, you can use PyCharm and it behaves more or less exactly the same way, the key bindings might be slightly different, command on Mac versus control on Windows or Linux, something like that, but generally, they're exactly the same.
If you're working on teams, where different people have different platforms, or you just want to use it on both the platforms, it's cross-platform so you don't have to worry, you don't have to say, "Well, Visual Studio might be cool, but it only runs on Windows, so we're all getting Windows," you don't have to do that kind of thing with PyCharm, which is very much in the Python ethos of running everywhere.
|
|
|
transcript
|
2:14 |
If we go over to the PyCharm website and we hit download you'll see there's a choice presented to us straight away— do you want the Professional version which you have to pay for or do you want the 100% free and open source Community edition?
Well, we probably want the Community edition, but maybe there's stuff in the Professional we might want, how do we know?
It turns out, some of the things we cover in this course only exist in the Professional, for example, that stuff about WebStorm and DataGroup that's in the Professional, but if we go over to this page here, to jetbrains.com/pycharm/features/editions_comparison_matrix.html just google it, it'll come up, you can see it actually shows you what is in each, so this column is the free one, the Community one, this one is the paid one.
So free actually has a ton of stuff, it has all that cool editors with the little fixer stuff I talked about, refactoring, that's the code inspection, source control, scientific tools, the debugger, all that is great, but here's the WebStorm right, and the WebStorm stuff, the web development, the various Python frameworks, now you can technically make Flask or Pyramid or Django work and run inside of there and you can edit in the Community edition, you can edit the Python files, but you can't edit all the templates and stuff and it's not quite the same experience.
The Pro version is really what you need to do web development.
They also have things like remote debugging capabilities, the DataGrip stuff, here are the DataGrip stuff that I talked about and of course, here are all the various frameworks that are supported only in the Pro edition, notice cool things like Cython, SQLAlchemy diagrams, or Docker, there is Docker over the top, and of course the web stuff over here, Javascript debugger, CSS, and REST clients and so on, but they do have some basic editing, the source control integration free, so you can decide whether it's useful for you to get the Pro version or not, what we're going to use in this course is absolutely the Pro edition and I would say probably about 30% of the features we're going to talk about are only available in the Pro edition and I'll try to remember to point those out as we go through them.
|
|
|
transcript
|
0:45 |
Now the Community edition of PyCharm is 100% open source so over here at the JetBrains organization in github you can see IntelliJ-community/tree/master/Python they have all the stuff up here, all the community editions, but down here, this is PyCharm, this is community edition of PyCharm, so if for some reason if it being open source is something that you really care about, and you really want to make sure this is like a feature or the editor you are using for the most part that's the case here, right, so we've got this and even has instructions on how to check it out and build and run it things like that, I've never tried, I have no interest in building this thing, maybe I'd build a plugin but I wouldn't build the whole thing from scratch, but nonetheless, here it is, in case you want to check it out.
|
|
|
transcript
|
1:47 |
If you're new to Python, you might not realize there's actually many different versions and flavors of Python.
So if you just say Python, you mean something called CPython and that's what you get if you go to Python.org and you download it or you just go to Linux and type Python, that's CPython.
But there's actually a bunch of different runtimes and sometimes these are called interpreters but I don't like the term interpreters, because not all of them are interpreters some of them are JIT compilers.
So runtimes is what I am going to say.
We have the two sort of direct Python ones I would say, on the right here this snake is PyPy, and this is a JIT version of the Python runtime, implemented in Python, it's very meta hence the circle is eating itself, that sort of thing.
In some circumstances, this can be much faster but it doesn't have as much coverage of all of the languages, all of the libraries and stuff that you might use especially some of the C based extensions and things like that, so you don't always want to just use PyPy but if you want to, you'll see that it is supported in PyCharm, which is cool.
Same thing for Cython, we saw that on the feature page just a little bit ago and Cython is a way to take Python code and compile it down the machine instructions not even JIT compiled, just straight up like C compiled but it uses a kind of a flavor of Python and that is supported with Intellisense and language understanding and everything in PyCharm.
Then we have the two plugin ones, Jython and IronPython and this is plugging into Java and .Net respectively, those are also supported.
So regardless of how you want to run your Python code any of these are supported with language validation and things like that in PyCharm, which is pretty awesome.
|
|
|
transcript
|
7:25 |
If you're new to PyCharm, this picture is probably super overwhelming, there's so many windows and so many things happening in those windows, kind of obscured in the middle, there some kind of editor that probably we know what it is, and there are all these project stuff, and if you were to right click on something in the project, it would fill the screen with options; down at the bottom we have 5 or 6 tool windows on the right we have database stuff, we have these configurations, and that doesn't even touch on things like using Vagrant to manage virtual machines, oh my goodness.
So, there's just so many things to learn in order to be effective with PyCharm and IDEs in general, this is not specific to PyCharm, these tools that do tons of stuff, they're really hard to remember all the things that you can do with them and if you don't use them to full advantage, then they're not nearly as valuable to you as maybe just a simple editor, so you have to really commit to learning all of these little features at least let's say 80%.
How do you do it?
How do you go through and you learn all of these things?
I'm going to give you a concrete set of techniques that more or less I use for myself and you can use as well.
It comes down to— you need to discover what the features are and well done, you're taking this course, so you're going to discover a whole bunch of them.
Even outside of this course, you need to discover what the features are and does that feature have a hotkey and under what context can use it, things like this.
And then, more importantly, more challengingly, you need to recall actually, "Oh yeah, there was this feature, and it was awesome and here's the hotkey," like how do I remember to do that?
You need to practice it.
I'm going to propose a couple of things you can do, take it or leave it, but I think this will help you a lot.
So, three things— there is going to be a cheat sheet that you can use, that has most of the common features as hotkeys, so you can figure out what those features are, how you want to use them and so on.
Throughout this course, to help you understand the hotkeys I'm using while I'm using the tool I am going to use something called presentation assistant but presentation assistant is not just good for me, it's good for you, you'll see as you interact with PyCharm, it will tell you what that command was and what the hotkeys that would trigger it would be, which is really awesome, so you'll be able to use that to learn it throughout this course but it will always remind you as you interact with PyCharm, "Oh yeah, there is actually a keystroke I could do to do the thing, just click on it in the menu." And finally, it comes down to sticky notes.
So discover really comes down to cheat sheet and a little bit of presentation assistant, I'd say presentation assistant more is in the recall, right you know there's a thing, you click on it, "Oh yeah, there's the command, there's a hotkey," and then sticky note, so here's what I propose you do: I'll show you the cheap sheet in just a second, you go to the cheat sheet or you write down things from this course that you really want to try and you really want to make sure you learn and you get a stack of sticky notes, and you write down one action, one hotkey, one thing that you want to learn on a single sheet and you write down as many as you want, 20, 50, 100 whatever it is.
And every week, you put one of those on your monitor, in the corner of your monitor.
Today, I'm going to make sure I use this hot key, I use this technique when I am say running unit tests, or whatever it is that you're trying to practice.
Maybe put a couple and pick one off every day, I don't know.
But write them now and put them up and make a concerted effort to practice and practice and practice.
If you just do it for a few days it will totally stick, especially with things like presentation assistant to bring it back.
So let's go see this cheat sheet.
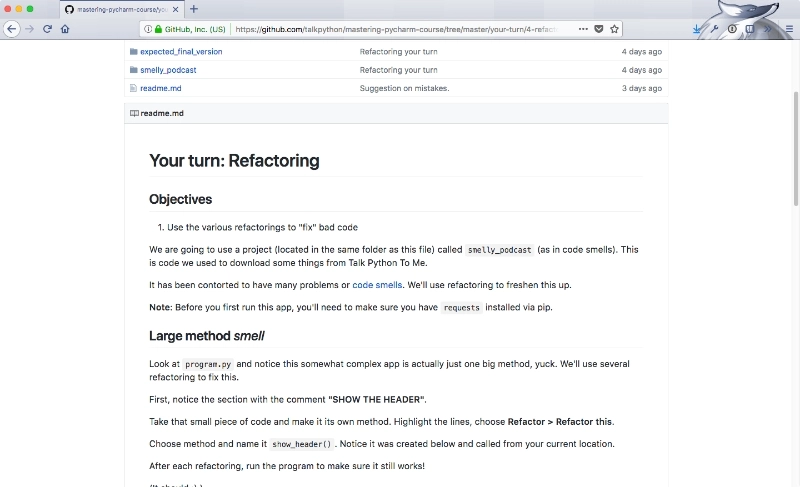
First of all, we have a github repository for the course, here it is github.com/mikeckennedy/mastering-pycharm-course and it will probably look different, because throughout this course I'm going to put everything I write and all the things I dig up for you, I'm going to put them in here, for you.
So there will be more stuff by the time I get through recording this course, but right now, we go to the beginning you can see on the readme there's a JetBrains PyCharm cheat sheet and they call it a reference card.
If we click this, you can see there is tons of stuff here so notice that there's a Windows and Linux version and there is a Mac version, pick your version, but they're just basically the corresponding hotkeys for that OS.
There's a bunch of stuff to do with editing, like show completion, show the auto complete window when it's not there so control space, we'll use that a ton.
Command p, show the parameters, I'm in a method and I forgot what the arguments are, hit command p and it will tell you exactly what goes where and what type they are and so on.
All of these are amazing features, we'll talk about them but you've got to somehow remember these, there are tons, I don't know how many are here but there is probably at least 50 maybe 80 of them, I'm not sure but there's a lot of things here.
So what I'm proposing is you write one of these down, you pick these off and you basically put them on a sticky note and put them up on your monitor and you make a concerted effort to use that for a couple of days, throw that sticky sheet away, get the next one and just keep going with it.
Eventually, they will all totally stick.
This is really good for the discovery on what you can do, "Oh look, there's a hotkey to show the parameter info, cool, maybe I'll start trying to play with that." The other thing is— this presentation assistant, so let's come back here to snake_bnb, it doesn't really matter and we'll just go down here, let's go here.
Up here into the code window, there's a reformat code and it does technically have the command here, alright, but if I click reformat code, notice down here reformat code here's the hotkey on Mac and here it is on Windows.
Also, you'll see me just hit the hotkey and it will show reformat code or maybe I want to go to the definition of let's say a booking, I could hit command b, how do I know— well, in the beginning, I would use something right click and let's see, there's go to over here go to declaration, I click this and oh, right here, presentation assistant is showing me.
So this is the plugin you can get for PyCharm, I'll show you real quick where you can get it, we'll talk more about these at the end, but if you go over here to the settings, you just type plugins and you click this browse repositories, and you type presentation assistant, you'll find it right there, you can install it, it's free, easy to use.
Basically it shows these pop-ups every time you do an action, whether you do it from here, which would show what the menu option is as well as what the hotkey is, so no matter whether you use the menu, a hotkey, a toolbar button it's always showing you what the name of that feature is and basically how to discover it, and what the hotkey, which is really important to be effective, what that is.
So, definitely install the presentation assistant, I use it all the time, it's good for me, but it's also good for any time I am doing a presentation course, but I think it's actually good for learning.
So back here, use the cheat sheet to discover what is available, use presentation assistant to help you recall that those features are there and what the hotkeys are and make some sticky notes for the things that really seem valuable to you and put it up and make a concerted effort to practice that thing that's on your monitor for that day or that week.
|
|
|
transcript
|
0:49 |
Now, before we get into the "meat" of the content of this course, I just want to point something out there real quick, about my motivations — this is not an infomercial or any form of paid content, I mean, I love Billy Mays as much as the next guy, but that's not what this is.
I just really think that PyCharm is the best editor right now, for Python developers, for writing Python code, and I want to make sure that everyone out there who wants to be is as successful with it as they possibly can be.
There wasn't a great course like this, so I decided I am making one for you guys.
Maybe in the end I will do some sort promotional thing with JetBrains to help spread the word, but this, it was just me on my own creating this because I think this is an awesome editor and I want to help you guys be successful with it.
Now, let's get on to the main bit of this course.
|
|
|
transcript
|
0:45 |
One final thing— drop over right now to github, at github.com/mikeckennedy/mastering-pycharm-course and star and fork this.
By the time you see this, it should have all the content from the course, including some hands on exercises that you can try to help reinforce through learning.
We'll talk about those throughout the course, as we get to each chapter, but make sure that you go over here, star and fork this so that you have it, to use as a resource and a reference for yourself, after the course is over.
Alright, so you should have everything that I refer to, or that I build for you during this course, right here, and I encourage you to practice along, when we get to the sections that are hands on.
|
|
|
transcript
|
2:05 |
Welcome to your course i want to take just a quick moment to take you on a tour, the video player in all of its features so that you get the most out of this entire course and all the courses you take with us so you'll start your course page of course, and you can see that it graze out and collapses the work they've already done so let's, go to the next video here opens up this separate player and you could see it a standard video player stuff you can pause for play you can actually skip back a few seconds or skip forward a few more you can jump to the next or previous lecture things like that shows you which chapter in which lecture topic you're learning right now and as other cool stuff like take me to the course page, show me the full transcript dialogue for this lecture take me to get home repo where the source code for this course lives and even do full text search and when we have transcripts that's searching every spoken word in the entire video not just titles and description that things like that also some social media stuff up there as well.
For those of you who have a hard time hearing or don't speak english is your first language we have subtitles from the transcripts, so if you turn on subtitles right here, you'll be able to follow along as this words are spoken on the screen.
I know that could be a big help to some of you just cause this is a web app doesn't mean you can't use your keyboard.
You want a pause and play?
Use your space bar to top of that, you want to skip ahead or backwards left arrow, right?
Our next lecture shift left shift, right went to toggle subtitles just hit s and if you wonder what all the hockey star and click this little thing right here, it'll bring up a dialogue with all the hockey options.
Finally, you may be watching this on a tablet or even a phone, hopefully a big phone, but you might be watching this in some sort of touch screen device.
If that's true, you're probably holding with your thumb, so you click right here.
Seek back ten seconds right there to seek ahead thirty and, of course, click in the middle to toggle play or pause now on ios because the way i was works, they don't let you auto start playing videos, so you may have to click right in the middle here.
Start each lecture on iowa's that's a player now go enjoy that core.
|
|
|
|
12:40 |
|
|
transcript
|
4:22 |
Let's talk about setting up PyCharm on your operating system.
Now there's going to be three of these videos, one for MacOS, one for Windows and one for Linux.
Unless you're just curious, you don't have to watch them all, just skip to the one that is your operating system and then go with that.
So we'll start with Mac, I'm going to use a Mac for this course, for my demos and so on, but you can use whatever you want, PyCharm works on all three operating systems.
So we're going to go and download the necessary version of PyCharm and the necessary version of Python, so let's go do it.
First you want to make sure you have Python, now on Mac you can always go over here and type Python-V and you'll have Python 2, it is shipped with that but it doesn't usually have Python 3.
Now I've already installed it, so you can check to see whether you have it by typing that, I have 3.6.4, it is great.
If you don't, you want to download it, so there's two options, one straightforward you come over here, you make sure you download whatever the latest version of Python 3 is, this course is based on Python 3, if you have only Python 2, a lot of the code is not going to work or it is going to be a little bit different.
PyCharm supports it but this course is not focused on it.
So this is one way, another way that is really nice is to use Homebrew, so Homebrew is a really sweet package manager for the Mac, now you run a Ruby command to get it set up, and it's based on Ruby but you don't really care, Ruby comes with Mac so it's all fine.
And then once you get it set up, you just brew install Python 3 and then when you work with it, just like you saw me type Python 3 will launch the Homebrew installed Python 3 interpreter.
So that's pretty cool, you can definitely get Python that way.
But you're going to need to install Python 3 if you don't have it, you saw the command to check to see if you do, it's just Python 3-V, see what you get.
Next step, we want to get PyCharm.
You can go and just download it right here, I would recommend getting the professional edition you can get the community edition, but a lot of the features we talk about, they're not there, the web tools, the Javascript tools, the server side tools, the database tools, those are all in here so you're going to want the pro version there's a free trial, you can get it, or you can pay a few bucks, maybe you already have it.
So if you have this, that's great, this is one way to do it.
Notice down here it says get the Toolbox app to download it, alright, so if we just download it this way, it's totally simple, you just run this installer, drag this baby over and run it, so that's about as easy as it gets, right.
The other thing though is, let's talk about this Toolbox app, so this is pretty cool, if you're going to buy more than one thing from Jetbrains, if you want access to more tools, there's a way to sort of subscribe to all of their tools, so I believe the way you get that is maybe just /toolbox and then yeah, you just say get toolbox.
And there's like a yearly subscription type thing, similar it's a little more than PyCharm but not terribly more, let's see what it costs.
If we pay yearly it's going to be 249 for first year and then, basically onward it's like 200 and 150.
That's nice, this is how I do it because I use a lot of the various tools from Jetbrains, so if you have that, let's check this out, so over here, you have this thing running, this is the little Toolbox app and it just has all the tools there for you, so for example apparently there's an update for PyCharm, and I could tell it to do this automatically, just always keep them up to date, maybe I want to do something else, maybe I am considering writing some swift code and also I have app code, so if you have licenses for all of these things, like down here this WebStorm will reference WebStorm this will reference DataGrip which is right there, you just click this and wait for a few moments, and it'll just be installed.
So I'm not going to wait for that to finish, but maybe we'll see some notification along the way.
You can either install PyCharm directly or install the Toolbox and get it that way, take your pick.
Once you have those two things done, that's really all you need for this class, I can't think of anything else that we use that you are going to need so do those two things, get Python 3, get PyCharm pro up and running and you'll be ready to take this course.
|
|
|
transcript
|
3:14 |
Are you using Windows for this course?
Well, let's get you set up so you're ready to follow along and do all the exercises.
The first thing you're going to need to do is make sure that you have Python installed.
Now, Windows doesn't come with Python, if you're taking this course, it's about Python, you may already have it, but if you don't, you absolutely have to download it, and this course is based on Python 3, so make sure you have Python 3 installed as well.
You might have Python 2, but that's probably not good enough, I'm sure it's not good enough.
So you can check, come over here in your command prompt and you can type something like Python-V or you can ask where Python, that also might give you a hint, okay, so that's Python 3.6 and then somewhere below that, we have Python 3.5, so apparently I have those two versions of Python on my system, I haven't installed Python 2.7.
So you want to make sure that you have Python and that it's at least 3.5 let's say, I don't think it needs to be higher than 3.5 for anything we do in this course, but you know, if you don't have 3.6, go and install it, you notice that this is a slightly bit out of date, maybe I'll install the update after this as well, there is as we saw right here 3.6.4.
So that's Python, how about PyCharm?
Well, in order to get PyCharm, we can just go to jetbrains.com/pycharm and download it and that's the most obvious thing, but it might not be the best thing, let's go through this path and just see real quick.
So we go to download and there's actually a choice of two types you have to make sure you use the professional edition, things like the web development tools, the database tools, some various other things that we're going to be using, they don't exist in the community edition, so you can get the free trial for the pro version, whatever but go and download that and when you do, you'll see that it's just a standard msi installer, just next, next, next, yes, next through it and you'll be all good, I'm not going to do that, I already have it installed, but also notice down here, it says get the Toolbox app to download updates so the Toolbox app is pretty sweet and this is what I've started using so what it is, is you can buy a subscription to many of the Jetbrains tools and this Toolbox app will let you manage it, I've already downloaded and installed it and it's right here.
So notice that I have a couple of things installed, I have PyCharm professional and I have resharper for Visual Studio also installed for the times I got to do some C# so down here maybe I need to use DataGrip or I want to go and use, we'll talk a lot about WebStorm in this course maybe I want to install WebStorm, so I can just click install and it will automatically install it, set it up to be registered to me, things like that.
So I actually really like this, you can even set it to auto update your app, just in the background, so you always have the latest version.
If you want to get more than one of the Jetbrains tools, I'd take it with the Toolbox, otherwise maybe just install it directly.
Do Python first, make sure you have Python 3, run the installer for PyCharm, you will be ready to go there's nothing else in this course that you need in order to take it, just Python 3 and PyCharm.
|
|
|
transcript
|
5:04 |
Let's get your Linux machine all set up and ready to go.
We're going to need to do two things, install Python or verify or update the version and install PyCharm.
Over here on Python.org, you'll see that the latest version is 3.6.4 and as long you have 16.10 or higher you should have a pretty recent version, I think even 16.04 is pretty good.
So you come over here and see what version you have, we can say Python3- V we have 3.6.3 that's the latest you can get on this, I think this is 17.10, I'm sure that it is.
So this is pretty much the latest we're going to get even though over here we have a slightly later version, this is what ships and that's more than good enough for this course.
If for some reason you have an old version, I'd say anything 3.5 or higher is totally good, you could do a sudo apt update and then see if there is something here for Python, so you see like Python 3 update options here, go ahead and do that, obviously updating your system is a good thing but we should have Python stuff already set up and ready to go, and Python 3 is what we're using for the course so you going to want to have that.
Now, what about PyCharm— let's go over here, there are two options for installing PyCharm, one option is we can come over here and we can go straight to the PyCharm page and download it, this is one option and notice right away you're hit with a choice for something we can either download the pro version or the community edition.
Now, community edition is great for a lot of things and much what you'll see will work there but many notable features will not exist, the database tooling, the web tooling and a number of other ones are going to be missing, so I really recommend you get the professional edition for this course.
So that works pretty well, but let's try something a little bit slicker, if you're going to have more than one app from Jetbrains like say WebStorm and PyCharm, you can subscribe to their entire set of tools, like 20 different applications, you can get this thing called the Toolbox app even if you are just using PyCharm, you can use the Toolbox app so go and download this and I just did a minute ago, so here it is.
So we can go open this up and let's just put it somewhere and get it going, so over here, let's make a folder bin and let's extract this thing into it.
So we have this thing called Jetbrains Toolbox and let's go over here, we need to make this executable, see it's green, not executable, so we want to change mood a + x and then once we do that, we can just run it, this comes up and says you want to allow it to send us things like that and over here it says what do you want install, let's install either PyCharm community, PyCharm professional or both, we just hit this, it is going to go download it, install it, I'll give it a second to finish, there you have it, PyCharm professional 2017.3.2 is installed and we can run it.
So this thing should be ready to go and notice over here once you work with some projects you'll have actually interesting history that you can just quickly go from.
One other thing to notice if you go to the settings here is we can have it automatically update itself and I am logged in as me, so this will give me access to all my licenses so you'll have to go ahead and log in potentially the first time when you run this.
Okay, so that's all good, we can now run PyCharm and see what we get.
There you go, it looks like it's opening this last project that I worked with, not super exciting, it was just some random thing that I played with, but here it is, right, this untitled thing that was in the recent projects history.
The last thing to note, under settings, this will automatically run that log in, if we reboot, it should be back and keeping our PyCharm nice and up to date.
So we already checked if we had the right version of Python which comes with most modern Ubuntus, and we use the Toolbox app to install and manage PyCharm.
Let's see if we can get to it— here it is, perfect, you might even want to pin that to your favorites once you have it running.
Here it stays right there close and active for us, we can just get right back to it.
This Linux machine is ready to take this course, you don't need anything other than Python 3 and PyCharm, we got those two set up, we're ready to go.
|
|
|
|
45:41 |
|
|
transcript
|
1:00 |
Now that we've talked about by PyCharm a little bit and why you want it, things like that, and you've got it all set up, it's time to start using PyCharm to do some really cool stuff.
We're going to start by focusing on projects.
We're going to cover many things as you saw in this course, but one of the central ones is this concept of a project, loading a set of files, piecing them together, working with the relationships, doing things like navigating from one file via definition of a method call say into another, or setting up the project structure so that if I'm running a web application it will give me say auto completion for the static files even if the static files are not really the root of the project folder but root of the web, the conceptual web app, things like that.
So we're going to focus on the really important parts of the project which mostly means how do we put a bunch of files together and navigate them and run them.
|
|
|
transcript
|
5:55 |
Let's start by creating a new project.
Now, I would normally just open a PyCharm and create the project but I want to make sure that you have everything that we're doing in this course so remember, our github repository over here, I'm going to clone this really quick just to take you through the whole life cycle so we'll come over here, we'll go to our desktop and we're going to clone this using the git command.
We could do this with PyCharm but you'll see there's one piece that maybe gets missed that I really like to do when we're getting started, but I'll show you where you could clone this from PyCharm directly.
We'll say git clone this, and I'll just call this course, and I'll put it on the desktop.
Okay, so you can see that appeared over here, now we're going to create a folder in here called demos and in the demos folder, this will be projects, so this is the project section.
So here is where I want to work, let's go over to PyCharm and you can see when you're in PyCharm it has the projects that you previously worked with, this one is from the MongoDB course, and we're going to create a new project.
Now, I'll do it this way first here, but in general, I actually do a few steps on the command line before we get going which I'll do in the next section here.
So we can start a brand new project and we can come over here and say we're going to browse to it and I want it in this location, in the demos, in the projects and maybe we want to make a subdirectory here because we might have more than just one.
So I'll call this first project.
Now notice, it's proposing that we use some kind of Python interpreter, obviously that is required, but it turns out there are a lot of options, here's a bunch of virtual environments that no longer are valid I have to go back and clean that up, I could even go over here and I could say add a local alternative version that could be Python 3.6 that we have here or it could be like PyPy, something like that, I could even add a remote one over ssh or create a new virtual environment.
I'll just go with this one for now, the system default one and this is going to create just a basic Python project, it will be empty, we'll create files and so on.
If you want more structure, something that is not empty we could go with Django, if we click here you'll see it will actually give you all the settings to set up the various templating languages and things like that, or Flask, Pyramid, one of my favorites, you can pick all the things that you might do from say the cookiecutter template that comes from there, there's a bunch of sort of frontend things down here as well, also Web2py.
But, we want to do this one, so let's say create and notice it's going to run down here just for a second and index all of the Python files in our main Python environment, it also says, "Hey look, this is some kind of git repository, would you like to add it?" basically tell this project to understand the version control settings that it found in the file structure, so yeah, we definitely want that.
So over here, we have no files in our projects, and these external libraries, these are the various things installed in Python this basically lets you look into the selected Python environment here.
So we're not going to worry about that right, we can just basically ignore the external libraries.
We'll come up here and we'll say new, and you can pick a whole bunch of different things here, it could be an HTML file, it could be TypeScript but we're going to go with Python.
In Python it will be, "Hello," maybe do a quick little, "Hello world," and notice, right away because we said yes to understanding or incorporating that git hierarchy that it found, it says we're going to automatically add this file, do a git add on that file to our project.
You could say yes or no, I'll just say yeah, you always do that, that's fine, and notice over here, that means it's green, because it's now staged but not committed in git so I'll just print, "Hello world," we'll talk about the editor a lot, we're going to spend a whole chapter on that, but for now, I really just want to focus on the files here, if we had some other file just add some other file, other file, like that, we could have a method, just print out something, this is the other method, we'll come back to play with that in a little bit.
Notice, as I discussed in introduction, down here we have the presentation assistant, so mostly you'll see me working with hotkeys not menu items, but that'll tell you what the hotkey was as well as what the menu item would have been.
Okay, so now we have this project and we're pretty much ready to go, we should be able to run it or something somehow.
But if you look over here, this whole little area about running and debugging and testing and whatnot it's all grayed out, it has no idea what to do with these files.
So the next thing that we need to do is we need to say which of these files to run, how to run it, what command line arguments to pass and so on.
So the way you do that is you right click on one, you create what's called a run configuration by picking one of these options down in this little area here, so we'll say run, and it immediately runs down here, it runs with the selected version of Python that we had and it ran the file that is here in my desktop and just here is the output, it said, "Hello world," or whatever it is that the script does, and once you've done that, there's now what's called a run configuration that lives up here and we can run it over and over, we can run it with hotkeys, control r on Mac, we can even debug into it, run it with coverage all those sorts of things.
So, that's how you create new projects in PyCharm.
|
|
|
transcript
|
8:47 |
Sometimes it's great to create a new project and you saw we did that with first project right here, but the majority of the time you will be opening existing projects, we work on projects and apps and websites for years and we only create a few new ones.
So, let's go and take an existing project and open it in PyCharm and MacOS is a little bit of a special treat for us in this regard, compared to say Windows or Linux, it will make it just slightly easier so let's go back over here and do another git clone and this time I want to clone my Python Jumpstart course's demos and the reason is, if you look in here the apps you'll see there's all sorts of different applications or projects in here if you will and within each one, they actually have two, every one has a final and a you_try so you can try it out.
In here, you'll see there's actually a lot of sort of sub-pieces and that will let us explore some of the more nuanced bits of PyCharm.
So what I am going to do, is go over here and git clone that, as Jumpstart to my desktop— done.
Now, I want to open up this entire project here and then have this apps navigable within my PyCharm instance.
Now you could decide to just come over here and just open up this lets pick something more interesting, just this one which has the sort of wizard game and you could open that up and you could rename it so it's not called final but if you want to do something more holistic, like I want to open up all the Jumpstart stuff, that's what we're going to assume you want to do here.
So if I go over here and I drag this on the PyCharm in MacOS it will actually open it in PyCharm.
If you want to do that in Windows or in Linux, you have to do open and then browse to it, it's not a big deal but this little drag and drop is nice.
However, either of those actions, you don't want to do them just yet; what I want to do is I want to create a virtual environment and use some conventions that PyCharm will detect for us to help set up this environment, so I already showed you when you create a new project how you can set the environment, you can do that internally from some of the settings after you open up the project, we'll talk about that later, but for now, let's see sort of what I think is the best workflow here.
So I just checked this out from git, git will not have the virtual environment with it virtual environments are tied to your machine, your Python version to your OS, so MacOS won't run say a Linux one or a Windows one.
So you don't want to check that stuff in, so I need to recreate it because I just checked it out so I am going to go to Jumpstart, and I'm going to go to Python3 -m venv, now on certain versions of Mac and certain versions of PyCharm intersected along with certain versions of Python there's this thing where some of the symbolic links are not quite detected as links and are followed and this doesn't quite work right, so I'll do --copies it's not always required but on Mac it can help with some things.
So I'll say create a virtual environment in the folder .env at the root of the folder I'm going to open in PyCharm, which is Jumpstart.
Okay, great that's done.
Now, what I can do is either do open directory or like I said on Mac drag and drop here and it opens up and we see it's thinking for a minute, okay, it's all happy now, come over here and you can see here's our .env that we actually just created and the question is if I were to run something, let's go find some of our files here, let's just run Hello world, final not super exciting, but let's run it.
You can notice right here that PyCharm actually auto detected that, it detected that we had a .env folder that was a virtual environment in the top level directory of the one that we opened.
So I recommend that definitely as a way to start into existing projects is to have that there, once you've opened it, you can't go and put it back, it won't detect it again, because it creates some other files that sort of say what it's supposed to do after you've credited it.
The very first time this little trick is great.
So now we've got this open, you can see we've already got our run configuration here because I right clicked and ran it, and it asked me what my name is, my name is Michael, nice to meet you.
Okay great.
Now, that seemed like everything works great, but there's a few other details here that we need to deal with, like this wizard battle for example, the program imports actors and you can notice that PyCharm is already like, hmm, not so much, I don't know about this, let's just say we're going to give it a try, this is probably going to work, let me try to run this and I'll show you to rename that better, so if I run it and I say attack, it totally worked, how about that?
So, even though PyCharm doesn't know that we are able to import actors the system did, and what's going on here, why didn't that work?
So the reason this didn't work is PyCharm thinks of this whole thing as one Python project, the way we are working right now.
And so when I say import actors it goes to the top and it looks for like an actor's thing up here, obviously, there is none.
So what we can do for each one of these is we can go here and say mark this as a sources root say basically this is the relative path that Python is going to use when we run it and so that's what PyCharm should use to analyze things like this from actors, notice that error went away.
So I can come over here, this one has a bunch of different things so I could say mark that as sources root, and over here this stuff can import the various pieces like journal without any errors.
So this ability to configure the structure is really nice if we were in say a web application, come over here and say maybe there's like some kind of a static directory like that, and then here we're maybe going to have a style sheet, this will be site.css, so down here we'd like to import this, but PyCharm doesn't really know necessarily where to start and stop in this hierarchy, so what we're going to do is we are going to go over here and we'll mark the top thing as a resource root, and so that way if I ever try to say /static/site.css in a web app it's going to know to look at all these sources roots.
So when we create these big projects, you probably want to take a little time to go through here and mark the directories as the various things, so if you're doing like Jinja 2 templates or Chameleon templates, you can mark this as a template folder, we don't have any here so that doesn't make any sense, but this one we might exclude this environment and that tells PyCharm to not look there, to not index there, to just treat that as just stuff hanging around.
Similarly, we have all these transcripts here which is like tons and tons of text, so this we can say don't look in here for any of your indexing or stuff like that, we want to keep it simpler, alright.
So now we just have our apps going like this with our sources root.
Here is how you open a new project, and you kind of get it configured in the way that you want so this way with PyCharm I can still get to all of the files but I can also tell it like, "Look here is where the code actually is, this is the part we're going to run." Now, when I ran, we saw we had these configurations up here and the names were a little weird, so let's call this "wizard app", and we can also edit the other one that's called "program" we could call this "hello world".
And then if I want to run it, it's super easy to tell which one am I going to run, "wizard app" or "hello world"— let's run "hello world".
"Hello world." We want to run "wizard app", beautiful.
Let's attack, great, "wizard" won the battle.
So let's just review real quick— if we are going to open existing project we can do that by just dragging and dropping the folder in MacOS or open directory with the file menu or the little icon in the others.
And once you get it created, once you get it opened, you probably want to configure the directory, so PyCharm understands here's where the source files live, here's where the static files live in say a web application, things like that.
We created our run configurations by right clicking the running and then once we got them up we didn't want to just call them program 1, program 2, we gave them some nice names and now they're ready to run, or debug or whatever we need to do.
|
|
|
transcript
|
1:42 |
You've seen how to create new projects and open existing ones.
For the new ones, we just click the create new project icon or button thing here and you get a list, what do you want a pure Python basically empty project, do you want a Pyramid web app, do you want a Google App Engine configured app or whatever.
You pick the type here and later you'll see that we can actually install NoJs as an option for things like ElectronJs and those as well.
So this is actually extensible through a plugin thing that we'll talk about at the end, but for now, these are sort of the default out of the box options.
Just give it a name, select your Python interpreter and hit create and off you go.
If you want to load an existing project, you can either go to the file menu and say open directory, click that thing, it says 'open, or if you're on a Mac, you can drag this onto there and it will open it.
And basically, that'll come in as the project root, it'll discover all the files, you saw there is already a git repository in place, either with the new or the existing, it'll import that as well and automatically integrate source control.
We'll talk way more about source control later, but it automatically sort of gets setup for you, it at least prompts you to click a button to set it up.
The one thing that we're not doing here in this picture is creating the virtual environment inside the existing directory before we open it, so I'll show you how that goes in a later concept, but that's the way I like to get started, because every one of my applications has its own virtual directory so it's totally isolated with the right naming conventions that happens automatically in PyCharm.
|
|
|
transcript
|
2:25 |
We've seen for large applications or large directory structures at least this concept of marking a directory as some sort of thing is really helpful, this is especially helpful in the web actually.
So we go over here and we right click on the directory we say mark directory as, we get these 4 choices here so let's look at the 4 choices: the first one is sources roots, so this contains all the actual source code and files and PyCharm uses this as the point for resolving imports.
We saw in our example that I tried to import some things from actors like the wizard and the dragon and stuff from the actors in that little silly game I created, and it said there's no actors, I went up to the top of this entire directory structure and said there's no module called actors, but it was right next to it right, so I said look this is actually where these files refer to each other by saying market as a sources root.
We also have resource roots, this is for static things like style sheets and images and Javascript and so on, so this is actually super helpful for the web because when you create things like Pyramid Web Apps there's a whole structure that is not the exact same structure in the project as it maps to the website, and because of that PyCharm typically will tell you every single CSS file, every single Javascript file is not found, is not there and it won't help you with any sort of auto complete in your HTML or your templates.
But, all you've got to do is right click and say mark it as a resource root, and everything falls into place, so that's really handy for the web.
I don't really know how this would be used outside the web.
Excluded roots, these are things that PyCharm will basically ignore saying don't look at this for trying to index stuff or try to read these files and understand them, so we did this for our virtual environment for example as well as my little transcript folder, those were just resources that were in the git project but had nothing to do with our program really.
Finally, templates roots, this is just where you put your Jinja 2 or your Chameleon templates in your web app and when you create things like Pyramid web apps you'll see that it actually automatically marks the template folders as template folders you have don't to do anything there, but for some reason you've created one more by hand and you want to indicate like, here's the template folder just use that.
|
|
|
transcript
|
7:57 |
The next thing that we are going to talk about is searching and navigating within a project.
These little simple applications, even the Jumpstart one, really are a little too simplistic for that, so what I want to do is grab a more complicated application for us to work with.
So over here at the MongoDB quick start course I wrote a little AirBnB knock off type thing so let's go and clone this as well, we'll go over here, go back and this will be quick review of opening an existing project, so we're going to come down here and say git clone that, and I'll just call it into Mongo, okay go here and then we'll create a virtual environment, and then we'll go open it.
This is actually the same one that you already saw, but that's ok.
Let's go over here to this, this is the one that was already in my reaching files but I want to make sure you can get started as well so yeah, we'll add that root, that's fine.
We're actually not going to check anything back in, but that's ok.
So over here you can see here is our program, here is our source root and so on, so what we really need to do to get started if I open up this for example everything is broken, so we're going to go over here and we going to say mark directory as sources root now that all fixes that, this actually depends upon MongoEngine and tqdm how does it know— this is pretty awesome, this is part of the project stuff, so look over in this requirements file, most major projects have at their root a requirements file, it says these are the modules that I depend upon and PyCharm knows that and it says, well look, these packages from PyPi— they're not here; how does it know— well, we have our virtual environment which I guess I created in the wrong place, it didn't exist so where did I create it— so I did it in the main root, not the one down here, so let's go and add that.
So we come over here to preferences, on Mac you always say Command + comma pretty much any app and it will take you there, we can just come down here to project, way down here, go to projects interpreter, and see it's using the main one so we'll go over here and say add local and this is going to be in users screencaster desktop mongo in there, the exact path varies by Windows or Mac, I believe it's in scripts not bin on Windows but over here you can see it says which things are here and if we switch that back, it'll say guess what— give it a second index, yeah, now there's even fewer things installed all of those requirements are missing because this is totally empty.
Why we're here— notice over here this UI actually would let us do things like install, I can come over and say MongoEngine, and it'll actually find all the stuff to do with MongoEngine and let me install that package right there.
We're not really going to run this app because we don't have Mongo set up correctly for it right now, but I can click this button and even upgrade it, notice this is now upgrades so that's pretty sweet, it lets you manage the environment but we don't have the things that are required there, if I exit out and come back to my terminal you can see now my environment is active, I could come over here and say pip install -r requirements notice I get auto complete, because this is my zsh shell even, so it even remembers your previous commands and whatnot, but I could do this, that's what I would possibly normally do but in PyCharm, it just says, you need to run that command I just typed, so let me just click it here, choose what you want to do and wait a moment, and it will download and install this.
So it installed them and ran for just a second to index those new packages and there you go, that's all good, we can make that go away.
And now, all of our little warnings go away everything is good so even in our data section over here where we say important MongoEngine that works, because PyCharm saw the requirements file and it installed it for us an indexed it and so on.
So that is really cool.
So now we have this project, we want to navigate around, it understands all the pieces.
The first thing you might be doing is like maybe we know somewhere over here, maybe there's something called book_cage and we know there's a method called book_cage but is it in infrastructure, is it in services, I can't remember where it was, so let's suppose we're trying to find a method called book_cage.
So what we can do is, there's little search thing up here you can click, but I never click that, what I do is I hit double shift and this is super helpful, the first thing you see are recent files, so Mongo setup, let me show you something that's really cool about this.
Suppose I have that part selected, I was working here actually let me pick a bigger file there, I can scroll way down, suppose I have line 71 to 75 selected, close these all off and that was in the data service file so if I do the double shift, you can see right here there is a search everywhere it's going to remember data service.
Now, it doesn't just remember, oh you had this file open, when I open it, it puts it exactly like it was so if I have stuff collapsed, I'm trying to understand this at a high level so I've collapsed most of these methods, and things like that, and I had that selected, it would come back just like this.
This is super awesome, so this double shift open up the recent files is actually a major way that I navigate throughout my applications because it doesn't just remember what you recently had opened which is really nice after you close it, but it actually remembers the state of the files, where you were, what you had selected, it really takes you back to where you started.
That's great, but we were looking for something called book_cage, so if I just type book, you can see there's some classes there's a booking class, this is a thing we stored in MongoDB, this is the file that contains the booking class, here it shows you just the files, there's some symbols, and look at that, book_a_cage, this is the guest version, this is like the low level data version, this is how I can get the book into my cage and so on, then there's even actions, look at that, how do I create a bookmark or these are literally menu options in PyCharm.
Alright, it looks like book_cage that's the one I was looking for, bam, I can navigate to it just like that.
So this search everywhere is really helpful, it works for Python, but it also works for text files, CSVs, Javascript, you name it, CSS, it doesn't matter so I can come over here and say Colorama, and it will take me into there.
Notice that I can include non-project items as well and it will look inside, it's looking inside the PIL package in Python, so you can even search the standard library that way, I could look for dict for example in built in, we can go straight to dict.
Now, you don't get too many details because this is just it's implemented in C in the CPython runtime, but at least it will give you the signatures best as it can tell.
|
|
|
transcript
|
1:16 |
We saw you can search everywhere, just by double clicking shift or double typing shift quickly, I found too quickly doesn't work, too slowly doesn't work, you'll figure out what the right speed for you is there, but basically double press shift and you'll get this dialogue which comes up at first if you type nothing with just your recent files which is as you saw, way cooler than maybe just a recent file it takes you exactly back to the way you were working on it which is super cool, but you're probably actually looking for something I do navigate the recent files quite a bit with that double shift but you're probably looking for something so you type like load if we're looking for that and you can see all the different places that load appears and if you double check the include non project items if you just check that with check box, you can see down into the symbols it's pulling things from like Json and Pickle and Marshall all the built-ins in Python, so it can look not just inside say your source files, but actually the packages and the standard library that you're using in your version of Python.
So that will actually let you navigate to the internals of the libraries you depend upon, which is great and if you don't like the double shift thing, just click that icon and you'll get the same thing.
|
|
|
transcript
|
3:52 |
So we've got our project open and we have it running, we've configured our sources route all these things and it's pretty much ready to go— but this may be is a new project to us, we don't really know where all the pieces are and how they fit together so let's look at some of the navigational elements within the editor.
So we've seen that we can use our search everywhere and I could find things like run, you can see there's a run method in a couple of locations here, for example this run method, and there was a bunch of those, so what if I just want to go to this one, I want to see what that does.
If you hold down command on Mac or control on Windows or Linux, everything here becomes a hotlink so these are all things that you can go and just jump to so I can go to print_header and just click on it and it takes us right there.
Notice, that would be the navigate to declaration or even the command b it says so this little printer header just shows us like silly snake concept, so if we want to go to program guest.run command click again, there we are, if we want to see what the show_commands is, now we're kind of done with the mouse we hit command b or it depends, there's a different function on Windows, so here we'll go here and it says control b but it really depends on the key mapping that you select when you get started.
But we can navigate around these and it's really cool, we navigated within our class and within our little function here so maybe we want to go back and we want to go to that print header again and we're printing this out, and notice we're actually printing this out white green white, so we're printing like a green snake here so if you want to know what that looks like just really quickly say copy this path, I'll run it over here in the new window oh yeah, we've got to have our virtual environment active so I'll just run it and here, right click run and you can see it's kind of this lime green it's not a great green that comes out there the little terminal down at the bottom, the colors are not always quite right but that's ok, we can x it out but you see we are getting this color here so where does this color come from— well it turns out at the top if you look, this is coming from Colorama and let's actually go to this white and see what that is.
Look at that, so if we jump down here we can see that this is an Ansi foreground color code and those are what the codes actually are, you want to know what defines light and black Ex well that's whatever 90 is in the Ansi color codes.
Okay, so we can navigate to anything, this is an external package that you saw PyCharm install as a dependency, we can also come over here and just navigate straight to print, there is the print definition granted, it's not super interesting because it's actually written in C and is imported as part of CPython, so not so much, but you can navigate into all the things up to the level of C not down into the C runtime, but that's ok.
So one other navigational thing that we can do is maybe we want to know where this is called so we could navigate from it, by command b when we have the cursor on it or command clicking it, right click navigate to we can also go in the reverse, so I can come over here and say find the usages of this and it says oh well, this is used in these various locations down here it turns out this one is just used one time if you double click, it says right here.
Not super interesting in this program, but it does show us where it's used and if it was used 20 times we would be able to explore throughout the whole program so you can see, we have our little basically turn your program into a set of hyperlinks to navigate through everything by holding command or just straight navigation through the hotkeys, it's amazing.
|
|
|
transcript
|
0:59 |
So you've seen our editor is also a rich navigation surface really, so anything up here, like for example this purchase where we have our cursor, if we want to know where that is, what defines it, what files are in all we have to do is hit command b and out it comes, we can see look it was in data_types.py and it's this class defined exactly like this, so anything you want you can either come along and you can use the hotkey command b or control b or you can hold down control or command and then click with the mouse and just navigate to anything that doesn't restrict to your code either this could be in this case the code we wrote, this data types thing or it could be an external package or it could be something built into the standard library there, so you can navigate to almost anything and you want to really make use of this because it really helps you find the code, understand the code super quickly.
|
|
|
transcript
|
3:21 |
We've seen that PyCharm understands virtual environments in several ways and that's really excellent.
Let's jump back over there and look at that in more detail.
Here we are in our snake_bnb knock off thing, and if we go and look at the run configuration, you can see that we have set a project default interpreter to be a virtual environment contained within this project, remember at the beginning, we checked this out from github.
We created this and then set it up and you can always tell what the default is by opening up this little terminal window and you'll see just like if you had done it in the terminal it's already activated the .
/env/bin/activate or /bin versus scripts in Windows but it's as if we'd already activated it and we can change that in run configuration up there but let's see how we set the default, if you don't know what it is you just set interpreter and it will go and find it, so we cancel that out so you can see that it's down here under project interpreter and notice, we have this visual GUI pip type thing so pip is for managing packages and there it is, and notice this one is actually up to date and there's sort of latest version of all the versions we have here because I just created it, but if I grab let's say this one, this is all the stuff basically in my standard library, and notice a bunch of them are out of date so for example Boto 3 is out of date and I can click here and update it if I want to find other stuff say I'm looking for more things about AWS, so I'm looking for the AWS CLI, actually I have no idea what that does but we can find all this things, there's AWS google auth, so acquire AWS STS credentials for AWS app single sign on very cool, you can go and check that out and you can install it and it would be just as if you had typed pip aws-google-auth install-that and you could even pin it to a particular version down here if you want say like the version 10 so this is super nice, you can manage them, you can create new ones, I find this to be super helpful when I was brand new and I don't use it that much, now that I'm very experienced running pip on the command line and manage environments that way, but this is a really good way to get started and slowly probably move away from that, so we can upgrade things, we can even uninstall stuff if we don't want arrow anymore— hit the minus.
So that's great, you can see that we can work with these existing environments, this one that we said is the default one or the other one, but we can also go and browse if you don't see it, add a remote one, or we can create a virtual environment.
Now, I don't have it installed on this user profile notice it's my screen cast account, that's all cleaned up but on my main user account I also have Anaconda installed and if you have Anaconda installed you'll see it create a Conda environment as another option here.
So if we want to create a new virtual environment we just come over here and check of all the options whether you want to inherit the global site packages and just add to it or make this totally isolated, it's your pick, I go with totally isolated.
|
|
|
transcript
|
1:10 |
Now you saw in the beginning when we opened our existing project for that snake_bnb I went and I created a virtual environment on the command line using Python 3 venv command.
And so there's conventions that PyCharm understands and this is super nice, so here's typically how I would make a new project in PyCharm that uses environment, you just saw the gui but actually this is a lot quicker.
So I might make a folder and then go into that folder and create a virtual environment using this Python 3 command right here, this would be exactly the same thing if you had gotten a project of a github, just you don't make the directory the git clone does that, if you go in there and then you run this command and then when we open this project in PyCharm, we open that folder or directory in PyCharm, notice, we've already got that virtual environment automatically detected as long as it wasn't previously opened in PyCharm, because it creates this sort of project file that one time figures out what interpreter to use, and then it's set.
So long as you do the command line stuff first and then you open the directory, you'll have this virtual environment set up super quick and easy.
|
|
|
transcript
|
2:44 |
If we open a project and it has a requirements.txt file PyCharm understands this, so these requirements are often here for complex applications that require many dependencies or maybe it's some kind of package itself that has dependencies like let's say Requests, you're working on the Requests package directly or you've even created Pyramid web application which each web app is itself a package that has a bunch of dependencies.
When you open one of these in PyCharm, it inspects the target selected interpreter and it says are the required libraries installed?
In this case you can see that they're not whatever interpreter we have set up to run you can't really tell from this window, PyCharm can say Requests, BeautifulSoup and Colorama are not satisfied so how does it know what these requirements are?
Well, if you open up the requirements.txt you can see those are the three that are listed right there and it's the fact that these are listed in the requirements file but not actually installed in the interpreter so PyCharm is saying hey, these are required, you have to install them.
Installing stated requirements is really awesome, but another problem that you can run into is you can create a rich, complex application and forget to put some of the requirements into this requirements.txt file, this is what tells everyone what you need to run and if you forget let's say, we're using 6 or we're using some other thing that won't get pulled in by any of the requirements here let's say SQLAlchemy for example, if we forget to list it here, our app will not run.
So, what we can do is actually PyCharm knows this and will fix it in both directions, so the previous example was you have stated there are requirements that are not here and we're going to install them for you; it will do the reverse, like let's look at this— Uplink is a really cool api package for basically mapping classes to apis on the client side if you don't know about it, check it out, it's super cool, but it's an external package that we need to state that we depend upon so here we are using it, we've imported it but we haven't actually gone back to the requirements file and PyCharm gives us a little squiggly and if you expand out, there's like a light bulb, if you expand out what it says it wants to do for you it says, it looks like this Uplink is something you're using, we know that's a package, but it's not actually listed as a requirement so if you click here, we'll go ahead and put Uplink in requirements.txt so that people who get your application, know exactly what they need and when they run pip install- requirements.txt it's going to actually be ready to run.
|
|
|
transcript
|
2:35 |
As you've seen so far, in order to actually execute our programs, make them go, run them with Python we have to create what's called a run configuration.
You know you have a run configuration when you see it up here in the top right of PyCharm it's got a little name, the play and debug buttons are not great out there, green and ready to go.
If you have it like this, you're good to go but how do you get one in the first place?
Well, there's a couple of options, first, we could pull down that drop down and we could choose edit configuration and when we edit, we can have the chance to cut a new one or we can go and pick some existing ones, so here's what we have say on Talk Python To Me, here's the Talk Python web app, which we can run, this is a Pyramid app, and then we have three other utility libraries, a choose random subscriber— sometimes I do giveaways and people who are friends of the show, I'll randomly pick out their email address and give them something like some kind of software license or something like that.
Maybe test the sponsorship slots, sometimes those change and they are kind of hard to tell in the database of what goes where, and so this lets me verify like if I reorganize things, they don't break.
And I moved from S3 to Digital Ocean as the cloud backing store for the podcast data, so these are some things I created along the way and we also have two particular unit tests one that runs all of them, and one that runs just a subset.
So most of these were gotten by just right clicking on the file that I wanted to run and say choose random subscriber, run that and this will create that choose random subscriber run configuration we could also you could see debug it, profile it, things like that we'll talk more about debugging and profiling later, but these run configurations are really powerful you can configure lots of details about them, I think you should definitely leverage them, right make sure that you create as many as you need and that you really take advantage of them because they will be super helpful.
If we go and edit one, here you can see like Talk Python web for example you can see the source points to a config file that is a development.ini, this is the Pyramid Web App convention, this is sort of the local non-production version so maybe it has like a local database connections instead of production, authenticated remote server database connections and things like that.
We pick an interpreter, we pick a working directory and you can even do things like at the bottom it says, before launch activate this tool window, so if you wanted to say run like a gulp task or you enter before you're even allowed to run your app or you've got to do something else to prepare it to run you can add a bunch of little tools right at the bottom.
|
|
|
transcript
|
1:58 |
You've seen how PyCharm worked with projects, now it's your turn.
It's your turn to open PyCharm, play around with it and explore some of the features around projects and you can just go and open any old project and play with it but I actually have a set of hands-on instructions for you to follow if you'd like.
So over here on the github repository under tree master your turn 01 projects we have some specific things for you guys to do to make sure that you remember and practice the various things around projects.
Let's explore them.
So this is your first hands-on exercise.
Let's go over here to the repository notice, there's a your turn section here and there's a your turn for almost every single chapter in this course.
So let's go over here and look at projects and see what we got going on.
So for projects, we have two things we're going to do open up a new project or create a project and add some code to it and run it and then we're going to open a somewhat complicated existing project configure it in PyCharm and then run it as well.
So you can just follow the steps, it should be pretty straightforward.
So we're going to go create a sort of a hello world and make sure that you use the virtual environment feature in Python, 2017.3 or greater.
This is nice, you get to play with this and we'll come down here and you also get to open up the jumpstart course demos and play with the wizard class here, the wizard game and one of the things to make sure that is the goal of this part is to not just make sure that you run it with a virtual environment, but also that this line 4 here has no squigglies, no errors.
So you'll see how to do that as you go through and if you find any sort of mistake in these instructions, you can submit an issue or a PR to fix them.
I've tested it out, hopefully it's all working well for you, so go out there, take a few moments and try PyCharm here.
|
|
|
|
58:06 |
|
|
transcript
|
0:38 |
It's time to talk about the editor.
That's super important because what is PyCharm other than a super amazing and feature rich tool for writing code.
Now, we're going to focus on writing Python code, actually this editor works awesome on Javascript and HTML and CSS and all sorts of other things.
But mostly we're going to focus on Python because, well it's PyCharm, you guys are Python developers.
You'll see that the editor in PyCharm is really rich and there's a ton of little subtle things that it does for us that are amazing, but not immediately obvious, so let's go discover them.
|
|
|
transcript
|
16:13 |
Now let's begin exploring the editor, and I think the right way to go about this is to just write a simple little program and talk about all the features that are immediately obvious and stand out for us.
We're going to go create a little application that will go and download information about the Talk Python To Me podcast and say what the titles of the recent episodes are and things like that.
We're going to do this and then there will be some features that they don't expose themselves because what we're building is not sufficiently complicated so we are going to jump around, open some other projects later.
But let's get started exploring the editor by— well, editing with it, right.
Let's go over here and I'll open up the terminal, and I'm going to cd into this directory here, this is the github repo that we're working with, and we could go to PyCharm say new project, but with the virtual environments I do find it a little easier to just follow the convention, so we can do a make dir, cd into the podcast, and then we can create our virtual environment like so.
And that little console trick or terminal trick there helps us get going.
Remember you've got to say open directory on Mac or Linux, but here we can drag it on macOS, so we're going to register that git repository because I want to make sure you get this code checked in and you can play with it.
Here is our virtual environment, let's click here and make sure that it's up and running, yeah, if we ask which Python— that looks right to me.
We'll go over here and we'll create a couple of files, I'll call this program, and I am going to create one over here called service or something like that, for downloading all the data.
Okay, so up here, let's define the main method, and we'll do something like "Hello, welcome to the Talk Python info downloader," or something like that.
It wouldn't be much work to actually edit this to have it download the MP3 or AAC files but, why don't I just do this, and let's say we're going to call some functions from this service over here.
So let's go write a function.
Let's say this, download info and we're going to write some function here, and then maybe we'll give it the ability to get some information, give it something a little bit richer.
I'll pass it and I'll have def get_episode and we'll have a number of the episode, I'll call it show_id, or something like that, and then we're going to come down here and we'll just do nothing like that.
Imagine I would like to call this function, so I am going to try to call download, it's going to store the information somewhere, and then, we'll be able to get information back like hey, give me the info about this particular episode, now I probably would have the download, just give you all the info but, I am trying to create a little bit of state here something we could make slightly more interesting.
So, I can come over here and I can say download info, and it doesn't look like anything is happening, does it.
But, notice there is a little squiggly, if I go here, a lightning bolt will show up, and if I hit alt enter, it gives me all sorts of stuff; I could import download info, like this, and if I hit that, it's going to actually do the right thing to put it up at the top here.
Okay, so that's pretty cool, and again, we can navigate back and forth as we saw it.
Also, notice over here, this doesn't have squiggles any more, this one, not here, but on this part it does seem this parameter show_id is not used.
This is super helpful in discovering bugs, because maybe this is like is the user admin yes or no, and the function is supposed to check whether you're an admin before you can do certain things, if you see these squiggles, they are like, wow, we're not checking, we're not using this admin feature, this could be a problem.
So that's a really cool feature, you can see obviously that there is a syntax highlighting there are various other things, notice here there is a PEP 8 no new line, so we can fix that.
Now we can go and download this info, I kind of prefer, let's do this— for the look at these things like so, so we can come down here and I can say service.
and you get immediate intellisense, right, download or auto complete, download info and show info, so let's suppose we're going to download this information, and then we want to get just some details about various episodes, so let's say for show id in a range, let's say 100 to 130, good enough, those will definitely exist.
We can go over here and we'll say info=service, notice, really nice intelisense there as well, we'll get info and we'll have the show id like this, alright, so this is coming along pretty well, let's go and we'll focus on this download thing, so we can again command click and just navigate over there, that's a small app we can find it right, but in something larger, command click go over here.
So, what do we need to do, well, we need to go and actually download something from the website, from talkpython.fm, what we're going to use is if we go over here to talkpython.fm/rss it's going to pull up a bunch of info, and Firefox tries to be a little too clever for us, so I am not going to worry about that.
We'll go over here and we'll say something like url= that, and then we want to use Requests right, who wouldn't want to use Requests?
We'll say resp=requests.get, now, what's wrong with this code— well, in a virtual environment, if we come down here and we say pip list, there is no Requests, right, by the way, pip install-- upgrade setup tools, so that's a good idea, this is like 10 major versions out of date.
Anyway, not required but always worthwhile.
So notice that PyCharm knows there is a problem here and actually it knows we're not using url, but if we pass it there, that's happy.
So what's the problem here, what is Requests, we have no idea, so we'll say import requests, but it was found somewhere else, so that doesn't work.
Now up here, when it's used like this, it says, maybe you should install the package, it doesn't exist, notice down here, what's it doing, it's installing Requests, great.
Now, if I had a requirements.txt it would actually also propose we put it there, but we are not going to do that for the moment.
Okay, so this is working, we can say response.raise_for_status, if for some reason it doesn't work, it should work, but if it doesn't, now what we need to do is we need to go and load this up into an xml dom.
So how do we do that?
We use this thing called ElementTree, and we can import this from xml.ElementTree, like so, and we'll say fromstring, so resp.text is going to be the raw rss text, and then down here we'll have the dom, so we can do whatever we want with this, we can start to loop over this and pull items out, so the first thing that we need to do is come in here and say items, and we're going to do some kind of selectron, so we'll say dom.findall('channel/item') if you actually look at the rss it's an xml feed, and it has an rss root but you don't say when you're doing searches, but then there is a channel which contains many items.
So let's just print out the length of items, just to see that this thing is working.
Now, if I run this, it's probably not going to do what you would maybe thing it's going to do, so we'll say run— nothing, darn it.
Why is nothing happening— it's because we didn't call main, Python, as you probably know, it's not like if you have a static main void it's just going to get called, so what we do is we use this convention, we say if __name__ == '__main__' then we'll call main, and that is going to work, with little formatting, just fine.
And because these little expressions are very common, PyCharm actually has what are called live templates, so if I type main, the top one there is the function I wrote, but notice the bottom, if I hit tab while that is selected, it's going to write that same code for us, and I'll just go ahead and call whatever function I named it here.
So these are live templates, and there is a bunch of them, you can create your own, I'll show you how to do that in a little bit.
Okay, so we're getting closer, let's run this, it's thinking, wow, it found a 140 episodes, you've got to love a good zero based podcast.
Okay, so that's awesome, we found a 140 episodes, it looks like it's sort of working, let's go over here now, we do need to store this information somewhere, and we probably want to convert it, so let's go over here and we'll say from collections import named tuple and down here we'll have episode it's going to be a named tuple of— give it the name of the type and then, what's it going to have— it's going to have a title, a link and a pub date.
And let's also give it a show id.
Alright, so this is nice, let's just put this as count, or episode count maybe, so it didn't conflict, so we have our episode count and we're going to load up for each one of these things into there, so we'll do like this, let's say we'll have a episode data, just a list, actually let's make it a dictionary, that will be even more fun.
All right, so we'll come through here and what we need to do is loop over every one of the items, so a for item in items, this is going to give us our little tiny xml element and then we can do things like this, we can say episode= create one of these now, what are we going to do— check this out, PyCharm knows about named tuples, and before I move the mouse it went in there and any time you're sitting in a method, you're like what do I pass to it, you hit command or control P and it will tell you check out how awesome that is, that comes from defining this named tuple right there, it gives us this, so perfect let's do it, let's say item.find and we'll give it the title and then text, so that's a little xml query thing we'll do item.find what's next, what are we looking for here, we're looking for a link, so this will be the link, pub date text and then we need to convert that into a date we'll just leave it as text, but in a real app we'd convert that to a datetime; and then finally, I want to put the item here, so let's do this, say idx for index and we'll do an enumerate on this, I'm sure there's some kind of xml query I can do to get the show number out and that's what I'd do in a real app, but I am just kind of feeling lazy so let's just say episode count - index because these are the newest or highest number first.
We'll do that, and then we'll just say episode_data[episode.show_id]= episode it's not append because it's a dictionary.
Now we can go down here and write this really quick so we'll go over here to episode data and we'll say turn episode_data.get(show_id) that way if it's not there it will just give you none rather than crashing, maybe that's what we decide we want.
Let's go over here and just see that it works, I'll just say print something like this where we print out the number and then the title, so info.
now look at this, no help, how frustrating so I know this is show_id but I'm going to show you the fix in a second let's just see that it works info.title, now let's give this a run.
Boom, now it turns out that title on the show number these are all together so we got them in that order, but then we ask for them in the other; now it looks like I'm off by one with my number, oh yeah, yeah, yeah let's go back to this here, let's just subtract one that should work for us.
Here we go, 129, number 129, okay, so we've got our various pieces back and we're using over here our non half-closed range so we only get it at the 129 not 130, but this is working.
So the final thing I want to show you here in this little demo is this part right here, so I got this back service.get_episode, that was cool and then I did this and I got nothing, in fact, even inside of service, this if I say dot— nothing, PyCharm doesn't know what this is.
So let's add type annotations to this for example, so I'm going to say: and the type this is an int, and it returns an episode, not a list.
So if we come over here and we do this now, dot, ta-da, look at that show_id, link, pubdate so with just the tiniest little nudge we can tell PyCharm what comes back from here and actually it's because the dictionary is kind of—who knows what it holds, once we get the data back from here, we could pass this from function to function to function and PyCharm would still know hey that's an episode because I know where it came from and I know that it started out an episode and it's not changing, you never reassigned it.
So we'll see that we can use these type hints in really powerful ways you could also use them in the docstring style but if you're using Python 3.6 or 3.5 really take advantage of these, because they're awesome.
I think that wraps up our little demo for downloading some stuff here you can see that we can lift out what the various episodes were except for if I go over here, one other cool little feature when this crashed, as I was fiddling around with intellisense and left it in a broken state, two things— one, I don't have to save, there's not really a clear save button all the time you can go over here and there's probably a save somewhere, but it automatically saves, and when I run it, all the files are saved, that's awesome.
Also, when I was away and I ran and something went wrong and it shows me right here, here's where the problem is, you click it, it takes you straight to it and then highlights it, so that's cool, I just need to put that away because I was fiddling with it.
Awesome, there we get a little info like I said, you can expand what we're doing here, in terms of pulling the data out of the rss feed and you could have like the mp3 or you could pull out the show id there's a place actually where there's an extension to the rss feed for podcast feeds that actually includes the episode number and things like that.
All right, so pretty amazing I hope you think, and that's just scratching the surface, we're going to look at a whole bunch more things that we can do with the PyCharm editor.
|
|
|
transcript
|
4:49 |
The first thing you probably noticed when we opened up PyCharm and it should be really no surprise, is that we had nice syntax highlighting.
Of course, it highlights the keywords, it highlights the methods, it highlights strings, and this is actually really configurable as you'll see.
You can pick different themes and so on, but the syntax highlighting is super nice.
In fact, if you go to the preferences and go to appearance you can see the theme that I'm using is Darcula, but you can actually pick other themes so here's Darcula, and on the right is just the I guess it's called default, I don't know white, boring, who knows, so there's another theme, this is another one built-in but you can actually go and download a whole bunch of other themes and import them and even create your own.
The other thing that you can control which is part of the theme but is very fine grained, you can control it super easily is the syntax highlighting colors.
Here you can see the path in the preferences so you can go over here to the color scheme say Python and change the color of decorators or change the colors of strings or operators and all these things.
All you've got to do is like here we click decorator and on the right where it says foreground it has some sort of yellow color you click that color and a color we look comes up, and you can pick it, or you can either take the sort of global definition, I'm sure there is not one for decorators but for things like strings that would be.
You can grab the global definition for that or for colors or you can create your own basic style.
So, you can create a style that is exactly the way you want by going into this part of the menu preferences and just really tweaking it, it takes a long time actually to get it right, but once you do it's super sweet and you can see you can also do the same for CSS, for Javascript for Cucumber test scripts you know, you name it, you can mess with it down here, so tons and tons of features around customizing the colors, and you can export those for other people on your team or on the internet to play with.
We saw that auto complete was a super important thing and it really helps with discoverability for large code, new code, code that you picked up but you don't really know super well, things like that, even learning the standard library really well because you get great auto complete on all of those things.
Here we have a wizard named Gandolf, level 75, we created him, we want to do some stuff, so we say hero.
and right away we can see the wizard class defines an attack method the wizard class derives from creature which has a get defensive role a name and a level, so we could work with that as well.
If we want to go way down to the Python data model heck we could go and work with a __dict__ that actually comes from object which is the base class of creature.
So over on the right you can see the source of actually where that method or that property or field is coming from.
Now, sometimes, it's not so amazing here we have data access library, we're calling find user by email address it's going to the database and it's doing a query and it's returning this user say SQLAlchemy or MongoEngine or any of the ORMs, is doing a query and it's pulling back these objects and almost all of those has given us proper intellisense as you'll see you're like why do you not know what comes back from this query it's always a list of users or something like that.
There will be times, and you saw this in our demo where adding a little bit of a hint just at the lowest level usually is all that's required to help PyCharm to help other linters really know what types you're working with.
So over here we are doing this query that turns out to be a MongoEngine query and it's totally fine and it works, but it doesn't tell the editor enough information to really give us the help that we might want.
So what do we do?
If we go and we add some types hints, like it takes a string and it returns an optional user there might be none or there is going to be one, it could be none or the actual user object so it first does that's what we should have done in our demo actually and once we do that— boom, PyCharm comes alive and anywhere we use this object that came back from find user by email is definitely a user you can see right there in the auto complete source that thinks all these things come from user, and it's right.
So these type hints can dramatically improve auto complete and discoverability as well as some of the linting, so use them judiciously but when you're crossing major application boundaries especially down to data access layer and lowest level of service layers, these can be really, really useful.
|
|
|
transcript
|
4:58 |
One of the more significant things that PyCharm does to help us is what I call light bulb moments.
So when you are in some error situation, PyCharm will say, hey it looks like something's wrong, but I can fix it, if it's yellowish like this one, I am pretty sure it's an error other times it'll be red and they are like, no, there is no chance this is going to work, I'm sure of it.
It depends a little bit on the severity of the situation because it can do many different things so the color of the light bulb tells you a little bit but what PyCharm is saying is your code is not right but I can fix it for you and I can do that most of the time automatically if you just agree to it, so what's happening here?
Well, we have this data access library but it doesn't have a change_address function but we're creating this, we're writing this bit of code this is the first time we're ever going to need to change_address function and we're just about to switch over to data and write it.
But we want to kind of sketch out our use case of it here and then we are going to go write it.
The thing is, you don't have to switch over to data and write it, PyCharm will do that for you.
So if we hit alt enter, you'll see it will pull up a list and it says hey how bout I create a function called change_address in the modular data and it would actually have first parameter called user and the second parameter, like parameter 2 or something because it has no idea what that string means but it would be a place holder for the email.
So we hit this and it will actually create the skeleton of the function in the right place for us and then we can go just sketch out the implementation.
That's really awesome, so we hit enter and it goes boom down here just like that.
And down here we may be want to type new email and implement the thing.
It'll go create this inside a data.py when we are trying to access it from program.py.
Really nice.
So you'll see these little what I call light bulb moments or code helpers, all over the place.
Now they don't just mean hey a function is missing they can do all kinds of stuff so if we look at those we can create a function or a class from a particular usage that's what you just saw; we can also say import a module, so if I type xml.etree.ElementTree but I don't have the import at the top, PyCharm would propose one of these little light bulb moments to say you know, you should import that at the top and then it's going to work.
It doesn't do that for external packages all the time if it finds something else that could have been a candidate and that's kind of what happened in my request example but it will basically import the module we also saw that we can install packages from that as well.
So we can do micro refactoring, this code, it has parentheses around if statement there's no need for that, we can take them away, and other little things like that.
It can find dead code and sort of clean that up for you.
I showed you the example of that unused show_id right, there's some little code helpers around that.
It can find PEP 8 violations and fix those it can even fix performance issues if it knows you're using some pattern that is sub optimal but it can automatically rearrange it to a better one it will propose that it automatically fixes that for you.
It could be aware of Python 2 and Python 3 differences or mismatches and fix those four you as well, it doesn't always turn these on, but if it's pretty sure you're mixing Python code from 2 and 3 it will give you a little pop up that says hey, should we turn on this Python 2/ 3 compatibility checking for you?
And if you say yes then it will propose to fix that.
It has all sorts of things around package maintenance, one example is if I have a package that it's using a dependent package like one package is using say Requests or SQLAlchemy, it will propose to put those inside of the requirements.txt if it doesn't find them in there, stuff like that.
Tons and tons more, you'll see these pop up all over the place and really it's tough to find all of them and list them here because it just does so many little things so keep your eye out for any time you see a little light bulb hit all enter, see what it's proposing sometimes that is 2 or 3 different things it's suggesting for you.
You'll get used to what it can do and this is really helpful when you are new but it's also really helpful when you are an expert so when you're new, it's like I don't know what to do oh it says it can fix this in this way great I guess that'll fix it.
Whereas when you're an expert, like yes you could go track down the requirements.txt file and write SQLALchemy in there or you could just hit alt enter and keep coding and not have to worry about that and stay in flow.
So I think this is a great feature for all levels but it offers different things to different levels.
|
|
|
transcript
|
2:17 |
Let's talk about discovering features for a second or discovering how to run a particular feature.
So I'm going to show you the operating system level way which only works on Mac, and then I am going to show you the way that's built into PyCharm that just works on any version of PyCharm, so all the platforms.
One of the things that's great about macOS, I've done ton of Windows and Linux as well and I like them both, but this feature is really fantastic, so you come up here into the help and you say I want to know how to— notice that this has little format error, this has a squiggly because of that space, we should, noticing these PEP 8 violations, these formatting violations here as well and what we should do is format that code.
But maybe I forgot how to do it like I don't know, somewhere maybe under code I don't know.
So, that doesn't matter, you can just quickly come up here and type format, reformat rather, that doesn't search sub strings, and it shows you hey right here is what you do and actually CMD ALT L with my current key bindings is a way to do it.
What if I want to know how to run, go over here and say run, there's a couple of options, this will just like randomly run stuff, this will run the program like the one you just saw.
So, those are really cool ways inside a macOS, really for any reasonable application, I don't know how to save things— here is how I save things I want to go into power saving mode etc, but PyCharm itself has a way to do that as well, I can say CMD shift A or on the other platforms CTRL shift A I believe, you can come over here and you type things like reformat code and it will tell you it's under code formatting, actually, if I just hit enter, boom, all those problems go away, beautiful.
What if I want to know how to run— I'll just run debug, there goes my code again; what if I want to take this and make it into a function, I could say I want to refactor this and I could turn into a method and it will tell me how to do that.
We'll talk more about refactoring later, it's awesome but anything you want to do, CTRL shift A or CMD shift A, and a little bit of typing is all you need.
|
|
|
transcript
|
3:03 |
We saw that we can use this find action either CMD shift A or CTRL shift A to put it in our platform so you hit that sequence of keys and you type a little bit of what you're looking for and it will even tell you like for example, refactor this is CTRL T.
However, be aware that that CTRL T is based on the key mappings I chose when I installed PyCharm and ran it you can change these later under preferences but basically, these get set and you're sort of stuck with them so on Windows, you might have a different set of keystrokes and there's actually a nice cheat sheet you can see at the bottom bitly/pycharm-card you can get it there that'll show you the various default key bindings and commands and sort of helps you discover that, we talked about that earlier.
But, we can actually go and change these key bindings here under preferences so under key map you can say what I have is macOS X 10.5 + and that will give you all those options here on the right you see that probably is like 5 or 6 pages of hotkey commands.
I could choose Emacs if I was really into Emacs or if I came from Eclipse and I wanted to use that I could pick that.
NetBeans, Visual Studio, like F5 would be run or debug in Visual Studio CTRL F5 would be run, things like that.
There's actually some listed here that are off the screen.
I show you this because one, it's cool to pick the one that you like so if you're .Net developer pick Visual Studio, if you are a Java developer maybe Eclipse is a good choice.
I just chose the macOS X 10.5 + version because I just wanted to use whatever the default was for my OS.
The other reason I show you this is you can change your hotkeys here so if you wanted to like cut up to line end, right now it's CTRL K and that's kind of Emacs or so, that's totally good but if you want it to be shift CTRL K you could come here and change that and make a custom key binding so that's pretty awesome as well.
Finally, if you're into Vim, you saw there is an Emacs dropdown for the key binding, but no Vim, just go get IdeaVim, remember IntelliJ Idea the IntelliJ platform so IdeaVim is the foundational Vim key bindings for all the various JetBrains IDEs, so PyCharm, WebStorm, IntelliJ of course, and you can install this and you can have Vim bindings if that makes you happy.
So this is made by JetBrains I think if you scroll down somewhere it says who makes it but yeah, you can install this and this will give you Vim bindings as well.
Some of the few key strokes that you want to really remember all the time is how to run the active configuration so ctrl R on Mac, I think I said F5 or shift F10 on Windows and Linux select words, ALT shift arrow the whole thing is CTRL shift arrow I think go to definition is CMD B or CTRL B or the CMD click, there's so many more so be sure to check out the cheat sheet just to kind of know what's out there.
|
|
|
transcript
|
1:41 |
In Python, it's great that we have PEP 8, it tells us how to format our code, how to name our variables and so on.
However, we don't always follow it or more writing code, reorganizing code, sometimes we get it into a place where it doesn't quite line up.
So if we hover over say this change address thing there's actually a few problems.
First of all, PEP 8 says we expected two blank lines from the find user by email function so it should have two more lines below; and according to our current conventions, we really should have something like change (lowercase a) address this is very much like Javascript style or Java style of function naming both for new email and for change address and it's not very Pythonic we should be using snake case after all.
How do we fix this?
Well, if we just hit CMD ALT L or CTRL ALT L or whatever the hotkey is for reformat code as we saw before this can change, but on Mac by default is CMD ALT L and I think CTRL alt L on the others it will reformat this and fix the PEP 8 violations so you notice that it actually went and it said okay we'll put those two lines there for you and if there was like other spaces or other minor things they will all be automatically fixed.
But a change address— well, if we're going to change address that actually might break other code and other modules or heck if this is a package that somebody uploads to PyPi, and then someone else downloads it, that could have like far ranging problems or knock on effect so it's not going to fix that automatically, but the refactoring would let us fix it at least within our project right away, but it will just give us a warning no autofix.
|
|
|
transcript
|
2:49 |
The code formatting fixes that we saw before, those were actually based on the coding style that we told PyCharm to follow, and chances are they were the default, but not everybody follows the default, and normally that's not really a big thing unless you're working in a team and you have version control and you both reformat a file, what are you going to get— you're going to at best get this file is changed, this line is changed, it was indented, this line is changed, it was unintended, this line is changed, it was indented, back and forth like the fighting every time somebody reformats a file, every difference in that formatting style is going to surface and show up as a difference.
And in a worst-case scenario, these are going to be merge conflicts.
This can be a super pain in the rear if you are working in a team.
Luckily there is a fix for that, so if we go to preferences, go to code style and we'll just focus on PyCharm but notice we could do this for Haml or Javascript or whatever.
Notice across the top, there are 6 tabs up there and each tab has a ton of options like for method call arguments, where do you align them if it's multi-line and so on.
You can go through and you can configure all of these or you could import or export a file, so this is really cool so you could basically configure everyone on the team say, this is the style we're going to use, you configure it here, export it, everyone imports it.
However, that's great, if you are on a single team like say work machine and we're only writing code against our one project; what if you are multiple teams, with different styles, what if you're contributing to an open source project that has one style and you're also working on your project at work which is a different style like that's a super pain, right.
You can also fix that.
Over here, you can say you can set up some styles and copy it to a project or export it to a file, so I could export this to a file and share with my team and give it a name and you could pick the style and things like that that's really great.
You can also say for this particular project store the formatting settings in source control, so there'll be a hidden .idea folder with a few files that talk about the project, and one of those can describe things like what is the formatting style around method arguments so you can actually store the settings for the format inside the project so you open up different projects, run CMD alt L, reformat the file that might mean different things based on that particular projects style choices so here's a couple of things you can do in terms of helping team members end up on the same style page because as I outlined in the beginning, if you don't that makes version control a real pain.
|
|
|
transcript
|
0:58 |
When you're working with large Python files, sometimes it's nice to peek ahead and see what's out there, what's at a certain level, maybe there's little error and you are like, wow what is down there what is that little squiggly in the scroll bar giving you a warning about.
So PyCharm has this thing called lens mode and if you put the cursor right there, just near the scroll bar there and you go up and down slowly, it'll actually pop up this little lens further down in the file so notice, look at the line numbers, it goes 3, 4, 5, up to 24, and then straight to 70, and that's because that lens mode also has the line numbers in it and that's looking like a couple of screens down like pretty much if you scrolled the scroll bar to where the yellow arrow is.
So be sure to make use of that if you're trying to like survey a large file and you are like what is this stuff down here and you don't want to lose your place, you just kind of want to peek around— lens mode.
|
|
|
transcript
|
4:46 |
Let's explore the object-oriented features, features for working classes and type hierarchies in PyCharm.
So over here, notice this is the code from my Python Jumpstart course which is right here, we just git cloned that in one of the earlier videos in case you're jumping in the middle, just go here check out app seven final, that's what we're working with.
Over here we're importing a couple of classes a Wizard, a Creature, a Small Animal and a Dragon, and we'll go check this out in a second but the creature is the base type and then we have a Small Animal and a Dragon, both deriving from Creature and then Wizard as well.
So let's go over to this actors thing we can use double search or so, just hit A and look, there's actors right there, obviously, it's small enough we could click over and find it but notice, we have this type hierarchy, here we've got our Creature the Creature is kind of the base type and it implicitly inherits from object in Python 3, it's as if we wrote this, but we don't have to because it's Python 3, so down here we have things like the __init__ and notice this is saying that this is overwriting or is overwritten in Dragon for example among other places.
This class is derived from by Wizard, Small Animal and Dragon, that's pretty super cool, right, and this is part of the Python data model, this actually comes from objects we're overwriting this from object.
Now, here, this get defensive roll this is itself overwritten somewhere else so let's play the game real quick, now remember, we could just click here and run it but I'll show you one other way to run our code just because sometimes this has console colors and whatnot and you just want it in a proper terminal so I could do this copy, copy path open this up, clear that out we'll just say Python 3 and boom, there it goes, well I guess it doesn't have console colors but that's all fine.
So what we could do is we could look around and we could see that there is a Toad of a certain level, a Tiger, a Dragon, an Evil Wizard and then we could say I would like to attack the Bat of level 3 that has appeared from the dark and foggy forest.
The Wizard has handily triumphed over the Bat, now a Tiger a is here, we could attack it, a Dragon— we've been defeated and so on.
The idea is we play this game, it's very simple but you basically have these attacks that the Wizard can do and all the creatures can have a defensive roll, some of them like we have over here the Small Animal and the Dragon have different types of defense than the standard Creature, well, we can use this to discover information about the type but we can also use this to navigate, so watch this, if I want to go over here to where this is all written by Dragon I click, boom, I'm in the Dragons __init__ where it's overwriting the Creatures and then, of course, we are doing this super here.
We're also capturing whether the Dragon breathes fire, capturing its level of scaliness, things like this.
This works in reverse too, get defensive roll, that says this is overwritten from Creature, click on that, it takes us back to Creature.
It even, and so much as we can understand information about the standard library works there as well so this will take us to the representation method in object but because it's implemented in C you don't know so much, not all of the standard libraries implemented in C though and if there was some piece that was written in Python it would take us straight to that and that would be awesome.
So you can see whenever we're working with these type hierarchies, we get nice little tips about what we're doing and this can let you know like should you call things like the super base method or not.
So here the small Creature is like half as defensive as a standard Creature because it's small and wimpy, right that's kind of what this implementation says.
For the Dragon, there's a bunch of different modifiers that we can have here, we tried a few attempts in the course that actually wrote this code to come up with it and talk about some of the expressions here but basically, whether you're scaly, whether you breathe fire these affect how defensive you can be as a Dragon.
You can see they are pretty tough to beat a scaly fire-breathing Dragon is super hard to beat in this game.
But, hopefully, that gives you a good sense of some of the objects or features the other things that you can notice maybe is if I type self.
I get Dragon features as autocomplete, I get Creature features from the base type, and I get object features, so you immediately get things like autocomplete throughout the type hierarchy as well— pretty awesome.
|
|
|
transcript
|
2:45 |
Here we are back in this Wizard game that we got came from the Jumpstart course, we talked about where that comes from a few times.
Now, suppose I want to have a Hero attack a Creature, so in our little world, a Hero is one of these Wizards, the Creature, active Creature is a thing like a Small Animal or a Dragon or another Evil Wizard things like this, right this object hierarchy we just looked at in the previous video it's one of those things.
Now, how do I know what to pass here?
Remember, I can take CMD or CTRL P and it'll actually tell you what the arguments are.
Now in Python you always have this self-argument but you never pass it on instant object so self is a Wizard that's cool, here is a Wizard we know that.
But it says there's this Creature and Creature is just the name of the type.
However, look what else it's showing us, it's showing us name and get defensive roll, so Python has this concept of duck typing, if it acts like a duck and walks like a duck— it is a duck.
Here what we're saying is we don't really care if it derives from Creature as long as it has a name and a get defensive roll that corresponds to how we plan to use it, you can pass anything that kind of does that in here.
So this is really cool, so CTRL CMD P great.
Maybe there's some more help, so we can come over here and we can view the quick documentation, F1 on Mac bindings, we can go over here it's the quick documentation, whatever that is, so F1, in my example may be something else for you, and it comes up and says here's the documentation for attack it takes a self parameter again, you ignore that that's like this in other languages, and it takes a Creature and again, it says the same thing basically what we said, it says here's the type, it looks like it takes this creature thing and it returns a bool true or false right, and that's pretty standard.
But we could do better if there was actual documentation for example, random.choice this is built-in, this has documentations we pull that up it says ok well here's the deal this is going to choose a random element from a non empty sequence by the way, that's important, it's an exception if the sequence is empty it has no elements, but you can notice here it actually gives you the intellisense or the documentation you're going to need an links over to Python 3.6 implementation, let's see another one over here and say format— notice it takes all these things, there's all these different ways in which you can use it and it's going to return a formatted string using the curly brace substitution like string format does.
Okay, so that's also really cool.
However, what if we want this, well, we'll see in a minute that we can actually give this better documentation as well.
|
|
|
transcript
|
3:47 |
Let's return to our Wizard attack here notice there's no real documentation there's a few things inferred by PyCharm, and that's pretty sweet that it does that but what if we wanted real documentation like what does it return the bool for if it was successfully able to attack the Creature or if it defeated the Creature or you know what does that even mean right, so we would like to give it more information of what types of Creatures can it take and so on.
So, let's go over there, CMD B or you know go to definition, so we'll come over here and in Python the way we create documentation for a method is we put the doc string at the beginning and you say triple quote " " ", type some stuff and a certain format that describes it and then you put another triple quote " " ", and that string is what's called a doc string.
Well watch what happens if I triple type quote, one, two, three that's cool it auto matches the closing quote; if I hit enter— boom, look at that, it tells me here is my parameter, here is a return value, so I'll say the attack method will attack and potentially kill and the return value is going to be this bool and it's going to be true if Wizard wins, false if they are defeated.
And then this Creature, this will be a Creature object which can fight another Creature, Creatures can attack each other in this thing.
We could even come down here and say type Creature and say it's a Creature one can spell, you can say it like this right again spelling is hard.
So we'll come over here and we'll even see this type so that's pretty cool as well.
Now let's just switch back, over here and I'll hit F1 to put my help and it says here's the documentation, look, notice this part about well it needs to have these features, it's gone, it's like that's a Creature, straight up, you're a Wizard, it's a Creature, you fight and get a boolean.
And it says the attack method will attack and potentially kill the Creature and here is the Creature, which happens to be a Creature we could see what to do with that in a second, creature object we can find another one and here the return value is true if the Wizard wins false if it's defeated so that little bit of help, remember what did I type, I basically came over here and typed triple quote enter, boom, and then just filled out the details, like so.
And we get this nice Python style documentation and then we can view it over here and you can even navigate so like if the creature had a documentation, well it doesn't but you know, let's go and give the creature documentation.
We'll say same thing triple quote, the base type for all combative Creatures something like that, now let's try this trick, one more time.
Okay, here's our Creature, we click on this, boom, the base type for all combative Creatures.
That's super nice, right, so you'll see both quickly we can discover the documentation for built-in standard library things like random.choice or string.format for external packages that have this defined or even within our own type and when we are doing with our own types PyCharm gives us tons of support on creating the right syntax for generating that documentation.
|
|
|
transcript
|
2:10 |
In PyCharm you can pull up what they call quick documentation, these little pop ups that document the various pieces you're working with and this works for built-in types in the standard library or types that we create.
So here our hero is a wizard that we created, it derives from Creature, you can see at the top, and it has this method attack, and PyCharm is pretty smart, it tells you what the requirements of the creature object are and so on, but not much more than that.
So, this could be better, right.
We should write some docs, so if we go over here and we type " " " and then hit enter you'll see that it's going to actually generate this skeleton piece of the various elements we're going to enter for our documentation.
Notice, you've got to be careful there needs to be a blank line between the param and the summary description, that's not obvious for what you have here, but it has to do that and then you can put things like what is the parameter, what does it mean, what is the return value you can also do colon type creature colon and give it a type there and that even tells PyCharm and other things what type that object is meant to be.
So now, we've filled it out like this, the commands the wizard to attack a creature and then the creatures the opponent to battle and what not, right, so this is like a different description of the same thing that we just did in our demo and like I said, you can even use this type which is not proposed by PyCharm, but this will help things understand the type hierarchies if one is in place or like if you expect an integer or you expect a creature, whatever.
And now if we get a quick documentation for our hero's attack we get a much better list here, at the bottom it commands the wizard to attack, the creature, it's a creature from that typesetting, the opponent in the battle and so on.
I don't document all my methods, I feel like sometimes they are so simple that adding the documentation makes it less readable, but certain times these sort of major functions within your application documentations option, it's really awesome, especially if you are writing a package for public consumption, definitely the publicly exposed methods should be documented, and PyCharm helps you do that.
So, now we have excellent documentation for even our own types.
|
|
|
transcript
|
1:28 |
One of the really important things to do before you start changing code is understand where and how it's used and sometimes you're just trying to decide is this used at all— it doesn't look like this is used but I don't really want to delete it because what if it is?
So we can use find usages to answer both those questions and more, so we can come down here and say right click on this function get defensive roll and click find usages and we get this sort of fine dialogue at the bottom and it says oh well, the get defensive roll is used in a bunch of places, the dragon uses it, the small animal uses it the wizard uses it within its attack both for itself and for the creature that it is battling with.
So then you can quickly understand where this function is used, how it's used, if you're going to change the signature or just want to know who is actually calling this function find usages, because PyCharm understands potentially hundreds of Python files and packages used across your entire project, this is much better than just hoping or maybe doing a search for get defensive roll as a string, because it understands the abstract syntax tree and it literally knows where is being used it's not just doing like a fancy find in text sort of thing, it's actually understanding the way the code is working together and then it navigates that abstract syntax tree.
|
|
|
transcript
|
4:20 |
One of the cool little tricks we saw earlier was that _ _name_ _=_ _main_ _ sort of run convention that we saw so if you import a module its name is just the name of the module but if you execute a module its name is _ _main_ _, that's a convention and we saw that we could type main and get it just like that.
And notice even where the caret is it's right where you should be typing to sort of do the stuff that happens.
We have a bunch of these things so if I want to say enumerate over this small set of fibonacci numbers and I want to like print out the first number is this, the second number is that it's super easy I could say iter, and that would be basic iter, I could say itere for the enumerate.
And boom, I num, and it proposes num, it knows this is iterable, and all those kind of stuff.
I'll say it's a fib and this would be index but you could just stick with whatever it proposes.
I could just do a little cool format thing.
And if we run this, notice it says run configuration, right click run— boom super, super quick, we have the first fibonacci number is 1, second is 1, third is 2, fourth is 3, it's hard to say that.
These live temples are awesome how do we know which ones there are?
Can we create others?
I'll show you and yes.
If we go down here to the editor, to live templates at the top, notice when in opens it should be like this probably there's a whole bunch and it tells you to expand them with tab and there's Python, there's Django, there's Flask there's even things like Javascript and Angular.
You can come down here and you can see we've got actually not as many as I would hope but here is a super call, here are some properties with getter, setter, deleter, here is the main thing, here's that iter notice for index variable in iterable, and it automatically proposed nums because that was an iterable in scope, really, really cool.
Now notice this is applicable to Python and Python classes, so this is important.
You can also tell it to reformat the code there are a bunch of things.
So let's add one, let's say hey, I want to be able to quickly have a wizard battle so I'm going to create a live template and this is going to be wiz is what I'm going to tie and this will be create a wizard battle and I've got some text copied here, can I indent it, I can so what this will do is quickly generate this wizard and some creatures so hey, they can battle, and let's say even format the code depending on where do we paste it.
Now if I try to run this, it's not going to work, it will never show up and the reason is a little like warning down here it says you have to say I could just say it runs everywhere, probably not so I could come down here and just say it runs in Python class other that's all good.
So now if we come down here and you want a Wizard battle, I type wi— wow and look, create a wizard battle, bam.
Now of course, we got to import these things, import the small creature but notice a little lightning bulb hey, your code is broken but not for long.
Now we could just come down here and say something like print hero battles whatever and we'll do a little format, maybe hero does an attack and remember we have beautiful help on what goes in there it that takes a creature, so let's just say it's going to have a creature of zero, the Toad so now if we run it, boom Gandolf attacks the Toad, the Wizard rolls 75, the toad one half boom, that is a pretty handily beating that the Wizard gave to that Toad, but what would you expect right, it's a Toad.
So we can create these live templates this Wizard example that I told you about is silly but it shows you how to create them, set their contacts and so on.
Definitely think about the patterns that you do over and over and over and if you could make those in a couple keystrokes and it just happens reliably, and you can even maybe share them across your team, that'd be awesome.
|
|
|
transcript
|
1:24 |
You've seen what the editor can do.
Now, it's your turn to play with the editor and try some of the more advanced features that we covered.
This is not going to cover everything, but it's going to give you a few examples of what I think are some of the major and most important and most helpful features in the PyCharm editor.
So let's jump over to github and have a look.
So here in your turn 2 the editor, we have some steps that you can follow along and I encourage you to play with other aspects of the editor as well open projects that you might have worked on with other editors and so on.
But, if you follow these steps you will see some of the cool features in action.
Now, notice over here we have a project folder called bad wizard, so you're going to start working with this bad wizard code right away and first step is to go and open this up so you've got to make sure you clone this repository so you have it, and then, we're going to play with autocomplete a little bit, so over here you have this hero, you can say hero.
I'll show you a bunch of options, one of the things it doesn't have is a wake up method so you're going to use the code intentions and automatic code generation tooling to generate this wake up method here.
We're also going to clean up the code according to PEP 8, remove some of the unused imports and document some of our functions.
So follow along here and you'll have a good understanding of some of the cooler features especially the code intentions and code formatting.
|
|
|
|
44:24 |
|
|
transcript
|
1:39 |
Now that we have our editor up and running the very next thing we want to do is make sure we put our code in source control so that it is safe.
The last thing we want to do is lose a bunch of hard work and of course, if you're going to work with anyone on a team you need good source control, and PyCharm has a ton of built-in features, for many of the common version control systems and you'll see it has a nice UI for those, as well as deeper integration like the editor actually represents source control features.
The project listing has stuff for source control, all those kinds of things.
So, let's get right into it.
The first question you want to ask is— is my favorite source control system supported and natively built-in?
The answer is very likely 'Yes'.
So of course, git is supported, git and github and to a slightly lesser degree, Bitbucket.
These are definitely the most popular ways that people work with source control so git is deeply supported in PyCharm, but we also have Subversion, if you want to go back to the year 2000, you could definitely use some Subversion.
They have Mercurial, they have CVS, you maybe haven't used that unless you've been around for a while, but in the 1990's that was quite popular.
They also have support for Perforce, so all of these are built-in and really nice.
If you are using Team Foundation Server TFS, or Visual Studio team system, whatever they're calling it these days or, god forbid, SourceSafe, you can get those but they're not built-in, they don't come with it, you have to go to the plug-in section, go to the very last chapter of this course and check out the plug-in section to see how to get to that.
|
|
|
transcript
|
8:08 |
To start our exploration of source code and its integration with PyCharm, let's just look at our github repository here, mastering pycharm course, we've already talked about where this lives, but you'll notice that there's really nothing going on here like a little while ago, I put the course image and I've updated the read me apparently but nothing has been committed and also notice that there are two branches like imagine, this is just to sort of pretend, I'm doing some sort of feature branch thing so I've got this feature branch one and maybe I'll issue a pull request back to the main master branch.
What we want to do is we are going to go back to the code that we already wrote and when I first did that, we did the editor stuff and the project stuff what I did is I created a folder called "demos" in here but I didn't check it in or anything, because we hadn't gotten to the source control part yet.
So here we are in one of those programs remember we got one, we can go and download from the podcast so I could run this and it will tell us what the items are basically available on Talk Python right now.
So you can see that we're getting, I guess we are getting the 0 to 129th one down here, we're not getting all of them.
Here in program, we're only showing this little bit.
You can see this is working fine, but it has not been checked into source control so how do we go about this?
I created this folder inside, let's go to my desktop, I created this folder here inside the course, here you can see the read me, and all those kinds of things.
We go over there, let's say go to the desktop course, this is a git repo, and we have some files in here, some that are new, some that are modified okay, so let's go check that out.
Now, if I just open this project, automatically it knows it's part of git, so go to the menu first up here notice there's a bunch of non grayed out commit, update source control options and we could go and say check out from github or some other types of things, but because we've already opened it there's actually a lot of git features available to us.
So we could commit a file, we could add it, we can merge changes, we could reset it to the latest, all of these sorts of things.
I could even create a pull request, how cool is that.
So a lot of stuff can happen up here notice there is also a local history which is amazing we'll talk about that in a minute.
For now, we're going to focus on the real, grown up git source control stuff.
So, this is all great, you might use that, but typically I find myself here extremely rarely.
So let's look down here, notice this, it says git master, how awesome is that?
Because we're in a repository it automatically knows, actually the very first time we opened it, it noticed it was a git repository and it asked should I add integration for it and I said yes, so that's technically the yes it's required, but down here now if I click on it, I get branch information.
Notice I could tag a branch, create a new branch, I'm on master local and on remote, I have my feature branch so I could do things like check it out, because it doesn't exist in local and things like this so we'll come back to the branching, but notice right away it tells us sort of where we're working and then up here, these are all the run options but on the right, we have update project, commit the changes, this shows the history, not committed, so there's no history, we'll revert it back.
So this little group of four things is also your source control.
And finally, it might not be obvious yet, let's go ahead and mark this as excluded so we don't look at it, the green here actually means this is a new file so if I go back over here, it is this little bit right here.
The green means new file here, if it were modified it would actually be blue not red, and if it were not tracked it would be basically that color.
So if I go over here and I add another file let's just call this other.txt, I told PyCharm when I created this project that it was allowed to automatically add things to source control, but if I added it without, it would show up as red.
So now let's go ahead and commit these, probably the first thing we want to do is get the latest changes.
So we can go over here and say get me the changes and we'll just pull those down, it says okay, everything's up to date, great.
Now let's go ahead and check them in, so let's go commit, so we'll come down here and it says these are all the files that we're actually going to commit for you there's some project files that's going to track for us but these are the ones that we're looking at and then there's a bunch of unversioned files that it's not tracking some project files that we could ignore we'll come back to that later.
Okay, so what we want to do is we want to check those in, we'll give it a message, whatever it is you do when you do your check in so this is committing the early work.
We could come over here and reformat the code according to our rules before we check it in, we could do certain things like optimize the imports, perform code analysis, other types of clean up.
So there's all sorts of stuff, we could even push it to production if you would like, I am not a fan of that but you can.
So down here you can see your differences, this is all green because it's all new, not a lot going on.
Now remember git is two staged, so if I just click commit, it's just going to stage it locally, what I really need to do is commit and then push those changes up, so I'll do that all in one shot.
And it comes back, it says okay you need to push this stuff, you are going to push it here, we could push tags and things like that, but let's just go.
Wait a second— ta-da, it was updated.
Now if we go back to github and we refresh, There it is, committing the early work, 17 seconds ago.
So we come down here, we were on this one, the podcast.
So, down here we're got the work that we did, awesome.
Let's go over here and make some changes, because we're not quite done exploring this yet.
So I told you if we made some changes that the color would change again, so let's go and suppose in program, what we want to do is we actually want to get 120 to 141, so we made some changes here, and if I go over there, notice it's already turned blue, that means it's been changed, it was in source control, it's been changed.
I can come over here and I can save, and we could say show me the history now, now we have some history, right, this was checked in, so we have our local changes, our log of what has been changed, our console down here for our git action, and then this, we could actually show the diff on that is not super interesting yet, is it; because we just checked it in.
Alright, so last thing, let's do it from here, actually this one from here, so we could compare with the current version, now we can see that we've changed this one line, right, so this is standard git changes.
Okay, so pretty awesome, let's just go and push our final change up, later episodes, something like that, and we'll do a commit and push, and push, awesome, I'll commit it.
Finally, let's look at annotations, so if I click on annotate, it will come along an it will say who has made these changes, when the changes were made, you can click here and it will actually show you that check in, right, if I click on this one, it will say look we just checked in that one file with this change, if I click here— now it's not super interesting because there is only 2 versions and it was all me, but you can imagine in a real application in a real project over time, this annotate is super cool.
|
|
|
transcript
|
2:50 |
Let's review accessing source control, specifically git from PyCharm.
We saw that we can go to the vcs, version control system menu up here and depending on whether you already are in a repository or you are going to create a repository, you're going to check out something from repository, this looks a little bit different but this is the view you'll see most of the time because most of the time you'll be working in an active project.
So you can see all of these features, tons and tons of git features here, stashing, annotation, comparing things and resetting them and so on, even creating a pull request, which is pretty awesome.
So you might go here, but most of the time, I think you will be using the toolbars and hotkeys in the editor.
If you look inside the editor up at the top, remember we have that group of four source control operations and down at the bottom, we also have stuff about the branching.
So up here, we have our group of four, and down at the bottom we got that.
We can click update, so this will get us the latest from source control, this is basically a git pull Over here, we'll do a commit, so this is like a local commit with the option to push but you don't have to, so we can do those, you saw there all sorts of features about running analysis and clean up on the code as it goes in.
You can compare the current open file against what is in version control, and you can even revert it back, like one click, oh that didn't work throw it away.
So, that's really nice to have up there and in fact, you'll see there is another place where version is usually kept as well, so when we get to local history you'll see that it doesn't entirely throw it away, but it does throw away in your git repository.
If we look at the bottom, then this down here, the branching operations, and we'll come back and look at that in more detail in a separate video.
So if we click update, we'll get something that looks like this, we can merge, we can rebase, we can just do whatever the branch default is, which typically I believe is merge.
And if we want to make a cleanup on our files like we got some working files or something, we can stash those locally.
You can also say just keep these, remember what I said here and don't ever show me this again, just do it.
If we want to commit, all right we push the commit button, here you can see we've made one change and we're going to push it back, it lets us select the files to check in, send a commit message, down at the bottom it shows you a more meaningful diff this time because the last time it was a new file so what did you see, right, this time it shows us the actual diff, and then we talked about all of the operations in the right, check of the to-do's, or rearrange the code, things like that.
Then you push commit and it gives you a little drop down potentially for a commit and push, which is typically what I do.
By the time I am committing, I'm usually ready to just send it off to the repository remotely anyway.
|
|
|
transcript
|
3:29 |
So we're back here in PyCharm with everything checked in notice they are white, our files are white that means that they are either ignored or they're up to date in git, and if we right click on them, you can see that we have git operations, so hey, they must be tracked by git.
Okay, so this is all good, now let's just go fool around a little bit, like let's suppose we want to have a function, I'll do it down here, let's say def show header, I'll put this down here, and say show header, okay, that's cool and then this download info that's fine, maybe you want to make this a function as well, we could refactor it later, and when we talk about that we will but let's say display results, we'll run a little cleanup on it, this is all good.
Okay, so we can come over here and notice a few things, again, our program file turned blue, that means there were some changes we could go and see how those are different, like view the history here we could actually right click and say git and say compare with that and see the actual changes we've made and this stuff is added down here and things like this.
So that's all well and good, but if you look carefully, there's actually more going on, so notice right here, there's a green line, so what does that mean?
If we click it, it says basically these green lines here show you what has changed in this source file compared to the git repository version so we can jump from change the change, we can revert it, roll it back or we could show the difference.
So notice we're just showing the difference of this little bit, maybe this is a thousand line file, we're not seeing a thousand lines, we're just seeing this little bit that changed in that section.
You come down here, same thing, show me the difference, look we used to say this, now we say— just the way it lined up it looks not that different, but it is kind of different.
And we can even navigate, this is kind of useless in this little file here but shows the next deference, shows the previous difference.
Down here, notice that we have another thing we basically deleted that line as far as it's concerned and it's just not a great diff comparison that really landed up there, but you can see these little arrows mean this section was deleted as far as like the diff is concerned.
Now if we go over here and we commit these we don't have to push them to the repository, I'll move it over to the side, I'll call it factored into methods something like that, so I'm going to commit it not actually push it.
Of course these changes are in our local git repo but not pushed yet so no one else will see them.
So we can come over here to git and say git push.
If you want to do that hotkey, shift CMD K.
So we're going to push that one change in and— wait for it, now we push those change up to github and we actually have a nice factored version there.
So, you can see this editor actually has a bunch of really cool features in that it will show you exactly what has changed by looking at the gutter or whatever they call it, thing on left there.
So, super, super nice, the integration built in the editor.
|
|
|
transcript
|
2:51 |
When we're in the editor, you can see a lot of cool features around basically the project structure and the editor itself.
So, on the left over here in the Wizard battle you can see we have a bunch of different colors we have a new file which is green, it's created and basically staged in git so a git add but not in git commit, yet done on it actors is just up to date, we have this red one that is not added and not tracked it's just an untracked file lying around and then the blue one is the one we have open, this one has actually been changed so that's pretty cool, you also see the colors up here in the various navigation bars and you see them in code, right there.
Notice that this first line, the one on line 77 is like— I guess blue, I don't know what color is going to come out after all the video processing, but to me it's like a light blue and that means that line is changed, it's not a new line whereas the 81 to 85, those are totally new lines.
So here is a new function whereas the one you've defeated all the creatures that actually changed a little bit, and we'll look into that next.
So if we zoom in on that section notice we can click here on this little segment, this little in the gutter to say here's something that's changed and when we do, we get a diff, immediately there's a diff for the changed lines for the new lines there's nothing to say other than, hey this is new.
So look here in this first line, it has what is actually current in the source but it highlights two exclamation marks, and then what's below where it says, "You defeated all the creatures, well done!" single exclamation mark, that's what the original was, and I wanted to add some enthusiasm so I added two more exclamation marks and that's what the change in this particular line was so you actually get a little inline diff which is really, really beautiful.
Now, if we click in this section and this little toolbar thing you can see we can navigate the diff with the up and down arrows, take me to the next change, the previous change.
If we click here, it will roll-back this change, so basically the top line will be replaced by the line in the red box because that's the original.
We can open up the diff window, here it is actually not needed but if this was a more significant change or we wanted to look at the file as a whole— totally we could do that.
Here we can actually copy the original so maybe we want to leave the code as it is but we want to copy the original and play with it somehow, not just to a straight rollback.
I think this is an amazing feature, and you can avoid a lot of the actual source control diff merging type stuff and just use this little gutter thing and just open it up right here and look at the code and how it has changed, as you're going through it.
|
|
|
transcript
|
2:51 |
We've made some changes in source control, that was fun, but really, let's go through the work flow of creating another branch and checking it out.
So, if we go down here, this is our branching area, and we click on it, we could go and create a new branch or we could check out by a particular tag or revision; but probably what we are going to work with is notice our local branch is here.
Right now, we just have the original one, from when we created our first repository and checked it out on github, but since then, somebody— me, has gone over to our repository, I did this at the beginning of this chapter, and I just in github created another branch here.
So when I did that, it shows up in this list and I could even favor it and whatnot.
So let's suppose that I want to make some changes on this.
We can go over here and we can check it out, if we click on it, it gives us a couple options, check it out as a new branch, and notice it's not local yet so that kind of has to create it locally first, so we'll call the same thing, so we don't go crazy; great, now we have kind of nothing in here, so let's go in add sample, we'll just print this is the other branch, I'll save this and let's go ahead and check that in.
It looks good, other branch, off it goes and notice over here, if I make this little bigger we're going to push from our local branch to our origin, same name, so let's do that.
This should turn white up here, when it is done.
We pushed it, now if we look back on github we go here and notice, somebody just did a check into this feature branch, so right now we're on master, you can see our demo projects, let's go in here, to the podcast that's the one we're playing with, notice these files, so let's switch to our other branch, and then there is sample, right.
So we're making these changes exactly as you guys would expect.
So we can come over here and switch between these branches if you want to go back, like okay, great let's just go back to the way it was, we're back, it has the option to restore, it's called a workspace and it will remember some of your settings but we're not going to mess with that, you can tell it to stop showing you that if you care.
So now we're back to this code, so we can toggle between our branches like so.
I can tell it don't show me that, so this lets you quickly, quickly see the branch you're working on and switch between it, so that's really, really cool.
|
|
|
transcript
|
4:36 |
Now you know how to use a proper source control system like git, it will be not super different for Mercurial or for Subversion or any of those other things.
But— you don't always check in every change and sometimes you really would like better more fine grained accuracy for the changes that have happened to your files.
Like, if you make a change and then you decide to throw that change away or you keep going and you end up breaking something you are like oh, I wish I had checked it in, like 30 minutes ago and then I could roll it back to there, but I got a roll it farther back because that's all the history that I have in my source control.
Git solves this little bit with local check ins and you can have more fine grained, but still I contend that there are times when you are like I really wish I had a version of this, and you don't.
So, PyCharm has this amazing thing called local history so independent of whether we were in a git repository or had any source control configured at all, local history is always active and you come down here and go to a particular file and view local history, there's not a whole lot to it, we could put a label or we could just show the history, watch this.
Here is the life-cycle of this program.
Back here, we had zero files and then we created this one file here, right, and then we made some changes, so if you click through, it just shows you all the various changes that happen, now it is starting to get interesting.
l'll show you these files, how they've changed over time, these are identical, here is another one, okay, so basically you get the various changes that you've seen over time.
Now, there's a bunch of changes that have actually nothing to do with this program.py so I'll just stay here, but this is really, really awesome we've got local tracking of any change, and also it shows you where we checked in the other changes.
Let's go and make some more changes let's suppose first I'll put a label so this will be factored, saved, right you don't have to put labels but you can.
So let's go over here and let's import random and let's go and say start=random.randint and we're going to start somewhere between 90 and 110 and we're going to end by going to let's say 130 140 so we'll come down here and instead we're going to say start and let me put a save, end and maybe let's put one line here again.
So let's just run it and see what happens all right it looks like it went from way back 105 to 137 was what it came up with the end.
So that seems totally reasonable.
Now let's go back to this local history one more time.
Now we can see some more meaningful changes so over here, we tagged it, notice when we do a commit it actually tags it automatically but over here we get that as well.
Now you can see we factored, we sort of labeled and we saved it and we made one change we came down here like this and we said okay, we'll go and have this version and then, we can get this one, this is where we added that new line there, so you can see, we started out with no randomness and then we added that random, I think this def is the current one.
So this is what it was before and then we go up here and then we added that new line down there.
So things kind of moved around a little bit but this is really, really helpful, I would say at least one time, I badly lost some file that I thought was in source control and for some reason it wasn't, I deleted it and then I needed it back actually, it turns out I was able to use local history to get it back exactly, so I don't use this often but when I do use it it's like really, really hopeful.
It's also great if you're working in a project that doesn't have source control set up yet, this is kind of like your wimpy source control, super, super cool stuff, you can even do a little revert here.
Okay, so local history— definitely, definitely check it out it's a parallel, independent version control that only lives in your project files.
|
|
|
transcript
|
2:02 |
One of the more advanced workflows in github or git in general but really github, is this thing called git flow.
So the idea is we're going to go and create an issue, we're going to create a branch, a feature branch for that issue, we're going to do all our work in that feature branch, and then we're going to create a pull request from that feature branch back to the target branch, master or q&a whatever we're going towards; wait until somebody approves that, merges that in and then we'll close that corresponding issue.
So here is a fake git flow, we've already created branch called Python-jumpstart-course-demos-29 because this corresponds to issue 29, not a great name but that's what it is, I definitely recommend putting the issue id as part of this.
So, we've created this and we've made some changes, we've checked it in there and then we can click on create a pull request as part of that statement we can say this fixes issue 29, which then associates a link in github between this pull request and this branch back to that particular issue it is supposed to fix, you can see there's no conflict, so we should be able to merge it— we do, the pull request successfully merged and closed the pr, if we want, we could delete the branch or leave it, take your pick.
Then finally, we can go over and we can close the issue 29 that was associated with it, so that's really, really great.
You can see below, mikeckennedy referenced this issue 11 seconds ago, that's because I put hash 29 in the pr description.
This is a very common workflow, common in open source, it's common even within companies as a way to partition feature development within a team so maybe somebody is working on a feature or a bug and then they issue a pr basically back to themselves or to their team members to keep going.
So let's see how this works in PyCharm.
|
|
|
transcript
|
8:55 |
Let's begin our exploration of this git flow in PyCharm by creating an issue.
Let's suppose one of the problems is our little podcast downloader thing it doesn't get the latest episodes, potentially, there's actually no way for it to know what the latest episodes are the way that we created the api.
I'm going to come over here and say add latest episode tracking that's not a great word for it, but we'll go with that the latest episode tracking for downloader.
I'll assign it to myself, I'm going to label that as an enhancement.
This is the description, so we'll come back to that later.
We have our issue being created, and our issue is a number 2, remember that number.
So we'll go over to PyCharm, and first of all, notice we have no pending check in changes and we can also update to make sure we have the latest, we're on master, all files are up to date, great.
Now what we want to do is, I would like to work with that work flow I would actually like PyCharm to know about not just git but github and the issues— how do I do that?
Well, it's not anything I've shown you yet it's hiding up here under tools, not under version control.
So if we go to tools Tasks & Contexts, we can go over here and configure servers this is a lot not obvious, but this is how you do it, you go to servers and you say, I'm configuring— look at all those bug tracking things, YouTrack, Jira, FogBugz, Trello, GitLab, but we're going to add github.
So I'm going to come over here and I am going to put my username and then we need the repository name, so that is this part right there I am going to put that there, and now what I need to do is put an api token in there and I could press create but this is actually kind of sensitive, so I'm not going to show you this.
Okay, I pressed okay, and notice up here, I was kind of hiding that, played with it a bit, this little default task thing has appeared, and if I go under tools, task, I can now open a task either way I could do it here or there, but if i click on this notice that I get some stuff right here, we have random common things that we've done recently, these are like check ins and stuff or I can hit open.
Now, if you wait for a second, this will download the various issues so these are basically repository name-issue number 2 so add the latest episode tracking for downloader, yes that's what we want to do, let's do that.
So I click it and it says okay great, what we're going to do is we can clear the current context, we're going to create a change list for all the changes we could even shelve pending changes, if I had them; create a new branch, I don't like this name here so I like to do this in mickeckennedy username something about the issue so we'll say 2-track feature, or let's call it track latest.
Okay, notice we're going to branch it from master here or we could actually use an existing branch if we want but I'm going do this git work flow go to the issue, create a branch, a feature branch for it, base it on master so when we merge it back it's going to go back into master and we'll go from there.
So immediately notice down here, we're in this new local branch that's getting checked out up here it tells us what we're working on, things like that and we'll just go do our work.
So let's go down here, and the reason that we don't really know the ending, is if we look at this api in this thing there's really only two functions, there's download and then there's get_an_episode, give it the id and you get it back, maybe.
So, notice that here's a dictionary and it contains the keys the episode id so let's say get count, or let's say get latest show id down here we'll just do something like return max of episode_data.keys all right, we'll probably test if that works let's go up here, do a quick little print, print working with total format service.
now we should have get our latest show id, and then we'll use this again down at the bottom, so instead of going to random, we'll do that plus one so we're always working on the latest.
Let's go and give this a run and see if it's working.
Hey look at that, if we go at the top we're working with 140 episodes, let's see if that's right.
Go to the episodes, 140, beautiful, so it looks like that is working and we're happy with it right, we've tested it, we made all of our changes.
Okay, so what we're ready to do, notice, we have pending changes, both these were changed and we're going to go over here and I would like to close this task tools, task say close active task and when it says that, it's like okay what do we want to do, do we want to commit the changes, do we want to merge the branches back together; do we want to update the issue state to make it resolved?
So notice over here, if I refresh— still open.
Okay, let's do it.
So we've deleted the branch, we've merged it into master, notice we're back on master here, go over here refresh the issue state is now closed, and do we have a closed pr?
No.
So you can see that was all done, if we go back to our master branch, we've got this change that happened just a minute ago, let's go look and see if it actually made the change here.
It looks like it did not, so all we have left is this sort of "random gets" so check that in, so over here we just have the two functions we have download and get episode so we're missing or get link because we have not yet actually created the pr for this so we got to go over here and say compare this so this fixes issue number two, notice, we even get little intellisense, thank you github.
So we can go create this pr, maybe someone else or even me will come along and say, oh look there's an open pull request I need to deal with it, in here and I can merge it, confirm my merge, change if I really want I could delete that branch if we go back to master, we now have this check in here, not the greatest name but if we look at service, we have our new little feature thing, it's hard to call it much of a feature, but you know what, there it is.
Now if we go over here and we look at it, do we have it yet— yes, it is merged in locally PyCharm did that for us, but it didn't do the pr actually, the more I think about it, probably following the git flow I don't think I would merge it locally into my branch or close the associated issue, I think I would go over to github and do that but if you're not working with github maybe it makes more sense to do it this way.
Either way, so if we go over here and we look to push our changes back notice, first of all, there should there be nothing to commit other than unversioned files, if we over here and we do a push, git push we have this local merge that we did there, I don't think that we really need to do that let's just do an update, alright, all files are up to date, now there's no change left to commit because we kind of did it in those two places right like I said, I would do this in github rather than just in PyCharm.
Now we can go over here and just go back to our default task it says our empty change list is no longer active, that's great so let's just get rid of it.
Alright, there you have it, that's the git flow in PyCharm.
|
|
|
transcript
|
3:10 |
We've seen that we can actually follow the git flow from within PyCharm.
And what you have to do to make this happen is you actually have to go into the tools task section and configure the server.
This is not really obvious at all, so you have to come down here and you have to say configure servers and unless you hit this plus, you're like what is this for anyway, task servers?
But you can see this is actually four issue tracking and at the very bottom, we have github.
So github is obviously where I like to do my work but wherever your company works— maybe you use YouTrack, maybe you use Jira, who knows.
We configure that, and we put the host name, the host is github.com we put your username, put your repository name, and then you put your api token, remember this is sensitive, don't share that with anyone.
So you can determine whether or not you want to see issues not assigned to you, you probably do, take your pick.
I guess it depends how many issues you have.
So, you can say that, show me the issues not assigned to me, and then, once you do that, this little default task thing appears next to the source control, that wasn't there before.
Now, once we have this, we can click on it and pull the drop down and say open task and it will give us this thing to search and whatnot, but what is really cool is all of our github issues, and our github repo show up here, and notice, to the left of the Python jumpstart 29 test issue there is a little github icon, little octocat thing.
So we click on that, and it says okay, great, we're going to open this task, however you are going to basically configure your work space for it, so you can click your context, we can create a new branch, remember, in here I use my username/ the id of issue I am working on- some short description so that it's pretty easy to tell like here is a feature branch for this issue, I based it on master, that seemed like it made a lot of sense, and creating a change list for git— I don't know if that's required, depending on how you're working, I don't use change lists that much, but if that's helpful to you, go for it.
Then, you do all your work, and when you're done, you come over here tool stats and say close active task and that will basically close it off and commit it and so on.
So, come over here, say close active task, you can commit the changes, we can merge the branch, we can update the issue resolved, and check it in, and that will do the commit and push, all that.
Now, if you're working in github, and you're doing the git flow stuff, I would recommend that you commit the changes— yes, merge branches— no, update issue— no.
Instead, what you do after this is you go to the github repo right at the top, it should say there has been a new check in in another branch, would you like to do a pr, create a pr?
Click yes, and take the rest of the flow through the github itself, but if your source control area, if you are just using straight git or something, doesn't support git flow and pull request, go ahead and do the rest right here.
|
|
|
transcript
|
1:46 |
The final little tidbit of source control that I want to touch on is github gist.
So github gists are not proper repositories but they're sort of tracked and managed individual files that demonstrate something interesting.
You can use these to show off something, to share a cool technique or even ask for help like create a github gist maybe refer to it in stack overflow or somewhere in a forum, right.
So it's not the whole repository, it's just one file.
So we can actually do that from within PyCharm, let's suppose this little downloading service is so amazing I want to share it, hint— it's not, but let's suppose we want to share this, we go over here we can go to the very bottom and say either open it on github, which is just to view it on github, or create a gist.
So I can say this is an amazing Talk Python title downloader thing, you can make it anonymous or make it public, keep it private so leave that just the way to is, I don't really care.
Wait a second and boom— see how amazing this is, this is really amazing.
And down here you can see this is the code that we wrote and it just automatically created a github gist, I could say yeah, pretty darn amazing.
So we can comment on it, just all the standard git stuff that you do.
So we could even come down here and star it, we can create additional revisions if we make changes, all that kind of stuff.
So if it wasn't mine I think I could even fork it.
All right, so super simple thing, create a github gist, but, pretty cool.
|
|
|
transcript
|
2:07 |
Source control in PyCharm is really comprehensive and for git that can mean it's kind of overwhelming the first time you see it I suspect unless you're really experienced with git.
So here's your chance to explore in a hands-on way how to work with git and other features around source control from within PyCharm.
So over here on GitHub under your turn 3 source control we have basically two things that you're going to do one, you're going to use git source control from within PyCharm.
You're also going to use local history.
So local history as we saw lets you work basically in your own file system as if you had a little bit of source control obviously, it's not shared even for you across machines.
So the first thing that we're going to do is actually build a game that we can call hilo or guess that number game or something.
And so it's going to do something like this.
Hey guess a number between 1 and 100.
50, it's too low, 75 too high and you kind of use the binary search here and narrow in on looks like it was 66 this time.
You're supposed to write this game, create a project that gives you some steps on how to do it and create this game, use the random module to basically come up with random numbers.
If you really need some help, over in the Jumpstart course under apps 02 and here there's steps under you try and there's a final one, which basically is this working code, but I thought it might be fun for you to write really simple game here and then check it into source control.
Okay, so this talks about how you put this into github up at the beginning we start out with some code from github here, things like that or how you just simply create a local git repository.
You actually don't check in anywhere, but it would work effectively the same you just can't push.
So you play around, write that code and you play around with source control here according to steps and then later on, you get to play with the local history which may or may not have some of the same saves as you had in your source control, but it'll probably have more depending on how you worked with the code.
All right, so get out there and try that source control.
|
|
|
|
27:58 |
|
|
transcript
|
4:11 |
Now that we've written our code and saved it in source control, it's time to make it better, to refactor it, to look at the code that we've written, find out where we've maybe done something not so great, we've got a method with like 10 arguments, or we've got duplicated code all over the place, or we've got some huge long expression that's like indecipherable even to the author of that expression.
So, we'll see that PyCharm has a bunch of refactoring tools built-in.
I want to really emphasize that refactoring here is not the same as some kind of like find text and replace across all the files; it's super important to realize the distinction that PyCharm understands your entire project, it loads it into an abstract syntax tree, understands literally how the symbols are being used and then uses that for refactoring, so it's way more than just find and replace and it's really powerful.
So, let's dig into it.
Before we get into the tooling though, let's talk about what refactoring is in the first place.
I feel like people often say, "Oh I'm refactoring my code," and what they really mean is they're changing their code, maybe they are kind of cleaning it up while they're adding features that are making it better in some way; but changing code is not refactoring code.
Refactoring is a very precise thing.
So if we look over at Wikipedia, they say, "Refactoring is the process of restructuring existing computer code— changing the factoring— without changing its external behavior.
Typically, refactoring applies a series of standardized, basic, micro refactorings, extract method, rename variable, things like this, each of which usually is a tiny change in the source code that either preserves the behavior of the software or at a minimum, does not modify its conformance to functional requirements." So, refactoring is changing the internal structure of your code while making it behave more or less the same.
So, that's great, but how do we know when to refactor, we can inline variables and then we can take the results that we can extract the variable; often you see these two things, there's a refactoring and then there's sort of anti refactroing, or a refactoring in opposite direction, a negation or something.
How do we know when to apply these refactorings, because we can just twiddle with our code all day long and get nowhere.
So let me introduce you to the idea of code smells, so a code smell is a problem with code that is not technically not working, right you can look at some method and you go ugh, you kind of turn up your nose at it and you go, "That's not so great", but it's working, it's working code.
There are different things that might make you turn up your nose at particular code so probably the best way to understand these is through some examples.
Duplicate code— if you have identical or very, very similar code in more than one location, let's say three or more locations, there's a really good chance that that code should be made into a method that then you call from those places, right.
So if you have duplicate code, this is often a copy and paste type issue, but not always, and that can really be a sign that you need an extract method refactoring.
If you have a very large class, it's doing too much, it's 500 lines long, maybe you should break it into smaller classes and sort of assemble it through composition, and to this larger class that is not so large now, kind of anti version of the large class is the freeloader or a lazy class it doesn't really do much, so like it has one method and one variable, why the heck is it a class, it could just be a function.
Too many parameters— if I've got a function with 15 parameters, it's super hard to know what that 11th one is doing right, it could do things like use named parameters to make a little bit better, but still, not great.
There's this whole list of these ideas of code smells, so when you're thinking about refactoring, take a minute and study this idea of code smells, it will really help you understand what the symptoms are and often what the appropriate refactoring to apply to it is.
|
|
|
transcript
|
5:43 |
Let's kick off this refactoring session by first looking at the structure of our code.
I still have or git repo up here, it says project course, which is not amazing, we'll fix that in a minute.
And I've just decided to create one project that opens all of it, and I have copied in this slightly altered Wizard code from my Jumpstart course remember, it's called the wizard code, because over here we have Creatures and Wizards which derive from them and we have Small Animals, and we have Dragons, things like that.
So it's a little game, we're going to make this game a little bit better, partly by removing some issues I've introduced.
Let's just say we haven't really looked at this code and I would say probably the most significant issue you're going to run into with refactoring is duplicate code.
Second to that, maybe tied with that is extremely long methods or extremely large classes that should be broken apart, and it turns out the solution for both of those is really often the same.
So, let's start on the duplicate code side.
Now, if we look at refactoring up here, you'll see there's a hotkey that always let us refactor anything, so if I was down here and I highlight this, I could hit CTRL T on Mac, I think it's something else on Windows, we can pick, extract variable, extract the constant, extract a parameter, all these different types of things here.
But let's take a moment and not necessarily use this, we could extract different things, pull members up and down, move, we'll talk about what that is, change a signature methods and so on.
But before we apply the refactoring, let's ask where is the problem?
Is there a problem?
Well yes there's a problem, there's always a problem with code, the question is— is it significant enough that a change will make it better?
Alright, so watch this— we go to code, this is a pretty amazing feature, locate duplicates.
Now, if we run this, and we pick the whole project, we could do one file or whatever; actually it'll do this for many different types, Javascript, Python, HTML and so on.
So we're going to use Python, and you can anonymize certain things like look for the same structure but ignore the details of say like a string and a number but if you're taking a string and a number to it and then doing something else, then it's always the same that sort of series, if I were to check this that would signal as a duplicate.
So we've got our options set here and we can just go and run it and watch this bam— across this entire project, we have found two sets of duplicates, check this out here, let's see if we can make a little more room.
If we open this up in Actors, in the Wizard and we can actually jump between them so over here, we are in the Dragon, notice there is a little hierarchy which is really sweet, this is kind of new in PyCharm.
So we're in the Dragon, and in the init we're checking if the level is less than one and in Actors, over in Creature, we have the same thing.
So this is not the most amazing thing, we're actually doing this exact same test twice, and let me open up the dragon here, it turns out, whoever wrote the Dragon class decided they want to check to make sure the level is good but they didn't realize this is actually being called here as well, so there's no need for us to call it here because this line will already raise this value error, so we can just remove that duplicate, and let's run our find duplicates again.
Alright, now we're down to this one set of duplicates but there's three of them and notice, I can use these little arrows to change like if I want to and do a diff, this one against that one over here, so you can like move these arrows around, pretty cool.
So it says these are identical, they don't have to be identical, but notice there is this representation that appears multiple times and if we just jump to it, you'll see that what we're doing is when you print out a Small Animal it says here's a creature of this level and with this name.
But the dragon does the same thing and the wizard does the same thing, but they all derive from Creature, so what we would like to do is move this sort of just into the Creature so we could come down here and the Wizard has the same problem, so let's just focus on the Wizard for a minute.
So down here, I could hit CRTL T to refactor and I could say pull members up in the hierarchy.
So what I'm going to do is I am going to automatically move this from the Wizard into the Creature, so it's part of the base class.
Hit that— boom, done.
So it's out of the Wizard, if I look at the Wizard the Wizard just has attack, and now, we have the Creature there init defensive role and now they have this representation, and because it's in the base class, and it's the same, the Small Animal doesn't need it, and the Dragon doesn't need it explicitly because they all derive from Creature and if we run it, it should still totally work fine, let's see.
We run it, a level 12 Tiger has appeared, we are going to attack that, a Dragon has appeared, so you can see this is the little print, the representation thing, I think somewhere around here, it's showing up.
But the idea is we can use these duplicate code plus refactoring to improve our code and it's fine on this little example of two files but if I had a hundred files, you would see this would be way more valuable because it would make sure the whole thing was hanging together.
|
|
|
transcript
|
1:59 |
Here we are in our program, basically in our game loop and there's a few things I don't really like about it.
One, notice up here, we're creating our creatures and then we have our player and down through here, our player is doing in attack, and then we have information, like output from the player.
But, I'd like to call this hero, so we know exactly who this is, this is the hero of the game, not just player.
So what we can do is we could go to the refactor menu or I like the hotkey, just CTRL T, say rename, and now I could just put hero and as you type it's just going to change everything.
So it works like this, when you are renaming parameters and local variables and stuff, but let's bring in something else.
Over here we have an attack method on the wizard class, let's suppose we want to rename that, and it could be used in a hundred locations across 20 files, it wouldn't matter, it would totally work.
So same thing CTRL T, rename and let's call this fight, so the idea is the hero is going to fight the active creature.
Now, this is pretty cool, you can search in comments and strings so this would fix like docstrings and also you could search in like within strings that are just output.
So hit refactor and it pops up this little preview thing, it says hey we're going to refactor this thing and this is where it is used, it will say if hero fight is what is going to happen you would see as many locations, up here also we have attack is coming from the creature to rename, and here's one of its usages, so we hit do it, It also changed here, but also, now we have a wizard.fight, if we run it, it should work just the same, the Wizard has handily triumphed over the Bat, how exciting.
Okay so the Wizard is doing good, our code is hanging together even across these multiple files, and I want to emphasize, this is not find and replace, that's not super cool, tech search this is abstract syntax tree understanding the entire project, that's super cool.
|
|
|
transcript
|
2:41 |
Let's turn our attention to this get defensive roll method right here.
So it's a super simple method, but it turns out that it's not entirely easy to debug and it's not also clear what this 3 means, and what is this— okay, if you have played enough Dungeon and Dragon that's a 12-sided dice right there, but what does it mean, right?
It doesn't have to be entirely obvious, the only thing obvious is this level, so somehow your defensive roll is based on like a number times a random number times your level.
So let's make this more explicit.
First of all, something I like to do a lot if I am doing debugging is I would like to put a break point here and stop and see what value came back for the random int, I can't do that here, you can sort of determine it in reverse by doing some division, but that's not the same thing.
So we can easily fix that by highlighting this, CRTL T for refactoring and say create a variable and we're just going to call it something stupid based on there, so let's call this roll, so that's what you roll, so now it's getting more obvious what's happening, the level times the roll of your 12 sided dice times 3— what the heck is that?
We could do the same thing, we could come over here and say, I'm going to create a variable, this will be modifier, and that makes it more legible, maybe we want this modifier to be configurable as well from the outside, maybe under different circumstances a different modifier is used.
Maybe we did this refactoring and it was kind of crummy so we can say, oh that wasn't great, we're actually making it less clear if we just had three times it would be more obvious.
So we could do a refactoring in reverse and say inline and it says, we're going to inline this modifier back, this sort of the reverse type thing.
Now down here again, let's suppose we're going to make this configurable, so I can say make this a parameter, and then it goes up there as i, equals 3 so the default value in the signature doesn't really change, all the function, all the people calling to get defensive roll, will just use the default value, but it could be overwritten, so let's call this modifier.
So now, this is pretty understandable, your defensive roll is the modifier, which by default is 3, times the roll, times the level, and I did that without typing a single character of code, I just did some CTR T action, technically, you could use the mouse, I named this, maybe that sort of counts, but you just saw I could totally use the tools.
Now, this function is one line long, it's totally simple, but, imagine on a much larger, much more complicated situation, this would be really valuable.
|
|
|
transcript
|
2:26 |
Let's look through our little application here, it's quite simple, we have our main, it prints out the header it prints out the game loop, but the header part, it's kind of hard to see, it's this cool dragon thing that I added, just some ascii art.
but maybe we could make this a little more maintainable because this is kind of a problem, like I'd like to put this aside and just say okay, give me the text that is a little dragon picture, all right.
So what we can do is we can come over here and highlight this and we can say I'd like to extract, it could be a variable, I guess it could be a parameter or a field, but let's say constant.
Now, in Python, constants are really conventions, there's no language mechanism to make a variable technically constant, so the convention is to make the name of the variable all upper case, so when we say extract constant, we get something like this, and let's scroll up if we can without messing this up and see what happens.
So we put it up at the top, there's this thing called S, and look, here's our string, so we'll go back down here and we'll call this DRAGON_TEXT and of course, up here it's naming it DRAGON_TEXT.
So now if we look at our print header, okay we print out a new line, dashes, DRAGON_TEXT, dashes, we could even make that a constant, so if we change it, it changes only one, truly it's just using these two places like two lines 30 and 32 so let's not worry about it.
But it's really cool how we can extract these constants, we could do the same for here, we could make a constant and if we replace, notice it will find all usages of it maybe we want to tie this to the dragon or wizard, maybe we don't, because it's not related, this time it is not, so we'll say the level where did it get that from?
Let's call this starting hero level, make it nice and explicit, where did it get the level from?
It's got it up here, it got it right from there, that's pretty awesome, right?
So I just go in some random number it's like hey this number here represents the parameter being passed to the thing called the level, so let's guess that, that's pretty sweet.
So we can use this extract constant thing and these typically go at the top of the file so right here we can configure a few things at the top and then play our game.
|
|
|
transcript
|
2:24 |
Now let's go through our code again here, we've got our little main, it's going to print the headers and the game loop and now the real meat of this thing is the game loop.
So let's suppose that for some reason we would like to take this method and put it into a separate module called like game core or something like that.
So we can highlight this over here, and we'll say refactor move, this is great, we're going to move it from program.py and the Wizard to another module— what do you want to call it, let's call it game core, like this.
And if we hit go, it's going to say we will create some dunder inits for you, it's treating this as if this was creating like a subpackage, we're not going to do that, so we can get rid of these, because they're not part of this, so packages make sense.
But notice over here in game core, we now have game loop and we're creating our wizard, like so, it's trying to do this, but I don't think that's going to work because over here we're importing game loop and this is going to create an infinite loop, so it should have just really taken this with it.
Okay, I think everything is good, It's not quite PEP 8— there we go, so if we look at our program down here, we should have this and game loop— where does game loop come from now, it comes from game core, right, so now we've got just this one dedicated module for working with the game loop, and I think I kind of like that, let's run it again make sure everything hangs together.
Awesome, a Tiger of level 12 has appeared, let's attack it.
We've handily triumphed over it, how about the Frog, there's a Bat, let's fight that— ah yes, we've triumphed over it, that Dragon, it's a little more tricky, oh we have been defeated, the Wizard must rest.
Okay, so it looks like our refactoring, all of this refractoring we've done, is truly a refactoring, in that we've changed our code, it has quite a bit of different structure than when I started this chapter, and yet, from the outside, it's indistinguishable in how it behaves and it runs and so on.
That's awesome, that's refactoring.
|
|
|
transcript
|
2:31 |
Now this final refactoring technique I want to talk about is a little bit of an advanced feature and it's not entirely a perfect match for what we're doing here.
So we just have a bunch of files hanging around in this wizard directory and it's just because of the working directory, they all find each other.
If we had created actual package, we would have done things a little bit differently.
Now, if you haven't created a package, what makes a thing a package is really super simple and Python uses this to behave differently, so if we had a file that was __init__.py and it was empty, I am going to say no for now, I don't really want to do it, this is sort of the main entry point to the package and it can be empty, it doesn't have to do anything, but the existence of this file in a directory is what defines a Python package and then you can put implementation details here.
That's different than say a module and you get many different subfiles and whatnot.
It is different than a module I say actors which contains creatures but it's just a single file, not a group.
So, what we can do is we can say if we like I can convert actors into a package, So instead of being a single Python file, it's a directory with __init__ and potentially many other files, all within that directory.
So, watch this, so if we operate on a particular file rather than on parts of code or whatever, we could say convert to Python package because it's a module, and what it does is now it creates a folder called actors, the folder is the name of the module, and the __init__ can, it doesn't have to, but can contain the implementation.
So you can see the actors.py is gone, the implementation is all put here but we could create a bunch of subfiles, import them here, break it apart and we probably should create a creature class, a wizard class and so on.
So that's pretty awesome, if we decide we have this situation, we'd really just like a file, we could do it in reverse; go back from the directory with the __init__ and the content in there to just a simple single file actors.py, the editor on the right didn't change, but the name of the file and structure and what it means to Python did.
|
|
|
transcript
|
4:24 |
You've seen refactoring in action in PyCharm, and we didn't cover every single thing, it was not an exhaustive presentation, because it doesn't seem worthwhile to actually touch every single little detail; for example, we didn't do super class, I'm pretty sure you can take the ideas that we've already applied and use them for the last few refactorings we didn't touch on.
So let's review the ones we did cover really quickly.
So my contention was, knowing when to refactor, it has to do with a few things it's primarily to do with duplicate code, extra long code or code that is really hard to read, so at least for one of these, we have locate duplicates, so we can run this and it'll actually show us all the duplicates in Python or in Javascript or even CoffeeScript.
So we run it, we highlight some code, we can run it and it will show us where stuff like that code exist, in this case, we are doing this if not name required error exception thing If you just run it without selecting code, it will actually just look for duplicates anywhere in the entire file not based on any origin, so that's really, really cool.
We saw that rename is super important, so here we could highlight some loop variable and say, call it this rename in action, and it will apply across through here.
We also saw that if we do this on a method or a class, we get a slightly different view, but this is within a method, it will edit it right here.
We can move code, so if we want to take this part right here and if we want to move the main method somewhere else, we can check off the functions or the members to move at the bottom and then do the refactor for that.
We can pull members up, so for example, if we wanted to say we're going to change the game, so that all creatures can attack, not just Wizards, but one creature could fight another and since the Wizards are creatures they can still do what they do, but we could pull this attack method up into the Creature class so that'd be a really nice refactoring, but maybe we'll change the word Wizard to the name of the Creature.
Similarly, kind of in reverse, we can push members down, so here in our base Creature class we have this string representation, if we want that to be super different for every type of thing that derives from Creature, we probably need a separate method to overwrite it.
So we can put in different direction and copy the representation method to all the things that derive from it.
We can extract a variable, we've played with this get defensive role, we saw random.randint(1,12) maybe wasn't so obvious, so we could call this roll value, and that was just to highlight that bit of code and choose extract variable, that was great.
Sometimes you want to in the other direction you've got all these variables and it would be better to just make a little expression, so we can come from here and say inline and it'll go right back into the single expression form, so these are sort of refactorial inverses of each other, if that's a word.
We can extract not just variables, but a constant as well, if we want to extract the roll that we have in the bottom, maybe we want to come up with a roll once and just keep it constant so we could do that and we could get THE_ROLL at the top, now, granted that makes no real sense, but I am just showing you we could highlight this bit and extract it as a constant.
We can also do extract parameters, like we have the 7 here, remember that was our modifier we're like it doesn't make a lot of sense that this 7 is here, we actually want to make that configurable as well, so we can highlight it and say extract parameter and it'll go up, it will put it up there you can name it whatever you want, we call it extra factor, in the example we call it a modifier, and it uses the default value that was there before, it uses that right here, which is pretty sweet.
Finally, we saw that we can take Python modules and convert them to packages and we can convert Python packages into individual modules.
Here we have our actors and notice, in the editor it's actors.py we can extract that, we can take this code, and we can turn it into an actor's folder with a __init__.py in the implementation of what was in actors.py in our __init__ for our package.
In this case, it maybe doesn't make a ton of sense, but if you're already working with packages, it could be really nice to create a subpackage out of what is a module.
|
|
|
transcript
|
1:39 |
Refactoring is a place where PyCharm really shines.
You can see it actually working much better than most editors.
Here is a chance to take some existing bad code and apply the refactoring tools to make it what I would consider better.
So, let's look at the steps we're going to go through on github.
Over here on github, your turn 4, there is a couple of things, we have our read me with the instructions, and we have the smelly podcast as in it has many code smells within it.
So smelly podcast is what you are going to work on to take and transform into a better version if for some reason you want to see what the expected result was supposed to be here is the expected final version, but obviously, don't start with that, there will be nothing to refactor.
So we'll come down here and we're going to open up that project and use some of the code smells to guide us on how to fix it.
So we're going to use the large method smell here, the large method, and some of the refactoring tools around that and we're going to use what I am calling the large module Kent Beck and Martin Fowler and those guys were in object oriented world where they talked about large classes, but I think PyCharm probably has a large module smell concept as well.
And then, this thing that I am naming variable absence where we just have these really complicated expressions like this we had some variables but names, we wouldn't know what that means.
So you're going to use the refactoring tools on that as well.
And once you're done with this, I think you'll see you have a much nicer bit of code and you can do this with really doing nothing but deriving the tools that run the refactoring you won't actually have to write really any code at all.
|
|
|
|
27:59 |
|
|
transcript
|
1:59 |
We've come to our database section and almost all major applications use databases and they generate tons of data and working with it is really, really important.
It can be the difference between that super slow laggy type of experience or super fast and crisp, so we're going to see what PyCharm has to offer in the realm of databases.
It's quite a bit.
First let's ask the question— why is working with relational data hard?
Well, there's a couple of reasons, but one of the primary reasons is actually broken or suboptimal tools.
We don't often have great, especially visual tools to help us explore and interact and modify even the schema of our databases, so yes, sometimes there are tools for this, but typically it's some specialized database tool if it even exists that we need to use, it's not built right into our editor and you'll see some really amazing stuff that can happen because the data tools are integrated with our editing tools.
Well, I'd say it's also hard because migrations you know, changing the schema after you put data in the database in production, yeah that's hard, and object/relational mismatches, so yeah, working with relational data can be harder than maybe it should be but those last two, those are just the nature of relational databases so we're going to focus on the tools that PyCharm has that can really level up your experience of working with data.
Remember this Pyramid here, we've got IntelliJ, WebStorm, DataGrip and PyCharm and PyCharm is sort of the Python tools plus all these other things.
In this chapter what we're going to focus on really lives right here, everything is going to come from DataGrip except for the final little feature that we're going to talk about, which is pretty awesome, it has to do with Python plus DataGrip but pretty much everything else is kind of a DataGrip type feature.
|
|
|
transcript
|
2:14 |
Now, in order to make working with the database tools interesting and have real data, I created this simple little application that we can play with, some of which I copied from a previous class, some of which I wrote from scratch.
So, if you look here, we've got our main method it sort of sets up some data access stuff and then it calls list_albums, and notice, this may look familiar to you, this is a SQLAlchemy statement so we're creating a database session and we're creating a query based on the album class which is a model mapped into the database, and we're getting everything, we'll just order by the name descending, reverse alphabetical and then we're just looping over them and we're actually traversing a foreign key relationship over to a track table here, we're not actually pulling back the tracks, but we are doing a length on them.
So first, let's run this, you can see, nothing super exciting, there are two albums in our database, the Year of The Snake, which has five tracks and Digital Age Boys and Girls, six tracks.
Okay, so this actually comes from my Python for Entrepreneurs class, The Blue Yellow Rockets app is a thing we built, so let's just look super quick, we're using SQLALchemy, there is nothing in the tooling that really matters around SQLAlchemy we're just happy to be playing with it through there.
So over here we have an album class which derives from SQLAlchemy base, it's mapped to the table album and it has a bunch columns, and interestingly, we've got indexes and uniqueness constraints and things like that, like the name is indexed and it has to be unique.
Similarly over here, we've got our albums and there's a foreign key relationship from the album id back to the album's id.
Alright, so that generated this database over here you can see we're basically connecting to SQLite and we could connect to lots of different databases as we'll see, but connecting to SQLight means there's really no server for you to set up so it's as easy as it can be to play this demo.
With that in place, what we're going to do really is explore the data that was created by this application in this little database and we'll do that in the next couple of sections.
|
|
|
transcript
|
3:03 |
We have our blue_yellow.sqlite database over here and notice, it has a little database icon on it, it has nothing to do with the extension, that has to do with PyCharm looking at it and going, oh that's a SQLite file, so that's pretty awesome, if I create another one and just call it .sqlite you'd see it would just be like a square white file icon.
So over here on the right, we have this thing that maybe has been tempting us to pull it out and it says database, this looks pretty awesome, we can create a new data source CMD N, we can click here, we can say data source, we could import it from a url, but check this out I was playing with it so it went to the top, but normally it would be near the bottom, so we've got Amazon Redshift or Azure, there is SQL server stuff, we've got, I think that's Excel, I am not sure I have never played with that, MySQL, Oracle, PostgreSQL, SQL server, Microsoft SQL server this maybe the better choice, I actually haven't tried both these and compared them, so there is a lot of options but we're going to choose SQLite.
Now, when this comes up, you might have, right now it says driver, SQLite serial, and that might be cool, but it's very possible that it says no drivers, click to download driver, or maybe it's down here, it says no driver, click and download drivers, I've had that happen before, things don't really work unless you kind of click that and it just downloads and installs super easy but you've got to make sure you open up this dialogue and check that.
So once that's done, once you have the driver in place, you could sort of skip all that, like I said, assuming you've already downloaded the driver at some point on your machine, we can come over here and we can drop this over here and you wait a second, it gets a little number, that means it's good, it understands stuff that's in there.
We have one schema, we can open that up and look, we have our main and we have our album, we have our track this is the first edition of this database, first version of this database, and it only has albums and tracks, the farther that you go in the course it gets more and more complex with users and password resets and purchases, but this is going to be plenty good for us, we can expand this out, and here, you can see this is the database representation of what SQLAlchemy generated; remember I said the name had a uniqueness constraint and an index, that's that little yellow thing, these are indexes, I think the little dot means unique down here, it's just the yellow, it's index, here are some things that are neither index nor unique and you can see down here these are the actual indexes and so on, and this one primary key, there is a little baby key so we can go and look at track as well, here's album id, there is a foreign key relationship, that's blue here's a primary key, that's yellow and so on.
So this is pretty awesome and you can see that we've added this database here and we can go and do a bunch of stuff at it, we can view it in diagrams to try to understand it, we can edit it, we can query it, all sorts of stuff.
|
|
|
transcript
|
2:32 |
There are a lot of things we could focus on first as we start to explore the data— querying it, modifying it and so on.
But let's start by trying to understand the data and a picture is really often worth a thousand words or something like that, so you'll see that we can actually do some pretty cool things.
I could come over here and right click on track and say show me a diagram, or I could do better, I could actually click on a group of schemas or the whole database and say show me the diagram, and I get two options, one is a straight up visualization, another is what's called a visualization pop up let's do the straight normal visualization first.
Look at this, how awesome is that?
So I told you that is this foreign key from album id over to id and look, there it is, visually.
We got SQLite in this master here, we don't really need that, I'll take that off of our diagram we put these up next to each other, it's kind of funky the way that maps over, but nonetheless, we can see this relationship and it's not a huge deal in this kind of simple little thing but if this was really complicated, this would be very helpful for us understanding how things relate, what the relationships are that we can navigate and things like that.
It actually helps a lot that we have SQLAlchemy because we can come over here and look at this as well and it will tell us a little bit about— well, it will tell us a lot but you know, only one table at a time, it will tell us a lot about what's in here, but even so, seeing the big picture is really, really nice and so these diagrams I think they're great.
Now, this is the sort of tabbed version, so sometimes you don't want to necessarily open up another tab and have a little file, so you can just do like a quick little peak if you will with this pop up, and here we have just this little quick pop up to remind you what the relationship of these things are.
It's kind of hard to wrap your mind around it like if this was actually complicated there might be 50 tables you have to imagine this is complicated, but you saw when we did show us all these, this little pop up we got everything, including the little master maybe we want to just focus our attention on the relationships between just a few classes right, again, this is so simple, it didn't really matter but if you had many, you could focus on three or four tables which seems pretty reasonable, highlight them and say show us the diagram, and now only those tables are included in the diagram.
This is really sweet, I love this feature it's really nice for both documenting and sharing the schema that you're using your data models with other developers and maybe in some form of documentation.
|
|
|
transcript
|
4:19 |
Now that we have an understanding of our data from the visualizations, let's talk about querying it, let's focus just on the album, pick any real table.
So we saw that we can expand it and see what it's made of, we could right click and say jump to console so this is going to open up a way in which we can run queries against any of the tables so let's write a real simple one, select * from, hit space, watch this I love it, so that album, we got track and it also gives us like group by and whatnot we're going to say select * from album and that's probably what you want to do to just see the data but maybe you'll ask, some way you want to order it so you could say order by, or you could say where, name, now look at this, this is auto completion inside the table schema, that's pretty awesome we could say name is LIKE --it's like a substring search-- snake one of the albums has snake in its name, so let's go and run this and down here, you can see we get our one output Year of The Snake because the name has snake in it.
Now, let's take away this, this where clause, because while it's great, it doesn't show us all the data.
Here you can see we get just all the pieces and is really cool at the top like hey look prices index you can tell that right from the column right there this sort of visual tells you whether you are going to do a query based on an index or you are going to do it just— has preview there is no index, so that might be super slow if you had lots of data, it didn't really matter if you have like two records.
Now we can also use this to modify data but it's not 100% obvious like let's change the price here run it again, see the price is 9.99 we come over here and let's say we want this to be 19.99 so I double clicked it and I hit enter, awesome, let's run it again, it's 9.99 again, what's wrong with this thing, it's broken.
Not really.
So you can edit this data, we can go down here like check has preview, things like that, but unless we push this button, save changes back to the database, nothing's going to happen; but if I do, notice little grayness and whatnot of those elements went away, run it again now that changes are sticking.
That's pretty awesome isn't it?
Come over here you can actually see what's running select * like, so you can see these down here, that pretty cool this little output there, we've got to change this, now the final thing to look at over here on the right, this is actually pretty powerful, so see this tab here so we get tab separated, what does this mean, there's all these different things we can get out of here, I could get comma separated values sort of export this as that, I could go over here and actually say, I would like the sql statements that will insert these records into the database, check this out.
Now to make anything interesting happen, we have to press this button and you could save it to a file probably you will do that a lot, but I'm just going to do the clipboard.
Now I'll just dump those up here, like so and notice, insert into album id such and such, such and such values— what they are, right this actually generates the statements that we would need if we wanted to take that data and reinsert it into another database, what else over here, we have updates, we have HTML table, all sorts of cool stuff that we can do.
Now, the DDL is data definition/description language, if we click this, it's actually going to show us the sql script that we would need to run to recreate exactly what this table is so what the columns are, what types they are, whether they are nullable, whether they are primary keys, as well as the uniqueness constraints and indexes and all that stuff.
So if you want to generate it, DDL, that's a pretty awesome feature as well, so you can really do a lot of stuff with scripts over here and also if we wanted to do comma separated values we could do that to a clipboard and just put it like so, now we have csv version rather than insert version of the data.
|
|
|
transcript
|
2:16 |
The final operation we want to work with here is to possibly change the schema, what if we need to add a column, or add an index or something like that, we can go over here and right click and say modify column for existing ones here we could change stuff about it like it could become unique or autoincrementing, or something like that we could also go to the keys, go to the indexes and say we want to add an index on whatever, right go in here and add those things.
So we can edit it on the column by column or probably it makes more sense to modify the table like so, so we come over here and basically it was as if we had double clicked one of these things it doesn't really matter that much but we could add say a column here and this will be rating, and this is going to be an int, and the default will be two, and yeah, it's fine, we'll just go with that.
We can either execute this in the database, and notice this, this is really sweet, alter table, this is the stuff I always forget when I'm working with relational databases, oh yeah, what's the DDL to change the type of a column but it has data in it, so you have to like transform, like— what do I do.
This is the kind of stuff you do right here, so here's the script and I could hit just boom, execute it and it will modify the database or I could say just open this here in this editor and I could make these changes and when I'm ready, I push this button and run it, and then I make the changes, let's go over here comment that out and run this, alter table, one row is affected that sounds like something happened and let's go resync, oh there is a rating, that's an integer, I don't like it anymore, we'll go over here and we can just remove it.
Alright, so we're going to begin a transaction drop a bunch of stuff, recreate it, that's pretty intense but if we do that now our rating is gone again, so this modifying data— not the simplest thing to do in relational databases, like I said at the start, I think this is one of the harder parts to evolve your database especially once it has data in it, but, not too bad with the tools we have at hand here.
|
|
|
transcript
|
4:24 |
It's pretty awesome that we can be over in this console here for the database and we can get intellisense with the SQL query language and with our database tables and even with our things, our schema inside there.
We want to see all the albums that have a preview, I think there's just one, yes, that one.
That's pretty excellent and while I think it's really nice, a lot of tools don't have that, it's not entirely blowing my mind, because inside the thing that works with the database, right here is the schema, like good job JetBrains but not entirely blowing my mind, but let me show you something that did blow my mind when I first saw it, and I think it will blow yours if you haven't seen this.
Let's suppose we just have some random Python file, super important, random Python file, it has nothing to do with SQLAlchemy, the only thing that makes what I am about to show you happen is the fact that we have this data source registered okay?
So we'll have def, some method, and suppose we're not using SQLAlchemy, right, SQLAlchemy has its own style with its own classes and it has Python level autocomplete because you're just working with the type, but sometimes you want to work directly with SQLAlchemy, or any SQL related database, so you're going to write some SQL embedded in a string in Python, so you might say this query="" and in this string you'll say basically select * from album, okay, so let's write this, just watch the words here so select— nothing, *— nothing from—oh, wait at a minute, look at that select * from album or track, that is full on autocomplete inside an embedded string, inside a Python back into our data model.
That is super awesome, let's do this one and soon as I have a really simple query statement or any kind of reasonably structured SQL statement it turns into full intellisense, so I could say now I get where, join, all of the stuff that you would expect, including— check that out, exactly the same where has_preview is true and what else— control space brings up the rest of the list, we could do a join over an album, so we could say the year is greater than 20, I don't know, whatever, 2001, something like this.
Now it even says the SQL dialect is not configured so why do we care about a SQL dialect anyway?
One of the beautiful things about working with SQLAlchemy is it adjusts automatically to the dialect that you're working with, different databases have annoyingly slightly different query syntaxes and ways of working with parameters, so in SQL server you would say add name, if you had a parametertized query where you passed thing called name, I think in Oracle you have question mark and it's based on the order in which you pass them in, but they're not the same, which is annoying and so we can come over here and we can go if you don't know where it is, you can just type SQL dialect but it's under language and framework SQL dialects, we can say for this project I am working with SQLite or I am working with SQL server or whatever, so we hit ok, I come back, and it's down with one more warning but that has nothing to do with the embedded SQL, that just has to do with the fact that we need to format that code.
Sweet, huh?
When I first saw that that just blew my mind, I'm like wow, I get full on schema based intellisense or autocomplete in embedded SQL strings— I love it, I still hate writing raw SQL, but this sure makes it more patable for as far as I'm concerned, but given a choice, let's stick to SQLAlchemy or something like that.
|
|
|
transcript
|
5:39 |
Let's do a quick review of the various database features that we've seen in PyCharm, which, really is data grip, right for the most part, except for that last one.
We started out by saying we're going to add a data source, we went to the database little tab tool window thing and we said hit the plus, add data source, pick SQLite serial, once we do that, it opens up this, you've got to make sure that there is no warning or statement that you need to download the drivers, because nothing will work at all from here on if you don't have those drivers.
But, once you have done that to verify that the drivers are all good, then you can just drag that SQLite file over to the database section and it will already know and understand it.
Once you've done that, you can expand it out and see that the database info should all be present.
One of the first things you might want to do is visualize the relationship between your tables in your database, you can go to the top and right click and say go diagrams show visualization, show visualization pop up, whatever it is, whichever style it is that you want, and then we also saw that you can select individual tables and do the same thing and it will show just that subset of the tables, so let's say we picked show pop up, we'd see something like this, pop up next to our code, here's a slightly more interesting diagram, from the same database but evolved further down into the application that we built in that course, you can see there's an account that has a password reset and album purchase which relates back to the album and the account and all sorts of stuff; so, really, really nice that we can visualize this really clearly.
Next, we want to do query data, once we know it's there let's go and ask some questions like what kind of data is there, here we're saying select just the album id, id and name from the tracks and notice that we get intellisense or autocomplete all along here, in the select part, especially once we say from track things get really good and we get the entire schema for the track table and the other tables as well.
We run this and it opens down at the bottom to this main.track thing and you can see here's all the tracks, their ids, their album ids and these came back based on the three columns that we selected, that's really cool, there's a bunch of stuff that we can do down here for example, if we make changes, we need to push the db button here to save those changes back, right now it's grayed out because there's no changes but if you made changes then it would turn like green and blue or something like that.
Also over here, we saw that we can export data we can export data modifying scripts let's say so like insert statements, we can create DDL which will give us the operations to generate or recreate the table, things like that so really, really nice, lots of features.
Sticking to that for a second, so if we focus here and we hit sql inserts and we click on it it depends on what was last selected, we might have tab separated values or comma separated values or sql inserts or whatever it was that you last selected so these are all the different export types, so csv is pretty common, notice there are some Javascript specific ones or groovy, closure, I don't really do anything with those but if that's useful to you, you can definitely work with those as well.
Now under DDL, we can say show me the data description language to actually generate this table, so this is the kind of stuff that I always forget when I'm working with relational databases, this DDL stuff and here including the schema, the types, the nullability as well as all the indexes are generated right there, so that's quite nice.
We also saw that we can modify the existing scheme, right click on a table and say modify and then we can add columns, keys, indexes, change them, delete them, all kinds of stuff.
So the final trick that we saw was PyCharm brings us together in a really wonderful way, so it's very common to write SQL statements embedded in strings that you then send off through something like db api or something like that.
So here we're going to write our SQL, then we're going to execute the command and then loop over that.
So this is not SQLAlchemy or other ORMs, this is just raw SQL, and PyCharm has some really nice help so when you write it this far, it looks like oh there's no help, it's just like, this is going to be a string like strings would normally be.
If you type a little bit more though, once it's really sure you have a SQL statement there it starts to give you all sorts of cool stuff so we have main.track, we have album_id=7, you see there's like join and where and from these are all known standard SQL keywords, so that's already cool, but it takes it one step further, where it actually, once you say the table, it actually understands the schema of that table and gives you autocomplete list there as well.
This is super valuable if you find yourself writing raw SQL statements inside Python.
This also works in the select field, you kind of have got to write enough out select * from main track and then go back and change * to something else, sometimes select * is not a great idea because you're getting a bunch of stuff you don't need so if you just want like name and audio url then you could easily do that here, select name,audio url and it will actually give you all that autocomplete stuff right there, which is super nice.
|
|
|
transcript
|
1:33 |
Databases are really front and center in PyCharm.
We saw we can add existing databases to our database explorer and use all sorts of cool tools against it and even have those schemas work with the editor itself.
So it's your turn to play with databases in PyCharm.
Over here on github under 5-databases you'll see there's some steps to go through here.
First thing I am going to do is open an existing project which is database project, same folder right there and then open this up and it will come with a folder and a SQLite file so we're going to start by opening this SQLite database in PyCharm so we can explore it, and one of the important things that's going to happen here is you may configure the drivers to actually understand SQLite for later projects, once and for all on your machine, so that's cool.
We're going to open up this existing project and explore it we're going to write some queries against it, to find some interesting tracks, this is like an album store with artist, album, tracks, users and so on and we're going to also use the diagram tools to understand how things like track and album, what they look like and how they are related to each other.
And finally, you're going to see the really amazing feature of when you have SQL embedded within strings in Python files how you get both SQL language and database schema autocompletion which is just amazing.
Alright, so get out there and play with this example and enjoy the database stuff.
|
|
|
|
26:45 |
|
|
transcript
|
2:53 |
It's time to build some web applications with Python and PyCharm and this is super important because I feel Python's biggest strength, one of its most important areas is web development.
The other being probably data science, but certainly, if you look at the different things people do with Python, some of the most major applications have been built on the web with Python, think of things like Instagram, Dropbox, YouTube, YouTube does several million requests per second using Python, so these are some major applications and Python's web support is varied and powerful and you'll see that PyCharm supports many of these things.
So let's again look at how that happens, remember our pyramid of what PyCharm is really built of, if we're talking about the various parts of the web development, it actually involves two of these components.
The server side framework stuff is all done through PyCharm itself that's the Python back end bits.
The client side parts, the HTML, the templates, the CSS those are done through WebStorm.
Now of course, when we're building Python based web apps especially data driven server side focused ones, the application is built out of many of these pieces right, that's one of the challenges of the web, you've got to learn all these different languages and technologies and you know— put them together.
We're going to split this presentation into two parts server side and client side, so on the server side, we're going to talk about creating new server side projects how do we create a new Pyramid or Flask app, how do we load existing projects into PyCharm, so if we go to the internet and download some Pyramid web app for example which can be somewhat complex to set up, how do we get that imported correctly; we'll talk about the HTML template editors, this is like Chameleon or Jinja 2 and so on.
Another one of the things that's important around both Pyramid and Django is they have tooling to kind of control them a little bit, especially Django, so in Pyramid, you have a setup.py that registers the web application as a package and we'll see that PyCharm has support for that, and in Django, there's a manage.py that does a lot of work for constructing your application and it's also supported in PyCharm.
We'll see that when you create a Python web app in PyCharm, could be a little bit better if we leverage some of our mark directory stuff, we will talk about that, and finally, some web applications require you to run little tasks before like gulp or something like that, webpack, we'll see how you can leverage the parts of PyCharm to automatically make that happen before you run the app.
|
|
|
transcript
|
6:58 |
Let's create some web apps.
Here is our working demo code and in this web world there's so many files and so many ways in which you create these projects and certain working directory has to be the top of your project and all those kinds of things for this all to work really well.
So what I'm going to do is I've created some subfolders here and we're just going to go into those folders and create a new project in there.
So we'll go over here and we'll say create a new project and then notice, we can pick a bunch of different options for the server side frameworks, now we can expand those out, so here is Django, we could figure out what kind of template language we want, what the template folder is going to be, name it, enable the admin, all the things you might do.
Similarly for Flask can get its Flask settings, template folders, and whether or not it uses those templates, sadly Chameleon is missing Google App Engine, Pyramid we can come over here.
Chameleon is amazing and definitely should be done there, so let's suppose we want to go into this folder and create it here and I wish there was a better way to copy a path but I don't know maybe there is that I just don't know, but let's copy that.
So we're going to put this over here and we're going to say let's have first_pyramid now notice, PyCharm actually updated middle of this class, which is awesome, that means you guys get to see a slightly newer version but they added one really awesome feature which is they have improved how virtual environments are created and they give you this ability to create them inside your project.
I like to name my .env, but venv, we can go with that.
We can just check new virtual environment, bam, right off, I'm going to choose Chameleon because Chameleon is a much better language than Jinja 2, even though it's less popular, still I think it's way better.
It's my opinion, I'm happy to talk about why, outside of this class.
Okay, so let's focus on the web side, so we are going to create this, in this folder, it's going to be a subfolder here, it creates a virtual environment, now this web framework was not installed in that virtual environment, none were, right, because it was brand new so it's going to install all the dependencies that we need also, like before, because we created this inside course which is the git repo, I'll just say add root so we get version control, that's awesome.
Now, there's a couple of things that we have to do for Pyramid to actually work and notice, PyCharm is helping us right here.
One of the things is we've installed the base we've installed the base Pyramid, but this version, this particular configuration runs with things like Pyramid, debug toolbar and Chameleon because I checked that box and things like this.
So it didn't install everything I need to run it needed everything to sort of bootstrap Pyramid.
And how does it know that this is the stuff that's required?
Well, this is really part of the set up here so these things, notice, it's just a random indentation warning, but this stuff right here is what's required up there, that's not listed.
So let's look it in the setup file— I already said that, so that's pretty awesome, let's go ahead and hit that, and wait a second...
Great, that worked.
Now the other thing we have to do, this is specific to Pyramid and it's a little bit funky compared to say Flask, but it is not that different I guess then Django in that, in order to run this, we have to run some scripts to kind of configure it.
In Django, we have manage.py, over here in Pyramid, this thing is actually a package that's why it has a setup.py and then in here is our actual web code, you can see our templates folder.
So in order for this to really work, we're going to need to run setup.py develop so we can actually just click this here and it will run that, and then everything is ready to go.
Remember, the red means that these files have not been added to source control.
Okay, so it looks like it might run, let's give it a shot.
Success!
Look at that, we have our web app going, everything looks good and we even have our little debug toolbar extras that got added in with things like our requests, with our performance analysis and stuff and by the way, 1 millisecond response time, our processing time, it's pretty awesome.
So that's how we get started here, it says do you want to register that in source control— yes we do.
So, we're up and running, we have our views let's just write a little bit of code to kind of round this out, we're not going to use a request, so in Python the way you say there's this input parameter that is required but I am not going to use it, let's say underscore, so that warning goes away, and let's just go over here and change this to demo project from PyCharm something like that, so we're going to take this, this is mapped to a route which is just / and it renders this Chameleon template under templates and we're going to pass something, a value for project over there so let's go look, notice we've got a templates folder and a shared layout which is the general look and feel of the site and then specific details for each page and down here, where are you— oh, for some reason this hardcodes this, that's not right.
So, this should have project here, so it's using that, let's try this again— ah, so this is really important for the web, see this, we have an error, and it looks like we've done something wrong but it says the address is in use, and notice it's still running over here but with Python you've got to restart the web app to pick up changes in the code, like here, but not for the templates.
So, how do we do all this?
First, we could press that button, but let's just stop these and make them go away and we go back here, and we go to edit configuration and you can check single instance only, that way if it's running and you rerun it, it'll just automatically restart, so if we rerun it, it's running, and if I try to run it again, it will say we're going to restart that, and I just say yeah, always do that.
So this is definitely the way to do it for the web and now we have our demo project, this is being passed, there is a little glitch in the template thing that came out, no big deal; very nice, we have our Pyramid app up and running.
|
|
|
transcript
|
7:47 |
When we created our web project, you saw that we could choose all the main Python based page templates.
In this case, I chose Chameleon because I think it's the cleanest, web friendliest version, we could have chosen Jinja 2 or the Django templates and so on and PyCharm has support for all of these, and whether this support lives in PyCharm directly or Web Storm, there is probably some sort of blend there but let's go and work with these templates just a little bit.
So if we just change the thing that we're returning from here, let's make this interesting, we can leave project for now, let's return some data, just some fake values, we'll return some particular numbers, I'm not sure what they mean, pretty much random, right.
So we will return those and what else are we going to return, so over here, what else, let's return one more thing, I'll call this show odds, it's true.
Okay, so now we're returning three pieces of information, so let's go look at how we can use these in the template.
So each template language, we're going to look in this one, each template language (Jinja 2, Chameleon, and so on) have their own way of working, but you'll see PyCharm actually understands these.
So let's go clean that up, and in this content section let's just say put an h1 template demo code, HTML code, and then down here, let's say we would like to have another h2 and we'll say showing odd numbers as well.
Now, we want this to be visible only if show_odds is true, right, but if it's false, we're going to hide it.
So, like I said, the different template languages have different ways of doing it but PyCharm supports them, so for example in Chameleon, we have the template attribute language tal so we can come over here and type tal, and notice that, we have all the options, tal repeat, tal condition and so on, and what we're looking for is a condition and the condition were testing is show_odds is true.
Maybe we could even do not show_odds, we'll say hiding odd numbers.
So then let's go down here and we'll do another div and we'll have ul and li and notice we format this, I'll show you something really awesome here in a second, but let's suppose that we want to put a number here, that particular number, so we have to loop over this set and for each one of them we want to put a number, so we can go over here and say tal:repeat, n data, so down here we can just put n, next number is n so watch this, let's run it, we run it just in case Python side changes boom, look at that, showing odd numbers as well, how cool is that?
So let's go to change this real quick, suppose this is data driven get this back from the database and this comes back false this time.
Now we run it, hiding odd numbers, well not so much let's go down here and we'll do this tal:condition n % 2 let's say show_odds or n % 2 = 0 so now we're up here, I guess that's not quite where we wanted let's put this, let's do it like this, we'll put a div and within the div, we'll put the li now, I know you're probably thinking, you know what, you are not allowed to have a div here and I know that so I'll show you how we'll fix that, just a second.
So we'll come over here and we'll do the repeat here but we'll just say omit tag is true, okay, now let's try it.
Boom, look at that, we're hiding the odd numbers, we're only seeing the evens and if we go back to our database here to our app here and we say, you know actually this time show me those numbers and we wait, run it again, here we go, showing odd numbers as well.
So you can see that we were able to use over here the temple language really nicely and we technically don't need this little span but that's okay.
So we are able to use the tal: type of tags for Chameleon but like I said, you can use a different template of language it will also support those features, just you don't have the bracket percent type stuff from say Jinja.
Okay, little format, now the last thing while we're here I want to talk about, there's a couple of things we did that could have been smoother, that could have been better one is, suppose I want to change this to a block quote, I have no idea why I would do that, but let's imagine I wanted this to be a block quote, in a lot of editors you have to go, you type here, I go over here and I go ok, I type here and I would say block quote and I would go down here and have to remember to make that a block quote but as you just saw if I work with this, the ending tag is always in sync, so if I want that a block quote, it's a block quote and the HTML is always in sync, it is not there's some huge tag structure and way down, somewhere you forgot to change the /span to /block quote, so things don't work PyCharm's got our back.
Let's just run that really quick, see what we get.
Beautiful— no it's not, but it took our change.
Now, notice also down here, we have navigation if I want to go to the ul here I can go back to the li if I want to see what div is containing that or maybe the parent div I can go back to my block quote and keep working.
Now this page is pretty small, maybe the other one would be a little more compelling so if I am say down here, I could see what is this template thing, oh that's right, there is the container, then there's the link yeah that's the one I was on.
So this navigation is super, super helpful.
And finally if I have something like this where I know I want to have a row with links, with the ul with three items I could type this out super painfully, and I could put the class and I could put the links but— hold on to your hats folks.
PyCharm has this thing called zen coding, let's check that out really quick while we're in here.
And I can say div, and that's going to create the div, I could hit tab and it'll create the div but in css the way you talk about classes is you say .class name so I could .row and it will create a div with a class row.
However, we can go farther, we can say and I want that div contains another dive that has the class links and now if I hit tab, we get that.
And I could go farther and say I want a ul and within the ul, I want the li and I want it three times, watch what happens when I hit tab now.
Boom, it even navigates me through the pieces, part one enter, no, part two, no help, enter and so on.
So this zen coding little thing, let me go back so you can see it, where you sort of express the css statement of a structure, a big hierarchy of HTML and then hit tab to expand it— fabulous.
|
|
|
transcript
|
3:40 |
Now let's look at static files here.
Notice there's a static file section and this is a Pyramid convention but what I'm going to show you with static files has to do with basically all the web frameworks.
The first thing is if you look over here we are using bootstrap, but we're using it off the cdn.
And I would kind of like to use a local version so let's go over here and copy this path so we can get to it very easily, cd there, and now we have this, let's make some directories, let's have one for css, one for Javascript and we'd put things in there, I guess we'd have one for images, just I'd prefer to put things together like this.
Now, the other thing I want to do is let's use npm to install bootstrap locally, so npm install bootstrap.
Okay, now if we look we have our node modules, there's bootstrap, there's the distribution, there's this let's say copy.
Now, if we say copy relative path, that almost works for us let's go over here and paste it, see what we get.
Notice it takes a little more than we wanted but that's pretty good.
So there's our local file and we do get really cool things around, intellisense related to css, so if I have say a hyperlink, and we'll just put # for now this hyperlink represents like some kind of button looking thing so I can have a class and the class could be btn notice all that stuff comes from our bootstrap so I could say btn and btn- primary so we get all this great intellisense or autocomplete there and we could also have, let's go and add a new style sheet this will be ours, and we'll just have buttons-list and we'll have that as a class.
We'll just have, background is green, I have no idea what we are going to do with this.
But if we go over here now, have back in our template we also have buttons list.
So we have really awesome support for css, but one problem here, also by the way, notice we had great Intellisense inside our css file as well but one other problem, notice this, if I hover here, it says cannot resolve directory static, and if I go over here and I type /static I get zero help node modules, like if I didn't copy that I would never have gotten that right without just traversing the tree on the left.
So we go to the top of the website and we mark it at a resource route here and that tells PyCharm when you're looking for static files this is kind of forward slash and then there's static and so on, and this is the way our web app maps, so this is perfect so we say /static/node when we actually want to load this up.
So now, notice first of all, the error is gone and we should be able to recreate this super easy now /static/node_modules/bootstrap, what's in bootstrap is there a dist, there is, /dist/css/bootstrap.min.css, how about that and let's just make sure everything looks good still.
Boom!
This is all bootstrap, like this little style here for the block quote with a bar that's bootstrap, so it is still completely working, how cool is that.
|
|
|
transcript
|
5:27 |
Let's review the core server side concepts that we saw for creating Python full stack web apps with PyCharm.
We start by saying create new project and we have a couple of options we've got Django, Flask, Google App Engine, Pyramid and Web2Py so there's a lot of things that we can create here and honestly, if you really needed something else you probably could create it outside of PyCharm and import it somehow, it's pretty flexible.
But, here we have these options and we chose Pyramid because Pyramid is a little more involved and so the tooling support that PyCharm brings is actually more helpful, like if we created a Flask app it would really just be like running a separate Python file, so I was able to show a little bit more of the tooling, you'd see a similar experience with Django as well.
So, we saw there's a new improved way for creating these virtual environments inside the project which is the way I'm doing things these days, I really like that.
Okay, so we say create a new one and off it goes.
We also saw that you choose a template language, Chameleon, Jinja 2, Django, Mako, and then within the HTML template you have to work with that particular template language, and PyCharm has support for all of them, so I didn't show you every single variation, like I didn't show you Jinja 2 but here is the template attribute language that comes with Chameleon and you can see all the intellisense and autocomplete stuff is there that you would expect, so it makes it super easy to work with it, like when I did that omit tag thing, I thought it was exclude tag but I just typed tag and it said oh yeah, you mean omit tag, oh yeah that's right, that's what that is.
So it's super helpful to have this.
We also saw that PyCharm supports zen coding this is client side as well, it's straight up HTML stuff so, we can say div.menu ul etc and we hit expand that via tab and it expands out to this whole nice prebuilt HTML structure and even guides you through filling out the elements, like it takes you through what goes into the individual lis, sometimes that is helpful, sometimes it gets in the way, but pretty to cancel the navigation part out, but this is a really nice way.
The hardest thing I find about it is remembering to use it it basically uses exactly css syntax so if you know the web well, you can pretty much imagine what to do there.
We also saw that PyCharm balances the tags so here we have a div, maybe we want to change it, we're going to change it to a span and all we have to do is highlight the div type span you can even just delete the div and the re-type span if you're careful about how you do that and PyCharm will balance the closing tag, which is super nice.
We also saw that it has css autocompletion, so that's great, it pulls it in from basically all the referenced css files so you saw it came from bootstrap, this is the bootstrap button info and it can also come from our own custom css elements and css files.
One thing to be aware of, you'll get auto complete for everything in the project even if it's not going to be included in that page, like we created our ours.css file and put button list in it and that showed up but we actually never included button list on that page, so it's more like, it looks like this is what in the project and I can help you but it's still up to you to make sure the css gets included correctly.
We also saw you can navigate the DOM really well with this little thing at the bottom, and they recently added this for the code navigation in Python as well until recently this was just on the server side, if you even hover over it, it will give you more details as well as you can see here that div show main.
If we go and tell the system that the top of our website is the resources root, we get lots of help for the static files and for whatever reason, at least at the time of this recording that doesn't happen in PyCharm, they may actually added this as a feature request, so who knows, maybe you won't have to deal with this, it will just happen, just understand why it happens.
So if we go and we set the directory, not the static directory but the one that contains the static directories as resources root you all of the sudden get all sorts of autocompletion, the errors about the file not being there and go away, all that kind of good stuff.
So notice, the little icon down here that says this is a resource root it looks, I don't know, I'm not sure what that icon means but it means resource root.
And then when we do it, not only do the errors go away but we get autocompletion.
The last thing to talk about here on the server side is running tasks before you launch the website.
So some web applications require you to say compile down certain types of Javascript into a minified version or something to that effect.
So you can create file watchers, you can create a gulp task, you can run an npm script, you can compile TypeScript, there's all sorts of little do this before my project launches if you need them, we'll see more about TypeScript in the next section but if you are doing these types of things, it's really great you can even run another configuration so if you need like a Python file to make sure the database is set up just right on new machines or whatever, you could run that configuration and then run your web app, so, all sorts of flexibility here.
|
|
|
|
32:22 |
|
|
transcript
|
1:19 |
We've seen the server side features of PyCharm's capabilities with regard to Python based web frameworks.
But, as you likely know, web applications are not just server side things there is Javascript, there's HTML, there's CSS and there's all the things surrounding that and spun off from that Javascript front end frameworks, things like Vue JS, Angular JS, that have their own syntax and would really benefit from having understanding within the editor, as well as things like LESS, SASS, TypeScript and whatnot that needs sort of precompiled to actually get ready to use in your web app.
So we are going to look at that side of the story for PyCharm right now.
So we're going to see about creating projects, just like we had in Python, these code intentions, these little code helper fixes.
We have the same thing in Javascript for taking code that might not be ideal and transforming it into something better.
We'll talk about support for popular frameworks, like Angular JS and Vue JS and so on, TypeScript, LESS and SASS, even Node JS and on top of that, ElectronJS which is pretty sweet as well, that's not obvious how to get those last two, so we'll see how to do that in the course.
|
|
|
transcript
|
3:30 |
Now let's play around with some of the HTML and Javascript features here.
Notice in the web clients side I have made a web app because we're also going to have a Node JS thing over here so let's go and open this, we can say open this in the browser, default, and here we just have our default test bed and what we need is we just want to see the console we're going to go down there and see the output, nothing yet but it's coming.
So let's open this and our Javascript file here and we're going to write a function so let's suppose that we're going to write a function it's called run at load, not taking any parameters or anything and right away PyCharm is saying hold on, hold on, here's a function it's not being called anywhere in this project.
So it's really nice that we have this dead code detection but let's go ahead and call that, notice auto complete as you would expect there and we're going to come over here and let's just person = "Jeff" and then I'm not going to do a console.log the person's name, right?
we could even do something like nice to meet you, like so.
Now there's something we're doing wrong here, can you catch it?
Obviously there is something wrong with person but what is it?
I guess it depends how much Javascript you write, but is it that we made person in here global.
And we need to run this of course, I haven't put the link in to pull in the Javascript so we can do that quickly like so and generally I put my Javascript at the end unless it's one of the front end framework type things, there we go, nice to meet you Jeff, that's cool, but now there's also this person object that's global, so what do we forget— we forgot to do var, and there's a ton of these things, just like in the Python part we saw a bunch of little fixes or code intentions over here in PyCharm we also have them, like so.
So this is really nice that you get these code corrections and whatnot if this took parameters something like that, it would come over here and we would know that these are not being used, so there are all sorts of nice little checks that we have in our Javascript code.
The other thing to keep on your mind I guess let's just add one more Javascript file here let's call this home.js and over here we can actually do some other stuff let's say define another function, registerAction, actionName, something like that so go over here and then let's just add a registerAction really quick, load or something, remember in this place we had a runAtLoad so again we have run at load talks about where it comes from and all those types of things, it even has help with modules and dependencies and things like that when you're working with multiple files especially around the Node JS type of things so I probably need some more interesting Javascript to show you a bunch of the features but you have many of the code intentions, you have the refactoring all the things that you guys would expect.
So we come over here and refactor actually let's refactor this one, it's more interesting across so we can come over here and say runAtLoadButOnce go back here, runAtLoadButOnce, it's beautiful.
Okay, so the Javascript tools are really great we already saw a lot of the HTML and CSS stuff on the server side but of course, it's the same story here.
|
|
|
transcript
|
6:03 |
One of the projects that I am interested in building some things with, is this one called Ionic.
So this is really, really sweet, it builds basically native iOS and native Android applications but using Javascript, HTML and CSS.
It has little widgets that look and adapt to the various OSs, that look like IOS widgets and look like Android widgets and so on.
Now, in order to use this, it's based on Angular 2 and TypeScript along with Javascript and HTML 5, I think that's probably largely because Angular 2 itself is based on TypeScript but I have to play with this more to really understand why that is, but if I want to work with TypeScript, TypeScript is a super set of Javascript, think of it as like what C++ is to C.
So the idea what TypeScript is that you start out with basically the TypeScript language and then you compile it down, you transpile it, if you will down into Javascript which then runs on all the platforms.
So let's see how this works in PyCharm.
So we can go over here and let's just suppose we're tired of our home js being written in Javascript, we're going to write it in TypeScript, you also see this CoffeeScript, but if you look at the popularity of the TypeScript versus CoffeeScript, TypeScript is way more popular.
So we'll just call this app, and notice right away, it says do you want to compile TypeScript to Javascript, notice also if you look over here, there's no little chevrony thing we have that you can expand this, just the TypeScript, I'll say okay, great; now let's go write something, let's define a class and we get TypeScript intellisense, that's cool, I'll call this person, and let's come down here and define a constructor which is a thing you do in TypeScript and I can come and create some public elements, some public properties just by taking them here as public arguments, that's the way it works in TypeScript, so let's have name, which is a string, public age, which is an int sorry, this had number in Javascript, we can go like this; now that actually defines a class with two properties, name and age, if we save this, notice right away that this little chevron is here, and if we expand it, we have an app.js, and we actually open it, you can see that we define a person which an IIFE, the result of this IIFE, an immediately invoked function over here and it defines a function, which takes two parameters, this is the constructor and then we're returning this thing and then that defines the type, that's the way you do classes in base Javascript, and you can actually control what level of Javascript the compiler compiles against.
So this is pretty cool, we could come back over to our HTML and let's include our little app.js in the right location, like so and go over to our site and let's just do this, we'll say let p = Person, and right there we got that, and we could give it say a name, which is Tom and the age is 11, and then over here we could log out p.
and what have we got, p.name is p.age years old, and you probably want some plus action going on right here, maybe put that back to var, I think the level of Javascript is not set that high it's probably set to a much older version of Javascript where let was not supported, we can change that in the second.
But now, we should be able to create this object and run it, of course, we're running the wrong one, let's go back over here and view this in the browser, view the console, p is not defined, I made a minor mistake here, it's all the Python's fault, I blame them.
So, of course in Javascript we need new when invoking these things, so let's go over here and reload this, here you go, now we have Tom is 11 years old.
And so what happened here is we can write our code in TypeScript and maybe you can tall I don't write a ton of TypeScript but you know, I dabble in just enough when I need it.
And you'll write the TypeScript, just every save that we do automatically compiles this output here and then we're able to consume it over here, as long as you don't forget the new.
Now, the other thing I want to look at really quick is we didn't get any help with things like let and const and so on and that's because the level of ECMAscript we're targeting, we can come over here and say we're targeting ECMAscript 6, this is the shiny new one and this only runs in the newer browsers and we can come over here and apply this and now we should be able to do things like define let so what I tried to write before, p= new person, Jake and he is 14, now notice, PyCharm is now saying— you know, you should be more specific than var and we can actually come over here and change this to a const if it is not changed or to a let, so we can change that to a const, and change that one to a let.
So, make sure you change your Javascript, you can even enable a file watcher to transpile this to an older version of Javascript if you need to, but if you look over here in our modern browser that should totally still work, and it does, so no need to change it for using modern browsers, so I am going to say no.
|
|
|
transcript
|
1:53 |
Now let's look at one of these Javascript frameworks and see how we get even better support in PyCharm.
So here we have Angular JS and this is one of the more popular ones, I showed you the Ionic example and of course, that's based on Angular so that's pretty cool.
And over here is a little tutorial on working with Angular JS like these little things here, and you can go and edit the HTML and the CSS to make this happen.
So let's look over here, I do a little reformat, we've got a link to Angular, this is Angular 1.0, it doesn't really matter, the way it works is all basically the same.
So we come down here, we have our code here first thing we've got to do is we've got to go here and say this is an ng app, let's put that away there, like so.
So we'll say this is our app and then down here we're going to have things like ng-click, so if I type ng you can see I've got -bind, -app, -class, -cloak, all the various things that you would do and now we have actual Angular JS help not just HTML, CSS and Javascript, but support for all that, let's have a look here.
One more time in our browser, and see what we've created or copy and paste, take your pick.
So it looks pretty good so far, if we click around you can see our little Angular JS app is working, granted it doesn't do very much, but it's quite easy to build as you can see with all the support for the Angular JS features and I find this really helpful because I don't do Angular JS so much so I am like is it ng-bind, is it bind colon, how do you do conditionals in here, and all this kind of stuff, controllers, routing, all the things you do in Angular, it's really nice to be able to just leverage the intellisense that is built in here.
|
|
|
transcript
|
7:12 |
When it comes to CSS, sometimes less is more, and in this case, it's definitely more.
What we're going to talk about now is this super set language of CSS called LESS and it adds functions and variables and hierarchies and all sorts of cool stuff to CSS that really should have been added to CSS at some point, but it wasn't, so it's LESS.
We'll see special support that PyCharm has for that, so let's just run our little— we can debug it as well— run our little thing here and you can see, this is from the last Angular JS video and it just lets us interact with it, so all we want to do is just change the styles up here, okay, and let's get a quick sense of where these styles are coming from.
So if we go and look at this, we can see that the nav a has a special color there, right, if we turn that off it goes back blue right, and it has this important, we're going to take that important away.
What we want to do is actually use LESS to style this, and one of the challenges with LESS is it's not CSS, our browsers can't run it.
And so unless we take special action or a special action is taken somehow, even if we don't really do it ourselves, we won't be able to use that language in Chrome here.
So how do we do that?
Let's go and start by adding a file, just a blank file, and we're going to have a demo_overrides.less now I probably would just rewrite this to be a LESS file, but I want to just have some from scratch, so watch what happens when I hit enter here.
Now, the first time you run this it will pop up a little dialogue that says do you want to configure a file watcher for LESS, say yes.
And if we go over here, you can see our file watchers are right here.
We have LESS selected, so let's go and edit that, and when you say okay it will pop up this dialogue but chances are this is empty, and this program is not set and that's going to be bad.
So you have to first determine if you have LESS, PyCharm doesn't ship with LESS but it will use LESS.
So if you type LESS, it might seem like you have it, like oh look, I have LESS— no, you don't have LESS.
Less is, let's see, so if we over here to read me, that one, we can say less and it'll just show us the file here, so less is very much like a slightly more advanced version of more, at least on Mac and on Linux.
So that's not going to help, what you want to make sure you have is LESS C, the LESS compiler, and the way you get that is you have to install Node so you have npm, and then you can npm install less-g for global.
And I'm not sure if you should put the g first, either way; so you run this, it will install LESS and then you'll be able to find this file somewhere on your system.
Once you have that done, and you said ok, then when you create these files, something really cool happens.
So first, let's talk about LESS.
The idea with the LESS is that it adds some programmability, some very basic programmability to CSS, and that's much, much needed, so if you've got say like a common background color throughout your site, with CSS you just have to repeat that thing over and over, and oh my gosh is that a pain on a large site.
Similarly, you've got a certain type of padding, like 5px padding around something and you want to have that throughout your design, well you've just got to type the five over and if you change it, you better remember which five corresponds to which, it is really tough.
So over here what we can do is we can define things like dark blue, and I'm going to say dark blue is— so, that's not dark blue, but some kind of blue, right.
So in PyCharm you can pull up on these code intentions and change the color to let's say a darker blue, like that one, that's cool; and let's suppose we want a light blue as well, a really light blue we can come over here and say let's make that really bright, move that up, it's more of a purple, isn't it, but that's okay.
So we've got these two colors, and now we can go and override the nav and we can say the background color is at dark blue, look at that, even auto complete for it.
And, we could set the color, but you'll see this is not actually going to do anything so we've got to fix this, say light blue here.
Now, let me take away this important thing somewhere, there's an important which is not typically a good idea.
Okay, so let's go back and look and see what we got here.
Alright, so we haven't set these yet, do you know why?
Because we have not included it.
Let's go actually include this.
Now, over here we want to include the code that we wrote for the styles, right, if we put the LESS over, the LESS won't run, LESS is not supported by the browsers, but watch this— so if we go over here and we expand this, just like with TypeScript, now we have these colors basically replaced, it sort of evaluates down to CSS.
What we want to do is include our overrides and see what difference that made, it's only going to fix it half the way.
Here we've got this, this is great, click around, it still works, but notice the hyperlinks are still white and that's because if you look at the style, we have nav a, so we have to go to the nav and then go to the a and then set the color, so if I uncheck this, you can see that's changing.
That's pretty cool, so let's go and fix that, in CSS you would have to say nav a and so on, but in LESS, you can group all the stuff that applies to nav and its children here, so I could just say a, like this and actually put this color inside here, like so.
And when we hit save, over here in our CSS, it writes the two parts that actually required by CSS.
Let's see if that did it— oh yeah, that's beautiful, see our terrible purple color, well it's beautiful in that our LESS is working, it's not so beautiful in our color pallet we're using, but the idea is that we can just use these LESS files, and PyCharm automatically create a file watcher, leverage LESS C to compile it down to CSS and you get a much better experience, you can also import one LESS file into the others so you can partition your styles in a whole bunch of small little pieces and then create like my whole site.less and just import all of them in the right order, and it's really, really nice that you kind of get this somewhat minified version whereas you actually can write in a much more granular way.
So LESS I think is great for web design, if you like SASS or some of these other ones, feel free to go with those, but the same idea applies there.
|
|
|
transcript
|
1:08 |
The final thing I want to cover while we're talking about client side Javascript just to sort of show how far you can push this is Electron JS.
So I'm not sure if you are familiar with Electron JS, it's pretty awesome, it basically takes Node and Chrome and packages that up into a self-contained executable that looks like a native application on macOS and Windows.
So you probably have interacted with Electron JS apps, so Electron JS actually came from Atom, from github, but we already saw that we were playing with Visual Studio code earlier and just to paste out some information, and this is an Electron JS app it looks just like standard macOS app here, and it looks like a Windows app over there.
Another one is Postman, great for APIs.
So over here we could hit the RSS feed for Talk Python, what do we get— wait for it to download here you can see that's the RSS feed, right.
So these are all Electron JS apps, so let's see how we might use this in PyCharm.
|
|
|
transcript
|
4:59 |
Over here on the electronjs.org page, go down a little bit, it'll show us a little quick start thing that we can do.
We can go clone this thing and then go in there and we just install and run.
Let's go over to PyCharm first and create a place to do that.
I'll have this electron_test or something like that, so we copy this path, it will be really easy to get there, like so.
Now, what it says we need to do is we need to clone the repo so that's going to download the various bits of HTML, so we don't have to type it, we'll go into the little quick start which is here and we'll see that we have an index and a main.
The last thing we have to do is install the various Node modules to make this work so we can come over here and run this, give it a second— and off it goes and runs.
So this is not a super advanced little thing right here, but you can see that we do have a native Mac application and there's stuff going on here, so let's get out of there, we can go and exit it.
Let's take this back to PyCharm.
So here we now have our Node modules and all of this and we can actually set this up to run inside of PyCharm so we can edit it, we can use all the cool stuff with TypeScript and LESS and whatever else you want to use to work with it.
The first thing we've got to do is make sure that we have the Node plug-in installed, so if you go to plug ins and then you see that you have Node— it turns out we don't have Node, so let's go browse for Node and we want this one, the Node JS, okay so this takes a moment because we've got to download and then restart PyCharm, okay we're back, we don't have anything to run this and there's not a great way to right click so we have to be a little more explicit but just notice now that if we went to new project we do have this Node concept, this is really only for Node web apps, the server side not Electron.
So let's go over here and say edit configuration and we're going to add something for Node JS and let's call this Electron and not hit enter, so over here it says we're going to run Node and that is not what we want, we want to actually do something a little bit different, actually what we're going to do is we're going to run out of our nude packages, now, this is a bit of annoying, so we want to go to our project here, this is our web client test, and we need to go into our Node modules and we need to go into the hidden bin folder, how do I do this here in macOS.
So let's go over here real quick, and we can get to it this way I'm sure this is easier on Windows, but we want to just go to our .bin and here we have Electron, so once we open this now we can get to this, it is unfortunately a little annoying, drag this over here and now we're inside our hidden folder and we can select that.
So, it's not the super easiest thing to do, but we can pick that right there.
And then, we want to set the working directory to be the directory down inside the course there so right here, all right, and then finally, we need to set the file that is going to be main.js in this example maybe you've named yours something else.
Alright, so not the easiest thing in the world, but we've got our Electron selected, we've got the right working directory, now, what happens if I run this, wait for it, bam, there it is, let's just make some changes to see that this is actually doing a thing.
Electron is fun, we could do something like this, all right, so we made this little proclamation that hey Electron is fun let's run it again, notice that right there, how cool is this?
So we are doing full on Electron JS inside of PyCharm, so just leveraging the fact that really this is WebStorm plus PyCharm, it's a super set.
So, super cool, I definitely think playing with Electron JS is fun, but like I said, I do wish there was a Python equivalent that really was as polished as Electron JS.
|
|
|
transcript
|
4:18 |
Let's review some of the core things that we learned about working with client side, Javascript and HTML and projects in general with PyCharm.
So we can come over here and say create a new project if we're doing a pure client side HTML thing, chances are you've created like a Pyramid or Django or Flask app and then you're working with these features in there, but you can't come over and create an Angular CLI app a traditional Angular JS app foundation, HTML 5, Node, as we saw, this is the server side express web framework and this even have this option requires the Node JS plug-in that we installed during the demos previously.
We also have the various React ones, Twitter Bootstrap and even the Web Starter Kit.
So some of the inspections, the code intentions were that we can upgrade our Javascript statement so not everything has to be a var, we could have constants, we could have let, things like that.
Remember for this to work you have to go into your Javascript settings and basically change the target Javascript version we changed it to ECMAscript 6 and these features turned on but by default it was I think 5.1 which did not have that feature, so be a little careful around that, but it's really helpful you get all this code intelligence and refactoring around Javascript.
We also can work with TypeScript if you like TypeScript or working with a framework that requires you to work with TypeScript, there are some really nice features there, as soon as you create the first ts file, it will ask you do you want to compile this across, and then if you do, you'll have this sibling or child Javascript file that is the transpilation version so you work in the app.ts, make all your changes there, every time you save it, automatically you get the app.js and nicely PyCharm sort of links these together so you can collapse them down.
And if you open up the TypeScript file you can also open up the Javascript file side by side and look at those and see what you're actually getting on the Javascript side.
PyCharm has support for the various Javascript front end frameworks, here you can see Vue JS, so vue-if, vue-for, vue-once, in our demo, we actually worked with Angular JS so many of the popular frameworks are supported you may have to go get a plug-in for it, but you should get pretty good intellisense there.
We saw that LESS like TypeScript is supported so we can work in LESS which is I think a nicer style of doing CSS and then once we do this, of course we get do you want to enable the file watcher, yes, of course you do and when you do, you get just like before, you have the LESS and you get the transpiled CSS file over here on the right, and the LESS maybe is a little more verbose at least in this example, but it is definitely more maintainable especially for large projects.
Now, for that to work, you have to npm install LESS, remember, LESS is not the command, it's LESS C so you want to definitely make sure that you don't put "less" there, but "lessc" and if you don't have lessc, you probably need to npm install LESS, but once you do that everything compiles and you get this transpiled CSS that is based on the LESS file, edit the LESS, include the CSS in your HTML.
Finally, we can even add Electron support with just the tiniest bit of work once you have that Node JS plug-in then if we want to do Electron JS to build desktop apps, that's totally easy, so make sure you have the Node JS plug-in installed and then you can figure it annoyingly by going to the hidden bin folder and this is not a field where it says Node interpreter you can't type in that, you have to browse to that.
So that means you need some mechanism to go in here and select that on Windows I know you can say show hidden files and it's pretty easy I don't know that you can do that in MacOS in the file open dialogue.
Anyway you go in here you saw the way I did it was I went to the terminal, I went in there found it and typed open and then I could drag and drop it over here, and then you set the working directory in the Javascript file and once you run it, boom, you will have full on debugging and development of Electron JS apps.
|
|
|
transcript
|
2:00 |
Python is a premier language for building web applications.
Many of the best web apps in the world are written in Python and of course, PyCharm is really amazing in all the ways it brings the various web technologies, which can feel quite scattered and random and disconnected, how it brings it all together seamlessly.
In this turn, in this exercise, you're going to get out and create a web application that is sort of fake data driven and play around with the HTML, the server side bits and so on.
We're not going to do too much with things like TypeScript or Angular JS because it's not a Javascript class, but you saw that all those features are there as well.
It's over on github 6-web-applications over here, just go to your turn here and make sure that you pick the web applications.
Come down here and you'll see that we're going to create a basic, Pyramid based web app, you can create whatever one you want, but in this example we're going to use Pyramid.
We're going to implement a view method we're going to take some data from that view, pass it to a template, render the template and change the overall look and feel of the site.
So there's some steps that guide you through this some pictures how it's supposed to look, so initially, it looks like this, because this is what a blank Pyramid starter project looks like, we're going to create some data here that we can get and we'll call it fake_data.py because it's not a real database but it's kind of a stand in for a data access layer.
And we're going to define a view method that returns this data and then finally down here at the end, we're going to set it up so that it renders these items into our application.
We are also going to change the overall look and feel of the site by adding a little @talkPython, whatever social media you want down there that's going to be applied across the entire site, not just this one page.
So follow the steps and have fun playing with web apps and PyCharm.
|
|
|
|
18:00 |
|
|
transcript
|
3:33 |
It's time to focus on the debugging capabilities of PyCharm.
One of the things I really like about PyCharm is its visual debugging and they really make a lot of things about discovering how your code is running super super easy and I feel like this in particular is one of the places where the other editors badly fall down, you end up just doing a bunch of print statements or you end up in some command line debugger which let me tell you, is not the same type of thing.
So, let's get into it, let's take a simple little application that's not entirely obvious what it's doing and debug it and play with it using PyCharm.
So to get started, what we're going to do is you just go up, we have our run configuration and a little play button we've been using this time we're going to use debug button for debugging.
So that's pretty straightforward and when you run it, it opens up this console in the commands there's a bunch of little buttons down here you need to get familiar with, so we'll go through them real quick and then we'll do an example of going through this.
So first of all, you can click this button to say show me where, which file on what line we're running at right now.
You might have stepped in a few lines and then moved all around trying to figure out what's happening and this is like take me back to where we are, what are we doing again, oh yes we're doing this.
Down here this is to step over, so if you're in a function and you want to just go down line by line, this is the button for you, but if you're in a function and you're like, "I need to go inside this other function that's being called here," then you click step into.
Now step into will step into anything, it'll step into packages that you've installed from PyPi, and step into even standard library stuff potentially.
Sometimes you don't want to go into other people's code you want to just go into your code so you click this step into my code button and it will only go into the stuff that you've written not the external pieces which is really nice.
Sometimes you might have to force that so you can use this button if it's there.
Now, when you're inside of a function, maybe you've stepped into it, and you are like I'm kind of done here but I want to go up a level and see what's happening so you just sort of bail out of one level and go up clicking this step out; and then this other one is really nice, this run the cursor so if you're like alright, these five lines are great but I want to go check this out, you put your cursor on that line you just say run to here and then you continue debugging, that's great.
And sometimes you want a little scratch pad to just say is this thing greater than that other thing, if I call this and compare with that it will return true so you can use this evaluate expression, it's like a little calculator type thing that pops up, you can type whatever you want in there.
Notice, we are over here and there's two other green buttons you've got to be careful about which green button you press, this one means completely throw away all your work, all of your steps and start over.
This one means keep going, stop this, and just run it again.
So you want to be really careful to press the resume one if that's what you want or the start over one, it's not so big if you missed that one but if you mean to keep going and you hit that start over button or even the play button in the upper right, that's going to throw away all your work, so be careful about which one you pick here.
Finally, before we get started there is the debugger tab and there's the console tab in this debug window down here, so before we were looking at the debugger side but if there is any program output or if it asks us any questions like type this in, or choose this option you have to come over this console window to see that.
|
|
|
transcript
|
5:39 |
Notice over here I have created a debugging folder for demos that we're doing in this chapter and I have a program that goes across two files you don't want to make it too complicated but not too simplistic as well.
So what we're going to run is program and I have a run configuration for that up here and it imports some things from math_tricks and one of the math tricks we can do is give me all the fibonacci numbers.
The other math trick is I can take any sequence of numbers and turn them into odd numbers and so if I give it the fibonacci numbers, I'll get the odd fibonacci numbers.
Now what's kind of insane is this is an infinite sequence, and so is this.
We've got to break out at some point, we can't just loop over it or try to sum it up or something, let's just run it and see what happens.
Okay, that looks like the fibonacci numbers except for 2 and 8 are missing well because we only got the odd fibonacci numbers.
Our goal is to use the debugger to understand the flow of this program.
Now, how do we generate an infinite series?
Well, actually it's much simpler than you might think, here while true yield this, so this is a co-routine, a generator function and what it does is it just goes through the fibonacci algorithm and uses the while true loop and the yield and so we'll see what that means in a moment, and then similarly, this just takes a series and then if it's odd it will yield numbers back in that series.
So both of these, at least this top one is an infinite series and this one is potentially infinite, it's the somewhat shorter than what you send into it potentially if you send in infinite numbers you might get an infinite set back.
Okay so let's go and just start by setting a breakpoint, that's pretty easy so we'll set a breakpoint right here and hit the debug, and immediately it runs down to this spot and if we were over here on this page, like this we could say show me where you are, okay that's right, we're right here, and you can see the call stack not super interesting because all of this stuff down here, this is all just Python start up -- here is our code.
We also have our variables, like we have our data here and you can see that we have our list and it's empty for the moment and we also have things like the various special stuff like the __name__ is __main__ this time in the file and so on.
So, the other thing to notice that's pretty awesome is up here right next to data, there's this and notice I can't select it but there's this green that actually shows you what the value of data is and you'll see that change over time, and let's just step through for a minute, so we step down, now we have a generator because we're using yield which is pretty awesome and then we're going to step down again and we have another generator and notice how fast that was, we just got an infinite series of numbers and it basically ran instantaneously, and that's because we're not generating them yet until we go over them here, so let's just step through a little bit and notice now that o is 1, I can see that right here, that's really cool, also you can see it down here and we'll go and append it, notice now, data is a list and it has the one that we just put in we go through, do this a few times, and now notice o changed to 3, its color here has changed this should change color in a second when its value changes as well now this turned orange because it's 1, 1, 3, so this is really great and if for some reason we're coming along and say well what would happen if o was not 13 but 9000 so we could actually come down here and say set value maybe we'll be able to do that here as well— no, I don't think so, we have to do it down here.
So we'll go over here and we'll say set value and then let's just say what if it was 9000 okay and we'll take our next step, it's 9000 and so that's bigger than this, we'll break out and then we'll print our data, how cool is that, over here in the console we have the ones that we got back.
So that's pretty amazing, let's do a little bit more though, let's try to understand how this infinite series work so we are just going to come down here and say run the cursor, that's great, we already know that those work, and instead of stepping over, let's step into our code so we're going to step into here and a series itself is a generator it actually says right there on the right, the fibonacci one up there and we're going to step down here like this and go through this and we could step into valuating this series and notice, now we're over here, so these generators have really funky behavior they're like restartable functions, so let me just step around a little bit notice we have 5 and 8 now if I step out, go down here, we are 5 now if I step in again, it's not going to go and rerun this function it's going to step right here probably with the values of 8 and 13 or something so let's step in, 8 and 5 and so you go right back so you can use the debugger actually really well to sort of figure out the flow, even though these things are quite odd so let's step out a little bit, out again, step through here right, now it's 13, now it's 21, now we can step back into this one through here, or step back in there, right so this is really, really great.
|
|
|
transcript
|
2:57 |
Now let's come back and look at a slightly different scenario.
Maybe something weird is going on right around the time when o is greater than and 500, or something.
So we could start out by putting a breakpoint here and say okay what's going to happen at this particular side, okay so o is 1, great, so we keep going, o is 3 and we can even do this version to just keep running to the next breakpoint, 13, 21, okay, 233, 987 right, now maybe that's where something is happening we want to stop now and look at it and see how it's evaluated this is super common when you have lots of loops or you maybe have some accounts and you're working with your web app and you want to see what when we get to this particular account, or this record that is an entry in our stores catalog or something like that and you want to stop on that one, that's the problematic one.
So there's a couple of things we can do we can come down here, first of all we can add special watches right we can say well I'm interested when o is greater than 500, it's true, so let's start over and is it greater than 500?
no run, run, run, right, obviously this is easy for you looking but there could be much more complicated things you're testing this thing equals that, this set is contained in that set right so you could do that sort of testing.
Now this is switched to true, great so this sort of ability to watch these expressions and not just variables is cool but we can do better, so let's come over here and say right click and notice all the stuff we get whether this is enabled whether it should suspend just this thread or all the threads, what is the condition here, let's say o, notice, intellisense, autocomplete right here, so fantastic 500, we could even get more if we click this we could even have it log a message let's say log a message here, something like that, we could say stop, there's all sorts of features we can do here so now if we just restart or debug, wait for a second, bam, it stops exactly when the first time o is greater than 500 it will save you a ton of time and by the way, it even logged that breakpoint reached we could even put out a little better message or something but click right here it takes you right back, not super interesting because we were there but far away, click here takes you right back.
Notice the icon right here, there's a little question mark because this isn't always a breakpoint it's a conditional breakpoint.
So these conditional breakpoints I don't find I use them that often but when I do, they're really helpful because you're not juggling around all these different scenarios you just put it into the breakpoint, let it run and it stops right when it should, it's great.
|
|
|
transcript
|
4:29 |
Let's review some of the concepts that we covered during this debugging section.
Over here we have our debuggers, hit some breakpoint on line ten of program.py and you can see all the variables, the special variables as well as the ones that are active in this function or in this overall module, so we've got our data, we've got our fibs generator our odd fibs generator and our o going through the loop and it looks like we're going through on the number 21 right now and we hit a breakpoint right there for some reason, so really, really nice and we could also see this in the editor so I almost never use this bottom window unless I'm trying to expand out a list or something complicated, I just look up here, like on line 4 it shows you what data 1, 1, 3, 5, 13, 21 if you look over on line 9 you know what o is, it's 55 it's really awesome that PyCharm puts these values into the editor and the color is meaningful as well so green is kind of green-bluish, it hasn't really changed and then it turns orange when it has changed for example on line nine it's 55 because that was new.
So here we can see the data lists, down here we can see the generators and here we can see our loop variable o which is our odd fibonacci number.
Sometimes you want to override the values of a program it can be really tough to test every little condition like if I'm in a web app and I'm logged in and I am logged in as a regular user but I want to see what happens if I was actually an admin in a particular situation, I could go to my user account or the active user account and say set the value of is admin to true.
Notice up here that we have the current value of o is 55 what if we wanted to test it when it was 72 instead of 55 we click set value, right click down in this little variables thing, click set value and then if we entered 72 instead of having the 55 there the program runs as if the value was 72.
We also watch expressions, not just variables variables are usually what you want to see but sometimes you want to do some processing with that variable or call the function or compare one thing against another, so you can put those in here as well, you just hit that little plus green thing right there with the glasses and then you type in the expression and then that will stay there even across the debug sessions, which is great.
We have breakpoints, you can set breakpoints just by clicking here in this little gutter area, that toggles them on and off, that's pretty straightforward you run your code and it just stops when it hits one of the breakpoints, that's super nice already.
We can also make these conditional, if you right click on an existing breakpoint you can check whether it's enabled, you can come down and actually set a condition here we only want to break on this breakpoint when our loop variable is greater than 100.
And if you click more you get even more options the ability to say log to the console or remove it once it's hit, things like that.
And once you've set this, notice right here there's a little question mark so it doesn't quite look like every other breakpoint maybe it could have a little more difference maybe it could have like a bigger color difference or something but that's what the question mark means, it means it's a conditional break point.
Also if you check under the more options, log message when the breakpoint is hit, you get something like this and you can see those interleaved throughout your program and they even become a little hyperlink things you can take and get back to your code.
Last thing, you may notice this warning here debugger speedups using Cython not found; now, you probably won't find it these days, PyCharm just released version 2017.3 and with that, they actually ship these binaries for Windows and for Mac so if you're using Windows or Mac and a newer version of PyCharm you probably already have these high-speed alternative debugger speedups, I think you might still see this on Linux though and if that happens, you just highlight the stuff in the quotes it says run Python this— just copy that and run it and then this message will go away and your debugging experience will be a lot faster.
|
|
|
transcript
|
1:22 |
When you're debugging your code it's really important to have great tools to visualize and understand exactly what's happening and view the entire state of your app and we saw the PyCharm debugger is pretty top-notch at that.
So let's go take an existing application and use debugging to understand its workflow.
So over here in 7-debugging, we've got math_tricks which is an existing little application that we're going to use we come down here into the core, this is the part we're going to try to understand and what we have is we have two generator methods, this yield keywords and generator methods are kind of weird you can think of them as restartable or pause and resume these methods so really, really cool in the way they work, really efficient but also kind of funky to understand, so what we are going to do is we're going to come down here and open up this project, open this in PyCharm, and we're going to run it just to make sure everything is hanging together you should see something like this, so we're going to play with breakpoints, we're going to use the visual debugger to step through and understanding the code flow and we're going to even alter the way the application runs by changing some of its state, which makes it go down different paths in the if block and things like that.
So, open up this project, these math tricks and play with the debugger and see how it all works.
|
|
|
|
17:48 |
|
|
transcript
|
0:43 |
Packages play a central role in Python.
One of the main powers that Python has is that you can go to PyPI and find among the 120,000+ packages something to do almost anything, you want to reach inside MP3 files and change their tags and album art, fine there's totally a couple options to do that, you name it, there's a good chance that it's out there.
So either you want to consume and work with one of these packages or maybe you want to build one and make it 120,001 which would be awesome.
So we'll see that PyCharm has support both for working with packages as a consumer and as a producer.
|
|
|
transcript
|
5:05 |
Let's begin our exploration of packages by working with an existing package, and what one is more popular than Requests.
So let's go and just download Requests, git clone it rather and we'll work with that, so do it this way, go to our desktop, git clone this, there you have it, nice and quick, and let's go open this in PyCharm, so we'll go over here into Requests and before we open it, let's create a virtual environment, and we don't want to mess with the Requests for the entire system, maybe just a little isolated thing.
So let's go over here and create a virtual environment like this and we'll keep that open, we need that again in a second.
So we can open our Requests, remember file open directory on other OSs, on MacOS you can do it this way which is sweet.
Down here, we have the various package management files and this is the actual implementation of Requests.
First of all, let's look at the setup file here and notice there are a lot of requirements that we have to install in order to run Requests, especially if we want to do tests on it and things like that, so let's go ahead and just click here for the moment, and let that go.
Now, this actually can take a while especially for pytest http bin so I'm just going to zoom ahead for you.
It looks like all the dependencies were set up, so that's great now let's just tweak this version a little tiny bit, let's just come over here and we'll say, do a print statement, right at the beginning, you would never do this but it will make it entirely obvious like this is our custom version.
The idea being we want to test out this package maybe we want to make some changes try in another application that we have and then once that's working, we could maybe do a PR back to the Request guys and whatnot, so we could also put a variable here, our_var = 42, things like that.
Now, in order for us to use this outside of this folder in our separate little application in theory would be we need to register Requests with Python, so for example, let's go over here, let's activate our virtual environment and let's go up here and run Python and import Requests.
Notice, we did not see our little message here let's see if it has our_var here, it didn't look like it, right, you just have that stuff right there, our_var, no, it has no our_var.
This is the Requests package from the system what we want to do is we want to build a work in Python and in our little Python app, this is just the REPL, but just as well it could have been I ran my app right here in this environment.
So what I need to do to make this one the one that I'm working on but for this virtual environment is I need to either install it or set it to development mode.
So the way you would do that is you would go into Requests and you would say Python setup.py develop is probably what you want, when you're working on it or install, if for some reason you want to install it and we could come out to the shell and type that, or we could go to PyCharm and come down here and click on tools and notice run setup task.
Now, I found that sometimes you have to have the directory that contains the setup files selected, not always but sometimes so it seems like it didn't matter here so let's try run this, now look what we get we can have install, we could have develop, all the cool features that come out of setup tools are right here and what we want is develop, we hit this and it actually creates a local symlink, a local install for this one and it would have installed the dependencies if I had not clicked that button previously.
All right, let's try this again, let me get out of Request because if I do it in this folder it's going to find that one.
So now let's do it again, if I run Python and I say import Requests, boom, this is our custom version and I'll say something like print requests.our_var, it's 42, of course it is; and if we had a different one, if we say Python 3 import requests, this is not the same virtual environment, it doesn't have that right, it doesn't have this variable.
So this is really cool, this setup lets us register this package that we got off of github, that could have been something we're working on for ourselves, but this existing package, it lets us register it for consumption in this development mode, which is really, really nice.
|
|
|
transcript
|
7:06 |
We've seen how PyCharm helps us work with existing packages when we played with Requests.
But what about creating new packages?
Now, over here I've created this folder for Requests I didn't put it in the source control because all I did was clone the get repository but this one we want to keep, so notice I have a package folder in a lower down environment here and I guess we could even go and say we don't want to look at it, but one problem that you run into is the tooling I'm going to try to show you— doesn't work because PyCharm discovers that this is a package and it's like, well I don't need to do the create package stuff because hey, you already have a package even though I really want to create another package here.
So in order to make this work, what we're going to do is open that directory by itself, here we have it, put it on PyCharm and off it goes.
Okay, so let's create an application that's going to use a package we're going to create and let's create the package itself, so what actually defines a Python package in its true essence?
Not very much to be honest, it is a directory that has __init__ so let's say we're going to have the package so what do we get, we got a directory with a __init__.py in it and it's empty.
We can put our implementation here or we can put it separate, you take your pick so we could define something external and import it here and the stuff that we imported would be in the package or we could just define it here for this simple thing I'm just going to define it in the __init__ and what we're going to have is also itself quite simple, we're going to have a calculator, a calculator class and the calculator class is going to have a couple of features, have the ability to add and turn X plus Y and let's also have a subtract.
Now we actually wanted to have this class so we can play with it but PyCharm is saying this could be static and let's just say you know what— for this one I don't care if these could be static, I want them to be instances just for the heck of it.
Okay, so this is great, we have this package but in practice, it's not enough we need to install the package, how do you install the package?
You have a setup.py, so let's go and create that now so we have this selected, we can go tools and actually say not run but create a setup.py so this package is going to be called the_package and it's going to be version 0.0.1, something like that, url is going to be http://the_package and the license will be MIT I'll put me in here and my email address.
Description, amazing package, all right so if you've done a bunch of setup.py stuff you maybe recognize these pieces and where they go but when I click ok, what I get is a setup.py now, one thing that's annoying probably at some point this will go away PyCharm will notice, this .env is actually not a source of packages it technically contains many Python packages but as you can see these are all just crappy built in ones, so let's clean this up, the idea is PyCharm is trying to find all the sub packages and list them so we could have like the package and then down here we could have a new package advanced or whatever and then down here, we might say we have the_package.advanced It was trying to help us with that, but obviously it was a little overzealous Okay great so this is super cool, right it looks like we should be able to run this, let's go down to the Python console here, I think the fact that it's added this is probably going to not let us have this fail, I'd like to have this fail.
But I think it's going to work, look at that we could say c = the_package.calculator, like that, c.add (7, 11) 18, our package works, it's amazing.
Okay, so let's go and see how we can work with this let's go create one more app, this app is going to consume this as well, I'll call this the_app, all right, and Python file called package_app here we'll say import the_package and we'll just do a little print using the package we'll do the same thing all right, it looks like it may be working let's try to run it and see what happens, I think it probably will work— yeey, it works.
However, that's only because PyCharm has altered the path to include this so let's go over here and let's copy this path, and do it this way so let's cd over here actually, go back really quick and activate our virtual environment and then we can go to the_app alright, here we are, if we just say Python package, no module or package, why— because we haven't run the setup.py, let's go back, there, now we have the setup.py maybe that belongs in there, I don't know, I haven't really organized this as well as I should but just to give you guys the sense what we're working with here, if we run setup.py and we say develop it did work pretty well, let's go over to setup okay great they're using setup tools the old version of PyCharm used to use distutils, which didn't have the develop version.
Okay, great so this worked very well now if we go back to our, the_app here remember we ran this before and it failed what about now— of course it works because we installed the package that we just created in PyCharm.
So what did we do— again, you would never jam this together like this but we have our package we created, we gave it the __init__ and we even have our sub package, if we really cared about that, and then we created the setup.py by using the details, basically the tools here now it goes to run, and then we ran it, right here, like so, and that installed it into our virtual environment, and then we can of course run our app, using the package.
|
|
|
transcript
|
2:47 |
Let's review some of the concepts that you saw while we were working with packages in our demo.
So we saw that we can load existing packages here we're using requests.cookies and it's easy for us to just open up requests PyCharm knows that this is a package, it knows that when it imports stuff it has to say requests.
for the various things so it's really good at working with packages that maybe you got off of GitHub or wherever.
So this is nice, one of the things we need to do actually to be able to leverage that package, to run it and import it into say our program for getting some kind of package, trying to use it and see how it works, and making changes maybe eventually with the goal of doing a PR back to the original package owner or something like that is you have to install it, or more importantly set it up in development mode so you can do that by just going to tools run setup task down here you get all of the options if you type develop then it'll go and install all the dependencies and register requests locally, so that at least that virtual environment knows to go back in local right here to run this local copy of Requests.
Now on the other hand, we might want to create a new package from scratch not work with someone else's, so we can come down here and say new Python package and this honestly doesn't do very much for you it creates a directory with a __init__ so this works for packages or subpackages you could just create a directory and put a Python file name __init__ in there if you want but this I guess saves you a step, and it sort of follows the convention a little bit more closely.
So these packages are not particularly useful if you can't install them to use them elsewhere so we can go and create a setup.py and you can just go to tools create setup.py this doesn't work if you already have a setup.py anywhere in your project so just be aware of that.
Look at this dialogue, it asks you all the pertinent questions what is the name, what's the version, what's the license and so on and so on, I hit OK and then boom— out pops a setup method ready to go and a setup.py.
Now traditionally PyCharm has used distutils.core to get setup and just recently they switch to the setup tools version and that's important because the older versions don't have the develop option so Python setup.py develop, that didn't use to work, just by pressing the button as long as you're using 2017.3 or above though it looks like everything is golden.
If for some reason you don't have that, you can just alter the import statement at the top and then you are ready to roll, your new package is ready to be set up and used or tested or whatever you want to do with it.
|
|
|
transcript
|
2:07 |
Have you created a Python package before?
Well, you're going to now, because we're going to create a new Python package and use the PyCharm tools to make it installable and get the right structure, all those kinds of things.
Over here, we're going to start from just blank, so you don't need to check out any code for this one, but what we're going to do is we're going to create a new project, we're going to make it into a package, not just a random Python project, we're going to add a silly little feature to it so you can run some code and play with it, we will create a setup file so that other people can install say from PyPi or other places your package; and finally, we're going to use that one by creating a virtual environment, running our setup to test that there and then importing the package to make sure it works.
So you get a little background on what packaging in Python is we're going to come over here and see how you can use the PyCharm tools to make it a package, add a feature, it's just a simple little calculator app that lets you create like an add and subtract method so really, really simple, we're not going too far down into anything advanced here, the code is not what's important, it's the package.
So we're going to call it Calcy, our little simple calculator, hopefully, that doesn't conflict with anything you have installed, I tried to name it something that probably doesn't exist.
And you see that you can import it, use its math submodule and add function.
They want to create a setup package, beware that PyCharm may go overboard with all the virtual environment packages in there so you have to clean that out, that's kind of unfortunate it does that maybe it will stop by the time you take this class, but right now it does it, and you'll see how to activate it notice the steps on Windows are slightly different than they are on Mac and Linux, we're going to run the setup and make sure you go somewhere else on your file system not the working folder because it'll just pick up the package right there so then we're going to run the Python REPL, and just interact with it like you saw before.
Alright, so go and create a calculator package.
|
|
|
|
32:00 |
|
|
transcript
|
1:49 |
We've written our code, we've debugged our code and it's working, but maybe it's not going as fast as we would like, maybe that website that we imagine being ultra responsive actually takes about a second and a half to render most of the pages, that would be really unfortunate.
How do we go about fixing this problem?
Well, the first step in fixing these performance problems is to ask the question where are you spending your time, what is slow and what is fast.
And then you can use your programming skills, thinking about algorithms and other types of things for making it fast.
So we're going to talk about PyCharm's profiling tools here.
It's really important to keep in mind that our intuition often fails us when we're guessing or thinking about performance, I've had this happen over and over in my career, I think okay, this part is going to be super fast and this part is going to be super slow, so if it's slow let's try to optimize think about why that's slow.
And then I went and measured it, and in fact, no, that part was blazing fast, what was I doing.
There's a couple of examples I can think of that that was just so far out of whack that a quick measurement showed me where the real performance problems were and those were actually way easier to fix because I often feel like hey, this is complicated this is probably the part that's slow.
So if you could find a simple thing to make fast that actually makes a whole app fast, even better.
So the main takeaway here is our intuition is going to fail us when guessing about where code is slow, and the profiling tools will tell you for sure, within some degree, how fast each part is, and lets you reason with data rather than guesses.
|
|
|
transcript
|
3:15 |
Let's look at this new little application I've imported and written for talking about performance and profiling.
So this is not anything practical in any real sense of an application but it does do a variety of different things which may or may not seem slow.
So here we are in this program and I've set up a run profile let's call it program(perf) to disambiguate from all the other programs we have and in here, for now it runs this function once, we might run it a bunch of times later and what it is, is you give it a string, usually a single word and you say okay, I want to go and search a website using an http api, get some results back, I want to go to the database and do some searches sort of searching for this keyword here, and then I'd also like to go and do some sort of fake machine learning type thing here that's a computationaly intensive and we're going to print out all the time that that takes, like I, said this is not entirely fake, but it is somewhat useless.
So the things we're doing here don't make a lot of sense really, it's just for us to do different things where you might think about what part is fast, what part is slow.
So in this search part here, this really does go to a url and it builds up the url, and it performs a search and then it converts the results back into objects.
Down here it actually is searching the transcripts all the content on talkpython.fm so when we say profiling, it will give us back the thing that had to do with profiling, if we said and anvil, give us the stuff about anvil web apps and things like this.
So that's really cool and it goes and it performs the search with requests, converts the results back, basically gets the description for each episode that matches.
And then, let's go to data access I think that one runs next we're going to create a database connection and we're going to omit the details for a minute on that, we're going to run a query based on this text sort of, kind of, not really, and then we're going to just loop over imagine 100 records came back we're going to pretend to read those rows back from the database and add them here and they we'll return that data.
And the details about reading rows, we're not talking about it yet.
And finally, here we're going to compute the analytics so we're going to read some data and then do some more stuff here, and then we're going to go and say given these two pieces of data let's go and do some machine learning that come up with the answer, some kind of index here.
We're going to try to figure out what parts of these methods I'm not showing you, which ones are slow and which ones are fast, how often we're calling them, things like that.
So I'll go and run this and then we'll turn on the profiling tools after.
You can see it takes a second to that first part and then the db business is kind of fast and then here I came up with this big long number right here in this learning thing, I'll run it one more time, you can see they are kind of similar the overall operations, the three operations but inside the various things they do, not so evenly split.
|
|
|
transcript
|
5:56 |
We saw this program is not especially fast, how long it takes maybe five seconds or something like that and we would like it to be faster, if that is at all possible.
So what we're going to do is we're going to use the profiling tools to ask where time is spent and if we want to just profile the entire application that's probably the easiest thing to do, we can go over here and push this button, to me this looks a little bit like a cd, but it's like a speedometer type thing so once you have a run configuration this can be for unit tests or for regular apps, or web apps even, what you can do is click here to run that with profiling, so let's do it.
So it started the c profiler which is probably the better of the two profilers, it did what it does and then it saved a snapshot here based on the project name and then it exited and immediately what came up is this statistics page here, so if we look at the statistics, what we have is the number of times the function was called so for example, this raising something to a power was called 600 thousand times that's pretty intense, right, this is probably our machine learning thing in terms of time though, that didn't take that long, 120 milliseconds, that is some time.
There's some other things going on here, learn was called one time but it took half a second, let see our socket, connect took a little while, but it's only 4% of the time so you can go on here and sort of, I would say sort these and then go and find where that's interesting, so own time, this means only this function spent this time not the things it calls, I find this to be super helpful sometimes but usually what I'd like to know is how long does it take for this function to run not how long just inside that level in the call stack, how long did it run that is this one.
So program.py took 1.6 seconds, main took that long, okay, we called go and that's really all that main was doing, it was calling go.
So here we have compute analytics, we had three things we were doing a search, we were doing get records and we were doing a compute analytics so it looks like this analytics thing is the slowest and then, we have learn over here and down here we have get records I think that's what we were calling it so you can sort of see the relative breakdown and this is really helpful, we can do things like let's say I would like if you just double click it I guess, I meant to click once but if you click once you can say navigate the source and it'll take you right to that function, okay this one is probably the worst one that we control actually well, this one is.
It's spending almost all of its time in learn down here, which is where we were.
So we can think about how we might be able to make this better we could think about the algorithm here now that's one way to look at it, and this is okay but I don't really like it that much, I guess it depends on how complex things are.
The other thing you can look at is the call graph and the call graph is awesome, this does not look awesome, does it?
So let's try to zoom in a little bit so we can get something more meaningful, so if we come down here there's a bunch of junk that's going to be in here that has nothing to do with us so like here you can see this is all the load module start up time from Python we can't make that any faster that's CPython, that is what it is, if you want that to be faster you need to use PyPy or Cython or some other runtime, maybe you could somehow pre-compile, get some pyc files but that's generally out of our control, this though, program calling main, calling go, calling these three functions, this is where it's interesting.
Notice the colors, this is red, this is like as bad as it gets and this is slightly less bad, just slightly because something else is happening and the start up and then this is among these three, not too bad so it's lighter green, this is yellow because it's maybe 3 times as bad as the other stuff on that level, and so on so we can go through and actually see what's happening, like this one is actually going out and calling get on request which is going over the socket, this one is calling learn and read data and those are both pretty bad it turns out; and this one's calling get records and the real slow part of get records is creating the connection here, actually I think I remember, I wanted this to be a little bit slower so let me go over here, we can navigate the source and let's make actually this part which we'll talk about in a second a little slower so one more profile thing here with the call graph it always looks easy like that so we'll just zoom it it's time it rearrange itself a little bit, here we go so now we're spending some time on read query and get row as well as connecting, so these all kind of have their own issues so how are we going to fix it?
Well, we can go through and optimize, let's say I would start with the worst thing, is there a way to optimize this for example, is there a way to optimize that, so I think we'll just start here, this is the slowest thing that we have control of, this is slow but it's only slow because it's just literally calling these, right and you can see right here its own time is zero milliseconds, but total it's that.
Similarly, here these are calling things that are slow.
Alright, so the goal is, armed with this information and having this loaded up here, let's say this is going to be the starting point we'll have this one and we could make some changes and we'll have another one of these show up and we can do a quick comparison and see how things are working.
|
|
|
transcript
|
3:52 |
So we got our information about the performance here none of these are acceptable speeds 300 milliseconds or above this is probably the worst, but let's go ahead and start with this one in terms of trying to optimize this.
So here we are going to talkpython.fm, and we're doing this query and we'll get it back and there's really very little to do over here you'll see under search, this is zero milliseconds, the time actually is way, way, way down here but it's in this whole create connection send output it's down on the network layer, there's nothing that we're doing here that we're going to actually make faster.
So let's think about how we can optimize this.
One of the things we could do, let's suppose we're going to call this over and over let's suppose we're going to go over here, I want to call this ten times or something, because optimizing it once, there's not a whole lot we can do here but if we say this code is actually called a bunch of times like it's in a web app, the web app starts up and gets going, something like that might make sense to think about what we're about to do, so I run it without any optimizations you can see it's doing its thing, okay, great.
So we go back over here to our services one of the things that's really easy is we could say let's just cash the output, how often does the content on talkpython.fm change; a couple times a week you, if we open our app, do some work and close it it is probably safe to just take the results.
So one of the things we can do is we can use this thing called functools, so we can say import functools and in here there's a caching decorator, momento type thing and what it will do is, if it sees an argument it will record the results and if it sees that argument again, it's just going to say hey I already know the answer to this question, it is whatever, right, whatever it saw from the last time.
So we can come here and say lru_cashe, so we'll come down here and we'll set the lru cashe and this is going to basically remember any search strings and if it sees the same search, it's going to say the same answer, and so we could search for many things and it would give us the different corresponding answers, but if it ever sees a repeated search, it's going to just give back the same answer.
So let's go ahead and run this again, notice that one was slower, but now notice, there's basically no lag when we hit to the search section, the other stuff is still slow, but search it's blazing.
So that's really cool, we're going to try to make use of this idea of caching as an optimization partly because we're not really doing interesting stuff so we kind of got to make up some examples, but this is really quite cool.
One caveat is the stuff that goes in the perimeter list here must be hashable, strings are hashable, so this works.
Okay, so that actually made this really fast, let's run this again and just see, of course we did it, ten times as much, but that's ok we can still look at the call graph and just zoom in and see what's going on over here, so down here we have our search, it was only called one time and it did take 280 milliseconds, we can't really make it faster unless we actually were to go and start saving that to disk but even though these were called 9 times that one was called once because we asked for the same search information over and over, so once it got warmed up, it goes really, really fast so I think that's about as good as it's going to get unless I get my network faster right now.
|
|
|
transcript
|
2:53 |
That's good, now let's focus on this get records thing.
You'll see there's this read data, there's this read row and so on, let's go down here to this run query, and it turns out read row is slow to create connection maybe, we could use connection pooling that's a possibility, we could think about how that might work, but let's go over here, we'd have to simulate this in a real database app it would actually automatically do that so let's go check this one out.
Now, let's suppose we've looked at this read row business and you can see I'm just faking this for our little demo we learned that there was actually no index on this database on this particular query that we're running and there's a lot of data, so the difference between having a large amount of data within index and not can easily be a thousand times faster, so let's suppose we go over to the database and we're like, we're going to put an index and make it a hundred times faster, so we improved it by adding an index, so we're going to go run this again and see how we're doing, I don't want regular to run, I want profile to run I got our answers, let's zoom in again and see what we got going on so now we look get records is actually still slow but it's really about creating this connection and this whole part about reading the rows, like literally fell off the map because it was under some sort of threshold, let's go back and actually imagine we could do some sort of connection pooling again this is just fake, like I said, real database connections, systems like SQLAlchemy would take care of this but let's just go say this and let's imagine that we could say if we have it, we're just going to return the connection otherwise we have to create it, and we'll set the connection to that and then we'll return the connection.
This is what connection, at least some sort of shared connection would look like, connection pooling will have a set we could get from but let's see how this works, I think we probably got our get records just completely flying now, all right put that over here, have a look at the call graph so down here we call get records nine times we call get connection and it only takes that time that it took for one of them and then that was it, it took a while to create the first connection but no matter how many times we call it now it's going to be open and it's going to be flying so these things are really going pretty well and this one is looking worse and worse compared to its friends, it's red right, so let's go and work on this one and then we'll see what else we can do.
|
|
|
transcript
|
7:11 |
There are actually two operations and they're both kind of slow read data and learn are both slow.
this one is processing some, this is all in our minds, this is processing some data and it turns out that it's accessing a bunch of complex arrays and stuff in memory and it's just a little bit too slow.
So what if we were say to switch to NumPy and make this much faster, we could speed that up by a factor of 20, so change that, okay.
If we do that this read data part will get a lot faster.
The other problem is this learn here so let's just do another profile real quick, make sure our change was positive, go to our call graph, zoom in, move around a bit, here we are, this is actually much, much faster it was spending a lot of time, I think it was about 4 seconds over here now it's 160 milliseconds, so yeey, NumPy, you've got to imagine we actually did something there, but now this learn is also slow.
Now suppose this is the machine learning algorithm and we cannot change this math, it must go like this now there's always something that you can do differently, but let's suppose this has to be this way, so maybe we could do our little trick, we could say functools.lru_cache like this import that at the top, this is going to make it so much faster because it turns out we're actually giving it a lot of the same data, bam, unhashable type list, so maybe we can't use lru, all right, so we could basically mirror what this is doing and we could create a decorator that actually tries to model this but it is specifically built for hashing lists and these types of data.
Okay so how do we do that?
Well, we're going to define a decorator, let's call it list_momento and what it's going to take is it's going to take a function and it's going to later return a wrapper func so the idea is, what we do is we create a function, it will be effectively past learn, we're going to define inside here a wrapper function that at some point is going to return calling the function itself and this function, let's suppose it takes a bunch of lists, I guess we could do it like this, it only accepts lists and it passes those lists on.
We could do something like that, kind of, sort of, generally and let's just run this and see if we still get the same answer.
Hey look, we're getting numbers down at the bottom, great.
So it's working, that's pretty cool but what's going on here, we're not getting any faster, I don't think, unless I miswrote this, yeah, look at this compute analytics, it's still in learn, it's doing its thing it's not any faster just because we wrapped it in this.
However, we are very, very close so the last thing we need to do is let's define over here, actually we can define it in here a cache, and what we'd like to do is put into this dictionary say every time we see the results coming in, or the arguments coming in the same we'd like to capture the results, send them out.
So we can come up and define a key that we're going to use for this and it's going to be maybe a comma separated what we can do is we can just take the string representation of the lists and let's just print out the key really quick, so we can see what's going on, yeey, update, yeah, so we've got to convert that, all right, so we'll say stir of l or l in that, alright.
It's a little hard to see, so here we'll have key like this and now if I run it you should see, there we go.
Okay, so the key is just taking the two strings which is the set of descriptions and some data records and it's going like this, but this is hashable, all right.
So what we could do is we could actually either compute the hash or just store the key, for now I'm just going to store the key, in reality you probably want to hash it because this is tons of data, you really just need a hash, take the hash.
So this is cool, we'll say this, we'll say if key in cache return cache of key, that's the super fast version, but if we've never seen this input, we're going to go over here and say cache key equals that and then we'll actually return this, so watch how fast this runs now, bam, done, super, super fast, I'll update you later markdown.
So over here, we're able to define this momento just like we had the lru cache, but we built it around lists those are not hashable, ours exactly knows what to do with lists, it converts them to strings and then hashes that, theoretically.
So let's run this one more time, see how have we done, I think we might be finished.
All right, so much, much better come down here and do a quick zoom and look at this, we've got our time down, we were at like 12 seconds, oh we still have one more to go, actually I'm not sure we can get much faster, this learn here we'll have to see, this learn actually is quite a complicated algorithm like you can see 600 thousand raising numbers to power and stuff, so that's pretty insane, but notice because of our lru thing, our list momento decorator we built, this is actually only called one time ever, because it turns out we're sending in the same data most of the time, all the time.
So the wrap function that we wrote, that was called 9 times but it almost spent no time there, right, one time it has to call this, the rest it just uses dictionaries those fly.
So we've gotten this down significantly faster, it's 1 second, you might remember it was like one and a half seconds before but we're calling it 10 times, 9 times as many times so we got it roughly let's say 10 or 11 times faster, and we did that by looking specifically at the output from the profiler and finding the worst-case scenario, fixing that, going to the what is the new worst-case but better than before scenario and just working our way through this program.
|
|
|
transcript
|
5:28 |
You've seen the profiler in action and you've seen our technique for making our fake little set of functions faster so let's go back and talk about some of the concepts that we saw.
So we can go to the run menu and choose profile our program here or we could go up and just press this to profile it, so there's also a way in the project to do it, so there's a lot of ways to start profiling our run configuration and like I said, this can be a unit test, this can be a proper program like the one we did, it could be a web app, whatever, any run configuration you should be able to just profile it.
Now, you run it and it runs down here, like this notice it's starting the C profiler and then after it runs, it pops open with the stats, by default it opens in own time and I think that's really not the right place to be you want cumulative time and sort of work your way down so go and sort by the time ms not own time, right here.
Notice that compute analytics was probably the worst thing that we are in control of, it's called 9 times, it took 7.6 seconds, that's really a problem.
So we should probably go look at that and analyze it.
We also have learn, we also have read data, those are the different parts that we've written that look especially bad, time.sleep we didn't write that, I can't do anything about it maybe we could call it fewer times or with a smaller value, okay we also have get records and so these are the places we should probably be looking and that's what our analysis here is telling us, probably starting with compute analytics.
We're also creating the connection and you might think well there's nothing you can do to make talking to a database faster you have to open the connection to talk to it but you could implement connection pooling or at least make sure what you're doing is leveraging the built in connection pooling of your database provider.
While the statistics are cool, I think the graphical version is much better so here we can dig into the individual functions, we have program, we have main, we have we go and after go it gets interesting, those are the three heavyweight things that go does and that's really all the program is doing.
So search is the least bad of the three options compute analytics is the worst.
So the way to read this is we start here in program.py it calls main, from main that calls go and from go we call this one, and then this one, and then this one so we're calling these functions sort of in this order so you can follow the flow until you get to a point like okay, this looks bad and like something we can optimize.
And remember, color matters, so we've got green for search it's pretty fast, relative to the other things we've got orange for compute analytics, and we've got red for main, so this is a percent of time and you can actually see the percent there, like search is 3.4%, compute analytics is 70% and main is 96% so it's kind of a gradient from green to red with a little yellow in the middle, relative to everything else it is probably fast enough.
Compute analytics, this could be faster, right, but the color is kind of telling you it's not the worst you've seen but it could be better, this is low right, this is pretty much as bad as it gets from this particular program.
We could also navigate so we could right click in the tabular version and say navigate the source or actually jump over to the call graph so if you click on the show call graph, it will take you over here but if you go to that one right click you could only navigate to the source, so there's not this bi-directional take me to the graph, take me to the table.
So here we can navigate down to the source and see what's actually going on.
So those are the techniques and tooling that we use, I want to leave you with one quick warning though be aware of the effects of profilers so profilers and their friends, the debugger, these can have non obvious effects so you might have two functions, one which is called one time and one is called a 100 thousand times and without the profiler, maybe they're the same amount of time, exactly but because the profiler is in the way and collecting data about every call the one that's called a 100 thousand times looks way worse in the profiler than the other which just goes down to the system and the profiler is not doing much so you can think of these as having a little bit of quantum mechanics effects kind of Heisenberg uncertainty principle the more precisely you measure it, you might actually be changing how it's behaving.
While C profiler is pretty good and the debugger with the Cython speed ups are pretty good, just keep in mind that this is not exactly the real runtime behavior, this is the runtime behavior while it's being deeply observed.
Okay it's still super, super helpful to help track down these issues and it's more important to look at the differences across time I'd say than it is to look at the exact dummers and say well now it is a tiny bit faster, it could be just the profiler is affecting it.
|
|
|
transcript
|
1:36 |
Just like visual debugging is important for understanding how your code works, if you try to understand its performance visual tools here also are really, really important, let's go and play with the visual tools for understanding performance in PyCharm.
Over here on github under 9-performance we already have a little application here, performance app so this is similar to the one you just saw in the demo, it's related to this chapter so we're going to come down here and we're going to use the tools to understand the app's existing performance and then improve it in a few key areas so we're going to go and open up this project, now if you create a virtual environment or you just do it on your main system, be aware you need Requests installed for it to work because one of its features is it goes out and makes a call to a web service, so notice here, we'll use the profile program this only gets set up once you create a run configuration so right click on programs, they run and then you can profile it.
So first thing we're going to do is answer a couple of questions, what are the three slowest methods and why, and then what is making them slow and then you go through, there's a few to do's in the code that says here's a section that could be improved, theoretically, it's got a time.sleep type thing and say well what if we use NumPy, maybe that makes it 20 times faster, so make that number 20 times smaller or what if we add an index, make it a 100 times smaller, so you can follow a couple of these steps here, keep running the performance tools to see what the changes and effects are and we'll make this program faster.
|
|
|
|
29:12 |
|
|
transcript
|
1:22 |
Unit testing and testing in general certainly weren't the pillars of software development and often distinguishes amateur from professional developers, so we're going to see that PyCharm has some really fabulous and deep integration with unit testing and related functionality, things like code coverage and whatnot.
Now before we get started, I want to lead off with two quick thoughts one from Steve McConnell who wrote Code Complete, "The problem with quick and dirty is that the dirty remains long after the quick has been forgotten," and an anonymous quote similar to this, "The bitterness of poor quality remains long after the sweetness of meeting the schedule that has been forgotten." So testing is all about building reliable code, making sure it meets the spec, it helps us know when we're done and don't over design it and it helps us provide meaning and import to the continuous integration build, honestly in Python what does it really mean for your code to build anyway not very much, so in order to really test Python or any other dynamic language you really need to exercise it, and the way you exercise Python in an automated build is through unit test so testing is important and we're going to see how PyCharm can do that for us.
|
|
|
transcript
|
1:30 |
We have a new chapter, a new folder, unit testing so down here we have this application called program and let's go quickly create a run configuration for it, and it's got to have a name, something better than just program so let's call it program testing, so down here if we run this program testing you'll see that it asks you for your dinner reservation, think like super simple open table type thing, so it says what kind of dinner are you in the mood for, I'm open for Thai right now, all right there's two seats at Thai Roses and one at Siam Thai let's take the one at Siam Thai.
So great, it's booked, now we can ask again what else is available, oh there's just these two and if we keep booking them, you'll see eventually if we go and say what's there for Thai, oops, no tables for that food type, try another, so we've sort of booked out of Thai and we go Seaburgers, we got Skyline and Little Big Burger, and things like that; our goal is to take this application and put some unit tests in place in reality you probably should have built them up together but just for the sake of keeping things short during this class I don't want you to have to watch me write this whole little app and its core functionality in fact, we're pretty much going to just test the behaviors around here this sort of simulates the database but it's not really, ok so that's the app we're going to test and we're going to do this with pytest and PyCharm.
|
|
|
transcript
|
2:56 |
Before we actually write our test, let's just get everything kind of put together in place, so over here I'm going to add a Python file I'm going to call this something super exciting like tests, like this and in here we're going to be using pytest.
Alright, so we're going to import pytest, now pytest does not come with Python, it's external so it's over here in the requirements.txt and so you want to make sure that you install that for this to work, so we're going to have pytest and we're also going to import core and notice this is the root here, so that's going to work, this file is looking up for that one, so that's the source root, this should work, and down here the way we work with pytest is we just define a method it has the word test and then other, it has some stuff in it and then we can just assert, we can assert true, we can assert false, whatever so, we're going to just make sure that we can run this now if this was based on unit tests if this is a class called tests deriving from unittest.TestCase I believe then I could come over here and right click in PyCharm and say run unit tests in here I don't think it's going to do what we're looking for here, not so much is it, so we can't run it that way however, let's go and fix this, let's get rid of that one and we'll stay I would like to add a Python test run and notice all the different options, Twisted Trial, unit tests that's one I was talking about, pytest, okay great and what are we going to run, we are going to run a particular file sadly we have to browse all over the place I do wish that would remember its location let us select this, that seems wrong doesn't it, let's do it this way, copy path and enter path.
There should be no more arguments we're going to use the same virtual environment and let's use the same working directory just in case, oh yeah, and name, let's call this table test, try again, look, now we have the test runner, so we have all the tests are passed and we can expand those out and we can see here is this module called test it had one successful dot, and here is our other and if there was output from it, you would see that down here.
So we haven't actually done any testing yet but we have the infrastructure here and we can rerun those tests and we can right click and say run just this one or profile just that one or check the concurrency diagram or run it with coverage, all sorts of cool stuff even just jump to the source which is hey no surprise right there, it's the one we wrote.
So now everything in place, we're going to actually write some test methods involving our actual application.
|
|
|
transcript
|
6:32 |
So we wrote this test and we can run it and guess what, it passes because we're asserting true, but yeah, that's not really that interesting, let's write some actual test.
So remember, we're going to work on our core bit over here and it does things like pull back a table, you find available tables, given a choice and this is like a numerical value that corresponds to say like Thai food or burgers or whatever, so we're going to write some tests and the first one that we want to write is that there are tables available at all in the beginning when the app starts, for some food category, so let's name the test that, test_there_are_tables_available, nobody is going to have to call this so let's make it descriptive, so let's come up here and create a choice, we'll say our choice is going to be one and be super explicit about this, we'll say one tables, these are the tables corresponding to choice or category one, so we'll say core.find available tables and we'll give it choice and then we just need to do as assert that there are one tables that is that the length of these tables is greater than zero so maybe we could be a little more explicit I guess because who knows really what comes back here, maybe a query or something, so len maybe makes it a little more obvious.
Now let's go down here and one of the principles of testing is that basically we want to see the test fail first so let's just do a quick return nothing and run our test, we failed, we got zero where we expected it to be greater than zero, right here we asserted the value of that, now it being false, it is zero which is false and so on.
So let's get that little trick away, this is not a real database it's coming out of memory but just to keep it simple.
Now we should see our test.
Pass, awesome, so you can see all the output here that we get from pytest and we have our test there, let's go write another test.
The next thing that we want to test is that we can actually book a table, not just that they exist, but that we can book them so we'll test that table can be booked, and let's go and get the tables, so we'll say tables = core.all_tables that's just going to be something to start with and then what we want to do is say come over here and get a single table or selected table or whatever is going to be a table of zero we've already asserted that there are some so this should be okay.
So here's the table that we're going to work with and then let's say we're going to go book it so we'll book a table.table_id so then all we're going to do is that assert that the booked one, well we could assert that the thing is there and that it is booked, so we have a table that we got back, it is booked and maybe the final thing we'll assert that booked.table_id == table.table_id the one that we booked is actually the same one it might not necessarily be the same pointer, but it is the same one it looks like we're working with some funky offset here so let's fix that, there we go, okay, so that seems like a reasonable test, let's run it.
Boom, it passed, let's suppose for some reason it didn't pass we should put not equal here— boom it fails, so we can look at this test run over here a little bit we have a few things that we can do, notice you already have the time in milliseconds which is pretty awesome you can sort alphabetically, we can sort by the slowest to fastest you can collapse these down like this, or you can expand them out, so if we had it like this we could just go say look at different modules, we could come over here and run only the failed test, pretty cool, so we could rerun them again a bunch of times by clicking this, or we could run just the failed ones and notice this one is failed so of course, we go and fix it it's failed because we did sort of bad test, we run that and now it's fixed.
That goes away, there's no more ones to run, but we can run them all, there's one other thing here that is pretty interesting, here we go run them all up there, notice this, auto test, watch this I probably need to leave that up for that to have any sort of meaning but maybe make it smaller, so let's go over here, to our core and let's say we're trying to do an optimization or a non-optimization, I don't know let's define a method called test and it takes a t for table or just a table and in here, it is just going to do this, we could say test t now this is insane to write, we're not going to say this, like this is not how it would be but watch what happens, notice when I save that, it reran the test, it reran it right away, and like oh yeah this is supposed to be table so we could go back and put a t like this, hit save, wait a couple of seconds and now the tests are running again and it refactored this and say okay I wanted to say table here, that's cool, wait a second and so as you work on your program, the tests are just continuously running, I'm not sure I would really like to work this way, I feel like it would stress me out a little bit too much to just have this constantly like running, but it is pretty cool to basically have this green here meaning your program is okay and it's just a continuous light of status right, that's pretty awesome, let's unravel this because this is silly but it give a little thing to write some extra code there, all right, so those are the two— it's still running, isn't it, let's stop it.
So those are the two sort of straightforward tests, that there are tables and that we can book them, those are the main thing that we can do.
We're going to come back and look at a slightly different variation for testing error conditions, which is also important in code.
|
|
|
transcript
|
4:11 |
We've tested what I call the happy path or the successful types of things, we tested that yes there are tables, yes you can book a table, let's test the other side of things.
The first test we want to write is that you cannot book a non-existent table, so what do we mean by that, well over here we tried to book this table and we got this book back, and we don't really care about what comes back, this is going to be a string that's supposed to go in here and we're going to say not an ID, so when we pass not an ID, what we'd like to see is that this is an error, so what should happen here, well there should be an exception I think, it could raise an error or it could just return none, I'd kind of vote for raising an error, but let's see what happens.
Look at that, entity not found error, that sounds pretty awesome so we tried to say we're going to get a table but it said if there's no table we're going to raise this there's no table with this id, and sure enough, that's what we got, that's actually good, that means this is working we tried to book a non-existent table, we got an error but we need to indicate that, we need to tell pytest this is the intent so over here we'll use a context manager we'll say with pytest raises and then we give it the exception type so core.
ENFE, entity not found error also notice right here I typed ENFE just hitting the cap letters of this and it pulls up entity not found error and you can even see it highlights it, this is a really great trick for typing out long words, long type shortly.
And then we say, within that context block we're going to try to call his function and let's suppose for a minute it does not raise this, I'll just have it do nothing for a sec, and if we run this, well, I guess we weren't really able to get that other one to work, were we, I've got to say pass, let's just do this, we're not going to test that so over here we got an error because it did not raise the right kind of exception we got an attribute error and then somewhere up here we were expecting an entity not found error, so we got the wrong type, so you'll see that we're testing this and if we do raise that error now yeey, everything works.
Okay, very last thing, there's one other similar test that we want to do and that is you cannot book a booked table, so let's go over here and we'll get all the tables and we're going to book one and then we'll try to book it a second time.
So we'll get all the tables, give us the first one we'll book it by that id, I guess we don't really need this maybe we could just inline this I am not sure if this is better or worse, but here it is booked, so this one is already booked now we're going to come down here and try to do this again try to book the same one twice, so this should work out not so well in fact, let's pick a different one, I'm a little concerned that up here we're not resetting this and that we might have already booked that one, so we'll pick that one and this one as well okay let's see if we got it working— we do not, what went wrong?
Nothing went wrong, it worked, table unavailable, error however, why did our test crash?
Because we're searching or we're looking for an entity not found there, and we want table unavailable, now we should be all good.
Great, our tests are working, so hopefully that gives you a good sense of how to write and use these tests, we now have a pretty solid application, now let's take a moment and kind of step back here, step back and close a few of these things we're going to come with them out so that we're not actually running as much you'll see why in the next lecture.
|
|
|
transcript
|
5:04 |
So we have some tests for our little application here and granted it's really small so that's pretty easy to do.
Do we have enough tests?
Are we testing the important parts?
Are we ignoring the unimportant parts, also important for your sanity and actually getting stuff done?
But are we covering what we need to cover?
Well, if somebody came to me and said, I have this project and it's really amazing because it has unit tests and it has 1000 unit tests, it's really great how much testing we're doing, that's a pretty vacuous statement, it doesn't really tell me a whole lot what you're doing, yes, you have a lot of tests, that's probably good, they may be poorly factored or whatever, but how does it actually address covering the important parts?
It's been a ton a time like mocking out logging and testing that logging works, like who cares, it's kind of useless, you should be focusing on the core thing that your application does.
In this case, we should be focusing on booking tables and all the validation and data access around that to make sure that's super solid, so then when we do get to our program and consume this core library, it's ready to roll.
So the way you answer that question is with code coverage and the idea is we run our tests, the system is going to watch what other code is executed while our tests are running, and then give us some kind of report and even better than that, so watch this, we can go over here and run this test but instead of just running it like this, with debugging, we can run it with coverage.
We try to run in it, it said no, no, not so much, you need to install coverage.py or enable use bundled coverage, I am going to install this.
So it's installing that into our virtual environment and in just a moment we should be ready to roll, click the button again, test run, just like before however, it takes a little bit longer as there is a report here so come in here, project and unit testing, now we have some interesting stuff, so notice we're not covering, not interacting with program.py at all from our tests and that's probably okay, test everything, that is kind of not meaningful but core, this is what's important, this is the thing under tests, the subjects of test we can export this stuff out and so on.
Notice over here in the left how awesome this is like granted this stuff isn't run because I jammed all these projects together but in a real project, these numbers would tell you meaningful stuff about how your test addressed covering your project, that is super, super cool so this is great, this is greater I think that is better, now final bit of goodness I think is probably the best, check this out, if I go over here, it might be hard to see but notice the color we have blank on the blank lines, we have green, we have red so we click this, this line was hit, we click this, I have red, this line was not hit, right so this line here, not run.
So you can actually click here and navigate between the various places and see what was hit and what was not hit, but the important part is I can look at this code file in the editor and just like github, it tells me these are the areas that you still need to work on testing.
We are testing the book a table, and we're testing this stuff, that's all good, and we're even testing these if statements, but we're not testing the failure condition, so we're not passing in in this case a poor or missing table id, in this case, we're not passing in a booked one, let's go undo one of our tests here, let's do the non-existing one, rerun it again with coverage, port being generated, and down here, if you look this is now 96% instead of 93%, that's an improvement, and if we look, now this line down here right there line 40 has turned green because we now tested that error condition, actually sorry, no, line 34, we tested that error condition, still we haven't tried this booked one, so we'll go and uncomment this, this is the test that tests the failure case of trying to book a booked table, which is exactly what we're doing on line 36 and 37.
So we'll run it again with coverage, wait, now how are we doing, we're up to 100% coverage on our core, that's pretty awesome, all green, everything is good.
Now I don't want to leave you with the sense that I think you should have 100% coverage on everything, there is definitely a point of marginal return, the Pareto principle, that 80-20 rule of there is some core essence of your app and that should really be tested and you are kind of wasting your time with a lot of the supporting bit around the edges, but it's really nice that we are testing the core functionality of our app and PyCharm makes it super easy to discover and work with getting that done.
|
|
|
transcript
|
2:50 |
Let's review some of the testing concepts that we covered in this chapter.
So we started out writing tests and in our example we use pytest we could have used any of the variety of supported testing frameworks and here we have two tests, notice the long method names, these are descriptions not meant to be really used, so make them descriptive, and these are testing the happy path, later in our example you saw us actually test the assertions and errors as well.
Okay, so we're going to write this code but how do we run it?
Well, PyCharm has some great options for running our tests if it's the unit test kind you can actually just right click on the file and say run tests in this thing, it will detect that but for the others, we need to go and create a run configuration so over here you'll say go to Python tests and I'd like to run say pytest, so choose the options there and set that up.
Notice also sort of there is a meta testing framework called Tox and we can use Tox to test different versions of Python and whatnot so this kind of is also in the realm of Python testing but maybe not, instead of but more along with something like pytest.
Once we run our tests, you'll see down here we get some nice output, we get a little hierarchy of the tests that are passed and the tests that failed and if we zoom in on this a bit, we look at the various options we have down here so obviously we can run the test clicking this little run button and the one in the top right they do the same thing if the test can run configuration is the active run configuration you can also hit CRTL R or whatever your key binding to run your project is.
Here we can hide or show the passing test, if you have thousands and thousands of tests and only a few are failing you want to zero in on that, so you can toggle that, here you can toggle ignored test, down here, this is really nice, similar to the if I have a 1000 tests but only a few of them are failing and I want to deal with them, this button is really nice because they will only run the tests that failed the last time, so maybe you're running your code, there's some little bit that keeps crashing so you can run it this way until there's no more failed ones and then just run it again one more time to make sure everything is golden.
We also have autorun, this is pretty sweet if you have a really nice test coverage and the tests are fast, this will basically continually run your tests, any time you make any changes to the code either under test or the test code itself it will just run in the background constantly and just let you know the status of your application, basically as your type, which is really pretty awesome.
Down here you can import and export results and so if you want to save these for some reason or pull them in and analyze them, that's pretty cool, you can do that here.
|
|
|
transcript
|
3:01 |
Code coverage goes hand in hand with unit testing, one validates the other, it's great to have unit test, but to say your test passed, well that only has meaning if you have significant code coverage on your application.
So we saw that code coverage is a measure used to describe the degree where the source code of the program is tested by a particular set of tests.
To do this in PyCharm, it's super easy there's a little button right there.
So you can just click that or sometimes depending on how your tests are set up you can right click and say run this with coverage.
So this is really great, and then you get some output, however, the first time you try it on a particular project, it might not work, it might not have coverage.py installed so that's super easy to do, pip install coverage.py or just click that little button and a little hyperlink right there, and it will install it for you.
Then click the button again and you'll run it with coverage.
That results in some code coverage results coming out, chances are very good that you'll have close to 100% coverage of your test, that doesn't tell you anything, that just means the tests were run, you want to look at the subject under test, so in this case the thing that is really important is core.py and notice it's 93% covered and we have two tests, these are the happy path tests, and what we didn't really cover in this particular stage here where we took the screenshot, is we didn't test the error handling so there's like 7% of error handling just not covered, mostly the error handling altogether set which represents 7%.
But notice what we have on the right a kind of tabular view and then over in the projects, we also have the coverage right in the project view, that's really actually super cool, so we have 93% of lines covered here and you can see over there as well.
However, the real value, one of the real cool features that makes it really useful is the results also show up in the editor, so here you can see this is greenish, I'm not sure what it comes out in the video after processing, but it's a slight, slight green, it's very subtle but that means that function, every bit of it was tested by our test, that's cool.
However that part right here, that line 34 that was not tested, neither was that.
So it's telling us we need some more tests, so let's go write some more tests and basically if we write two more tests, as we did that test the attempt to book a table with the wrong id and attempt to double book the table, that'll run the two missing lines, we did that here and now we have 100% code coverage on our core stuff, that's pretty awesome, like I said, you don't have to have 100% code coverage but for the core essence of your app, you should probably have test for that and you can really determine what you need to do super easily with PyCharm and especially in the editor like this.
|
|
|
transcript
|
1:46 |
Unit testing is important for reliable code and PyCharm has support for most of the ways that we do testing in Python, let's try pytest.
Over here we have a starter project, in the beginning it doesn't really have any tests but it does have at least some working code that you can write some tests for, so over here, we're going to do a couple of things first we're going to configure the pytest test which is not super obvious on how to do in PyCharm until you've seen it, and then we want to use code coverage to see how well we're doing, realize we need some more tests, write a few more tests, realize now we have great code coverage.
So we'll start out by opening up your table create a virtual environment in it, open it in PyCharm, standard stuff, so we need to add a run configuration for the tests and so you need to go edit the written configuration, drop down, pull down, hit edit, go over here and add a new Python test pytest option, it talks about the settings to use to get it to work, when you run it you'll see, stuff is not so much working and they're all failing, now, that's okay that it's failing, for now, let's just run it with code coverage and see how much code we're even trying to run with our faulty test.
So we're going to come over here and run the test with coverage you may have to click the little button to install coverage.py into your virtual environment and then what you're going to do is you're going to start implementing the tests and you'll see in the test code, there's some little notes on how to do that what you need to do, once you get all the tests to pass and core.py has on 100% code coverage, you are done, you should see some awesome like this, all green at the end.
|
|
|
|
18:39 |
|
|
transcript
|
0:56 |
Our next topic is the scientific tooling and special features of PyCharm around the data science tools, so if you're working with things like NumPy, Pandas, machine learning, Jupyter notebooks, all of those things fall well in the realm of what we're talking about now, and you'll see that PyCharm has special support and debugging tools for these types of libraries.
So the first thing you're going to notice when you start working with PyCharm doing data sciency things is some of the packages that are well known to be used in data science contexts like NumPy for example, PyCharm sees you importing one of these, it'll automatically say hey it looks like you're doing something data sciency, do you want to turn on scientific mode, and that will flip open into a new mode, so let's go explore that now.
|
|
|
transcript
|
6:42 |
Over here in our set of demos, let's go create another project that we're going to call something like science or whatever, science mode and right from the start let's you say sources root.
We're going to create some new explore Python file called explorer.py, because we're going to explore some data here.
Now, we're in what I guess is regular development mode, I don't know, something like that, so we're going to come over here and we're going to try to work with some of the data science tools, we're going to work with NumPy, we're going to work with Matplotlib, and we're going to generate some cool graphs, now we're not going to use real data, we're just going to randomly generate data and plot it but if you care about the data science tools you probably have data and you can just pass that right in there.
So let's start by typing import NumPy and now there's a couple of things going on here, one you can see the pop up, PyCharm says looks like you're using data since mode, awesome let's switch to it, so let's do that.
Now we switch to this data since mode and that's pretty cool, however, the documentation isn't amazing, and this is red, why is it red, because we've not installed NumPy in our virtual environment down here, if we do a pip list, no NumPy, okay.
So we can use a code intention and say install this and of course it'll install it to our virtual environment and I closed that, didn't I, here we go, it was like that, all right great, so that works, now we should be better off with the documentation notice, now it's coming down, so it says module NumPy, it works with all these things, here is how you get going right, go to the NumPy home page and so on, so that's pretty cool.
What else is it telling us, it says you should probably put NumPy in your requirements, yeah we should, and finally it is saying you're not using NumPy, but that is just because we're still writing code, so let's say as in p.
this is standard data science stuff and then we'll import Matplotlib now, also not found, use code intention, install that into our virtual environment, wait a moment, awesome, now let's install it, we can see we have our documentation here what we actually want to work with is Pyplot, we'll import that as plt, so we're going to plot some random dots and let's say we want 50 random dots, we're going to have an X is going to be in np random, notice over here on the right we have all of the features of NumPy random, we can do random.random, random.bytes and so on, so we'll do random.random of N so what does random.random do, let's see.
It returns us random floats in a half open interval zero to one, perfect, that's exactly what we want and we also want one for Y so we're going to do X and Y and let's do some colors, and then we're going to compute an area we use np.pi, multiply that by 15 times np.random, random of n again okay, great so we've got that done now let's go with our plot over here in plt and notice we're now getting documentation for Pyplot, all really cool you could do this, by the way, outside of data science mode, right you could do this for anything in Python.
So we want to create a scatter plot of X, Y, make it nice and pretty, so this is cool, now we can say plt.show, we're going to show this and finally, let's just do an input waiting for exit.
So this is all good, you already saw that this is pretty neat down here we have our little special variables we could play around with this console down here, that'd be great maybe we don't need to see all this right now, I'm going to run our code, what is this warning about added the requirements, sure we should, okay, so we should be able to run this and see something pretty cool happen we have this data science view but there's nothing over there, however, if we run it in the debugger and we stop somewhere for example, let's try that we are totally running the wrong thing.
Here we go, let's come down here and we're waiting for input and notice that we've already got this graph, that's pretty cool right, right in here we have this graph that we can play with we also have some data, so we have our plots that these graph, and bunches of them pile up here, and we have data so that's not so interesting, why, because I ran this, I didn't debug it let's actually press the debug button.
Now we'll come down here, I'll squeeze this back so it fits and notice this stuff down here, these NumPy arrays, so X, Y colors area and so on, see these are nd arrays, now we can open them up and look at them like this, or in PyCharm we can say view as an array and up here, we get the area or view as array, now there's single dimension, so it's not super interesting but they could be multidimensional right, so really, really nice, you can see that debugger has special features we have our special SciView with the plot that we have here and the data and so on, we can turn on the little grid lines and whatnot.
I don't think it really affects this particular plot, but you can see really, really nice stuff here.
Now this is the standard, just write a Python script and go with it, how would this work if we ran this outside, here let's go here and activate our virtual environment and then let's say Python 3 this, we run it, and now what do you get, you get your little figures running outside and of course, any print commands or output there would go here, so this is pretty nice, those extra windows are kind of bundled up and kept there for you, and you see they even persist across runs, we could get rid of that one, but as we run it over and over you'll see it here.
|
|
|
transcript
|
2:15 |
We saw when working with libraries like NumPy that are typically used in data science, PyCharm detects this and suggests that it goes into what is called scientific mode, and in scientific mode, we have the couple of tool windows that rearrange themselves and you can always get to this under the menu system but it's nice that PyCharm suggests it.
Over here we have our main editor, we have our code documentation and this really only worked when you actually have the library fully installed, remember we had a virtual environment, NumPy was not installed, we had to use our code intention to install it, then it started working, and then down at the bottom, we have this Python console.
Now notice, this is an IPython console here and when I did the demo, for some reason, it was just a standard Python console, I couldn't get the IPython console to come back, I'm pretty sure the intention is always to be an interactive IPython console, who knows, I'm not sure why it didn't come up for me when I was doing the demo for you.
So, it's really nice that these tools come up like this and when we write our code, we'll see that we have another area called the SciView, so we have the documentation, but we also have this SciView.
Now, any sort of graph that is going to be shown will appear here, when you run it, whether you're debugging or you're not debugging, so we saw that when we call plot.show normally that's a separate window per plot that just pops up but if you do it inside PyCharm in this data science mode it will actually just here in this SciView over here, so that's pretty cool.
Now if we actually debug it and stop here in a break point, we get some more options, so if you look down here at the bottom in the variables, in the debugger the things that are certain types of data science variables like nd arrays from NumPy actually have this view as array, so if you click on the view as array, over here on the right you'll see you have this nice visualization.
Now this is not super exciting because it's one dimensional but it could be two dimensional or more over here on the right, so it's pretty cool that this option is available while you're debugging as well.
|
|
|
transcript
|
4:33 |
Writing code like this was really fun and this is certainly important in data science, but one of the premier tool sets that people use these days when they're doing data science of course, is Jupyter notebooks, and we'll see that PyCharm has special support for Jupyter notebooks as well.
So let's take the same bit of code and redeploy it, revision it as a Jupyter notebook, we'll come over here, right click and say new jupyter notebook and I'll just call this explore as well, and now we have right in line here a Jupyter notebook and we can have different things, like we could have a heading, saying this is our data exploration, great.
Now we can go and try to run it, and that works but let's go and do some code.
We're going to work with basically the same code here so let's come over here and do our imports, and try to run that, now, something maybe somewhat unexpected happens, it says, okay, well where is the url for your running notebook server and you're like wait, running notebook server— come on what's going on here, I don't have a notebook server, I'm trying to get started with Jupyter.
So if you actually cancel this, it will go and propose that the system set up and start a Jupyter notebook server for you, so let's cancel this, it says couldn't connect do you want to try to run it.
Now remember, down here we don't have Jupyter install we do have some of the data science, but we don't have Jupyter, so we'll go over here and let's do it one more time and click this and it'll try to basically install it for us, so it says we're going to run like this, oh except for that we can't because it's not installed, so you get fixed, watch this little part down here, my window is being small for recording, it's hard to see, but there you go, installing Jupyter.
So it's all fixed, you can see it's done, I would actually like for this little fix warning thing to go away when that happens, but it didn't at the moment, so we'll just hit run, and then everything is up and running.
Now, we could use this, right, we could use this but in fact, we can just put this section away and hit play again and guess what, it looks like it works, like we could try print Hello Jupyter, it is working again, all right.
Now, let's take our code over here, let's work on our data bit, using a few little blocks here, run that so now we have our data all loaded up and we can do that, and over here, notice something happened we have our science view, and it just popped up the same graph over here so let's go and actually make a change to say, no in Jupyter, what we typically want is we want our data shown in the notebook, so let's go back to the top and we're going to use command is directed to Jupyter, not to Python we can use Matplotlib inline, now it decided it has to reindex something so this went gray for a second hold on.
Okay, so run that again, run that again, now if we run our plot, boom, right there inline, how cool is that?
In fact, I don't even think we need this show anymore, let's see, we don't need it, but we don't want to output that where that pointer is.
Okay so here is our same bit of code that we wrote over here, but now we've written it in a Jupyter notebook style and we've used the Matplotlib inline to make it render here instead of pop up separately, pretty cool huh?
So if you're using Jupyter notebooks this is how you do it, there's a few steps, you sort of try it, it doesn't work, you hit a button to fix it or you cancel on that and hit the button to fix it, so it's a little bit of a back and forth, but it's really easy once you get it set up, an it's even easier because it's already installed, so very, very cool, the support they have here for this as well.
|
|
|
transcript
|
1:47 |
So we've seen that we can explore data in Jupyter netbooks right inside PyCharm as well, so create a new Jupyter notebook and you can just start typing, here we have just a standard Python variable being declared, if you want you can pip install Jupyter within your environment preemptively or as we saw, when you try to run it, PyCharm will open up a dialogue and suggest to fix it for us.
So if we try to run it, even if Jupyter is installed it probably is not running at first, so it'll say couldn't connect, do you want to run it, you click yes and it will pop up that dialogue you either just press run, or you have to say fix it by installing Jupyter and then run, that's cool, so just click right here.
Once it is running, this url you can actually use in your web browser to get back to the Jupyter notebook and interact with it, but if you want to just run it within PyCharm, you actually don't have to use the url, just minimize this window and hit run again so the little play button right in the middle and now it'll just discover that that server is running inside itself and connect back to it, and that's pretty cool.
So here we have a message, some imports basically the same code that we wrote, this is just a Jupyter notebook right here.
And right now we have the plot showing over on the right and if you want to have it inline, remember use that percent in Matplotlib inline.
So we write our code, and then the stuff shows over in the data science view as well.
We can even do other things, if you're familiar with Jupyter notebooks you know this we can do for example markdown right here, why, because you can, right, Jupyter notebooks are not just code, but they are sort of reports around exploring code and data which is why people love them.
|
|
|
transcript
|
2:26 |
The data science tools are fun to play with because we get to draw cool pictures, so in this your turn, you'll get to create some cool looking crafts like this and draw them in PyCharm, both directly within PyCharm and by using PyCharm's embedded Jupyter notebooks.
Go down, you can see your steps are here, so we're going to start up by using PyCharm's data science mode and if we just start working with the data science libraries we saw it will actually suggest and adapt to that directly, we'll draw some cool graphs and then we'll do the same thing but this time we'll redo it again but in Jupyter notebooks and there are a few minor changes to make things work the way you might want.
So we'll start out aiming to draw this picture we're going to use Pandas, Matplotlib and so on, so create a new project, we're going to write this import up here and then we're going to important NumPy and once we do that it says, oh, NumPy science, you want to be scientific and go into scientific mode, yes, you do, click that.
So then we're going to add this remaining imports, we're going to write some code here to create like a three dimensional parabola, sort of inverted quadratic equation type thing and we're going to put it here, you might get a warning about arange, don't worry it should be working, PyCharm just doesn't detect that correctly for whatever reason you want to create a surface and show it and it should look like this in PyCharm, you also get a warning about this color map coolwave, also, it's fine.
So you get this working, this is really cool, over here in this science view, now we're going to do the same thing in Jupyter notebooks, so we're going to create a new Jupyter notebook, and the code is slightly different, you want to tell Matplotlib to render inline you have to do a few steps to actually install and set up Jupyter notebooks, so that's pretty interesting, there's a few things we got to do here, notice there is this fix button you have to click, it is going to do some work, it's going to eventually be ready to run once you click run, you'll be able to use this url, you don't actually have to click it though, you just go and rerun, there's a little button that's hiding right here, a little green button, you just click that again, it will automatically connect, that's awesome.
And then you'll go and write the rest of the code you don't have to do the service.show this time because Jupyter knows about it already and down here embedded within our Jupyter notebook is basically the same output, it's pretty cool.
So, have fun drawing pretty pictures with PyCharm.
|
|
|
|
14:43 |
|
|
transcript
|
0:22 |
Ready for a grab bag?
So, here are a couple of tools that are really important and super helpful and we've maybe touched on them a little bit, at least some of them, throughout the other sections but they don't really belong in any one of those sections.
So, I've put them here in the additional tools, and I think almost any one of these you'll find to be really, really helpful.
|
|
|
transcript
|
4:33 |
The first assorted tool that I want to talk about has to do with keeping notes for yourself.
There's lots of ways you can track what needs to be done with a program, you can have a github repository, and have an issue there on a particular thing or just some kind of issue tracking in general, Jira for example.
You could have code comments and those maybe say hey sometimes you need to optimize this function or make sure we have the proper error handling here, things like that.
But how do you know to go back to that and where should you go back to actually to get it.
So check this out, if we come over here, let's go to the search, actually not the search one, let's go to one that has something more interesting, let's say over here, we want to have some kind of reminder, we could say for this, you know what, this is great what I want to do is remember to use a hash rather than full text for the key, so it's great and we could remember that and somebody comes in here and they are looking through and they find this and then are like, oh yeah look, here I'm supposed to remember to do this.
But, on large projects that doesn't maybe work so well and also how do you know if you got them all.
So I can come over here and type TODO, that's cool and then boom, that turns yellow, okay, so that's kind of cool, the yellow stands out and you are like here is something I really, really should do.
So maybe we'll say key = hash (key) and now we've remembered to do that, something to this effect, but how do we find them all, if we're not on this page we don't know to go on and do that, so here we have this little to do thing, so down here in this section, we have two things that are to do's and check out the little color there, this one, we got to improve the index on our data access when we did this demo, we theoretically improved the index it made it a 100 times faster, 20 times faster, I can't remember what we did, something like that.
And over here this is remember to use the hash, so this is really cool, we can jump around on and go to these things.
So we can come here and we could say yeah, that was great, we improved the index and that one goes away, come over here and say, yeah I think we did this, let's run this again, just to make sure where is our performance one— make sure that still works it's pretty fast, it looks like my little hashing trick worked, it was not too much work, was it, I could have done that before but this little reminder was kind of nice.
Now, these are great, except for sometimes you get other people's reminders, watch this, so check it out, we have 69 other reminders, really, I don't remember doing that much work, here's the eggs from our virtual environment and in here, these are all the reminders to do with this thing.
So watch this, if we go over here and jump to the source on this one remember, we can set these directories as excluded and one of the things that happens when you exclude the directory, in addition to other things, is it no longer tracks the to do's in there, that's pretty cool, notice same thing for node down here in or less file, it doesn't have to be Python in our less file, we have a to do, but you know what, this bit right here, I am not really sure like we don't want to exclude bootstrap all together so it's kind of careful, we don't want to just go and do this because I'd love to get intellisense autocomplete for bootstrap and its Javascript, but this stuff, like this less here, we don't need it for that, do we, so let's exclude that, there we go, now we have zero to do's, so let's just go put one more in and collapse everything down for a sec, maybe something like this, to do, evaluate whether to expire the cache, right, we probably need something different than just his wrapper, we could move the caching concept into our method and do it ourselves, but now we have another one and see right here, if we expand it out that's our final to do.
So this to do thing, I find this to be actually really helpful, I don't think it really replaces issue tracking but it is pretty handy to put reminders in here just don't forget to follow up, like don't put a reminder like we should really check if the user is admin before we do this but I am just going to write it for now, if you forget that, that's going to be bad right, ok so to do's— pretty sweet.
|
|
|
transcript
|
1:05 |
The next assorted tool we've been using a lot actually, it's kind of unavoidable to get much done, and that's the run window.
So down here we have the title run window and if you have a run configuration you can just run it and it pops up, so not too much to say about the run window.
You can do input into it, like this is input and it has nice green coloring to indicate, you know what that is we go down here put a 1 to choose Thai food, then we want a book the number 3, great, you've already booked it and here is our book and reservation.
So we've seen that, that's pretty cool there's things like line wrap, scroll the end right, so you can tag this and pin it down so it will keep scrolling to the end, things like this.
That didn't really love that, did it, but it did scroll along with it that's great.
But, of course, really central, the way you run stuff down here is click this button and of course, you can rerun it over here, you can even pause the output, I don't think that stops the application but maybe pauses the stuff from shooting by, so you can go check it out and this will fully stop the program, just like a CTRL C basically.
|
|
|
transcript
|
3:03 |
The next one that we're going to talk about is the Python repl.
So that's what happens when you go over here and you type Python, hopefully Python 3, this thing over here, this read print evaluate, print loop over here that we can run and it's great that we can go to the shell and run this, but it'd be nice if we had a way to work with the Python repl that knew about our project, that knew about our settings, our virtual environment, all that kind of stuff.
Well, that's what's called the Python console and it's pretty sweet and this is like a brand new thing over here on the right actually so there's a couple of things to notice, first, it's explicitly calling out that we're working in our sort of root folder up here, so that's been added, that's great and it's also running our virtual environment, this is the one that we put in the beginning.
So this is really great, and look at this, it even remembers what I was doing before, so let's play around a little bit, if I say var = some value, notice over on the right we have var = some value, and we could even change it this is basically the debugger, this could be some other value and then now here we say var, and you can bet it's this.
So that's pretty cool, we have this kind of like live debugger view into the Python repl, in my opinion that's massively, massively better than just typing Python in the shell, so the other thing that we can do, because of this really is we can work with our project, it's also awesome that we have our virtual environment so we can come over here and say import and notice we can import course.
oh actually I don't think we got that far we say demos.projects.
and look here's our entire project what do you want to work with, let's work with the podcast one, down here, what do we have, we have the program and we have the service and we could say as svc, we can say svc.
and look at that, this is all of the stuff that we get there so let's say download this, right, it's going out to Talk Python and downloading that, I could say get episode like this and let's put 122, I'm sure that will be around, bam, look at that, so we can jump right in and you get auto complete you get all of your project set up, you get it the same as you're running, the same virtual environments, all these things, and on top of that, we get this great debugger over here, if we open this, this is like the things that it finds, so here's the little service thing that we've created you can get things like the name and so on, so we come over here and look at our episode data, and look, there's all the upsides, pretty sweet way to explore the shell here.
I really like this, I find that I use it some of the time when I kind of want to test something out and I know I need my database connection and my models and I just need my environment but also want the repl.
Here you go, this is how you do it.
|
|
|
transcript
|
1:54 |
Sometimes you want quick access to your shell and over here I could obviously open up terminal and I have my shell and I happen to run, you can see up here zsh I run oh my zsh which is really, really nice you can get it on ohmyz.
sh really, really nice, my favorite by far.
So it does things like if you're in git repo right here this is the one for our course you can see that it changes the prompt to adapt to get status and things like that, so really, really nice, it has great memory of what you've typed and sort of auto complete and so on.
Now, when we're over in PyCharm there are times when we might want access to the terminal but just kind of like with the Python console we wanted sort of in our working directory with our virtual environment activated so if I wanted to actually work with this I actually come over here and go oh yeah what is this thing, let's see in here there's this, this, so maybe I can activate this and then go to the right directory and so on, I can easily recreate this, but I've got to know what I'm doing and sometimes you just want to quickly run a thing as if you had gotten into your proper environment and that's down here, so notice, automatically activates with our virtual environment and notice that it picks up your native shell so I'm using oh my zsh like I just said, and here it is right, you see it's actually down here and the last thing I typed was that, it has auto complete back to my normal things, so it's really, really nice, if you want to do something like pip install-r requirements that one, see it even auto completes through those, boom, and that sort of works against my environment that is my project right, we just ran that against that against that virtual environment, so really, really nice to just jump into the shell but the shell activated the way your program or your run configurations and your project would see it.
|
|
|
transcript
|
1:45 |
The next tool area window thing we want to look at is favorites, and that hides over here by default, I think.
And this actually brings together three things that you might want to track.
First of all, if you go to any of the files like say this core compute maybe we really want to keep access to that, so we could right click on it, we actually go over here, can we do it here— yes, add to favorites, and you could make either a new list like data access in my thing will just search your whole project, I'll throw it there.
and now we have access to that, so let's suppose were over here, we care a lot about this testing so maybe we want to add that to our favorites and so on.
So if you've got some big project, it's all collapsed right you can jump back and forth between these various places.
The other thing that you might want to do is you might want to add some bookmarks, so over here, we got a bookmark and we can create a little bookmark right at that location, so these are the two tests let's say we want to bookmark the two tests that are sort of the negative case, checking for errors and then over here, we've got out two little bits, right we can just jump back and forth between those; and finally, if we have any break points, we're over here, we set a break point here, set a break point there, maybe another break point there, we can get to those as well, and notice this last one over here is a conditional one whereas these ones are normal.
We could even edit it by right clicking, go and change all of its info, if you really wanted, it's very nice, the ability to sort of save stuff and navigate around here.
Honestly I don't use it that much, maybe I should, actually I kind of like the bookmarks especially, quite a bit.
|
|
|
transcript
|
2:01 |
The final little window feature thing to check out is project structure, or file structure.
So over here in my project, we have just the file, notice I have opened up my Jumpstart course demos just because I need something more complicated than what we've written so far in this course, not much, but a little bit.
So over here in this wizard battle, which we've played with before, we have our actors, so we can explore the file structure like this but this structure structure thing is for structure of the individual file that you have open, over here is program, you can see we have some methods here and over in actors, well we have some classes and we can either just have them in the order that they appear or we can have them alphabetically sorted, let's go with alphabetically, and by default it's all sort of collapsed here so we can expand this and see what is in creatures, do you want to go to the get defensive roll— boom, we're there, do you want to go to the level where it's defined, it's right there.
Similar with small animal, get defensive roll, it's overwritten version, there it is.
So this is all pretty cool, we can actually look at it in greater depth, if you want to look at all the inherited stuff, so there's creature, here is dragon, you could see the highlights or the colors are for the ones that it actually implements and then the gray is for the stuff that it comes from the base class, so for example, we are in dragon which gets its level from right there, from creature, so this can kind of help you look at some code and go okay, I think this thing has a level, where does it come from, right, this will help you somewhat, there are probably other ways just go into definition.
So this is pretty cool, but you can see it takes all of the dunder methods as well which is pretty intense, so generally I would say turn that off.
And not a whole lot more to it than this, but be sure to flip over here if you are trying to quickly navigate between files, or within a file that's fairly complicated like this one that has four classes that all derive from each other.
|
|
|
|
8:39 |
|
|
transcript
|
1:19 |
It's time to focus on the plugins and there are so many things that we can add to by PyCharm to make it do awesome stuff, maybe you wanted to support Vim key bindings and it doesn't, well just go to the plugins and add them, you want to work with NodeJS, we saw that was a plugin, you can do that, or ElectronJS, all sorts of stuff, and we'll see there are a bunch, we'll survey some of the ones I think are notable and look and explore how you might add third party or external ones.
Plugins are things we can add to PyCharm, over here in the settings slash or angle bracket whatever plugins and there's a bunch of them built in and you need to be a little careful here because the ones that come with PyCharm, these are the ones that basically support the features of PyCharm, so for example, we have cvs integration, maybe you don't care about that but right above it, css you might care about css support and if you uncheck it, you won't be able to get any help with css files anymore.
So be a little careful in that much of this stuff is actually the functionality of PyCharm itself, but then you'll see we can turn them on and off and we can also add new ones and maybe the most exciting thing there is that we could just go get a ton of other cool things that were not built in and bring them in.
So let's go do some playing around with these.
|
|
|
transcript
|
2:17 |
Let's go and have a look at these plugins.
You can hit command comma on basically any Mac app to get to the settings or you just go PyCharm preferences I think it's called settings in Linux for or reason.
Anyway, go over here to the plugins section and notice there's a bunch of cool stuff already installed and I have only installed one or two additional things.
First of all, notice I have disabled things that I don't care about, I never will do cvs again, for a long time back in the mid 1990's I guess I used use cvs but I have no intention to using that again.
Gherkin, no, GNU text, no, Haml, no, so I went and I turned some of these off, I think that makes PyCharm start a little bit quicker, I don't really know but it seems like if I know I'm never going to use them, I might as well turn them off.
So let's look at some things that are here.
Now, one of the questions you might ask is is this a built in thing that came with PyCharm, or is this some kind of third party thing.
So over here, notice how there's not much information or hyperlinks that means this probably just came with PyCharm when you installed it.
Similarly, CoffeeScript, there's no like this is run by Joe and here's his getup repo, these are all builtin things, right, so let me try to find something l've added that wasn't builtin.
NodeJS, but you can see the vendor was Jetbrains, so it wasn't builtin but it was built by Jetbrains really for WebStorm and I added that.
Nginx is a thing I added so this looks pretty active over here and you can see this is actually done by Max, thank you Max I'm really glad that you built this.
So we'll talk about this one in a bit.
So that's pretty much your clue on is this a builtin thing or is it external, right, if it's here, it doesn't have an uninstall button and it has no like external repo, here this one I can uninstall, not just disable, and it has a repo.
Okay, let's see what else is builtin that we might want to talk about, so you've got the profiler stuff, you've got Docker, you've got a nice rest client, we haven't really talked about that in this course, but it's pretty cool, Vagrant and so on, Yaml, a lot of really cool support but like I said, I actually turned these off like so I have no Saas, unlike Less, so we'll go with that, and maybe if I need it, I will turn it back on.
|
|
|
transcript
|
5:03 |
You've seen the builtin plugins, let's go look at what we have for the external ones.
So when you get to this list, this is really the builtin ones plus the external ones, you come over here and see if there is some Jetbrains ones that maybe weren't there, like for example Handlebars and Mustache, these are ones made by Jetbrains or at least collaborated on by Jetbrains, but not necessarily shipping, whereas like this one, there's no install button, it's builtin.
So that's cool, but the real good stuff is over here in just browse everything, so suppose we want better support for git ignores, so here is your git ignore, your Mercurial ignore, all that so we could install that and what do you get, you get things like syntax highlighting for ignore files, template and hide them in project views, all sorts of cool stuff, so we could install that, if we want.
What else do we have that's in here that's pretty interesting, so there's just so many, I did sort of a rough counting by scrolling a little bit, look at how many things were on a page, how many pages I could guess out of the scrollbar, I guess there are about 1600 plugins here.
So let's start with one that you've seen throughout the course, it's presentation assistant, this is really awesome when you're doing a presentation recorded like the one I'm doing or at a meetup or something, so whenever you do an action, as you know you've seen the little green stuff popping up down here over and over, and that's what does it, this presentation assistant thing, so that's pretty cool.
I also find like I said, it's good for helping me learn what the keystrokes are if I click a toolbar button all that's what the name of the command is, the keystroke is such and such, so that's pretty cool.
If you want to add additional languages, there's things like Rust, Rust is pretty awesome new language from Mozilla, so here is support for Rust as a separate language; we could have Dart, from google, here it's built by Jetbrains, the support for it and things like that, so all sorts of additional languages we can find if we just search for languages as a category so I got a bunch of different categories here.
So what else do we have that we could work with, Apache Configs, a lot of this is sort of file structure, so bash files if you're going to work with you sh files or something like that.
Coocoo, I've never even heard of the Coocoo language but I'm sure it's amazing, there is D support and so on.
Okay, so if there's a language that you use that is not supported there's a reasonable chance that it's here.
Another thing that you very well might want to look for is Javascript stuff and how will that show up here— let's just look in everything.
We already saw there's AngularJS, but we could add like little live templates some other things you go check out the home page, see what is cool about this, apparently this is collaborated with Jetbrains, this must be the one that's builtin because I can't install it.
I'm a big fan of a VueJS, and that's already installed, so VueJS I think is a nice simple frontend framework for some reason in this brand new version of PyCharm this stopped working, it worked in 2017.2.5 and then it went to 2017.3, it's not working, probably by the time you watch this video it's back to working, which is pretty awesome.
We're going to do with TypeScript, there's some more generator stuff, so if you want to work with these Javascript frontends, Ionic, oh yeah Phone Gap, Cordova plugin, pretty sweet, it has Ionic support.
If you're working on a project and your tooling PyCharm doesn't have support for it or WebStorm if you're using that, go over here and check these out, because there are a lot of good options.
Another one to think about is, I know a lot of people like Vim mode, so you can come over here and enable the Vim key bindings and various other Vim behaviors, one that is pretty cool if you're going to do a lot of, obviously, you're going to do string manipulation, so this one is cool, because it lets you convert say from Javascript style to Python style, or to constants, you can get screaming snake case, versus snake case, maybe you have a variable, you want to make it a constant, so you would convert it from this to this, something like that, so a lot of string manipulation options here, so this is a pretty sweet one.
Here is what you've got to do, when you start working on a project, or you're feeling sort of you need a break and you just want to look around, come, click browse repositories, put your cursor up there and just type around and look what's up here, there is really a bunch of cool stuff to add.
|
|
|
|
11:42 |
|
|
transcript
|
6:43 |
Look at that, it's the finish line!
You've done it, you've finished this course.
I hope you really learned a lot, because you now possess many of PyCharm's superpowers.
All of these amazing things that PyCharm does, you've now seen in action, you have these hands-on your turns to try them.
So, let's go and review what you've learned.
We began looking at the concept of IDEs in general, we talked about the spectrum of editors and the value that IDEs bring.
We talked a little bit about are they fast and what you define as fast, is that literally the launch speed of the application or how fast you write code, what you're optimizing for, things like that.
We began our actual exploration of PyCharm by focusing on working with projects, large and small, we checked out some very complicated, nested directory structure that required some arrangements using the Jumpstart demo code and things like that.
We saw that there's a ton of really powerful navigation features around navigating across files in your project, finding usages, go to declaration and things like that.
So you really start with the projects, right, that's where you're going to create your files and write your code.
Writing code, well that's the editor and we saw the editor has a whole bunch of amazing features and we honestly just touched on some of them, we can't really be exhaustive here, we'd just go on and on, but he editor is really powerful, great syntax highlighting, code formatting, code completion, documentation generation and all kinds of stuff.
So the editor really, really great and of course, front and center in PyCharm is — We worked with source control and we focused on git and github, we saw that many source control systems are supported here but of course, git is sort of the source control de jour, so that's what we were playing with.
And, we saw that we can do branching, we can see even inside the editor the changes that are not committed to source control, so we have green bars for code that's new, we have bluish bars for code that has changed, things like that.
Refactoring is a really powerful technique, but you need a proper editor and the thing that understands the abstract syntax tree of all your files to make this work reliably and safely.
Remember, refactoring is not just change your code to find and replace, it actually understands how your code is used and changes it.
In this section we saw really awesome refactoring tools just around Python, but later when we got to the web, we saw actually that applies to Javascript and other things that are supported within PyCharm as well.
The relational database support in PyCharm is really unrivaled, it's so amazing, the tooling that you get just for exploring the data is great, the tooling that brings the schema of your database back into your Python code for those embedded SQL strings, that just blows my mind, and continues to delight me every time I see it.
Python is a premiere language for writing web applications, we talked about YouTube and Instagram, and all these other amazing places, and we broke our discussion of the web into two parts, server side code, Pyramid, Flask, Django, that type of things, with the page templates, and support for project structure like setup.py in Pyramid or manage.py in Django, and there are all sorts of great support that we covered here.
We also talked about css, HTML, Javascript, and in Javascript frontend frameworks on the client side as well; we talked about less, saas, TypeScript, so many things on the web side that you get.
And remember that somewhat comes from PyCharm and that somewhat comes from WebStrom which is a subset or embedded within PyCharm.
The debugging, the visual debugging is really powerful and awesome, and it's honestly one of the reasons I come back and back to working with PyCharm.
One of the other is the really great autocomplete and support around that as well, those are probably my two favorite, most amazing things that PyCharm does.
In Python, packaging is really important, but it's a little bit tricky if you haven't done it a lot before, and we saw there is a lot of support, both directly in creating new packages and actually in the refactoring for converting two and from packages.
When you want your code to go fast, sometimes it's really hard to use your intuition to know where it's slow, where it's fast, I've tried to take a guess at this before and failed many times, so you need tools to visualize how your code is running, where it actually is fast and when you make a change, what does that change do.
So the profiling tools, the visual profiling tools in PyCharm are pretty straightforward and simple, but really powerful and I definitely encourage you to use them when it makes sense.
Unit testing is really important, it's extra important when you're working with dynamic languages like Python, and we saw PyCharm supports the whole breadth of testing options in Python, the builtin unittest, obviously, but pytest, Tox and a bunch of other things, really great.
If you are a data scientist, PyCharm has this special data science mode it has the science view, it has its special debugging for regular Python code, as well as it has builtin support, and help for Jupyter notebooks.
There are some things that didn't really fit into what we talked about so far, like the terminal window or various other little windows and tools, so we threw a few in here, the Python console, stuff like that.
We saw that if the things that we've talked about so far are not doing what you want, and you want something more, there is a whole bunch of plugins that you can get for PyCharm and add them on, you want Vim mode, go get a plugin for that.
You want NodeJS support, go get a plugin for that.
One that I use is Nginx for working with Nginx configuration files, that's really nice that you get some help there when you're working with those things, so tons and tons of plugins, and really great that those are out there.
Look at all these things you've learned, and honestly, we really didn't cover everything, there is actually a bunch of other features that I left out of this course, just for the sake of time and focus and so on.
These are your superpowers, you can now go and apply all of them at the same time within one tool against your project, and let me tell you, you can go build something awesome, so get out there and do it.
|
|
|
transcript
|
2:35 |
Remember at the beginning we talked about how to learn the features of an IDE.
And if you see a picture, if you open your screen and you see this here you may think, oh amazing, look at all what this does or you may be like oh my gosh, I just want to edit some code, how do I work with all this stuff.
So you really need to learn the features of the IDE to make every one of these things be a benefit and not just a distraction at best.
So let's review the technique that I talked about.
Now, when I introduced it, it was maybe abstract but we've seen so many features that you probably want to use, how are you going to remember them?
Well, remember I said you should first discover what those features are, and that to a large degree is what the purpose of this course is, it takes you through all the features, it shows them in action it shows you the true benefit and the particular times to employ those.
We kind of solved the discover problem, obviously there's more to discover, but you've got a bunch of that now you need to remember them, which is tricky, and you need to practice them.
So I had this plan for how you could do that.
There's the cheat sheet that you download from the beginning of the course, then you can install presentation assistant, which I hope you did, that's one of the plugins and that will tell you every time you work with a menu item or you do something it will tell you what the name of the feature is it will tell you what is the hotkey is, which I think is really important to learn the hotkeys of everything, and then get yourself a set of sticky notes or a piece of paper cut up into small pieces, write down the things that you're like I really like this from this course and I want to make sure I make it part of my daily routine, and put one of those sticky notes on your monitor and try to make use of that every time it makes sense, maybe one of them is refactor to a method or refactor this, maybe one of these is just to use conditional break points or something like that, you could write down 50 of these things and put one on your monitor until you've used it enough you feel like yeah, that's totally going to stick.
So these three things I think can really help, hopefully this course has helped as well.
Do make a concerted effort to find all the features you care about and find a way to make them part of your daily routine, at first it might seem overwhelming, there will be a bunch of things you have to learn, but in the end, you'll really have many more super powers, I described this at the beginning of this section, you'll have these powers and ways to work with your code that maybe you didn't have before.
|
|
|
transcript
|
0:27 |
Here is a reminder to not forget the source code.
We built a ton of projects and example code in this course, and I want to make sure you take it with you, so, be sure to jump over to github.com/talkPython/mastering-pycharm-course and star this and consider forking it, at least clone it so that you have it locally.
So I want to make sure that this is a resource for you, so star and fork it and don't forget.
|
|
|
transcript
|
0:37 |
I hope you've been taking advantage of the your turn exercises while you are going through this course.
But, if for some reason you haven't, be sure to go over here and go through the various exercises, we've got one for almost every chapter that we cover in the course, and they vary in time between say 10 and 30 minutes for the very longest one, depending on your experience level.
So I think these will really help drive home, and highlight the various features that we talked about, and will help you remember much like I talked about in the wheel there, this is one of the practice steps right at the beginning that I think will make a big difference.
|
|
|
transcript
|
0:49 |
So you've spent quite a while with PyCharm to get this far in the course, and you might be interested in a little bit of the backstory, where did it come from, who were the people behind creating PyCharm.
I want to highlight an episode of the Talk Python To Me podcast that I recorded with Dmitry Trofimov.
So Dmitry is one of the core developers on the PyCharm team, and back in November 11, 2015, so a little bit ago, but still relevant, I interviewed him about PyCharm, his work there and the internal workings of PyCharm, there is actually a ton of interesting stuff here, so if you feel like spending an hour with me and Dmitry just chatting about PyCharm, well, head over to talkpython.fm/36 and check it out.
|
|
|
transcript
|
0:31 |
Finally, thank you for taking my course, I really enjoyed writing it for you, I hope you've learned a ton and really appreciate everything that you've gotten out of it.
Feel free to follow me on Twitter over at @mkennedy check out the podcast at talkpython.fm and I hope to see you online, or a conference somewhere around the world.
If you enjoyed this course, please consider recommending this course or any of my other courses to the people that you work with or your friends and colleagues.
Thanks and goodbye.
|