|
|
|
8:26 |
|
|
transcript
|
1:39 |
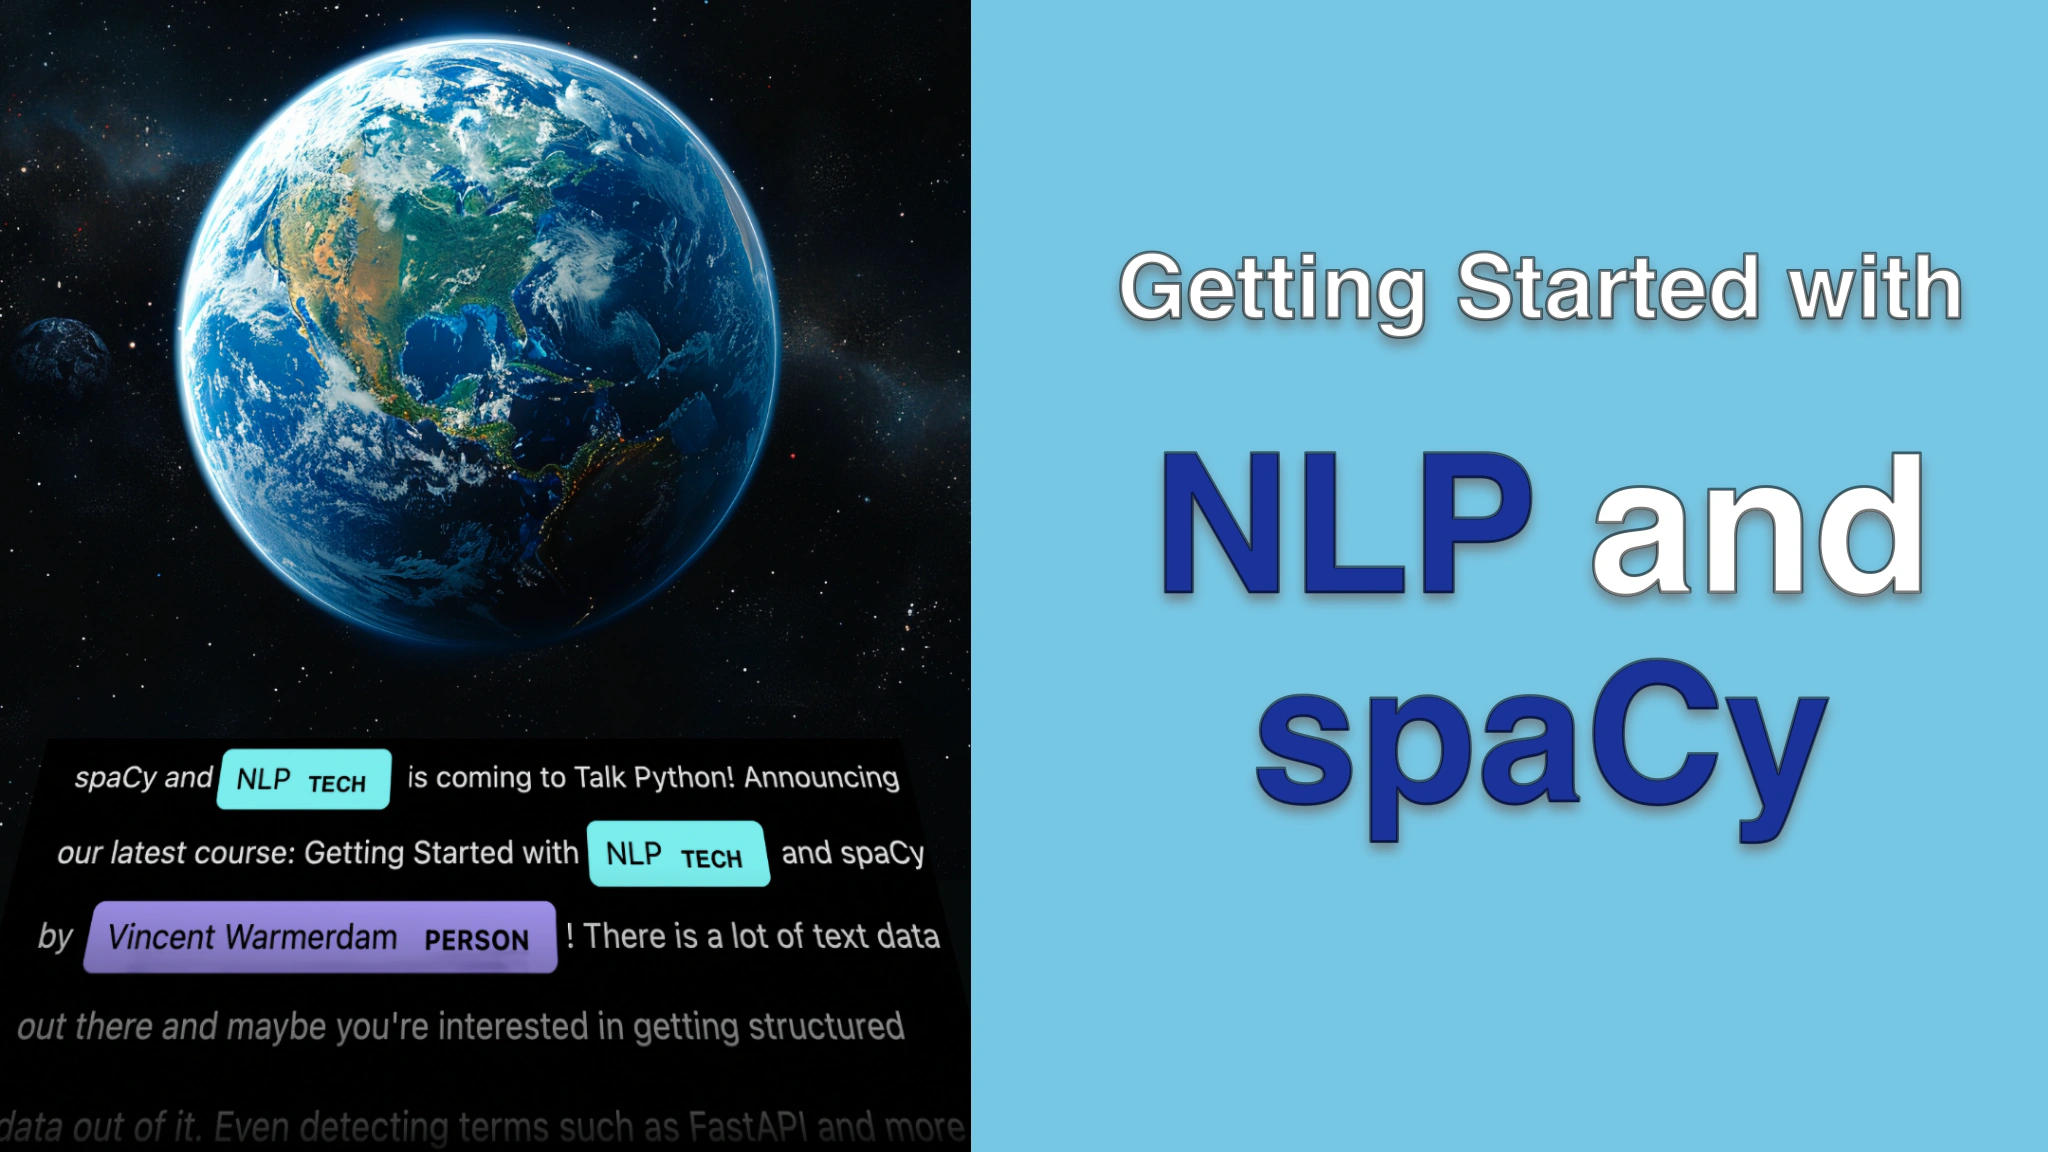
Hi there, my name is Vincent and what you're looking at is the introduction of a course in natural language processing. Specifically this course is going to focus in on a tool called spaCy, which is a very likable and general library with all sorts of tools that are going to be useful if you're going to be diving into this realm. But as a motivating example what we're also going to do is we're going to look at the Talk Python transcripts. These are the transcripts from the popular podcast that you may have heard of before. And what I just thought would be a fun exercise is to see if we can detect Python tools from these transcripts. There could be all sorts of fun use cases for that. We might be able to see when certain tools become more popular and less popular etc. But I thought that was going to be a fun motivating example to learn more about NLP but specifically to also dive into spaCy. We're also going to talk a little bit about how you might want to run projects in general when you have not just code that you're dealing with but maybe also datasets that are updating. And at the end we're also going to talk a little bit about some new tools that are around the corner. And specifically we're going to also talk about how LLMs can also be useful when you are running a NLP project. Now NLP is rapidly developing right now in part because of these LLMs. But the goal of this course is to show you just enough so you can start your own NLP project. We are not just going to do a whole bunch of syntax. We're also going to talk a little bit more broadly about things to pay attention to. I hope that sounds like a lot of fun. My name is Vincent and I will be your instructor. [ Silence ]
|
|
|
transcript
|
1:19 |
So let's start by discussing how this course is organized. What you're looking at right now is the introduction, where we're mainly going to discuss what you can expect. After that there's a very small segment where we're just going to install the required software. Then we get to what I would like to call part one of this course, where it's mainly going to be about syntax. We have to understand some of the data structures inside of spaCy before we can actually start using it. But that's a relatively short part, after which we are immediately going to get our feet wet. We're going to take the Talk Python transcripts here and just see what we can do with some of the base models of spaCy, just to get a bit more familiar. After that we are going to be training our own custom spaCy models. And I'll also dive a little bit more into projects and what the concerns might be when you're doing NLP. And after that we're also going to have a part where we discuss some other tools. These include HuggingFace as well as some LLMs. I'm also going to show you how these might integrate with spaCy, but this will also be a point in time where I show you some new tools that are on the horizon as well. After which the course will wrap up and the hope is that by the time you get here you have everything you need to start doing an NLP project on your own. That is the final goal of this course really.
|
|
|
transcript
|
1:37 |
The goal of this course will be to be on the pragmatic side We're not gonna do a whole bunch of math to explain fancy algorithms here I'm really going to drive home more of an intuition feeling That said I do have some expectations about the audience In particular I do expect that you have done a little bit of Python beforehand If this is your first time doing anything with Python Then maybe this course just isn't for you because I do assume that things like for loops and functions That all that stuff is well understood Also, you would benefit if you're able to run Jupyter on your local machine You don't need a whole lot of compute power for this course But I do need enough such as you're able to run Jupyter comfortably If you can't run this on your own machine that can still be fine You can also use something like Google Colab or maybe VS Code via Codespaces But I do need you to be able to run Python on your own machine Finally in terms of machine learning knowledge I actually expect very little but I can imagine that if you have some machine learning experience that it would be beneficial Definitely don't sweat it if you aren't necessarily a superhero when it comes to machine learning As we'll see later in the course. It's not so much the algorithms that will help you It's definitely more of a data quality game that we're going to be playing But to summarize the main assumption that I've got is that you are Not necessarily an expert but that you are comfortable using Python If that's the case and you're able to run Jupyter locally Then you should learn a bunch about running an NLP project from this course
|
|
|
transcript
|
2:02 |
So, with that out of the way, I guess it might also be a good time for me to introduce myself. Hi, my name is Vincent and I will be your instructor for this course. At the time of making this recording, I currently work at a company called Probable. I'm doing very cool stuff here together with some of the scikit-learn maintainers. Before that though, I used to work at a company called Explosion. This is the company behind spaCy, by the way. Before that, I've also been quite active in open source projects. In particular, you may have seen one of my talks on API data. I tend to frequent them, especially in Europe. But I also maintain a bunch of open source projects. My GitHub username is koning, K-O-N-I-N-G. And if you go to my profile there, you should see almost a small dozen of projects at this point. But you may have also heard from me from this project called CalmCode.io. I'm also the person who started that project. What you're also noticing, by the way, is that I like to teach using a drawing utensil. I have a little screen here that I can draw on. And I find that to be a very convenient way to teach. I can doodle around as if it's a whiteboard. But what I am also able to do is point to code that is on screen. And I really like to think that that's a nice way to learn. What I also really like is if I'm able to teach with a bit of focus. So I'm going to try to keep the videos nice and short. But I also want to prevent any distractions. And because the stuff that's on screen is going to be the most important thing, this will also be the last time that you actually see my face in this course. I'm going to be doodling over everything with the goal to keep things nice and clean and focused. And it's my hope that, of course, this is a very enjoyable style of teaching for you as well. But again, from now on we're going to do everything using the Wacom tablet that I've got. And you're going to see all the stuff that I also see on screen.
|
|
|
transcript
|
1:49 |
Just in case you're interested, if you want to follow along, then you can also find the code for this entire course on GitHub. If you go to the Talk Python organization and then to the NLP with Python and spaCy course repository, then you will find the repository that contains all the code that you'll need. Most of the course will be done inside of a Jupyter notebook, so a lot of the code that you might want to refer to can be found over here. But there is also part of the course where we're going to start a proper NLP project, and that will also require us to have a project structure. So part three of this course will be contained here. There are some separate files which will be explained later, but the other main thing in this repository is this data folder called transcripts. The goal of this course will be to actually explore the transcripts from the Talk Python podcasts to see if we can find Python tools in them. If you're eager to follow along but with the most recent podcasts, then you will have to update this transcripts folder. This repository will not be in sync with the actual podcast itself, but if you are really eager and would like to explore those transcripts yourself some more, then you can go to the actual Talk Python transcripts repository, and that contains this folder over here that is actually updated somewhat recently. I might be mistaken, but I believe there's an update about once a week for every episode. The transcripts will just appear over here. So if you copy this folder into the folder from the course repo, again, there will be this folder over here, then you should be good and totally up to date. Again, you don't necessarily have to follow along live. You can also just watch the videos first. That's totally fine. It is good to know, though, that all the code that I am going to be using can be found over here.
|
|
|
|
9:09 |
|
|
transcript
|
3:26 |
In this course, we're going to be playing around with spaCy, and we're going to be doing that from a Jupyter notebook, but it also means that we have to install some software. So in this video, I'm just going to install all of that and walk you through everything you need to do. First of all, you typically want to do your work inside of a virtual environment. So what I've got here is I've got a couple of Python versions on my machine that I can go ahead and use. You don't have to use the same version that I'm using, so for Python 3.10, that's a relatively modern enough version. And to start a new virtual environment, I can do python3.10 -m venv. This -m is going to access a module inside of this version of Python, and I'm going for the virtualenv module, so to say. And basically, this is a little command line application, and I'm telling it to create a folder called venv where my virtual environment is going to reside in. So that's now created. I can source that virtual environment folder by going to source, virtualenv bin activate. There we go. And you can now see in the terminal that I've got my virtual environment activated. From here, I want to install a bunch of tools, so python -m pip. Note, by the way, that when I type this, this Python over here is going to refer to the Python inside of my virtualenv. It might just be good to show that as well. So if I call whichPython now, you can see that I'm now inside of this very special spaCy course virtual environment folder. And if I were to deactivate my virtual environment and call whichPython again, you are going to see that I've got a different Python. With that said, go back to the virtual environment, bin, activate it, back inside. And now I'm just going to go ahead and pip install something. I usually like to run python -m pip, mainly because it's explicit this way that the Python that I'm using is the one from this virtual environment, and it's not capturing some global pip or anything like that. But okay, pip install spaCy. That's definitely a package that I want to have. And in this case, I would also like to have JupyterLab around because that's a very easy environment to do some demos with. So I'll go ahead and install those. Depending on your machine, this might have taken a minute, but we can totally confirm now that a bunch of stuff got installed, which is great. For this series of videos, though, there's one extra thing that we want to have, and that is that we also want to have a spaCy model downloaded. You will see this in more detail in upcoming videos, but in essence, spaCy provides a bunch of pre-trained models for you that you can do natural language stuff with. But that also means that you've got to download such a model up front. And in this series of videos, we're going to go ahead and use the English Medium model. This is a model that's relatively good, but still relatively lightweight as well. It's about 42 megabytes. Great. And with that now downloaded, we should have everything that we need to get started. So what I'm going to do now is just call JupyterLab from this virtual environment that has spaCy. And this will start up Jupyter. It'll also give me a link that I can open. And when I click the link, I'm in this familiar JupyterLab interface, and I can open up a new notebook to get going.
|
|
|
transcript
|
5:43 |
So definitely feel free to skip this particular video if you are already very familiar with Jupyter. But I figured since I'll be using Jupyter a whole lot, I might as well show you how I like to use it. This is especially going to be useful if you're less familiar with Jupyter. If you are though, again, definitely feel free to skip. The way Jupyter notebooks work is that you have these cells. So you can add cells by clicking, but you can also just type some code in a cell. So I'll type 1+1 here, and then what I can do is I can hit Ctrl+Enter to run the code in this one cell. But you'll notice that whenever I hit Ctrl+Enter, the cursor doesn't really move. The only thing that you really see change is that the number here updates. So this is the fifth cell that's running in a way because it's the fifth cell that the interpreter has seen. However, what I can also do is I can hit Shift+Enter. And when I do that, you'll notice that the blue line actually moves down, which also means that the cursor has moved to a new cell. And that's kind of a thing in Jupyter. You will typically think in cells, and that also means that sometimes you're going to want to shift between them. And there's also a little concept that's good to be aware of, which is the concept of being in a cell or kind of just outside of it. So right now you can see this blue line over here, right? And just let me hit Enter. You'll notice that when I do that, the cursor actually moves inside of the cell, and I can start typing. But now if I were to hit Escape, you will notice that there's no longer a cursor in this cell. And you will also notice that the arrow keys can actually be used now to move between these different cells. So again, I can hit Enter to enter a cell, and I can update the code. And I can hit Escape to exit and move around. In this case, the orange indicates that the cell is new and hasn't been executed yet, so I can just run that. But there is a notion of being in a cell and outside of it. If you want to move around these cells, you've got to be outside of the cell. Once you're in, then you can move around within. Now, an extra thing that's just kind of good to know is that cells can be of different types. So if I'm outside of a cell, I can hit M to change the cell type to Markdown. Note that you can do the same thing by going to this little UI widget over here. And I can say, well, I want this to be either a code or I want it to be Markdown. But the shortcuts are pretty easy to remember. If you want to turn a cell into Markdown, you just hit M. And the only weird thing is the other shortcut, which is turning it into code. The shortcut for that is Y. So again, inside of the cell, you can write code. Outside of the cell, you can move around. But you can also change the cell type. You can change it into Markdown, such that you can have a nice heading and some text. But if you want to turn the cell into code, you first have to make sure that you're outside of the cell. And then you hit Y or you use this little widget over here. So as far as navigation between cells goes, that's about it. There is one extra thing that comes to mind, though, that I guess I also want to show. And that is that I can import Python code as you would normally. So I'll go ahead and import spaCy here. And then, because I'm dealing with Python objects and modules, there are actually some helpers around as well. So one thing that I could do is I could put a question mark in front of this module over here to kind of get some information out. And this module has a function called spaCy.load. And by putting this one question mark in front, you'll notice that I get some information, like the signature of the function, but I also get the full doc string. So this is basically documentation that's at my disposal as well. If you're really eager, what you can also do is you could put two question marks in front of a function or an object, run the cell, and then you will also get the implementation. So the actual code that's inside of the function is then also something that you can inspect. I don't know if we're going to be using this a whole bunch, but it's definitely useful when you're trying to learn a new library. There's one final tip, and this is something I won't use in these videos, but if you're new and you're learning, this is definitely something that might help out. What you can do is you can go to File here and go to New Launcher. And then there's this one tab over here called Show Contextual Help. Let's click it. I will close this window over here. And now I will move my cursor over to this spaCy.load over here. Notice what happens to this contextual helper. The whole point of this contextual help is to show you the help text of whatever thing your cursor is on over here. And that can be extremely useful, because basically it means you'll have access to any docstring as you are working with code. And when you're learning a new library, that can be especially helpful. Another thing that you can also do while inspecting new code is you can have an open/close bracket, and then you can hit Shift+Tab to also get the signature information. And there's also some autocompletion stuff inside of the notebook, but especially when dealing with a new library, I found this contextual helper to be this sort of missing feature that more people should maybe know about. Anyway, this was my super brief introduction to Jupyter. It should be relatively intuitive as is, but hopefully to people who are new to Jupyter, this was a just enough introduction.
|
|
|
|
22:17 |
|
|
transcript
|
4:36 |
All right, so let's explore spaCy in the notebook. I will start by doing a import statement there. So spaCy is now imported. And next what I will do is I will load a spaCy pipeline. So just to be explicit, this en-core-web-md is the name of the model. It is a pre-trained model that the spaCy library, but what we're getting back here is a language object. And one way to think about that is that we have an NLP pipeline of sorts. So what can we do with such a pipeline? Well, one thing that I can do is I can give it a sentence like, ""Hi, my name is Vincent and I like to write Python. When I type that, it almost looks as if we get a string back a string that says, ""Hi, my name is Vincent and I like to write Python. But we actually get something different back. And we can confirm by checking the type of what comes out of this pipeline. And we can see that what comes out is a spaCy doc object, which stands for document. So let's rewrite that a little bit just so it's more explicit. So we give text to a spaCy pipeline and out comes a document. That's what we see here. And this document has many properties, but I guess like one property to maybe start with is that a document has tokens. So one thing I could do is I could loop over all the tokens inside of this document. Now you might be tempted to think originally that a token inside of a document would be a word. And to a large extent, that's accurate. But in spaCy, punctuation can also be a token. So we can see that this comma over here gets printed as well as this dot at the end of the sentence. And there's a couple of interesting examples when it comes to tokens. So let's try another sentence. So Python isn't just a language, comma, it's a community, exclamation mark. Now something that I think is pretty interesting here is that Python is and then nt. That is to say this last part of isn't, that's now also considered a separate token, just like abbreviated is over here from its. Now that might come across as unintuitive, but in this particular case, you could also argue that this can be translated to not. And this over here could be translated to is if we're talking about like the meaning of characters in the sentence. So the first thing that spaCy gives you is tokenization really. We have a document and inside of a document, there are tokens, but the way that it handles these tokens and the way that they are parsed is because of a rule-based system that's internal to spaCy. And these rules are language specific. So the parsing rules that you might have for English are different than in Dutch. I won't focus too much on this in the rest of the course, but I do think it's pretty good to just acknowledge that a token in a sentence isn't necessarily a word because we can also have punctuation, but also words can theoretically be split up because again, a token is not necessarily the same thing as a word. Now, what is the whole point of the spaCy library? Well, the whole point of the spaCy library is to attach properties that you might be interested in to these documents and to these tokens. And just to give a example of this, we have some part of speech information that's attached to each of these tokens. Now, part of speech in this case gives us information about what kind of word we're dealing with grammatically. So is it a noun? Is it a proper noun? Is it an auxiliary verb? That sort of a thing. And under the hood, there's actually a statistical machine learning model that spaCy has pre-trained to give you this information. These models are not necessarily perfect, but the whole point again is to give you models that give you properties on these tokens and on these documents, some of which are rule-based and some of which are based on machine learning. And what we'll do in this first part of the course is we'll just explore what spaCy has to offer from these pre-trained models from the get-go.
|
|
|
transcript
|
4:33 |
So what I want to do now is just dive into some of the properties that are on these tokens that spaCy provides and what I've done to help me is I've made this function that gives me a pretty overview. Internally this function is using a library called Wasabi which is a dependency on spaCy so if you've downloaded spaCy you will have also downloaded Wasabi. This is a pretty printing library that spaCy uses internally but let's just run this and then I'll explain the function in more detail. I have a function over here text to doc table and I'm giving it this sentence that I also mentioned earlier so hi my name is Vincent I like to write Python. The text goes into this function and I'm turning that into a document and then this document is used in this list comprehension over here that's generating me a bunch of data. I'm looping over all the tokens in the document and then I'm accessing the text property, the lemma property, the part of speech property, the entity type property, the shape property and the is punctuation property and the morphology property. It's a whole bunch but then all of that's put into this table function over here and then I'm printing it and then this is the table that we get. So let's go over some of these properties. The first one is relatively simple this is just the text of each token. No surprises here. But then we have the lemma and that's something that's kind of interesting. The way to think about the lemma is that it turns a token into its base form and that's going to be relevant to some nouns and some verbs. So is turned into be for example. I could change the verb to was and then you'll also notice it gets turned into be because that's I guess you could say the base form of the verb. Another example let's just let's write down another example. I own two books. So let's consider just one more example to make the point of the lemma more clear. So let's say my name is Vincent I own two books. In this case the lemma on this noun books turns it into a singular which again kind of feels like it's a base form. Next we have the part of speech which we saw earlier which says something like hey is the word a noun or a verb that sort of a thing. Followed by that is something that's called an entity and this is something that's also generated by a statistical model. Entities tend to be quite useful because they are things that you might be interested in detecting in a sentence and in particular Vincent in this sentence is indeed a person and if you want to detect the name of a person in a sentence then this is a useful entity to detect. There's another entity being detected here called cardinal that basically deals with numeric values but one thing that's interesting is that and this is also a pretty useful entity in general because sometimes you're dealing with numbers in text form instead of written down as a numeric value. Let's move on. So we also have the shape which says something about capitalization and length of a token so in this case high is capital letter X and then lowercase X. Followed by that we have whether or not a token is part of punctuation. You technically get the same information from the part of speech but it's also nice to have this as a property on the token as well. And this final feature is a bit of a mouthful but these are the morphological features and especially if you're interested in more linguistic properties this is something you might be interested in but this tells you things like what is the tense of a verb is the past or present tense is a word possessive yes or no that sort of a thing. There are use cases where information like this can be useful but it's also a feature where having more knowledge about linguistics can definitely help. Out of all the properties that I've shown you here I think the part of speech and the entities are the two items that I've used the most in the past but I do want to give you a good overview of all the different properties that we do have access to because who knows maybe they are useful to you it's just good to know that there are lots of properties that spaCy does provide.
|
|
|
transcript
|
4:57 |
In the previous video I made a little table to show information on separate tokens, but spaCy also provides a utility via this Displacy submodule to visualize documents right from the get-go, and I figured that might be good to show too. So just for good measure, I have my sentence here, Hi, my name is Vincent, I would like to write Python. That's my sentence going in, that is turned into a document, and then the Displacy module has a function called render that I can pass the doc into, and here's what that looks like. Now this is a visualization that is pretty big, so I need to scroll to see it properly. There's two sentences here that are being plotted, and what you're also seeing here is yet another property that spaCy does provide you. We have the token here with the part of speech attached, but there are also grammatical relationships between the tokens that spaCy can estimate on your behalf, and these are also shown in this visualization. There are, however, also other visualizations possible. If you're interested in grammar, this might be cool, but sometimes you're more interested in just looking at the entities, so that's a style that you can select as well. So in this case, we no longer see the arcs, but we do see that Vincent is detected as a person. One thing that's actually kind of nice about this visualization is that it also shows a property of entities. So in this case, I'm saying my somewhat full name, Vincent Warmerdam, and if I were now to run this, you will see that Vincent Warmerdam together is seen as a single entity, and that's something that this visual shows you quite nicely. So if you feel like playing around with spaCy and what it can detect, you'll see that this can be a very fun interface to do that in. One thing that I also just like to do in general is also show you when the model maybe doesn't work out so well. So let's go to this base example again. So hi, my name is Vincent. I like to write Python, and in this case, we can see that Vincent is indeed a person. Well, let's see what happens if I were to sort of introduce a slight misspelling by calling Vincent with a lower letter V. Well, then I get a warning. It is warning me that no entity was detected, so spaCy is giving me a warning about it, but I can also see from the visual that right now, Vincent is no longer being detected as an entity. So that also serves as kind of a nice reminder. These entities that are being predicted are part of a statistical model, and the statistical model will not be perfect. And this is especially true if you consider how the spaCy models were trained. These spaCy models were trained on a preexisting corpus, and if you think about the data set that the model was trained on, there are a couple of properties. One property is that the data set that spaCy has trained on historically has always had pretty good spelling. Names were always capitalized, but that also means that if your use case involves social media data, let's say, where spelling isn't necessarily immaculate, well, then that might be a reason why a spaCy model doesn't perform as well, because the data that it trained on originally did have this property. And second, I also think related to that, it might be fair to say that the data set that spaCy was trained on was relatively formal. A lot of the data sets that were used have also been used in academia, and that's all fair and good, but maybe not all text out there is like the text you would have in an academic setting. Even if you have immaculate spelling, things like slang might also be hard for the spaCy model to detect. And that brings me to the final point, and that is also that the data set might be just a little bit dated. A lot of new concepts in language can be introduced over time. Just to give one example, Brexit is definitely a phenomenon that's been in the news, but only if you've been paying attention in the last couple of years, I suppose just like COVID. And as far as I'm aware at least, spaCy hasn't had data sets that have these concepts in them as well. So that means that it could be tricky for spaCy to understand these topics out of the box natively, but there's also many other topics that might just be too new for spaCy to detect, or I should say for these base models to detect. You can always train your own models on your own data, and we'll see later in this course how to do that, but I do think it's fair to not expect too much from the pre-trained models that spaCy provides you. Anyway, this was a slight tangent. If you're exploring entities in spaCy models though, I highly recommend you play around with this spaCy tool. It is a very likable and interactive way to understand what models are detecting in sentences.
|
|
|
transcript
|
3:42 |
In the last few videos we've been looking at properties that spaCy provides on tokens, but there are also a couple of properties that spaCy provides on the document itself, and I figured just showing a few demos of that. One thing that spaCy provides on the document is this sents property. This will return a generator, which you can unravel by turning that into a list, but this gives you the separate sentences in the original document. And you might be tempted to think that that's relatively easy because you just have to split on this one dot over here, but just to show you that it doesn't necessarily have to be the case, if I were to write down ""My name is Mr. Warmerdown"", then the dot here that's part of ""Mr."" should not be the reason why the sentence splits. So the fact that spaCy can detect these separate sentences for you is indeed a very useful and likable feature, because it might be the case that you have systems that work on a sentence level, and then spaCy can be used to generate the separate sentences on your behalf. Let's now consider a very different sentence. So I have ""Star Wars is a very popular science fiction series. Besides sentences, a document also has a property that's noun chunks. Again, that gives me a generator, so I need to turn it into a list. But the way to look at this is that spaCy is able to detect that multiple words together, as far as grammar goes, could kind of be seen as a noun chunk, almost as if it's a single phrase or a single noun chunk, so to say. And the reason why this might be of interest is that a lot of entities you're typically interested in detecting, they tend to be nouns. They're usually not verbs, so having something that can just give you noun chunks to evaluate is also pretty useful in practice, I would say. And then finally, here's a property that could be useful if you want to turn this into an API at some point. A doc object also has a toJSON method attached, and this will give you back a dictionary that just contains a lot of the information that spaCy has detected. And that's kind of neat, because that means you can use this inside of a web app or API to communicate with a front end. Now, as you go through all the properties here, you'll notice that typically there's a start as well as an end being specified. So for example, the sentence starts somewhere and it ends somewhere, and another sentence starts somewhere and it ends somewhere. And these refer to the character indices in this sentence. So you can also see that this first token over here, it starts somewhere, it stops at the second character, then we have the comma, the punctuation that goes from two to three. So these represent the character indices. But there's also all sorts of other information, especially on these tokens. So we have the lemma, for example, we have the morphological information, etc. You can also scroll down and see all the different tokens. But one thing you will notice as you look around is that even though we have lots of information in here, it doesn't show all the possible properties on this document. So the noun chunks, for example, aren't being shown here. But that said, a lot of the time this will be sufficient, especially if you're mainly interested in these entities, so to say. So if you're building web APIs, this tends to be a very useful method to know about.
|
|
|
transcript
|
4:29 |
So far in these videos, we've been talking about some of the building blocks in spaCy. So what we've seen is that we have a doc object, a document, and that it has some tokens. That's all well and good, but we also saw this thing called an entity. And there's an interesting thing there because we also noticed that an entity, even though it is definitely part of a document, we also noticed that an entity can actually contain one or more tokens. So you might wonder what is up with that. In short, an entity can be seen as a new concept that we haven't explained yet, that's called a span. And a span can be thought of as a sequence of tokens in order. And to maybe help explain that, I'll go ahead and explore that with some code right now. I have my sentence here, ""Hi, my name is Vincent. That gives me a document. And just to confirm, this is the representation of the document. It looks like a string, but it's actually a spaCy document. The type is being confirmed here. And I can do the same thing for the first token in that document. So just for good measure, let's just grab that thing that's the token ""Hi. And we can confirm that that's indeed a token. But let's now grab some more. So this is grabbing the first two tokens. That will be ""Hi"" plus the punctuation point over here. Those are two separate tokens. And the type of those two tokens together, attached like this, that's a span. Now we will remember that because one property that this document has is it has all the available entities. And we can confirm that Vincent is indeed an entity on that document. So let's loop over that for ""int"" in document entities. Let's print that. So we can see that the entity Vincent is actually a span. It's not a separate entity class. It is really just a span object. And spans also have a couple of properties. So they tend to have a start and end segment. In this case, that means that the start token will be index five and it would end at index six. So let's count one, two, three, four, five. That's where it starts. And then six where it ends. So that seems correct. But I can also query for the starting character and the ending character. Depending on what the use case is, you might be more interested in where the characters start and end. Now at this point, you might wonder, well, if an entity is just a span, what makes it so special? And the primary reason is that an entity has a label that is attached. So we can confirm that this span, this Vincent span, so to say, that has a person label attached. We can see that through this property. And that's not the case for this span that I can select, like the first three characters. If I were to query for the label there, it is going to tell me that it's an empty string. So this label is something that I would only expect on a span that is actually an entity in a sentence. So that's just really good to remember. But moreover, the reason why we need a span here, that's related to the fact that an entity can have more than one token in it. So as we can see now, if I were to change my name to my first and last name, then the entity updates this full name over here. That's the entity that's being detected. I need something that can represent that. And that's what we have the span for inside of spaCy. Now, again, this span needs to have tokens that are consecutive. So first name and then last name, but you can't have empty tokens in the middle. It all has to be sequential. And we can have many different kinds of spans. We can select many of them, but typically the entities as found on this doc.ents property, those will have a label that we are typically interested in. So maybe in summary, an entity in spaCy is a span, but not every span in spaCy is an entity.
|
|
|
|
28:55 |
|
|
transcript
|
2:11 |
Okay. So far in this series of videos we've really just been discussing the API spaCy and I think at this point we've kind of got some of the basics covered. So now what I would like to do is just get a fun dataset in and just really start using spaCy. And as I was looking for a fun dataset I was kind of reminded that we have this Talk Python podcast. It's a podcast that you might have heard of, it's a pretty good one, it's about Talk Python. But the cool thing about this podcast in particular is that Michael, the host of this program, actually maintains a GitHub repository with all the transcripts. So if you go to GitHub to Mike Kennedy and then Talk Python transcripts, that's the name of the repo, then you have this repository that actually has all the transcripts of past episodes. And these go back a long time, like many, many years. So I'm just going to grab one at random, let's go for this one. And this is one kind of transcript where you can see a timestamp, then a name and then a colon. And then basically we can read what was spoken at that point in time in the podcast. Now one thing to keep in mind, and this is usually true when you're dealing with text data, is that the data is not necessarily perfect. And there's a couple of reasons for it. One is we see that we have these multiple formats that we might want to deal with, and not just in the file names, but we can also see that here I've got a file where I do have a timestamp, but I don't have the name of a person saying something. But there is also something else which this GitHub message is actually hinting at, and that is the fact that all of these transcripts are generated by a machine learning model. So we shouldn't assume that these transcripts are going to be a perfect representation of what was said. I am going to assume they're good enough though for what we're going to try and do. But if you want to follow along, basically now might be a good time to go to this GitHub repository and clone it locally, just so you have access to this transcripts folder over here, because we're going to do a bunch of fun stuff with this text data.
|
|
|
transcript
|
4:11 |
Right, so what I've now done is I have downloaded the transcripts, I have my little transcripts folder over here and I can confirm just from opening up a file over here that these are indeed transcripts and what I will be doing is I'll be focusing in on the txt files that are in this folder. But as we saw in a previous video, this is a text file where we're going to have these timestamps so I'm going to have to do something clever that turns this into some clean usable data. And I have written a little bit of logic for that. Let's open that. And here is just some utility code. What I'll do is I'll just quickly go over what's happening here. Definitely feel free to just copy this code. But the reason I want to sort of just go through this is also because usually some data cleaning needs to happen before you're going to do NLP and this serves kind of as a nice tangible example. So just as a rough sketch, what is this code doing over here? Well I'm using a regex, that's what you see me do over here, and that regex is basically there to detect the timestamp that we have on the line. So if I were to look at this function over here, I give it a path and then the goal of this function is to give me a generator with every single line properly printed with some meta information. So I'm going over every line in that path and I'm going to match a regex and if it matches then I'm going to do some logic. So if I see a timestamp appear on the line then I'm dealing with a line that I'm interested in. Then this variable is basically that line without the timestamp. And next what I do is I use the colon to figure out if there is maybe a name, because remember some of the files that we saw had a name attached as well. And if there is, there's just a little bit of extra logic for me to find the speaker. All of this stuff is pretty useful. Sometimes I will have some meta information about the speaker, but the main thing I'm interested in is just every single line that's appearing and I'm outputting that in this yield statement over here. So maybe just for good measure, let's come back to that little bit of extra code at the bottom later, but let's just give a quick demo of this. So I'm saying episode lines, let's just give it one of the files. So I have my transcripts folder and then I have that htmx for Django developers file. This function returns a generator, so what I should be able to do is just call next on it. And we can see the first sentence that was spoken in that transcript file. Part of the metadata here is telling me that the speaker is unknown. This was the first turn in the episode in terms of speakers and the files attached just for good measure. And this little generator will just loop over every single line. And this is just kind of nice. Gives me a nice way to just loop over all the different lines in a single file. Now of course doing that for a single file over here is nice and all, but I also want to do this for every single file. So that's what this function does. But basically it just allows me to do the same trick. I have all of the lines in an episode, I can just call next on it and this is going to give me every single line in the generator. Note by the way that I'm doing this with reversed sorting, so newest episodes kind of go first. But again I really just want to have a generator here that can loop over all the different sentences. What we're going to do soon is we're going to use a text over here and that's something we're going to pass to spaCy eventually. But again I do hope that it's clear that even though this cleaning code is probably not complete, when you're doing NLP there's always a step that kind of looks like this. You are going to have to think about what data is coming in and how do I want to pass that forward in a somewhat clean way. Investing in a function like this definitely saves a whole lot of time later.
|
|
|
transcript
|
3:17 |
So at this point I hope that you recognize that we have a nice little way to loop over all of these Separate files and then after that we are doing some generator stuff to Go through each line so to say and this is a big generator It is gonna give us all the lines of all the files But I can imagine that you might have been trained to use a different thing. Maybe you've been more accustomed to Pandas when you're dealing with data in which case you might also be more familiar with a data frame And with that in mind you might be wondering well, why would we prefer generators in the first place? it's a pretty good question, but this example actually highlights a reason why generators could be seen as a good thing and That has to do with memory use you see when I'm looping over this folder then at most One file will actually be opened. We're not gonna open multiple files in one go and That's kind of nice. I don't have to load all these separate files into memory in order to do some analysis I can really just take it line by line But there is also another reason and that has to do with nested data structures So let's import spaCy to demonstrate that I will get me an NLP object and I will load the medium model I Will reset this generator just for good measure, so let's now make a function called two sentences it will accept a generator and Let's pretend that I am going to be passing the text in that line To my spaCy model and that I'm going to get all the sentences out Then I could say well for every sentence in This document let's add a variable for that just for good measure Well, then I can yield again saying something like the text that I've got here is The text from that sentence and I can keep the meta data attached that was the metadata was attached to that line But what's kind of nice? I can just use this two sentences function on that generator. I had before you And I can call next on it Just like I would before and It kind of feels flat still and that's kind of the nice thing here when you keep everything inside of a generator Being able to always call next allows you to turn something That's kind of nested like multiple sentences in a single doc. You can very easily make that flat the fact that we are able to keep things low on the memory and Also be able to do stuff like this. That's just kind of pragmatic not just because of the memory but also because these documents tend to have nested objects in them and Using a generator is just kind of a nice way to unnest it Not to mention the fact that if at some point we're going to be doing this with huge data sets Then this whole we're not loading all the data in memory immediately aspect of it is going to matter a lot, too
|
|
|
transcript
|
3:10 |
Alright, at this point in time we have our little generator that's able to give me a full line from an episode and I can keep on requesting a generator to give me back more stuff. So that's good but let's now actually start using it together with spaCy. Import spaCy just for good measure, spaCy.load, let's go with the medium English model for now and what this allows me to do is it allows me to say well whenever I call next on a generator let's just only grab the text for now. That is indeed a bit of text and that text is something we can pass on to spaCy which will give us a document object. Now just for good measure what I'm going to go ahead and do is I'm going to say from spaCy.displaCy I'm going to import that render function that allows me to make a pretty chart and that's just going to be a convenient way for me to explore this document. And this is a flow that I do kind of like when I'm trying to get a feel of how well models behave on a dataset because I can just keep running this cell, it's going to then grab the next line and I kind of get a nice visual for all the stuff that it's been detecting. And in this case we can definitely see that there are some entities in this model that are being detected correctly but there's also some interesting things happening under the hood here. So let's just check when it comes to artificial intelligence AI, AI in this case is being detected as an organization so that's an interesting prediction I suppose. But then we notice that what's good for a trillion dollar that's a monetary amount that got detected correctly. But what's good for a trillion dollar companies isn't necessarily good for people that's the theme of season seven which in this case got picked up as a date of IRL, Mozilla, then I see Bridget Todd and name, season seven is being detected as a date here again and AI is being detected again. So it's not immediately perfect but some of the predictions I hope do make sense. Let's see if we can find another example. So okay I ran the cell a couple of times again until I hit this big paragraph over here and again the model makes some good decisions but also some curious ones. Week is spotted as a date that feels okay, annual is spotted as a date that also feels okay, over a dozen, three or four that's a cardinal number that also feels pretty good, the talkpython.fm/centurylaunchweek that's being detected as a person. And one thing you are noticing here is that this spaCy model isn't exactly trained on this kind of data. I do encourage you to do this exercise yourself for a bit just to get a bit of a feel of what kind of things the model does well and what kind of things the model does poorly. Under the hood I do think that the spaCy model does a lot of good for you on your behalf but it is good to just observe that this is still a statistical model and that there are all sorts of reasons why the results over here are not going to be perfect.
|
|
|
transcript
|
2:37 |
If you're tagging along and you're also exploring this data set, then you might have noticed something and that's related to these product entities that it sometimes detects. Right off the bat, in this case Django makes a couple of appearances in this document and the model doesn't always have consistent predictions. Over here Django is detected as a person, over here it's detected as a product and there are also instances where, but it's not detected as an entity one way or another. Again, there are all sorts of statistical reasons for this that depend on the data set that spaCy has used but one thing that I have noticed, if the spaCy model detects a product it is commonly, at least seemingly, referring to a Python tool or a programming language and that kind of makes sense if you think about how people like to talk about products or programming languages because usually it's a noun that has utility, so when I read the sentence we can just start with product"" itself before we dive into etc. Well, given the kind of text that I'm dealing with, I am curious if we were to reuse this product prediction from spaCy do we actually get a bunch of programming related entities in return? And I wrote some code to just quickly test this hypothesis. And here's a little script. 20 times I'm doing the following. I'm grabbing text from my lines generator, I'm turning it into a document and then I'm checking all the entities that are in there and then I'm checking the label for those entities and if the product string appears in any of those labels well, let's just render the document then just so we can see what kind of products got detected. And if I just have a quick glance over here then Python is a product. Flask is a product. I also see that Twitter is a product. JavaScript makes an appearance. So even though it's definitely not perfect it does feel that for this particular corpus I might be able to reuse spaCy's product entity over here to see if I can grab me a bunch of programming languages and/or programming tools that are used in the talk Python transcripts. As we'll see in a bit, it's not going to be perfect but it's not going to be horrible as a starting point either.
|
|
|
transcript
|
4:18 |
I have my spaCy model loaded, and right now I wanna do something with the entities of all the lines that I've got. So your first inclination might be to write code that looks a little bit like this. To keep things relatively lightweight, what I'm doing first is I'm making sure that I'm only grabbing the first 1000 examples from my lines over here. But after that, I'm saying, well, let's loop over every single line in that subset. Let's grab the text from that line. Let's pass that text into my NLP model, and then I have a document that can totally give me the entities that I need. Now, this code will work, but let's just track how long it takes to actually run this. All right, it seems to take about seven seconds. Note, by the way, that what I'm using here is something called a Jupyter magic. In particular, I'm using a time magic on this cell. And effectively what it does is it's just going to try and run the cell while keeping track of how long it took to run everything in it. So, okay, seven seconds, 1000 examples, I have many thousands of them. It will be kind of nice if we can maybe speed this up. And there is one big thing we can do right from the get-go. When we have a look at what's happening here, I have my NLP model and I'm giving it a single line of text. Now, you can imagine kickstarting the big machine learning engine just to analyze one text. We're going to do that over and over again as we are running this for loop. Instead, what might be maybe better is if we can kickstart the big machine learning model over here and then give it a batch of texts, because then there's all sorts of internal optimizations that might be able to happen. Stuff might get vectorized and that sort of thing. spaCy also has support for this. So let's rewrite the cell just so we can see how we might be able to improve it. All right, so here is a revised version. A lot of stuff is still the same. I still have my subset, but the next thing that I do is I just grab every text that I have in this subset. Remember that this lines generator that I've got that returns me some dictionaries and the spaCy model really just needs this text. So by doing it this way, texts right now is a generator of strings. And that is something that I can pass to the NLP pipe method. By doing this, spaCy actually has the opportunity to do some batching internally, which means that this should run a whole lot quicker. And when I iterate over this, I just get my document objects directly this way. And indeed, this definitely runs a whole lot quicker. So that's certainly very nice. However, there is this one awkward thing at the moment with the way that this loop is currently set up. And that is if I were to call next on the lines again, then sure I am using the text here for spaCy and that's great, but I am losing this meta information, which might actually be useful too, depending on what I want to do with this data set afterwards. So with that in mind, there is this one extra thing that we can do if we were to rewrite this one more time. And there we go. What I've now done is I've rewritten this line that turns my dictionaries into texts and I've adapted it to make a generator that returns me tuples. The first item in the tuple is the text that I do want to see translated into a document, but the second item can just remain a dictionary. Now what I can do is I can actually tell this NLP.pipe method that the data stream that's coming in represents tuples. And then the assumption is that spaCy should only really treat the first item of a tuple as text and then the second item will just remain intact, which means that within the for loop, I still have access to the document and my entities, but I also still have access to the original dictionary with all the meta information. Let's run this. And this is definitely nice because I can confirm that we're not really getting a performance hit if we do this. So if we're going to run this product hypothesis on all of our data, this might be a very nice way to do that.
|
|
|
transcript
|
2:01 |
In the previous video we got a speed boost by using this NLP.pipe method, but there is also another improvement that we can make. To help explain it, let's just dive into this NLP object a little bit. Because there is this pipeline object inside of it that tells us what kind of components are actually active. I can see for example that there is a tagger, that there is a parser, that there is a lemmatizer, and also a named entity recognition component. To dive in a bit deeper, this tagger component, that's a component that's making sure that each token has a part of speech attribute attached. So that would be stuff like, is this token a verb or a noun? There's also a grammatical parser. And all these components are in general pretty dang useful. But if in our case we are only interested in doing named entity recognition, well, then we can also just turn all of these other components off. We have to be a little bit careful when we do that, because this named entity component does depend on this token2vec component, there are dependencies in this thing. But one thing that helps us with that is that there is this setting called enable, in the spaCy.load method, where we can say, well, let's just enable this one part of the component, and then spaCy internally will make sure that this NER component can still run, all the dependencies will be there, but everything else will just be turned off. So let's rerun this. That now gives us a new NLP object. And let's run this code one more time, to see if we can get a little bit more juice out of this. Ah, nice, that's again a fair bit quicker. So in general, definitely be mindful if you're gonna only use a subset of a model, because you might have components missing if you're not careful. But in this particular case, I'm only interested in a component that can do entity recognition for me, and I definitely welcome this speedup.
|
|
|
transcript
|
4:38 |
With the speed improvements in place, it now feels like I can actually test my hypothesis. I am importing two extra tools. I'm importing the counter object from the Python collections API. And I'm also using a library that will give me a progress bar called tqdm. Next, I have my spaCy model that only does named entity recognition. And I also rewrote the loop that we had before because it does a couple of extra things now. So what am I doing? First, I am just making sure that I'm dealing with a fresh generator. I am then initializing a counter object that I'll use in a bit. And then I'm saying how many lines I actually want to go ahead and read from this generator. In this case, I'm just doing 500, but I can easily increase this number. I am then making my subset just like I did before. I am then making my generator tuples again, just like before. But then I'm using this progress bar library, which I'm able to give a generator and I'm also able to pass the total number of items in that generator as an integer. And that's nice because then this progress bar can give me lots of relevant information. And I know the number of lines that I'm about to draw from the get-go. So that's something I can totally put in here. Then next comes the big for loop over here. I am passing it this timed variable over here. And that's something that spaCy can still batch. I'm still treating this as tuples. So I have my document and my original example at the ready. But for every document that I got here, what I'll be doing is I'll be looping over all the detected entities. And then if any of the entities have the label product, then I'm keeping track of the text that the entity has. This gives me a list of entities. I can then pass that to a new counter object. And this is going to count how often each entity appears. And then this counter object can be used to update this I will call global counter. And therefore every time I loop and I loop, this counter is going to get an update. Hopefully when I run this, I should just get an overview of examples that get detected as a product. So that ran relatively quickly, which is nice. But let's now inspect the counter. Django got detected a bunch of times. FastAPI got detected, JavaScript, EuroPython, which is a conference, not a tool really. Twitter is also not really a tool, but Flask got detected. I'm seeing Ninja here, which might refer to Jinja instead. But in general, if I were to just look at this, it seems that my product hypothesis is not that big of a stretch. There's definitely a couple of programming tools in here. And that is pretty interesting. If I'm interested in finding programming languages in these transcripts, this might not be a bad starting point. Okay, so let's just go through a whole bunch of lines now, not 500, let's go through 50,000. All right, so that took a bit less than a minute, but we definitely went through a whole bunch of data. I'm happy we took the effort of making somewhat performant code here. That speed up is definitely something we're getting benefits from now, but let's explore the counter one more time. Okay, so again, not bad. I guess we see some operating systems, which you could argue is kind of like a programming tool. Is Excel a programming tool? Yes, no, I mean, that's more of a philosophical debate at some point. But just from glancing at this again, a lot of this stuff definitely feels like it's tools. Probably not everything, but it's definitely a bunch of stuff in here that does feel appropriate. And it does feel like I hit a nice balance between effort and reward. This is actually kind of a nice example on how you might be able to use spaCy. I'm able to reuse an entity that a spaCy model does provide. And even though it is not a perfect match, given that I have a very specific dataset, I might still be able to reuse it in an interesting way. I should remember that even though there's a couple of entities here that have been detected, it is likely that there's also a bunch of entities in this document that could be a programming tool that I'm missing because this is definitely only a subset. But again, as a first iteration, I think this is pretty nice.
|
|
|
transcript
|
2:32 |
As a next and also final step for this line of work, I figured that I would run the same exercise but on all the lines that I've got. So I'm going over all the lines, I'm counting one for each line, I'm taking the sum and that gives me about 84,000 lines. I've updated the number of lines over here so the code that's listed here will now actually give me the counter and find me all the detected products which might just well be programming utilities from the transcripts and that's great. And looking at this setup, it seems to take about two minutes which, you know, is pretty decent given the number of items I've got here. I could argue that's pretty quick. But there is this one extra thing we can actually do to make it just a bit faster and what I'm about to suggest won't always make it go faster but in this case I found that it actually did. And that is that I can add this one extra parameter to my nlp.pipe method. You see, this pipe over here is able to batch data in and that's already a good performance boost but it also has some multi-core capabilities in it. The thing with multi-core processes though is that it can be a bit hit or miss because there is a little bit of syncing that needs to happen as well. Not to mention the fact that going through these batches, that's something we might be able to do in parallel if we give it more cores. But the stuff that I'm doing inside of this for loop, well, that's still very much a single threaded thing. So again, the mileage might vary if you do stuff like this but if you're working on big datasets it can make a difference. Because here you can definitely see that out of the two minutes we're almost down to 140 here. That's still not a bad chunk of performance I guess. So that's still something that I might keep in mind if you're dealing with very big datasets. And if you're working on a machine that actually has a couple of cores then this is something I would also try out. Now having said all that, there is also another line of work that we should pursue because you could wonder if we have to go through the effort of actually resorting to somewhat heavy machine learning models. Maybe if we want to detect tools from Python in these transcripts, there is actually just another more simple technique that we can try.
|
|
|
|
38:06 |
|
|
transcript
|
1:31 |
So, so far in this series of videos what I've been doing is I've been showing off spaCy and initially I was only showing the features but then I actually also started using it. But what I would like to do now is also make a small step in maturity because so far, yeah, I've been showing spaCy but I've been doing all of that from inside of a Jupyter notebook. And odds are that if you're gonna do a real NLP project properly, then you kind of want to think outside of a Jupyter notebook and you kind of want to think more in terms of a project. This will involve a project structure but it also involves a slightly different way of thinking about your code. Things will have to be more maintainable and repeatable at this point in time because if we're going to be doing NLP one thing is going to happen and that is that we're going to have to iterate a whole bunch. And this is something I would like to focus in on in the next we're going to be making our own spaCy model that has our own methods to detect programming languages and tech tools and all that but we also need to think about a project structure that makes it easy for us to iterate and as luck would have it spaCy definitely has some tools to help make this easy but most importantly of all I hope that we also appreciate the fact that if we're going to be going about this in a mature way we have to go a little bit more towards the project way of thinking and a little bit less of experimenting inside of a Jupyter notebook. There's definitely a place for that. But right now, I am going to assume that we want to do things a bit more formally.
|
|
|
transcript
|
2:33 |
So I'm just going to draw out schematically what kind of things I need in my NLP project, just to kind of get the project structure maybe going. So one thing I've got, let's draw that over here, are my transcripts. These are the things that were spoken inside of a podcast, and there's stuff in here that I would like to predict. However, if I'm going to have a machine learning learn anything, then I will also need to have some labels. I will need to figure out some sort of way to turn at least a subset of these transcripts into a subset that is, I will call, annotated. And just to give a quick example, if I have a sentence, something like, Python is nice, then this annotated subset would have that sentence, but also something that indicates that Python over here, that is a tech tool, let's say. And I need to have some sort of data set where my machine learning model is able to learn from these annotated patterns. Once I've got my annotated subset, there's actually another step, and that is to maybe prepare this dataset for training. There's a little bit of a detail here. Typically what we wanna do is you wanna have one set of data that you are going to train on, and another set of data that you're gonna use for evaluation. Then this training dataset over here, that can be used to train a machine learning model. And that machine learning model, maybe we want to be able to package that. And as you can see from this little overview, I do hope that you appreciate that there are actually a bunch of steps here that depend on each other. And it'd be nice if we can structure our project accordingly. Note that another aspect of this is that suppose that I've got my annotated subset over here. Well, then I can train a machine learning model. But if this subset doesn't change, then there's also no need to retrain this machine learning model. So there's also something I would like to have in the system that is going to prevent unnecessary work. So hopefully this diagram paints you a picture of what we need. We are going to need separate steps in this entire process. But before diving into the code, what I would just like to do first is just give a glimpse of how to do this part. Creating proper training data is an art in and of itself. But there are things that we have at our disposal to make this easier. And I'm going to discuss that first before moving on to how I'm going to implement this project structure.
|
|
|
transcript
|
5:17 |
So let's talk about data annotation for just a bit. And again, we have our transcripts and we would somehow like to turn this into annotations. Then one thing that I could do is I could just go through this list of texts one by one and then I could use some sort of a UI to highlight where my entities are and that could give me my annotations. And again, the annotations that I would need is if I have a sentence like Python is nice, then I would like to have some sort of user interface that allows me to highlight Python in this case and say that that's a tech tool, let's say. This is all well and good. And one direct approach would be to say, well, just take that big list and go through a lot of them in this user interface. But there are a couple of problems with that. In particular, these transcripts are sorted. And it could be that we have to go through a very specific episode maybe an episode that's all about Django. And it might take us half an hour before we get to the next episode that's all about Click. And before you know it, you've spent an hour annotating while you've only covered a small amount of the surface area of all the tools that you would like to get examples of in your annotated data set. So maybe the right way to go about this is to try and see if we can do things that make it easy for ourselves. And in this particular case, I actually did a little bit of extra work to do just that. Because you see, one thing that we can do is we can take all of these transcripts and we can train a little search engine. In particular, there's a lovely little Python library called lunar.py, which is something that I've used in the past. But what that allows us to do is that allows us to build an index such that if we ever have a specific query, like Django, for example, that then the search engine can retrieve us 50 examples that have Django in it. And then once we've done Django, we might be able to move on to another project like Click. Click might be especially interesting because not every instance of the word Click will refer to the Python library that's called Click. But again, you can imagine that having such a search engine around might actually make our day a whole lot easier, especially if we're able to use that search engine inside of this user interface to help us steer the stuff that we'd like to annotate next. And for this particular project in this particular demo, I've actually been doing just this. For the labeling tool, I am going to be using Prodigy. Note that Prodigy is made by the same people who are making spaCy, but it deserves to be said that Prodigy is a paid tool. And I should also be upfront and mention that I was a core developer of this product when I was employed over at Explosion. I definitely feel that Prodigy is a very powerful tool, but I'll gladly leave it up to your own discretion to see if you need it. There are other annotation interfaces out there as well. For this particular course, the main thing that I do think is relevant and important is that you think about ways to make annotation easier for yourself. In this particular case, I felt that having a search engine around was going to make it easier for me, but there are many techniques out there and as you're going to be iterating, odds are that you will be using one technique for one part of the data and maybe another technique for another. Having said all this though, what I would now like to do is just give you a quick demo of the UI and the setup. So you can also kind of see what it's like to be annotating this data set. All right. So this is what my user interface looks like. What I'm able to do is I'm able to say, well, I'm interested in looking for instances where FastAPI made an appearance. and then this interface allows me to say well that's FastAPI let's highlight that, that's also FastAPI let's accept that that's also FastAPI so far so good I mean after a while after I feel that I've annotated enough of these FastAPI examples I can also just hit save for now and maybe look for Flask instead so there, makes an appearance there, etc. You can accept that. So I hope that you agree that being able to annotate this way is actually really, really nice, but I still need to be in the loop, so to say, as a human. I need to make sure that I cover enough ground with these queries that I get a good portion of the Python tools in here, and this will also require a little bit of iteration. It is possible that at some point we have a trained model and we learn that it's really bad at detecting some kinds of tools. And then I will have to iterate and then make sure that I add tools that the model gets wrong in here. So as I mentioned before, I have already been annotating for a bit. I have a small data set annotated for now, about 140 examples or so. And while I will definitely need more data moving forward at some point, I do think that this is enough to start talking about the project some more, so let's move on to that.
|
|
|
transcript
|
5:00 |
All right, so let's talk about project setup. Now what I've got here are some files and folders. And one file that in particular I would like to point our attention to first is this project.yaml file. It's a file that I've got open right here. And this is a spaCy specific YAML file. That's kind of like a make file if you're aware of that. But the main thing in this file that's going to be interesting and important is that I'm able to have this collection of commands that I can reuse later. And I'll just highlight one such command. So I've got a command over here called annotation export that I could go ahead and run. And this is going to get annotations out of my annotation tool and into one of these folders. So the way to read this script, by the way, is I'm going to be exporting. That's what this command does. And I'm going to be exporting a particular name of a data set into a folder. And then I'm going to say, well, let's take that file name that got generated and actually make a file called anots.jsonl, short for annotations. And let's move that in the data folder. So as we can see right now, that file is not in here. But what I should be able to do now is call python-m spaCy and then run the project command. And then this command will pick up that there is this project.yaml file and that there are these commands in it. And I'm telling it to run this annotation export command. Then spaCy on our behalf is going to run all of these scripts and let's just confirm that that works. And there we go. We have our annotations file. That's now listed over here. That's all well and good. There is another step though that we can run now. And that is a step that follows, which is we are going to take our annotations over here and we are going to turn these annotations into a format that spaCy can go ahead and use. We will dive into this script in the next video, but I want to highlight a thing that happens when I actually run this command. So let's run the convert command. When this runs, we will generate some spaCy data that's going to happen as a side effect. but notice that this command over here it's got outputs defined but it's also got dependencies defined and what I'm able to say here is that this particular script it depends on this file as input note by the way that this other command that I used before mentions the same file as an output over here Under the hood, that is super useful information because what spaCy can now do on our behalf is it can keep track of this lock file. And what it's going to do is it's going to say, ah, there's a command over here. This command is generating a dataset. And from here, if this dataset didn't change, then any scripts that depend on it don't have to run anew either. So if I run this convert command one more time now, you can see that this command actually got skipped because nothing changed. There were no new annotations that were moved into this file over here, which means that the script doesn't have to run to generate these files. Now in this example, that's not going to save a whole lot of time, but you can imagine as we have a project that's going to grow and grow, The fact that we can have this collection of scripts that we can write unit tests for, but also that we have this framework such that they don't run unless they really have to, that is going to be super nice. We can kind of make a collection of scripts that need to run, and this project.yaml file gives us a nice way to orchestrate that. Now, if you're curious about the details, definitely go and have a look in this file, this project.lock file. And when you look around, you'll notice that we have specific names of commands over here, and that for all these different outputs, we have this hash that's readily available. And in this case, we can confirm that the last time that this convert command was run, the same hash appeared as what we've got over here. So under the hood, this is the method that spaCy uses to understand which commands need to be reran and which commands don't. So I'm going to be using this a whole bunch, I'll take the time to explain the steps, but I hope that the orchestration of what we're about to do is also clear. Having such a system around is going to make it a lot easier for us to have a proper project, as opposed to having lots of different scripts in a Jupyter notebook.
|
|
|
transcript
|
4:17 |
In a previous video we noticed that the spaCy project framework makes sure that commands like convert that depend on the previous step don't run unless they really need to. And in particular we saw that if and only if this file over here changes then this script will run to generate these spaCy specific files. What I would now like to do though is actually dive into the script that we're using to generate these files because they paint a somewhat general picture of something that you'll probably need in most spaCy projects. So I have a folder over here with lots of scripts and in particular let's just have a look at this convert.py script. So here is the script and as this little docstring can confirm this script basically makes sure that data is pushed into this.spaCy format. This is a binary representation of the data that's nice and specific and also relatively lightweight. And the way you should kind of think about it is that we're really just storing spaCy documents. There is this object called a docbin that we are importing. And as we are looping over all the examples from our annotation file over here, what's really just happening is that we are taking a text, turning that into a spaCy document, and then this JSON file has a key called spans, and we are just adding all of those spans as entities. By the time that we're over here, we have a document with entities, and then the main thing that's happening here is that I'm saying, well, let's have a few documents for training and a few other documents for evaluation. In general it is a good idea to keep evaluation sets separate from your train sets but that's the final bit of logic that's happening here. Everything else that's happening above is really just creating a spaCy document object with all the properties that I would like to predict in my machine learning model. And then finally at the end I have this doc bin object with lots of documents for my train set and that needs to be stored to disk and I'm doing that to the validation set as well. Note that in this particular case we are interested in doing named entity recognition NER which is commonly abbreviated as NER and that's why we really have to make sure that any entities that appear in our annotations actually get set here but if you're dealing with another task. Effectively you will write a very similar script as what we've got over here. You just got to make sure that the thing you're predicting is properly attached to the document. That's the main thing that really needs to happen here. So you might wonder well what do I do if I don't have named entities but I've got this other task that I'm interested in. Well then my best advice is to go to github and go to the explosion projects repository. There's a folder here with lots and lots of tutorials. some of these tutorials are for named entity recognition but we've also got some for text classification and in particular here's one for doc issue tags and what you can find here is a project.yaml file just like we have before but moreover what you can find here are just example scripts each one of these projects typically has some sort of pre-processing script that takes some sort of JSON file and it's then assumed that this JSON file has a specific format but again the pattern remains the same. In this case we are not adding entities we are adding categories to this document over here and again we are adding that to a doc bin and then at the end that doc bin is saved to disk and this kind of holds true for any spaCy project. You will always have to pre-process data into the spaCy format and the way that you would go about that does depend on the task but there are plenty of these examples on the project's repository. So if you ever feel lost, I do advise you to just go ahead and copy some relevant scripts from here. Quite frankly, that's actually what I always do.
|
|
|
transcript
|
3:43 |
In a previous video, we showed this convert script from this convert step, and we also showed that it generated these.spaCy files, which are binary representations of documents, and because those binary representations have a very strict, well-understood internal schema, it's relatively lightweight, and spaCy knows what to look for. So that's great. We need this in order to train a machine learning model. However, there are lots of ways to train a machine learning model, and there are also lots of settings. So the next thing that we will need is some sort of configuration file. And I have this one extra step over here that is going to generate one such file. Under the hood, it uses the spaCy command line utility to initialize a config file. I can tell it where I want the config file to go, but I can also give it some extra settings. In this particular case, I'm saying, well, I want to do named entity recognition. I have the English language, and I want you to care about efficiency. By choosing this setting, we are effectively saying that we don't care about having the best of the best of the best model, because that might imply that we have a model that's very heavy and might be very compute intensive. Instead, we are actually fine with having some settings that are pretty good, but can actually run quite quickly. In general, I advise everyone to go of this setting. if you go for the most optimal setting out there, you might need a GPU, but I figured mentioning it explicitly because you might have a use case where you care more about this. So that is definitely an easy setting that you can change. After you ran this config command, you will see a configuration file that will look a little bit something like this. This is my base configuration file. And at first glance, you will notice that there are lots and lots of settings. And I can definitely imagine that at first glance, this is also somewhat intimidating. In general, my advice would be not to sweat this too much. If you have a background in machine learning, then you may recognize some of the names of the settings here, and you might find your way to try to make an improvement. And if you want to go further and read the docs, then there are also some settings like this vector setting over here that actually can make a bit of an impact. That said, if I were to take a step back and think about the larger project, then really tweaking the settings in this file, that is something I would do quite late in the project. When you're very early in a project, you're much better off focusing on these annotations. And that's partially because these expose you to the problem. But also at some point, we're going to have our first machine learning algorithm. And that algorithm is going to have mistakes. And the easiest way to fix those mistakes is to make sure that those mistakes are properly annotated and that we add enough examples like the mistakes to improve the model. Training data in the end is a very well understood steering wheel. And tweaking things here sometimes requires you to just get a little bit lucky. So for now, the main thing that's really important is we need some sort of a config file for the spaCy model to train. and we have this step that basically just does that. But don't worry too much about the contents of this file. It's not the most pressing thing for us to focus on right now. What is important for us to focus on next is to actually train a model because after this step, we have our training data and we have a configuration file. So that should be everything spaCy needs.
|
|
|
transcript
|
6:09 |
All of that brings us to the train command, which is where we're actually going to start training our machine learning model. Under the hood, it is just using the spaCy command line. In particular, we are passing it our configuration file over here. But you'll notice that we are actually setting some extra settings. And there's just one interesting detail here to kind of just zoom in on. Notice here, we're saying paths.train, and we're passing in the train file. Well, there's a correspondence between this parameter that we're setting from here and this configuration file. So let's remember there was a paths.train value that I've set in the command line over here. And in this configuration file, we can see that there is this paths key and that there is a train key under it. The way to read this is that from the command line, you can actually choose to override configuration settings. And there are moments when this is quite convenient. I personally like it that it's very nice and explicit that this is the place where we're going to be taking our training data from. This is particularly nice if we have more than one config file. And you'll notice that we actually have a couple of these settings that we set this way. the path to the evaluation set is also something that I've got listed here. I'm also able to override the maximum number of steps that we're going to be training. But you also notice that I'm setting an output folder over here as well. And this is basically the folder where we're going to save our trained model. This parameter is part of the spaCy command line. This is not part of the configuration file. But what is going to happen when I run this step is that we are going to be training a machine learning model, and the saved representation is going to be stored in a folder called trained. So let's run this. Python spaCy project run train. So we can see the command that's being listed here. We can see some confirmation that stuff got initialized. And we can also see something of a progress bar. Or table, I guess you could say. From this table, we can see that there are steps that are being taken. And every 200 steps, it seems that we get our evaluation that's being shown here. So we get some metrics out. Some of the metrics are kind of detailed and nitty gritty, like these loss functions over here. But there are also some other metrics that have a pretty clear interpretation. So we have the recall score, which tells us how many entities we detected. we have the precision score over here which tells us something about how accurate our prediction is if we are saying it's an entity. To get more of an intuition on these definitely check the docs. For now though the main thing that's important is that the higher these numbers are in general the better. And as time moves forward you can see that sometimes it is making an improvement sometimes it's also degrading a little bit. And once we're done after 2000 steps which I configured we get this notification that indeed the model is done training. We can have a look in this trained folder. And one interesting thing here is that we actually see two folders appear here. We have one which represents the last state that we had in training. That will be the model that we had over at the end over here. That's the model that gets stored there. But we've got this other folder called model best. Typically, this is the folder that you'll be most interested in. And that's because theoretically it is possible, as the model is searching for the best weights, that there is a degradation. You do see sometimes that we go from a higher number to a somewhat lower number as time moves forward. There are all sorts of numerical reasons for this. But because we are making sure that we're storing the best model at all times, we don't have to be afraid that we actually lose information. When you open up this folder, you can confirm that there are lots of different files and folders over here. These are all very spaCy specific files. But one quick thing we can kind of do now, just as a final demo. If I were now to open up this IPython REPL over here, what I could do is import spaCy. But now I can call spaCy load and I can point it to that model best folder over there. You might remember that before we would write something like en core webmd to specify a downloaded model. But in this case, I can actually point it at a model that we just trained. And I can give it a sentence, something like, I enjoy using Django and FastAPI. Let's have that be the sentence going in. I'm going to store that onto a document. I can ask for the entities. And there we go. What you're seeing now is a NLP pipeline that we trained from scratch that is able to detect some Python libraries on our behalf. Now, what I don't want to suggest is that this model will be perfect because what you are seeing here is a reflection of the way that I've been annotating. I've been annotating lots of examples like Django and FastAPI. but if I were to pick a more obscure Python library like I enjoy using lunar.py which is a very cool little library actually but I don't think I annotated that that doesn't get detected so again it's definitely cool as a milestone that we are able to load up our own custom model but I also hope that it's clear that we're not exactly done yet because our model is definitely still making some mistakes
|
|
|
transcript
|
4:37 |
Hopefully by now you've gained an appreciation of the way that these project YAML files work, but I would like to wrap this up by just highlighting a couple of extra features of these files. For starters, one thing that you can also do is you can declare directories up front. This is basically telling the project's file that if these folders don't exist, that it should go ahead and create them. Another thing that we also have access to are these variables. So we can declare variables at the top of the project and we can then refer to them later. And that can be very useful if you want to attach a version or if you want to have a consistent name everywhere. In particular if I were to scroll down to the final command in this file, this package command over here, this is a command that can turn a trained model into a pip installable gzip file. Yeah, you can see that I'm referring to some variables over here. So I'm saying grab the vars.name variable over here and grab the vars.version over here. And again, that will be referring to the vars.name that we've declared here. And especially if you get like a very big project.yaml file, using variables can be a nice way to constrain the complexity a bit. Another thing that we can do is we can actually chunk and combine commands together. and that is something that you can declare under these workflows over here. So here is a command all that runs the convert, config, train, and then package command after each other. So what I should be able to do now is call spaCy project run, but then run all of them. And in this case, I'll be referring to this workflow over here, and this is going to run all the steps in this workflow. And here's what I get when it's done running. It went through all the separate steps. So this is the output for the package command that it ran. We see the output for the training pipeline. We also see the output for the config step as well as the convert step. And notice that in this case I was starting on a clean disk. But if I were to now rerun this, then we should also see that some of the steps are a whole lot faster because nothing changed. And again, this is kind of the beauty of the config file. All of these steps will only run if there's a need to. And in this case, that would mean that either we have new data sets, which might be a reason to train everything again, or we have a new config file. Now there's one final command that I do think is worth to show real quick, and that is that you can also run the document command. When I run it, you will notice that there's a bunch of markdown being printed down here. You'll also notice that some of that markdown refers to some of the things that we've defined in our project.yaml file. Just for good measure, let's move that into a readme.md file. And if I were then to open it, here's what the rendered markdown file looks like. It is basically a readme that's derived from this project.yaml file with an appropriate title, with a description that I've added. But it's also got all of these commands that I've defined with documentation. And this is definitely very convenient if you're interested in maintaining this project in the long run and new people have to sort of jump on board. Now, a final thing, because it might be confusing, is that you may have noticed this weasel pop up a few times. And you might wonder what's up with that because we're using spaCy. Well, kind of the cool thing about the way that spaCy is set up is that some of the logic on how to maintain these projects is put in a separate repo called Weasel. That means that if you're interested, you can use these project files without having spaCy. And there could be good reasons for that because the way of working is actually kind of nice. But it's good to know that under the hood, spaCy is actually using a project called Weasel to handle all of its project features. Now note that Weasel is maintained by the same group that maintains the spaCy project, so as long as you're using spaCy, you can expect Weasel to be well integrated, but it is good to know that technically it is a separate package, and that's also why you might see a reference to Weasel now and again. Having said all that, the main thing that I hope you appreciate at this point is that these project.yaml files are actually very nice if you're working on a larger project.
|
|
|
transcript
|
4:09 |
So in this section of the course, what I've done is I've shown you how you might be able to set up a project for NLP. And what I mainly hope is that I've introduced a couple of good habits. You typically start your journey with some annotated data. Then there are some steps. You probably want to convert your data. Then you want to train on it. and then at some point you've got some sort of a model artifact that contains the machine learning nice and packaged up. But the only thing I've shown you so far really is how to get started. I've shown you tools to sort of get this thing rolling, but you might wonder, well, what's the next step? How do I get the best machine learning model out there? And truth be told, there's not really a magic bullet here. The main thing that you're gonna have to do from here is you're gonna have to iterate. And here's what I mean by that. When you've got a machine learning model, one thing that you can do is you can actually toy with it, expose it to some data that hasn't been annotated yet, and see where it makes mistakes. If you notice that it starts making mistakes, well, the examples that it gets wrong, let's annotate those. Then, once we've got more examples, we should be able to convert again, we should be able to train again, and we should have version two of our machine learning model. And then that new version can be used to toy around. And what I hope is clear here is that every time you poke at your model, there's an opportunity to figure out what it gets wrong, which also means that there's an opportunity to improve your training data. And as you iterate and as you play around, you will keep getting better versions of your machine learning model. And this in the end is a very pragmatic way of thinking about it. You get to play around with your model and you get to see if you can break it. And if you can, well, time for version 5. There's another opportunity to make things better. Having said that, I do want to leave you with just a few hints of inspiration of techniques that might be useful in general. Because even if you have a machine learning model, you can expose that to your big data set. But you might wonder, well, where do I start? The big data set is big, and maybe there are ways such that I can focus on subsets that matter most. The most general trick that I've seen work quite well is to consider two modeling approaches. Let's say we've got this machine learning model, but let's now also say that we've got some sort of rule-based model. What I mean with a rule-based model here is something like the patterns files that we've made earlier. There's just a couple of strings that should refer to Python packages, And we have a long list of those, so that could also be useful. One thing that we can then do is we can then expose both of these models to data points that are not annotated yet. And we can kind of just say, well, you know what? Let's see where they disagree. The thinking here is that the machine learning model should have learned useful patterns, and the same holds for the rule-based one. And when they disagree, well, then either we're going to expose ourselves to examples that we can annotate, and that's something we can use to make the machine learning model better. or we see that we have some patterns that are wrong and we can use that to make the rule-based approach a bit better. In general, I have found this heuristic to work quite well on a lot of problems out there. Again, it's not a silver bullet, but it is a trick that does help me iterate. And that's the name of the game at this point. You're going to have a model in the beginning that doesn't really perform super well, and it's going to be very useful to understand the failure scenarios. And from there, there are things that you can do to improve. At some point, you might have enough data such that you can tweak the configuration file for your machine learning model and then maybe use that to make things a bit better. But honestly, so far, I haven't seen that many projects where changing the config makes a huge difference. It's usually more of a game of annotating the data, understanding the problem a bit better, and iterating on the data set as well. And in my experience, that's the way you should set up your project for NLP. Data quality is just to be super important. And if you set your project up in such a way that it's easy to add new data and also easy to train, well then you're going to be in a nice productive spot.
|
|
|
transcript
|
0:50 |
So this concludes part three where we talk about NLP projects. Hopefully I've been able to show the weasel and spaCy way of going about it, but the main idea that I hopefully got across is that you want to be in a spot where it's easy to iterate. Having said that, what might help as well is to also take a step back and have a look at the larger NLP ecosystem. Don't get me wrong, spaCy is an amazing tool, but there is also an ecosystem of plugins, And there are also tools beyond spaCy. So what I want to do in the next part is to focus in on this. The thinking will still be that you're going to use these tools to do NLP projects in an iterative way, but it is also good to broaden your horizon a bit, and that's what the final part of this course is going to be about.
|
|
|
|
37:31 |
|
|
transcript
|
0:46 |
So far in this course we have been talking about spaCy and again, spaCy is great. But there are also other tools and spaCy also has an ecosystem and that's something I would like to touch on now. So just high over, one thing we'll touch on in this part is we're going to talk about other tools. These might be tools that integrate with spaCy but they might also be tools that do something well all together that can also be helpful in an NLP project. We will also talk about some useful plugins and we will also talk about slightly different techniques that might also be helpful. In particular we're going to also talk about LLMs these large language models like chat-gpt and we're also going to talk about how they might be able to help out with our NLP projects. So let's dive in.
|
|
|
transcript
|
2:13 |
So let's discuss some related things you might find interesting about spaCy. And before talking about all the different plugins, I feel that maybe I should spend some time talking about these different models. Now, because this course is in English, what I've effectively done is I've taken English models. These models are great, but there are also lots of other languages you might be interested in. If you go to this model section on the spaCy documentation, though, you can have a look at all these different pipelines that have been trained beforehand. So, for example, let's go to Dutch. spaCy doesn't support every language, but when it supports a language with machine learning tools, then typically there will be a small, medium, and large model. There's lots of details that might matter here, but in general, the smaller models are a little bit less performant in terms of entity recognition abilities, but they are really nice and fast and definitely lightweight. In this case, the small model is only 12 megabytes, which is pretty nice. If I were to contrast that with the large model for Dutch, then we can see that it comes in at about 500 megabytes, which is a whole lot bigger. The medium model sits somewhere in the middle, and in general, I can recommend going for the medium model when you're just trying to get started. In general, the medium model will be the thing that will work just fine, but know that there is a large model available, too. Some languages, not all of them, will also have this TRF model attached, which is an abbreviation for transformer. Now, the interesting thing with those models is that they might not be the biggest size in terms of megabytes you've got to download, but these are models that are using a so-called transformer architecture under the hood, which is a very heavyweight model in terms of compute. It does depend on what you're doing exactly, but you may need a GPU in order to run these models comfortably. These models have pretty good performance statistics, and again, if you're just getting started, I would definitely go with the medium model instead, but it is good to know that these models exist as well, in case you're interested in them, and in case you've got access to a GPU.
|
|
|
transcript
|
2:55 |
One cool feature of spaCy is that it also has plugins. And you can explore some of them by going to this Universe tab over here. Now there's a lot of different types of plugins. Some of these plugins are things that use spaCy under the hood, whereas other plugins are adding new functionality to the library. For example, this Blackstone project over here is a project that contains a spaCy pipeline that has been trained on legal texts. We can also scroll down a bit and we can see that there are these community models that have been trained on different languages. This one is trained on Danish. But there are also projects that fall a little bit more in the hobby category, like this Hobbit spaCy plugin that adds NLP support for Middle Earth. A bit of a fan language there. But there's also some interesting projects for, let's say, Ancient Greek or Latin. These languages technically aren't spoken that much anymore, but it's still pretty cool to see that one can make a spaCy plugin for such a language. And there are also use cases for this, especially if you're a little bit more in the linguistic humanities. And I guess another good example of a spaCy plugin would be this one. This one is called negspaCy, which gives a pipeline for negating concepts in text. And it's pretty handy. You can typically see the instructions on how to install the plugin. And there's usually also an example that you can just copy and paste to get going locally. And this particular plugin has some algorithms to deal with negation on entities. So just to zoom in on the example that's listed here, the sentence here reads, She does not like Steve Jobs, but likes Apple products. So that's referring to Steve Jobs. And that's a property that you can extract on that entity if you've added this pipeline component. And you should also be able to confirm that negation is not active on Apple, which is, I assume, the other entity found in this sentence. negspaCy is just one example of a plugin, but this spaCy universe over here has lots of them. And it can be worthwhile to just have a look what's in there. Now, the one thing to remember is that these universe projects are not hosted by spaCy itself. These are community projects. And that does mean the projects can be a little bit stale. If we have a look at the GitHub repository for negspaCy, then we can see that it's still fairly well maintained. I can see that there are some unit tests, and the last commit was about a year ago, which isn't that bad. But I can also see that this project is over 5 years old. And it can happen that a plugin, especially after 5 years, isn't maintained as much anymore. That does totally happen with open source packages. So before you dive deep and start using one of these plugins in production, it will be good to just at least have a glance at the GitHub repository,
|
|
|
transcript
|
4:57 |
While spaCy is definitely a likable library, there are also other places where you can look for pre-trained models. And Hugging Face is actually a pretty interesting candidate to consider here. When you go to their website, there is this model tabs over here. And here you're able to find lots and lots of different models for lots and lots of different tasks. There's a whole bunch for computer vision. There are some multimodal models here as well. But if we scroll down, at some point you will also notice that there is this natural language processing section. And there are lots of tasks here that could be of interest. But if you're interested in named entity classification, then you're going to want to look in the token classification part over here. I have zoomed out a bit just to give an impression of how many models there are to pick from. In total, it seems that well over 16,000 models are being hosted here. And that means that there's actually a whole lot to pick from. Big companies like Microsoft sometimes put their models here, but there's also lots of individuals. What I'm just going to go ahead and do though is open this one, because I think it's a somewhat likable project. The project on display here is SpanMarker, which is a NLP library meant for detecting entities. And one thing that's really nice about this particular project is that there is this model card attached. Not every model that you'll find on Hugging Face has this, but here you can kind of get a summary of how the model was trained. In this particular case, it's a multilingual model, so there's different languages that have been trained. And you can see some scores on how well these models performed. You can also scroll down and get some impression of, hey, what are the kinds of labels that you can expect to get out of this model over here. This particular model seems to be trained on some biological data as well, which could be useful if that's your thing. But in practice, if you're interested in using a model like this, what you're usually going to have to go ahead and do is go to the right-hand corner over here. And then there's usually some sort of button that you can click that explains to you how you can actually use this model from Python. So as a demo, I'm doing just that. I installed the SpanMarker library. And what I've also done is I've pointed to the Hugging Face repository that has this model. It's good to know in this case that this SpanMarker model has a tight integration with Hugging Face. Different libraries from different third parties might have a slightly different way of going about it. But this does give me a model which can also do some NLP task for me. And here's what a prediction looks like. Note in this case, this model is receiving a single sentence. This model.predict is following an API that's different than spaCy. But we can see that we get something out, and it's able to detect that my name is indeed a person. It even gives me a confidence score. So this looks pretty good. However, notice that I've also been timing this cell over here. And it seems that in order to make this one prediction, we need to wait for over a second. It's actually taking a small while. And this is somewhat common with Hugging Face models. This doesn't hold for all models, but it is good to understand that a lot of the systems on Hugging Face also use a transformer architecture under the hood. And I am running this notebook with a machine that only has a CPU. So it is pretty normal to see this take a small while. You might need to be a bit patient when you use these models. Let's compare that to spaCy. When I give the same sentence to spaCy, and when I have a look at the entities, then again I get Vincent D. Warmerdam out. In this case, this is a span instead of a dictionary. But moreover, I can see that this is way faster. Like, an order of magnitude faster, if I'm honest. Just like spaCy, a span marker model is something that you can fine-tune. It is something you can also train from scratch. But given the fact that it is a somewhat heavyweight model, I might recommend maybe using models like this while you're doing annotation. It does feel plausible to me that you might be able to use a heavy model to help get you some high-quality annotations. And then once you've got those, you can try and train a somewhat more lightweight model using spaCy. And that can be something that makes a lot of sense for some production use cases as well. Now a small note on this. In this case, I have been exploring the span marker model, which I do think is pretty likable. But if I were to maybe sort by most downloaded, and if I were to just have a quick look at something I see there, then in this case, if I were to explore this, I have to use the transformers library instead of the span marker library. The fact that something is hosted on transformers doesn't mean that everything is using the same API. So definitely always check the code block that you see here, as well as the docs, if you're interested in using one of these Hugging Face models in your project.
|
|
|
transcript
|
2:07 |
Another way to explore Hugging Face models is to explore organizations. So Explosion, which are the creators of spaCy, they have a bunch of models hosted here as well. And as we can see, there's a couple of these models that do token classification, but there are also other models that do text classification instead. As always, there's a button on the right hand corner over here that I can go ahead and click, and this will give me the code that I need to run this model locally if I wanted to. This particular model is a bit different than the models that we've seen so far in the sense that it actually performs a different task. So far in this series of videos, we've been interested in taking texts like this, and then being able to highlight substrings. So I'm able to say Vincent in this sentence is a person. This is a kind of task that you might have when you're doing NLP. But sometimes it's not so much finding things inside of a sentence, sometimes it's saying well, I've got this bit of text, what kind of category is it? So in that case, text might go in, and then you might have tags let's say. In this case, maybe there's anger in this text. Yes, no. And there are some other emotions that we have over here. And this is of course different than named entity recognition. This is more of a categorization kind of a task. spaCy can be trained for this, and there are projects that you can go ahead and copy if that's something you're interested in. But there are also other projects that can do this for you as well. And again, just to give an impression of how many models there are, Hugging Face at the time of making this recording has over 55,000 of them. With that, I would also like to remind you that not every model here is going to be as relevant. Partially, that's because maybe there are some labels that are being used in this model that don't fit your use case. But moreover, you should also remember that anyone can upload a model as they see fit. So it might also be the case that not every model that's listed here has the quality standards that you need from the get-go.
|
|
|
transcript
|
2:03 |
If you're interested in doing NLP these days though, there's also this other tool that by this time you probably will have heard of, called chat-gpt. This represents a large language model, which gives you the option of communicating in natural language in order to get knowledge that you're interested in. And that means that I am able to do stuff here that can also help me in my NLP project. And just to give an example of something, suppose that I'm actually interested in finding Python packages that are very popular. Well, one thing I could ask chat-gpt is to give me a list of those packages. I can give it this prompt, give me a list of popular packages, give 100. Usually it's a good idea to add that to the prompt if you want to actually get 100 of them. And if I were to now run this, then chat-gpt will happily generate me a long list of popular Python projects. Now a small grain of salt needs to be applied here, because you could say that Jupyter Notebook technically, you know, it's a Python tool so it's fair game in a way. But Jupyter Notebook is the name of a tool, not the name of the Python package. And similarly when I scroll up here, there is a site called readthedocs which has lots of documentation on it, and it's a cool resource. But again, it's not a Python package as far as I know. Although this list is plenty useful, because a list like this is something I can use to generate me a pattern file that I can use inside of spaCy, it is good to know that if you were using chat-gpt for something like this, that the list itself is probably not going to be 100% perfect. But still, stuff like this can be immensely helpful. A tool like chat-gpt can be used to give me a long name list, and then from that point on I can use this name list locally without communicating to a third-party vendor. And stuff like that does make these LLMs pretty useful to have around when you're doing an NLP project. But if you're willing to experiment a little, we can actually turn this up a notch as well.
|
|
|
transcript
|
4:57 |
In the previous video we gave ChatGPT a prompt and it was able to generate text that was interesting to us. However, before we just got a big list of items but maybe we can come up with a more elaborate prompt for a more elaborate NLP task. One thing I could do is I could literally make a prompt telling ChatGPT to perform NLP for me. So I could do something like from the text below extract the following entities for me. And I could do something like dish, ingredient and maybe equipment. And then I could do something like here's some text. I know of a great pizza recipe with anchovies. And here we can see that ChatGPT responds and that it's actually able to make some solid detections. It is able to confirm that pizza is indeed a dish. We're also able to see that anchovies is a ingredient so that's nice. And it's also able to say that the equipment, well there's no equipment mentioned in this bit of text over here. Now what's kind of interesting here is that technically you could look at this and you could say hey it seems that ChatGPT can be used to do some named entity recognition on our behalf. And that's definitely a cool observation but we should also be a little bit critical and wonder if what ChatGPT is giving us here if that's actually enough. And that's because usually when you're applying NLP text will go in, you give that to your NLP system and then structured data comes out. In this case it's a little bit different. We have text in the form of a prompt with the text we're interested in detecting. We're giving that to a large language model and then what comes out, well that is actually more text. Technically speaking there's no structured information here. This is just text that's being generated on our behalf. So that technically means we need an extra step here to turn the response text into something that is structured preferably. So how might you actually be able to get something that's structured here? Well one thing you can do is you can change this prompt over here. Right now we're just asking it to give me entities but we could also ask it to give the entities in a specific format. So let's just try that real quick. All right so here's an adaptation. It's a small change but what I've now done is I've said well there's a very specific format that you have to follow. So there's a dish and then there has to be a comma delimited list of strings. Then there's an ingredient and the same thing. And although it's a subtle change we do see now that instead of it being a bulleted list we really just get new lines in the format that we're asking for and we see again that it's performing the NLP task in a way that we like. Now if you were to build a proper NLP system for this what you kind of need are two components. You need some sort of way to take this output and to turn it into something that is structured. If I were to think in terms of spaCy it'd be nice to somehow get this into a spaCy document object right. In particular it'd be nice to see those as entities on that object. But maybe something else we would like our system to do as well is maybe generate this prompt. You can imagine that I might be able to start with some text that goes in. That'd be the text over here. But constructing a prompt over here such that the information that comes out over here is nice and structured. It'd be kind of nice if we have some sort of a prompt generator for that as well. And hopefully it's also clear that this prompt generator together with this response translator. Well these two things these would be nice to have in some sort of a library that just handles a whole bunch of this translation and prompt generation on my behalf. And this is exactly what a plugin called spaCy LLM does for you. It can generate prompts on your behalf and there's actually a fair effort being taken into account to make sure that prompts are being generated according to the latest literature. And for each prompt we can also have a proper response translator. But even better spaCy LLM will also allow you to pick the LLM provider. You can use tools from OpenAI if you like but OpenAI is not the only LLM vendor out there. In fact there's also open source models from Hugging Face that you can run locally that spaCy LLM can also communicate with on your behalf. I hope this was useful context but next up what I think I should do is just give a very quick demo of spaCy LLM.
|
|
|
transcript
|
3:11 |
Alright, so I'm back in my notebook and I've taken a couple of extra steps. First, I've installed some extra packages. I've installed spaCyllm, which is the llm plugin, and I also installed this library called python.env. The reason why I've installed this library is because I need some environment variables that have my OpenAI credentials, and those are stored in this .env file. Now, the two variables that I've set there are the OpenAI API organization, which is my personal identifier, and I have also set the OpenAI API key, which is my secret key. These are the two environment variables that I've declared in that particular file, and these are the two environment variables that this llm provider needs. Besides this .env file though, there's also this other file here, which is called spaCy-llm-config. Here's what it looks like. But in this particular case, this config file is somewhat limited. We can see that there is this pipeline defined here, where there's only an llm component, but inside that llm component we can see that there's a task definition and that there is a model definition. This model definition over here contains everything that spaCy-llm needs to understand what backend to use. There are lots of backends that are described on the documentation, but I'm using the gpd3-5 setting here, which is chat-gpt. Then, for a task, I have a suite of tasks that I can pick from, and you can kind of look at this as a recipe that contains both the prompt generator as well as the response translator. But in order to generate the prompt, the minimum thing that I would need is I would need to know the names of the labels that I would have to predict. And that's something I'm able to define over here. So, in layman's terms, this is all the configuration that you need to have a NER model that detects the dish, the ingredient, and the equipment. And this configuration is something I can actually use to bootstrap a spaCy model. To do that, there is this assemble function from the spaCy-llm-util library. I can point that to the config file. And because I've loaded my keys by running this load.n function, that means that the keys in this file are now properly loaded, then this NLP model, whenever it sees text, will do a call to OpenAI. When we send something to OpenAI, we send the prompt plus the text. Then we get a response back. And then the text in that response, that is something that spaCy-llm can then use to construct a spaCy doc object. And that's what we see happen here. As a user, it really feels like you're using spaCy as you would normally. It's just that all of this in the background is abstracted away from you. But that is still definitely kind of a nice feature, I would say. We are able to use big LLM models, and it still feels like we're just using spaCy.
|
|
|
transcript
|
5:54 |
There's one setting that I glanced over in the previous video, and that is this save I/O setting. That setting actually allows us to do something extra from the notebook over here. Now just to reiterate, I've got an NLP object here that really behaves as if it's loaded from a normal spaCy model, but because I'm using spaCy LLM and because I've configured everything the right way, all the NER predictions are really handled by an LLM. But the look and feel really is just like you would normally have with spaCy. I get a doc object out over here with entities attached, etc. But this doc object over here also has some extra data attached. So because we've configured it, we can have a look at the user data that's attached to that document. And there is this LLM I/O key, and then this LLM key, and then a prompt key. And if you inspect it, you'll notice there is a prompt being listed here. The text that goes into the LLM over here is injected below there, but we definitely have a command that goes to the LLM. Fun fact, by the way, believe it or not, adding this sentence saying that the LLM is an expert named entity recognition system actually makes it a bit more performant. It's one of these weird little trade tricks when you're designing prompts that seems to work. After that, we again ask the LLM to give the response back in a certain structure, and we can actually also get the response from the LLM back as well. The main difference is that we have to query the response key instead of the prompt key, but also here we can see what the LLM is generating, which is something very similar to what we saw in ChatGPT. So that's all pretty interesting, but you might wonder, well, is there maybe more information that we can give to the prompt? Because right now the LLM, you could argue, doesn't have a whole lot of context to go by. I am telling the LLM that there is a dish, but maybe I should also explain what I mean by this label dish. And the same thing with ingredients. Is salt an ingredient? Is a sandwich a dish? There are these extra things that I might want to give the LLM in order for it to make a better guess on what the entities are over here. As luck would have it, what I could also do is make a somewhat more advanced config file where I pass that information along. So to help emphasize the comparison, this is the config file that we started with. I'm using spaCy NER version 2 and, you know, just a few settings. But I can also add more settings here. For example, I can add label definitions. So I could say, well, this is the name of a label, but here is just a little bit of a description that hopefully will be able to push the LLM in the right direction. I can add stuff like saying herbs and spices would make for good ingredients. What I'm even able to do is add a few examples. So I've got this YAML file over here where I have a text example and I've got entities that it should detect. The thinking here is that if you spot that the LLM makes a couple of mistakes, then you can add those mistakes here as an example. And by adding that to the prompt, the hope is that the LLM won't make the same mistake again. So let's look at the effect of this. I'm keeping basically everything the same, but I am going to point to the advanced configuration file instead. And here are the results. The same entities are detected as before. So far, so good. But the one thing that's going to be very different now is this prompt. Because we now have label descriptions, you can see that this part of the prompt is now being added. We are telling the LLM that each label has a description that again have been written by an expert. Then another part of the prompt is added. Here we can see that there are some examples to be used as a guide. At the end over here, we can see again that the response is exactly the same. But the main thing, at least here, is that you do see that we're able to configure a more elaborate prompt. In general, more elaborate prompts are more expensive because you are using more tokens, but they are also more accurate. So getting that right will require a little bit of experimenting. But the main thing that I do think is just kind of neat about this approach is that you don't have to go and read the API documentation of all of these different LLM providers. You have one consistent config file and this can communicate to a whole bunch of places. If you're interested to learn more, if you go to the usage section of the docs, there is this large language model section over here that you can click. And besides giving a lot of extra context, you can also scroll down to this models bit over here at the end. And here you can see this giant list of all the different models and backends that you can configure and use. A lot of these are based on OpenAI models, but there's also some competitors like Cohere and Anthropic, as well as some open source models like Dolly and Mistral. As time moves forward, I'm sure more models will be added over here, but I do hope at least for now that you appreciate the separation of concerns. You are able to pick from different providers and still get an LLM that integrates nicely with spaCy.
|
|
|
transcript
|
3:39 |
So you might be a little bit curious now because I've shown you two different ways of doing NLP with AI tools. On one end we've got spaCy where text can go in and because we have a spaCy model that was trained using training data with labels we are able to get some structured information out. But you might also look at spaCy LLM that is also able to get some structured information out. But the main difference is that here I would also need to have some labels and here I would only need a prompt. So that might make you think that this way of building machine learning models is actually preferable. It's easier to get started with and wouldn't that always be better? And here I want to apply a little bit of warning and a little bit of nuance. If you're going down the LLM approach be reminded that it is a bit costly. This is especially true if you are using third-party providers you're going to have to pay. But even if you're running models locally these models tend to be very heavyweight. And you also need to pay for compute so that's something to keep in mind. spaCy models tend to be nice and lightweight which is definitely not the case for these LLMs. Second, especially if you're using a third-party be aware that the data needs to go there. And depending on the industry that might be a no-go. The third reason is accuracy. And the easiest way to explain that is maybe by drawing a chart. Now imagine that we have labels on the x-axis over here. So the more labels we've got the more to the right that will be over here. And let's for all intents and purposes say that we've got some sort of measure for performance. Well in my experience so far with no labels whatsoever you can get a pretty decent performance out of an LLM. So even at zero labels when you've got a decent prompt you can get pretty good performance. The spaCy model on the other hand is probably going to start out a bit slow. But there does come this point usually where the spaCy model is able to surpass the LLM. Now this probably won't hold for every use case out there but I do have a small theory on why I've seen this in practice so much. Even when you've got a pretty good prompt this LLM over here can be seen as a very general model. OpenAI really needs to facilitate a wide spectrum of use cases. Our little spaCy model over here doesn't. The lightweight spaCy model only needs to concern itself with a small subset of natural language and on a very precise task. And I think that's why at some point the spaCy model tends to perform a bit better as you collect more and more labels. That's not to say that LLMs aren't useful though. There is this moment in the beginning when you're bootstrapping when the performance of an LLM is actually going to be pretty good. But this phenomenon at least to me is the reason that I really like to use spaCy LLM early in a project as a annotation aid. With very little effort I can get a model that's okay and I can compare that to my own spaCy model and again when there's disagreement I might be able to give priority. And it's tricks like that that really do feel very useful. So in summary, who knows, times might change, maybe these LLMs become more and more lightweight and they also become more performant. But it does feel that at least for now there's still a lot to be said to also train your own spaCy model even though we've got these very useful LLMs at our disposal as well.
|
|
|
transcript
|
4:49 |
In my mind the way that you're gonna do NLP projects doesn't change. You're always gonna want to iterate. But it is pretty common that you're gonna see new tools pop up once in a while. It's a fast moving field, but once in a while there's a tool that just sticks out as being quite useful. And when I was wrapping up this course I just noticed this GLiNER library that really does something that I think is likable. It is not quite an LLM, it's a bit more lightweight than that. But this package is part of a research paper that you can go ahead and read. There's a link on the GitHub repo. But in essence the thinking here is that maybe we can have a very, very, very small LLM-like model that is able to run locally on your machine. In effect this would allow you to still get prompt-like behavior to get your named entities, but you don't have to send any data to a third party. This model is designed to be somewhat lightweight. So to give the quickest demo of this, I've installed the library and I have a little demo here that shows you how you can use it. You gotta make sure it's installed. Then to load up a model what you gotta do is you gotta give it a string that points to a type of model. I'm giving it one of the more lightweight ones right now. And then this model can make predictions on your behalf when you give it text as well as labels to go ahead and detect. In this case I'm saying, well, let's just go for Python tools. And in the cell block below over here, what I'm basically doing is I'm looping over all the lines that I've got for my transcripts. And then I'm giving that model one line at a time as well as this list of labels that I would like to go ahead and detect. That will give me some entities and I'm just gonna show you some of the entities that it was able to detect. And keep in mind the only thing that I'm passing here are these labels. It's just a list. This is all the context that the model really has. And out of the box it is able to detect a bunch of things that I would argue are pretty relevant. I got a couple of Django and HTML detections over here. It's also able to detect Sentry. But we can also see that it makes a few subtle mistakes. For example, view over here. To my knowledge that's a JavaScript library, not a Python tool. It's not the worst kind of mistake. But similarly I can also see that Sentry-launch-week also gets detected as a Python tool over here. And we can scroll down and see some other interesting examples. Async I think is not necessarily a Python tool. PyCon and DjangoCon are great conferences but they're not really Python tools either. And you can see that there's like subtle mistakes but it does get it right in the realm of Python, so to say. And it's even able to sometimes deal with these odd spellings like lowercase fast space API. This is not how I would spell the package but it is able to detect that it's referring to it. So even though the results over here are not perfect I do feel that it's relevant to mention this. Because models like this are incredibly useful when you're annotating datasets. You only have to pass a label and even though the predictions are not going to be perfect you are going to get some predictions. And when you're annotating it's typically a lot easier to say Is this correct? Yes/No"" than to really manually annotate everything by hand. Another thing I would like to emphasize with this model is that this is part of a research paper so who knows how well the support is going to be for this model going forward. But just the fact that you can run models like this locally that is super nice. And it's also no surprise that I think within a month of this paper being out there together with this package a community member actually made a plugin for spaCy. So if you were to go to urchade/GLiNER-spacy you are going to find a plugin that you can go ahead and use. And in effect it works in a very similar way. spaCy will want some configurations so you're able to set some settings like Hey what labels would I like to have?"" etc. You're able to add that as a pipeline step to the NLP pipeline which is also just kind of nice. And then you also get these entities but they're not part of your normal spaCy workflow. But I hope you agree this is kind of a nice example to maybe end with because it shows that despite the fact that NLP is a somewhat fast-moving field the fact that we have different components that can always click into a spaCy pipeline that's definitely kind of nice and it really fits the vibe of spaCy. The goal is to have a somewhat general pipeline for NLP projects and spaCy is just a really really useful tool for that because it's nice and flexible.
|
|
|
|
2:15 |
|
|
transcript
|
2:15 |
Time to wrap up. I hope that in this course I've been able to show you a few nice things about spaCy as well as how to do NLP projects in general. I've also given a glimpse of what you might be able to do with LLMs as well as some other tools. So at this point you might be thinking, well great, I've done a course, what now? And I guess my advice is pretty simple. The way that I've learned NLP is to really just expose myself to NLP problems. And I might give the same advice to you. If you want to learn NLP, at some point you really just got to get your hands dirty. You can try to read all the books and all the documentation pages, but more often than not, you really need a motivating example to keep you going. So maybe think a little bit about some text as well as a use case that you might have for yourself. And if you don't have one right now, well, one thing you could do is you could go to the transcripts of the Talk Python podcast and you can try to build your own NER model on these transcripts on something that you are interested in. You can use the code from this course as a starting point, but I do really recommend you to give it your own try and to see what interesting things you might be able to do with this data set. It really is pretty fun to play with. You can definitely also use your own data sets, but if you've got a problem like this, what's probably going to happen is you're going to hit a problem, which will act as a forcing function for you to check the spaCy documentation. Maybe you want to build a custom pipeline and that'll be a reason for you to read this document. But by the time you're here, you will have a motivating example for you to keep going. And that, I think, is the most important thing to do right now. I would worry slightly less about the theory and the models out there. I would mainly just try to focus in on a fun problem that you'd enjoy working on. The name of the game here still is iteration. You want to be in a flow where you're able to make changes and see if they work. But iteration really becomes a lot easier if you've got a fun example to work on. So if anything, try to focus on that first. If you don't have text data yourself, do trust me, these transcripts are pretty fun to dive into.
|