|
|
|
26:58 |
|
|
show
|
2:38 |
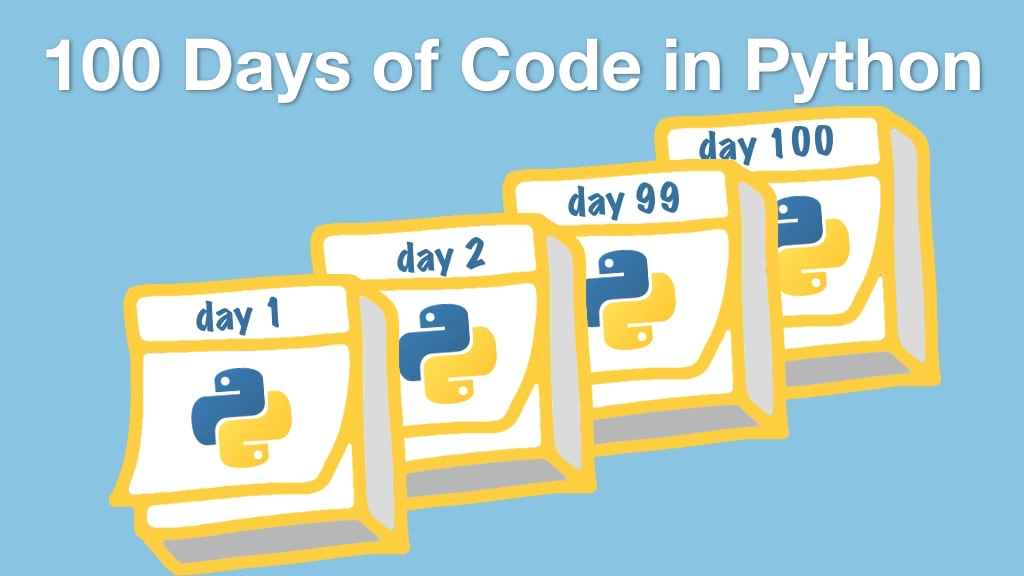
Hello and welcome to 100 Days of Web in Python, written by Bob Belderbos, Julian Sequeira and myself, Michael Kennedy.<br>
Maybe you're wondering what this #100DaysofCode you've seen all over social media is all about.<br>
It's really really taken off, and people are finding this concept of 100 Days of Code really powerful for getting them over the hump, and to become capable developers, or maybe learn a new language like, say, Python.<br>
Here's an example of what you might see on Twitter.<br>
Horne Sanchez says, "Day 11, #100DaysOfCode progress." "Today I worked more on byte 18." "Find the most common word from codechalleng.es/bytes." This code challenge platform they're referring to is actually from your coauthors, Bob and Julian.<br>
We'll talk more about that later.<br>
Here's another tweet.<br>
"Day five of 100." "Did some short exercises about modules." "Imported modules, did a couple of my own." "Tomorrow, I/O." "#100DaysOfCode #Python." Way to go, Briggs.<br>
Here we have "Round one, day 101." "Had to do an extra day due to one day off sick" "earlier in the 100 Days of Code." "Today's more of Python debugging." "Tomorrow starts round two." And Jeff says, "Round one, day 19 #100DaysOfCode." "Did three exercises in the book, basically my average." "Been taking it a bit slow these last few days." "#CodeNewbie #Python #IndieDev indie game dev." And finally, let's look at one more.<br>
Amit Kumar says, "#Day32, another autowebcompat PR" "that is, pull request, just got merged." "Way to go." "Python tkinter #100DaysOfCode." So he added some new feature or bug fix to autowebcompat.<br>
Very very cool.<br>
So you've seen this stuff probably all over social media, Facebook, Twitter, and so on.<br>
What's it all about?<br>
Well, this is actually a very structured project put together by this guy, Alexander Calloway.<br>
So Alexander, he was studying in business school he also wanted to learn programming.<br>
He was having a hard time making progress so he came up with this idea of 100 Days of Code.<br>
Here's a quote from him.<br>
"The idea of 100 Days of Code originally came from" "my personal frustration with my inability to" "consistently learn to code after work." "I'd find other, less involved activities" "to spend my time on, like binge watching a TV series." "One of those days, I was just sitting in a restaurant" "with my wife, sharing my frustrations with her." "I suggested, maybe I should make some kind" "of public commitment to learn for at least" "an hour every day." "I thought it would go for maybe three months" "but it turned out 100 days was just the right length." How about that?<br>
Well, thank you for creating this project, Alexander.<br>
This is really really great for many many people getting started.<br>
That's what this course is all about we're going to give you lessons and exercises for every one of these 100 days.
|
|
|
show
|
1:01 |
There are a lot of things that people do to support each other and encourage themselves to stay focused and keep going on 100 Days of Code.<br>
But, there's really just two main rules and they're really, really simple.<br>
The first rule is to code a minimum of an hour a day every day for the next 100 days.<br>
And I would say taking a coding course like learning the lessons in this course and then coding a little bit counts, right?<br>
You're immersing yourself in code for at least an hour a day every single day for 100 days.<br>
And if you get sick, like you saw the person before had gotten sick and had to take a day off that's okay, just add a couple days on the end to make them up.<br>
The second rule is a public commitment to making progress and keeping with it.<br>
And the way that works is to tweet or put something on Facebook like #100DaysOfCode with an update every day.<br>
The PyBites platform is actually going to help you a lot with this, but however you want to do it it's code an hour every day and share your progress every day.<br>
Super simple rules and we hope this course really makes 100 Days of Code project work for you.
|
|
|
show
|
3:48 |
We are going to cover so much material in this course that we simply can't go through it all in any reasonable way.<br>
But, I do want to give you a sampling a couple of the highlights that stand out to me.<br>
We're going to cover the three major frameworks as we see them, Django, Flask, and Pyramid and we're going to do a lot with each one of these frameworks tons of different things we're going to add and use cases and scenarios we're going to put them through.<br>
We're also going to cover some of the foundations of the web like HTML 5, CSS, and JavaScript.<br>
So, maybe you know HTML, maybe you're not super good at it maybe you have always kind of avoided CSS.<br>
We're going to spend a certain amount of time really digging into that so you know it really, really, well as we go through this course.<br>
We'll do a quick primer on JavaScript if you haven't used that language for awhile or it's totally new to you.<br>
No worries, we got you covered there.<br>
We're also going to cover some of the single page application frameworks for JavaScript like React and Vue.js.<br>
We're going to talk about how to write data and query data from SQLite.<br>
This is an embedded database that comes with Python and it's super simple to use but it's a good stand-in for your favorite database be that Postgres, MySQL, Microsoft SQL Server, whatever.<br>
When we talk to databases we can do direct queries against it but, most of the time, we're going to use some kind of ORM.<br>
We're going to use SQLAlchemy a lot.<br>
We're also going to use the Django ORM during the Django sections.<br>
We're going to see how to create REST APIs in a whole bunch of different frameworks.<br>
So, you're going to do all sorts of cool stuff with things like API Star, Responder using Pyramid and Flask and just tons and tons of different APIs we're going to build.<br>
Then, we're going to call those services sometimes testing it with Postman sometimes calling it from JavaScript or even directly from within our Python code with something like Requests.<br>
We're going to write async code.<br>
The web server and web applications are ideal candidates for using Python's async and await keywords.<br>
The reason is, most of the time web apps are waiting on something else on the network, on external APIs, on databases, and so on.<br>
So, they could go do productive work while they're waiting on these other systems.<br>
And, we're going to talk about a couple of frameworks and async and await itself to make this super easy and super powerful in Python.<br>
We're going to talk about web scraping.<br>
Sometimes, it's great to call an API but if the API doesn't exist, and the data's on the web guess what, you can use Python and get at that data anyway.<br>
So, we're going to talk about web scraping and how to get data off of websites that don't have an API or, maybe, we don't know about their API.<br>
Of course, once we write all our web apps we don't want to ship a busted version to production and take the website offline.<br>
We want to make sure it works and it continues to work automatically so we're going to write unit tests against our web application mocking out the database and API calls and all sorts of cool stuff like that.<br>
We're going to take our application and deploy them to Linux using uWSGI and Nginx and we're also going to deploy them to Heroku so you'll see a couple of deployment scenarios which are pretty awesome, and you'll learn the basics of operating Python web applications in production on Linux.<br>
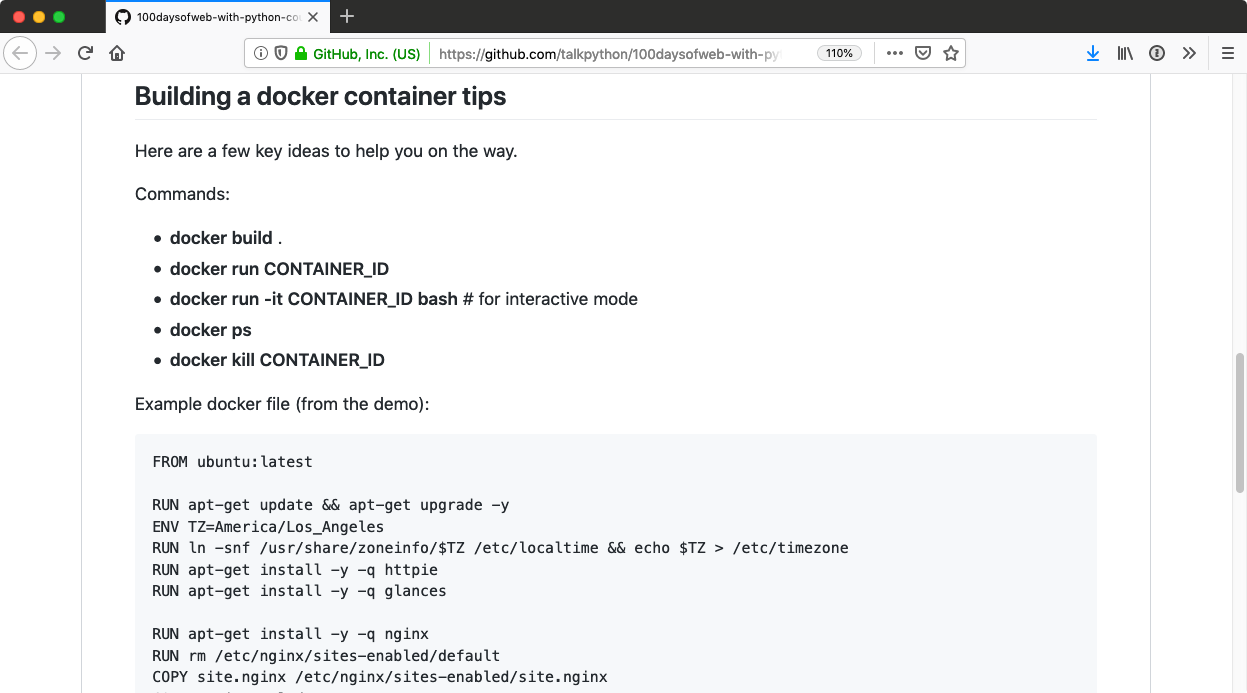
We're also going to talk about Docker.<br>
Containers are super important these days.<br>
There's a lot of use cases for them and we're going to follow on our Linux deployment stuff with Docker because Docker is really a special way to create very small, lightweight customized Linux deployment, right?<br>
So, everything you learn about deploying to Linux is going to be super useful for when we get to Docker.<br>
You'll just have to use the Docker commands rather than, say, the Shell commands directly.<br>
We'll see how to do containers and even orchestrate multi-container systems with Docker Compose.<br>
This is just a tiny sampling of what we're going to cover.<br>
We're going to go through so many amazing topics and little libraries, and different things that you can do on the web with Python.<br>
You're going to have a hard time choosing what to use at the end of this course, I'm sure.
|
|
|
show
|
2:02 |
So you've chosen Python for your 100 Days of Code project in this 100 Days of Web.<br>
Well I'm here to tell you that you've chosen wisely.<br>
Look at this picture.<br>
One of these languages is unlike the other.<br>
Can you pick it out?<br>
Of course, Python is growing super super fast and this graph is not just some random thing I found on the internet.<br>
This is a report done by Stack Overflow which has some of the better insights into the developer space.<br>
Here you can see the red graph is the actual usage up to 2018 this report was done a little while ago but I think it's still totally relevant.<br>
And the gray part is the projecting out.<br>
So if you look at Python it is just set to dominate the industry in terms of programming languages.<br>
JavaScript has been really really popular as well but guess what?<br>
It's topping off, you know it's not quite going down but it's not really growing that much.<br>
You look at Java, Flat, the rest of 'em are going down.<br>
So if you had to pick somewhere to build your skills and to jump into this technology space would you rather be in a growing space or shrinking space?<br>
You know, my rule of thumb is I like to bet my career on things that have positive derivatives are going up, they're not going down.<br>
Okay so, this is cool it's really popular amongst the old school traditional languages if you will the ones that have been around 10, 20 or more years.<br>
You might be thinking well Rust and Go, I heard they're hot.<br>
And Swift is pretty cool and all those things so how does Python compare to those?<br>
I bet they're even more awesome and they're probably going up even faster.<br>
Well, I have a graph for that too.<br>
Here's how it compares to things like Swift and TypeScript and Go and so on.<br>
Yes all of these languages are generally going up but even so they're nothing like Python.<br>
The usage is not like Python nor is the rate of increase like Python.<br>
So Python's pretty special and I think this is a really great framework for building web applications and other types of apps and I think it's a super super good skill to have in your skillset.
|
|
|
show
|
2:20 |
Let's talk a little bit about the course organization and how you're going to go through it during your 100 Days of Code.<br>
We don't have 100 separate little projects nor do we have one huge project you work on for 100 days.<br>
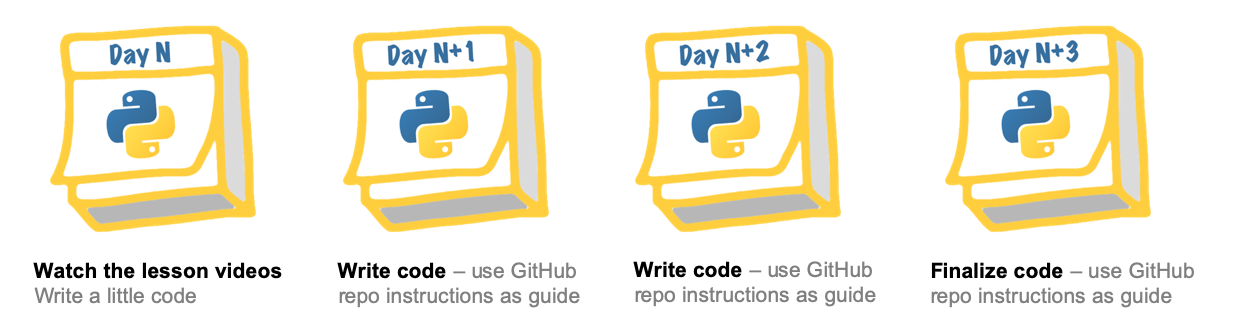
Instead, we've broken the course into four day segments where you work on one project, one idea you learn one thing and you work on it during those four days.<br>
Typically, the way it goes is on the first day you're going to watch the lessons.<br>
They're usually 45 minutes to an hour or maybe you do a little bit of coding we'll tell you what to do and help you along the way there but mostly the first day of any major topic Django, Pyramid, Async, whatever is going to be watching these videos.<br>
Then then next day we're going to have some project for you.<br>
And on GitHub, each section has its own read me that says on day one or day N you do this on day two you do that, on day three, day four and it just walks you through.<br>
It's pretty open-ended and you get to explore and play with the ideas but it is guided so you're not just left all alone.<br>
Next day, probably a little bit more code and then you might finalize what you're working on and finish up that project as you go.<br>
And that's typically a given topic in this course.<br>
So you can think of this course as 25 four day segments.<br>
Except, we've actually left one open where we have four little independent ideas that weren't big enough to fit into this format.<br>
Also, some of the topics are longer the way I've laid it out here.<br>
For example, Docker is an hour and a half.<br>
So on the first day, you watch maybe 50 minutes of Docker, something like that.<br>
Day two, you work on applying what you learned there.<br>
Day three, you come back and watch some more videos and build on that with, say, Docker Compose in this example.<br>
And then finally, on day N plus three or day four you're going to finish up working with those new ideas.<br>
So the basic workflow is these four day segments on any given topic.<br>
If you want to skip around, that's fine that's totally okay they don't have huge dependencies between them but we do assume that you know what came before.<br>
So, for example, if you jumped to the end into some Flask section, we've assumed that you have the knowledge that we covered in the first part where we just introduced Flask and things like that.<br>
But as long as you're willing to fill in those gaps or you feel like you have the prerequisite knowledge you can jump around and that's okay long as you think of this format as being kind of the atomic unit there.
|
|
|
show
|
1:30 |
Hello and welcome to the course.<br>
My name is Bob Belderbos and I'm a software developer at Oracle and co-founder of PyBites, a blog, community and platform that teaches Python via practical real world code challenges.<br>
I'm honored and excited to teach you Python and web development in this course.<br>
My programming journey started 12 years ago learning HTML, CSS, JavaScript and PHP to build websites.<br>
I've been hooked ever since.<br>
Programming for the web is awesome because the browser gives you instant feedback as you can easily get users to run your code.<br>
My more recent work includes building our PyBites platform using Django, AWS Lambda and Heroku all technologies you will learn in this course.<br>
Good day everyone this is Julian Sequeira.<br>
As with Bob I am the co-founder of PyBites and Code Challenges.<br>
And currently I'm a new Python developer at Amazon Web Services, very exciting.<br>
And last but not least I am a trainer here on Talk Python Training.<br>
I'm absolutely stoked to be sharing your 100 days journey with you.<br>
Please don't get sick of me but I'm here to help.<br>
So if you need anything you always feel free to reach out.<br>
Hey welcome to the course.<br>
I'm Michael Kennedy, nice to meet you.<br>
A little background on me, I'm primarily a web developer as well as the founder of the Talk Python To Me podcast and Talk Python Training.<br>
I've been a professional developer for 20 years and I'm really excited to share that experience that I've gained with you throughout this course.<br>
Welcome to the 100 Days of Web in Python.
|
|
|
show
|
1:10 |
You inevitably will learn a ton of Python during this course.<br>
But, it is not a beginner course.<br>
This course is supposed to teach you web development in Python assuming that you basically know Python.<br>
Now, you're going to be able to follow along if you don't know absolutely everything like, if you couldn't bust out Metaclasses just off the top of your head no problem, don't worry about it.<br>
We'll talk a little bit about the features as we use them and of course repetition you'll learn a bunch from that as well.<br>
But, when you think about the Python language when you look at it if it's a little unclear it's a little hazy, maybe you don't remember all the details of exactly how it goes maybe you don't know much about it you just played with it a bit don't worry, we've got something to clear things up for you.<br>
At the end of the course we've added a Python primer.<br>
So here's 46 minutes of little concepts that show you how each of these core ideas in Python works.<br>
Two minutes on classes Two and a half minutes on slicing one and a half minute on if else statements and things like that.<br>
So if you're a little rusty or a little blurry on the Python language you know, be sure to jump to this appendix at the end get a little refresher and then jump into the main course content.
|
|
|
show
|
2:13 |
It's really important that you get the source code for this course.<br>
A lot of the projects start with existing code or existing data and you're going to need to build on top of it.<br>
And of course, where do we put the code?<br>
We put it on GitHub.<br>
You can find it over at github.com/talkPython/100daysofweb-with-Python-course.<br>
So let's go over there and see what you'll find when you get there.<br>
Here's the GitHub repo for our project.<br>
First thing you need to do is go and star this and fork it.<br>
So you're going to want to fork this repository so that you have it with you and you can make changes to yours and also star it just so you have a quick reference.<br>
Then you're going to want to download it somehow.<br>
Either click here and copy the clone URL and just clone it with Git, if you're familiar with that.<br>
If for some reason you don't want to mess with Git that's fine, just grab that gear and just download the ZIP file.<br>
Git's a little better 'cause you can do a Git pull and then update it if we make any changes.<br>
Of course, a ZIP file's probably just fine.<br>
You can always update that as well.<br>
Now the most important part is the days.<br>
So here you can see these are the four day projects that we've talked about.<br>
So here we're going to talk about Flask and then HTML5, and then CSS basics and things like that.<br>
Let's jump into the CSS one to see what's there.<br>
Told you it's important to start with this because there's existing code to work with and one of the things you do is work with this thing called Selectorville to play with CSS selectors.<br>
It's like a little app that lets you type CSS selectors into it and it'll generate changes in the page, basically.<br>
Then, the most important part is your turn.<br>
As you know, you're going to be writing some code in this course.<br>
Here's where you go.<br>
So you come in here and it just talks about the various stuff that you've done kind of like the flow we discussed in the beginning.<br>
Day one you just watch the videos day two you play with Selectorville that's the thing you just saw next to this folder.<br>
So you're going to go play with that.<br>
It talks a little bit how to do that.<br>
On day three, one of the things we did in these videos is build out a custom navigation.<br>
So it says, "Hey, why don't you try to recreate "the talkpython.fm, the podcast navigation bar up here?" Like this, just this top black box.<br>
So it talks about here's how you do it and here's some of the tools for it and then finally, the fourth day for this one is to play with Bootstrap Themes and finally share what you've learned.<br>
So make sure you get the code because each four day project will be something like this.
|
|
|
show
|
1:29 |
When you dedicate yourself to taking a course and carefully working the way that the instructor the author is working, you are effectively gaining much of the experience that that particular author that developer, has gained throughout their career.<br>
This course is special because it's taught by three people.<br>
That means you get three experiences in one and this is super valuable.<br>
Imagine that you have a job in this place.<br>
You get to work with cool VR gear, on hardware and IoT things, you'll gain one set of experiences but if you took a different job say you're starting a fashion startup with your friend, this woman from college and you're working out of this coffee shop being scrappy, working and trying to get venture capital and launch your application, you'll have a totally different experience than that dude in a VR headset.<br>
Or maybe you go the corporate route work at Microsoft like this guy here.<br>
He's working on some new programming language tooling around Python.<br>
These are all super different experiences and these experiences are all really positive.<br>
They'll give you different perspectives on programming, and that's awesome.<br>
How is that relevant to this course?<br>
Well, with three instructors, we each have a slightly different set of tools and a slightly different way of working.<br>
We're going to show you next how each of us gets set up what you need to follow along with each of us Julie and Bob and myself, during our particular segments.<br>
You don't have to work like us but if you want to follow along and do exactly what we're doing we'll show you how to set up the tools to do that.<br>
You'll have not just one experience but three experiences bundled up into one.<br>
So on the other side of this course, you're going to have a broader perspective on Python development and that's pretty awesome.
|
|
|
show
|
0:34 |
G'day guys, this is Julian Sequeira.<br>
Just running you through my setup for the next 100 days.<br>
I use Windows 10.<br>
Don't judge me, but I do, and I absolutely love it.<br>
So you'll see in all of my videos I'll be running Commander as the terminal equivalent on Windows, and that's simply installed.<br>
You can follow the videos to get that done.<br>
For anything web, I use Chrome.<br>
That's pretty much all you need from me to follow along with my videos.<br>
There will be some other services that we'll set up but those will come on the specific days.<br>
So let's get cracking.
|
|
|
show
|
0:35 |
In this course, I use Python 3.7 on a Mac which you can get from Python.org and I use Vim as my default editor.<br>
For external Python dependencies I create virtual environments using the built in Vim module then pip installing the requirements or external dependencies into them to not clutter up the global Python name space.<br>
For my JavaScript and React lessons I use Node, NPM, the JavaScript Package Manager and the Chrome DevTools.<br>
Lastly, I will introduce you to our platform where we developed 100 days progress tracker you can use to share your progress and stay on course.
|
|
|
show
|
2:45 |
Let's talk just a moment about my setup so you can most easily follow along.<br>
If you want to work the way I'm working when you're following my examples of course you're welcome to work the way Julian is the way Bob is, but if you're going to follow along like me, here's what I'm doing.<br>
So I'm running macOS Mojave.<br>
I'm using PyCharm Professional for my editor and I'm using Python 3.7 installed from Homebrew.<br>
So if you're on your Mac you probably should know about Homebrew.<br>
Homebrew's pretty awesome.<br>
It's easy to install, you run that little command right there, then you can type things like brew install Python.<br>
So you're going to definitely want to check and see if you have Python because if you just type Python on your Mac, mmm.<br>
Not good 2.7, look and see Python and we don't want that.<br>
Type Python3 to make sure that you have a modern version.<br>
I think some of the projects are going to require Python 3.6 or higher, so aim for 3.7 or higher than that.<br>
If a new one comes out since we've recorded this or at least Python 3.6.<br>
You don't want an old one, okay?<br>
Do some of the async stuff and f-Strings and things like that and you're going to need at least 3.6 for that to even work.<br>
What you get this is brew install Python.<br>
Python 3 is just straight Python.<br>
That's the way they treat it.<br>
Modern Python is Python in Homebrew which is really really great.<br>
I've already done that so I don't need to but that's how I got Python on here.<br>
If you're on Windows instead, I recommend you check out this relatively new thing Python 3.7 in the Windows store.<br>
So this will put Windows in your path it'll give you the Python3 command.<br>
All the important stuff you want on Windows and it'll even auto-update itself.<br>
Totally free, you can check that out on Windows 10.<br>
If you're on a Linux, it probably already comes with Python 3.<br>
Use your package manager to install that and update it and just do that check Python3 -V to see what you get.<br>
Finally, PyCharm.<br>
I'm going to be using PyCharm as my IDE.<br>
And now there's the full fledged Professional Edition and the Community Edition.<br>
If you click on features, it shows you what features are in the Pro Edition and what are also available in the Community.<br>
If you're doing standard Python stuff you could use the Community Edition, it's fine.<br>
But, you know what this course is about?<br>
Web development, and Python Web Frameworks, and Databases.<br>
All three of those things are only in PyCharm Pro.<br>
So either also get PyCharm Pro.<br>
It has a free trial, it's like eight dollars a month if you want to pay for it or if you're not going to use PyCharm my second best recommendation would be Visual Studio Code with a Python plug-in.<br>
So those are probably the two closest things of course, PyCharm is what I'm going to be using.<br>
There's a little bit where I use WebStorm but that's kind of the same product, more or less.<br>
You can use PyCharm Pro in that situation.<br>
We talk about it then anyway.<br>
All right, here's my set up and what I'm working with.<br>
You don't have to match this exactly but here's what I'm doing in case you want to try to get as close as you can.
|
|
|
show
|
2:48 |
In this video I want to introduce you to the PyBites Code Challenges Platform.<br>
If you head over to codechalleng.es you're presented with this home page.<br>
We designed our Code Challenges platform because we are strong believers in learning by doing and the best way to learn Python is to write a lot of code.<br>
First, let's log in with GitHub.<br>
When you log in you're redirected to the dashboard.<br>
You have a leaderboard the bites you have earned but what's relevant for this course is that we have 100 Days Of Python section.<br>
If you go there, there are a couple of grids and to follow along with this course we made a talkPython_web template.<br>
And here you see all the course materials spread out over a 100 days.<br>
You can start the 100 days by clicking start button.<br>
This will create a project or as we like to call it, grid and every day you can Tweet out your progress and mark items complete.<br>
The Tweet is already formatted to show the work you are going to do today #Python, the day number and copy in @pybites and @talkPython so that we are notified on Twitter.<br>
Then you can mark the items complete.<br>
This way you're working towards 100% completion of the course.<br>
This is totally optional but we noticed that having a tracker can be very efficient to persist and the Tweeting part is a nice way to share your work and to work with accountability partners.<br>
A great way to share your progress is to join our Slack community.<br>
There are some great Pythonistas there sharing the work and you can always ask questions if you get stuck with the course.<br>
To join our community, just head over to settings, confirm your email and use the join PyBites Slack button.<br>
By default you will join the code challeng.es and the general channel but we also have 100 Days of Code channel which is a dedicated channel for people taking a challenge.<br>
Well, that's that.<br>
We hope you enjoy the course and use our platform to stay on track.<br>
Have fun and learn a lot of Python and web.<br>
Keep calm and code in Python.
|
|
|
show
|
2:05 |
Welcome to your course i want to take just a quick moment to take you on a tour, the video player in all of its features so that you get the most out of this entire course and all the courses you take with us so you'll start your course page of course, and you can see that it graze out and collapses the work they've already done so let's, go to the next video here opens up this separate player and you could see it a standard video player stuff you can pause for play you can actually skip back a few seconds or skip forward a few more you can jump to the next or previous lecture things like that shows you which chapter in which lecture topic you're learning right now and as other cool stuff like take me to the course page, show me the full transcript dialogue for this lecture take me to get home repo where the source code for this course lives and even do full text search and when we have transcripts that's searching every spoken word in the entire video not just titles and description that things like that also some social media stuff up there as well.<br>
For those of you who have a hard time hearing or don't speak english is your first language we have subtitles from the transcripts, so if you turn on subtitles right here, you'll be able to follow along as this words are spoken on the screen.<br>
I know that could be a big help to some of you just cause this is a web app doesn't mean you can't use your keyboard.<br>
You want a pause and play?<br>
Use your space bar to top of that, you want to skip ahead or backwards left arrow, right?<br>
Our next lecture shift left shift, right went to toggle subtitles just hit s and if you wonder what all the hockey star and click this little thing right here, it'll bring up a dialogue with all the hockey options.<br>
Finally, you may be watching this on a tablet or even a phone, hopefully a big phone, but you might be watching this in some sort of touch screen device.<br>
If that's true, you're probably holding with your thumb, so you click right here.<br>
Seek back ten seconds right there to seek ahead thirty and, of course, click in the middle to toggle play or pause now on ios because the way i was works, they don't let you auto start playing videos, so you may have to click right in the middle here.<br>
Start each lecture on iowa's that's a player now go enjoy that core.
|
|
|
|
47:20 |
|
|
show
|
0:59 |
G'day everyone, and welcome to the 100 Days of Web in Python course.<br>
Thank you for giving it a crack.<br>
I'm Julian Sequeira.<br>
I'm going to be taking you through the very first section of four days, and we're going to be looking at the Flask web framework.<br>
It's going to be an introduction to Flask specifically around setting up a Flask package of your own that you can run and then we're going to look at templates and not just templates as a page but as a recurring theme throughout your website or your web tool, okay?<br>
Very simple, but very, very powerful stuff and very useful, okay?<br>
And that's what we're all about here with this Hundred Days of Web and Hundred Days of Code thing so I hope you have a lot of fun.<br>
Stick with it.<br>
Get through the full 100 days, and you will be so impressed with how far you come.<br>
But enough talking.<br>
Let's get cracking on Flask.
|
|
|
show
|
2:15 |
Alrighty, before we get started let's have a quick look at what we're going to be doing over the next four days.<br>
The first day is going to be watching videos.<br>
How lucky are you guys?<br>
This is all about setting up your first Flask app.<br>
In the package format go through the videos starting at the initial setup video and work your way through to creating your app and then configuring your Flask end file.<br>
That's where I'd like you to draw the line.<br>
Try not to do too much.<br>
The reason I say this is this is the 100 days of code challenge.<br>
You do not want to get burnt out by doing four or five hours of straight code in your first day.<br>
The idea behind the challenge, again, 30 to 60 minutes.<br>
Limit yourself, maintain that motivation and focus.<br>
So watch the videos have a little bit of a play but don't do too much.<br>
You don't want to get burnt out.<br>
Day two, watch the second half of the videos.<br>
Now these videos from day two will actually continue what you did in day one and this time we'll extend on the application and then create a standard template that will flow across all the pages on your website or in your Flask app.<br>
That's actually a really important concept of Flask.<br>
Very useful, so make sure you master that one and then when you are done, again try not to do too much because you've got days three and four to play.<br>
That's going to be a lot of fun for you.<br>
It's free form.<br>
I don't want to make it too difficult.<br>
I don't want you to burn yourself out again.<br>
Just have a play.<br>
This time for three and four I would like you to actually create your own app.<br>
So start from scratch.<br>
Get rid of everything that we've done just push it to the side.<br>
Try not to look at it.<br>
See if you can create your app.<br>
Obviously, reference it where you have to but create everything yourself.<br>
Create your own base HTML file get some basic CSS in there make it pretty, and just have some fun with it.<br>
And that's it!<br>
So, move onto the next video.<br>
Get cracking on day one and work your way through these days referencing this Read Me file if you need to.
|
|
|
show
|
3:39 |
Righty-o, quick video here.<br>
Just on the setup for this application.<br>
We have here Commander, I'm on Windows.<br>
It's going to look similar regardless of whatever you're environment is that you're using or your OS.<br>
I've created a directory called 1-flask just 'cause we're on Chapter One and we're building a Flask app, go figure!<br>
What I would like you to do is create a directory something like that, whatever you want to call it.<br>
This is going to be your parent directory.<br>
We're going to build our very first Flask application within this directory.<br>
The first thing we have to do after doing that is arguably the most important thing you have to do and that is create your virtual environment.<br>
That will make sure everything we do here all the packages we install, it's all self contained in this awesome little virtual environment.<br>
So because we're using Python 3 I would not be using Python 2.7 or whatever for this course.<br>
We're doing it all in Python 3.<br>
You can check your version with python --version.<br>
I'm using 3.6.<br>
Haven't installed 3.7 yet.<br>
Doesn't really matter for this.<br>
Just make sure you're using Python 3.<br>
Run the command, Python -m venv venv and what this will do is create it will create a virtual environment called venv, okay?<br>
Do an LS and you can see I've got this venv folder there.<br>
Now, if you are using Windows, I hope you're using Commander or some sort of Linux shell 'cause it is a bit of a pain to do this on the default command line.<br>
But that's completely up to you.<br>
So what we're going to do is we're going to go in to the venv.<br>
You'll see there is an include, lib and scripts directory.<br>
This is different on macOS or Linux.<br>
In those ones, you'll probably see a bin folder, okay?<br>
A binary folder.<br>
This one, because this is Windows we're going to go into scripts and you'll see there is an activate batch file, okay?<br>
All we have to do is activate it.<br>
And there you can see we have this virtual environment little bracket thing in front of our command line.<br>
That means that we have now activated the virtual environment and everything we do is going to be self contained in there.<br>
If you are using Mac or Linux from your parent directory here, where you see the venv directory you're going to do source venv/bin/activate.<br>
Running that command will initiate your virtual environment.<br>
And that's it.<br>
Next, and next most important you are going to install Flask.<br>
All we really need to know for this specific chapter is that we're installing Flask with pip.<br>
So pip install flask.<br>
And we'll let that install that we'll install Flask and all of its dependencies.<br>
You can see them flying up the screen there.<br>
We don't need to install anything else.<br>
Just ignore this if you see that.<br>
I mean, you can always upgrade pip yourself, that's fine.<br>
For me, I'm okay.<br>
And now, we can do a pip list and this will show you all of your installed packages.<br>
And that's it!<br>
So, we have our environment installed.<br>
We have Flask installed and we're now ready to start creating the directory hierarchy here for Flask and get cracking on our first app.
|
|
|
show
|
2:57 |
Now that we have our virtual environment created right there we need to actually create our application directory hierarchy setup, okay?<br>
What we're going to do, which is the more Pythonic way of doing this, I suppose, is actually package our Flask application.<br>
This package is going to host our application.<br>
The reason we're doing this is just to allow the app to be imported at a later date.<br>
It's more about scalability and growth and everything like that.<br>
You can actually just create a Flask app as we did in one our previous courses just with a single file but this is the better way of doing it and, as I said, it's more scalable.<br>
So, with that said take a look at this.<br>
This is what our hierarchy, or what our folder directory structure is going to look like.<br>
We have here our parent directory.<br>
That's the Flask folder.<br>
And we have our virtual environment here.<br>
What we are going to create is our Python file that defines our Flask application.<br>
It's nothing crazy.<br>
It's just one line of code, so we'll see that going forward.<br>
I just wanted to point that out.<br>
The meat of our application is going to live within our folder here, which we're creating our program in so, I've decided to name it "program".<br>
We have our parent directory.<br>
We have the program directory which is going to house the meat of our application.<br>
This is the package.<br>
Inside that, we have the dunder named file so it's a __init__.py file.<br>
That is what denotes that this is a package that this is a Python package, that can be imported.<br>
It has the rules in there, in that __init__.py file.<br>
And the bulk of our application is then run out of the routes.py file, as you can see down there.<br>
The routes file is going to create all the routes all the webpages, all the links for our application.<br>
It's going to have all the Python code in it.<br>
There will be other folders going forward but this is what we're creating now.<br>
So, go ahead, create a folder called "program".<br>
That is going to be your application directory.<br>
Create a demo.py file.<br>
It's just going to be blank.<br>
Create, within your program directory, an init file __init__.py, spelled exactly like that and a routes.py file.<br>
So, give that a go, and when you're done it will look something like this.<br>
Okay, so we have our demo.py.<br>
We have the program directory.<br>
We have have __init__.py and we have routes.py.<br>
Leave it there.<br>
Let's move on to the next video.
|
|
|
show
|
2:33 |
Okay, we're going to set up each of these files, one at a time.<br>
Let's start with the __init__.py file cause that's arguably the most important file here.<br>
To begin, let's start our virtual environment.<br>
If you don't already have it, activate it.<br>
Okay, in the folder we have demo.py program and virtual environment.<br>
Let's head into our program directory and there is the __init__.py file we created.<br>
So use whatever editor you want to just pop into that and what we need to do is we need to first import flask.<br>
So if you've ever done a single file flask app before you keep the actual importing of flask and the configuration of your app object, your Flask object.<br>
That all happens in the one file where your routes is stored and everything.<br>
Not so here.<br>
Your __init__.py file is going to actually configure flask for you and tell the package what's what.<br>
Alright.<br>
What we want to do is insert.<br>
So, I forgot for second there I was using Vim.<br>
So we're going to do from flask.<br>
So from flask import Flask.<br>
And then we're going to create.<br>
This is where we create our application our flask application instance.<br>
Now this is going to create the flask instance using the name of __name__.<br>
Now, here's where the magic is.<br>
We're going to do another import here from our program directory that we're already in.<br>
Alright, we're already in it.<br>
We're going to import the routes file.<br>
Now this has to happen below where we create the app instance because we need that app instance to be created first before we can import any of this.<br>
So, the order of our file is to import flask it's to create our Flask app instance then once it's created, import the routes file from the program directory that we're in.<br>
Alright, that's it.<br>
Lets write that.<br>
Lets cut it.<br>
And there it is.<br>
All right, next video, next file.
|
|
|
show
|
3:10 |
Alright, welcome back.<br>
In our last video we looked at the __init__.py file and we now move on to the routes.py file.<br>
You can see the relationship here.<br>
At the end of __init__.py where we're setting up our Flask app instance, the last thing we do is we then say, from our program package, import routes which is going to be our routes.py file.<br>
Let's edit that file now so we actually have something to import.<br>
Something to work with.<br>
Now, traditionally, if this was a single file Flask app we would import Flask here but we've already done that in the __init__.py file so we can pretty much get straight to the code.<br>
The only thing that we need to import here is the Flask app.<br>
Okay, that app object that we created in our __init__.py file.<br>
To do that, we just simply go, from program from program import app.<br>
And the whole __init__.py thing handles that, alright?<br>
That's all we need for the absolute basic Flask app here using our packaged app scenario.<br>
Alright, so pretty much we can get straight into the Flask code.<br>
What we're going to do here is we're going to create an app route.<br>
Now, this is going to be our URL.<br>
So the first URL we want to create is the root or the index path.<br>
In this instance, we can actually specify both 'cause they are practically the same thing, okay?<br>
So, we have this decorator here and it is creating our URL.<br>
What is it creating that against?<br>
What is the code that is going to run against this URL?<br>
That's what the decorator works against.<br>
In this case, we're going to run it against this function and we're going to call the function index().<br>
General rule of thumb, I wouldn't say all the time but one of the good practices with Flask is to try and name your functions similar to your actual URL.<br>
So, this is the index() function for the index or root path to our website.<br>
Alright.<br>
For the simplest of simple all we're going to do is return something which is just plain text.<br>
We're just going to return plain text.<br>
We go "Hello Pythonistas" and that's it.<br>
That's all we're returning.<br>
And would you believe it, that is our app.<br>
That's all we need to do, to make this very simple initial Flash app work.<br>
So we can save that and we can pretty much run our app now.<br>
We just have to do one last thing so move on to the next video we're going to configure that demo.py file and you'll see why I've left that 'till the end in the next video.
|
|
|
show
|
3:41 |
Okay, time to work on that demo.py file so just head up one directory back to our one Python Flask directory and there's your demo.py file that you created.<br>
Let's just Vim into that and all we really have to do in this file, is we're telling Flask what to do so when you run the Flask command to launch your app which I'll show you straight after editing this this is the file you point at because this is what kicks it all off.<br>
This is what tells it what package to use and so on.<br>
So, all we have to do is go, whoops from program, import app.<br>
Now the reason this sounds confusing is because we're importing app and we've referenced that before in other places so let me just walk you through it really quickly.<br>
Save that.<br>
Let's just verify it.<br>
Okay, so from program import app.<br>
Now, this is talking to the __init__.py file.<br>
So we have app in here.<br>
What we're saying is, from our program package import the app instance, or the app object of Flask and then, from there, it's going to do this one from program import routes and reference the routes.py file.<br>
Alright?<br>
It just sort of goes through that tiered approach.<br>
Now, we head back up.<br>
One last thing we need to do before we actually run this program is tell Flask, the Flask command, to use demo.py and we do that through an environment variable.<br>
Now, this environment variable is set differently in Windows from macOS or Linux.<br>
If you're using any sort of Unix environment you'd be used to using this method.<br>
So, export Flask underscore app and then we want to talk to the demo.py file and that works.<br>
Now, in Windows, we can't do that because you can't set environment variables using export.<br>
We have you use the actual set command.<br>
So, set FLASK_APP=demo.py and then we go.<br>
So, if you're using Mac, use export or if you're using macOS or Unix, whatever and if you're using Windows, use the set command.<br>
Now, all we have to do, is flask run.<br>
Okay, and you can see we are running our website on 127.0.0.1.<br>
That's localhost, port 5000.<br>
So, let's bring up a web browser and check that out.<br>
So, I've just opened up a web browser here.<br>
This is Google Chrome in incognito mode and I've just punched in the URL or the IP address 127.0.0.1:5000, and that's it.<br>
We see the returned string that we had in our routes.py file, okay?<br>
In the background, we see the actual timestamp.<br>
We see the address that we're talking to.<br>
We see the URLs that were requested.<br>
Just ignore this one.<br>
This is a remnant from a bookmark I had in there and that's it.<br>
There's our very first Flask app.<br>
What I'd like you to do now is just have a play around with the routes.py file.<br>
Add in some other return values.<br>
Do whatever you want to play with but this should be long enough to get you through today and possibly a second day depending on how much time this took you.<br>
Just have a play, have some fun and let's move on to the next video.
|
|
|
show
|
3:03 |
So there's one little gutcher that I wanted to discuss here.<br>
And that was that environment variable that we created, that flask_app.<br>
To view it, we can just quickly some up windows we'll do it this way.<br>
We can see it their, flask app equals our demo.pie file.<br>
Now unfortunately, what happens is when I close this terminal window when I can cancel this session or exit out we lose that data.<br>
So let me show you that, one second.<br>
Let's deactivate and let's exit out.<br>
And now with the new terminal launched, let's just get into our folder 1-flask.<br>
All right so there we're back in here.<br>
Now, let's activate our virtual environment.<br>
Right, and now if we run that same command...<br>
Flask app its gone.<br>
Okay, so if we were to run flask run, we're going to have issues.<br>
It doesn't know what it's doing.<br>
It doesn't know what file to talk to.<br>
It's just running nothing, all right.<br>
So it's even say's it here "you did not provide the flask app environment variable".<br>
So, the problem there is, every time you close your environment for the day if you happen to shut off your computer and you come back, you're not going to be able to do this.<br>
You're going to have to reset that variable.<br>
And it's really frustrating.<br>
So, one work around for this, is to install a new package into our virtual environment here.<br>
Called Python-dotenv, it's this one here let's pick install it now.<br>
If I can type pip install Python-dotenv Now, what this module allows to do, it will allow us to specify that environment variable in a environment file, in this parent directory here.<br>
And what we do is, we create that file that's actually going to be called .flaskenv So let's go Vim okay because we're in an environment file.<br>
We'll be titled in Linux and everything is classified as a dot file, so Vim .flaskenv and we throw that line in there.<br>
FLASK_APP=demo.py Save that, oops.<br>
All right, and now flask, run, there we have it.<br>
So, what this does is it now refers to that .flaskenv file.<br>
So if we close out terminal session and we cancel it out and we come back into another week, we don't have to remember signing that environment variable again.<br>
It's just taken care of by the .flaskenv file and the dotenv package.<br>
So, install that, get that cracking and save yourself a bit of heartache.<br>
Just remember to put it in all of your projects from here on in.
|
|
|
show
|
4:52 |
You're probably wondering when we're getting to the more interesting stuff because at the moment, your webpage looks like it was made by a 15 year old in 1996, right.<br>
It's nothing flash.<br>
To get that, let's create what's called a template.<br>
A template in Flask is pretty much the file, the HTML file that you will write, that links to each one of those URLs.<br>
So at the moment in your code, your URL for index simply returns plain text, whereas the HTML.<br>
Well, rather than code HTML into that routes.py file we're actually going to create an index.html file as you would with a traditional website.<br>
And then you can throw all the flashy HTML and CSS you want in there but for now, let's just go ahead and set everything up.<br>
Within our program directory, we're going to create a directly called templates, pretty obvious.<br>
And in our templates folder we have nothing in there obviously let's create an index.html file.<br>
And, in this file let's just give it something basic let's say.<br>
So we have our head and then we'll have our body, okay.<br>
Right, and in that body this would be where we usually punch in all of our information all of our HTML code, all of the text that goes on your page, all of those things right.<br>
Let's actually just put in some test information here.<br>
Alright, one thing at a time, right so let's make this say something like this is text, we've included in our HTML file.<br>
That way we don't want to make it the same as the other one because then we won't know, right.<br>
So, let's go body and let's close this off, come on.<br>
Alright, so there is our file.<br>
It's nothing special.<br>
Let's just write that, okay and we'll head back to our routes.py file to relate the two.<br>
So, right there we have our return value of "Hello Pythonistas." Now, what we want to do is we want to return that HTML file instead.<br>
And we do that using another feature of Flask.<br>
So, that means we're going to have to actually import something here.<br>
So let's, delete that, let's head up to the top.<br>
And, let's throw in, actually we'll put it down here from flask import render_template.<br>
So, what this going to do, this is allowing you to render a template, render an HTML template file.<br>
Now for the traditional term template you would assume it's a template that is carried across all of your other files.<br>
We'll get to that in a minute.<br>
Let's just work through this one at a time, okay.<br>
All we're doing now is we're returning that template so let's go return render template.<br>
And in here, we specify the name of that template file that we're using.<br>
In our case, we called it index.html and that's it.<br>
So, now what we've done is we've replaced that text return of "Hello Pythonistas." We've replaced that with the index.html file.<br>
So, let's run the app and see if that works.<br>
We've got our environment variable set.<br>
We do flask run.<br>
Alright, so there's the actual URL we're going off with the IP.<br>
Let's bring the browser across.<br>
There's our site from before.<br>
We refresh it now and we get the title, this is our site.<br>
And, there is the paragraph tag that we've put in our HTML code that says this is text we've included in our HTML file.<br>
That's how we create our webpages using an actual template and we don't have to include all of that HTML code in that simple routes.py file.<br>
So, now that you know where you can put your HTML in you can imagine, this is where you set up your CSS and your divs and all those sorts of things which we're not going to go to in too much detail in this course but now you know, so that's a template.<br>
That's a very basic template.<br>
Let's move on.
|
|
|
show
|
7:19 |
Our site is pretty plain.<br>
There's nothing special about it.<br>
It's just simple text and there's nothing really much else to it.<br>
What we need to do is create some sort of template around it, some sort of common theme that flows across the entire site no matter what page you go to.<br>
So looking at PyBites here, the common element that flows between every page regardless of which page you're on is this left-hand bar, okay?<br>
It's almost like your nav bar.<br>
It's almost your menu bar along the top of the page.<br>
Whatever you're used to seeing on your favorite websites.<br>
To do that we actually need to create a base template file, something that our webpage can call on.<br>
So as an example here with PyBites this stuff on the left here stays the same.<br>
All that changes is the content on the right.<br>
Imagine if you will two files, a file called base that contains all the code for this and then the unique file to the page in which case this is an about.html page.<br>
That is what we're going to create with Flask and that's what's awesome about Flask is that you can create a template.<br>
You can create that left-hand column.<br>
So let's head over to here.<br>
You've got your templates folder.<br>
Let's create a base.html file.<br>
Now, in this file we're going to keep it really simple.<br>
What on our page stays the same?<br>
We have a title, we have a header we have the HTML code, and we have the body, right?<br>
The only thing that really differs is potentially the title in the title bar along the top but that doesn't have to change and the thing that definitely changes is what's in the body.<br>
It's that unique text to that page.<br>
Now, we're just going to keep it really simple.<br>
Let's put our HTML header, let's throw in the head tag, and let's throw in a title.<br>
Now, this title will stay static across all of our pages so this is our site.<br>
Whoops.<br>
Getting ahead of myself there.<br>
And we close off the head.<br>
And what else did I say?<br>
We said body, so the body tag is now static across every page but nothing within the body tag is static so let's leave that blank just for a second.<br>
And we close off our HTML.<br>
So this is our template.<br>
This template is going to be static across every webpage on our site.<br>
But what differs?<br>
The stuff in between.<br>
So without explanation let's just throw in some Jinja template code, block content.<br>
I'll explain in just a minute.<br>
And we'll close that with end block.<br>
Now, what this means is in this template we have HTML, we have head, we have title, we have body.<br>
That is static across every page.<br>
What differs is everything within the body tag and Jinja calls on that using block content the block content code.<br>
This is something we will refer to we will link to in our other files.<br>
Everything that calls on this base HTML template is going to have this block content tag.<br>
And you end it with endblock.<br>
So you will see in just a minute.<br>
Let's leave this up here.<br>
Let's head on in another window here to our templates.<br>
And we'll open up index.html.<br>
Now I have prepared this already so just roll with it.<br>
In here see the block content?<br>
Block content here will be inserted into here on the template.<br>
This is where it's going to fall.<br>
So anything that we put within the block content and end block Jinja tags is going to appear here.<br>
Now, I know that's a lengthy explanation but I need to drill it in.<br>
This is how it works.<br>
In this block content we now have our H one text saying, "Hello," and we have a paragraph tag that says, "This is text we've included in our HTML file." The one thing I haven't explained here is extends base HTML.<br>
This is pretty much our import.<br>
This is pretty much the Jinja code that says to this when you render this index file it says Hey, go and grab my base.html from here.<br>
Go and grab my core template, my core formatting from this file." We are extending the base HTML file into our index.html file.<br>
Then we're going to put everything that is within the block content Jinja tags into our base HTML file here and this is what we're throwing in there.<br>
We're throwing in a H one header, we're throwing in a paragraph tag, and that's that.<br>
You can see the relationship between the files.<br>
Here's the core file, here is what extends it here is what is unique about every page.<br>
And we're just going to work on an index.html file for just a second.<br>
So let's write that.<br>
Let's write that.<br>
Just go back and look at routes.py.<br>
You can see we don't need to reference base.html.<br>
We just need to try and render index.html.<br>
That's it because by rendering index.html that template we have that Jinja code in the top that will then pull in the data from the base HTML file.<br>
So let's launch that.<br>
Here we have our browser.<br>
Let's launch the file here.<br>
And you can see there's, "Hello" from our actual index.html file.<br>
This is the text we've included in our HTML file.<br>
That came from index.html.<br>
What didn't come from index.html is this is our site.<br>
That title was not in that code.<br>
It was not in that file.<br>
If we open up base.html this is where the title came from.<br>
There's the proof if I may that this base HTML file is being used by this index.html.<br>
Same thing, we call the index route and we get the same thing there.<br>
This is our site.<br>
So on the next video we're going to create another file called 100Days.html and that's also going to pull from the same base HTML file but it's going to change a few things and you can see how the same template is being pulled over every time.
|
|
|
show
|
4:30 |
Let's create another page.<br>
As I said, it's going to be called 100Days.html.<br>
To do that let's create it here, 100Days.html.<br>
We're going to speed this up a little bit.<br>
Now that I've explained it there's no need for us to type it all out one by one.<br>
There is our Jinja code to create this template.<br>
Again, we are extending base.html.<br>
We're going to take that code, that template that format from the base.html file and we're going to import it.<br>
We're going to extend it into this 100Days.html.<br>
Essentially at the moment all we're taking in is that unique title code.<br>
That's the only real valuable stuff that we're taking in.<br>
Let's throw in another H1 tag here.<br>
And let's throw in some unique text here.<br>
This is text from 100Days.html, not base.<br>
Again, a little bit more proof to show that we are taking the code from this file not from the base file.<br>
And the one thing we didn't do previously was edit the routes.py file because we already had an index.html route created.<br>
So let's edit this now.<br>
We need to create a route for our new page.<br>
We need to tell our Flask app where it needs to go if someone says, "I want to load 100Days.html." So let's do that here, app.route.<br>
And the URL end point that we're going to be using is 100Days.html.<br>
That's the file.<br>
I will show you something here.<br>
This won't work.<br>
We can't actually use a number to start our function name.<br>
We have to use a letter.<br>
That's just a rule in Python.<br>
Notice the color change difference.<br>
It knows, it knows too much.<br>
So let's put an arbitrary p there and continue.<br>
And all we need to do here is return, just like the other one, return the render_template that we're going to be using for this.<br>
So in this case it is return render_template 100Days.html.<br>
That's all.<br>
Just to recap, if you browse to 100Days.html that's the route that the app hits.<br>
We then load this HTML file.<br>
That's what this function does.<br>
It returns that.<br>
That's all we need to do.<br>
Let's head over to our app and run it.<br>
Open up the browser again.<br>
Okay, we're in our browser.<br>
Hit enter.<br>
You can see that it ran and we see our same site.<br>
Let's go to index, same thing.<br>
And now let's change that to 100 days.<br>
And that hasn't worked obviously.<br>
Look at that and let's leave this area in because this is a really good point.<br>
What I've done wrong here is in the routes.py I've actually left in the route here .html.<br>
That's not going to work.<br>
Let's get rid of that.<br>
Let's restart the Flask app.<br>
Bring up the browser again.<br>
Okay, we have the browser up.<br>
Let's reload the page and there we go.<br>
So you can see there's just a little bit of an error there.<br>
Congrats on starting your 100 Days of Code challenge.<br>
That is text that came from the actual 100Days.html.<br>
Again, this is text from 100Days.html, not base.<br>
But this is our site.<br>
This came from our base.html template.<br>
Now you can see how you can create as many web pages as you want within your templates folder for whatever your website might have and they can all call on that one base.html file for the overall architecture of your page.
|
|
|
show
|
3:25 |
As a bonus, I thought I'd throw in a bit of CSS some cascading style sheets to make the site look a little bit nicer, specifically with a menu bar.<br>
I'm going to be using something called MUI CSS it's just some pre-established CSS I can link to it saves me writing all the code manually.<br>
Now we are going to head over to our base.html file.<br>
We're going to throw in quite a bit of code here so I'm going to paste it in and I will explain it line by line, just a minute and here we have all of the extra code I've just thrown in these are the meta tags up here that are required to load MUI CSS, you can pretty much just ignore all of those for now, this is all static stuff that they will show on their web page to actually get MUI CSS imported into your script, so all of those need to be thrown between the head tags and the key stuff here I want you to look at is within this body tag we're creating a div all right, in HTML, just a little section there called menu bar, this is using their MUI panel CSS class, just ignore that for now most importantly within our menu bar div that we're creating, we're creating a button with these characteristics, again ignore that this button that links to our index.html file our index route and says home.<br>
So we're creating a home button that takes us back to the home page, the index page, there is a second button here which has the same characteristics but this time it's called a 100 Days button and it links to our 100Days route, all right.<br>
So there's not much to it there, it's pretty simple and that is within our base.html file, so that menu that we are creating is going to be across every page and be extended and all we're going to have unique is our block content, all right, so we'll save that file.<br>
Let's move this to the right, and all we have to do here we don't actually have to do anything else to our routes.py file 'cause that all stays the same we just run the app, let's bring up our browser all right here is our browser, let's get rid of 100 days hit enter, and it again, it's not styled perfectly just roll with it, this is pretty simple stuff but there is our menu bar and we have two buttons, home and 100 days.<br>
If we hit 100 Days that takes us to 100Days page.<br>
Remember the div that we created for their menu bar is static, so that will stay on every page, it's in our base.html file, that will never change, just the content in the body tag will.<br>
Click on home again, this is just that custom content in the body tag that's changing, menu bar staying the same.<br>
Nice and simple, you can see this is the framework of your web page, your web page is starting to come together, so this is really exciting, you've learned quite a few concepts here, move on to the next video for a little bit of a wrap up.
|
|
|
show
|
4:57 |
Congratulations you made it to the end of your first two days of the course.<br>
This was the introduction to the Flask Web Framework.<br>
I hope you enjoyed it, I hope you got a lot out of it.<br>
Let's do a quick recap of everything that we learned.<br>
What we're looking at here is the Flask package hierarchy this is pretty much how our entire application was laid out.<br>
If you remember we started out with our project folder we created the virtual environment, we have our demo.py file which tells the flask app what to run and we also have the flask n file there which was the actual environment variable for the flask app.<br>
We then had the program folder, that's where our actual application lived, it was packaged within that and that's denoted by the __init__.py file that tells the package what to run, what to import and so on and it imports the routes.py file which contains all of the information for routing out applications so all of your routes, the app.route decorator and what each one of those web pages actually does.<br>
We then have the templates folder which contains all of those HTML templates including the base template which was the one that carried across all of our pages and then we have our two unique pages, index.html and 100Days.html.<br>
Just looking at our __init__.py file quickly, we begin by importing flask, that's the very first thing you have to do for this file, you have to tell it to import the flask module from the flask package, and then we create our very own flask app object.<br>
So we get this app object and that's what's used throughout all of our application.<br>
We then from our program folder we import the routes.py file, so thinking back to that hierarchy, from the program folder we're importing routes.py.<br>
Looking into the routes.py file, we import app so again from that program folder we know because of the __init__.py file that we can import our flask object called app, from flask itself we then import render_template and looking down a little bit further, we then have our decorators, these are the decorators that sit on top of our function, and these tell our function what path is going to work with that function and at the end of the function we then return the actual HTML file or the template that is going to be used when that page is called.<br>
Looking to the base.html file now, this one's quite simple nothing much to it, it was just some base HTML code with some Jinja code injected right into the middle of the body tag, this again was the place holder of all of the content that we're going to be injecting into this base HTML file, and that code that we're injecting in is our unique HTML files and looking at those unique HTML files, those other pages we then have the extends Jinja code and that tells us what file we're extending from, in our instance we're extending from base.html, taking that base HTML code that template, and using it for this other page.<br>
The block content as we saw in the base.html file this is the code that's going to be injected, this is the code that fits within that block content on the template and last but not least we then played with a little bit of MUI CSS, this is just a screenshot of the website there's the URL down on the bottom, if you want to have a closer look, have a bit of a play.<br>
So now it is your turn, have a quick look at the video again on the read me, or go and read the read me yourself on the actual GitHub repo but now it's up to you.<br>
In your last two days you are going to make your own web application, the idea is to be completely free form there is no rule around this, all I'd like you to do is take everything you've learned and make your own website, make your own page, it doesn't have to be functional just as long as you are using a base HTML type file to have a template that flows across all of your pages, do whatever you want come up with anything, make it as simple as possible it doesn't matter, just remember it's all about the consistent learning, so day three and day four dedicate at least 30 to 60 minutes to just playing around with your own website and remember keep calm and code in Python.
|
|
|
|
37:49 |
|
|
show
|
1:05 |
It's time to lay the groundwork for so much of this course.<br>
When we talk about Django when we talk about Pyramid when we talk about Flask and all these other frameworks we're going to be using HTML through and through.<br>
Sometimes JSON, but a lot of the time we're going to be using HTML templates and we're going to talk about that foundation right now.<br>
Now, you may be thinking, oh, what is there to HTML?<br>
I know this.<br>
We've got paragraphs, we got BRs for line breaks header, body, done.<br>
Well, even if you know HTML pretty well I encourage you to watch this chapter.<br>
It's going to be pretty short.<br>
We're going to build two interesting applications and we're going to show you a couple of cool editor tricks and other techniques to be really effective with HTML.<br>
We're also going to talk about HTML forums some of the client side validation and good stuff like that.<br>
So if you're really familiar with HTML go ahead and just watch the video and maybe skip the hands-on section but if you're not, if you're a little unsure your HTML skills are not quite up to par well, we're here to strengthen them up and get you ready for the rest of the course.<br>
Now let's get to it.
|
|
|
show
|
1:42 |
You may be thinking, what is there to HTML?<br>
It's pretty easy, right?<br>
I mean, here's Yahoo.<br>
We could write that up in some really simple HTML.<br>
In fact, here it is in 1996.<br>
If you go to the Wayback Machine this is the front page of Yahoo and basically it's like a Yellow Pages of websites.<br>
It wasn't really a search engine.<br>
It was like a bunch of people just going around the internet going "That's interesting.<br>
"We'll add it to Yahoo." Totally crazy.<br>
One of the demos we're going to do during this chapter is we're going to rebuild this site almost exactly like this with no CSS.<br>
Very, very little styles, just pure HTML.<br>
So yeah, pretty simple.<br>
Kind of blows my mind that's a $100 billion company at their peak, but there it is.<br>
That's Yahoo.<br>
So, the web is simple, right?<br>
Well, it was, it was simple.<br>
It's getting a lot more interesting, a lot more complex.<br>
As people go from building documents on the web that are linked to building applications that are on the web that are responsive that are progressive, that do interactive things like this Turo site here.<br>
So, Turo is a place, kind of like Airbnb for cars.<br>
And these are private car listings that you can rent.<br>
Get a Ferrari, a 2007 Ferrari, for just $695 a day.<br>
Pretty awesome.<br>
So this is a really cool site, very nicely done.<br>
It's beautiful, but it's also highly interactive with the map, with the progressive infinite scroll stuff going on and whatnot.<br>
So I would bet that this HTML is not quite that simple.<br>
We're going to focus on building a good foundation talking about some of the modern features like HTML5 and so on.<br>
So that you can build apps more like this, less like that.
|
|
|
show
|
3:41 |
Before we start writing some HTML let's just talk briefly about its timeline when it was introduced, and what features were added when.<br>
HTML starts way back in 1990, 91, with Tim Berners-Lee where he invented HTML back at CERN.<br>
And it was really meant to just be linking documents.<br>
All right, so that's kind of how it started.<br>
Hyperlinks, basic non interactive documents.<br>
In 1995 to five years later HTML 2 was released and that added form elements such as text boxes and option buttons.<br>
Ability to change the background and better tables and things like that.<br>
We quickly get to HTML 3.2.<br>
There was, you know HTML is very standards driven and they tried to do some stuff for HTML 3 and apparently that failed or didn't go anywhere.<br>
So they rebooted that effort as HTML 3.2.<br>
And here we have better supports for tables still.<br>
Applets, text floating around images, things like that.<br>
Superscripts, subscripts.<br>
So still working on this document in this non interactive like document world.<br>
Moving ahead quickly now.<br>
In 1999, remember this is the Dot Com boom.<br>
Pets.com and all that craziness.<br>
We get HTML4 and finally we get style sheets.<br>
So until then, you wanted to style something you would have to put the styles on the elements.<br>
Think how tedious that must have been, right?<br>
That was horrible if you wanted to have a common design across your whole site.<br>
So here we have style sheets that allows us to style all of our site not just embedded in each individual page and scripting ability for multimedia elements.<br>
Sort of a competitor to HTML4 is XHTML.<br>
So HTML4 is a little bit more loose.<br>
It doesn't have to be an exact super set of XML.<br>
And remember around the 2000's this is like the height of XML on a text base.<br>
We have XML SOAP web services, all sorts of stuff like that.<br>
We have style sheets, XSSLT, transforms all those kinds of things for XML.<br>
So there was a push to take HTML and make it proper parsable XML, all right?<br>
Everything is properly closed.<br>
You know that got some traction but really modern day HTML is not nearly that strict and it's probably a good thing.<br>
However, we've been moving pretty quick up til here.<br>
In 1999, 2000, we get these two competing standards and then there's a long waiting period.<br>
As time goes on and on all the way out to 2014.<br>
In 2014, HTML5 comes along.<br>
That was a long period there of not too many things being released.<br>
This release of HTML is meant to replace things like Flash.<br>
Remember Flash, you had to have Flash to watch this video.<br>
Well replace those types of things with built-in video elements and audio elements and so on.<br>
Also allowed for web applications to be much more like well, applications and not documents, right?<br>
They can access local storage, the little databases they can run in offline mode, all those kinds of things.<br>
They have location based services, mapping and whatnot.<br>
And also changing the syntax a little bit to separate content from presentation.<br>
When you look at some of the features especially around validation and stuff of HTML5 you will see it's decidedly not an XML document, all right.<br>
You might have attributes that don't have values and things like that.<br>
So this is more of a carrying on of HTML4 heritage than the XHTML.<br>
So basically 15 years between major new versions here.<br>
But now we have HTML5 we're kind of moving along to building real applications on the web properly.
|
|
|
show
|
0:50 |
A quick comment about editors before we start writing some code.<br>
In this chapter, you're going to see me using an editor WebStorm.<br>
This is from JetBrains.<br>
Now, I really like the JetBrains set of IDEs.<br>
You'll see they do great work around working on HTML and CSS and JavaScript and all the stuff have to do with the web.<br>
Noe, if you don't want to use WebStorm, that's totally fine.<br>
Here I'm going to use WebStorm.<br>
I'm also later when we get to the Python framework use PyCharm, which basically has most of WebStorm in it plus also, it has Python capabilities.<br>
If you don't want to use WebStorm but you want to have some of the cool editor tricks that we're going to do, probably your best bet is Visual Studio Code.<br>
So you can try that, as well but I'm a big fan of Web Storm and PyCharm.<br>
So I'm going to be using those.<br>
And just want to give you a heads up of what's sort of compatible out there that's also free.
|
|
|
show
|
1:15 |
You want to see what Yahoo was like back in 1996?<br>
Here we are in the Wayback Machine.<br>
You can see all the different versions of Yahoo that have been saved and we come down here about a week after the launch and let's just click on that and see what we get.<br>
Well, there we have it.<br>
The little image at the top didn't come through.<br>
That's okay, we're not going to model that.<br>
Anyway, so here's our Yahoo we have a new, and a cool, and the brand at the top and the news, and more Yahoo and then we just have a listing like, here's all the arts and humanities and here's education, or if you want K12, you go in here.<br>
And this is basically a Yellow Page of the internet put together by actual humans going around and looking for stuff that's cool and categorizing it.<br>
And this literally predates search engines and Google, and things like that, it's pretty wild.<br>
But notice the HTML is really quite simple.<br>
So what we're going to do is we're going to go and reproduce this pretty well actually with almost no styles no style sheets for sure 'cause that didn't exist back then.<br>
So we're going to get this and we're going to built this it'll be quite a bit of fun.<br>
So you can go find it in the Wayback Machine if you want to try this we'll talk about your turn chef when we get to it later.<br>
We're going to build this cool little website and learn a little bit of HTML 5 while we're doing it.
|
|
|
show
|
12:21 |
So, if you were going to rebuild the home page of a $100 billion tech company you would think that might take a little while, right?<br>
Well, give it five to 10 minutes and we're going to build Yahoo.<br>
Well, at least its homepage right?<br>
So, this is the sites that we're going to build.<br>
Here we are over in our repo.<br>
I open this in WebStorm.<br>
I'm going to drag and drop this folder onto the icon in the Dock and this only works on macOS, unfortunately it doesn't work on the other ones.<br>
On Windows and Linux you just say file, open directory.<br>
Never mind this for now.<br>
You can see there's nothing in here we have our Yahoo clone directory we have some images, these are images that we're going to use across the top they're red because they're not yet committed to GitHub, I'll do that in just a moment.<br>
So let's go and add a new H I don't want to add a new HTML file normally you would but I want to add a new plain file and just call it index.html.<br>
The reason I didn't add the HTML one is that it already has some of the structure.<br>
So, what do we have to have here for our document?<br>
Well, if it's going to be treated as HTML5 it has to have a doctype of HTML.<br>
So, doctype HTML, that used to be really complicated for other older versions of HTML and now like no, just HTML.<br>
This is great for HTML5.<br>
Then we have two main parts, we have the head and we have the body.<br>
Now, notice in WebStorm I can hit Tab and it'll autocomplete stuff so if I hit p, hit Tab.<br>
Not all editors do that but be sure to take advantage of that.<br>
Up here we're going to have title, it's Yahoo and we're going to not create the exact one because hey, they own Yahoo, we're creating Yaaahooo.<br>
Anyway, it'll be silly but that's what we're going to create.<br>
So we can put this up here and we can put all sorts of stuff, like style sheets and meta information, and whatnot but in our simple little version we're just going to have that.<br>
Over here, we're going to need to have these little bits here, these images.<br>
Now, when we start to design elements on a page one of the most important things that you have to think about is what is the, they call it display what is the flow layout style?<br>
Is something treated as a new line or is it treated as an inline element that flows around other ones?<br>
So the most important thing we're going to work with or the most common, at least is div.<br>
It's the most flexible, it has no semantic meaning it's just containers of things and this can act as a paragraph but it's just going to hold the stuff at the top.<br>
Now, we want to have some images.<br>
So, the way that we're okay, image is img and you have to set the source and you're supposed to set the alt like, for some reason if you're visually impaired or something you can't see the image a screen reader could read the alt and make sense of it.<br>
So what we're going to do is we're going to have and then start grabbing some of those simple images.<br>
So, we come in here and we can get how to go, start with new and then we come in here and, I like this one what's the next one, it's going to be cool.<br>
Yahoo.<br>
News, and the last one was more.<br>
All right, so, now if we go and just go back here and just double click this.<br>
Well, that's super looking isn't it?<br>
Oh my goodness, there's a few little things that we need to do so these are the images but right now they're huge.<br>
We have two choices.<br>
One, we could size them to exactly match the size we're using them as long as we're only using the one size or in old style here we could set the style to have the height of the element to be, you know something fun like 42 pixels.<br>
We'll just put that on all of them.<br>
Of course when we use style sheets later but we're not there yet.<br>
There you go, that looks better.<br>
That looks more like Yahoo not exact we have this stuff in the center so let's go over here and put a style on this.<br>
Say text align in WebStorm and PyCharm have these little shortcuts so you'll have to hit Tab and then type c.<br>
So, now it's getting there.<br>
All right, not quite the same images 'cause I recreated them.<br>
Not sure what the copyright's on those are and they're pretty cut down on quality in The Wayback Machine.<br>
Here we have our Yahoo with our little image so what's next?<br>
We need to have a couple of things here that are not super easy to see so let's do another div.<br>
Again, that's going to be aligned in the center.<br>
So, now we're going to have some hyperlinks you probably know hyperlinks but just going to have 'a' inside the href that's where it's going to go to the hyperlink reference.<br>
Now, I'm just going to put hash because we don't really have more of the site to go to but, what do we have?<br>
We have Yahoo Finance, Yahoo Finance.<br>
We have Net Radio and we have the World Series.<br>
We hit Command + D to duplicate that so we have Net Radio and World Series.<br>
All right that's looking pretty good.<br>
A little bit of spacing but we're not going to stress too much about the layout and stuff this is just the HTML.<br>
Now we need to put a form that we can submit a search into.<br>
I've no idea what would happen if I tried to search this surely some kind of error.<br>
But, we're going to have another section it's going to be similar to this so let's just grab that.<br>
Now, in order to submit data at least using traditional web stuff not like, JavaScript binding with front-end frameworks like we'll cover at the end of the course but to submit stuff back to the server we have to have the form and the form typically has an action actually we can just leave it like this so it'll go back to the page and often it has a method which is GET or POST, we'll say POST.<br>
So, here we have our elements.<br>
We're going to have, first thing is the textbox, and a textbox in HTML are input and the default is text.<br>
If this was cool and modern we would go in here and see things like, placeholder and all sorts of stuff but remember what we're trying to recreate looks like this.<br>
So, we're just going to leave it alone.<br>
The next thing we have is a button and it says, Submit, I believe.<br>
And, we have a hyperlink that says Options.<br>
Let's see how we've done.<br>
Coming along pretty well I out of do a little back and forth.<br>
Now, we have some spacing maybe we could set some margins.<br>
And, let's just go and copy these real quick.<br>
So, the final thing for that little top part before we get into the main directory listing.<br>
I'm going to try to put those into a bunch of hyperlinks.<br>
Let me just zoom ahead and do that for us.<br>
All right, there we have it I've typed those all out and let's see how we're doing now.<br>
Those are looking pretty good, again, font size maybe a little margin, other than that we're pretty much, we're like, halfway there with the Yahoo.<br>
So, what have we got left?<br>
We've got these Arts and Humanities and Architecture sub-listings.<br>
So, for that, we're going to have another div.<br>
Now, this one does not align in the center so we don't have to do anything in terms of styles for it and over here we have our little unordered list.<br>
So, the way we do that in HTML is we say, 'ul'.<br>
Now, here's a really cool editor trick.<br>
How many of these do we want?<br>
We have one, two, three, four, five, six.<br>
Let's just say want four 'cause I'm going to just, do some copying in a bit.<br>
But, if we wanted four.<br>
You knew you wanted an unordered list and in there you wanted four list items.<br>
The way you do that is you'd say Angle Bracket + li like this.<br>
We can leverage this cool feature called Zen Coding where you do an < this is a CSS type of language, so you say 'ul' immediately contains li times four and if I hit Tab.<br>
Check that out, even automatically moves you from the things as you hit Enter and fill out the values.<br>
That is pretty awesome, although I'm not going to use it here because we have a whole bunch of stuff that goes in there I'd like to copy.<br>
So, we have a bold element and then a bunch of sub elements.<br>
Let's just copy this one for starters.<br>
Turn this into a hyperlink.<br>
Then wrap this round and make each one of these little ones also a hyperlink.<br>
This one we want to be bold and the proper way to do that these days is to put it inside of a Strong element or to use CSS and we're just not doing CSS yet.<br>
How have we done?<br>
Looks pretty good right?<br>
It's not that hard to build Yahoo.<br>
Okay, I'm going to zoom ahead and just duplicate this part over here over and over and over again fill out the details and we'll resume the video.<br>
Okay, I've done a whole bunch of typing in that text and formatted it so now we just have a bunch of hyperlinks going to these locations, again, we don't actually have Yahoo we don't have that underlying data so we can't do much more than that here.<br>
I'm just going to throw in a couple of these other bits so that visually these two sites line up.<br>
All right, so now got something like this and we got something like that.<br>
Now, let's do just a little bit more work to make this look you know, legit.<br>
On these, we need a little more spacing.<br>
So, on each one at the top, let's just go and have a margin-bottom 10 pixels.<br>
On those, a little more space and then these have a lot of distance between the lines and the way set that is we want to set the line height and just do that here.<br>
I'll make it 1.75em.<br>
Now, em is a measurement that means however big this thing is now multiply it by 1.75.<br>
So, if the line-height is, I dunno, 20 now it's going to be, you know, 30-something.<br>
We run that again and it looks like it maybe needs even more, let's say 2.25.<br>
2.5.<br>
There we go.<br>
I'll make this little top part go away again.<br>
Yeah, those are looking pretty good.<br>
They're not exactly identical one I got to scroll to the top, there we go but, feel like we're building Yahoo.<br>
Now, the last thing to do let's just put this little divider and that little bit on the bottom and I'll just say, actually.<br>
Move this down here at the bottom.<br>
Another div, whoops.<br>
A div, now then we want to horizontal line looks like that.<br>
Notice, this is not closed.<br>
This is one of the parts where HTML5 differs from XHTML.<br>
In here, we're just going to put these in hyperlinks.<br>
Now, if we just wanted a new line we could use a little br tag not always the best way to do it but let's just bring it in the mix here.<br>
All right, there we have it.<br>
We've added our hr, we've added the links a couple of line breaks, let's see how we're doing?<br>
Pull down, close those down there were definitely centered so let's go and throw that on here again.<br>
Remember, style sheets, we'll get to them.<br>
There we go, so, not a perfect replica but it pretty close to Yahoo what we've built over here.<br>
So, this is a quick little introduction to basic HTML.<br>
We're going to do another demo where we talk about working with forms and some of the HTML features but we wanted to kick it off with rebuilding Yahoo.<br>
Just, thinking back on this, here's a site where basically you could have done it through really static files, maybe it had a database behind some of it, I'm sure it did but it's super easy to create.<br>
Hundred billion dollar company I guess it was good to create a company in 1996 on the internet.<br>
Well, it's still good to create companies on the internet but it's not as easy as oh, well let's rebuild this thing in a few minutes and try to go with that.<br>
All right, hopefully that was enlightening for you and we'll move onto the next one.<br>
Remember, all the cool editor tricks that you can take advantage of.<br>
It really helps you get HTML correct because it auto-closes the tags and even if you wanted to change them from say a div to a span you'd notice it's changing the bottom as well.<br>
Super nice.
|
|
|
show
|
2:41 |
Let's review what we built here and talk about some of the important tags that we used.<br>
We always start an HTML5 document with DOCTYPE HTML Don't say HTML5, but just basic, clean HTML.<br>
That's what that means.<br>
And then we're going to wrap the entire doc in an HTML tag.<br>
At the top we put the head the head has a title but it also has things like style sheets, metadata and so on other stuff to configure the page or tell consumers of the page like mobile browsers or search engines about the page.<br>
And then we get to our body which has the main content over here and there close those tags of course as we said the most common and flexible element for layout is the div it has no semantic meaning other than it sort of acts like a paragraph.<br>
It has what's called block layout.<br>
Block layout is important because it means basically that element goes on a new line and things that come after also go on a new lines shift doesn't flow around it inside there we put some images.<br>
Now images have inline layout.<br>
So that means they'll flow next to each other.<br>
And we didn't have to do anything to get them to span across the top.<br>
That was great.<br>
We wanted to have some input.<br>
So we have a form.<br>
And we have input elements like input type equals text, and other types.<br>
We'll talk more about that shortly.<br>
And if you want to submit that we're going to have a button.<br>
And we going to submit that button you can even say type equals submit on the button to make it super obvious.<br>
Now these both have either inline or inline-block layout.<br>
They seem like the kind of the same thing at first but inline, those elements do not respect margin, padding, stuff like that.<br>
Whereas inline-block, do you could put a padding on a button you could put margins on the button.<br>
So you may choose one or the other for that.<br>
Now, these are just the default values so we going to choose them in there we are kind of acknowledging how they work.<br>
When we get to the design then we going to talk about how we control that how we use that to our advantage.<br>
Of course we have our form that we put these elements into and we going to submit them back.<br>
Often the action is just empty which means submitted back to the same page.<br>
Typically post is what we want here.<br>
Then we want to an ordered list.<br>
It's layout style is block, by the list items.<br>
These are the elements of the list.<br>
And then we can put things in them here we put a bunch of hyperlinks.<br>
Speaking of which, those a tags are hyperlinks and their layout, of course, is inline as well.<br>
So those are most of the elements that were used to rebuild Yahoo.<br>
I mean, a lot of stuff on this page but it's not that much considering what we built.<br>
Right Well those are the basic HTML tags and some of the key concepts around them.
|
|
|
show
|
3:40 |
We've seen the basics of all the HTML tags and we even talked a little bit about forms but let's build something quite a bit better around accepting user input and giving validation and those sorts of things.<br>
So over in our GitHub repo, we now have a signup folder.<br>
Let's open that in WebStorm.<br>
Anyhow, you can see we have a really simple site.<br>
It has just a little bit of styles already set up.<br>
So here if you see if I refresh it we have this big blue screen.<br>
Let's see what that's for in a minute.<br>
So we've got a few styles sheets because earlier we recreated Yahoo from 1996 and that was cool but if you build something that looks like it's from 1996 today?<br>
Not cool.<br>
Don't do that.<br>
So I threw a few basic styles in here to style some forms and stuff.<br>
It doesn't change anything about what we're doing but at least it makes it look and feel better.<br>
Also I threw in a little bit of JavaScript here that will capture the form input that we type and show it back to us as if we had submitted to the server.<br>
All we have here is an index.html file.<br>
There's no server.<br>
We haven't got to the server side frameworks yet.<br>
This is going to simulate submitting it back to the server.<br>
Now our goal here is to define some basic HTML forms that allow users to input data or interact with the data from our website.<br>
So as we saw before what we're going to do is we're going to have a form element here and often an empty action is fine.<br>
That means post back to the same page.<br>
The request method is going to be post.<br>
And in here, we want to have something to sign up.<br>
So let's actually put a little header here so it's a little more obvious.<br>
We're creating this fake startup that we're calling Foxrem.<br>
So you're going to be able to sign into our cool site at Foxrem.<br>
If we come over here and refresh it we now have a form and we have our ability to sign up for Foxrem.<br>
There's no input elements in our form.<br>
It just had a white background.<br>
So what we need to do is accept a full name an email address, and have a button that they can click.<br>
So let's have an input of type equals text.<br>
And we'll have another input type equals text, and I'll have a button.<br>
We'll set the type equal to submit and we'll call this register.<br>
Let's see how we're doing now.<br>
Better.<br>
Here I guess that's full name.<br>
And I guess, what is it?<br>
This is email that we can register.<br>
And if I click this notice what we're sending to the server is empty.<br>
Why is that?<br>
Well, in order to send this data we actually have to give it a name.<br>
Not an id, not a class, but just a straight up name.<br>
So this is going to be full name, something like that.<br>
And this one's going to have a name of email.<br>
Now if we go back and restore oh it must have remembered this is who I am.<br>
Sure, let's go and try to submit that.<br>
Registering, see now the full name is Michael Kennedy.<br>
The email is michael@talkpython.fm.<br>
Super.<br>
So this is already working.<br>
It's already coming along.<br>
So if I refresh it though, I got to make it forget somehow.<br>
If it looks like this as we really get to it in the beginning it's not at all easy to tell what this is for.<br>
Well, sign up and this says register.<br>
This probably has something to do with like a username or an email or maybe a first name.<br>
Maybe this is password.<br>
I don't know, but we can't tell, right?<br>
So we're going to do a little bit more work to make it look nice.<br>
And speaking of which we also do want to have a password section here.<br>
All right, so which one of those is the password?<br>
I don't know.<br>
So we're going to go and add a couple of extra features to our form to make it really clear what we want to put in and also to do some validation.
|
|
|
show
|
2:55 |
Here's our signup form.<br>
Fill it out.<br>
What goes where?<br>
Obviously, we have no idea what goes where.<br>
One option would be to put a little label left of these things like full name and email and password and stuff like that.<br>
We could even style those to be fixed sizes.<br>
Ah, that works.<br>
Is it clever?<br>
Is it beautiful?<br>
Is it smooth?<br>
Does it beg me to type in my stuff and register and give away my personal information.<br>
No, not so much.<br>
So let's go here and do a little better job.<br>
So we can add a place holder.<br>
Here we can type full name, maybe lower case or something like that.<br>
Here we have a place holder for email.<br>
Here we have a place holder for password.<br>
If we put a little space at the beginning it kind of centers it a little bit more.<br>
Ah, that's better.<br>
Now if you go here and you type your name obviously it goes away but if there's nothing in there comes back, right?<br>
So, nice little place holder.<br>
Put a very secure password.<br>
Maybe not the best type here.<br>
We might want to hide that away but you can see we're now passing that information along.<br>
Little bit nicer.<br>
Okay, well that was good.<br>
Having those place holders there was good.<br>
The other thing that we probably care about is maybe we want to hear about how and where they heard about our company.<br>
Like, "Hey I heard about you through search or through a friend" or "Oh, that newsletter you guys gave out that's how I heard about your new product." So, what we want to do is go in here and put some kind of a drop down.<br>
And the way drop downs work in HTML is these are called select boxes and the name, let's heard of, heard of like that.<br>
An id doesn't actually matter.<br>
And inside here, we're going to put options.<br>
These are options you can pick and the value of nothing from it.<br>
We'll say please select an option.<br>
And then we can say something like podcast.<br>
And this will be your podcast.<br>
And down here, what else are we going to have?<br>
We're going to have search, search engine something like that.<br>
Notice the tech doesn't have to be the same.<br>
Friends recommendation and this can just be friend for the value.<br>
Let's say that, it's you know actually spelled okay.<br>
So this is all good.<br>
This one we want to leave empty so it'll indicate nothing has been selected.<br>
And this one we could also just say selected like that.<br>
So if we refresh again, just now we have please select an option and those are our other ones we've picked.<br>
'Kay so if we click it now, you can see heard of is now a podcast.<br>
If we change it to friend, it's now friend and son.<br>
Okay well this is pretty good.<br>
Looks like we have a nice little self-describing forum that looks really slick.<br>
When we refresh it, it's going to come out looking like this.<br>
Looks nice to me.
|
|
|
show
|
5:36 |
Well our form, it's looking good.<br>
It has this nice little options down here that we can pick.<br>
We can come down here and it has our email but if you type a real email of course the placeholders drop away.<br>
Super nice but notice it will let us submit right away.<br>
Oh and by the way this isn't too secure, right?<br>
So we want to do a couple of things.<br>
One, oh actually let's add one more column here one more thing that we're asking for.<br>
Let's ask for age and that's just be age in years, something like that.<br>
Here we go.<br>
So there's a couple things we want to do.<br>
Like it would be nice to only allow email addresses here, to make sure that they type in a full name, to make sure they select an option, to make sure that the age is actually a number like 27 and so on.<br>
So we can use client-side validation that's part of HTML5 really easy.<br>
We want to make sure they've selected an option you can say that is required.<br>
You don't have to set a value, nothing like that just required.<br>
We can do that for all these if that's the way we want it.<br>
We don't have to make them all required but it seems reasonable here.<br>
So now we should go and try to submit it it says, "Whoa, whoa, whoa, you're going to have to have some stuff in here." And soon as I type it gives immediate feedback.<br>
Take it away again, warning.<br>
Type it in, good.<br>
Of course if we reload it those warnings are gone.<br>
It doesn't start that way but soon as you try to submit it, it starts telling you about what's missing.<br>
So let's put this in here.<br>
Let's go and select, actually, let's leave that one off.<br>
Let's say if it was 10.<br>
Notice it won't let us go.<br>
It won't let us submit that when data is required.<br>
One quick comment on all of this client-side validation.<br>
It's a convenience.<br>
It's here to help the experience be quicker and smoother for the user.<br>
So as I type stuff it immediately, you know removes that little light of red around it.<br>
Let's do another, no, this part's good now.<br>
That does not mean you can skip the validation on the server.<br>
We could entirely disable this validation.<br>
We could change the HTML or we could just submit form posts directly to the server, entirely skipping this HTML.<br>
So this is not enough but it is a really nice thing for our users.<br>
So this is nice but what if I put this?<br>
Well, it still thinks the email's okay.<br>
So let's go and change that as well.<br>
We just said we want a bunch of text boxes but with HTML five we can do better.<br>
We can say, "This is an email, a date, a file "a range, a check box," you pick it.<br>
So that's an email.<br>
This is a password.<br>
That's been around for a while.<br>
This is a number.<br>
And with a number we can set cool things like the minimum must be 18.<br>
So you have to be 18 in order to do this.<br>
And this one we could say min length is going to be six.<br>
So you have to have at least six characters and so on.<br>
Well, let's try that again.<br>
Okay, so we come down here.<br>
Okay, this name is required.<br>
Cool.<br>
We'll just put Michael for a moment.<br>
When we say register and it says, "No, no, no." It's not just required, it requires an email address.<br>
Oh, well, that's good.<br>
Okay, ABC, how about the letter a?<br>
Just love the letter a.<br>
But even right away it tells us like "That's not going to work.<br>
Please fill out with at least six characters and you're using 1, 2." Yep, now using 2.<br>
Register no, it takes the letter a six times right, or more.<br>
So that's pretty cool.<br>
Down here I could put 16.<br>
It's like, "No, no, this is a number." Okay, 5.<br>
Nope, it has to be no less than 18.<br>
All right, how about 45?<br>
Now it's happy, right?<br>
If you all the scroller down it stops at 18.<br>
And if it were empty and I come in here and hit the up arrow to run the scroller it starts at 18.<br>
So that's pretty cool.<br>
And finally over here we can select an item from the list which we'll gladly do.<br>
Finally our form is all valid.<br>
We fill it out correctly and none of that happened doing a bunch of round trips to the server.<br>
It's all client-side.<br>
It's not even JavaScript.<br>
It's just HTML in HTML five.<br>
All right, let's hit it.<br>
We better save that password.<br>
Here we have it.<br>
So we fill it out, Michael Kennedy michael@talkpython.fm.<br>
I told you, the letter a six times, so secure.<br>
He's 18 and we heard of this on search.<br>
Pretty cool, right?<br>
And so all we had to do was go down here and fill out the types and we could pick the extra types.<br>
We saw there are many options here.<br>
Text obviously is the default but there's a bunch.<br>
Add some nice placeholders, some required values some minimum length for characters, minimum values for numbers, and even that there was a required selection from our list.<br>
Well, that feels like we covered a lot.<br>
And this, these little, tiny attention to detail this little, tiny attention to detail is really nice.<br>
I think it makes the experience from a user perspective feel much more professional and polished than, you know, just something went wrong with your form post.<br>
Go scroll down and find it, right which is a very common behavior on the Internet.<br>
And now that you see how easy this is it's even more frustrating, right?<br>
Be like, "Oh, come on, just put a required in there.<br>
"Just do it, please." Anyway, here's the HTML forms.<br>
I think just a little attention to detail and you'll make them super, super-nice.<br>
When we get to the server-side frameworks you'll actually see how to submit those and process them and store 'em at a database and whatnot but, you know, here's half the story.<br>
The HTML half.
|
|
|
show
|
2:03 |
This wouldn't be a 100 Days of Code course if you didn't get a chance to write a decent amount of code yourself.<br>
Now, we may be stretching the definition of code here a little bit when we talk about HTML but in this context I think it kind of counts.<br>
We're going to talk about what you get to do for the next three days after watching the videos.<br>
So, how do we get started?<br>
Well, you start out by watching the videos and since this one comes last you probably have done that.<br>
Maybe you're skipping ahead.<br>
So go back, watch the videos if you haven't already done that.<br>
This should take you, occupy you for a day, about.<br>
Now, we're going to do something really fun.<br>
You saw us recreate Yahoo before.<br>
Now, we're going to create another early version of one of these tech giants, Google.<br>
So you can see here, we've got the Google home page circa 1998.<br>
Yeah, it's built with tables and center tags and all that badness.<br>
It's really quite simple.<br>
So, what your job is going to be is to recreate something that looks roughly like this.<br>
So, I would say go back here to this link and go to the 1998 version and download this picture here.<br>
But the rest of it you can just do with straight HTML and tables.<br>
Yeah, that's right, tables.<br>
We didn't talk about tables, so here's a little quick example of how you do tables.<br>
You just need a table with three columns.<br>
One here, here and here.<br>
Actually, the Google page, that's a table row with column span three.<br>
You can do that or you just put it out there as a div.<br>
That might be a little bit better.<br>
So, this will be great.<br>
You can rebuild this over days two and three.<br>
And then for day four, you're going to add a registration and sign in, log in page, if you will.<br>
However detailed you want to get there.<br>
Basically, imagine Google not like it was but like it is, where you have to create an account.<br>
So, you're going to create a login form with the right validation and all of that kind of stuff just like we did.<br>
That's it!<br>
You've got three days of playing with HTML and maybe some really rudimentary styles.<br>
Hopefully, you have fun on this retro tech tour and playing with this older HTML with of course, HTML5.
|
|
|
|
32:03 |
|
|
show
|
1:05 |
Hey, Michael here.<br>
There's a change of plans.<br>
Originally, this section was all about a hot web framework called API star.<br>
However, over time in 2022, that web framework officially retired.<br>
So we have a replacement that is the hottest API framework with a ton of traction, FastAPI.<br>
FastAPI is currently the second most popular web framework in Python today.<br>
And it's just behind Django with its trajectory having it surpassing Django very soon as well, making it the most popular web framework for Python.<br>
FastAPI, unlike API star, is very unlikely to be a flash in the pan and learning about it will be a boost for you for a long time.<br>
The following content is taken out of our modern APIs with FastAPI course as the first chapter on FastAPI.<br>
I think it'll serve you very well here too.<br>
Now, be sure to do the final exercises in the repo for day nine and onward, just like you did for the prior three days.<br>
I have a fun project in there for you.<br>
Enjoy learning about FastAPI.
|
|
|
show
|
0:50 |
It's time to write our first FastAPI API, we're going to create a simple application that will actually show us a ton of the moving parts of FastAPI.<br>
Now, because I want to just focus on getting everything set up, I'm going to first have us build a simple little calculator API, you'll be able to submit a couple of numbers, it'll do some simple math, the programming will be as basic as it gets.<br>
But what will not be basic will be all the things around FastAPI, we're doing the types being passed in the validation, the required fields, the error reporting, all of those types of things, we're going to focus on that.<br>
And then we're going to come back for a second iteration and build a much more interesting and complicated API that would be well more realistic.<br>
But let's start by building a really cool calculator app.
|
|
|
show
|
3:49 |
Now, for us to build our application, we need to create a new web project.<br>
Now almost every web project that I know of depends on external libraries.<br>
And anytime you have a Python library or Python application that depends on external libraries, you're going to want to start by creating a virtual environment.<br>
And of course, this is no different.<br>
So that's what we're going to do.<br>
Here we have the demos.<br>
And right now we only have chapter three, of course, all the chapters will be here by the time you're watching the course.<br>
Let's go over here.<br>
We just pop open a terminal right there.<br>
And what we're going to do is we're going to create a virtual environment.<br>
So we're going to say Python 3-m venv venv.<br>
And now we're going to activate it.<br>
So on Windows, you would activate it just by saying venv scripts slash activate.<br>
But on Mac and Linux, you say dot to apply it to this shell, then venv bin.<br>
Why is it been in scripts?<br>
Pick that up with someone else.<br>
I have no idea.<br>
But we're going to activate it like this.<br>
And you'll see our prompt change either way where it says now you're in this virtual environment, we can ask things like, which Python?<br>
Yep, it is the one that we're working with.<br>
Another thing we want to look at is by default, whenever we create a new virtual environment, there's a 95% chance that pip itself will be out of date.<br>
So let's just go ahead and upgrade that real quick as well.<br>
I'll just go ahead and do these things next time and not run you through it.<br>
But first time through, I want to talk about it.<br>
All right, everything looks like it is good.<br>
And we have our virtual environment.<br>
Let's go ahead and just come over here and open this in PyCharm.<br>
Now on macOS, you can drag it onto the icon on the other S's, you just go to PyCharm, say file, open directory, or Visual Studio Code, and open that directory as well.<br>
Alright, so notice down here, it says no interpreter, there's a chance that it might pick the right one.<br>
Let's go and see which one is after it.<br>
It seems to always change, it's super frustrating.<br>
And the way it works, like sometimes it works and finds the local one we created, sometimes it doesn't.<br>
This time it didn't.<br>
So we're going to say go to our home directory, go to vnv, bin our scripts, pick Python.<br>
Okay, now it looks like everything's working.<br>
It's got a read through Python real quick just to make sure it understands all the types.<br>
And then we'll be ready to get going.<br>
Next up, let's go and create a main.py.<br>
That's pretty common in FastAPI to have a main that we're going to run.<br>
And I'm just going to right click and say run to make sure everything's working.<br>
Okay, the last thing we need to do is we're going to need to be able to use FastAPI.<br>
And if I go and run this again, it's not so happy about it.<br>
The last thing we have to do is install FastAPI.<br>
And we're going to keep track of our dependencies by having a requirements.txt.<br>
And in here, we're going to put FastAPI.<br>
For now, we're going to have a bunch more later.<br>
And of course, it's suggesting it could install it for us.<br>
But I'm just going to go to the terminal and show you what we would run.<br>
More generally, we'd say pip install -r requirement with the virtual environment active.<br>
We get all the dependencies of FastAPI at this time.<br>
All right, it looks like everything's good.<br>
I think it believes it's misspelled, which is unfortunate, but you can tell it to stop showing you that.<br>
And let's just do a print, ""Hello, FastAPI,"" and run this.<br>
All right, perfect.<br>
So it looks like we've got our system set up, ready to run Python or running Python 3.9 at the moment.<br>
If you're unsure which version you got, you can come down here.<br>
We have 3.9.0 at the moment.<br>
But again, anything from 3.6 or beyond should be fine for what we're doing.<br>
And we're able to install and import FastAPI.<br>
So I think our app is ready to, well, begin writing it actually.
|
|
|
show
|
5:17 |
Well, this was fun, but hello, FastAPI is not exactly what we were hoping.<br>
We're hoping to build a web application that our programs and other services could talk to.<br>
So let's go and build that.<br>
Now, if you've ever worked with flask, FastAPI is sort of a flask derivative style of API.<br>
It's not the same, but a lot of your intuition will work for it there.<br>
So what we're gonna do is we're gonna create, we can either call it app, or I've also seen it called API.<br>
Let's go with API.<br>
We'll come over and say FastAPI and want to create a instance of FastAPI like that.<br>
And we'll drop that magic there.<br>
And then we're going to define some function.<br>
This is going to be an API endpoint.<br>
So we're going to have a calculator and we'll just say calculate like that.<br>
And let's say it's going to do something incredible, like return two plus two.<br>
And then in flask, you would go over here and say run, but that's not what happens here.<br>
What we need to do is provide an external server.<br>
And there's a really awesome production level high performance one recommended here.<br>
And we're going to use uvicorn.<br>
Now notice there's an error here because uvicorn is not necessarily included when we install FastAPI.<br>
So that's the next thing to go over here.<br>
Again, it's not misspelled.<br>
This time I'll just press the button, let it do the install.<br>
You'll see it happen down the bottom.<br>
And we're good.<br>
So now that's up there.<br>
And so then we just say uvicorn run and we pass it the API.<br>
That's it.<br>
Except how does it know that calculate has anything to do with this and what URL should we use anyway.<br>
So the last thing we're going to do is come over here and say API dot.<br>
Now be careful, you've been doing flask, you might type route.<br>
And that's fine.<br>
But what you really want to probably say is I want to only respond to get requests HTTP get requests.<br>
And then we'll pass over, you can see there's a few options here, a lot of stuff going on, but our initial usage is simple.<br>
I'm going to do a get against API slash calculate like this.<br>
All right, now let's try to run it and see what happens.<br>
So let's just open this up and see what we get.<br>
Now this is not the most encouraging response here.<br>
What is the response not found?<br>
Well, that's because nothing is listening on just the forward slash like the basic URL.<br>
So we're gonna have to go to API slash calculate, we can fix this like opens as a crash sort of thing in a minute, but calculate spelling is hard.<br>
But once you get it, right?<br>
Yes, look at that for the answer is four.<br>
And maybe we want to respond with some sort of JSON, right?<br>
That's how API is are.<br>
So we can come over here and we could say, result equals.<br>
Let's just say, we're going to calculate the value, then we're going to store it into this thing that we're going to turn and actually, let's go ahead and inline that right there.<br>
So we'll just straight up return that value, that dictionary out of there.<br>
So we'll do our work, and then we're going to return the dictionary.<br>
And again, and now, you can see if we go look at the raw data, we have proper JSON.<br>
So when you're talking to API's, it probably makes sense to have some kind of schema, some kind of data structure rather than returning just the number four or some string.<br>
Not always true, but generally, it's a good idea.<br>
So we'll just start doing that here.<br>
And we'll build on that, of course, as we go along throughout this course.<br>
So that's it.<br>
Let's just review real quick what we got to do.<br>
We import FastAPI, we create an instance of the API.<br>
And on there, we use that to decorate the functions.<br>
In this case, we say we have a calculate function, and it's going to handle request to slash API slash calculate.<br>
And right now, it doesn't take any arguments, we're going to work on that.<br>
But right now, it just says, well, okay, you want some calculations?<br>
How about two plus two?<br>
That's cool.<br>
And we'll pass that back.<br>
We're going to return this dictionary, which is automatically confirmed to JSON.<br>
And also, if you look over here, and we go to the network, we do this request.<br>
I look at this one, you can see that the response content type assumes that it's application slash JSON.<br>
So it says this is JSON, which is all the more reason that the actual thing that we get over here should be JSON, not just the number four.<br>
So it automatically returns this as JSON if we pass the dictionary there by default.<br>
And then in order for our application to start, we're going to come down here and say, you vehicle run this application.<br>
And we could also add in here port, I'll be explicitly call out what what is the default value.<br>
So you can see if you want to adjust them.<br>
Here we go.<br>
That way, if you saw if we put like a one here to listen on, or one and so on, or 8000.<br>
Cool.<br>
All right.<br>
So this is this is simple, right?<br>
This is incredibly simple to build a high performance API and get started, we just have to have a project, set up the dependencies FastAPI, new vehicle, create a simple method, and call uv corn run done, you've built an API.<br>
Pretty awesome, right?
|
|
|
show
|
0:45 |
Now that we built our first FastAPI endpoint, let's just review what it takes to get a minimal API endpoint up and running in an application.<br>
Pretty simple.<br>
So we're gonna import FastAPI to use FastAPI, and then we have to have a server to run it.<br>
So we're gonna use uveicorn.<br>
And we create an instance of the FastAPI object, calling it API, create a function, some kind of method that we're gonna call, and we're gonna decorate it with HTTP verbs and their configuration.<br>
So an HTTP get against API/calculate, we'll run this right here.<br>
And then we just say uveicorn.run, we pass it the API object, we say the host and we say the port, and that's it.<br>
We're off to the races.<br>
We have our app up and running.
|
|
|
show
|
3:09 |
You can see that working with HTTP verbs, get, post, put, and so on, all of those things are right up in front when we work with building APIs with FastAPI.<br>
And understanding what verbs are out there and when they should be used is really important when you're building RESTful APIs.<br>
So let's just take a moment and talk about the four most common HTTP verbs.<br>
There are others that we're not going to mention here.<br>
You can go look at this link at the bottom to see them all.<br>
The one that everyone who has interacted with a computer on the web is familiar with is get.<br>
So get is just give me the information on this resource.<br>
Like any time you're using a browser, most things you're doing are just click a link, do a get.<br>
So the get requests a representation of a specified resource, in our case the result of that calculation, and it should only be used to retrieve data.<br>
One of the really important ideas around get is that it's supposed to be potentially cacheable, whether or not you access it multiple times or whatever.<br>
It shouldn't change the state of the system.<br>
There was a really interesting bug in Wikipedia way, way, way back in the early days when there was a delete button, actually had a just a get request to delete a resource.<br>
And then the web spiders like Google went through and started trying to index Wikipedia and started following those links and started deleting the pages.<br>
So yeah, don't do that kind of stuff.<br>
Get to just return things.<br>
Think of get as read only.<br>
If you want to change something, if you want to modify something, use HTTP post.<br>
This is to submit some new object, some new data, which is going to cause a change in the server potentially.<br>
So if you're going to log in, you're going to create an account, you might submit your username and your password that you want to create the account with.<br>
And of course, the state that's being changed on the server as well.<br>
Now there's a new account with that username and password that you can log in.<br>
Delete similar to post in that it modifies things, but if I want to remove a resource, so if I had like a bookstore and I had slash books slash book seven, and we decide, you know, we don't want book seven anymore.<br>
And the API could set it up.<br>
So I do a delete request against that URL against book slash seven, and the server could respond by deleting book seven, no longer there.<br>
Also similar to post is we have put now with post you say I have some data, I want you to create it on the server.<br>
Basically what comes back is great, I recreated this and here is where it lives.<br>
But if you already know where you want it to be in terms of the URL, think of like a blog post, blog posts, you might already know the URL where you want your blog post to live, but it doesn't yet exist, you could do an HTTP put and say, I would like to make this location have this blog post, right?<br>
You don't let the server control where the thing gets created.<br>
You you say explicitly server put it here.<br>
This is not nearly as common as post but sometimes you'll see it used in these are the four most common HTTP verbs as far as writing APIs and you know, explicitly making them part of your API.<br>
There are a bunch of others like I said at the bottom you can check out but get for read only posts for making changes, delete to delete put if you know where it's going.
|
|
|
show
|
2:14 |
HTTP verbs are what the client is instructing the server to do and telling what the server to do.<br>
But the server has an ability to talk back to the client and say, yes, that worked, or no, that wasn't okay, because of this, or you don't have permission.<br>
So the way the server communicates that is with HTTP status codes.<br>
So if you are not super up on your HTTP status codes, you're going to need to really get those a few of those figured out to see exactly what you should tell all of your clients.<br>
So a really good place to go is HTTP statuses.com.<br>
Status is not status, there we go.<br>
It should be status codes.<br>
Now this is a really cool site because it doesn't just have them grouped and categorized, but it has details.<br>
So before you saw we got a 200 okay, when we did a request for our calculate, if you click on this, you get all sorts of information about when you should do that, how you should do it.<br>
Okay, so get represents, it's a good thing to return for a get if here's a proper representation, the payload sends a 200 response.<br>
And it depends on the request method.<br>
The meaning is basically that worked, or this is the same as get but no data and so on.<br>
Now if you come down here, you can even see like some of the places you might use it.<br>
There's like constants in Python, like HTTP.httpstatus.okay.<br>
And you can use those if you like.<br>
You can also come down here and we can see created.<br>
This is much more common for HTTP post.<br>
You know, once you've done a post like, hey, that worked, I created it.<br>
And then you're going to say where it was.<br>
All the 200s, these are good.<br>
Over in the 400 section is another place where you definitely want to look so bad request about request is awesome, because it means you pass some data like invalid data or some other thing that's not good.<br>
So we're not going to process that.<br>
We come around here and say you don't have permission to do it.<br>
Or this data wasn't acceptable.<br>
So on.<br>
And then finally, the ones we hope we don't see too much of are the 500 internal server errors.<br>
So this is like the server crashed or some part of our infrastructure couldn't get to another part.<br>
Nginx couldn't talk to unicorn, one of those types of things.<br>
Definitely look through here when you're thinking about what should I send back to answer this request, especially if there's something that went wrong.<br>
What should I send back?<br>
HTTP statuses is a great place to go look.
|
|
|
show
|
2:59 |
So our calculator API is working.<br>
We open it up down here, let's see what we got.<br>
Remember we have a not found, but if we go to API/calculate, we're getting this data back and it's four.<br>
Well how exciting and how generally useful is this calculator?<br>
Not at all, right?<br>
All we're ever going to get is four, so the answer is always four.<br>
Maybe it should have been 42, but four it is.<br>
So let's go and change this so we can pass some data in.<br>
Now let's say we take an X, a Y, and a Z.<br>
Those are three things we could pass in.<br>
And the value is going to be X plus Y, like this.<br>
For now we'll do times.<br>
Maybe we'll do divide, it'll let us do something slightly more interesting in just a moment.<br>
So we can go over here and if we run this again, we come up and say question mark, X equals two, Y equals three, and Z equals ten.<br>
What are we going to get here?<br>
Are we going to get, what did we say, X plus Y is five, and then times ten, this should be 50.<br>
Are we going to get 50?<br>
Let's find out.<br>
No, we got nothing.<br>
So we cannot multiply a sequence by a string.<br>
Wait a minute, what's going on here?<br>
Let's take away the Z for a minute, try that again.<br>
Two, three, 23, as a string.<br>
If you look at it real careful, notice right here there are quotes.<br>
That is not an integer in JSON, that is a string.<br>
So what's the problem?<br>
The problem is everything passed around on the web is strings by default.<br>
But something needs to say, no, no, no, we expect this to be an integer.<br>
So if I go over here and I change this, and I use type hints, we say this is an integer, and this is an integer, and we say this is an integer.<br>
Let's do this again.<br>
Also notice it didn't say anything about any of these values being required.<br>
But now, let's try it again.<br>
Check it out, we got the value five.<br>
If we look at the raw data, it doesn't have quotes, it's really a five.<br>
Let's go back here and put R times Z, run it again.<br>
Yes, we got 50.<br>
Okay, this is working pretty well.<br>
What happens if I omit the Z?<br>
Look at that, we got an error message.<br>
And if we actually look at exactly what we got, it says there's something wrong with the query string, and there's a Z that's supposed to be in there, but there's no Z in the query string, but we expected one.<br>
And the problem is the Z is required, and the type of error is that it's missing.<br>
So let's put our Z back.<br>
Okay, so you're going to see when we pass these over, if there's no default value and there's no optional value, things like that, these become required.<br>
But we could say over here that this is a 10.<br>
There we go.<br>
Now we don't have to specify the Z because there's a default value for it, but if we do for the, omit the Y, where there is no default value, then hey, guess what?<br>
Y is missing, we've got to pass it over.<br>
Alright, cool.<br>
So this is how we pass data, at least from the query string, as well as you would see the path, like we could do like X, Y, like this, and make that part of the URL.<br>
Doesn't have to be the query string, and you'd be doing this exactly the same way.<br>
Okay, so this is how we pass data over to our API method.
|
|
|
show
|
1:12 |
We saw that if we want to pass data, especially from the query string or part of the URL path definition, where we can put variables in there, what we have to do is create the same variables or arguments in our function.<br>
So here our calculate function now takes an x, y, and a z.<br>
Now we're going to specify these to have concrete types.<br>
So over here, these concrete types that have no default value, these are required.<br>
We can also specify an optional integer and set it to be none.<br>
That way we know for sure that no value was passed for z over here.<br>
This value is optional.<br>
We could pass none or just completely omit it, and it's going to come through with its default value of none.<br>
But if we do pass some value for z, just like x and y, it has to be a valid integer.<br>
I don't think we saw that in the example, but if we pass like abc for x, it would say, No, no, no, the type is wrong.<br>
X has to be an integer, and we can't get an integer out of the string abc.<br>
So we get this automatically converted to integers, and the types are validated that what we pass over are either completely missing, or if they are there, they can be converted to the types that we said they should be, including z, which is optional.<br>
It either has to be missing or it can be an integer.
|
|
|
show
|
5:33 |
We saw that by default, our API method is going to return 200.<br>
That was great.<br>
And you can actually control it up here by setting the status code to say like 201 for some kind of post or something along those lines.<br>
But what if we change this a little bit and we put a divide here and let's go ahead and change this to an optional.<br>
Import that.<br>
Oops, not like that.<br>
Import it like this.<br>
An optional integer.<br>
And by default, there's nothing there.<br>
If we're going to return, we're going to compute this.<br>
How well do you think dividing, say, the number five by none is going to turn out?<br>
Not so well.<br>
And let's go a little step farther.<br>
And let's actually kind of echo back the arguments as we saw them, right?<br>
They pass something we want to say, this is what we got from what you sent us.<br>
We'll put our X, Y and Z here.<br>
So we're going to need to do some sort of test, right?<br>
Value is going to be X plus Y.<br>
And then we'll say if Z is not none, you might say if not Z, but yeah, if it's none, if not Z and if it's equal to zero, maybe we want to respond some other way.<br>
So if it's not none, we're going to say value slash equals, you know, divide value by Z.<br>
And we're going to return it.<br>
Let's try this.<br>
All right, we do a request right now.<br>
Let's put a Z back first.<br>
Z equals 10, like it was before.<br>
Perfect.<br>
So we got two plus three is five, divided by 10 is 0.5.<br>
Everything's great.<br>
Now that Z is in there, what if we say we omit Z?<br>
That's okay, it doesn't crash.<br>
It just doesn't do the calculation.<br>
But what if we put in Z equals zero?<br>
That explicitly is not good.<br>
It's not that the Z was required.<br>
It's just that this value of Z is bad data.<br>
So how are we going to communicate that back to them?<br>
So let's go over here and right at the beginning, we'll do a test.<br>
We'll say, look, if you passed in a Z and it's exactly the number zero, well, this value is just not going to work for us, right?<br>
How do we communicate that?<br>
Could you come over here and say error zero Z, right?<br>
Return that.<br>
We return that.<br>
Well, yes, we technically could return it, but what status code is it going to send?<br>
What message is it going to communicate to the client?<br>
200, everything's okay.<br>
So yeah, not really.<br>
We could do this, but it's not going to communicate well with the API endpoints.<br>
Especially think of a program trying to talk to this API.<br>
How is it going to know which is which, right?<br>
So what we want to do is return a FastAPI dot response, and then we can just set two things.<br>
We can set the content to error Z cannot be zero.<br>
And then the status code, here's our HTTP statuses.<br>
And let's just say 400 bad request, right?<br>
So we're going to come in here and we'll say, look, if you give us zero, this is totally bad.<br>
We cannot continue.<br>
It's going to crash, but we don't want our server to crash.<br>
We want to say the reason this has gone wrong is the data you supplied, not 500 server error, which we saw up here, internal server error.<br>
This looks like the service broke, not like they gave us bad data.<br>
Okay.<br>
It's also very unhelpful to them.<br>
So if we just rerun this, now we get an error.<br>
And more importantly, more importantly, if we look at the network, 400 bad request, right?<br>
400 bad requests.<br>
But if we put like one, now we get a 200 A okay, and we get our value back.<br>
And if we put no Z, that's fine.<br>
Here are 200, just a different calculation.<br>
So when we want to communicate one of these non-standard responses, not everything's okay, and here's your data, we're going to create a FastAPI response, set its status code, potentially set its message.<br>
Now one of the thing you might want to do, might want to consider here, I'm not going to do it in this simple example.<br>
Maybe we'll do it later.<br>
Is if you look at this over here, our Z equals zero back.<br>
So what came back is 400, but the type it came back is plain text.<br>
Whereas the normal response like this, this comes back as JSON.<br>
Let me just do it up here so you can see it actually in the network tools, right?<br>
This is coming back as content application slash JSON.<br>
So what you might consider doing is creating a dictionary in here like this.<br>
I said I wasn't going to do this, let's just do this.<br>
Like that.<br>
It's a string, not some JSON.<br>
And then we come over here and we could say media type equals application slash JSON, like so.<br>
And put the commas in the right place.<br>
There we go.<br>
And that went a little wonky, didn't it?<br>
Okay, a weird indentation got in there, but let's go try this again.<br>
Here we got back this application is JSON, everything was okay.<br>
If we got an error, notice the data we get back is still JSON.<br>
This we can look at that.<br>
The response is still JSON.<br>
So that way the clients consuming it can always just get the document and look at what they got back.<br>
It's not like sometimes it's text, sometimes it's JSON.<br>
I don't know, I think that's kind of nicer.<br>
It's up to you guys whether or not you want to follow up on that and do this.<br>
But by default, FastAPI returns errors that are not controlled by you as JSON.<br>
Like remember, if we click here, we get a 404, but the 404 is actually a JSON document plus the 404.<br>
So maybe it makes sense for us to factor that into our error message as well and pass over this application in JSON.
|
|
|
show
|
1:28 |
We saw we could create a response and return it with some content that was JSON with a status code.<br>
However, FastAPI actually has some shortcut ways to improve upon this.<br>
So if we can go over here and say FastAPI.responses, and you look in here, notice we have a JSON response, a file response, an HTML response, plain text, redirect, et cetera, et cetera, et cetera.<br>
So that's cool.<br>
Let's go into the JSON one, which is up here.<br>
And how is this different?<br>
Well, it's going to automatically set this to the media type.<br>
So we don't have to specify that.<br>
And also the content is going to be set to be a string, which would parse as JSON, but some kind of dictionary, just a straight dictionary there.<br>
And then the status code, well, we're still going to need to set that because that's kind of error condition like that.<br>
Okay, let's wrap that so you all can read it.<br>
This should do exactly the same thing as we had before.<br>
Go over here and we refresh, everything is good.<br>
But now if we make it error out, notice again, we get some JSON passed back here.<br>
And if we look at the type, it's application JSON.<br>
So same basic idea, but we just have to write a little less code.<br>
We don't have to set the content type and all those things.<br>
Also, if this content you wanted to pass back had come from some other location or included other data, you'd have to use the JSON library to turn into a string, which should be a hassle.<br>
So this is This is much better.<br>
If you're going to return JSON response, do it like this.
|
|
|
show
|
1:22 |
If you've received some input, some data from the user that you just can't process because it's not in the right format or something's missing, some of that is actually handled already by FastAPI.<br>
So for example, if an X is passed over and the X is a string that can be converted to an integer, FastAPI will just handle that.<br>
It'll return a JSON response with a dictionary that has some details about the error message.<br>
But there's other times where just certain values are required.<br>
Like for example, you have to have a non-zero Z if a Z is specified in this calculation, because you'll get a divide by zero.<br>
So in this case, we got Z from the user and it's zero, so we need to tell them, ""No, no, no, this is bad.<br>
If we just try to do the division, it's going to crash our server.<br>
They'll get a 500 response.<br>
They'll think our service is unreliable when really they sent us bad data.<br>
But we want to communicate that back.<br>
We're going to create some kind of error dictionary not shown here that we're going to return like error is the message, you know, Z has to be non-zero for division and so on.<br>
We're going to do that as a FastAPI JSON response.<br>
We're going to set the status code to 400 or whatever status code you think is the best fit.<br>
And then the content to a dictionary, which will be converted to JSON and sent back along with the status code.<br>
And that's it.<br>
Super easy to return errors in this controlled way back to the clients.
|
|
|
show
|
2:20 |
There is one more thing I think we should check out and fix before we move on from this simple calculator API.<br>
Recall, when we run it, we can go over and we can go to whatever this URL port is here, slash API slash calculate and pass x and y.<br>
And that works great.<br>
But if we just go to the server, something bad happens, we get a 404 not found, right?<br>
See this?<br>
And if we actually pulled up the dev tools, you would see the response code is 404 not found.<br>
So it's not ideal for just the homepage or the domain name of your API.<br>
So let's take the smallest measures here.<br>
And we'll take bigger measures later to improve upon this.<br>
Let's just do a little bit of tiny work here so that we can have something.<br>
So let's go API, I want to do a get to forward slash, whatever we write next is what's going to happen when you just request the server by itself.<br>
So I'm going to create a call index.<br>
And I'm going to paste some text here, I'm going to have a body which has some HTML, the body, then the head, and then a div.<br>
And maybe it even needs a HTML slash HTML to be proper, even though it would have worked before.<br>
And we can just use what we knew before we can just return a FastAPI dot responses dot HTML response.<br>
And what do we want to set the content is this body.<br>
All right, that's it.<br>
And we had a little continuation character there.<br>
Now, now that's it.<br>
Nothing else got messed up.<br>
Okay, good.<br>
So let me just rerun this.<br>
I'm gonna click here now.<br>
Yes, welcome to the super fancy API.<br>
And now if we click on that, it takes us over to our actual API, because it just seemed wrong that you opened up the server and it just says crash, this is not working.<br>
So here's a little tiny bit of work that we can do stuff we've already discussed of just passing back some alternative response besides JSON and hooking this.<br>
Actually, this is the gateway to having a whole bunch of pages and stuff on our site.<br>
If we wanted, we're going to talk more about using things like Jinja templates, and maybe even better templates later.<br>
But for now, this will at least let our site work in a way so it doesn't look broken.<br>
And then we can go on and work with our API here.<br>
So that's a quick introduction to FastAPI.<br>
You can see it's super clean, super easy.<br>
And there's tons of neat stuff that we haven't even gotten to yet.
|
|
|
|
47:26 |
|
|
show
|
1:22 |
In our previous section together we built some really cool webpages we used some HTML5 techniques to build some really nice forums that work doing client-side validation and accepting just the right kind of input, giving lots of feedback.<br>
But what we did not do is make those sites look good.<br>
One of them looked straight out of 1996, on purpose and all the other ones we were going to build if we built them, they would look that way too because we hadn't talked about CSS and design and that sort of thing.<br>
That's what this chapter is all about.<br>
Taking just client-side HTML, whether that's generated through some kind of server-side framework a frontend JavaScript framework or however you get it, and making it look really nice and learning just enough about web design to be comfortable and getting our sites to work the way we want.<br>
Often, web design can be something super frustrating for people who are like I would love to write a website but I don't know web design and I'm not a designer, I'm not a graphic artist I'm not artistic or creative or whatever you don't need any of that stuff.<br>
You'll see there's a bunch of clear little steps and clear little topics that you need to learn and then you'll be quite capable with web design.<br>
Then you go and find some assets, other places we'll talk more about that as we get into the chapter.<br>
I think everyone can do web design and I'm going to show you what I consider to be the foundational core elements things you have to know to be successful here.
|
|
|
show
|
3:38 |
Let's start this chapter by asking a question about a beautiful website, airbnb.com.<br>
Could you design the site if somebody threw a pile of images at you and said here's the type of content and copy we want on our site and the kind of behaviors?<br>
Could you build this just without references and, you know, type it up?<br>
If you can, feel free to skip this chapter and go on to the next one.<br>
You probably are some kind of expert 'cause that is a pretty seriously cool page right there but if you'd like to learn how to build sites like this and you're like thinking Well, I'm not a designer.<br>
When I see something that looks like this completely unstyled I don't know what to do with it.<br>
It's just like ahhh, it's horrifying.<br>
Right, maybe if you had a beautiful site you could adapt it.<br>
Right, but if you start from truly from scratch and you want to turn that into something that looks like that Airbnb site you feel like there's no way.<br>
Don't worry.<br>
This is not a problem.<br>
You can definitely learn enough design.<br>
So what are some of the goals?<br>
Well, first of all my goal is to help you not fear web design.<br>
As I said in the opening a lot of people I believe consider themselves not to be designers and they're bad, quote bad at web design and they hold themselves back from building really cool things on the internet because they feel like it's going to look like crap and they can't deal with it.<br>
So I want to teach you just enough to make web design your advantage.<br>
If something like this is hard it's probably hard for many people and if you can master it well then that gives you an edge on most folks.<br>
That's great.<br>
So how are we going to do that?<br>
Well, we're going to learn the CSS basics because once you learn the basics you can go learn another technique.<br>
Oh, how do they get that huge image in there to scale like that for the banner?<br>
Well if you know all the CSS basics you know you're pretty close to understanding that as well.<br>
So that means we're going to study the CSS selector model.<br>
We're going to study the box model.<br>
This is how the size around elements can change padding, margin, borders, things like that.<br>
Layout, or what in CSS is called a display mode.<br>
This is really important for understanding how the elements fit together and flow together on the page.<br>
Speaking of flow how do we get items to flow around other items?<br>
So we'll talk about floating items and getting them to stick, like, to the corner of the page stuff like that.<br>
And finally, your web browser comes with an insane amount of tooling to help you understand websites.<br>
Not just the view page source but as you interact with them as they're being mixed together with JavaScript and multiple CSS files and things like that.<br>
Now all of this is really a precursor to what are called frontend frameworks.<br>
You've probably heard of Bootstrap but there's other ones like Symantic UI and whatnot.<br>
So there's a ton of these front end frameworks and understanding CSS basics is of course an important part of working with them.<br>
To build real sites I would absolutely recommend choosing one of the front end frameworks.<br>
We'll talk a little bit about that at the end of the chapter.<br>
So I just want to leave you with the idea that you can learn enough web design.<br>
If you had to start with this thing on the right that would be tricky.<br>
But thankfully, it's 2019 or later.<br>
It's 1996, so we have all sorts of assets.<br>
Today we have front end frameworks, we have font sets like things like Font Awesome for really cool graphics as well as a bunch of on demand nice fonts we can use.<br>
Theme aggregators, graphic arts on demand you know, Fiver, 99 Designs, that kind of stuff.<br>
So we have a ton to work with and I think you'll find you learn a little bit of CSS basics you'll be able to do some really cool stuff.
|
|
|
show
|
4:12 |
If you've not done a lot of CSS I think you'll be surprised at the power and flexibility of CSS.<br>
The primary idea is that we have our HTML markup that has the content and CSS is supposed to style it so it controls how it looks and feels on the page.<br>
So the look and feel is separated from the content.<br>
A nice programming concept, right?<br>
This place called CSS Zen Garden takes this idea and really puts it on display in a powerful way.<br>
So, let's jump over here and check out a couple of sites.<br>
Here we are at CSS Zen Garden.<br>
You can click on 'view all designs'.<br>
The idea is that we're going to go through an example that says CSS Zen Garden, The Beauty of CSS Design a demonstration of what can be accomplished.<br>
A road to enlightenment, so what's this all about?<br>
You can see there is a style on this page it's not super impressive or whatever.<br>
Here you can see little logos you can see who are the contributors and so on.<br>
However, basically, this was a challenge and the design challenge was to take this HTML and do something interesting and different with it.<br>
I want to take you through five different designs here that take the same HTML but put different CSS styles and also, through CSS you can set things like background images.<br>
So, in a sense, maybe some different images as well.<br>
All right, the first one, is this one.<br>
It's like this cool, old book.<br>
Let me make it a little skinnier.<br>
Right, so we've got this cool, old book and this is actually the same contents.<br>
CSS Zen Garden, The Beauty of CSS Design a demonstration of what can be accomplished here's your road to enlightenment.<br>
Look how cool this looks!<br>
Here's the different contributors, versus let's say this section right here.<br>
So, we had that before now we have it looking like a table of contents.<br>
Really cool, right?<br>
You can go and view all designs.<br>
So, so nice.<br>
And really creative I think.<br>
You flip through those two sites here you don't feel like those are the same thing.<br>
But they are, they definitely are.<br>
Let's try another one.<br>
Check this out, here's a cool little robot and, depending on the size, that thing either goes alongside the text or over the text.<br>
So, here we have this robot here and as we move him around they do different things.<br>
We can go in and check out notice how the robot gets scrolled over.<br>
The road to enlightenment what's this all about, participation.<br>
Go down and find those there's our folks again that we just talked about.<br>
Notice they're in different places in the page.<br>
The thing looks totally unique and different and has cool little animations.<br>
Let's try another.<br>
Here's another one.<br>
It looks kind of like something out of a dystopian type of movie.<br>
I don't know if it's good or not but it's definitely different.<br>
Right, here's CSS Zen Garden, Beauty of Design demonstration of what can be accomplished.<br>
So what's this all about, right?<br>
There's all the pieces and whatnot.<br>
Here's the people.<br>
Okay, so quite cool, quite cool.<br>
What about another one.<br>
The Beauty of CSS Designs let's make this one a little wider.<br>
I see some cool stuff happens as you change the size there make it a little skinnier.<br>
This part becomes top most, there you go.<br>
Pretty cool right?<br>
Again, this is the same page.<br>
The Beauty of CSS Design, demonstration, etc, etc.<br>
Road to enlightenment.<br>
Look how cool and different this looks.<br>
Did they change the HTML?<br>
No, not at all.<br>
The design challenge was that you cannot change the HTML.<br>
They just changed the CSS.<br>
All right, last bit.<br>
It's like this retro, Mackintosh type thing from way back in the day here.<br>
Again, demonstrating what can be accomplished getting started, same thing.<br>
Right, there's those little icons, very cool.<br>
So, if you think of all these different sites being completely controlled, starting from this to be just, you know, specify the CSS and accompanying images that the CSS sticks into various places.<br>
I think that's pretty remarkable.<br>
Hopefully this inspires you to learn a little CSS because it's truly powerful and once you master it it's definitely a power that will help you on the web, everyday.
|
|
|
show
|
3:50 |
Let's talk about the structure of a CSS file.<br>
Here we have a file, /data/site.css in our relative web path, and if we want to include this, we're going to put a link to the href is /data/site.css.<br>
Don't confuse that with the javascript one where you have src for source, and then you say rel equals style sheet.<br>
And, of course, you can have comments, you can see the top is sort of these old school C style comments.<br>
If we want to style something, there's a whole language for how we do that.<br>
So we're going to talk about a few of the core ideas.<br>
If we want to style something like just the body the body tag, we just type body.<br>
If you want to style all the hyperlinks, just type a.<br>
If you want to style the divs, you type div, and so on.<br>
So you can target a node by name, by HTML name.<br>
So here we can set the background color to some hexadecimal kind of grayish, light gray, and the color itself to almost black, just short of black.<br>
So we can just use bare HTML names to target nodes across the board.<br>
Often, though, we don't want to target every hyperlink or every body, or every div we want to target some special thing.<br>
So maybe we want to just focus on the main content of the page.<br>
We want to give it a higher line height, 1.5 EM's is like 125% of what the default is.<br>
And then the padding is padding all around you have 20 pixels of space on each side.<br>
The way we're going to do this is we're going to specify a CSS class.<br>
So when we say .<br>
something, the .<br>
means we're talking about class names.<br>
So there's some element in the page with class equals content.<br>
And we want all this to apply.<br>
So you can see on the left here, it says anything like .name means the element class equals whatever that name is.<br>
We can also express hierarchies.<br>
So, for example, here we're saying .nav ul.dropdown contain within something, # profile image.<br>
And this actually targets things that only live within this hierarchy.<br>
There can be stuff in between, so we're saying something contained in an element with class nav inside that nav there's an unordered list, so the ul.<br>
That unordered list has to have the class dropdown so applying the .<br>
like that means it has both the node name UL and the class dropdown.<br>
The arrow means directly contained in there is a profile image, and the # means id.<br>
Whew.<br>
So you can get these very precise targets of I want to go to the nav, and wherever there's a UL in there target it, and within the ul with the dropdown exactly the next thing has to be a profile image.<br>
Make its width 64.<br>
So when we have #, that means we're talking about a id.<br>
So #name would be something with id equals name.<br>
Finally, we can also express not just hierarchies, but and.<br>
So here if we have no spaces, we have content.lead which means that we're both taking the class content and the class lead.<br>
So it would be element class equals content lead.<br>
So you can put multiple classes in there like that.<br>
And this would some form of inheritance and overriding.<br>
So we already have a content tag, now we're saying the content that has, also, the lead class, we're going to do other stuff in addition to what we did before.<br>
All right, so there's a lot more to learn.<br>
We're going to talk about it throughout this chapter but here are some of the core concepts.<br>
Target by tag, target by class name, target by id, and combining these into hierarchies and and type statements.
|
|
|
show
|
1:19 |
Let's talk about the demo application that we're going to use throughout this chapter that lets us explore the CSS selectors and properties and so on.<br>
So I call this Selectorville and now this is, of course, in the GitHub repo under Days 13 to 16, CSS Basics and Demos.<br>
You can check it out.<br>
It doesn't actually require anything special to run.<br>
It's just a bunch of static HTML files and whatnot but let's go ahead and have a look.<br>
Now there's this index.html page and the only thing this does is really provide navigation to the other parts that are relevant.<br>
So let's go ahead and open this up.<br>
So here you can see this is our design foundations CSS idea app.<br>
We have things like CSS selectors, the box model layout, that's like display modes, and floating items.<br>
Now notice, when I went over here and ran this in WebStorm it popped this up.<br>
Let's just call this something a little cleaner like run site, or something like that.<br>
So now I can see we can click run site, great!<br>
So here's our app.<br>
Like I said, you don't have to run it in WebStorm.<br>
You just double click the index.html and it'll open up and go and we're going to go through all of these different elements and build up this app as we go.<br>
Some of it's going to be pre-built, like the CSS selectors we just get to play with.<br>
Others, like the layout and floating items we're going to built that up more from scratch.
|
|
|
show
|
4:13 |
Now that you're familiar with our CSS selector app.<br>
Lets go click around, and see what we got.<br>
Let's start by exploring the idea of selectors.<br>
That's what we've spoken about so far.<br>
So, here we have a static page, selectors.html.<br>
And it kind of looks like my podcast, right?<br>
Talk Python To Me.<br>
So, you can see if we were to go to Talk Python and we were going to go to the episodes you'd see it looks very much like this.<br>
However, what I've done is I've added this little section at the top that lets us type in CSS selectors.<br>
And so, for example each one of these little blocks here is going to be a td, right?<br>
A table data element.<br>
If we hit that notice how they're all lighting up.<br>
We can come down here and see that we have a whole bunch of little boxes lit up.<br>
And we can do, show me all the table rows.<br>
There are the table rows.<br>
I could show me all the images.<br>
Then it goes to the images on the page.<br>
So the idea of this site is going to let us explore and let you experiment with creating selectors that will do interesting things.<br>
Now, there's a bunch of HTML here you can go and open it up and look at it but its not super relevant to know what's going on.<br>
Instead, I made this dialog using Bootstrap to let us ask questions like "I would like to see all the elements that are episodes released this month." So, they're going to have a class, this-month and it's worth pointing out the meaning of having a class is you know, there's a bunch of things potentially with that class but the meaning of an id is that it's supposed to be unique within the page.<br>
So as you think about designing HTML if there's going to be exactly one thing like one latest episode, than maybe its an id but if there's multiple things like say, this-month or course-images or whatever then, of course you need that to be a class.<br>
So, lets go over here.<br>
I want to find all the stuff that has the latest-episode.<br>
If I run that, nothing happens because this is an id not an HTML tag, right?<br>
So, remember, in CSS, how do we say id?<br>
Hash, so hash latest-episode there.<br>
That's cool.<br>
What if we want to know about the ones that were this-month?<br>
Remember, that was a class.<br>
So, to specify a class you say, dot.<br>
That little tiny dot right there.<br>
So, those are the ones that have run or released in March 2019.<br>
See one on the 9th and one on the 13th.<br>
That's pretty awesome right?<br>
What else can we do?<br>
We could ask for the body.<br>
We could ask for the table head, th and because that's an HTML element we just put, th, and that selects that.<br>
If you want tbody, for the table body there's the table body.<br>
If you want all the things with class, button that would be this one, this one and this one that I can see.<br>
This is a Bootstrap design style, click that and now all three of those change.<br>
So, it's kind of better this thing can even change itself, right?<br>
Let's clean that up.<br>
Let's do one more thing, let's say we are interested in all the things that are course-images but ultimately we're only going to be interested in the one that has a certain id.<br>
So, we come down here and say course-image and it's like that.<br>
What if we wanted to select just the hyperlinks within there?<br>
Well, the way we have containment is we put a space, so we put a little space right there and we put, a, for hyperlinks now the image itself is a hyperlink and that's a hyperlink.<br>
Okay?<br>
So, we're selecting that.<br>
We could also say the ones that are only directly contained within there and it turns out that's how it is so it doesn't really make any difference.<br>
We could also come over here and say that we want the course-images that are also have the name Pythonic.<br>
So, that selects the element that is contained within the course-image that has id, Pythonic, and that's just the hyperlink there.<br>
Okay, so hopefully this gives you a sense of what you can do with CSS and I really like the visual aspect so you want to see all the td's, the tr's the, this-month, things like that it lets you quickly, quickly get feedback on experimenting with CSS selectors visually.
|
|
|
show
|
1:55 |
We saw that we can target CSS classes using the dot character.<br>
So, if we want to apply some kind of styling to something with a class content we just say .content, and within curly braces we set all the CSS properties.<br>
This can apply to one or more items on the page or across the site.<br>
However, sometimes you want to set some base styles that all content has but you might also want to say this little bit of content here, this is a lead element.<br>
It should stand out above and beyond the other content.<br>
So, we can do that by saying .content.lead.<br>
So, this element would have both the content class and the lead class.<br>
It says right in the name how this is going to work.<br>
Cascading style sheets, so the styles cascade or you can create more specialized versions.<br>
So, here we have content, and we have content.lead, and the more specific you are those are the styles that will override the other ones.<br>
So, if we have some kind of element down here with both the class content and lead it's going to first get all the content properties and then anything in content lead is going to override them.<br>
So, notice content says padding 20 but content.lead says padding 30 and if you look at the bottom, the little note says the applied style's actually padding 30 but the line height of 1.25 vm that is actually only set in the base and it still applies to content lead and we have the font size only set in the specialization that also applies.<br>
So, you can see that all of the blue elements are being applied to content and lead and that's because they either come only in the base, or they're overridden or only appear in the more specialized version.<br>
This is a super powerful technique to let you factor your styles, and to base elements and specialized elements and avoid repeating yourself within your style sheets.
|
|
|
show
|
4:17 |
Jump back to our design app play ground thing and look at the box model.<br>
So the idea of the box model is this controls how elements fit together.<br>
So if I jump over here first it's going to tell you you know how much space around maybe this hyperlink there should be how much padding, or even the table row you see the Grey thing.<br>
You know what is the padding?<br>
What are the margins?<br>
So padding includes the background color.<br>
Margins of course excluded but they keep other stuff you know pushed away and so on.<br>
So let's go back here to our box model.<br>
And here we've some content.<br>
Right this black box is the content and it's contained within a container that has a gray background.<br>
Neither of them have any padding border, or margin.<br>
Let's go and play with that a little bit.<br>
The padding and the border and margin both have colors so you'll be able to see.<br>
So if I set this to something super big like 10px.<br>
You can see the border width is now 10 pixels.<br>
And that's the red part.<br>
It's you know made the container that contained it get a little bit bigger because now the content within it itself is also bigger.<br>
We can also set the padding let's put that down to like one maybe it's still hard to see still.<br>
Say three, there we go.<br>
Let's set the padding to 10.<br>
And there we have the background color of this thing that we're setting the padding on.<br>
It's not quite gray, it's like a blueish it's a little pink here.<br>
Contains element we're not actually setting the border on this we're setting the border on the thing that contains it.<br>
And we look at also like this in the dev tools.<br>
So we've contained which is the black thing.<br>
Notice the design tool are really really helpful.<br>
Other thing we're setting with has the background color of light blue is the inside and the outside is this black thing.<br>
Okay, so we're going to go and set the margin also set the margin be 20.<br>
Here you can see, we got the overall thing that contains element with these property set has some space around it and then it has a border and then it has the padding and then any other content in here.<br>
Typically you wouldn't do this we have the light blue and then the content.<br>
Maybe it's an image or just something that's transparent.<br>
So you don't really see the padding up here so much but I am going to make it super obvious.<br>
When your playing around with this what it is.<br>
So there's not a whole lot more to it other than if we go and inspect element.<br>
We have this nice design tool that actually let's us see the box model right here.<br>
And if we go click on the inside bit you can see right here the margin is 20 all the way around, and the padding is 10 all the way around.<br>
The internal element is 300x200, and the border right there is 3.<br>
And as you move around notice as I scroll it up a little for you as I interact with it over here it actual highlights those elements.<br>
Additionally, like if you do it over here.<br>
So you can do some really cool stuff to help understand the box model over here.<br>
And if this is being inherited you can go to the computer tab and see you know where it's coming from and stuff like that.<br>
So definitely leverage the dev tools to help understand this.<br>
Come over here I've built this little web-page for you also to play around and visual see it as well.<br>
And, of, one final thing.<br>
We can go over here and set the values here.<br>
So I can turn off the padding that's being set by the page.<br>
I can change it to be 2 things like that.<br>
So you can both visualize as well as play and enable all these little features, both.<br>
You know this let's you play with regular web pages that don't have like giant input boxes to let you set these properties, right?<br>
Alright, there is not a lot to the box model but understanding it is really important for designing how your page fits together, and how it looks, and make sure everything is spaced just right.<br>
One final note on the CSS box model it does not apply to elements that have inline as their display.<br>
So if we go over here to this thing.<br>
We change it, display, to inline.<br>
All of a sudden, look all the stuff falls apart.<br>
It looks totally weird, there's I guess I probably maybe set that on the outside.<br>
I don't know.<br>
There's all kinds of stuff going wrong with this now that it's inline.<br>
It has to be in my block or blocks something like that.<br>
Talk more about that in a minute.
|
|
|
show
|
1:11 |
Let's review how we control the box layout in CSS.<br>
So we have our CSS file over here.<br>
site.css, and we're going to apply this to the lead.<br>
Now this has to be something like block or inline-block for display, otherwise it doesn't work.<br>
And then we just set things like the padding.<br>
I'm going to say padding all the way around is 5.<br>
Oh except for the left, make that 10.<br>
Now we say the margin all the way around is 5 as well.<br>
Then we can set a border by saying the width the style, it could be dashed or solid things like that, and then the color.<br>
Right, so that could be hexadecimal or something written out that CSS and web browsers understand, like white, gray, black, so on.<br>
On the padding one here, there is a way to specify I want, and one line padding is like 5, 5, 5, zero, sorry, 5, 5, 5, 10 something like that.<br>
And I always forget, is it top and bottom left and right, left, top, bottom, right.<br>
Whatever it happens to be.<br>
So I'd like to be more explicit and you know, explicitly call out when I'm doing something funky like setting the left to be different.<br>
But other people like to mix it all together.<br>
Right, whatever works for you.<br>
Feel free to roll with that.
|
|
|
show
|
7:19 |
Let's look at applying this box model and controlling the layout or display style of a couple of elements to do something kind of mind blowing if you haven't seen it before.<br>
So I want to focus on the layout.html page and it has this thing in here so this is an ordered list so like 1, 2, 3 and then a bunch of list items and each list item is a hyperlink.<br>
What I'd like to do is turn that thing into a navigational structure stuck at the top of the page and we're not going to touch the HTML at all we're going to do this purely with CSS.<br>
And then there's this page content stuff at the bottom and that's just there to take up some space and make it look legit.<br>
So over here we have our page loaded up let's click on layout.<br>
Well, that's no surprise, right?<br>
It's an ordered list, 1, 2, 3, four of these items and it's kind of like a little navigation and you can navigate around and go back home and so on.<br>
By the way, here's a bunch of Lorem Ipsum that's like fake text put out there but it's Hipster Ipsum, which is kind of fun.<br>
So we have sustainable twee slow-carb whatever iPhone kale chips, things like that.<br>
That's a little bit of a humor there but the idea is we're just going to focus on this, right?<br>
This just lives here as, theoretically the content of the page with some important message for everyone.<br>
So we're probably going to do more CSS here than anywhere else.<br>
Let's start with going over to our layout.css file and if you look, back here you can see at the top we're including this extra CSS file.<br>
So it's going to apply all the styles we put there automatically.<br>
So I made a couple of notes things I would like to do.<br>
So let's actually work on this one first I'll put it at the top.<br>
So I would like these list items displayed horizontally, okay?<br>
So we look over here, they look like vertical they have the numbers, their display style is technically the list item which gives them their number and so on.<br>
So let's just go over here, and I want to say actually, let's give this an id of a class of nav.<br>
I'll call it custom nav.<br>
So it doesn't clash with anything that might be in somewhere.<br>
So we're going to go over here and say I would like all the things contained within custom nav that are list items I want them to display horizontally.<br>
So I can say display as inline and it can be either inline or inline block.<br>
I want to set padding and margin and stuff like that so we're going to go for inline block and with that minor change, let's see what we get.<br>
Well it kind of could be like a nav thing up at the top, right?<br>
Doesn't look like a nav, but it could be.<br>
We also want to set the padding on them.<br>
I'll stick this is here just so we remember I won't do that just yet.<br>
The next thing I want to do well let's change this over here let's put this 1 up that's where I want to change the background of the nav, so we could just target ol but let's do custom nav its background color oh my goodness, cool thing lets us pick all the colors that it's seen us use elsewhere and then also, you can come over here and get a little wheel to change it but we're happy with that so let's see how that looks.<br>
Looking pretty good, yeah, looking good.<br>
Don't really like the color, the blue and the fact it gets darker and get underlines so let's keep rolling with this.<br>
Let's make the navs, the hyperlinks bold so that's easy.<br>
Come down here and say I want to target all the hyperlinks contained within the custom nav.<br>
I want to just say font weight is bold there we go, good and bold.<br>
Not sure we really want it to look that way but, oh no, sorry, this is supposed to be within the page, so that would be within page content.<br>
So let's go down here and change that to hyperlinks contained within the page see if that worked.<br>
So notice down here this is not bold.<br>
We refresh.<br>
Now it is.<br>
Okay, great.<br>
What else do we want to do?<br>
We want the hyperlinks to have that color the hyperlinks in the custom nav to have the color #AAA So color, #AAA, just like that and it's pretty good, but if you have visited them but we also want to make sure if you visit them for some reason I think it's not really recording when we visited it we can apply what's called a pseudostyle, I believe come down here and say visited so put the colon saying, not just this item but when it has the additional property it's visited also make it that way and we want the items here to not have an underline.<br>
So if you over here you can see underlines and maybe that's good if you want it, I decided I don't, so we want text decoration.<br>
It's going to be n1.<br>
Come down here now, notice you still get the pointer but nome of those.<br>
What else do we want to do?<br>
It says we want the hyperlinks visited when they're actually being visited like when you click on it, if you watch it's kind of hard to see maybe if I click on the layout when I can get it to work.<br>
No, not easily.<br>
But when it gets into this active mode we want it to have a yellow.<br>
So let's go ahead and set that style.<br>
I'm going to try and get it to work.<br>
So we have active as 1 of its pseudostyles and then we just set its color we'll just take a quick way out and say yellow.<br>
Now, see really quickly as I click on it it's yellow?<br>
That indicates, or it tells people hey, you just clicked that.<br>
Super!<br>
Are we out of items?<br>
I think we are out of little descriptions.<br>
We also want to give a little spacing like it's hard to see home, CSS selector, CSS box this is all just going together, that's not super good.<br>
So let's set the padding to be 5 px but the padding right to be 10 px.<br>
Let's try that.<br>
There we go, that looks like a navigation, doesn't it?<br>
I really like it.<br>
Maybe even a little more space, but it's okay.<br>
I can see our little navigation is working quite well.<br>
Did we touch the HTML?<br>
No, not at all.<br>
Remember what it started out as.<br>
Like, let's do this.<br>
It started out looking like that, right?<br>
It looked like just a ordered list 1, 2, 3, four.<br>
We added, you know, pretty small amount of styles and now we have a cool navigation right at the top of our page.<br>
So that's how you can control layout.<br>
We change this from list item to inline block to turn it into this horizontal strip and then we set a bunch of its box properties the padding and whatnot, to make it look good and then did a few other cool little tricks around pseudo classes and things like that with the hyperlinks and so when we click this it turns yellow.<br>
Pretty cool huh?
|
|
|
show
|
4:02 |
The final thing I want to look at here are floating elements.<br>
So let's go over and look at this page.<br>
Now right now no items are floating but what I'd like is I would like this thing to be over here on the right and this message and any other content in there to flow around it.<br>
How do we do that?<br>
Use a table?<br>
No.<br>
The answer's almost never use a table.<br>
So what we're going to do is we're going to change the style of this dune cat image here and we're going to float it to the right and then the message is going to go around it.<br>
So let's go here and look at the HTML.<br>
This is the part that we're interested in.<br>
So we have this top <div> id and we have the dune cat image and we have the message.<br>
So, we want this to be to the right of that.<br>
What's kind of unexpected, maybe, is elements that are floating have to precede the thing that is supposed to flow around them so you put the image, and say go to the right and then stuff beyond it flows around it.<br>
All right.<br>
Let's go over here to our CSS file again.<br>
You can see at the top we're including float CSS as you might expect.<br>
And here we're doing a little style remember like this kind of black background color and white text and so on.<br>
And it's all being done right here.<br>
So I want to have that image float around there.<br>
Turns out it's pretty easy.<br>
I don't want to target all images.<br>
Just the images contained within the top div.<br>
So I'll do this hierarchy thing here.<br>
And what I want to do I want to type say the float is right.<br>
All right now with this float set boom that's it.<br>
Well sort of right?<br>
There's a couple of things going on weird here.<br>
First of all I actually want the picture smaller.<br>
But before I make it smaller did I really mean for it to bust out of this top div and then like have that float around it and like that little part float around it?<br>
No I want it to be stuck in the top div but to the right.<br>
Once you start something floating it kind of floats forever.<br>
And so everything around it even hierarchically coming out will start to float around it.<br>
So what we have to do is if you want to control that at some point say no more floats.<br>
We're done floating.<br>
There's a new reset that.<br>
So we can come over here and have a div.<br>
And we can say the style we just hard code it.<br>
Sometimes we have classes for this and set the CSS style but for this one I just hard code.<br>
So what you got to say is clear both.<br>
So clear left.<br>
Clear right and so on.<br>
So just no more floats.<br>
Clear.<br>
Now if I run that you can see at least it stays within its little box.<br>
That's pretty good.<br>
What else could we do.<br>
Let's set the size so this looks a little bit better.<br>
Let's go to our image and say lets' go for height and set that to something like 96 pixels.<br>
Here we go.<br>
That looks quite good.<br>
Now this.<br>
If you notice this message is a little bit off right.<br>
I feel like it's a little more black at the bottom than at the top.<br>
So let's go over here and find out what is.<br>
That is this div right there.<br>
And let's give it a class message or something like that.<br>
Now we can say hash top div not message.<br>
Let's set the margin top to be 10px push it in a little.<br>
Pretty close.<br>
Not quite.<br>
Maybe 12.<br>
And then margin left.<br>
I'll set that at 10px as well.<br>
There we go.<br>
I mean we're not doing incredible web design here but it definitely looks better than when we started.<br>
So we got this positioned nice in the middle.<br>
We got our image on the right side and we got it flowing to the right.<br>
Except not entirely not jumping and taking over the whole page.<br>
So that's how we use float to stick that thing to the right and I guess it's worth showing you that if I move it around it's still going to do the right thing.<br>
Let's unlimited Size limit at some point in Firefox but there you have it.<br>
Looks pretty good I think.
|
|
|
show
|
0:58 |
A quick review of floating elements.<br>
Here we're saying, all images on our HTML page, they float to the right.<br>
Now, that's a little broad, obviously, but in this tiny HTML fragment, it makes sense.<br>
There's a couple rules to keep in mind.<br>
One, that thing that is going to float to the right has to precede the stuff that floats around it, that is on its left.<br>
So, we want the message to be on the left, and the image to be on the right.<br>
The image has to come first.<br>
If it was the other order, there'd be one line with the message, and then another line with the image.<br>
Also, we saw that this floating is perpetual; it goes to the rest of the page unless you say, until here.<br>
So, when you want to say, no more items float here, then you add this clear equals both for the style, and that says, Dune Cat, you're not floatin' around anything else after this, and it keeps it contained within the top div as well.<br>
For some reason it's bigger, it will actually change the size of the top div, as opposed to shooting out of it as we saw before.
|
|
|
show
|
4:02 |
Well, that's about it for what we're going to cover in this chapter.<br>
But I do want to highlight some things that I think if you really want to get into web design further that you should go research and explore.<br>
So, grid layout: Grid layout is so important.<br>
Websites are intended to be mobile-friendly if not mobile first.<br>
At least, they should work on a phone.<br>
And so, these responsive grid layouts are really important.<br>
They're kind of like, table-like feels and you say, and it has three columns except for if it gets too small, it's going to actually flip, and just put them one after another.<br>
So they work really well on small screens.<br>
You'll find this in things like Bootstrap but also many other places as well.<br>
Flexbox: Flexbox is so cool.<br>
Imagine you want to have a little part of the page at the top, just stays there.<br>
A little part of the page at the bottom that stays there and in the middle, you want something to just take up the space.<br>
This is a new-ish, somewhat new CSS property that allows you to do that docking style of layout.<br>
It's really, really cool.<br>
Typography and fonts; having the right fonts on your page actually makes it look much, much better.<br>
But it goes beyond just selecting the font face.<br>
There's things like, how much space between each line?<br>
Probably shouldn't be 1.0, maybe it's 1.2 or something like that.<br>
How much space between the actual characters?<br>
There's a lot of these settings that get set behind the scenes without you really realizing it when you use things like Bootstrap, and whatnot.<br>
But, knowing about them will help you make your page look much, much better.<br>
Table styles; you shouldn't use tables for design but if you have tabular data you absolutely should put it into a table that's what it's for, and there's some really cool stuff you can do to style the tables.<br>
Themes; these are Bootstrap themes and other UI framework themes, you go out there.<br>
Search for StartBootstrap, WrapBootstrap, stuff like that.<br>
So if you're using something like Bootstrap grabbing one of these themes and dropping it in there is a really nice way to make it look much, much better.<br>
Start from some design and just tweak it with your actual data.<br>
We talked about CSS, but we haven't talked about higher-level languages that let you write better CSS like Less and Sass.<br>
I'm a fan of Less, and what it lets you do is define variables, and also, write in hierarchy.<br>
So you could define, say, a top div section and you want to style it.<br>
If you put another style inside of there that applies to things that are hierarchically contained within that top div.<br>
So, there's some really nice features.<br>
Also, lets you include a bunch of smaller, individual Less files, and compile into one giant CSS in the end.<br>
So, that's a nice way to write more maintainable and understandable CSS.<br>
I don't know you necessarily need it but it's not bad to know about and work with.<br>
Finally, definitely, definitely look at Bootstrap or some of the other Front-end Frameworks, like Semantic UI.<br>
They allow you to use a bunch of pre-built styles and the themes I mentioned before are not to be discounted.<br>
The ability to go and find oh, here's a really cool admin theme with graphs and charts and layout that I already want, I just need to put my data in there.<br>
That will super-speed up your projects.<br>
So, check out Bootstrap and the associate themes or if you want, other UI Frameworks as well.<br>
Finally, there's more to CSS itself.<br>
I really like this book, "CSS: The Missing Manual." I felt like, once I learned the stuff I'm talking about in this chapter, and some of the other items covered in this CSS book, the web was no longer a scary place that I felt like I had to bumble around in.<br>
Like, well, I'm not a web designer, but here's a webpage it has some stuff, there's a box here, you can work with it.<br>
But no, I can really build professional, beautiful websites even if I'm not an artist, or super creative or have any ability to work with Photoshop.<br>
You can build really nice stuff if you understand CSS.<br>
So again if you want to dig in further, check out this book.<br>
There's probably a newer edition but I really like this one, and I found it to cover the right stuff without being too deep and too much, you know, getting buried in all the details that you're never going to use.
|
|
|
show
|
1:07 |
Now you're a CSS expert, it's time to get your hands dirty and do a little bit of writing in CSS and styling some webpages.<br>
So you've already done day one if you've made it this far, you've watched the videos.<br>
That's really all we had on store for you on that first day.<br>
Now, for day two of this four day segment we're going to be playing with CSS selectors.<br>
So, you remember that selectors page where it had the episodes from Talk Python listed there and you could type in stuff?<br>
So basically, the idea is to go open up that page play with the selectors and open the dialogue, see what's there and just see what you can find.<br>
Try out different things, what happens if you have a space?<br>
What happens if you don't have a space?<br>
What happens if you have a .<br>
or #?<br>
Things like that.<br>
So, experiment, play around, and then go a little further, look at the HTML source and figure out some elements and say, well, what selector would I have to use to get just this item or just that item?<br>
All right, so you can play around and come up with a little challenge for yourself.<br>
I'd like to select these three things, how do I do it?<br>
So on.<br>
All right, so that's day two, play with and understand CSS selectors.
|
|
|
show
|
2:20 |
Day three of this four day chapter.<br>
Again, this a hands-on day for you.<br>
So the idea is to rebuild a navigation out of an unordered list.<br>
So here you have a graphic, this is the top banner of talkpython.fm, one of my podcasts.<br>
So, what you're going to do is you're going to take an unordered list like this one you have down here of course, actually put it in HTML source don't just copy it over and your goal will be to apply CSS styles to it until it looks more like what's up here.<br>
Each one of those are hyperlinks that's also a hyperlink from Font Awesome more about that in a minute.<br>
You could try to style this thing out that's one hyperlink but it has a different styles and it has hover behaviors and all sorts of cool stuff like that so try that out for real and pop over here and I'll show you what it means.<br>
So if you hover over it and notice how the little quotes glow, all right?<br>
They do their thing, that just takes you home.<br>
Feel free to download this image or just hotlink it, whatever you want to get that image in there as well.<br>
And then finally, there's this little search thing here and this is actually a font from Font Awesome Font Awesome's a great resource and basically lets you include just HTML elements that come in as styled fonts and what's awesome about that is they scale perfectly to all sizes and you can make them any color you want with CSS.<br>
If that was an image, you couldn't style it, right?<br>
But because it's actually a font, that looks like an image there's thousands of these at Font Awesome super good resource to know about.<br>
So rebuild this top section don't worry about the little node bit.<br>
You can just take an image in there or just leave it blank, whatever it's not really the point it's just that top nav bar you're supposed to work on today.<br>
So your goal for today will be to build a navigational unit out of an unordered list.<br>
Now should you really do this?<br>
No.<br>
Not for a real site, this is actually using bootstraps so, for example, notice if I make it smaller some of them go away make it smaller still, becomes this pop-out menu and there's all sorts of advantages to using these web front-end frameworks which we'll talk more about on day four.<br>
So probably this is not the best use of actually creating a nav but it's not about I'm teaching you how to build a nav for your site it's more the idea of learning how to style these things to control them and here's a pretty cool application of that.
|
|
|
show
|
1:41 |
On day four, it's basically a fun little research project.<br>
So we didn't get a chance to talk about Bootstrap even though I mentioned it several times.<br>
It turns out to be a really important front end framework in my mind, as a stand in for all the choices you could have of various front end frameworks.<br>
So I'd like you to just take a little bit of time and imagine something, some product or service, or something that a company you work for is creating, and you would like to have a cool website for it.<br>
So there's a site called WrapBootstrap, and the idea is I want you to go over here and look through the themes and see what's out here, and find three themes that you would be able to start from for building your site.<br>
So imagine, I'm over here, and these are always really impressive, and these.<br>
You can download it and play with it, and have all these cool little live animations and so on.<br>
Anyway, go through, maybe use the categories, or just click through the popular ones and find three that you might want to use.<br>
And the idea is, you come over here and pay $39 or come over here and pay 15, and have access to a professional looking website immediately, before you spend hours and hours laying around trying to get something to look like you want.<br>
Much much more productive to start from one of these and then tweak it, put in the live elements that we're going to talk about when we get to server side code things like that.<br>
For day four, just do a little bit of experimenting go look through the themes section, find a couple that might match up with this imaginary idea that I asked you to come up with.<br>
All right, that's it.<br>
Hopefully you enjoyed the web design section and you feel much more confident and comfortable with CSS.
|
|
|
|
59:31 |
|
|
show
|
0:34 |
G'day, and welcome back to 100 Days of Web in Python.<br>
This section we are going to talk about calling APIs in Flask.<br>
That is, we're going to do simple API calls off two random APIs that we'll discuss later and we're going to present that data in Flask.<br>
So it's all going to be wrapped within a Flask app.<br>
It's quite simple but there are quite a few concepts that we need to cover so these will be pretty dense days.<br>
So get ready, click Next, and let's dive straight in.
|
|
|
show
|
2:28 |
All righty, so here's the plan for the next couple of days.<br>
We're going to be dealing with a couple of APIs, we're going to specifically use one around Chuck Norris jokes and then a second one around Pokemon.<br>
For Day 1, you'll just be watching videos 3 till 6; that involves setting up your environment learning about sending objects and variables to your Flask template, and this is all to do with the Chuck Norris API.<br>
It's pretty simple.<br>
Follow along as well as you can.<br>
If you can't do the coding at the same time because you run out of time, and that's okay then let that flow into your Day 2.<br>
Your Day 2 is going to be just coding.<br>
You're not going to watch any videos unless you're just referring back to Videos 3 to 6.<br>
In Day 2, you will be catching up with the code that you may have missed on Day 1 otherwise I'd actually like you to expand on the app.<br>
Nice and simple, just go and create yourself a menu bar.<br>
It's not really Flask related other than just editing that base HTML file which you'll learn about shortly.<br>
If you have time on Day 2, go and check out the list of APIs that I've got here.<br>
It's pretty cool, there are some pretty fun ones in there.<br>
Choose something other than Chuck Norris or Pokemon; please don't touch those.<br>
That's what we're using for the course and see if you can just get some static data from there and print it to your web page just practicing everything you've learned.<br>
Day 3 we're going to move on to Videos 7 through 12.<br>
There's quite a lot of content so don't worry if you don't get a chance to code unless you can keep up with the coding.<br>
The important thing is that you just watch the videos and learn as you go.<br>
Day 4, continue building on Day 3.<br>
Do the actual code now, so follow along build the app, and this is all to do with the Pokemon API.<br>
I won't spill the beans yet, so you can wait till you get to the data actually figure out what it is you're doing and as for the remainder of Day 4, just go ahead and follow these instructions here put in some error checking, check out the rest of the API Endpoints, and if you're really brave have a go at returning more data to the app that we created than just the Pokemon name.<br>
See if you can get their nature their form, their habitat, whatever else is associated with the Pokemon.<br>
And that's it, that's Days 1, 2, 3, and 4 of Calling APIs in Flask.<br>
So head on over to Video 3, set up your environment and get coding.
|
|
|
show
|
4:38 |
So to begin, we are going to set up our environment just like we did in our previous Flask work.<br>
What I am going to do, just to make things a little bit simpler, and you're welcome to simply copy the code right out of the GitHud repo but what I'm going to do here and show you is I'm going to actually just copy our entire Flask project from day one and we're going to actually extend onto that.<br>
So all of these API calls that we're going to do is going to be within the same Flask app that we created at the start of this entire series.<br>
So let's hop into that first.<br>
One thing we haven't done here is actually created a requirements.txt file so let's do that quickly.<br>
Okay, and when we do that, that takes all of the packages and modules that we've installed into this virtual environment here dumps it into requirements.txt file and then we're able to just simply pip-install from that requirements file.<br>
So we'll deactivate the virtual environment now.<br>
Head back.<br>
Let's simply do a recursive copy of this directory.<br>
We'll delete the virtual environment after we copy and created as new just in case.<br>
Let's create a directory called 2-flaskapicalls.<br>
Now with that copied, we can hop into it now.<br>
There's our venv directory, let's delete that.<br>
Just for good measure, let's also get rid of pycache just in case it is referencing anything from the previous app.<br>
All right, do an ls and this is what we're left with.<br>
That's perfect, we can go into program we should have our __init__.py files let's get rid of this pycache as well.<br>
Then we have our templates folder.<br>
That's everything we wanted, so that's perfect.<br>
All right, now that we're in this folder let's create our virtual environment.<br>
We'll call that venv, and with that created let's activate it again.<br>
Venv scripts activate, remembering that if you are on a Mac or something Unix-based you'll have to type in source venv/bin/activate and that will get you your virtual environment activated.<br>
All right, now that that's activated, let's just see yes, we have our requirements.txt file.<br>
We should also have our .flaskenv file which we created as well, that was for the Flask environment variable, if you remember.<br>
Let's install all of our packages from requirements.txt We do that with pip install minus R requirements.txt Of course I have a typo there.<br>
Let's try that again and there we have it.<br>
It'll just install all of the packages that we wanted Flask_env, Python.env, and requests and everything.<br>
So we'll let that happen and then we can do a pip freeze and that will just print it all out for us.<br>
We have Flask, Python.env but we don't actually have requests and that's because we didn't use requests in the last module of introductory Flask so let's install that now.<br>
So pip install requests.<br>
Now we can actually pipe that into our requirements.txt file so let's, just to be sure, pip freeze.<br>
There we go, and now we are ready to go.<br>
This is everything we need to get started so make sure your environment is set up just like this and let's get crackin
|
|
|
show
|
7:10 |
Before we get started in actually playing with APIs we just need to quickly, quickly cover off how to pass variables from our Flask app the actual Python code, through to that Jinja template to display it on the webpage.<br>
So right now we've just been passing off standard text through print commands.<br>
This time we are actually going to pass off a variable that can change.<br>
So in this example we're going to use the date.<br>
So using a date time string we're going to pass that off to the webpage and then display that.<br>
And that's a great example because the date time string will change every time the page is loaded because the time keeps ticking, right?<br>
So to do that let's edit first our routes dot PY file.<br>
That's where we're actually going to do the number crunching or the code so to speak.<br>
Once we're in this file because we are going to actually put the date time returning on our index page that's where we want to display it.<br>
We need to put our code within our index function.<br>
As this is just a simple date time though if you really think about it we just need to return that string so there's not much that we need to do in here.<br>
All we really have to do to keep it super-simple is import date time and then assign the time to a variable.<br>
So let's import datetime.now from datetime import datetime.<br>
And then let's just create a little time object called time_now because we'll take the time_now.<br>
And then we will just quickly do datetime.today.<br>
And what that will do is it'll get date time dot today, it assign it, it convert it to a string and then assign it to the time_now variable.<br>
And then all we have to do is return that.<br>
So if you think about it we are returning with our render template index.html.<br>
We are also going to pass off a variable.<br>
So that will go in these brackets here just after this one.<br>
Now, just let me type this out before I explain it.<br>
Now, this looks a bit confusing but what we're doing is we're actually sending our time now variable, this one here, to our Jinja template as a variable called time, as an object called time, okay?<br>
You might see in other Flask apps where these are named the same thing.<br>
In other words, time_now equals time_now would be a traditional way of doing it but just for demonstrative purposes I'm going to name them differently and that is so that you can see which variable is which.<br>
So this one here, time_now, is the one that we're specifying up here in our Python script.<br>
And time is what we are going to call in our Jinja template.<br>
All right, so that's all we have to do to update our routes dot PY file to send the date time object over to our Jinja template.<br>
So let's save that.<br>
Let's head over to our templates folder.<br>
And let's have a look in index.html.<br>
As you can see from our previous Flask section we have our index, everything that's unique to our index.html page, in between these block content tags.<br>
And all we want to do is have a message that says that we are printing the time.<br>
So we can do that underneath here.<br>
Let's just throw another p tag in or how about we throw a h1 tag here.<br>
The current date is, and as we learned from the previous videos, anything that is Python code is going to be within these types of brackets and then we close it off here.<br>
Now as I mentioned in the previous file the variable that we are sending off to our Jinja template is the word time, okay?<br>
So we actually put in two of these brackets to indicate that we're playing with a variable here.<br>
I know it's hard to see with the highlighting there so let's just space that out.<br>
And we throw in the word time.<br>
That's our variable.<br>
So because this is an actual object or a variable that we are calling from our Python script it goes between these double curly brackets.<br>
And that's it.<br>
So the current date is, and then we can throw in that time, and we save that, and we run our Flask app.<br>
And with that running let's bring up the browser and take a look.<br>
All right, and here's our website running.<br>
We are on the 100 days page up here so let's click the home tab and this will initiate the index.html route.<br>
And there we go, the current date is 2018 October the 11th, and there's our timestamp.<br>
Now, one thing you will notice is if we move back to the 100 days page and then move back to our home tab, the actual time is not changing.<br>
And the reason this won't change is because of where we've specified that assignment variable.<br>
If we just cancel our script we go into routes dot PY and this is being specified at this level.<br>
It's being specified outside the route outside the index function.<br>
And what that means is it is only being assigned when the Flask app is run.<br>
So if we cancel the Flask app and then rerun it this will update with the time.<br>
All right, so that is why that won't change until you close your app and relaunch it.<br>
If we actually want this to run every time that page is loaded, we have to put that within the index route, the index function here.<br>
That way every time this is called it activates down here.<br>
So let's just copy and paste that.<br>
All right, there we go.<br>
And right quick, Flask run, bring up our web browser.<br>
All right, back to the home tab.<br>
There's the time, 9:57 p.m.<br>
23 seconds.<br>
Launch it again, it's gone to 27 seconds.<br>
And that's how we can redo that every single time.<br>
And that is how we pass a variable off to our Jinja template.<br>
Just remember we have the render template that we're returning and we're just specifying the variable there.<br>
We put the actual Python variable on the right and we assign it to a variable that we want to call within the Jinja template.
|
|
|
show
|
4:16 |
Now that we know how to pass variables over to our Flask Jinja template we're ready to start pulling data from an API.<br>
The API that I've picked for this first attempt is kind of nonstandard, but let's take a quick look.<br>
There we have it, the Chuck Norris API.<br>
This is a pretty simple and cool API.<br>
Just for printing out Chuck Norris facts or jokes, or however you want to look at it.<br>
And it's as simple as, pointing to that URL there to that endpoint.<br>
All we have to do is do a request of that.<br>
api.chucknorris.io/jokes/random and that will return us a random json outputted joke.<br>
So we'll have the icon URL, we'll have the id the direct URL, and then the value.<br>
And you can see by digging into all of this the only thing that matters to us is to return the value.<br>
At this end of this, we are going to have a webpage called "Chuck" that when you load it will simply return a joke, a random joke from this Chuck Norris API.<br>
So back to our terminal here we really need to do a little bit of planning, okay?<br>
You need to visualize what you're going to do before you just start writing code because it helps you get a full understanding of the picture that you're trying to paint.<br>
In this instance, as I said, we're going to be using the Chuck Norris API to get a joke but in order to do that, we actually have to split our code into two sections.<br>
Remember, we have the part where Flask takes your joke will take our joke, and pass it off to the Jinja template, but then we also have to pull the joke down as well.<br>
So that's going to be two separate functions there.<br>
One is going to be our decorated app dot route function and the other one is going to be our get the joke function.<br>
Alright, so to do that, let's jump into routes.py and I think a great place to start would be to actually get our joke first.<br>
Now I've written this up in advance in the Python shell so I've tested it and it works.<br>
You can just trust that when you write this in it's going to be okay.<br>
If not, feel free to actually open up Python shell and punch these commands in.<br>
You can get them from the Github repo and follow along that way.<br>
As I said, we're calling it "Git Chuck Joke," and we're just going to do a standard requests dot git and we're going to punch in that Chuck Norris end point there.<br>
That's the one there, and that's it and that will return that json app that we saw on the webpage into the variable "r" or the object "r", and then we just do I dot json and we know that we're going to return the data value.<br>
And what we've done there is we're returning the data that belongs to the value tag in that json app so we'll bring that back up and we can see we have the value there.<br>
So what we're doing is we're getting this we're converting it to json, and then we're decoding the json I should say and then we are getting that data there that is signed to the value key.
|
|
|
show
|
5:30 |
After we've created that little function called get chuck joke, we need to actually create the app.route for the chuck route.<br>
And to do that, we go into routes.py as we have many times before and we're going to create yet another route here in our list.<br>
But before we get started, because we have done requests down here, we do need to actually import that so import requests.<br>
And following on from that, we can create our route.<br>
So, app.route.<br>
We're going to call the URL that we access this page on Chuck, and we'll do the same for the function so def chuck.<br>
And all we are doing is returning a joke and that joke is called using the get chuck joke function.<br>
So when this page is loaded or every time you load this page you are going to run get chuck joke.<br>
That will run the code we ran in the last video to pull the joke down, it will assign that to the joke object here and we are then going to return that joke object to our template, using the same thing we've done before which is render template.<br>
So, we are going to create this page shortly so chuck.html is a file we will be talking to.<br>
And let's go across and joke=joke.<br>
So, the joke=joke is similar to what we have up here in our date time, where we have the time now and then we're parsing that off to their jinja template as time.<br>
In this instance, we are using the joke object here that we've just created here and we're parsing it off, also using the exact same name to the Jinja template as joke.<br>
And that is all.<br>
So now that we have that, we can let's just give ourselves an extra space here now that we have that, we can actually create the template so let's do that.<br>
Right.<br>
Go into our templates folder.<br>
And we'll copy index.html, because it's pretty similar to what we want to do here with chuck.<br>
So, copy index.html to chuck.<br>
Let's vim up chuck.<br>
And let's get rid of all of this.<br>
So we have our block content this is the content unique to this page and we're extending again from base.html.<br>
Give ourselves a h1 tag, just as a nice little title and we're going to call the page Chuck Norris Jokes.<br>
Right, and now what we have to do we have to take that joke object the one that we just parsed off using the render template to this template.<br>
We are going to take that joke object and simply print it within a paragraph tag.<br>
So we can put the P there for paragraph open our bracket there, throw a second bracket in and notice again, the double left-hand brackets means we are about to reference a variable or an object and we closed it off there, we're referencing the joke that we're parsing to our Jinja template and then we close it off.<br>
And that's it.<br>
So we can save that now.<br>
So assuming I've actually done this right and that's a pretty big assumption no I'm just kidding, let's run the code.<br>
And that's always a good sign that means nothing died yet.<br>
I say yet on purpose.<br>
So let's bring up the website and here is our 100 days page, still up.<br>
Let's get rid of that.<br>
Let's open up Chuck and we have an error.<br>
And of course it's a nice little typo.<br>
Instead of running chuck, I've written check.<br>
So let's get rid of that.<br>
And quickly replace that, make sure it all checks out.<br>
Get chuck joke, yes.<br>
Let's cross our fingers and try again, Flask run.<br>
Let's go back to our page reload the page.<br>
And there we go.<br>
So Check, Chuck Norris Jokes, geez, now I'm saying check.<br>
Chuck Norris can finish Mario Brothers without using the jump button.<br>
So incredibly lame, I did not promise that these were going to be good jokes, so please don't hold it against me.<br>
Now you can see, hopefully this next joke is okay.<br>
I'll leave that to you to read I'm not going to bother reading it.<br>
But again, pretty silly, but you get the hang of it now.<br>
So the idea is every time we reload this page we are running that code that was in our app.route decorator function for this page and that is to simply talk to the API get a random joke, print it to the page.<br>
You can do this as many times as you want.<br>
And that is the general approach to hitting an API using a Flask app.
|
|
|
show
|
1:35 |
Welcome back.<br>
This time we are going to work with the Pokemon API.<br>
This one's actually pretty exciting because it's a lot of fun.<br>
There's a lot of data for you to play with it's not just pulling some random joke from the Chuck Norris API.<br>
That was a simple response, right?<br>
With this API, we actually get to choose what kind of data we pull out from the database and that's probably the more common scenario you're going to face when you're using API's in your Flask cap.<br>
This is really cool because you get to choose Pokemon names you get to choose anything you want that they have.<br>
So we'll go into the documentation's into V2 I'll show you what we're going to pull down.<br>
We're looking at Pokemon colors and what we're going to do here is we're going to allow the user on our website to enter a certain color and it is going to send a request, a get request after this API with that color substituted in here as the ideal name, and then it's going to return us a list of all the Pokemon that have that color as an attribute and then it will print that on our page.<br>
So it's a simple submit something from the user so collect that from the user, submit it to the API return result, print it on the page.<br>
There's a couple of little steps there in Flask that we haven't covered yet and I will spend a little bit more time on that Because we've covered the API aspect and we sort of get that.<br>
So head onto the next video and let's get cracking.
|
|
|
show
|
8:16 |
Next thing we're going to do here is we're going to work on the actual template file.<br>
We're going to work backwards.<br>
And the reason behind that is it's a bit easier to teach because we're going to start with the flow that the user will use.<br>
And that is they will enter that color into our template, into the webpage.<br>
And they will enter that in what's called a form.<br>
Now, in HTML they have the form tags and if anytime you have been to a website and you've typed in something and then clicked in submit that is a form.<br>
Now, there are methods that work in the background and I'm not going to go too much into this but these methods define how the user interacts with your page.<br>
So for example, when a user enters a color and hits submit they are posting, so post is the method, they are posting that data through our page into our app, into the backend that Flask app.<br>
And then when they're pulling the data back from our Flask app to the webpage that's called a get.<br>
So anytime you present data to a webpage from your backend that's simply the webpage getting data.<br>
So there's not too much about that.<br>
That's like a default method.<br>
But what isn't default is posting.<br>
So we have to specify that somewhere.<br>
But before we get too far into it let's create the template.<br>
We're just going to copy Chuck into pokemon.html and then we can Vim that up.<br>
Let's get rid of h1 and the p tags and we're left with our usual block content tags.<br>
Now, what I would like you to do here is just instead of writing this in yourself just get it from the code but follow along and try to understand how this form is made from a HTML standpoint.<br>
So let's throw in our h1 tag for the header.<br>
We're just going to call it Pokemon color list.<br>
Yes, there is a u in there.<br>
Yes, I'm Australian.<br>
Then we're going to throw in another tag.<br>
Enter a color to see which Pokemon are a match.<br>
Okay, and now we open up our div that is going to house our form, okay?<br>
We are using muay CSS so this is just to make it look pretty.<br>
You don't really have to do this yourself.<br>
Just copy it in.<br>
It'll help, all right?<br>
And the method, as I discussed just before, is post.<br>
We are posting, this form is allowing us to post information through to our backend.<br>
Action is the tag that actually tells you when you post that data what happens to your site.<br>
Do you stay on the same page?<br>
Do you go to another page?<br>
That's pretty much it.<br>
So we're going to stay on the same page.<br>
We're just going to stay on the Pokemon page.<br>
It's not going to do too much.<br>
Next we're going to create a label for our form and that label is going to be called Pokemon color.<br>
But let's just give it a label here called Pokecolor.<br>
This is how we can reference it.<br>
We know what it's labeling in the background.<br>
So Pokemon color, close off the label and now we have to choose the input type.<br>
So this is all creating that form.<br>
This is just simply to create a little input field that someone can type the color in, right?<br>
So the input type is going to be text.<br>
Class form control.<br>
Just go with this one.<br>
This is again, part of the muay CSS stuff.<br>
Now, we have an id.<br>
Now, this id is so that we can reference this input field at any time.<br>
We're not actually going to do that at the moment.<br>
So just put it in there.<br>
It's a good practice to put this stuff in there.<br>
And then we have the name.<br>
So the name of this input field is we're going to call it Pokecolor.<br>
And then the placeholder text.<br>
So placeholder equals, we'll just put example blue.<br>
Yeah, let's just go with that, blue.<br>
Now, this input placeholder, this is what you'll see in sort of a light shaded gray in the input field so that you know what sort of format, right?<br>
And let's just throw in a line break there.<br>
Next we actually have the submit button.<br>
So we're going to create a button.<br>
Type equals submit.<br>
And now we're going to give it some formatting so we'll call it muay button.<br>
And we'll make it a special button, button raised.<br>
Again, these values you can find on the muay CSS site.<br>
If you want to format and style this differently go for it.<br>
And the value is submit, okay?<br>
Don't worry too much about what these all mean.<br>
This is more just the formatting around it all.<br>
All right, and we give it everything within this button tag, this word here in the white where it says, "Submit" that is actually what's going to be written on the button.<br>
All right, and we close that off with a /form.<br>
And then we can close the div.<br>
All right, let's just save that for now.<br>
And let's try and run the app and load that page.<br>
In order to load that page what do we have to do?<br>
We have to create a route for it.<br>
So let's go back to our program vim routes.py.<br>
And let's quickly throw one in here.<br>
We're not going to do anything special other than just returning the render template.<br>
So app.route('/pokemon').<br>
Because we're going to call the page Pokemon we reference that in our form with that action.<br>
So we have to keep that the same.<br>
And we'll just create a function called Pokemon.<br>
Now, we're not going to do anything special in here.<br>
All we are going to do is return the template because we don't want to pass any data just yet.<br>
So let's go return render template pokemon.html.<br>
That's all we're going to do.<br>
We are going to populate way more into this function.<br>
But let's just leave it there so we can see that what we've created in the HTML template actually works.<br>
So we'll write that.<br>
Then we can do Flask run.<br>
And we bring up the browser.<br>
All right, and we are on our 100 days page still.<br>
Let's go back to Pokemon.<br>
And there is our page.<br>
So we have that h1 header called Pokemon color list.<br>
We have that little h3 tag, which is enter the color.<br>
We have our Pokemon color label here.<br>
We have the input field with that little text inside that says, "Example blue." And then we have our submit button.<br>
We can obviously change these colors and do whatever we want but we're not going to go too complex now.<br>
So the idea is any data we throw into here will be passed back.<br>
But we haven't actually set up any of that code to receive that information.<br>
So watch what happens if I throw a color in here.<br>
Method not allowed because we haven't allowed the post request to hit our Flask code.<br>
All we've done is we've put that into our template but we have not told the Flask code to expect anything from our webpage.<br>
It's a nice security feature, right?<br>
You don't want people to just be able to put code or text or anything to your backend unless it's allowed.<br>
So in this instance, method not allowed that's because we haven't done anything with the routes.py file yet.<br>
So let's move on to that in the next video.
|
|
|
show
|
6:46 |
For the fun part, now we get to actually play with the data that we're going to be calling from the API.<br>
One of the fun things to do and probably the better thing to do is to play around with all of this API call stuff in the Python shell before you put it into an application, that will you know what works, you get to play around with it, see test things out and you know, just have a bit of fun.<br>
So let's bring up the shell here.<br>
And what we're going to do, we're still in our virtual environment, that way all of the modules that we imported or pip installed, are accessible to this Python shell.<br>
And we're just going to run a couple of the commands that we're going to put into our routes.py file, but we can test them here first, without having to keep editing that file, saving it running it we just do it live.<br>
Right?<br>
Thinking ahead, we are going to have a list of Pokemon.<br>
Right?<br>
So let's create an empty list I've already done this testing before, obviously, this I'm just saving a bit of time.<br>
Next up we need to still import everything, so we import requests because we going to do a request we will import json because we going to work with JSON.<br>
And just for demonstrative purposes, we're going to import pprint So from pprint and this is pretty print, it'll just make our return JSON output look nicer, but I'll show you that in a minute.<br>
So from pprint, import pprint as pp just so I don't have to type that pprint every time I only have to type in pp now to call that.<br>
All right, next we need to do our request, so we'll do r = requests.getget.<br>
And based on this Pokemon API page over here, we have our API call Alright, so we have the actual endpoint we going to talk to and that is going to be https://pokeapi.co/api/v2/pokemon-color And we're talking to Pokemon color end point.<br>
All right, and we'll hit enter on that.<br>
That should work yes we have it.<br>
And now we're going to actually format it nicely.<br>
With we're going to decode it nicely with JSON.<br>
So pokedata we going to call this object pokedata = r.json() Right?<br>
And now we can pretty print this out to actually format it nicely.<br>
Because look at this if we just print this out normally we get this it's a bit ugly, right?<br>
We want it to format nicely So we can go pprint sorry of pokedata.<br>
Right and we have these endpoints here for the different colors so we can we now know that people can specify black, blue, brown and blah, blah, blah, down the list to yellow.<br>
Anything else will fail.<br>
But that's a catch That's an exception for another day.<br>
For now, let's just work on these.<br>
What we can do now is let's change our request to include one of these colors on the end, we're just hard coding it.<br>
Remember, the user will be able to specify this for now let's hard code it.<br>
And the color we shall choose let's go with yellow.<br>
That will work.<br>
And now we can reassign pokedata.<br>
Right?<br>
And we can do pprint of pokedata.<br>
And what we've done is we've sent a request off to the Pokemon API, and we've said return all the Pokemon that are of the color yellow are tagged as the color yellow.<br>
And now what we're doing is we're just printing all of those Pokemon out.<br>
Now mind you, you're not just going to get the name at this point, you're going to get that Pokemon and all their attributes.<br>
So just be prepared we've got quite a lot here, look at that list there's heaps there.<br>
Let's just focus on the bottom one here.<br>
And it says whatever they whatever that is, I've never heard of that one.<br>
So we've got that Pokemon And now they had that Pokemon itself has an endpoint.<br>
So this URL if we were to pop that into the browser, we get the return value of that Pokemon, all this stats, right?<br>
But all we want is their name.<br>
So we want to call on this name object here, this name key here I should say.<br>
So what we can do is, we can go for i in pokedata, that means each one of these, each one of these entries here is an individual entry that we're going to iterate over using i, so for i in pokedata.<br>
Now if we scroll to the top of this output, you'll see that these all come underneath one object here one key sorry called Pokemon species.<br>
So we have to so these are all individual line items within Pokemon species, right So we need to specify that Pokemon species.<br>
Now this is all pretty much JSON decoding stuff, and I'm just sort of skimming over it because that could be a whole chapter in itself.<br>
It was in our previous course so check that out if you haven't, I go into way more detail on that one.<br>
So for i in pokedata and we're going to specify Pokemon species.<br>
And what are we going to do every time we hit one of these we are going to append the name of that Pokemon to our Pokemon list remember we created that Pokemon that empty Pokemon list at the start, so we are going to go i name.<br>
And we close that off.<br>
That's done and now we can do for i in Pokemon.<br>
Print i and then we have a list of names and this is the data that will be returned to our page.<br>
So all of that code we just used will actually work and we can pop that into a function in R dot pie.<br>
And I'll show you that in the next video.<br>
Once that's in there, we can take this pokemon list that we've just specified here this one there, and we can return that to our template our Flask template.<br>
So let's move on to the next video.
|
|
|
show
|
7:10 |
Here's the routes.py file and I've created a get pokecolours function for us that's this one here.<br>
And what it takes in is the color that the user enters.<br>
So this is an object that we are passing into this function.<br>
And you can see straight away we have our requests dot get I've added in color dot lower here, what this is doing is whatever color the user enters we are going to change it to all lowercase.<br>
And the reason is, with that endpoint of the Pokemon API for colors it only takes lowercase letters, it actually matters.<br>
If you were to enter in the word black with a capital B, this would fail.<br>
Right, so to protect us against that little tiny thing we are going to manually say that every color that is entered, every word is going to be changed to lowercase.<br>
And that is simply going to be tacked on or appended with the little plus sign there onto the end of our endpoint there, all right?<br>
That gets returned and assigned to the object we decode it with JSON, assign it to the poker data as you saw in the previous video and we create our empty list of Pokemon.<br>
We then iterate through poker data looking for the Pokemon species key, there was only one.<br>
And with all of the little mini dictionaries that were attached under this one as values we are going to take the name key from those dictionaries and append them to this Pokemon list.<br>
So every Pokemon in there that matches that certain color is going to be thrown into this list here.<br>
And then we return the Pokemon list.<br>
And that's it.<br>
So now the next question is where are we going to call this function?<br>
Where in our app dot route for the Pokemon page are we going to do this?<br>
All right, here is our Pokemon function here for the app route for the Pokemon webpage.<br>
What we need to do is we need to actually start referencing that form that we created in our template.<br>
So we're going to say, all right if that form sends us data then what are we going to do with it?<br>
So let's enter that in here.<br>
This may seem a little confusing so just go with it for a second.<br>
We also need to create an empty list of those Pokemon explain why in just a sec.<br>
So we'll go if request.method so remember, we got that method is not allowed thing, right?<br>
So if the request dot method is POST and pokecolour is in the request form so that request form that we created we gave it a label, we gave it an id of pokecolour and we're referencing that here, we're saying so if we are getting a POST method from our webpage and it's coming from a request form that is the id pokecolour then we're going to do something.<br>
So if request dot method is POST and pokecolour is in request.form then what are we going to do we're going to take the color here's request.form.get('pokecolour').<br>
So when people entered a color we designated that color the id of pokecolour.<br>
And we're taking that and we're going to assign it to the color object in our Python script.<br>
So this is the link between our front end and back end.<br>
So we've just taken the data from the user and we're assigning that to the color object here.<br>
Now there is something I want to show you and you've probably picked up on it.<br>
It's this here, I'll explain that just a second.<br>
But let's continue down.<br>
Now what we want to do is we're going to take this list we'll throw one in here an empty list just like we did below Pokemon equals empty list.<br>
And what we're going to do is we are going to assign that the list that is generated by our pokecolours function.<br>
Okay, so this line is taking our function get pokecolour it's passing it the color that the user has specified.<br>
And then it's spitting out that list of Pokemon names and assigning it to this Pokemon list here.<br>
And then we can return this list.<br>
Now that we have this list we've built it and we have this list we can return it with our render template.<br>
If you remember from our Chuck Norris joke thing all we really have to do is specify the name of the object we are passing to the form and what name it's going to have in that form, all right?<br>
So we can go down here Pokemon equals Pokemon.<br>
And just to reiterate, this here on the right of the assignment operator there is our Pokemon list here.<br>
And it's going to be called in our Flask template it's going to be called Pokemon.<br>
Now, before we continue on, we do have to do a couple of little extra additions to our code here.<br>
First and foremost, at the very top we need to actually allow ourselves to import the request functionality of Flask.<br>
Let's just save everything we've done.<br>
All right, and we have here from Flask import render template.<br>
Well, now we want to import the ability to have a request, to have a form so import requests.<br>
So from Flask import render template comma request that will allow us to actually use that functionality.<br>
And going down, we actually need to tell our app route for Pokemon that it has that POST method there.<br>
So let's just add it in here.<br>
Methods equals GET and POST.<br>
So we can both pull and push data from this page.<br>
And that is going to allow us to actually work with our template.<br>
And this should work.<br>
So now all of this code is there.<br>
We are now pulling the color from the user.<br>
We're talking to the API and then we're going to return that list of Pokemon back to our page.
|
|
|
show
|
6:56 |
Before we get too ahead of ourselves we need to actually test everything we've done.<br>
And if you've tested exactly what I've typed in you probably would have found a few errors.<br>
So I hope you resolved those before watching this video.<br>
If not, let's take a look at them.<br>
What I've actually done here is in routes.py there are a couple of little issues here.<br>
One, I had failed to title this function correctly.<br>
I called it get Pokecolor and it's actually get Pokecolors because that's the name of the function here.<br>
I'd left out the s, and just down here in Pokeman.append, I had a square bracket here in front of the i, instead of a curve bracket.<br>
Really small typos.<br>
Things that happen.<br>
Love it.<br>
You would have caught it when you ran Flask run but is you copy the code directly from the repo you wouldn't have seen that.<br>
So getting out of that let's do Flask run.<br>
There is our site.<br>
We have it here.<br>
Let's just refresh.<br>
Let's make sure it works.<br>
Yes, it works.<br>
All right.<br>
Now if we punch in a color here what's going to happen is it's going to take the color back to our...<br>
It's going to post the color back to our backend.<br>
It's then going to hit the API get all the Pokemon that match that color from the API and then return it back to this page as a list.<br>
So let's through in black.<br>
And what happens, absolutely nothing.<br>
And the reason that is is because we haven't done anything with the template.<br>
With this page itself to say well what am I doing with that list.<br>
So this is the easy part.<br>
This is right at the end.<br>
We're almost there.<br>
It's very exciting.<br>
So let's move into that.<br>
So we'll close off our script here.<br>
Right move into templates.<br>
Bring up Pokemon.html and what we want to do is we want to create another div.<br>
Now this div is going to be a bit of a special one.<br>
One of the tricky things with this is that if we don't have data to present what's going to show up on the page?<br>
So when a person gets to our page for the first time here they don't see a list of Pokemon down here because they haven't entered anything.<br>
So what we need to do is have a div that is essentially empty and only shows data when there is data there to be shown.<br>
All right, and we're going to specify that using some cool code.<br>
And what we can do.<br>
Let's just throw a line break in.<br>
I always do that.<br>
Let's throw in two just to give ourselves a lot of space.<br>
All right.<br>
Starting off with our new div.<br>
This is where our interesting code comes in.<br>
We're going to say that this div will only exist or show anything really if that Pokemon list has been passed back to our page.<br>
That is, after someone's entered it its generated all the information and then returned it through that return function of our route for Pokemon where it says, return rendered template Pokemon=Pokemon.<br>
So, only if that has been returned is this div going to show something.<br>
And we can do that using this code tag so % if Pokemon.<br>
Right, this is one of Python's truthiness things.<br>
If pokemon exist.<br>
If Pokemon is true.<br>
You don't even have to say, is true you can just say, if pokemon.<br>
That's how it works in Python.<br>
So, if Pokemon has been passed back then we can generate ourselves a table.<br>
So lets throw this code in really quick.<br>
All right, so this is the code for our table.<br>
So again, if Pokemon exists we are creating a table with the class the Mui CSS stuff of Mui table and Mui table bordered.<br>
That'll give us a nicer looking table, I should say.<br>
Now we have our table header and there are rows for that.<br>
So, we only have one column, one row which is just going to be Pokemon.<br>
And the header for that is Pokemon and we can close that table header off.<br>
Now we have the body so that is what is the body of our table.<br>
Everything that's going to go in it is going to be the Pokemon.<br>
So we can enter in some special code here.<br>
Right, so Python code in there for i in pokemon we're simply doing a loop for i in pokemon.<br>
We're going to generate table rows and the table data for each one of those rows is going to contain the Pokemon name which is i in this list.<br>
So, replacement fields there for i table data.<br>
Close that off.<br>
Close off the table row.<br>
For every object within our Pokemon loop our Pokemon list we are going to print out that name as table data.<br>
For every name in that list and then we can close off our for loop.<br>
And then we can close off the rest of our table.<br>
And after closing off the table we then need to close off this if statement up here.<br>
Otherwise, we will get some errors.<br>
So, and if And then finally we can close off that div.<br>
Don't worry too much about the lining up.<br>
This isn't Python code so this is HTML doesn't have to be perfectly square.<br>
All right.<br>
And that should be it.<br>
Let's quit out of that and let's try running our app and see what happens.<br>
All right, we have our page.<br>
Let's make sure there are things working.<br>
Yes it is.<br>
Go back to our Pokemon list.<br>
Fingers crossed.<br>
Let's see what happens.<br>
We throw in black.<br>
And there we go.<br>
Every Pokemon that was in that black list now appears in this table.<br>
Two line breaks below our original form at the top.<br>
And we have Snorlax, Murkrow and going through that list.<br>
So you can do all sorts of funky things with that.<br>
You can, you know, sort them.<br>
You could potentially follow that end point URL that each one of these has and start printing out maybe the image, or more data on them, you know.<br>
Go nuts right and this is cool.<br>
So we can go yellow this will actually refresh this page and get rid of this information here and put the yellow ones in.<br>
So, there's Santru.<br>
There's all the ones that we saw before, right.<br>
We can go red.<br>
Get the next one, and so on.<br>
So that's it.<br>
This is the rest of the app.<br>
This is it.<br>
It's done.<br>
Have some fun with it, and in the next video we're going to talk about how you can expand on this for the ne-
|
|
|
show
|
4:12 |
And that was calling APIs in Flask.<br>
Congratulations on making it to the end of the four days.<br>
If you are just starting your fourth day or just finished the videos on that go ahead, check out the README file to see what you have to do on this day otherwise, let's run through some of the key stuff that we've learnt.<br>
So these were the two APIs that we touched on.<br>
We used the Chuck Norris API and we used the Pokemon API.<br>
Now, with the Chuck Norris one we actually learnt how to parse objects from our app.route, from our Flask application over through to our template.<br>
Now, the first thing we had to do was create the route for our Chuck webpage.<br>
Then we took the actual joke that we pulled from the API and we assigned it to a joke object.<br>
And then what we did, was we took that joke object and returned it to the Flask template as an object named joke.<br>
That's why you can see the two colors there the yellow and the blue.<br>
The joke in blue was the object that came from the API from that function, again, Chuck joke.<br>
And the yellow joke object was the one that was sent across to our Flask template.<br>
It is important to note that the object returned to the template can have a different name it's just this format here of having it named the same is something you'll see more often than not.<br>
Next we wanted to look at handling post methods.<br>
This was within our Pokemon API's chapter and what we did was, we had to specify right at the start of our app.route for the Pokemon webpage we actually had to specify that it could handle post request and if you remember from the video we actually got an error because we didn't tell it we could post.<br>
Now, given we are allowing post requests we don't want anything to just be able to come back to our application, to our backend.<br>
So what we have there, is we have a request method that will only respond or do something if it's a post-request and the idea of pokecolour is in the request form.<br>
That is, the post request that comes through has the ID of pokecolour.<br>
And that way we know that that is the only data we are going to take, if there is data that is sent through as a post.<br>
We then took that data that was sent through assigned it to the color object and then we used that color object to query the API using the get poke colors function.<br>
And finally, after getting all of the data back that we need, we parse it off back to the Flask template just like we did in the Chuck Norris API with pokemon equals pokemon.<br>
Now, within that get pokecolours function we parsed through the color that someone enters when they use the website.<br>
Now we did this so we could customize the request that went off to the website that went off to the API because we wanted users to be able to request a specific color.<br>
So you can't hard-code every color into the request; you simply just take that variable, that object that people enter in and append it onto the end.<br>
And that's what we did that with color.lower we made sure that it was lowercase so that it actually works with the API.<br>
If there is any capitals in there, it was going to fail.<br>
And finally, we take that data back we convert it to JSON and we assign it to the poke data object.<br>
And that was it, that was pretty much everything that we did in the course.<br>
It doesn't seem like there's a lot there but as you know, there was quite a bit that we covered so feel free to go back over the videos again.<br>
If you're on Day 4, look at the README file and see what it is that you have to do.<br>
Once you are done, head on over to the next chapter and keep calm and code in Python
|
|
|
|
55:09 |
|
|
show
|
2:02 |
Welcome to your next four days and oh my gosh, this is an amazing topic.<br>
We're going to talk about bringing asynchronous programming to the web to web servers, and these web frameworks like Flask.<br>
So why do we care about async programming?<br>
Well it lets us take the same amount of hardware and the same amount of processing power and CPUs and memory and all of that kind of stuff and massively scale it up.<br>
You'll see we're going to take a simple API that we're going to create and we're going to first write it in Flask and then we're going to convert it to this other framework called Quart which allows us to do async programming effectively in the Flask API.<br>
When we do that we'll see that the performance should be quite a bit better.<br>
Asynchronous programming is fairly advanced but it's an interesting topic in that modern Python and by modern I mean Python 3.5 or higher makes writing this type of asynchronous programs ridiculously easy.<br>
It's almost exactly the same as writing regular programs.<br>
The synchronized kind that just happen in order.<br>
The language will really help us out.<br>
So actually programming the async version of our website, no problem.<br>
You're going to see it's quite easy, actually.<br>
However, actually understanding what's happening understanding the power and what's going on with all of this asynchronous stuff well that is much harder.<br>
So we're going to take this topic in layers.<br>
We're going to start out by just talking about regular asynchronous programming.<br>
Forget the web.<br>
What does asynchronous programming look like in Python?<br>
Why does it matter?<br>
Once we understand that we're going to create our website in Flask.<br>
Something you've already studied and already have experience with.<br>
Finally, we're then going to convert to this framework called Quart, apply our asynchronous ideas and get better performance for exactly the same hardware.<br>
So I hope you're excited, I'm thrilled about this topic and I'm looking forward to sharing it with you.<br>
So let's get to it.
|
|
|
show
|
4:34 |
Before we start writing some code let's just think about what synchronous execution means and most importantly, what this looks like and where the actual problem is in the first place.<br>
Because, until you run into a problem you should probably stick with synchronous code and Flask or one of the other frameworks that we're talking about in this course, because asynchrony does add complexity.<br>
Let's understand the value of it so you'll know when to use it and when not to use it.<br>
So, here we have particular web server and I'm trying to visualize the processing time for various requests.<br>
Now, I said our first example was going to be straight async code, but let's motivate this with a web example.<br>
So, here we have three requests coming to our server requests, one, two, and three.<br>
Request one, takes as long as that green box.<br>
Label that.<br>
Request two takes about the same amount of time another big, fat green box.<br>
And request three is really quick, but because the way the processing works, this just gets queued up our server just takes them in order.<br>
Let's do one, okay, now we're done with that.<br>
Let's do two, now we're done with that.<br>
Let's do three, and so on.<br>
This is not so good.<br>
Look how short three is.<br>
Wouldn't it be better if we could just get that answer to them right away?<br>
If we look at the actual response time.<br>
So, when the request comes in, when it they actually, as far as the external client sees it when it's done, we can map that out as well.<br>
So, the response gets sent back right away.<br>
So, for request one it's, they did the request same amount of time that it actually took us to do it they get the response.<br>
But request two, well, their request came in right at that beginning of one so they had to wait for one to be done, and then two.<br>
And three, this tiny little thing, actually was the worst.<br>
So, it had to wait for one and two and then its little bit that it had to do.<br>
This is not ideal, but if you can make the size of those green boxes small enough if they can outrun your traffic you don't need asynchronous programming.<br>
You're golden, right.<br>
Let's suppose you are getting a request every 200 milliseconds to your server and it takes 20 milliseconds to process a request.<br>
You're fine, just synchronized programming.<br>
But when things start to back up like this example here, well, that's a problem.<br>
So, how are we going to deal with that?<br>
Let's look at one more thing before we actually get to code side of things.<br>
We take one of those green boxes let's say request one, and we zoom into it.<br>
We look at actually what's happening.<br>
There's a bunch of different things operating here.<br>
Probably right at the top, Flask, the framework is doing some processing, is running the routing figuring out what to call, it's creating and initializing the request object, things like that.<br>
All that stuff's getting set up and then it comes and runs our code.<br>
The first thing our code does let's say this is a purchase, for example.<br>
Somebody's going to come in.<br>
They're going to go and say, I'm user such and such.<br>
So, our first time to do is say well, we're going to go to the database with their cookie, or their session, or something like that query for their user object, and pull that back.<br>
So, that first part, that first read database that's us getting the user back.<br>
Then we'd write a little code to say well, if we have this user and they're requesting this thing, let's find out if they own this object, or maybe we want to show them a list of things, or whatever.<br>
So, we go back to the database with maybe one or more, queries, and that runs and then we get a response.<br>
Maybe should be a little another blue box where we turn our response into something we're sending back, but then we just send that back.<br>
The framework creates the response out of a template or something like that, or JSON and returns it to the request.<br>
This is totally normal database code and there's not a problem with it per say however, look at this part here.<br>
What is our code actually doing?<br>
It's just blocked on some database query just waiting, waiting on the network.<br>
If we send a request over the network to the database server, it's got it, queued it up.<br>
Eventually it's going to compute the answer and send it back.<br>
So, our code is just kind of sitting there not really doing anything except for waiting.<br>
So, the idea of the asynchronous programming is these red sections, we can give up our execution time and hand that off to other requests like request two or three while we're waiting on the database.<br>
We don't care.<br>
We're just waiting.<br>
So, if we could just wait and then be re-run when the response comes back from the database it would be the same to us.<br>
So, that's the idea of this asynchronous of programming is.<br>
We want to take these dead zones these waiting zones where we're waiting on external services, file system database, web services, things like that and make them productive times for our code to do other stuff.
|
|
|
show
|
6:16 |
All right, enough talk, let's write some code.<br>
So over here in our demo repository we can see the days, and this is the quart-async section.<br>
So what we're going to do is we're going to create a simple project that we can work with and we're going to write some regular synchronous code and then we're going to convert to async and see how things get better.<br>
All, right so first, let me just make a folder here.<br>
And I'll just call this Python_async.<br>
Now this part's not technically necessary but I do want to use one external package and because of that, I'm going to create a virtual environment that we can use here.<br>
So we're just going to use Python3 to create a virtual environment.<br>
And then I want to go and open this in PyCharm.<br>
Use whatever editor you want, I'm going to use PyCharm.<br>
All right, with that open, let's create a file that we're going to run.<br>
We're going to have a synchronous version and a asynchronous version.<br>
I'll just call that synch_program not super exciting, but here we go.<br>
Now, for this one, I'm going to start with some code that I'm going to paste in here and we're just going to talk through it because it's a synchronous program, you guys already know how to write this stuff.<br>
I want to have a really clear foundation to make an asynchronous version but it'll still be interesting to explore.<br>
Okay, so you can see I've pasted some code here and we're going to use this external package called Colorama.<br>
So I'm going to create a requirements file just so you can clearly see that you need to have this.<br>
We'll come down here, pip install -r requirements.txt into our virtual environment that we created.<br>
All right, everything is looking good.<br>
Now, let's talk about our program here.<br>
So we have this main method.<br>
And the main method is going to do sort of this orchestration thing.<br>
So it's going to print out that it's started and we're using Colorama to make sure that is white.<br>
And I'm also flushing it so that you immediately see the output, we're flushing everything so that you immediately see the output.<br>
This is important because the interweaving of behaviors from the different parts of our program are really important to detect.<br>
Okay, so what we're going to do is, we're going to implement this pattern called the producer-consumer pattern.<br>
Now, the idea is that there's some part of our system, maybe it's even a web service that's receiving an external request.<br>
It's going to generate stuff to be processed and basically put into a queue or a list this data thing here, in this case.<br>
And then another part, once the data's been generated is going to take that data and process it.<br>
So if we look down here, you can see here's the generated data and it's super basic it just goes and creates a square of a bunch of numbers and throws them into this list.<br>
And it prints out yellow, the generator is yellow.<br>
And then the processing part says we're going to go down here and loop over this and pull this data out.<br>
And in cyan, a blueish, it's going to say we processed this value.<br>
It also computes how long from a request to generate or the generation of data to the actual processing of data this takes.<br>
Let's go over here and run this in PyCharm.<br>
You can see the app has started the white's kind of gray in this little terminal thing, but it's okay.<br>
Then we're generating items notice all of the work is being generated all the generation is happening, and then the processing.<br>
That's not surprising, we call generate_data and then we call process_data, totally reasonable.<br>
So we're going to do 20 items, and now they're processing one, four, nine, these are the order they came in.<br>
And notice, the first one took almost 20 seconds until it got to be processed.<br>
And if you go down, it gets a little bit less drawn out.<br>
But the generation takes some time the processing takes some time.<br>
So you can see the best case scenario the one that was closest, because processing is slightly quicker than generating it still took 10 seconds to get to that request.<br>
And notice, it all happened, all the generation, all the processing.<br>
Let's just look really quickly at what we're calling it up at the top that's totally reasonable, right?<br>
We called generate_data 20 times and we did 20, and then we called process_data and we processed 20 at a time.<br>
But if we look at either of these there's a part where we're waiting.<br>
And this simulates requests coming in or we're waiting on an external system without adding the complexity of something like that which we could build, but would be way overkill in terms of trying to demonstrate this.<br>
This is just simulating, it takes some time to do some work and that time probably depends on an external system, right?<br>
We're waiting on something, right?<br>
Waiting on a database, waiting on a web service.<br>
We're not really doing that so we're just calling, time.sleep which puts our thread to sleep.<br>
But it means that it takes half a second at least half a second, up to 1.5 seconds to generate an item.<br>
Same thing, we're processing the data we're pulling out just basically holding onto it and talking about processing it and then it takes us half a second to process it.<br>
Okay, so this is this program.<br>
This is the synchronous version of what we're doing.<br>
And we've introduced via time these sort of arbitrary wait periods, but they're very much modeling real world things like databases and web services and so on.<br>
How can we fix this?<br>
How can we make this better with asynchronous programming?<br>
Well, if we could say, after we've generated a few items while we're not generating, we're just waiting maybe the processing could kick in and process the few we've already generated.<br>
But if we're not processing any because we're waiting down here, we could generate some more.<br>
These could work as a team, but they don't.<br>
They don't because we wrote this very straightforward program.<br>
Grab the time, print out some colored stuff but really that's not so interesting.<br>
This, this is all there is to it.<br>
We said, generate_data, and then process_data.<br>
So we're going to generate it and wait, and then process it.<br>
And that's the way synchronous works.<br>
But we can do better if we write a different version.
|
|
|
show
|
9:09 |
We've seen our synchronous version running.<br>
Now, let's improve it so we can have our code running during these downtimes and we're going to create an asynchronous version.<br>
So we'll just duplicate that file in PyCharm and we'll look over here.<br>
So the first thing that we need to do in order to make our code async in Python is to do what's called an event loop.<br>
So there's going to be little bit more stuff to orchestrate these things like, main is going to set slightly more complicated.<br>
Let's not necessarily focus on main right away let's look at the other two pieces here and see how this works.<br>
So in order to use the asynchronous programming model in Python we really need to use some of these asynchronous data structures and for that reason, we're going to import asyncio.<br>
Now, over here, we have a list and getting items out of the list and putting items into the list there's no way to sort of coordinate that and say I would like, for example, to wait until there's an item in this list and then get it out.<br>
But you're welcome to go do other work while I'm waiting.<br>
Lists don't work that way, they're not built for that.<br>
So what we're going to use is going to convert this to a queue that comes with asyncio, like that.<br>
And notice, PyCharm is saying you said this was a list, it's no longer a list.<br>
So where can I go next change our little annotation here and let's look at this one, this generator this producer bit, in order for us to make our functions operate.<br>
In this asynchronous mode, we have to make them as async.<br>
We have to say, this method participates in a different way in fact, the way it's implemented when it runs is really different.<br>
So we come over here and we say this is an async method, async def rather than say, this one which is a synchronous one.<br>
Once we've said it's an async method then we find all the places that we are waiting.<br>
So there's going to be actually two places.<br>
This doesn't have an append, but it has a put.<br>
And what we're putting into it is this tuple.<br>
So really, one thing is going to it even though it may look like two.<br>
Now, PyCharm say, whoa, whoa, something is wrong here.<br>
We hover over it, it say, you're not waiting on this.<br>
So this is one of these async methods itself and it may take some time to put this in here because thread coordination and whatnot.<br>
So we come over here, and say we would like to pause our thread until this operation is done potentially giving it up for some other bit of our code to run.<br>
We don't have to really do anything special we just have to say, we're willing to wait we're willing to let Python interrupt our execution here.<br>
And then, this time.sleep well, we want a different kind of sleep we want asyncio because this one is awaitable.<br>
Again, this is signaling to Python I would like you to run through this loop until you get here then you can let my thread run or if you have data, just give it to me and we'll do a little print, and then we're going give up our thread's time and let other stuff work.<br>
This one is really the important one.<br>
We're going to let other code run while we're waiting.<br>
That's what that await's just done and when it's done, then we go back and go to the next thing through the loop.<br>
Python handles it beautifully for us.<br>
Let's do the same thing here.<br>
So async def, and then notice there's a get on our queue.<br>
Now, for some reason, PyCharm doesn't detect this but if you go to the definition for get you can see it's an async method.<br>
That means we have to await it within our async method.<br>
So we do this, and this is going to be asyncio await Actually, we don't even need this anymore.<br>
This didn't used to be a blocking call, but now it is.<br>
And then, down here, asyncio I have to await it, PyCharm tells us, there we go.<br>
So, when this one's processing, it's busy and then it says, hey, while I'm waiting you can go back and do other work like say, for example, generate_data.<br>
That is what we need to do to make our methods async.<br>
Really, you just put the async word and everywhere you might be waiting you just throw in the keyword await.<br>
So I told you, this programming model is straight forward.<br>
Understanding all the nuances of it how it's implemented, different story.<br>
We're actually going to only touch a little bit on that.<br>
Now, in order to run these async methods there is a little bit of ceremony that we have to go through.<br>
Not all languages work this way Python does for whatever it's worth.<br>
So what you have to do is create this thing called an async loop and basically, things within that given loop share execution time so they're all trying to run and when one of them says, hey, I'm awaiting something the others get a chance to run so it's like this shared cooperative multi-threading.<br>
So I'm going to create a thing called called a loop and we just call get_event_loop here.<br>
Now, we have our data.<br>
Now, instead of directly calling these we're going to do something different.<br>
We're going to go over here and say loop, create a task.<br>
The reason we need to create the task is we want to wait until these two operations are done and then, our program is going to be done.<br>
So I'll call this task1 and same thing for this async method but of course, task2.<br>
That's pretty straight-forward.<br>
And then, finally, we would like to create something that lets us say we're done, our program is done when all of these tasks are done so when all the generation is done and all the data processing is done.<br>
So what we can do is create a third task from the first two.<br>
The way we do that is we can so what what's called gathering the task.<br>
So we'll say gather, and we just give all the tasks become star args there and then, we can tell our loop to run.<br>
So up to here, nothing has happened nothing has executed, so down here, we say loop.run_until_complete(final_task).<br>
So it's a little bit more ceremony to sort of coordinate all this stuff, but it's not too bad.<br>
However, once you get the start-up stuff done everything is golden.<br>
So, you're ready to run it?<br>
Are you excited to see what happens?<br>
Well, first of all, hopefully, I didn't screw this up.<br>
We're going to find out.<br>
So we're going to run this one and now, look at this we're processing an item, are generating an item processing, generating, processing generating, processing.<br>
Now notice, it's one and then the other because they don't take very long for them to do this work.<br>
As soon as one goes into the queue, we're processing it and because we're processing faster than they're being generated, we can keep up.<br>
But what's really interesting here we can actually generate more and more data and just have the one processor.<br>
So let's go task3, I'm going to generate more data and task4, I'm going to generate more data and then, we'll just wait on those two.<br>
So were generating 60 pieces of data and just because the way we wrote this so it exits right at the end we need to tell how much data to process it.<br>
It would be easy enough to write this in a way that can be canceled, by we're not doing that we're just adding them up.<br>
Now, let's run it, and this see this cooperative bit here.<br>
We're generating a bunch of items and notice, let's go back up to the top here we've generated three, and we process one and we process two, and then we started to process three but then, it turned out, we ran out of time and this one sort of kicked in again and these other three are running at parallel.<br>
Processed a couple, these others got to go.<br>
Process one more, one got to go.<br>
And you can seem sorting starting to interleave here until they're all done.<br>
We generated data faster than we could process it so we had a few backed up here in the end.<br>
Well, let's go back and tone this down a little.<br>
Let's just put one extra, let's just put 40 two producers for every consumer.<br>
Run this again.<br>
The other thing I want you to notice.<br>
The first time when we ran the synchronous version remember that, the synchronous version the very quickest response we could get was 10.5 seconds, that was the best.<br>
The worst one was like 30 seconds.<br>
Look at these numbers.<br>
Because we processing them when we're waiting we can get to them right away.<br>
A request comes in, we can get to it because the other one's waiting on the next request to be generated, and so on.<br>
So these are extremely small numbers because we don't have to wait for all the work to be done to start the processing.<br>
We're doing this cooperative multi-tasking.<br>
Also, if you notice here we have 20 seconds completion time.<br>
I think it's 30 seconds in the other but if we had actually generated this much work it'll be as we did double it'll actually be even quite a bit more.<br>
So it's much faster and the response time is insanely faster.<br>
This is the behavior we want to add to our web application and with Quart and async programming, it's pretty easy.
|
|
|
show
|
2:24 |
Let's look at the order and timing of operations.<br>
Imagine we have asynchronous execution like we just saw.<br>
So again, we have request one, two and three coming in on exactly the same timing.<br>
They take exactly the same amount of time to run.<br>
But when we dug into the requests we saw most of the time we're waiting on a database or something else right like a web service.<br>
So during those times, maybe our requests actually could just run almost truly in parallel.<br>
Notice, for example, when request three comes in we couldn't quite run it exactly when that request came in but it's pretty close because soon request one and two went back to waiting on the database.<br>
So again, let's look at the timing here.<br>
So, we have our request one come in.<br>
And, of course, just like before it got done right when it did in fact maybe just took a hair longer cause it gave up its time and couldn't quite get it back from two right when it was ready to run, somethin like that.<br>
But we have our response time roughly the length of request one.<br>
But now, when request two comes in we saw that request one was waiting on the database so it could immediately start running.<br>
And it got done more or less in the same amount of time it took.<br>
And request three was, actually its response was moved up ahead of request two.<br>
So from a response perspective, it went one, three, two because three was really short and one and two were waiting on the database.<br>
So, boom one, two, three and it could just get that out of the way.<br>
So the response time per request from the outside one, two, and three, looked much more like what they would be if there was just one user to the site even though it was theoretically really busy.<br>
Now if we dig in again like we did before we'll see that yes, we're still doing framework database code, maybe web services which I haven't highlighted here.<br>
But now the database section is green because during those times, we're telling Python via our async and await programming you know what?<br>
I'm just waiting here.<br>
If you've got other stuff to do other requests or processes feel free to go work on them until they start to wait.<br>
And then let me come back and run my code.<br>
That's the beauty of async programming.<br>
This is a really powerful concept in Python in general.<br>
And it happens to be really useful on the web because a lot of time, what you're doing on the website is waiting on a database, waiting on an external service something like that.<br>
You can make that productive waiting time.<br>
So that's an overview of asynchronous programming in Python.
|
|
|
show
|
2:43 |
This wouldn't be 100 Days of Code course if you didn't write some code.<br>
So now, it's your turn.<br>
Let's go over to the Quart section of our GitHub repo and notice that there's a code that we wrote and then there's a your_turn section so that's where it gets interesting for you.<br>
We have something for you to do on day two and something for you to do on day four.<br>
So let's talk through, really quickly what we're going to do in the first section here.<br>
Well, the first part is to watch the videos and I'm guessing if you got this far well, then, you've watched the videos, awesome!<br>
So you're kind of done with day one play around with some of these ideas and just make sure you kind of understand what's going on in the videos.<br>
So on day two what you're going to do is play with a pre-existing app that we've already built.<br>
This one is called web_crawl, and it's just a terminal-based app, and what it does is it goes and downloads like, 20 webpages off of talkpython.fm, and just prints out the title.<br>
It's kind of not really valuable, but it's a really good chance to leverage async programming.<br>
So what you're going to do is you're going to create a virtual environment and activate it and there's a set of requirements to make this work so you got to make sure that you install those after you activate the environment.<br>
Then when you run it, you'll see that it does a few things it says get me the HTML, and then from the HTML it gets the title and then it prints out the title for episode 150, then it does it for 151 then it does it for 152.<br>
Well, what do you think your app is doing most of the time?<br>
It's waiting for talkpython.fm to stream that HTML back to you.<br>
Now that happens pretty quick on the site but there's things like latency on the internet and all sorts of stuff, so you could really ramp up the speed in which this happens if you leveraged async, so that's your job.<br>
What you're going to do is you're going to go to the get_HTML method, you'll see that in the code that's provided for you, you're going to convert that method to be async, and we're going to use this thing called aiohttp Client.<br>
So this lets you do, as a client, kind of like requests the requests library that lets you make http requests, but this one supports async so you can do async type of stuff like get a URL or read the text stream, things like that.<br>
So in this part, this is day two, your job is to go through and convert this thing we're calling web_crawl, up here convert that from a synchronous program to an asynchronous program.<br>
There's a final little trick here at the end that you actually have to leverage to make things truly go faster and truly happen in parallel and I'll just leave that for you to discover as you go through this whole project.<br>
All right, hope you have fun on this day there's a lot of sort of step-by-step instructions but it's not meant to be hand-holding you're supposed to explore these ideas so hopefully that balance is there.<br>
And most importantly, have a great time.
|
|
|
show
|
2:08 |
You've seen this async/await programming models, pretty awesome and really opens up some cool possibilities and the application to the web, really important.<br>
However, Flask will not operate in a async world.<br>
Neither does Django, neither does Pyramid or many of the other frameworks.<br>
Now that might change after this is recorded.<br>
I know Django now has at least a road map towards this async world.<br>
But generally, these popular frameworks are built on what are call WSGI, W-S-G-I Web Service Gateway Interface.<br>
And that API cannot be made async.<br>
So, part of the magic of all these frameworks is they are based on this common standard the common standard doesn't allow for async.<br>
Moreover though, for Flask, at least at the time of the recording, you check out their design decisions and they say, Flask is just not designed this is from their documentation Flask is just not designed for large applications or asynchronous server.<br>
Flask wants to make it quick and easy to write a traditional web application, period.<br>
Well, it's cool I guess we cover this async stuff but Flask does not get support it, so forget it we're out of here.<br>
That's one possible outcome, the other is enter this thing called Quart.<br>
So, Quart was designed by Philip Jones who I actually interviewed him on the Talk Python To Me Podcast and Quart is a Python web micro-framework based on asyncio.<br>
That's the same asyncio we just did magic with our producer and consumer world.<br>
It is intended to provide the easiest way to use asyncio in a web context, especially with existing Flask applications.<br>
You'll see that converting a Flask app, into a Quart app is actually super, super easy.<br>
We're going to use Quart to add this, basically the leverage this async programming model on the web but use everything we know about Flask and even Flask extensions in that application that we build that is async.<br>
Even though Flask itself, claims it will not support it.<br>
So, very, very cool project here and we're going to use that to level up our API.
|
|
|
show
|
7:11 |
We have two more directories in our GitHub repository under the Quart section.<br>
So, we have cityscape_api and we have async's cityscape_api.<br>
So, what is this about?<br>
Let's open up this project and see what's goin' on.<br>
So, again, we're going to have a lot of requirements to install this.<br>
We're going to create a virtual directory virtual environment here, rather.<br>
So, go over here and we'll just do our virtual environment thing that we did before, and then open this in PyCharm.<br>
In macOS you can drop and drop this here and it'll open.<br>
On Windows and Linux you have to say file, open, directory.<br>
Now, of course, to run our application we need to install the requirements.<br>
So, we're going to use Flask.<br>
We're going to use Requests.<br>
Now and later we're going to use something called aiohttp so we can make our web service calls asynchronously.<br>
Basically, these three replace are the asynchronous equivalent of those.<br>
So, we got to install Flask and all of its friends, as well as Requests.<br>
Okay, so let's just really quickly look and see what this web app is about.<br>
And I mean, mark this is as excluded and this one as resource root.<br>
So, if we go down here let's just look at our app from the top.<br>
So, we have these services.<br>
These services we need to figure but these are the things that call our web APIs.<br>
I'll introduce you to a couple of services that we're going to do, but basically we need to know the latitude and longitude given a city.<br>
We're going to give you the sunrise and sunset information for the city you ask and we're also going to give you the weather for that city.<br>
And we need our location service to help drive that service so we don't have to ask people for weird things like what's your latitude and longitude.<br>
Okay, so we're going to create our Flask app.<br>
This is standard Flask.<br>
We're actually decomposing it into various pieces using what's called blueprints.<br>
So, instead of writing all of our view code here we're putting it into these pieces we'll see them in just a minute but this register blueprint let's us sort of still hook in those routes.<br>
We're reading out some config files that we put in here a development and a production one and we're going to set it to I think, what is it set on right now?<br>
Let's set it onto debug true.<br>
So, it's going to set up things about how it runs.<br>
We're also going to tell the services to use cached data.<br>
We're going to set that to be false initially but later we want to do some performance testing.<br>
And it turns out that these services cannot take the amount of traffic or at least they refuse to take.<br>
They may, like detect it, and say go away, you're doing this too often.<br>
But they have a limiting, that either limiting or failed performance that will not let it work well enough for our asynchronous version when we try to push it to the max.<br>
So, I had to set up this caching mechanism so that we could actually truly compare the performance of Flask versus Quart.<br>
Okay, we'll see how that works in a minute and then just standard, just run our Flash app which is app.run, and this one running on port 5001.<br>
All well and good.<br>
Let's look at our service.<br>
Home is super boring.<br>
It just has an error handler and it just says welcome, use api/city for your API calls.<br>
Really, 'cause this is an API primarily not a website, but it could be.<br>
All right, works, Quart and Flask just as well for websites.<br>
Okay, so we're going to go over here and import our services and we have two services you can call.<br>
api/weather/zipcode/country and that will give you weather data.<br>
So, let's try that real quick here.<br>
Okay, notice it running, and here we got our view.<br>
It says that we can go to this API weather.<br>
Let's put zip code in there at 70002, and let's put that in US.<br>
This'll be somewhere, Oregon, near Portland.<br>
Goes in, makes a call.<br>
Look at this.<br>
This is the weather right now.<br>
Here's our longitude and latitude actually coming back.<br>
Here's the temperature.<br>
That seems kind of intense, right?<br>
The max and the min for the day.<br>
We have our wind and so on.<br>
This actually is a little bit bizarre.<br>
This is in Kelvin, yes, Kelvin.<br>
So, you come over here and that's 23.6 Celsius, or 75 degrees.<br>
It's in the evening in the summer.<br>
It's kind of a nice summer night so yeah, that looks totally correct and I guess I got Salem for the city which is also in Oregon, but a little bit away from here.<br>
So, here's our weather API, and we could also do sun, I think it's just called sun.<br>
Here we go, and we got the sun.<br>
The sunrise is at 6:00 a.m.<br>
The sunset is at 8:30 p.m.<br>
Pretty much, pretty accurate, sounds like to me.<br>
So, here we can get sun data we can get the weather, things like this.<br>
Of course, we could add more and more services to it, but this is our service.<br>
Let's really quickly see how they look and how they work.<br>
So, let's just take the sun one, for example.<br>
This one is the most complicated, 'cause it has to use a location and then the sun service.<br>
So, we go here to this location one.<br>
It's going to come in here and create an URL to this data science tool kit, street to coordinates.<br>
So, this is a free API you can call given some kind of expression for an address and it'll return you the latitude and longitude.<br>
Now, I've hard-coded some near my location if we decide to use that, but right now I turn that off, so we're using the real data here, as you saw.<br>
We got Salem, not this other place there.<br>
It goes and it uses requests to download that JSON and then it pulls that data out of the JSON document and shoots it back to us.<br>
So, that's the location service and then if we look at the sun service it's very, very similar.<br>
Get a URL, we're using api.sunrise-sunset.org.<br>
We're going to pass that along.<br>
And then we can, again, use requests get our JSON result back, and process it.<br>
Well, this is all good, but are we getting somewhere?<br>
Yes.<br>
We are massively, massively waiting right there and even this part, a little bit, could be, if there's a lot of data waiting for it to stream down.<br>
Okay, so this just is the beginning of the request, and this is kind of the end.<br>
Same thing over in the location one.<br>
We have to wait.<br>
So, if we could do other work online while white line 21 is waiting on sunrise-sunset.org that would be really awesome.<br>
That would let us go do tons of stuff.<br>
Here's our app.<br>
We're going to focus on primarily on this.<br>
We're going to go use the service, location service which we looked at using requests to get the latitude and longitude, given a zip code.<br>
And then, we're going to use the sun service given a lat and long, to tell us when does the sun come up when does it go down, things like that.<br>
Then, we just return that data.<br>
That data is what you saw right here sunrise, and sunset, and so on.<br>
Pretty awesome.<br>
See if I refresh it, it takes about half a second for it to do its processing.<br>
That's almost entirely waiting.<br>
I think we need some async code.
|
|
|
show
|
2:58 |
Are you ready to convert our Flask app to a Quart app?<br>
Well, that actual transformation is super easy.<br>
Well see, most of the time we have to spend on actually rewriting our web API calls or work consuming services with requests but lets just convert this to Quart real quick.<br>
So, we go over here and we going to comment that out and put Quart.<br>
Let's just rerun this pip install -r requirements.txt.<br>
Download the Quart stuff.<br>
Okay, that went great.<br>
And let's while were here go ahead and uncomment these bits.<br>
aiohttp has a client like requests which lets you make calls to web services but it does it in an async friendly version.<br>
Our dependencies are switched, of course we're still using Flask up here.<br>
Let me just give you the quick overview what we're going to do.<br>
Where you see Flask, we put the word Quart.<br>
If you see a lower case flask, you put lower case quart.<br>
If you see upper case Flask, you put upper case Quart.<br>
Let's try this.<br>
I know, we can all do it, it's no big deal.<br>
That was good.<br>
And we got to go to our other views these should be the only other two places where Flask appears.<br>
So we go Flask is now Quart we're going to do a response we do it like this we have one more place with Flask with this blue print and then we're also using abort and jsonify.<br>
That's it.<br>
We've converted from one web framework to the other.<br>
We converted from Flask to Quart.<br>
Let's run it and see what we get.<br>
Oh, yeah.<br>
Over here we have the way this is running it set this up as a Flask server.<br>
Let's just run it directly.<br>
There we go.<br>
Now, we're running on here again let's see if it still works.<br>
Still does.<br>
Let's see if our API still works.<br>
Oh, 'cause it's 5,000, let's put 5,001.<br>
There we go.<br>
'Cause I changed that.<br>
Okay, so our API still works.<br>
Everything is good.<br>
Are we getting all the benefits the magic of asyncs that I've already shown you?<br>
No.<br>
Let's go look.<br>
The only part that really much matters is over here.<br>
This method, is that method an async method?<br>
Right there.<br>
Sun, is sun an async method?<br>
Well, no.<br>
'Cause it doesn't say async.<br>
So in order to actually take advantage of Quart we can run on it but this stuff still behaves basically identically to Flask.<br>
But what we have now is Quart would be able to process this if we wrote an async method.<br>
Whereas Flask couldn't do anything with this.<br>
It wouldn't work.<br>
That is all you could do.<br>
But in Quart we can now start writing this.<br>
So if we just put an async here and make those async and we await them, magic.<br>
Let's do that next.
|
|
|
show
|
5:11 |
So let's make this async and we'll begin by starting at the lowest level so, in order to make this useful, we have to make this an async method, and that an async method so we can await it here.<br>
So let's go here well, there's nothing we can await here, right.<br>
This is regular request, we can't await that.<br>
So, instead we have to switch to using a new API.<br>
Now, it's going to look a little bit funky but it's it's not too bad.<br>
So we're going to get rid of this and we're going to say aiohttp and instead of this part coming out I'm going to delete it in a second we're going to come over here and use a with block a with block to manage the life cycle of our request and that with block itself is async so the syntax is a little wild, let's say.<br>
So, we create an async with block for an aiohttp client session, add session.<br>
Cool, right?<br>
Now, we're going to use that session to make a call.<br>
Get that URL and we're going to store the response well, as a response.<br>
Then we're going to go like this.<br>
Now, this should get begins the request this one finishes it and that also is an async method so we need to go over here and add an await there.<br>
Now, for any of this to work we need this to be an async an async method up here.<br>
Okay, so, we could also do response.raise_for_status like that.<br>
Intellisense autocomplete thing doesn't come up but it's good.<br>
The other thing to do is if we switch this caching on for this to work this has to be awaiting an asyncio.sleep otherwise it's not it doesn't simulate the right kind of thing.<br>
Okay, so we had that now we have this it's slightly more complicated but well, honestly what we have is that right there, right?<br>
It's a little bit more complicated but honestly not so much.<br>
Let's do the same for the sun.<br>
Async the method.<br>
Await asyncio for that one that's not really what we're doing but here these are aiohttp and we'll just do it like that.<br>
Once we've turned this into a Python dictionary we no longer need to be in here like this and this of course, we have to await that right there.<br>
Let's call that data and then, let's say sun.<br>
Perfect.<br>
So, that's going to give us our items back we can go do the processing all the stuff right here is happening outside the concurrency.<br>
In fact, we could move that back, I suppose.<br>
Like that.<br>
Okay, we've now made this async.<br>
Let's run it see if it's working, still.<br>
Oh, got to tell this to run single instance.<br>
So if we start calling this on one port well that part still works but we didn't change anything there.<br>
This one, though this one we've made some changes actually, I think it's going into that one, let's see.<br>
Yes, bad bad trouble.<br>
What is wrong here?<br>
Well, I'll show you what's wrong.<br>
We didn't finish.<br>
We've made those async methods but we have not made this actual method use them correctly.<br>
Because they're async they have to be called from async methods and we have to await them to get their response.<br>
Now, let's try.<br>
Golden.<br>
Golden.<br>
Look at that.<br>
Now, it looks the same.<br>
Any individual request will take about the same amount of time but instead over here, let's just jump to this one.<br>
Instead of blocking and just going, well we're awaiting on this until we can do anything else we're now going and saying we're awaiting all of these things.<br>
We're awaiting getting the session the URL reading the stream to get the JSON all that kind of stuff.<br>
So that means that all of these steps through here other processes other requests can come along and do the processing just like I showed you with the more obvious producer consumer version same thing with the web here.<br>
So we're sharing basically giving up our wait time to go do other work let other requests be processed.<br>
That's awesome.<br>
And how hard was this?<br>
Well, you find and replace the word Flask with Quart and then you write async in this programming code here.<br>
For web services, you have this.<br>
For time, you have this.<br>
I don't know why you'd ever do this in a real web app but this simulates some load balancing or some load testing we needed because this eventually gives up if we pound it too hard.<br>
Pretty straightforward.<br>
And then you have to do it all the way up and down the stack so the most important part is the outer side outer, outer piece we have async methods and we await the results when we call them.<br>
Basically, that's it.<br>
That's how you get going with Quart
|
|
|
show
|
2:34 |
We saw that we were using Requests.<br>
That was great, except it did not have any async integration.<br>
It had no way to await it which means we couldn't unlock this powerful shared, cooperative multi-threading that asyncio provides and Quart is based on.<br>
What we had to do is go find aiohttp's client.<br>
We needed to find a replacement for requests.<br>
I want to give you a few other examples so you kind of know where to look.<br>
Every place where you're waiting think, database call, web service call cache server call, things like that.<br>
To get true, full advantage of what we're talking about here you have to use an async version of that code.<br>
Many of the most popular libraries don't have an async option so they're kind of useless or almost even harmful to you.<br>
So let's look at a few others.<br>
So we saw requests and aiohttp client.<br>
If you're using Postgres, there's this thing called asyncpg for Postgres for Python and this is a fast Postgres database client for Python and asyncio.<br>
If you look down here, often you'll see, like "Oh, it's super fast.","Awesome, awesome graphs" but the idea is, that with this one you can await your calls.<br>
So, for example, we're going to run, and await connecting to the database and then, we're going to await running a SQL query and await closing the connection.<br>
Alright, standard stuff, like you might expect.<br>
What if we're using MongoDB and not Postgres?<br>
Then you can look at Micromongo.<br>
Synchronous and asynchronous MongoDB.<br>
Very cool.<br>
And this actually has the cool capability to be based on synchronous MongoDB on Motor asyncio, which is an asynchronous version or even a mocking foundation.<br>
So there's all sorts of cool stuff you can do there and if you're doing like, Redis, well, aioredis.<br>
Again, very, very similar.<br>
Await connecting to it.<br>
Awaiting executes some GET operation on a key things like that.<br>
Standard Redis caching stuff.<br>
You have to go get one of these asyncio-based libraries if you're going to take advantage of it in Quart.<br>
It doesn't mean you have to have it.<br>
You could make a synchronous Redis call but it means that that portion of your waiting time of the request, you're not giving up to do other processing.<br>
You're hurting your, sort of, scalability there.<br>
I guess the take away is, if it's available use an asyncio-based one and await it.<br>
If not, you know, what are you going to do?<br>
You still got to write your code and run it, right?<br>
So use what you've got.
|
|
|
show
|
2:09 |
So you now know async and await we spend a little bit of time on the first day in the first set of lectures talking about that.<br>
How we can take regular code and make it async.<br>
Here we have a function and we're converting it to an asynchronous function by adding the async keyword in front of def.<br>
Any time that we're in a waiting state, any time we're waiting for a response on calling a database or web search or even getting something from a queue, cause maybe the queue is empty or we're waiting until something goes into in, who know how long that's going to take?<br>
We need to await that so we're going to await any other other calls to other asynchronous methods like this asyncio queue.get.<br>
It's async so we basically have to do this.<br>
If you don't know whether it's async just go to the definition of get, it says async def get, well you should await it.<br>
If it doesn't then you can't await it, I noticed also that we're using data structures like the asyncio queue to make this possible.<br>
Right, so you know async and await now that we talked about it in the first bit you already knew Flask, what do we do to make Flask work?<br>
Well, we add a route, we write our controller logic and once we've come up with the data, we can either return it as a JSON response or we can return it as a template using that data, but we're going to return some response back to the server by passing it as a model data.<br>
You've already learned Flask, so you know asyncio as of a day ago, you know Flask so putting that together to make Quart, that's crazy easy right.<br>
Now we convert our view method or our controller method into async contoller method by adding async.<br>
We implement our controller logic, but now awaiting any chance that we can get the more asynchronous we can make this, the better chance we have for scalability here.<br>
And then we return our response, and notice anywhere we have the word Flask we put Quart.<br>
So this is really simple path forward, to go from a Flask API to a asnycio friendly API, very cool.
|
|
|
show
|
4:08 |
We've done all this work and converted our web app to be asynchronous friendly and we've converted it to use Quart which will actually execute the stuff in parallel.<br>
So here's the moment of truth did we actually get anything out of that?<br>
Was it any better at all?<br>
The truth is it depends a lot on a lot of different conditions.<br>
Much of, under certain circumstances, absolutely so let's find out.<br>
We're going to use this tool called wrk which as a modern HTTP benchmarking tool let's you on the command line sort of hit a URL or set or URLs and say, test them with this many clients and this many connections and see how fast you can do requests and see if there are any errors, things like that.<br>
So this is kind of hard to get if you're on macOS like I am, it's pretty easy.<br>
You can brew install it.<br>
You can see the bottom initial link on how to install it at these various locations.<br>
So on macOS, brew install is pretty easy if you're familiar with Homebrew.<br>
On Linux, you have to compile it from source.<br>
You check it out from GitHub and you compile it.<br>
It's not too hard in Linux.<br>
And on Windows 10, you can also install it but the way you install it in Windows 10 is you install the Ubuntu subsystem for Windows 10 and then follow the Ubuntu Instructions.<br>
So pretty much, that is probably the most work.<br>
You don't have to install us you can use any load testing tool.<br>
I'm just going to show you some results.<br>
So here is what we got when we run wrk against our Flask version of the sun API call.<br>
So we're saying here, run with 20 threads 20 concurrent connections and pound the heck out of this URL for 15 seconds.<br>
Run it for 15 seconds, 20 threads, 20 connections and see what you get.<br>
Well it turns out we got not such great response.<br>
We got 4.72 requests per second.<br>
That sounds okay, but if you look over here actually we got 71 requests per second, but see that red?<br>
We got 65 timeouts.<br>
That's bad, that's not really amazing at all to me actually.<br>
If I had a site, and half of the time it was timing out it would be basically considered to be down.<br>
Why is it timing out?<br>
We talked about as many, many requests come in if you can't keep up, they backup, and backup, and backup until eventually we got to the point where those requests actually timed out.<br>
So this is the straight Flask version of that code and remember these calls take pretty long.<br>
It's like a half a second per request to do the API interaction and stuff.<br>
How about switching to Quart and running the exact same thing?<br>
Here it is with Quart.<br>
First of all, notice the red line is gone.<br>
The red line is gone, timeouts are gone, that's awesome.<br>
We also, instead of having 71 requests per second we have, sorry, 71 total requests, we have 311 which is instead of four requests a second 20 requests a second so actually it's about four times better in terms of performance, so that is pretty awesome.<br>
One word of warning if you go and do this.<br>
This is basically a deployment for Quart in general.<br>
If you want to do this testing and you run Quart under a standard WSGI based web server uWSGI, gunicorn, something like that without configuring gunicorn in a certain way it's still going to just act exactly like Flask.<br>
You have to run it in a different kind of web server that understands a different asynchronous API.<br>
The guy who made Quart created a variant of Gunicorn called Hypercorn so if you wanted to take advantage of this asynchronous bit and if you're using Quart, of course you do otherwise why would you not just use Flask?<br>
If you want to take advantage of that you need to run with Hypercorn which we got when we installed Quart itself.<br>
So just be really careful around doing this testing that you actually run your app in Hypercorn and not just run it like we did out of PyCharm because then you'll get Flask performance for both of them.<br>
This isn't change the world levels of performance but all those errors are going away and much better response time.<br>
I would say that that's actually a really big deal.<br>
Thumbs up to Quart.<br>
I definitely improved the performance here.
|
|
|
show
|
1:42 |
Here we are in the Quart section of our GitHub repo and it's time for day four.<br>
So let's scroll through, we're already done some of the stuff.<br>
You should be familiar with day two cause you did that.<br>
Day three was to watch all the videos and now that you're here if you watched them in order you're done with day three.<br>
You're welcome to play around with the demos and things like that.<br>
For day four, your job is to take one of the existing web applications based on Flask.<br>
So we'll take one of our existing web apps you could use the one that you built when we introduced Flask and just make it a little bit slower.<br>
We talk a little bit about how you might slow down your app so there's actually some reason to make it async.<br>
You'd never really do that but it simulates database calls, web service calls, things like that.<br>
So then it walks you through the steps of converting from Flask to Quart and making everything async.<br>
If for some reason you don't have a Flask web app to use, and you're like "Well I don't have an app, what am I supposed to use now?" Just take this one.<br>
You're welcome to take this one and make it async.<br>
This is the one that we actually created during the videos, so you've already kind of seen it.<br>
Maybe that's a good thing maybe it's not a good thing I don't know.<br>
So either take an existing Flask app that you built in a previous part of this course or somewhere else or take this one and follow the steps here to make it slow, convert it to Quart and you should be able to see that it scales better.<br>
It won't be any faster, but it will scale better.<br>
When you're done, be sure to share what you accomplished.<br>
Put some sort of message out on Twitter, Facebook that's the whole idea of this 100 Days of Code is the social accountability.<br>
So be sure to share what you're up to.<br>
And if anything's unclear you're welcome to submit an issue or even a PR to just make it better.
|
|
|
|
1:14:31 |
|
|
show
|
0:48 |
Hello and welcome back to A 100 Days of Web in Python.<br>
It's day 25 now.<br>
I'm going to give you an introduction to JavaScript.<br>
And, of course, a whole new language.<br>
That's a big topic.<br>
So we're going to keep it pretty focused and simple give you the basics to become dangerous in JavaScript.<br>
And I want it to be really hands on so after introducing the history of JavaScript and the basic syntax of the language I have exercises lined up for you to practice.<br>
And then we're going to look at manipulating the DOM basically using JavaScript in the browser and we make a simple calculator.<br>
We learn a bit more leading to a full-blown JavaScript app to track your calories.<br>
There's a lot to learn.<br>
So let's dive straight in.
|
|
|
show
|
2:51 |
Let's look at the plan for the coming four days.<br>
In the first nine videos, you're going to see me explain the history of JavaScript, how to run it and some fundamental building blocks of the language.<br>
Then in video ten, I will present you with four optional exercises to help the concepts sink in.<br>
Then for day three we dive into a very fundamental aspect of working with JavaScript which is the DOM or Document Object Model.<br>
I have a simple website with a bunch of quotes which we're going to manipulate using JavaScript.<br>
Then for day four, I got two projects for you that you should be able to code with the concepts you have been learning throughout the lesson.<br>
It's a simple calculator and a calorie counter.<br>
In the checkout go to Days, Day 25.<br>
And in the demo folder, you have all the materials.<br>
So you got the language building blocks including the four exercises that will point you to on day two.<br>
You have the demo you're going to use for the DOM lesson and the two projects.<br>
Let me show them to you.<br>
First of all, simple calculator which drives home what you will learn about the Document Object Model.<br>
Because it's going to grab the values you need to input fields and a operator that's going to handle a button click, calculator result and bounce that back to a div.<br>
It will handle some edge cases and change the styling accordingly.<br>
And the final project is the calorie tracker.<br>
I have some artyom complete code that will be provided from the start.<br>
and it will work like this.<br>
I loaded in some foods from McDonald's and I should add them.<br>
It counts up to calories.<br>
You're consuming.<br>
You can also remove them by clicking on the X.<br>
And the total count adjusts accordingly.<br>
When there's nothing left the whole diff will hide.<br>
So apart from the exercise there's two fun projects you should be able to work on day four: a simple calculator and a calorie tracker using McDonald's calorie data.
|
|
|
show
|
3:16 |
Sure Python is hot but look at JavaScript.<br>
It's the number one language used right alongside HTML,CSS not a coincidence because those are the three languages used for the web.<br>
Python has risen in the ranks and it's has a solid claim to being the fastest growing major programming language.<br>
And this course is all about Python and that's great.<br>
But for this sixth year in a row JavaScript is the most commonly used programming language.<br>
And I got this from Stack Overflow.<br>
So you're really wants to learn JavaScript.<br>
A bit of history.<br>
I found this nice infographic from checkmarks.com.<br>
And we see that JavaScript was invented in 95 at Netscape.<br>
It was not until 2005 that we saw a big boom And that was because there was a new invention and it was called Ajax.<br>
You probably have heard of Ajax it made it possible to do stuff interactively on the web without refreshing the page.<br>
We also saw frameworks popping up like jQuery.<br>
That's actually how I used most of my JavaScript.<br>
Since then JavaScript is booming.<br>
And you see in 2016 92% of all websites use JavaScript.<br>
And of course you all use JavaScript taking your Facebook feed, Gmail, Twitter and all the major websites you use all those nice UI effects that's all JavaScript.<br>
So again, why JavaScript?<br>
Well, it's the language of the web.<br>
If you aspire to become full stack developer and doing any web development you cannot escape JavaScript.<br>
And yes it definitely has some design flaws but being adopted by all major web browsers it definitely its something right.<br>
JavaScript is also labeled lightweight its high level, weakly tight and it's considered relatively easy to write programs in.<br>
And actually it's getting a lot better.<br>
Since the ES6 or ECMAScript 6 the JavaScript standard the language has made major improvements introducing more concise syntax.<br>
And we'll see some of them later on in this lesson.<br>
And again it's really cool and useful.<br>
So looking at the docs at developer.mozilla.org I found this quote saying that all these cool effects you see in your browser like animations, graphics you name it it all has JavaScript behind it.<br>
One important distinction is what is called Vanilla JavaScript.<br>
And it's the JavaScript that's not extended by any frameworks or additional libraries.<br>
And that's what we're going to focus on in the coming four days pure JavaScript.<br>
But don't worry you will also get to play with two frameworks in this course.<br>
later chapters will introduce you to react and Vue js.<br>
Okay now it's time to start introducing you to the basic syntax of the language so you can start writing your own JavaScript programs.
|
|
|
show
|
4:23 |
First let's actually look at how to run JavaScript.<br>
And I will show you three methods you can do it.<br>
And the first method is to just run it in a browser.<br>
So let's first write out Hello World and to make a file called hello.js.<br>
And I'm going to write small function and we will deal with language syntax starting the next video.<br>
Just bare with me.<br>
And we're going to return a string, 'Hello '' + name.<br>
And to call this lets log a message to the console.<br>
So I'm going to do a console.log, which would be the equivalent of Pythons print.<br>
And I'm going to call the function passing in a name.<br>
So we have a script, saved to hello.js and how do we run this in a browser?<br>
Well we can write a little bit of HTML.<br>
So here's a simple HTML5 template and the script tag allows you to import JavaScript as well as just write it inside script tags.<br>
So here I imported my script hello.js as living in the same directory.<br>
And here I can call it, so I don't need this for now.<br>
And what I now can do, is open this index file in the browser and nothing happens.<br>
So what you first want to do is to click inspect and we'll open the Chrome dev tools and you head over to console, end of string must print it.<br>
And here you have this function now available so here's the source code.<br>
You can call it with and that is to the finer variable, we will see that in the next video and now I can call that function with another name.<br>
That's nice.<br>
Now to complete.<br>
And there you go.<br>
So here you have the console in the Chrome browser you can imbed your script in Index@HTML and run it interactively.<br>
The second way to run it is to use server side JavaScript or Node.js but you would have to install Node and then you can run it at the terminal.<br>
So you would come down to Node.js, download the starter of yours and install it from the package.<br>
I've already done that so then the work flow would be you don't need this HTML, you can write your function you can write the console log here, go to background and now I can just run it, node hello.js.<br>
So if you like to work with a terminal then that's a second way you can run JavaScript.<br>
Install Node.js write your code and run it from the command line.<br>
A third way is to use an IDE.<br>
So here I have my VS Code editor open, I can put in the JavaScript I just wrote and by default there is not a run code option here so you would want to install VS Code runner you can get that from the Visual Studio marketplace install it, open it in Visual Studio Code, you can install it here, install, now it's installed and here I've got a new option under my right click called runcode.<br>
Here it opened a pain running the code and the output.<br>
So that would be the third way to run JavaScript using IDE and probably with an extension and this is VS Code.<br>
I've actually just discovered this IDE.<br>
You will still see me use VIM throughout this lesson though but yeah I know a lot of you use IDE so this is worth exploring and the process will probably be very similar for your IDE of choice.<br>
In the next video we are going to dive into the language syntax.
|
|
|
show
|
5:27 |
In this video, we're going to look at JavaScript basics.<br>
Let's open a console and write some JavaScript.<br>
So the first way to do a Hello World to the console is to use console.log.<br>
Second way, we can do it in the browser is to use the built in alert.<br>
And that gives us a nice pop up.<br>
To define a variable you can use var.<br>
But var is a bit outdated and these days it's best practice to use let.<br>
This creates it's own scope and we'll see that in a bit.<br>
Let's rename it something else.<br>
The advantage is that I can not redefine my variable.<br>
Where var was more permissive.<br>
JavaScript has a reserved word to define constant and it's const.<br>
I'm using camel case as is best practiced in JavaScript supposed to hyphen which would use underscores.<br>
Okay, for example set an min age for driving at 18 and now I can not set this to another value.<br>
Because it's defined as a constant.<br>
So just play a string.<br>
Use alert or console.log.<br>
And especially when you start to write your JavaScript code print it to the console is one way to debug your programs.<br>
But I will show you more tricks in a later video.<br>
Define variables, already JavaScript used var but now best practice is to use let and constants are defined with const.<br>
And we saw that one advantage of let is that you can not redefine a variable and a constant can not be assigned another value.<br>
Var vs let.<br>
Let was introduced with ECMAScript 2015 let variables are Blocked Scope.<br>
As we know from the Zen of Python name spaces are a good idea and that's exactly what's going on here because if you give a variable scope then it's more difficult that variables take on values that you wouldn't expect.<br>
And here we see a practical example where with the old style, var the variable will still be available outside of the block.<br>
And block I define as whatever goes into curvy braces.<br>
However with let the variables scoped inside of this block and if you try to reference it outside of that block you get a reference error and that's way safer you can read more about that on Mozilla's developer documentation.<br>
I want to introduce this early on in the lesson because it's often that you define a variable so it's good to know best practice.<br>
JavaScript has primitives and objects.<br>
Primitives are boolean, null undefined, number string and symbol.<br>
It works pretty much as you would expect.<br>
We're all familiar with boolean from Python the only thing that like cause confusion is null and undefined, where Python generally has None.<br>
The more options you have the more likely it's that you'll make a mistake.<br>
Another tricky thing is one type for numbers which is number.<br>
And Python has ins and close which usually leads to less mistakes.<br>
String you already know from Python str.<br>
And symbol is a new data type I have not found a use case yet so it's the youngest cub of this chapter.<br>
Objects are very important in JavaScript at the most basic level you can use them as ticks of key value mappings and I will have an example latter in this lesson.<br>
But there's much more to it you can actually use them to add methods and behavior.<br>
Making them what in Python would be fully flat classes.<br>
More info on data types here's the link.<br>
Be warned that JavaScript is extremely permissive when you add different types together and that puts the responsibility on developer.<br>
A nice example is summing an int and a string.<br>
In Python it will lead to a type error which probably is a good thing because Python doesn't really understand what you want to do.<br>
However JavaScript makes that decision implicitly for you in this case it adds it to as if there were strings.<br>
So in this case you need to do a parseInt on the 37th string to get an integer result.<br>
So just keep that in mind that often times where Python crashes Java Script does something implicit and it might not be what you want.<br>
Towards the end of this lesson I have a whole slide on JavaScript contrast and it's important to become familiar with how the language is designed.<br>
In the next video we're going to look at JavaScript erase.
|
|
|
show
|
4:50 |
Let's look at JavaScript arrays which will be the equivalent of Python lists.<br>
Defining one is very easy, and similar to Python.<br>
An array has a bunch of methods we can call on it and see, by the way, the nice console feature of autocomplete and showing the output already before typing till the end.<br>
I can sort the array.<br>
I can reverse it and notice that those operations are in place so the list is now reversed.<br>
The slicing syntax is not as powerful as Python.<br>
You can do it for the first item but not so for the last let alone taking a slice.<br>
So you have to use methods to accomplish the same.<br>
Sorry, it's not itertools.<br>
To add items to the array you can use names.push..<br>
It prints to new length.<br>
You can get the last item using pop, just like Python.<br>
And to get the first item, you can use shift.<br>
And again, those operations are in place.<br>
Those cover the main use cases of working with arrays in Javascript.<br>
And to recap, defining an array, very simple same syntax as Python.<br>
You can then get the first item you cannot get the last item like this let alone slicing.<br>
But you can use the slice method on the array object.<br>
We can reverse an array in place sort it, get the last item, get the first item add a new item or name and get the length.<br>
So we still got names.<br>
Let's add one more.<br>
And another one.<br>
So we got four names.<br>
And the classic way to loop through an array is very C-like by doing a classic for loop.<br>
And a local variable of i, the index, we set to zero.<br>
We go till i reaches the length of the list.<br>
Really like this autocomplete.<br>
And let's say we just print them out, right?<br>
And we have to index in the list.<br>
And make it small for and by the way when I was talking about indexing I only showed how to get the first item.<br>
But you can of course get the second item the third item up until the fourth item.<br>
And there's not a fifth item.<br>
And that's interesting because Python would actually crash here and Javascript again is very permissive.<br>
It's not raising an exception, so be careful.<br>
So this is the classic for loop I showed.<br>
It's quite a lot of code so starting ECMAScript 2015 there's a shorter, more concise way to do this.<br>
So you can do for { console.log ; } so for { console.log ; } and it gives them all four.<br>
And that's a bit less code to type and it's more elegant.<br>
So again we have the C-style for loop with indexing into the array but starting ECMAScript 2015 you can actually write it more eloquently and both for loops print the names in the order that they're in array.<br>
In the next video we're going to look at conditionals.
|
|
|
show
|
5:54 |
This is a quick video on conditionals and a break in continue statements.<br>
First, let's demo a very simple if else.<br>
Let's use our constant from the previous lesson of mean age close to 18.<br>
And that set my age to 17.<br>
Now what if you want to determine if at my age, I can drive being the driving age, the mean age of 18?<br>
Well, it's very simple to write an if statement.<br>
So if my age, is greater than or equal than mean age I can drive.<br>
And that doesn't return anything, because I'm not 18 yet.<br>
So we can add an else block, to print a different message.<br>
And now, that gets me, cannot drive as expected.<br>
Now there's a shorter way to write this in JavaScript using a ternary statement.<br>
So in that case I'm doing the if condition in parentheses.<br>
And look again at the nice auto complete of the Chrome DevTools console.<br>
So the ternary, I put my conditions in parentheses then to question mark then you put the code in that hits when it's true.<br>
Then you do a colon, and you put a code that hits when it's false.<br>
So instead of five lines of code I can do this just on one line.<br>
That looks pretty nice.<br>
Next, let's do something a bit more advanced.<br>
So we're going to make a list of names.<br>
We're going to print the names ignoring the ones that start with B and stopping when we hit a name that starts with Q.<br>
So here is an array of names.<br>
Let me use what I had before but add a few names starting with B one that starts with Q, where we want to stop and two names at the end.<br>
So an array of seven names I'm going to look over with a new syntax.<br>
Right, that gets them all seven.<br>
And next I'm going to ignore the ones that start with B.<br>
So we can write an if statement.<br>
If name starts with then we should recognize that from Python.<br>
We only get the ones with B.<br>
One in this case.<br>
I want to continue.<br>
So I can use the continue statement.<br>
So now I got five names because the one starting with B are omitted.<br>
Lastly we said, if we hit a name with Q we stopped a loop, and we can use a break.<br>
So if you have a second condition we can use else if.<br>
And that condition will be the name starts with Q.<br>
I'm going to break out of the loop.<br>
And now we have only two names because Bob was ignored, Tuni and Mike were printed Berta was ignored.<br>
Then we found Quintin and we broke out of the loop.<br>
So again, as simple as else.<br>
If my age is greater and equals and mean age they can drive.<br>
Otherwise I cannot drive.<br>
And as my age is less than mean age cannot drive was printed.<br>
I can write the shorter using ternary.<br>
A nice construct in JavaScript puts condition in parentheses, followed by a question mark.<br>
Then you have your true code.<br>
Colon decoded hits when it's false.<br>
An example of using if else and for loop.<br>
I got a bunch of names.<br>
I'm going to ignore names that start with B and stop when we hit a name starting with Q.<br>
First we have our loop.<br>
Then we have an if else if else.<br>
And actually my console lock defaulted after here.<br>
But here I put it in an else.<br>
Should have the same effect.<br>
If the name starts with B I will have to continue to look without doing anything.<br>
Else if, the name starts with Q I'm going to break out to look and effectively stops this program.<br>
If it's neither of those I have to print a name.<br>
And we saw that Mike and Jillian are the only ones left.<br>
It's just an example to show you how you can combine four if else with continue upgrade to manage, to control flow.<br>
Now there are two major building blocks left when it comes down to JavaScript basics which are functions and object.<br>
And I will cover those in the next two videos.
|
|
|
show
|
9:18 |
This video is about functions.<br>
Like in Python, functions are first-class citizens.<br>
They can be assigned to variables, passed around, et cetera with one or more expressions, also called side effects and can optionally return a value.<br>
It's not required though.<br>
Each function creates a new scope.<br>
Localizing the find parameters and bindings not visible from the outside.<br>
Functions can be nested also called Closures, and call themselves recursion just like in other languages and they can have one or more parameters or arguments.<br>
And here's some more information.<br>
So that's stacks trading.<br>
A function is defined with a function reserved word, a name optionally you can give it arguments and a block is defined within curly braces.<br>
So in this case I am just going to bounce 'Hello' + name and we close off the function.<br>
To call it, I can give it a name and we see "Hello Mike" just as we would expect.<br>
If we omit the argument we get "Hello undefined".<br>
And here again we see JavaScript's more permissive because Python would raise an exception for example.<br>
Type Error and expects one argument and it doesn't allow you call it without that argument.<br>
Not so in JavaScript, and we'll see later how we can set default arguments.<br>
Let's return the value Next.<br>
So I'm going to do a function Calculation2Celcuis that takes a Fahrenheit temperature does the calculation And returns the value.<br>
So now I can call this with say 100 Fahrenheit and I see that's 37.7 Degrees.<br>
Great.<br>
Now let's talk about arguments.<br>
JavaScript functions keep an internal array like object with the arguments passed in.<br>
So to Demo let's just write a function called PrintArguments that's going to print them out.<br>
So we can do For let arg of arguments Console Log of arg close up the for loop and close up the function.<br>
So calling it without anything I don't get anything Calling it with 1,2,3 I get 1,2,3.<br>
Arguments is only accessible within the function because it's called to the block inside the function.<br>
Okay, calling it with a bit more.<br>
So next, how would you handle default arguments.<br>
For example we want to do another hello function and if name is not provided we want to bounce a "Hello stranger" message for example.<br>
So one way to do it is to check name against undefined and we will come to this with JavaScript gotchas with our two comparison operators 2 equal signs and 3 equal signs and you usually want to use the 3 equal signs because it not only checks for equality but also the same type.<br>
So here it will exactly match undefined.<br>
And that's just more specific and you probably make less mistakes.<br>
So if name is undefined and doing this in the same line I can omit the curly braces I can set name to "Stranger" and then do the printing.<br>
Let me close those off with semi colons as is best practice.<br>
So now if I call it without anything I get "Hello Stranger" If I call it with a name I get "Hello Name." So that's one way to handle default arguments.<br>
But there's a nicer way and it's similar to Python.<br>
So as you know you can set a default argument in Python like this.<br>
And now if I call it without anything I get "Stranger" and when I call it with a name I get "Hello Name." And starting ECMAScript 2015 JavaScript now has the same syntax So we can write function Hello Name = default "Stranger" I don't think there's an Fstring.<br>
No there's something similar actually.<br>
You can do backticks and embed the very role like this.<br>
I call it without anything I get "Stranger" I call it with Mike, I get "Hello Mike".<br>
So JavaScript is gaining a lot of nice improvements lately.<br>
Another one I want to show you introduced in ES6 is Arrow Functions.<br>
And to use the same example you can write it even shorter.<br>
We can omit the function reserved word.<br>
And instead of a block we can just use the Equal Greater Than or Fat Arrow I think it's called and print the string.<br>
Let's assign it to a variable.<br>
And now I can call it like this or passing a name.<br>
So a bit more concise syntax.<br>
Arrow Functions are pretty exciting and again JavaScript syntax is getting a lot better.<br>
So to recap a simple function Function, Reserved Word, name of the function Parameters, in the body inside curly braces which defines a new scope.<br>
And you can do some work and optionally return a value.<br>
And when we print it to the console it will return the value as a string.<br>
So function takes input parameters and returns one or more values.<br>
You read it a typical calculation from Fahrenheit to Celsius and calling it with 100 Fahrenheit, you get 37.7 Celsius.<br>
Arguments.<br>
Internally JavaScript functions keep an array like arguments object.<br>
And here we print all the arguments passed in.<br>
When we call this function with 1,2,3 it prints 1,2,3.<br>
So how would we then handle default arguments.<br>
The old way is to look explicitly for undefined and set the name to a default value.<br>
But lately with ECMAScript 2015 we got the new Python like syntax of sending a default value in the parenthesis and that's way nicer.<br>
Lastly ES6 introduced Arrow Functions which introduces a more concise way to write functions.<br>
You can use it on one line like this send to variable and call it.<br>
Because functions are passed around as first class objects.<br>
That's definitely not all there is to functions but it's enough to get you started.<br>
Functions are an important building block when your programs grow and when you have to interface with other parts of the program.<br>
Next up are Objects.
|
|
|
show
|
3:53 |
In this video, we will look at objects.<br>
They are fundamental building block in JavaScript.<br>
Like Python, everything in JavaScript is an object.<br>
You can say person is Bob.<br>
You can method on that object.<br>
As a data type and at the most basic level objects can be seen as dictionaries in Python and they can in find one using an object literal.<br>
If you're familiar with the platform you know that our exercises are called bytes.<br>
Let's define a byte.<br>
A nice thing is that in JavaScript you can access the properties with a dot notation but also like a dictionary in Python.<br>
Now objects in JavaScript are way more than just dictionaries.<br>
They're fully fledged classes under the hood so we can also add methods.<br>
For example, if we will do something like the Dunder STR in Python you can do that straight on the object.<br>
And I forgot to mention in the last lesson that anonymous functions are defined like this.<br>
Now I'm just starting to print the info of the object to the console and to actually access the properties I need to use this, a bit like self in Python.<br>
So then I can call that method and I get a nice output.<br>
So the recap, like Python and JavaScript almost everything is an object.<br>
You can define a variable and we can call methods on that object.<br>
All JavaScript objects inherit properties and methods from a prototype.<br>
Now a prototypes are beyond of this beginner lesson but I encourage you to look into it further because it supports powerful object-oriented program features.<br>
To create a simple object we can use an object literal which seems like a dictionary in Python.<br>
We can access the attributes or properties by the dolt notation or putting the keys in square brackets.<br>
We can add methods to our objects using the anonymous function notation and here it just bounced the object information to the console and to reference object attributes I need to this keyword which is similar to the self keyword in Python classes.<br>
Here I call the method and again an output.<br>
To inspect objects you can use console lock and when you click on the arrow you get a nice representation of the object.<br>
You can also use Jason string a pie to serialize it to a string.<br>
One important notice that objects are copied by reference by default so I would assign byte to a new variable called by two and I changed one of their properties that change is reflected in both objects.<br>
Some something to keep in mind.<br>
This concludes the basic JavaScript construct of day one and tomorrow on day two I got four exercises lined up to make you practice the materials that you've learned so far.<br>
See you tomorrow.
|
|
|
show
|
3:10 |
Welcome back to JavaScript Introduction.<br>
It's day two now and today it's all about practicing what you have learned so far.<br>
So now it's time to see into the Demo folder of your checkout.<br>
And there you will find a couple of directories and see into the language.<br>
Now, run JS and debugging are for my lesson but the exercises are in control, flow, functions looping and objects.<br>
As you see, every exercise has an HTML file that will embed the JavaScript, so you can run it in a browser and you will start with the exercise.html and if you're stuck or if you just want to work from the solution, you can use the dash solution files.<br>
So let me quickly show them.<br>
I have a multi-line command showing what's required and some startup code has been provided.<br>
So here we make a simple number guessing game asking the user for an input partial to an int and check if the number is a secret number.<br>
If it's lower, we print to low; if it's higher, we print to high.<br>
And if we assert a number, we print, you guessed it.<br>
Again, if you get stuck you can always look at the solution.<br>
The second exercise is about using functions.<br>
So here, we're going to write a function to some numbers.<br>
You might have seen this one on the platform, actually it was one of our first bites and here you have the sum the numbers provided to the function but if numbers is not defined you sum a default range of 1-100.<br>
Now, already you can say that JavaScript is not having built-in range so you probably have to write a second function to generate a range from 1-100.<br>
But that's awesome, because you should be practicing writing functions.<br>
Then I got a looping exercise where you're provided with two arrays of names and ages and you write a small program to loop over both.<br>
For each person, you print a name, the age and if they're allowed to drive, based on their mean age.<br>
And it's closely related to what we've seen in the previous videos.<br>
Now the last exercise is about objects and it's kind of pre-work for the final project but to kind of recounter.<br>
And here we can just create a list, or array of simple food objects that contain a description and a count of the calories.<br>
Then you print that to the console.<br>
So, some exercises to really get you practicing what you've learnt so far, because as I always say the learning's in the practice.<br>
And with that done, tomorrow I have some more video lessons lined up, to start looking at the document object model a fundamental piece of working with JavaScript.<br>
See you tomorrow.
|
|
|
show
|
8:03 |
Welcome back to day three of JavaScript Introduction.<br>
I hope you liked the exercises of yesterday.<br>
I hope you learned a lot.<br>
I hope you had fun guessing a number.<br>
I hope it was straightforward to sum some numbers and define a range function as well.<br>
And some food objects looping through the array of those objects.<br>
Today, I'm excited to teach you about the Document Object Model, or DOM.<br>
So what is the DOM?<br>
The Document Object Model is a platform and language neutral interface that will allow programs and scripts to dynamically access and update the content structure and style of documents.<br>
Basically, it's how JavaScript can manipulate content on a website.<br>
And it's important to note that browsers may extend the standard so there may be differences across browser.<br>
Think of it as a tree of objects.<br>
So, you have your webpage, and that's a root you have the HTML element which is further broken down into head and body.<br>
The head then typically has title and metatags.<br>
And the body is the actual content of your page.<br>
So you got links, a tags headers, h1, paragraphs, divs, etc.<br>
So with the object model, JavaScript gets all the power it needs to create dynamic HTML.<br>
JavaScript can change all the elements attributes, CSS styles can remove elements, add new elements react to all existing events and that's really exciting because all those modern apps we use today there are a lot of handlers listening and as you click on things, scroll or do anything on those websites JavaScript listens and does things on the fly.<br>
And it's all JavaScript that's responsible for those nice effects and animations in the apps that we use every day.<br>
Now, let's get practical and do a demo.<br>
I'll retrieve some of Richard Branson's favorite quotes I put them in a website where I edit some paragraphs and the quotes in an unordered list of list items.<br>
We're going to manipulate the DOM of this simple page learning how to target elements using elements by tag name, class name, and by id write new content using inner HTML and then remove elements with append and remove child taking the CSS using element style color and a click event using add event listener so we can share a quote on Twitter.<br>
So let's go to my demo folder in the checkout that's seeding into DOM.<br>
Here I got my website, which is a simple HTML tree of head containing a title body containing a div paragraph, an unordered list with id quote and a ten quotes in reversed order.<br>
And I did that on purpose so we can write them back to the DOM in order as part of this demo.<br>
One quote has a class of Churchill and at the bottom, there is a p tag with an id of more and we're going to write some content into that.<br>
Then I got my Javascript tags and inside it, I got the tasks I want to accomplish.<br>
Let me open this website.<br>
And here it renders in the browser.<br>
First of all, let's get the p tag with an ID of more.<br>
To work with the DOM, we have to document object and we can call methods on it.<br>
So, in this case I want to call cap element by id.<br>
It's very similar how you target elements in Selenium which you also learn about in this course.<br>
So here's the paragraph and an ID of more and I can get the element by ID specifying more in parenthesis and let's just bounce this to unordered.<br>
I get an object of HTML paragraph element that's got its content and I can say inner HTML.<br>
And that's just a dash.<br>
So let's put something more excited in there.<br>
I can target the inner HTML and just write a string into it.<br>
Now if we refresh that content gets written into that element.<br>
Great!<br>
So how can I get all the p tags?<br>
Let me define a variable.<br>
From here, I can use get elements line tag name then target the paragraphs.<br>
And let's just bounce 'em to the console.<br>
Let me open the console.<br>
Refresh, and here I get my p tags.<br>
So this is the first one and the second one.<br>
The first one didn't have an id the second one had the id of more.<br>
Great!<br>
Let's get all the li tags, or list items which are effectively the quotes.<br>
It's the same as the paragraph, but we just target li.<br>
And I'm going to store them in quotes.<br>
You can bounce the length of the quotes and as it's an array, I can index into the quotes and get the first element and its inner HTML.<br>
Let's try that out.<br>
Awesome, I get ten quotes and the first element is number 10 "The beautiful thing about learning...," etc.<br>
Great, we're getting somewhere.<br>
Now what if we want to get the Churchill tag which happens to have a class of Churchill?<br>
Well, I can also target elements by class name so let's do that next.<br>
But you're not going to really use it I'm just going to straight log it to the console.<br>
Document get elements by class name.<br>
And notice it's plural so I can index into the results which is an array and get the content with inner HTML.<br>
Let's refresh again, and there you go: I get quote number three, which had that class set.<br>
Now in the next video we're going to do some more manipulation of the DOM writing the quotes back in order, add a new quote remove the last quote, adding color to quotes and work with an event listener.
|
|
|
show
|
8:58 |
All right, continue with the demo.<br>
As we've seen the quotes are listed in descending order and I did that on purpose.<br>
So the next task is to extract them and write them back to the DOM but now in numerical order.<br>
So we have quotes already stored in a variable the only problem is that I can just reverse them let's see what happens.<br>
Oops, reverse not a function.<br>
That doesn't say that much let's just bounce it within that art.<br>
Ah, it's an object of HTML collection which doesn't have a reverse method.<br>
So I need to cast it to an array we can do that like this.<br>
If I bounce this to alert I should get what I want a proper array.<br>
And erase after reverse method so if I do this I should get what I want and of course I see only the parent note name I've already resolved at church, it was this one which now shows as the third item.<br>
So this seems okay.<br>
So lets write 'em back to the DOM we start them in quotes learn how you could get the quotes id remember that the unhonored list had an id of quotes.<br>
So let's target that, I'm going to define a quote eval variable and use a get element by id of quotes.<br>
To verify that I get the right element let's just override, what's in that tag.<br>
And that didn't work because I made a typo well that was a silent error because I had to use enter HTML and that's something you have to get use to when writing JavaScript that some errors are not shown and unexpected behavior might happen.<br>
So be prepared for that, now it worked.<br>
So I got the list items overridden by some text, so let's populate the unhonored list with the quotes of now in numerical order.<br>
And I can use appendChild, with the quote.<br>
Let's get rid of some text and look at that, awesome.<br>
Now they're in the right order and it's writing them actually overriding them back to the DOM.<br>
Let's add a new quote.<br>
I had this already in my bathroom because it's a lot of typing.<br>
So I define with everyone new quote which is from Douglas Crockford who wrote "JS The Good Parts" so let's add that one as well.<br>
Notice that I cannot just add the new quote with appendChild, like we did before because this merely created the TextNode.<br>
Actually I can but it's not a list item so the proper way to do it is to first create a new list item with createElement use the appendChild on that new element and implant that new list item instead.<br>
So here it gets me to write HTML a list item and inside it this text and then it shows up as a list item.<br>
To remove that last quote, it's very simple you can target the same quote ul and use the removeChild method.<br>
And it's gone again.<br>
Let's do a little of CSS.<br>
What if you'd color the quotes given the even and uneven quotes a different color?<br>
The module index is 0.<br>
And set the quotes style, the color to say red else we set up to blue.<br>
And there you go, now the uneven quotes are red and the even quotes are blue.<br>
And that was pretty easy to do Finally let's add a behavior to the quotes I'm going to add an EventListener that's going to watch if the user clicks on the quote.<br>
So I'm going to use the same file.<br>
Add each quote, is going to get an add EventListener and it's going to listen to click events.<br>
And we have to give it a callable which gets the event and know we can do something when a user clicks.<br>
I'm going to get the target element which is target work not set.<br>
I get this source element.<br>
I'm going to define a tweet URL which is the standard intel link.<br>
And then to add the argument element in our HTML.<br>
Now if we send anything in a URL which we are basically doing here I need to make sure that I URIencode the content And JavaScript comes with a handy encode URI, for example, my quotes contain spaces and what encoding does is converting spaces to percentage 20 to make it compatible to share in a URL.<br>
Now we are going to open a new tab which is to tweak your URL.<br>
And to do this in a new tab, I can specify blank.<br>
We are going to get to use a bit more information, what they can do so I'm going to target again that more paragraph and append.<br>
Lets see if it works.<br>
I've got a typo, right I did not close off the parenthesis.<br>
And hear I see click on the cross to share them out to Twitter.<br>
Awesome, and notice that this is the URI encoding in action, so all the spaces are converted to percentage 20.<br>
Let's click on another one so if I click on another quote this handler fires, grabs the quote and turns it into a Twitter share link and goes to that link opening a new tab.<br>
Pretty cool.<br>
The click event is just one example there are many, many more.<br>
For example we can add mouse over mouse out, resize of the window, etc.<br>
And to all these user behaviors we can add an EventListener and a function to do something based on this user behavior.<br>
In the final two projects you will work a lot with the DOM and it's elements with the demo shown you should have all the basics to give that a try.<br>
In the next video we are going to look at debugging in JavaScript.
|
|
|
show
|
2:54 |
In this video we're going to look at how to debug in JavaScript.<br>
CD-ing into my language folder I got a debugging folder and a simple HTML page and it's actually the calculator you're going to build.<br>
The only problem is that it has a bug.<br>
This as well is not correct because one plus zero is one and not 10.<br>
So let's see what's going on.<br>
I can go to inspect, which will open the Chrome dev tools.<br>
We've used console a lot throughout this lesson but now I want you to go over to the sources tab.<br>
Here we can access the source code of this page and in this case, I have the JavaScript inline.<br>
Let's make this a little bit bigger and let's set a breakpoint right after the calculation.<br>
Then we're going to enter one and zero, and take the sum and now it breaks into the debugger.<br>
I opened the console below, and I can access the variables as they're set at this point in time.<br>
So this is actually the bug and to fix it you can use parse int on both variables and that works so I can apply the fix in the source take away the breakpoint refresh the page, and that now works.<br>
I do want an A, I got a NAN, not a number which is what I expect.<br>
There is a lot of options you can: step into a function call step out of the current function just do a step, for example, if this would be a for loop you can step through every loop with step can pause, resume, etc.<br>
But here, I just wanted to show the very very basics: how you can look at your code in realtime by setting a breakpoint.<br>
When you write JavaScript, I highly encourage you to become familiar with the dev tools in the browser of your choice because it will speed up your web development.<br>
Talking about bugs and potential issues.<br>
In the next video, I will show you some common JavaScript gotchas.
|
|
|
show
|
3:30 |
JavaScript gotchas.<br>
It's important to acknowledge that JavaScript was designed in 10 days.<br>
Gary Bernhardt, in his inspiring talk The Birth and Death of JavaScript, shows this in relation to the time it took to design Closure and you see it was very fast.<br>
And that led to some weird decisions in the design and here he shows some examples.<br>
Go watch this talk.<br>
It's not only highly entertaining, and inspiring but also visionary 'cause a lot of what he said five years ago is actually very relevant today.<br>
So what are some common JavaScript gotchas?<br>
Well, the most important thing are global variables.<br>
As per best programming practices the less isolated something is the less reliable.<br>
Make something global and it can change in multiple locations.<br>
We've already seen that if you use the var keyword to initialize variables those variables can easily be clobbered in outer namespaces.<br>
So you should use let and const.<br>
JavaScript has C-style block syntax but not its block scope.<br>
No information hiding.<br>
In the same vein, the flexibility of JavaScript allows you to omit semi-colons at the end of your statements.<br>
Which usually is not a problem unless you space your code in a certain way then errors again pass silently.<br>
So make sure you use semi-colons to not run that risk.<br>
And there are two equality operators.<br>
If you use double equals sign to compare number one and string one it would say that they were equal.<br>
But that might not be what you want because although they look the same they're not from the same data type.<br>
So it's recommended to use triple quotes which not only compares the values but also the types.<br>
So in that case number one and string one would not be the same.<br>
And, similarly there are two ways to say that something is null, or undefined.<br>
Where Python for example only has none and it still confuses me which one is used in which scenario.<br>
Remember, errors should never pass silently according to Python, unless explicitly silenced.<br>
There should be one, and preferably only one obvious way to do things.<br>
And namespaces are one honking great idea.<br>
And of course this is a lesson on JavaScript.<br>
It's not Python.<br>
But looking at the inner works of JavaScript, I both appreciate Python a lot for its design, but I can also see how JavaScript is dynamic and easy to get started with.<br>
It's just that you have to keep these kinds of gotchas in mind when you're programming JavaScript to rule out any unnecessary risks.<br>
And this is a very high level overview of JavaScript.<br>
And in the last video, I'm going to point you to some resources so you can keep studying JavaScript.<br>
Because again, it's used everywhere and the web is running on JavaScript.<br>
So any time you can invest learning this language is time well spent.
|
|
|
show
|
3:08 |
Further study.<br>
If you're still feeling very new, there's this link where you have a nice interactive page to learn JavaScript in 14 minutes.<br>
It's nice to go through, even if it's just a refresher.<br>
The W3Schools JS tutorial is very easy to follow and there are a lot of practical examples that you can try in a browser.<br>
As I always recommend, you learn by example that's the reason I really like t try in a browser.<br>
Examples.<br>
The Mozilla developer documentation is a great way to read through and learn more JavaScript.<br>
Then for books, I can recommend three.<br>
There's this series, You Don't Know JavaScript by Kyle Simpson.<br>
He has seven or six editions and they're pretty small each and explain the concepts very well.<br>
As JavaScript has some amazing parts but also those we discussed in our last video JavaScript: The Good Parts by Douglas Crockford is a great book to further familiarize with the good, the bad and the ugly and it's pretty small I think around 100 pages.<br>
To go more in depth, not only JavaScript but programming overall I can really recommend Eloquent JavaScript.<br>
It explains concepts very well and goes beyond the basics and teaches you how you order functions acing programming, a lot about the DOM and web programming and has a lot of exercises with hints and solutions and fully-Flash projects you can code alone.<br>
Now next you probably want to look into one or more specializations, so you've got node.js for to server-side, you've got typescript if you want to learn how to write JavaScript using static typing.<br>
Then the next logical step will be to look into one or more frameworks.<br>
You've got, of course, jQuery which has been around forever.<br>
I mean, I used it quite a lot, like eight years ago.<br>
But since then, we have Angular, React, and Vue.JS.<br>
Later in the course, you will learn about React and Vue.JS, so we've got you covered.<br>
Lastly, it's important to see if your browser supports the newer features, like arrow functions and default arguments I touched upon in this lesson.<br>
And you can go to caniuse.com and enter the feature that you want to use and you get a nice matrix of browsers and versions that support that feature.<br>
So make sure you check out that website when you implement more modern JavaScript.<br>
And this concludes the JavaScript lessons of Day 3.<br>
For tomorrow, Day 4, I've got two exciting projects lined up for you, so you can put into practice what you learned throughout this lesson.<br>
See you tomorrow.
|
|
|
show
|
4:08 |
Welcome back to the hundred days of web and day four of the JavaScript introduction.<br>
You've gone through all the videos of this lesson congratulations.<br>
And now it's time to practice as I showed at the beginning of the lesson there are two projects you can build.<br>
A simple calculator and a calorie counter.<br>
And all the materials is here in the demo folder of the 2528 JavaScript folder.<br>
So the calculator again just a simple form.<br>
It can perform calculations multiple operations.<br>
And it has a bit of error handling in the sense that if you divide by zero or you give it a different type, a string it gives infinity and none and it's colored red.<br>
By over riding the styles in the DOM.<br>
I have provided you starter templates so we have the HTML, some CSS and even the form actually and the function you have to write.<br>
And here we do an inline event handler.<br>
So when the user clicks the calculate button, do calculation fires and that's the function you're going to write.<br>
The second app is the calorie counter.<br>
And its under calories, and again open index and this should work like this.<br>
I can, there's some McDonald's foods loaded in with their calories.<br>
I can add the foods some nuggets and it's all calculated on the fly.<br>
Of course, this seems way more involved and that's why I got you some boiler plate code.<br>
So if you go to the starter template that nice auto complete that you say that's actually a vanilla JS auto complete plugin.<br>
And included all that code that's already written.<br>
Then I made function stops and some of them are filled in, and some are empty and have some commands what you need to do.<br>
And the foods are actually loaded in also.<br>
So, in scripts I actually made a Python script to scrape menu into JSON.<br>
So here's the data.<br>
So a bunch of foods from McDonald's with their quantities and calories.<br>
And I made a script that loads in that csv and just dumps it to JSON to food_json which is food.json and that gets loaded into the page.<br>
Again, also the auto complete and the script.js is where you actually going to write the code and that was again the starter template.<br>
So this links to script-template.js and if you're stuck you can actually just go to script.js and here you see the solution.<br>
So don't worry you can also just work from the solution type it over, copy it over, read it but the main thing is to work with the code.<br>
Because that's how you really learn.<br>
So again, also link to the solutions here.<br>
Also, these two projects are totally optional I designed them not too easy but maybe also not too hard but really tailored to what you've learned in this lesson.<br>
Now, if you have your own projects in JavaScript you can work on today, that's awesome and you should definitely do that.<br>
The thing is to really dedicate this day to practice as much JavaScript as you can.<br>
Because as I always say, the learning is in the practice.<br>
Finally, we encourage you to share what you've learned using #100daysofweb and include @talkpython and @PyBites in your tweets.<br>
Then we see your work and we're just very excited to see what you come up with and see how you progress your hundred days.<br>
So good luck, have fun and see you in the next lesson.
|
|
|
|
45:19 |
|
|
show
|
0:36 |
G'day Julian here again and welcome to Static Site Generators.<br>
For the next four days we are going to focus on building our very own static website and I actually mean a site that's going to exist on the internet so you can keep it iterate over it, and use it by all means.<br>
We are going to build this using Pelican which is a framework based around Python and then we're going to deploy it onto the internet for us to use and play with on the Netlify platform.<br>
So click next and let's get started.
|
|
|
show
|
2:00 |
A quick overview of what we are going to be doing over the next four days on static site generators.<br>
Firstly, we're going to be playing with Pelican which is a Python-based static site generator.<br>
Going through the next few videos, we will explain what a static site generator is and I will go through all of the detail you need to be able to install it locally and then get your site up and running.<br>
Now, what's different about these four days compared to the other chapters in the course is for the first two days I actually want you to watch all the videos.<br>
So actually go through the entire chapter of content don't stop and play.<br>
Days three and four are for playing.<br>
And the reason is, is because when I created the content, it was probably a bit too staggered and haphazard to cut you off after one day and then make you wait another day to get cracking on some more content.<br>
What made more sense, because of the nature of this chapter with static site generators was to just show you the start-to-finish.<br>
So, create your website, make changes do things with it, add more content and then deploy it.<br>
Do all of that upfront, learn how to do it and then days three and four is when you can actually do it yourself.<br>
So feel free to follow along in the first two days but really, just try and understand.<br>
Do the basics if you must.<br>
Days three and four, go nuts.<br>
So, add posts to your site, have fun with a theme go into Pelican themes, get all that stuff going.<br>
Play with the HTML, create static pages really flesh out your site, make it your own.<br>
So that's days three and four and I think that actually will work better for you because once you get sucked into this with Pelican and how easy this static site generator stuff is you're not going to want to stop, to then watch more videos.<br>
So, have a go, have a crack and enjoy the next couple of days.
|
|
|
show
|
4:52 |
I figured a good place to start would be to cover what a static site is what is a static website and what is a static website generator?<br>
We'll start off by covering what a static website is and forgive me for showing you the PyBytes website.<br>
It is a shameless plug, but I'm proud of it so you're going to have to look at it while I talk.<br>
A static website is PyBytes.<br>
That's a perfect example of what a static website is.<br>
A static website is essentially a series of web pages with fixed content.<br>
It's static content.<br>
It's content that does not change unless myself or Bob as the admins of the website go and make an intentional change.<br>
So, taking a look at PyBytes if you would have browsed to PyBytes now I strongly recommend it, it's a great website you would have the same experience browsing this website that I do.<br>
Clicking on the About page would bring up the exact same About page here.<br>
Same with clicking on Articles.<br>
You would see all of our articles here.<br>
The entire website is static.<br>
It stays the same no matter what.<br>
You can't do anything to it.<br>
I have to make a change for something to change on this website.<br>
Now you might wonder what's different compared to other websites.<br>
Well, think about your favorite news website lik, you know, news.com or news.com.au.<br>
That's a dynamic website.<br>
There is a database in the back end.<br>
There's all sorts of funky stuff going on and every time you go back to that page changes are happening.<br>
You're doing stuff to it.<br>
You can log in.<br>
You can do all sorts of crazy things on these other websites.<br>
They're not static.<br>
It's not a simple as one of these websites.<br>
That's why static websites are actually fantastic for blogs because blogs don't potentially change other than the admin or the blogger creating an article and that's why we have static website for PyBytes.<br>
Now, what is a static website generator?<br>
A static website generator is something that takes the back end code, so to speak takes some markdown content takes some schematics, if I might and converts that to the HTML that renders in your browser.<br>
I figured the best way to show you this is to show you physically.<br>
This here is the GitHub repo that houses all of the back end schematics or source files that make up PyBytes.<br>
If you look in our content folder you will see every article that we've written on this website.<br>
There are code challenges, there are Twitter digests everything is here.<br>
But notice it is the markdown format md.<br>
This is our source file.<br>
This allows us to do things like adding double hashes, like markdown format so you can get headers and manually putting things like bold and italics.<br>
Now, you can't really see it here because GitHub is interpreting that so we can edit this quickly and you can see here is more of what it actually looks like in the markdown format.<br>
So we've got the four tildes here to allow for a code block, and so on.<br>
So this is a source file.<br>
This is obviously not what it's going to show up like on the website.<br>
What happens is we use a static site generator called Pelican which is what we are actually going to use in this chapter and we use Pelican to take this source file in these md files in our instance and we use it to convert these into HTML files.<br>
So it goes through.<br>
Pelican converts these.<br>
It generates a website, which you can see here.<br>
Now, this is our output folder.<br>
It takes everything that was in that content folder converts it to HTML.<br>
It literally generates our website.<br>
And in here, taking a look let's choose one of our code challenges you can see everything is now HTML.<br>
It has converted everything from that markdown format into a nice HTML page for us.<br>
And as you can see, it's all quite static.<br>
There's nothing special about it.<br>
This is raw HTML.<br>
Very similar to, you know what you would have used back in the '90s or when you were first starting out learning HTML.<br>
And therein lies the beauty of static sites and static website generators.<br>
These sites are very simple.<br>
They're very simple.<br>
They're lightweight.<br>
They're very quick and they're easy to maintain.<br>
So this is why we're teaching you that in this chapter.<br>
Let's get cracking.
|
|
|
show
|
1:45 |
All right, let's go old school and kick off a repository in GitHub.<br>
If you haven't used GitHub, please go on and sign on.<br>
You probably would have by now.<br>
I just have to say that.<br>
But, as you can see here, this is my homepage on GitHub.<br>
This is a dummy account I've just created for this to keep it simple.<br>
Click on Create a Repository or whatever screen you're on, just and let's throw in a name.<br>
So, I'm just going to name this pretty simply 100 Days Website.<br>
Done.<br>
Nothing crazy.<br>
You come up with your repo and do the same.<br>
I'm not bothering with the description.<br>
I'm just going to make this Public, don't really care.<br>
And, you know what, don't even need a README, so.<br>
Really simple, nothing crazy.<br>
We just want a repo we can push and pull code from.<br>
So that's it.<br>
We've got everything done.<br>
Now, all we need to do is clone the repo.<br>
So, I'm taking this here.<br>
I'm going to do it by https and I'm just going to bring up my site here my folder here, I should say.<br>
I've created a folder under 100 Days a web folder we've been working in called static sites.<br>
I've got nothing in here.<br>
I'm just simply going to git clone and that url.<br>
So, let's let it clone.<br>
Obviously, there's nothing in there.<br>
We also got that warning saying You appeared to have clone an empty repository.<br>
That is fine and that's it.<br>
So for this video, all I want you to do is go on GitHub, create your repository and set it all up on the command line, clone it in and we'll start doing some installations in the next video.
|
|
|
show
|
4:45 |
Next up, we are in our folder.<br>
We now have to install Pelican which is the static site generator we are using for this chapter.<br>
To do that, the very first thing is, what?<br>
Yes, that's right, we are going to create our virtual environment.<br>
So, I'm creating one as usual called venv.<br>
So, Python -m venv venv.<br>
Once that is installed, we simply pip install pelican and pip install markdown because we are going to be using Markdown for all of our documentation here for all of our source files.<br>
Let's do that now.<br>
We should have the venv folder.<br>
So, activate your virtual environment.<br>
Remember, using Mac, that will be source venv/bin/activate but on Windows, we can just use the batch file.<br>
With the venv there, let's do pip install pelican markdown.<br>
All right, with that done we can then do a pip list, make sure we have it all there.<br>
That all looks good.<br>
Let's do a pip freeze into requirements.txt just to make sure we have all that backed up.<br>
All right.<br>
And that's all we have in our repo.<br>
Now, what we are going to do is create a skeleton project.<br>
This is pretty much installing Pelican.<br>
This is pretty much setting up our static website for Pelican, for Pelican to use it take all the source files and convert it to HTML and we're using the Pelican framework to do that.<br>
So, we'll do pelican-quickstart and this will actually take us through a bit of a guided website.<br>
So, where do you want to create your new website?<br>
Anyone who's familiar with the command line will know dot means present directory or current working directory so we'll continue leaving that as the default.<br>
We're just going to create the website here in this folder.<br>
What will be the title of the website?<br>
Look, you know what?<br>
Just use whatever you used for the repo.<br>
I'm just going to call it 100 Days of Web site.<br>
Who will be the author of the website?<br>
Throw in whatever name you want, it doesn't matter.<br>
What will be the default language?<br>
Mine is English.<br>
Do you want to specify a URL?<br>
Now, I don't have a URL prefix for this website because I haven't bought a domain so I'm just going to hit No for now.<br>
And just bear with me, we will deploy this later so we don't necessarily need that just now.<br>
Do you want to enable article pagination?<br>
Now, what that means is when you have a certain amount of articles on one page it will then create a second sort of index page so you don't have an infinite scrolling index page with every article you've ever made.<br>
It will say, okay, here are the first here are the latest five or 10 articles hit number two to move on to previous articles written.<br>
So, we're going to say yes, we do want that.<br>
How many articles a page do you want?<br>
So, the default is 10.<br>
As I said, it will display the latest 10 and everything that was made prior to that will be on a different page.<br>
So, let's just go by the default, to 10.<br>
What is your time zone?<br>
Enter in your time zone here.<br>
Mine is Australia, Sydney.<br>
Do you want to generate a tasks.py/Makefile to automate generation and publishing?<br>
For this, just say yes.<br>
Do you want to upload your website using FTP?<br>
No.<br>
SSH?<br>
No.<br>
Dropbox.<br>
No.<br>
S3.<br>
No.<br>
They're pretty thorough, aren't they?<br>
Rackspace.<br>
No.<br>
GitHub Pages.<br>
No.<br>
The reason I'm selecting no for all those is we want to control everything.<br>
Let's just get rid of all that config we don't want that there.<br>
Now, super exciting.<br>
We do an ls.<br>
Look at that.<br>
Look at that lovely stuff there for our Pelican to eat.<br>
Now, what we have here is a very basic framework.<br>
There is nothing here for us to generate.<br>
Pelican, what it does is it actually takes everything that's in our content folder and generate it into a site.<br>
There is nothing there.<br>
So, we're going to limit this to this video get your environment set up pip install Pelican and Markdown and then go through the pelican-quickstart.<br>
We'll start creating files in the next video.
|
|
|
show
|
6:48 |
Okay, it's time to create our very first post or page.<br>
Again, looking at our folder here we have our virtual environment activated and we have the Skeleton bare bones framework.<br>
Let's pop into that content folder.<br>
Remember, content folder is where all of the source files or the schematics for your site live.<br>
And once Pelican has its way with it with the content folder it then dumps all of that outputted HTML into the output folder that you also see there.<br>
So, let's hop into content.<br>
We have nothing in there.<br>
Let's create our first post.md file.<br>
We're going to go with an .md file, a Markdown file so we can use that format.<br>
Alright.<br>
Now, to get started we actually don't just start writing.<br>
What Pelican needs to be able to generate this page is it needs a series of little markers, I'll call them at the top of our file, alright and it takes these markers and that's how it generates the HTML that's how it knows what it needs to do.<br>
You'll see what I mean in just a second when you see what these markers denote.<br>
So, the first one is title.<br>
It needs a title.<br>
I'm going to just go really, really generic here.<br>
Let's get this party started.<br>
Right, so we've got our title little flag here.<br>
Next up, we need a date.<br>
Alright, this is a date that's going to show up on our articles and help place this article on our page on our website.<br>
And the format, let's go with 2019, month and day.<br>
Let's go with 31st of March and the time let's just call it 22:00 not that it's 10:00 pm or anything.<br>
Now we need a category because all of that articles can be searched by category.<br>
They are stored based on the category on our site.<br>
And this category, I'm throwing in Python.<br>
Super creative there.<br>
Now, we have tags.<br>
These are the tags that you know, I suppose would have to do with your content.<br>
What is this article going to be about?<br>
Think of these like your hashtags and your tweets and whatever.<br>
We're going to say a tag for this one is 100 days of web.<br>
It's separated by comma.<br>
We can then say it's also about Python and we're going to say it's about awesomeness because this is totally awesome.<br>
Now, slug, slug.<br>
If you haven't heard the term slug that is just a really gross way of saying URL.<br>
Because no one likes slugs.<br>
Pretty sure, no one likes slugs.<br>
And the URL of this post is going to come up as your domain.<br>
So if we're going to use the PyBites example it'd be PyBites forward slash and then this whatever you type here.<br>
I'm just going to go, again, really generic and call this first post but you could call this whatever you want.<br>
This is just going to be this page's URL.<br>
The slug, whoa, for this page.<br>
Authors.<br>
As it's just me, we're going to say the author is Julian.<br>
And finally, we're going to have a summary.<br>
So I'm going to write this is a summary of the first post written for our Pelican block.<br>
We're using this for the 100 days of web course.<br>
Done.<br>
Alright.<br>
One other thing I will throw in here but I'm going to delete it in a second is the term draft.<br>
Alright, if you have draft here, with true this essentially tells Pelican this is a draft post and it should not show up on the main website under our default slug.<br>
It will actually show up on the website as using PyBites as an example, PyBites/draft/slug.<br>
Alright, so when you're drafting a post you can put that there and then when you're done, delete it and save it and then it will show up on the normal website.<br>
Right, let's add some more content in here.<br>
Now, we can actually start writing.<br>
So, let's go with a big heading for a big day and we have double hashes there.<br>
That's Markdown format.<br>
That's a certain size of a header.<br>
This is the first paragraph of our article.<br>
If I can spell.<br>
Hoo-zah!<br>
And we want this, the reason I'm putting this all in is because when we render the website shortly we want some content there, okay?<br>
And I'm teaching you a bit of Markdown here so we can use two stars symbols to indicate a bold.<br>
So if we use two stars around a word or a term or anything that indicates it's going to be bold formatted block of text.<br>
Now, let's change the header size a slightly smaller header and we can also use, here's some more Markdown for you a single star around a block of text to indicate an, and here's a special word for you an italicized word.<br>
Get that star in with a shift.<br>
Alright.<br>
And that's it.<br>
Let's go with the end, cool story bro.<br>
And that is our first webpage.<br>
So right-click, we can cap that out just to see how it looks.<br>
We have our first post we have the slug, we have all that stuff there big heading, so on and so forth, that's it.<br>
Finish completing your first post.<br>
Go through and make it as big and lengthy as you want and in the next video we will now actually use Pelican and launch it into the browser.
|
|
|
show
|
3:48 |
So, in our content folder we should only have our firstpost.md We head back one folder make sure we're in the parent folder Venturion environments activated so we Pelican that we could use.<br>
And now, all we have to do is tell Pelican that we want to generate our website.<br>
The way we do that, is we use Pelican and we point it at the folder we we want it to actually generate.<br>
So Pelican content, and you'll see it simply takes our file it processes it and it dumps it in the Apple folder.<br>
So let's head to Apple list that out, and there we go.<br>
Straight away, we have firstpost.html Now, these here, these other files we have in here, this is all stuff that's generated by Pelican based on what we had in that first post.<br>
So, notice there's now an Office file with nothing in it at all.<br>
We have a categories file that is simply going to contain the categories that we used in our first post and that was simply Python.<br>
If we actually head into the Tag folder you can see the tags that we had.<br>
Hundred Days of Web, Awesomeness, and Python.<br>
As your blog or site grows and you use more and more tags and you use them more multiple times you will see when you start looking up by tags, all the articles that use that tag will show up.<br>
The same goes, the same goes for category.<br>
And, same thing, we have an index page that will run the website and we have archives.<br>
But most importantly, we have firstpost.html.<br>
We can go through that really quickly.<br>
I won't actually show too much because there's a lot of .html there.<br>
You can look through your own, I won't waste your time.<br>
Now, now that has been created now that we have that juicy .html file let's actually run the site.<br>
We're going to use Python's in-built web server Python http.server We're on local host, we're on Port 8000.<br>
Let's bring up the site.<br>
There is our beautiful website, 100 Days website.<br>
We have our category.<br>
Now remember, there's, that's the difference between categories and tags.<br>
We could use a hundred, we could use a thousand tags for all that post.<br>
We don't want a thousand hitters showing up.<br>
We just want our categories showing up.<br>
And, straight away, we see our first post.<br>
Let's get this party started.<br>
There is our main hitting, smaller hitter.<br>
There's that bold format from using two stars.<br>
And, there's the italic word for using single star around it.<br>
We have the details here, we have the publish date we have by who, they're our tags.<br>
This is a default theme that ships with Pelican.<br>
You could go through the Pelican website.<br>
There are lots of different themes you could have for Pelican blogs.<br>
I'll let you dig through that.<br>
They're pretty simple to install.<br>
But here's a nice, simple theme and that is our site.<br>
How easy is that?<br>
This is why static sites are very simple to use and just a lot of fun to use.<br>
We have the power to make this right.<br>
We don't have to rely on anyone else.<br>
This is just there and we did it through purely typing markdown and running Pelican.<br>
So, that's that.<br>
Let's move on.
|
|
|
show
|
5:11 |
Alrighty, now that you have your code all sorted go ahead and push that to your github repo of choice the one we set up before.<br>
I've pushed it to my 100 days web-site repo and you can see that here.<br>
Next up, I'd like you to head to netlify.com so www.netlify.com.<br>
This website is actually a platform that allows you to deploy your static sites.<br>
So right now, we've been playing with our static site locally, right, but we want it out on the internet.<br>
So while the files are hosted on github where can we get this hosted so that it actually appears on the internet with its our URL?<br>
Enter Netlify.<br>
Really simple.<br>
You'll see that in just a minute.<br>
What I'd like you to do is sign up.<br>
Go through the sign-up process.<br>
I'm simply clicking on login and logging in with my github account.<br>
Once you are logged in you will be asked to essentially connect Netlify with your github account.<br>
And what Netlify will do, is it will talk to your github repo, so that's the repo that our static site is stored in and it will take that, it will process Pelican our static site generator and it will then populate our website onto the internet.<br>
Okay.<br>
First things first, let's create a new site.<br>
So it wants to connect to which git provider so in our case we're using github, so we'll click on that.<br>
It will then ask you a series of authorization questions: do you want to authorize Netlify to talk to your github account?<br>
Say yes.<br>
Go through that.<br>
Scroll down here, it wants us to choose a repository.<br>
Now, my one only had one repository so I kind of only had one choice here.<br>
But you go through and choose whatever repository had your 100 days website in it.<br>
So you go ahead and select that.<br>
Click on that and once you have the repo selected you will then have some build settings here.<br>
Now, I am going to deploy to our branch of master but that's the only branch I have, so I had no choice.<br>
Basic build settings.<br>
Now, if you think back to when we launched our website when we used Pelican to generate our website, I should say we ran the Pelican content command.<br>
Now, we are not going to run that every time on a live setup, on a production setup.<br>
We can run it on our local setup but we don't want to have to run that on the web.<br>
This site, Netlify, this tool will actually take care of that for us, so we want to tell it what that build command is.<br>
And the build command is Pelican content.<br>
Now, content is the folder, remember that.<br>
So this is all relative to our repo.<br>
Now, if our repo started with a folder here in the parent folder, and then content was one hierarchical directory below we would have to specify that here.<br>
So you might say, folder then content, okay?<br>
But in our instance, content is actually in the parent directory so we can just write Pelican content.<br>
Now the published directory is where we are going to actually store the files once they're generated.<br>
So again, Pelican generates the static files, the md files converts them to HTML and puts them in our output folder.<br>
So we need to specify that here output.<br>
Just click on Show Advanced; there's nothing here for us.<br>
We can click on deploy site.<br>
And that will bring you to a page that looks something similar like this.<br>
You will first see a line here mine actually went really quickly but you will see a line here that says this site is deploying and if everything was done correctly, as we have you should actually see this go green and you will get this URL here.<br>
That's your actual website.<br>
And you'll see that the site was successfully published.<br>
This is literally how quickly this things works and how easy it was to deploy this onto the internet.<br>
So I've right-clicked, opened our URL into a new tab and we have here our Pelican website.<br>
Check that out!<br>
Everything we did locally has just suddenly been deployed on the internet, you can share the URL with your friends and there's your website, nice and live.<br>
So, now you can see, as we make changes to our github repo here, it will automatically be picked up and deployed by Netlify and changes pushed to this website here.<br>
And we'll do that in the next video but it's pretty awesome, so stay tuned.
|
|
|
show
|
4:30 |
We have our brilliant web page How good is that?<br>
Next, we probably want to do something special with the website.<br>
So far, we pretty much just have text, right?<br>
There's nothing else on this page.<br>
How about we add an image?<br>
To do that, we need to create a new folder.<br>
Let's take a look in our website right now.<br>
We have our content folder.<br>
Now, you would sort of assume based on the fact that all of our content goes in that content folder that we would simply just copy an image such as this pb-logo.png file.<br>
Now, that's not actually how Pelican works.<br>
Pelican requires you to have an images folder inside the content folder for any images you want to use.<br>
So let's create one.<br>
Make the images, check that it's there.<br>
Yep!<br>
And let's move our PowerBytes logo into that images folder.<br>
There we go!<br>
Now, if we want to link to that obviously if you think about folder hierarchy we are going to need to link it from the images folder /pb-logo.png.<br>
And we can do that from directly within our Markdown file.<br>
So let's throw this image into our Markdown file now.<br>
We'll head right down to the bottom where are, and let's throw it in here.<br>
Alright.<br>
Give ourselves a little bit of a header we use the same size there.<br>
Let's throw an image in here.<br>
Now, the syntax in Markdown that we need to use is we start with an exclamation mark.<br>
That indicates some sort of image, or static file.<br>
So we can go PowerBytes logo, this is our alternate text.<br>
So again, web stuff, really good practice to have alt text.<br>
Okay?<br>
Now we link to the actual file.<br>
We have to use this flag here, Static.<br>
This tells Pelican that we're about to link to static content.<br>
Therefore, it knows to look within the contents folder for that static content.<br>
And we're going images, we're telling it to point at images we then go to logo.png.<br>
And that's it.<br>
That's seriously it.<br>
There's nothing else to it.<br>
We can write quit let's just cap the file, make sure it's there.<br>
There we go.<br>
And that is it.<br>
Now, if you'll remember, what do we do to generate our site?<br>
Because obviously we have put that into our content folder but it has yet to have been generated into our output folder, has it?<br>
So, if we were to launch the site now we wouldn't see the picture.<br>
In fact, let's do that just so I can demonstrate really quick.<br>
Python -m httpserver Alright, let's bring up localhost.<br>
There is our site, and we actually don't have anything there.<br>
Right?<br>
So, let's go back here and then control + c out of that.<br>
And when that returns, it does take some time, sometimes depending on your OS.<br>
It will take a little bit of time to cancel out.<br>
Alright, with this finally, control + c'd out let's see where we are, we are in our output folder.<br>
Let's do a pelican ./content from the parent directory.<br>
And when that's completed we'll just move the mouse out of the way.<br>
We have a web page!<br>
So let's head to output.<br>
Let's do Python -m httpserver We're back to our page.<br>
And there is our wonderful PowerBytes logo hopefully you recognize that special and that's static content.<br>
Now, you can play around with that.<br>
You can get any image you want and you can throw it in there you can make your own image repository do whatever you wish but that's how you link to static content.
|
|
|
show
|
2:22 |
Now looking back at this site that we've just created with our static content remember I said that with Netlify if you push content to your GitHub repo it will automatically sync that over to your live website.<br>
While refreshing our live website here we don't have the image.<br>
But on our local host, we do.<br>
And the reason is, we haven't pushed the code, obviously.<br>
So we need to push our code to our GitHub repo.<br>
So let's get that done.<br>
We can then go back here we can simply do a git add .<br>
and git commit -m pushing the images directory and git push origin master that will push this logo file plus the images directory and all the content we generated in our output folder up to our GitHub repo.<br>
And we can then see pretty much instantly we'll be able to see Netlify do an automatic build.<br>
So we go back to our deploys.<br>
And straightaway look here, today at 9:32pm.<br>
It's still 9:32, building it's automatically building and pushing doing our latest commit.<br>
So you can see the name of the commit there pushing the images directory once it has finished building we'll be able to see that reflected on the live website.<br>
So this is one of the key things about Netlify that makes it really awesome, right?<br>
Once you have committed that code it'll automatically update your website.<br>
Now that could be a Catch-22 situation for you if you've made a mistake but you can always roll back, right?<br>
That's the beauty of GitHub in the back end.<br>
So let's wait for that to finish building.<br>
Once it's done, we'll be able to see that in the website.<br>
And with that published finally showed up there published probably took about 40 seconds to finish building.<br>
We can then go back to our website reload the page, and there is our image.<br>
So see how easy that is.<br>
If you had your own blog you could literally write it locally on your computer test it, push the code, and bang, it's live.<br>
You don't actually have to do a thing.<br>
This is the beauty of static site generators and Netlify.
|
|
|
show
|
3:48 |
By now you're probably getting antsy to continue working on your site so let's just hammer out one last thing and that is creating static pages.<br>
So, you had static content which was like your images now we have a static page.<br>
What I mean by that is this one page that will stay the same on your site every time people view it.<br>
And I don't mean one of your posts.<br>
Because that post will sort of move down the page and whatnot.<br>
What I mean by that, is if we go to our live site here we have our categories at the top.<br>
But what about something like, your About page?<br>
Your terms and conditions?<br>
Or, something like that, you know one of those pages that you never edit never change, it's not a post, but it's a dedicated page.<br>
You can do that in Pelican and it's quite easy.<br>
Similar to the way we created our images folder hidden to content, we actually create a pages folder.<br>
So, we make the pages pop into there.<br>
Nothing in there.<br>
And now we create our file.<br>
So, I'm going to create an md file called about.<br>
And this is just going to be the stock standard about page.<br>
All it's going to say, is something about me at the bare minimum.<br>
The requirement for Pelican, is that we have a title.<br>
Remember all those headers we had before?<br>
We don't need too much, let's just call it about and that's it.<br>
We'll start with, About page.<br>
And then we will say, this is a page about me.<br>
I made this site to demonstrate static site.<br>
Generators, that's it.<br>
Let's get rid of these, we don't need them.<br>
And let, ooh, I merged this site.<br>
There we go, nice and good, looks good and let's right-click that page.<br>
Let's follow the whole process here through the proper production.<br>
Okay, we'll go back one folder, back again Pelican content to generate the page now that we've created it.<br>
Okay, head into our output folder.<br>
Always a good idea to test, of course Python -m httpserver.<br>
That's running.<br>
Let's bring that up, refresh the page.<br>
And we now have an about page.<br>
So let's click on that.<br>
There's our master header.<br>
This is a page about me.<br>
I made this site to demonstrate static site generators.<br>
Looks good.<br>
Now, let's pop back into here.<br>
Now that we're out of there, let's push the content and get commit about page creation.<br>
Get push urgent master.<br>
Pushes it to github for us.<br>
And then we can quickly flick to Netlify and see this become a reality.<br>
Yup, that's done.<br>
Pop back up to Netlify.<br>
Go to deploys, straight away, look how quick that was.<br>
It was like, it was a matter of seconds, pretty much.<br>
Now, we wait for this to go to published and that's now published to roughly about a minute.<br>
And we can head over to our website, reload the page and there we go.<br>
There's our About page.<br>
The whole turnaround of making that was roughly three minutes away from when we created the page.<br>
When started this video and then we had it completed.<br>
How good is that?<br>
All right, one more thing I want to show you really quickly, we'll move on to the next video.
|
|
|
show
|
1:35 |
Now last but not least, the last thing I want to show you is our URL.<br>
Look at that, romantic bends, hopefully you've got something slightly better than that.<br>
It's actually not fantastic, is it?<br>
You probably don't want to be sharing that with people saying hey, this is my blog, or this is my website.<br>
So what I'd encourage you to do just for simplicity's sake, and do not think we are affiliated with Netlify in any way 'cause we're not, it's just for simplicity's sake.<br>
On your overview tab for your site, for your page you can see that our site is deployed.<br>
Okay?<br>
But, we haven't set up a custom domain.<br>
If you click on that you can actually bring your own domain.<br>
So you can bring a domain name that you already own or buy a new one.<br>
So when you buy the domain with them they automatically configure your DNS settings and provision a wildcard certificate for your domain.<br>
So they do a lot of the work for you.<br>
If you really want to make this a real, proper website with a proper URL, follow these steps, and that's it.<br>
I added this video in purely because I'm sure a few of you will probably wonder how you get your current domain or how you find a domain.<br>
If you've probably created a nice little website for yourself who knows how much a domain might cost?<br>
It might cost you a couple of bucks right, and you might want to show this off.<br>
So this is where you do it.<br>
Go through those steps and follow the prompts and you'll be able to set up your own domain and have a nice little website running.<br>
That's it.
|
|
|
show
|
3:19 |
And that was our chapter on static site generators specifically using Pelican and Netlify.<br>
Let's have a quick look through what we learned.<br>
Again this was a really fun chapter because it was really easy right?<br>
So to start with we had our Pelican work flow.<br>
Let's just run through that really quick nothing crazy.<br>
After installing Pelican itself we ran the Pelican quick start script and this script pretty much creates a bare bones skeleton project and that project looked like what you see below.<br>
The makefile, the pycase the content output and so on.<br>
And what we did was we learned that our content folder was where all of out source files went.<br>
So all of our markdown formatted files, static pages and everything going to that content directory.<br>
And then after we create those source files we run our Pelican content command That pretty much processes those source files and generates the site and that site is then generated in the output folder and to then see our site locally to demo it we cd'd into the output directory we ran the inbuilt Python web server and we tested our site on local host.<br>
Next we had static content.<br>
Now our static content specifically images is what we tested with the pie byte server.<br>
They go inside the content folder in the images directory.<br>
Simple as that.<br>
Then we used static pages which was to create our back page and terms and conditions and whatever else They went in the content pages directory So they didn't just go in the content directory.<br>
They had their own subdirectories inside that.<br>
And finally in our markdown file to reference this static content we have to use the word static inside those braces there and then out the path to our file which was our logo.<br>
Next we wanted to deploy our website onto Netlify and we did that by pushing all of our content on Github and then having Netlify monitor our Github repo and deploy that code live onto the internet and I was lucky enough to have a really dodgy URL.<br>
Romantic Bends don't know what that's about but let's just roll with it.<br>
And that just made the site live and they monitor our Github repo and by monitoring it what happens is every single time we created a change and pushed it up to the Github repo Netlify took that within seconds and updated the website and that was the beauty of Netlify.<br>
And that was it we ran through Pelican.<br>
We used Netlify.<br>
We used Github.<br>
Everything worked thogether and we have our own website.<br>
So hopefully you had fun with this chapter.<br>
It is one of the most satisfying things to create your own website have it live on the internet.<br>
Especially have it in such a nice flowing format where you work it locally you push the code it automatically becomes the website really cool stuff.<br>
Hope you enjoyed it.<br>
Keep calm and code in Python.
|
|
|
|
1:01:01 |
|
|
show
|
4:07 |
One of the absolute pillars of web applications are their data access and database systems.<br>
So we're going to talk about something called SQLAlchemy and in many many relational based web applications this is your programming layer to talk to your database.<br>
SQLAlchemy allows you to simply change the connection string and it will adapt itself to entirely different databases.<br>
I want to use a local file in SQLite for development maybe MySQL for testing and Postgres for production.<br>
Not really sure why you would mix those last two but if you wanted to you could with SQLAlchemy and not change your code at all.<br>
just simply change the connection string.<br>
So SQLAlchemy is one of the most well known, most popular and most powerful data access layers in Python.<br>
SQLAlchemy of course is open source you'll find it over at sqlalchemy.org.<br>
it was created by Mike Bayer.<br>
and his site is really good, it has tutorials and walkthroughs for the various ways in which you can work with SQLAlchemy.<br>
One for the Object Relational Mapper one for more direct data access, things like that.<br>
So why might you want to use SQLAlchemy?<br>
Well, there's a bunch of reasons.<br>
First of all it does provide an ORM or Object Relational Mapper, but it's not required.<br>
Sometimes you want to program in classes and model your data that way but other times you want to just do more set based operations in direct SQL.<br>
So SQLAlchemy lets you work in lower level programming data language that is not truly Raw SQL so it can still adapt to the various different types of databases.<br>
It's mature and it's very fast it's been around for over 10 years some of the really hot spots are written in C so it's not some brand new thing.<br>
It's been truly tested and is highly tuned.<br>
It's DBA approved, who wouldn't want that?<br>
What they mean is by default SQLAlchemy will generate SQL statements based on the way you interact with the classes but you can actually swap out those with hand optimized statements.<br>
So if the DBA says whoa there's no way we're going to run this all the time you can actually change how some of the SQL is generated and run.<br>
Well the ORM is not required I recommend it for about 80% 90% of the cases it makes programming much simpler more straightforward and it much better matches the way you think about data in your Python application rather than how it's normalized in the database.<br>
So it has a really really nice ORM with lots of features and this is what we're going to be focusing on in the next course.<br>
It also uses the unit of work design pattern.<br>
So that concept is, I create a unit of work I make insert, updates, deletes, etc.<br>
All those within a transaction basically then at the end I can either commit or not commit all of those changes at once.<br>
This is in opposition to the other style which is called active record where you work with every individual piece of data separately and it doesn't commit all at once.<br>
There's a lot of different databases supported so SQLite, Postgres, MySQL, Microsoft SQL Server, etc.<br>
There's lots of different database support.<br>
And finally one of the problems that we can hit with ORMs is through relationships.<br>
Maybe I have a package, and the package has releases So I do one query to a list of packages and I also want to know about the releases so every one of those package when I touch their releases relationship, it'll actually go back to the database and do another query.<br>
So if I get 20 packages back I might do 21 overall database operations separately.<br>
That's super bad for performance.<br>
So you can do eagerr loading and have SQLAlchemy do just one single operation in the database that is effectively a join or something like that that brings all that data back so if you know that you're going to work with the relationships ahead of time you can tell SQLAlchemy I'm going to be going back to get these so also load that relationship.<br>
And these are just some of the reasons you want to use SQLAlchemy.
|
|
|
show
|
1:46 |
Let's talk about the demo app that we're going to build to explore SQLAlchemy.<br>
And we'll even use this a little bit for your turn when you get to write some code.<br>
So, you're probably familiar with these scooter rental things that are popping up everywhere.<br>
Maybe you're seeing Lime scooters, or the Bird scooters.<br>
These are both really popular here in my town I could open an app and I can rent them and scoot around town.<br>
Probably no helmet in traffic, things like that.<br>
Probably not great, but there it is.<br>
I could rent these things and they're really, really popular and getting a lot of VC funding.<br>
We're going to create another scooter share start up.<br>
Now, when you create a start up obviously you have to have a reason to exist.<br>
Like you have to have your main differentiating factor.<br>
We have that.<br>
So we're the latest scooter start up we're going to call it Hover Share.<br>
And we've identified a key weakness in the existing scooter rental and sharing market.<br>
There's no seat.<br>
You can't go very far on those things without a seat that's not comfortable.<br>
So we're going to get some of these Hover 1 scooter, electric bike things and we're going to outfit them with IoT devices and GPS.<br>
We're going to make them the backbone of our new scooter sharing start up.<br>
Good news is we've already closed our angel round of investing and secured $1.7 million to buy this fleet of Hover 1 e-bike scooter things.<br>
We even have all the IoT specs solved.<br>
We've got GPS thing working, we've got the locking we've got the communication to unlock the scooter.<br>
Everything's working, but we don't have a database to really manage the user interaction with these scooters.<br>
So that's our job.<br>
During this chapter we're going to build the database that is going to be the backend the very simple backend albeit of our hover share start up.
|
|
|
show
|
1:35 |
When you choose a framework whether that's for a database or a web framework it's good to know that you're in good company.<br>
That other companies and products have already tested this and looked around and decided yep SQLAlchemy is a great choice.<br>
So let's look at some of the popular deployments.<br>
Dropbox is a user SQLAlchemy.<br>
And Dropbox is one of the most significant Python shops out there.<br>
Guido van Rossum and some of the other core developers work there and almost everything they do is in Python.<br>
So the fact that they use SQLAlchemy that's a very high vote of confidence.<br>
Uber.<br>
Uber uses SQLAlchemy.<br>
Reddit.<br>
Reddit's interesting in that they don't use the ORM.<br>
In fact, they use only the core.<br>
At least, awhile ago they were using only the core aspect of SQLAlchemy.<br>
That's pretty cool.<br>
Firefox.<br>
Mozilla, more properly is using SQLAlchemy.<br>
OpenStack makes heavy use of SQLAlchemy.<br>
FreshBooks, the accounting software based on, you guessed it, SQLAlchemy.<br>
We've got Hulu, Yelp, TriMet.<br>
That's the public transit authority for all of Portland, Oregon the trains, the buses, and things like that.<br>
So they use it as well.<br>
So here are just a couple of the companies and products that use SQLAlchemy.<br>
There's some really high pressure some of these are under.<br>
You know if it's working for them it's going to work well for you, especially Reddit.<br>
Reddit gets a crazy amount of traffic.<br>
So pretty interesting that they're all using it and we'll see why in a little bit.
|
|
|
show
|
2:10 |
Before we actually start writing code for SQLAlchemy let's get a quick 50 thousand foot view by looking at the overall architecture.<br>
So when we think of SQLAlchemy there's really three layers.<br>
First of all, it's built upon Python's DB API.<br>
So this is a standard API.<br>
Actually, it's DB API 2 these days but we don't have the version here.<br>
This is defined by PEP 249, and it defines a way that Python can talk to different types of databases using the same API.<br>
So, SQLAlchemy doesn't try to reinvent that they just build upon this.<br>
But there's two layers to SQLAlchemy.<br>
There's a SQLAlchemy Core which defines schemas and types a SQL expression language, that is a generic query language that can be transformed into a dialect that the different databases speak.<br>
There's an engine which manages things like the connection, and connection pooling and actually which dialect to use.<br>
You may not be aware, but the SQL query language that you use to talk to Microsoft SQL Server is not the same that you use to talk to Oracle it's not the same you use to talk to Postgres.<br>
They all have slight little variations that make them different, and that can make it hard to change between database engines.<br>
But, SQLAlchemy does that adaptation for us using it's core layer.<br>
So if you want to do SQL-like programming and work mainly in set operations well, here you go, you can just use the core and that's a little bit faster and a little bit closer to the metal.<br>
You'll find most people though when they're working with SQLAlchemy it will be using what's called an Object Relational Mapper.<br>
Object being classes, relational, database and going between them.<br>
So what you do, is you define classes and you define fields and properties on them and those are mapped, transformed into the database using SQLAlchemy and its mapper here.<br>
So what we're going to do, is we're going to define a bunch of classes that model our database in SQLAlchemy, and then SQLAlchemy will actually create the database, the database schema everything, and we're just going to talk to SQLAlchemy.<br>
It'll be a thing of beauty.
|
|
|
show
|
1:12 |
Let's talk about how we might model our data even what things we're storing about our scooter start-up.<br>
Here's my proposed model for this particular adventure we're on here.<br>
We're going to have four main items that we're going to store in our database.<br>
We're going to have scooters and we're going to have users.<br>
Those are the two primary things, I guess.<br>
And then we're going to have rentals which is really the user getting that scooter for a period of time and then returning it.<br>
And then we have locations where the scooters can be parked.<br>
And the users can either pick them up or drop them off.<br>
And that's it.<br>
You can see the relationships here.<br>
The user creates a rental the rental links over to the scooter.<br>
The scooter may be parked at a location.<br>
So we're going to have foreign key relationships in our database to link these things.<br>
That's the relational part of the relational database.<br>
And then the rentals could also be picked up at a particular location.<br>
Pretty simple data model.<br>
I tried to keep it not overly complex.<br>
Obviously in the real world we'd probably have 20 or 30 tables, you know, with ecommerce history and auditing and all kinds of stuff.<br>
For what we're doing, I think this is going to be complex enough to give you a real world feel of what we're building but not so complicated that you get lost in all the details.
|
|
|
show
|
3:38 |
Here we are in our GitHub repository for this chapter.<br>
Let's get our app set up.<br>
We're going to start from just a little bit of code so we stay focused on the database sides of things instead of all the user interaction stuff that I'm going to write.<br>
Let's go over here to the starter.<br>
It's empty right now.<br>
I'm going to set up a little bit of this for you and then make a snapshot so if you want to pick up from there and keep going, that'd be great.<br>
So we're going to go over to that folder and as always create a virtual environment for installing third-party packages let's stay focused on just the ones we need.<br>
Should be good.<br>
Now we're going to need a couple of utility libraries to get started, so I'm just going to put those in here.<br>
So over here we have this switch statement thing that I'm going to use and this thing for parsing numbers a little more nicely and the ability to locate our database folder, we're going to use SQLite which means we're just going to have a file living here, we're not using what you might call a proper database server.<br>
What we're doing here will exactly work on things like Postgres and MySQL and so on.<br>
It just so happens it's easier for you to pick up this project and use SQLite 'cause I don't have to give you lots of instructions on how to set up the database how to set it up so it's at the right location so it has the right permissions.<br>
You can just run it.<br>
So we're going to use SQLite 'cause it's simple but what you learn here will apply to all the databases.<br>
And finally, because we're using SQLite we added that as a requirement, so let's go ahead and install that.<br>
Okay, looks like it's all good for the foundations and then the last thing I want to do is add the actual program that we're going to write and I'll call it program just so it's clear what we're going to run and go ahead and run it to create a run configuration up here.<br>
Obviously it does nothing.<br>
But, I do want to get the structure in place.<br>
Let's talk about that really quick.<br>
So, over here, we're going to have a main method it's going to set up the database and then it's going to go through this loop over and over asking for a command and then using my little switch statement that I created.<br>
Get this in GitHub if you care.<br>
Or you obviously have it here as well.<br>
It'll say if they typed in r, run the method.<br>
Rent a scooter.<br>
If they typed in a, run the method.<br>
Find available scooters.<br>
If they hit x or nothing, exit the app, things like that.<br>
And it's just going to go along and run these various methods, none of which have any implementation other than just a little bit of printout and even a cool little misspelling there.<br>
So, we're going to run this.<br>
And I'll just show you the interaction.<br>
There's zero database stuff going on right?<br>
This is just a little user interaction here so we could say I'd like to locate my scooters.<br>
It says, here's your scooters.<br>
I'd like to see my personal history.<br>
It says here's your rental history.<br>
I could say boo it says I don't know what to do with Boo I could hit X and we're done.<br>
So this is where we're starting from.<br>
We have this structure of the sort of interactive command line interface.<br>
And then we have these methods that are going to do the database thing.<br>
Now, one thing you might notice is this is not a web app.<br>
We're talking about databases because databases are the foundation of web applications.<br>
However, I wanted to start just from the pure data access side of things.<br>
So we're going to do it in a command line interface that has nothing to do with HTML and CSS and views and forms and all of that.<br>
We're just going to do the simple command line interface here and then part of your project may be to adapt it to the web, but once you learn how to use SQLAlchemy, it doesn't matter if it's a web app or not.<br>
Right, now you just write the same code.<br>
So this lets us focus on just the data access side of things.
|
|
|
show
|
5:41 |
We have our app in place now what we want to do is create some classes that map into our database.<br>
In Python we work in classes and objects and in the database we work in relational normalized data in the tables.<br>
So, in order to do that I'm going to create a couple files in a folder here let's create a folder called data.<br>
And, in there I'm going to put another folder called models.<br>
So these are going to be all the SQLAchemy models that map to the database.<br>
Create sub-folder because there'll be other stuff we'll end up with in this data section.<br>
What's the primary thing we're going to work with?<br>
How about scooters?<br>
So let's start by defining this class and you're going to see there's one other thing we have to do to sort of set the foundation in terms of classes.<br>
So let's say import sqlalchemy as sa this is a pretty common practice.<br>
You don't have to do it, but I'll do it just to keep things a little bit shorter.<br>
We'll create a class called Scooter singular 'cause this represents a single scooter it's going to be an object we create.<br>
One scooter that can go in the database.<br>
Now there's going to be a base class we'll talk about that in a moment.<br>
Now, in order to define this class, we just put what would be columns in the database as fields here, at the class level.<br>
So, we're going to have an id, and this is going to be a SQLAlchemy column, and then you need to say the type.<br>
It's *args, **kwargs.<br>
To me that's just like "well too bad we're not going to help you learn how to use this class." I really don't like this design pattern I think it's really a cop-out.<br>
There's certainly other techniques that are more helpful you could put in here.<br>
Anyway, let's not get me on a rant you have to kind of know what goes here but honestly it's pretty simple.<br>
So we're going to have the type which is going to be an integer.<br>
Every table needs a primary key, and when it's an integer if you just want the database to figure out what the next number should be?<br>
That's pretty easy, so here we can say primary_key=True and we can say autoincrement=True.<br>
Great, so that's our id.<br>
What else do we want to know about the scooter?<br>
Almost every database record that I ever work with I often want to know "well, when was that actually inserted when was it saved?" So let's just go ahead and add that really quick.<br>
Create a date, and it's going to be SQLAlchemy column of SQLAlchemy DateTime, like that.<br>
There's going to be more stuff we add to these columns but let's do the basic pass first.<br>
Our scooter's are going to have VIN Numbers we want to be able to look them up and a VIN number a Vehicle Identification Number, seems pretty decent.<br>
This is going to be a string, so it's going to be SA column, SA string, like this.<br>
We have a model, this is like a descriptor, so it's the same thing.<br>
We want to know what the battery level of our scooter is.<br>
Our scooter is going to be an electric scooter it's going to cruise around, we need to know "is there enough charge so that we can rent it to this person?<br>
Or is it going to run out in five minutes and then they're going to be dissapointed?" So let's say "integer as a percent" %20, %23, things like that.<br>
so we're going to add some relationships here in a little bit as well, but we don't have the other pieces built.<br>
So, we'll sort of put a placeholder for that.<br>
Now finally, if I were to go and store the scooter in the database, SQLAlchemy will create the table with all of these columns here.<br>
With the right types and everything.<br>
What is it going to call that table?<br>
Well, exactly that, Capital S "Scooter".<br>
Now, it's great that the class represents one scooter but the table holds many scooters.<br>
So let's go into this, and the capitalization isn't great either.<br>
So in SQLAlchemy say "table name" __tablename__ = 'scooters' what you really want it to be called let's say "scooters", lower-case.<br>
Pycharm thinks that's misspelled, tell it it's not.<br>
Now, this is almost ready to go into the database, it's almost ready.<br>
There's one problem though, we have to put a certain base class here.<br>
So, all the things we store in the database derive from this common base class and that's actually how SQLAlchemy figures out "well what tables do I need to create?" Well, all the classes that derive from my base class that's the tables I'm going to create.<br>
This is not a static type because you might want to put some into one database some other classes in another database, things like this.<br>
So, we have to create this class to use it.<br>
So here's another file, call it sqlalchemybase.<br>
Now, it's going to be pretty simple, we're just going to put one thing in here, but I put it in a separate file so we don't end up with circular dependencies or other weirdness.<br>
So, we're going to import sqlalchemy.ext.declarative, okay?<br>
And then we're going to define a type at runtime SqlAlchemyBase, the name doesn't matter just pick something you like for a class name.<br>
We're going to say sqlalchemy.ext.declarative.declarative_base just like this, if we get out of the way.<br>
So we create this type here, and this is just as if we had typed class SqlAlchemyBase, right?<br>
But it's declared at runtime here.<br>
So now we can use this as our base class here of course we have to import it above.<br>
Now this scooter is ready, this scooter can now be modeled in the database, as long as the database matches that schema.<br>
We could do queries against it, we could do inserts updates, deletes, all those kinds of things.<br>
So this is how we model data in SQLAlchemy.
|
|
|
show
|
3:33 |
I told you this is the simple version of the scooter.<br>
What if I would like to say, run a query that says find all of the scooters that have a low battery level so we can go collect them and charge them up or something.<br>
Well, we would do a query based on this, right?<br>
How fast is that going to be?<br>
If we have lots of scooters, it's going to be madly slow.<br>
Why?<br>
Because it has no index.<br>
Indexes are super, super important for high-performance queries.<br>
Literally adding an index if you have a lot of data can make the query run a thousand times faster.<br>
And it's incredibly easy to do, so let's do that here.<br>
That was good, we're done now.<br>
Now, queries about battery level will be way, way faster.<br>
We also might want to ask questions of well, how many model three scooters edition three scooters do we have?<br>
So if we're going to ask that question put an index there and we very likely want to find by VIN number.<br>
So these are all good here.<br>
And we could even say this has to be unique because we can't have different scooters with the same VIN number.<br>
We want to add in these various constraints and indexes and so on.<br>
Kind of like we did for our primary key up here.<br>
On the way primary keys automatically have indexes.<br>
We're not quite ready to do relationships but we'll do that in a second.<br>
What I do want to do, is add the rest of the models and just quickly talk through them.<br>
So let me just drop those in here.<br>
So here we have the location.<br>
And for our location, same thing we have an integer.<br>
We have a created date.<br>
Oh, one thing, let's go back here really quick.<br>
When we insert this it would be nice if it automatically just was the time when we inserted it.<br>
Databases have this concept of a default value if you don't specify one, use a default value.<br>
Zero false true, or like daytime.now.<br>
And SQLAlchemy also has this concept.<br>
So we come over here and say the default is going to be some function that will be called the datetime function.<br>
So import that, datetime.datetime.now it's super, super easy to make a mistake here so double-check yourself.<br>
If I hit Enter, Python says, awesome.<br>
We just called that function and we're assigning the default to be well whenever this line of code was run which is when the app started.<br>
That is not what we want.<br>
We don't want to insert the scooter time as it was created when the app started.<br>
We would like to pass a function now.<br>
Not the result of calling now, but the function now which will be called any time a new record is inserted.<br>
So this, we're going to pass now, not the value of now.<br>
Right, so we have this default value and let's just look through the others.<br>
Our location has a city, street, state.<br>
And a maximum storage.<br>
Talk about relationships later.<br>
Our rental, pretty similar, has a created date but it has a start and end time for when we actually want to rent it.<br>
Has the user that rented it and the scooter that rented it.<br>
And finally for users we just have their name and email and passwords and things like that.<br>
Again we have some relationships.<br>
We'll talk about them later.<br>
In fact, let me comment out, though all the relationships before we get into that.<br>
Great, so besides relationships our four main items that we're going to model are in place.<br>
We have our scooter.<br>
We have our users.<br>
Users can create rentals.<br>
Rentals apply to scooters.<br>
Scooters are parked in locations.<br>
Perfect, and then we have our SQLAlchemyBase here that every one of these has to derive from.<br>
So that rounds out the various data models that we're going to use.
|
|
|
show
|
3:58 |
Well we've modeled our data, can we insert it?<br>
Can we do queries?<br>
Actually no, no we can't, not yet because we need to actually establish a connection to the database, as well as create the tables and the database schema that was going to support this particular model.<br>
So let's go over here and create another file here called session_factory.<br>
Why did I name it that?<br>
Well SQLAlchemy follows this concept called a Unit of Work, which means I start the Unit of Work I do a bunch of database things, inserts, updates, deletes and then I commit that session.<br>
I commit that Unit of Work back and the object that actually manages that is called a session.<br>
That's actually the class name the type name in SQLAlchemy and so we have to create this thing that establishes the connection and then creates these sessions that lets us do transactional like operations on the database.<br>
So session_factory, this is going to be the thing that creates the sessions that lets us do queries, and so on.<br>
Now there's actually going to be three parts there's going to be three things going on here.<br>
One, I'll call global_init.<br>
This is going to take a database name and it's going to use that to create the connection and the table schema, and all that.<br>
And we're going to have one that's going to say create_tables.<br>
We may not want to call that every time we call this so we'll have those separated.<br>
And then the last one is going to be create_session and let's put a little type annotation on here.<br>
This is going to be a sqlalchelmy.orm.<br>
Now we got to go over here and import when I need them both so I'll do it like this.<br>
And in the ORM, we have a Session object that's the thing that we're going to be creating.<br>
This is the thing that represents the unit of work.<br>
Now let's go up here.<br>
We're going to have a thing called an engine and we're going to have thing called a factory.<br>
Now I'm putting them in double underscore because I don't want to expose them directly.<br>
They need to call either this function or this function to sort of interact with them.<br>
So this global_init, it's job is to create a connection use that connection to create an engine use that engine to create the factory.<br>
Let's go.<br>
So our connection string for SQLite it's going to be sqlite:/// kind of like the web.<br>
And that tells SQLAlchemy how to talk to it cause talking to the different databases their query syntax is very similar but not identical.<br>
Okay, so we're going to do that and then we're going to come over here and actually use this thing from the db, the db folder.<br>
Okay, so we'll say db folder, and it will give us the full path to this directory appear plus the database name.<br>
So if we just pass the base name like hovershare.SQLite or something it will figure out the full path that we need.<br>
So the actual connection string is SQLite/// the full path name that we're going to use.<br>
And then the next thing we want to do is just create this engine, say sequelalchemy.createengine point just pass at the connection string.<br>
I'll put one more thing in here.<br>
You don't have to do this, but it can be helpful say echo=false, and that's what it is by default but if I flip this to true you'll see the SQL statements the actual database commands printed out to the console as you interact with it.<br>
So this will help you understand what SQLAlchemy is doing.<br>
But I'll put that as false cause we don't need to see it right now.<br>
Final thing, we're going to initialize the factory.<br>
The factory is going to be sqlalchemy.orm.sessionmaker let's say bind=engine.<br>
We also want there to be only one of these so if somebody calls this twice and it's already done we want to bail, so let's say this.<br>
If they've already initialized the factory then we're going to not let them do it again.<br>
Everything is already good.
|
|
|
show
|
3:28 |
The next thing we need to do in our little initialization bit.<br>
We have our connection to the database through this engine and we have the ability to create the unit to work through the factory.<br>
What we need to do is actually initialize the database to match exactly what we have in our models.<br>
Now this, actually, there's some non-obvious things that are going to happen here.<br>
So what we want to do is, we're going to go down here and we're going to go to our SQLAlchemyBase.<br>
Of course, we need to import that and it has this thing called a metadata and on there we can say create_all and pass along the engine.<br>
Okay, notice that there was no auto complete on these parts, but that's okay.<br>
This is what we've got to type, metadata.create_all.<br>
Now, we only want to do this once this part has been run.<br>
So we're going to not let them run that if they haven't yet.<br>
So we'll say, if not engine then raise exception you have not called global init.<br>
So this will be totally good.<br>
It seems.<br>
Now there's one little problem here and what is it?<br>
Well, how does SQLAlchemy know what create_all means?<br>
Create_all means, find all the classes that are derived from SQLAlchemyBase.<br>
How do we know what those are?<br>
Well, Python only knows what they are if it's already loaded that module.<br>
So, for example, over here, if nobody has loaded up scooters or rentals those tables will not be created.<br>
So we need a way to ensure that these are all loaded up.<br>
So there's a couple of options: we could, right here, you know, right, we could even do it just here, 'cause it only matters when you call this, we could say, import data.models.locations.<br>
import data.models.rentals.<br>
When you add a new one, it's pretty easy to forget, like, buried deep down in this function here that this thing is supposed to happen.<br>
So let's do a little convention here.<br>
Create one more Python file called, __all_models.<br>
Maybe with the underscore there as well.<br>
And the idea is with this __all_models that is where, whenever we add a new model we do that import, just like I typed.<br>
Import data.models.rentals, locations, scooters, users.<br>
Now PyCharm is trying to be helpful and says Guess what?<br>
You're not using this.<br>
You could delete it.<br>
if I hit Alt + Enter, it deletes it again but, no, I actually want this to happen.<br>
This is the sole purpose of this file is just to do that import.<br>
So we could go over here to tell PyCharm Stop this.<br>
I meant to do this, even though you think it's an issue.<br>
So now, we come over here, and just locally import data.__all_models that way every whenever we add a new model we just put it in all models and everything will work.<br>
There's a chance it'll work if we don't do that but there's a chance that it won't work.<br>
It depends on the order of operations and it's really frustrating and tricky when it doesn't work, so that's why I'm making a big deal of it here.<br>
I guess while we're at it, one more thing we could do: we really only need the SQLAlchemyBase down here if we call this as well, so we're going to do it like that.<br>
And finally, PyCharm is, again, warning us that we're not using this, but we are.<br>
Okay, so our create tables is all ready to go.<br>
We just have to, somewhere at the beginning of our program, called global_init, we have to call create_tables and we're off to the races.
|
|
|
show
|
2:36 |
Lets look at our main now.<br>
So heres our main method in our program and this stuff UI loop if you can call it that.<br>
It goes around and around and asks the user what they want but first thing we have to do is setup the DB.<br>
Now I've thrown in a few little to-dos to remind me what this means in the right order.<br>
So what we are going to do is we're actually going to have to initialize the connection by calling global_init.<br>
Make sure the table schema is there call it a second time SQLAlchemy will just verify that things are set up okay.<br>
And then we actually want to import some data eventually and set what's called the default user.<br>
That will basically be whoever is logged in.<br>
So lets go over here and say, session_factory and import that at the top and say global_init and what do we call it hover_share.sqlite called DB SQLite name doesn't actually matter.<br>
This line should actually have the database created right here.<br>
You'll see it appear and that's a folder but it will have no schema.<br>
It'll have, just be an empty database okay?<br>
The next thing we need to do is go to session_factory and say create_tables.<br>
Then I'm going to leave these other two things here because we are not ready for those yet.<br>
Let's run this and see what happens.<br>
Well this is already a good sign the fact that it did that without crashing that's like hurray.<br>
Now if we look over here we now have this thing popping up and it has a little database icon see that blue icon?<br>
That didn't come from the file extension that came from PyCharm looking at and going Ah-ha I understand what's in that file it is a database a SQLite database, Professional Community Edition this doesn't work for so professional we go over here to the database we can drop this here and we can open it up and look at it.<br>
Now notice it didn't really work hmm why didn't it work?<br>
Lets hit this.<br>
It says the driver is SQLite except for there are no drivers for it so you got to download them wait a moment.<br>
Now we can click test success.<br>
Go okay hit the little refresh now we have a schema.<br>
We open up our schema we have a main and look at that locations, rentals, scooters what's in here?<br>
Open it up, oh it has an id which you can see there's a primary key these yellow vertical things mean those have indexes all sorts of good stuff.<br>
And this is an integer and this is a varchar and things like that.<br>
This is the datetime so it looks like SQLAlchemy has properly created our database schema based on our classes.<br>
Yay!<br>
Put that away so that part is pretty much up and running.
|
|
|
show
|
4:24 |
Let's come back and address this ToDo I left here about relationships.<br>
We want to set up a foreign key constraint a relationship between the scooter and a location.<br>
A scooter can be out in which case it has no location or it can be parked where it has to be in a location that's specified in one of the locations over here.<br>
So we can model this in SQLAlchemy.<br>
This comes in two parts and its also sort of bidirectional.<br>
So what we want to do is say that it's possible that there's a location id which is in sa.Column integer like this.<br>
So the scooter may have an id set on it and that id will correspond over to one of the primary keys coming from our location.<br>
This would let us model that in the database but it won't actually create that true relationship.<br>
That database integrity that we want to get.<br>
So what we can do over here is we can add a few things.<br>
We can say this is an sa.ForeignKey and the foreign key we speak in terms of the database names.<br>
So over here we said the name of the database is locations and the thing we want to map to is this id.<br>
So we're going to say locations.id.<br>
And they may not always be there so we're going to say noble is true.<br>
So this is going to set up the relationship the foreign key constraint.<br>
But what it does not do is it doesn't let us navigate.<br>
When you think about the scooter or let's look at it form the Location's perspective.<br>
The location is going to have a bunch of scooters parked at it.<br>
And it would be nice to go to any given location to say dot scooters and that's a list of scooters.<br>
Well, we can actually model that over here as well and it'll say scooters equals.<br>
Notice I'm importing sqlalchemy.orm.<br>
So you can say orm.relation.<br>
I'm going to say scooter.<br>
Now it's a little confusing because when you speak in terms of these relations you say the type name.<br>
You say that name, not that name.<br>
Whereas in the foreign key constraints you say the database name.<br>
That's okay.<br>
I'm going to come out right here and say this is going to backpopulates.<br>
Location.<br>
What is this?<br>
As I told you, it's biderectional.<br>
I can go to any given location I got from the database and say show me all of the scooters, a one to many relationship.<br>
From the scooter, it may be located in a location.<br>
So, we're going to go and do the reverse of this as well.<br>
So we're going to have a location and again, like before, we're going to from sqlalchemy import orm I mean orm.relation.<br>
And this is going to go back to location.<br>
And it's this id that actually drives the database, and then this lets us navigate memory.<br>
So there's, for every scooter there's one or zero locations.<br>
For every location, there's potentially many scooters.<br>
So here's our one, sort of models our one side of the one to many.<br>
And then this part just models the many to one here.<br>
Okay, that should totally set up our database and if I run it, you might think things are going to be okay.<br>
They are not.<br>
Notice our scooter is supposed to have a location id.<br>
Does not have it here.<br>
Let's rerun our code.<br>
We can exit out again.<br>
It should have recreated this right?<br>
Hmm, why isn't that showing up?<br>
Well it turns out this create_tables thing that we did here this create_all will create new tables, it will not update or modify existing tables.<br>
We need something totally different for that something called migrations.<br>
Do that in another whole chapter later in the course.<br>
But for now, what you need to understand is it will not apply those changes till either you delete the tables or recreate it or you do this migration thing that we're going to do much later in the course.<br>
Since we have no data we're gong that delete route.<br>
Delete, rerun.<br>
Now if we do the little refresh whoohoo, location is there.<br>
And you can see, it has a little key foreign key on it.<br>
And that's supposed to map over to as you can see right here from location_id to locations.id.<br>
Perfect, our relationships are all set up.
|
|
|
show
|
6:01 |
Let's return to our program.<br>
We're making some really good progress here.<br>
In this part, we have some import data.<br>
So, for example, if I come down here and say show me all the available scooters.<br>
It just says there's none, really.<br>
And the reason it says there's none is there's nothing in the database and we haven't written the code to do the queries.<br>
Let's go and talk about inserting data and then I'll show you the little import program that'll pre-populate the database so we all have interesting data to play with and not totally empty things.<br>
And then we'll go from there.<br>
Notice there's a lot of database operations here.<br>
Like importing data, renting a scooter, and so on.<br>
And we got to do things like, get the scooter, or scooters, here.<br>
Find available scooters, and of course find available scooters has no real implementation.<br>
'Cause we haven't written that.<br>
Now, we could write all of that code here and have a thousand line file, that would be terrible.<br>
Or we could create a separate data access layer and write the functions there and if we change our mind about using SQLAlchemy we can switch to something else and probably to change this code.<br>
So I'm going to go over here, and create a new directory called services.<br>
And here I'm going to create a thing I'm going to call data_service.<br>
And the idea is we write some functions here that the rest of our program can call and in this section we do all of our data access.<br>
So again, I'm going to start from some existing code here that we already have, but it's, as you can, see empty.<br>
So what we want to do is let's focus on just this get_default_user.<br>
What's this about?<br>
Well the idea is up here, there's this user object, and we want to populate this user object with kind of your account, you're logged in account.<br>
So the first thing we're going to do is write this function.<br>
We'll just sort of make our way down the line here.<br>
So this will let us see how to insert some data into the database.<br>
So how do we create a new record to insert?<br>
How'd you do this if it was a class?<br>
If it were a class, you would type this: User, and then you would probably set some properties.<br>
Like the email is going to be test@talkpython.fm.<br>
Username, is going to be 'Test user 1'.<br>
What else we have?<br>
Create a password, we don't need to set those things.<br>
The id's auto-incrementing.<br>
So this will create them, and return them.<br>
But it won't put them in the database, right?<br>
What we need to do to put them in a database is to create one of those units of work.<br>
So back we go to our session_factory.<br>
So our session_factory is going to create these sessions.<br>
And we already have this thing defined.<br>
So we can come down here, and we could just say I would like to create a session, and the way we do it is we execute the session_factory we've got here.<br>
And then what we're going to do is we're going to return the session.<br>
Okay, great.<br>
I think this is just PyCharm being a little confused about what the factory is.<br>
It thinks it's none, it's not none.<br>
We've initialized it.<br>
I guess we could check like we did above.<br>
So it's going to create our session, and we'll return it.<br>
Now this will totally work, there's one other thing that's a little annoying.<br>
So I'm going to set this over here and actually say this is a session.<br>
We can say, session.expire_on_commit is false.<br>
So you'll see sometimes if you insert some data, and then you try to work with it some more, it'll not work.<br>
It'll say, it's expired, you have to go get it from the database again.<br>
But we're going to say just let us continue to work with it.<br>
So here's how we do this unit of work.<br>
We say, session = session_factory.create_session.<br>
Then later, we say session.commit.<br>
And here we do database stuff in between those two things.<br>
And in order to do an insert, we say session.add(user).<br>
If we had gotten them back from the database, and did an update, we don't even have to do a line like that.<br>
It's sort of tied to the session.<br>
But because it's brand new, we have to add it here.<br>
So this will work, sort of, it'll work.<br>
If we look over here, our email actually does not have unique equals true but probably should.<br>
So maybe the insert, if that were the case, would fail the second time.<br>
So actually what we want to do is to a test.<br>
We only want to insert this person if they don't exist.<br>
So that let's us do a quick, little test.<br>
Show you how to do a query, we're going to say user equals this, and we're going to go to our session, and create what's called a query.<br>
And you pass the type, we do a filter and then here we say user.email.first.<br>
We're going to use the same email address.<br>
We'll say if user return user.<br>
So we're going to try to get them from the database 'cause only the first time do they need to be inserted from the database, right?<br>
And then afterwards, we're just going to give them back right here.<br>
But the first time we'll create them save them, and then return them.<br>
So let's make sure we're making use of this.<br>
Say, user...<br>
User default user, and we can just print out, found default user with our email or something like that.<br>
We'll delete this in a second but just to see that it's working.<br>
If you go over here to our database we can go to the users, and say jump to the console.<br>
Select star from user, nobody's there.<br>
Let's go run our program.<br>
See we found our user, we re-run our query.<br>
We now have our user inserted.<br>
Alright, it looks like that is working, and that's basically the pattern for the rest of this demo app.<br>
Create a session, we can do queries like this.<br>
We can do inserts like this.<br>
And then if we did make changes, we call commit.<br>
If we don't, we could return the user.<br>
Like in this case, we created the session and then returned the user, and did not call commit in that execution path.<br>
That was pretty straight forward.<br>
Let's go write the rest of these queries.
|
|
|
show
|
4:38 |
It probably doesn't feel like we've made tons of progress.<br>
It seems like there's a lot to do.<br>
We have these other queries we have to write.<br>
But in fact, these are pretty simple 'cause they're kind of the same thing.<br>
In fact, so much so that I'm going to copy that line right there.<br>
Any time we're going to do a query, we start with a session and then we make some changes to it.<br>
So we would like to do two things when we book a scooter.<br>
One, we want to remove it from that location and then we want to create a new rental.<br>
Let's do the rental first.<br>
To do the insert, we're going to do this and we'll say session.add_rental and then session.commit.<br>
Okay, we need to set some properties here.<br>
So we'll set the scooter_id to scooter.id set the user_id, well, you guessed it, to the user.id set the rental.start_time to now and we'll set the rental.end_time to be the start_time plus one day.<br>
So the way we do that with time, so we say timedelta and the days equals one.<br>
So this is doing our rental, right?<br>
We now have this rental, but the scooter on the scooter object, it's still actually oh, we want to do start time here.<br>
So the scooter though, is still parked as far as it's concerned.<br>
Remember, if you look at the scooter it's going to have a location id that's set.<br>
So let's go and unset that.<br>
Now, it would be nice if I could just say scooter.location_id = None however, this scooter object was not retrieved from this session.<br>
It's annoying, but that's the way it is.<br>
So if you're going to make changes to the scooter you have to get it from the database again.<br>
So we'll say scooter = session.query(Scooter).filter(Scooter.id == scooter.id) So we want to go to the type, and sort of tell it do the query where the id is actually this particular value.<br>
And then, we want to make sure that we get one and if it's not in the database this is some sort of weird case that went wrong so we'll say one().<br>
And one will either give us the scooter back, or crash.<br>
Now we're going to set the location like this then we call commit.<br>
That's actually going to push that change down 'cause it came from that session, right?<br>
The other thing we want to do is let's change the battery level just so we can see the battery level change, right?<br>
They've got it, it's going to drive it presumably was charged when it was put you know, left there at the scooter location.<br>
Let's say 50 to 100, right?<br>
So the battery level is going to be somewhere between 50 and 100 on our scooter.<br>
I think booking a scooter is all done.<br>
Parking a scooter is going to be very similar.<br>
So let's go, come over here and get our scooter and we're just going to pass the id this time.<br>
And then all we have to do is say the scooter location_id is in this location, maybe set the battery level back and then say session.commit.<br>
Done, we've now parked that scooter in that location.<br>
The final two queries we have to write here are for show us the scooters that are not parked in a location or show us the scooters that are parked in a location.<br>
And these are actually almost identical.<br>
So let's come over here.<br>
We'll do this, say scooters is this.<br>
Of course, we don't want to do one let's say we want them all.<br>
And the query is going to be that the scooter location_id is None.<br>
Now, PyCharm is going to complain, and say "well you're supposed to use is None." In general that's true in Python this is the way you have to write it and you can tell PyCharm to chill a little bit.<br>
It's still going to complain some, that's the way it goes.<br>
Okay, so we're going to create a session get our scooters back, make sure we iterate over them so we can close our session and get that done, and so on.<br>
So where the scooters have no location those are the ones that are out for rental.<br>
Where they do have a location where the location is not None these are the ones that are parked.<br>
Look at this, these are all the queries we have to write for this entire section.<br>
We have our data access layer totally done we just need to use it in our app and also insert some data so we can actually test this out.
|
|
|
show
|
2:04 |
So, we think we have our data access layer working but we have no data.<br>
We can't really test it.<br>
So, let's go and add one more file.<br>
And this one I'm going to drop in and just talk you through because it's super tedious to write.<br>
So, what this is going to do is it's going to import data only if those particular tables are empty.<br>
So, it's going to import only the user's table if there's no users, or the scooters if there's no scooters.<br>
So, let's just look at the scooter one.<br>
So, just like before, we create a session and it does this check, this count to see if there are any scooters available.<br>
If they are, it must have pre-populated it.<br>
We don't need to worry about it.<br>
Otherwise, it's going to have some models some random VIN values it can use and get all the locations so that it can then use those to populate with.<br>
Then we're going to go and add 20 scooters here, 21 scooters.<br>
And it just randomly fills out the values randomly generates a VIN number, randomly picks a location and adds it and then commit to all those.<br>
Same for all the others.<br>
Right here you can see it's going to get the default user as well and create a second user so we have more than one.<br>
I'm going to just delete this one more time so we start over.<br>
Now let's go to our program.<br>
And notice this part was still missing.<br>
So, we'll say import data import if empty, and we delete this.<br>
Okay, so everything should be up and running.<br>
Let's try to run this and see if we now have data.<br>
It didn't crash, so that's quite exciting.<br>
So, here you can see we have our scooters.<br>
They all got created with their IDs and their VIN numbers and their versions, and their various battery levels.<br>
Some of them are checked out for rental because you can see their locations are null.<br>
These, the ones that have locations, they are checked in.<br>
Their batteries are charged up and they're waiting to be rented.<br>
Looks like that's working.<br>
And it turns out the other ones are all good as well.<br>
So the final thing to do before our app is entirely done is just implement these little functions.<br>
That might sound hard, but it actually is pretty easy because we already wrote the data access stuff.<br>
We just have to do the reporting.
|
|
|
show
|
6:32 |
Let's implement the rest of these functions here and we'll be done with this program.<br>
First thing we have to do is rent a scooter.<br>
Now, if we go over here where this ToDo was we'll have our data_service, and it has book_scooter.<br>
All we have to do is provide it the scooter, the user, and when.<br>
So, let's say we want to book this scooter we're going to list out all the scooters here that's what this does.<br>
And then, we'll let them randomly pick just a number and they'll say, I want scooter four.<br>
So we're going to book whichever one they pick here and that's going to be this global default user that we set up.<br>
Last thing is just the time.<br>
Let's say we want to book it right now.<br>
Now, PyCharm is not being very cool about what type it is.<br>
We can go over here and say this is a user, which we have to import.<br>
PyCharm won't get over itself.<br>
Okay, so we booked the scooter, right?<br>
That's pretty good, but we won't really know whether that worked until we can say show us the available scooters and see that it's no longer in that list.<br>
So remember, available ones are parked at a location and then, it's to just go over here to the data_service say, give us the parked scooters.<br>
I already wrote that.<br>
The other thing to do is say for s in parked_scooters we want to pronounce something and we want to give it a number so that people can pick.<br>
So we'll use this enumerate operation here say enumerate, that will say also that start equals one so it goes one, two, three; not zero, one, two.<br>
And for that, we're going to print out I'll just drop a little thing here for you.<br>
I'm going to print the number and the location, street, and city the id of the scooter, the model its vin number, and its battery level.<br>
So that will let us print those out.<br>
Let's go ahead and run this.<br>
We should be able to get some sort of output now.<br>
If I should say, show me my available scooters boom, look at that, it's working.<br>
How cool is that?<br>
This one's over on 700 Terwilliger Boulevard in Portland.<br>
It's all charged up 'cause it's parked here's its vin number, things like that.<br>
It's a Hover-1, Third Edition not the sport, which is nicer.<br>
But, okay, so that worked pretty well.<br>
We should be able to rent one.<br>
Let's go here and run this one more time and say, show me my history.<br>
We have no rental history because we haven't rented anything.<br>
Let's go try to rent one.<br>
I want to rent number two.<br>
Now, how about number three so that would be this vin number right there I'll go ahead and copy that.<br>
Okay, that was weird, let's see our history.<br>
We haven't implemented our history so that's not going to show a whole lot, is it?<br>
So the next thing to do, let's go and implement our rental history.<br>
This one is really interesting it uses our relationship.<br>
So we have our user, right this is our global logged-in user, if you will.<br>
We'll say, for r in rentals, I guess r in user., remember, we have that relationship.<br>
Oh, comment it out, that's why it's not working.<br>
So we are also going to have a rental relationship over there.<br>
Any more commented out, yes, I'll get back to this.<br>
So we can come over and say, now that we're finished user.rentals, that's going to be the rental we got.<br>
And then, on the rental we can actually go to the scooter and print that out.<br>
And then, here, we're going to go and just show the start time for that rental and then the scooter model that we have rented.<br>
I believe that import stuff actually already added some history for us.<br>
So here, if we say, show out history, yeah, perfect we rented, there were four that we rented before that's part of the import data and we added a fifth one.<br>
So this is the one that we added today when we rented.<br>
Let's rent one more.<br>
I want to get number nine.<br>
Now, let's view our history.<br>
I made such a silly mistake.<br>
So down here, when I was trying to see the user let's say, change this so that we don't get complaints notice we were using that user to just traverse their relationship.<br>
Well, see SQLAlchemy tries to be smart and say you probably don't want to hit the database over and over and over.<br>
So once you've done that, like load that list and just keep it in memory.<br>
So this rental wasn't refreshing.<br>
So what we need to do is go back to the database do a query to reset that user each time.<br>
So, everything's working fine except for that little bit of reporting.<br>
So now, we come over and see our history.<br>
We have one, two, three, four, five and we could rent another one.<br>
Let's rent this Touring, First Edition here it's going to be 11.<br>
Now, if we look at our history, you can see we have one, two, three, four, five, six and the Touring, First Edition right at the top.<br>
So we have our history working we have our rent working we have our available scooters.<br>
These are all the ones that are available for rental under Being Parked, and let's say, locate ours.<br>
I don't think we've written this yet.<br>
No, let's go write that and it'll be the last thing to write.<br>
So we say, data_service.rented_scooters data_service.parked_scooters and then, we just want to show a kind of a loop like we did before.<br>
So we'll say, how many are rented how many are out with our client and let's do a little print like id and the model and the battery level.<br>
Okay, these should all be below 100, probably.<br>
Then, similarly, for our parked scooters we want to go out and say the parked ones are parked in these locations navigating that relationship and then, similar information.<br>
Let's run this, and it's going to be a locator scooter.<br>
This would be a function that somebody ran who maybe owned or operated the hover share business.<br>
So look at this, we have 11 remember, we have 21 total.<br>
11 are out with clients these have been where they are rented from and their battery levels and so on.<br>
And these are the parked ones parked at their various locations.<br>
Perfect, right?<br>
So now, we have our entire app written.<br>
We've inserted data, we defined our schema we've set up the relationships we imported some starter data for you and everything is up and running and I think it's working really, really well.<br>
I hope that was fun to build.<br>
I think it's a pretty realistic example.<br>
It's a little bit complicated but hopefully, not so complicated that you lose sight of what we're really trying to do and what the lessons are.<br>
I'm going to give you something fairly realistic.<br>
I think this encapsulates that pretty well.
|
|
|
show
|
0:22 |
One quick thing to round out this chapter.<br>
Want to tell you I interviewed Mike Bayer.<br>
Mike Bayer is the creator and maintainer of SQLAlchemy a he's been working on it for over 10 years.<br>
So if you want to hear Mike Bayer talk about where SQLAlchemy came from things like why he's using Unit of Work pattern and all these things well, check it out talkpython.fm/5 and get the full backstory.
|
|
|
show
|
3:16 |
It's time again for you to write some code so here we are in the SQLAlchemy section of our GitHub repo and we have our demo code that we created during the course and we have your turn and this is a set of steps for you to follow, of course so if we come over here, notice there's no starter code.<br>
You're going to just start from scratch here and the first two days, just watch the videos.<br>
If you got to this video by watching them in order first two days are done.<br>
You've finished that part.<br>
Congratulations, and then day three and four of this section is where you write some code.<br>
One thing we could have done is said we're going to model a blog and you're going to have posts, and categories, and tags and et cetera, and that may or may not be interesting.<br>
There's so many things like that, right?<br>
So, we wanted to give you a little more flexibility and what I've done here is I've picked 18 database project ideas so come over here to this website, scroll down you can see it here do you want to create a inventory management database student school record system, online retail college database, hospital, library, whatever and each one, it talks a little bit about the details of how you're going to do that and what you need to keep so your goal will be to go through here and pick one of these 18 or if you just get inspired and there's something derivative of that then pick that other one.<br>
What you're going to do on day three is to pick one of those projects come up with the SQLAlchemy classes to model it set up the database connection and put the unit of work pieces in place like the session factory and so on so if you need help remembering how to do that you can come over here and pull up the demo code so for example, under data we have our session factory.<br>
This shows you how to connect to the database using SQLite, for example, and go over to the models open that up, see how you create a class, right things like this.<br>
Your job is to put the basic data model in place in Python and SQLAlchemy after you pick one of these following the ideas that go there.<br>
You don't have to do anything with it.<br>
Just get it all in place.<br>
That's what you do on day four so speaking of day four, now that you have this connection these database models and so on your job is going to be either to ask the user for some data so they can type it in and you can query it or go out, search the Internet for data that seems like worthwhile that you could import and then write a little script to import it.<br>
Either way, your job is to insert some data so you have data in your database and then ask a few interesting questions.<br>
These are not wide open like you say there are three things like in our scooter example you could ask where are the available scooters?<br>
Which ones are rented?<br>
Which ones are available for renting?<br>
And what's my history?<br>
Like, a couple of questions like that.<br>
So, come up with a couple of questions you might ask about the data and then write the queries to answer them, and that's it.<br>
Day three, you create the database model.<br>
Day four, you put some data in there and you use it.<br>
After that, hopefully you'll find SQLAlchemy really approachable and it takes a little bit of practice.<br>
There's a lot of moving parts.<br>
Once you get those parts, it's kind of like driving.<br>
Much of it fades to the background and it's a really sweet system for building data-driven relational database-based applications in Python.
|
|
|
|
1:08:50 |
|
|
show
|
1:34 |
Welcome to your next four days.<br>
I hope you're super excited to learn about the Pyramid Web Framework.<br>
Pyramid is one of the top three big web frameworks in Python.<br>
We have Django, we have Flask and we have Pyramid.<br>
Now, they have a cool little slogan here The Start Small, Finish Big and Stay Finished Framework By Artisans, for Artisans.<br>
I really like the philosophy of Pyramid and the way they maintain the framework.<br>
One of their core ideas is that you can get started really easy, but there's actually a lot of features to grab onto and start using as your project grows.<br>
It's worth mentioning, at the time of this recording the website you're taking this course through Talk Python Training, or training.talkpython.fm that site is built in Pyramid.<br>
talkpython.fm itself, another site, is built in Pyramid the other podcasts I run, Pythonbytes.fm built in Pyramid, and they have been for about four years at the moment.<br>
And they have been bulletproof super, super high performance better performance than Flask better performance than Django and really, really reliable.<br>
On this site we get easily, ten millisecond response times from data driven pages that are pretty data intensive, actually.<br>
So, really great, highly scalable framework that's worked great for us.<br>
There were times during some promotions we had thousands of users on the site and we were serving them up on a $10 server and that $10 server was running at maybe 10% CPU.<br>
I mean, this framework is really, really awesome it really will go far for you and I hope you're excited to learn it I'm excited to share it with you.
|
|
|
show
|
1:57 |
Before we even get into the core ideas and features of Pyramid, let's talk for a moment about the application we're going to build.<br>
We're going to build the Bill Tracker Pro demo application.<br>
So of course, this is just a made up thing, but you know I think mint.com or one of these personal finance tracker ideas, and this is going to be Softwares as a Service meaning users can create an account here and then they can add their bills pay their bills, things like that.<br>
Turns out, this site is going to be pretty simple at the moment, we're not going to have too many features we'll have a handful of pages, we'll have this home page we'll have the ability to add a payment do some form input around that.<br>
Things like this.<br>
It's going to have a database and be data driven with SQLAlchemy, and you could also see that it has this nice design, so this app is going to be built from scratch.<br>
We're going to start from the very beginning.<br>
However, that's true for the behavior that's not true, necessarily, for all of the exact CSS maybe even some of the HTML, paste in a segment like this little top piece.<br>
I'll explain it and show you what's happening but I would rather do a little copy and paste around the CSS, so you have a truly nice looking website that you can take and run with, or use it as an example rather than have something that looks like it's straight out of 1994.<br>
So this is the app that we're going to build throughout this course.<br>
The building of this app is going to be pretty involved, honestly.<br>
The reason is, we're going to build out a proper web application, not just a toy so there's going to be a couple things we have to do that are maybe going to make this demo go a little bit longer, this section go a little bit longer than you might otherwise expect.<br>
But we're going to use it when we talk about migrations and we're going to use it when we talk about deploying to Linux and the general overall deployment story of Python web applications.<br>
So we're going to invest a little extra time in this chapter so that we have a great project for the remaining two segments that you're working with me on.
|
|
|
show
|
2:28 |
When I think of Python web frameworks I think of them on the spectrum.<br>
On one end, we have what are often referred to as micro frameworks.<br>
The poster boy for micro frameworks is probably Flask.<br>
But there are actually ones that are even more simple and, you know, less comes in the box.<br>
Something, you know, something like Bottle.<br>
And then we have for lack of a better term building block frameworks.<br>
You take these big pieces of your application and you click them together.<br>
You want an admin section?<br>
You choose the admin thing and you drop it in and now you have an admin section.<br>
You want, you know, some other forum?<br>
Okay, drop in the forum section and now you've got it.<br>
Right, so there are very different philosophies around building frameworks.<br>
The micro frameworks are better suited for people who carefully want to pick various libraries and packages that they're using.<br>
You want to decide between SQLAlchemy and MongoDB or MongoEngine or ODM for talking to MongoDB.<br>
Or something else, right?<br>
You want to really carefully choose that?<br>
Well something like a micro framework will let you pick that, 'cause it has none provided and has no guidance on one way or the other.<br>
On the other hand, building block frameworks like say Django, come with their own ORM.<br>
It's kind of fighting against the system if you're not going to use the stuff that it comes with.<br>
So where you like to land on this spectrum is really how much do you want to pick each individual thing separately and bring it to your project or do you want to just take what's provided from the building block frameworks?<br>
Here's my assessment where these frameworks live.<br>
There's not really a science here, it's just a gut feel but you know, I don't know what the science around it would be so here we go.<br>
Out on this building block end I definitely have Django in mind.<br>
Probably not the only one out there like this but it certainly is the most popular one of this category.<br>
So like I said, you could just flip a switch and now you have an admin data table editing section.<br>
That just comes with Django.<br>
The micro frameworks don't have those kind of things.<br>
In the micro framework land, we have Bottle.<br>
We have Flask.<br>
Those are very very simple.<br>
And Pyramid, it lives a little bit in this Goldilocks range, I guess.<br>
It's not quite as simple or unopinionated as Flask or Bottle.<br>
But it's definitely closer to say Flask than it is to Django.<br>
Most of the stuff, you bring.<br>
Most of the libraries and capabilities you bring to the framework and you start using it.<br>
Here's where Pyramid generally fits in the spectrum of frameworks, according to Michael and hopefully that will give you a little bit of a feeling on which side of the spectrum that you live on which will help you understand maybe which framework you like best.
|
|
|
show
|
2:57 |
Let's talk briefly about Pyramid's principals.<br>
The core idea is that the developers are using to guide what should be in there what shouldn't, and what is important to the framework.<br>
One of the principals I really love about Pyramid is this pay only for what you eat approach.<br>
The idea is that you can get results from using Pyramid even if you have a partial understanding of the framework.<br>
You don't need to use its role based security.<br>
Then you don't even need to think about you'll never see it it doesn't matter but it's there if you want to add it in.<br>
If you want to work with sessions there's something you could add in for sessions but you don't care or need to know about that if you're not using it.<br>
So it has this really simple pay only for what you eat approach.<br>
It's also in the micro framework world which is another way of saying it's sort of a minimalist framework.<br>
It solves the fundamental problems of web application, mapping your URLs to code templating, security, and serving static asssets.<br>
Not a whole lot more than that but it does those really well.<br>
The core developers on the Pyramid team definitely take documentation seriously and their goal is to have no aspect of Pyramid remained undocumented.<br>
It's not too hard because there's not too many pieces but they also drive a little bit of the features and changes that they accept or don't accept because well maybe adding some minor change to the framework is not big it might have a big impact on the demo's documentation and so you could file a thing about all these things.<br>
They definitely try to keep these very much in sync.<br>
I touched on this to the opening but Pyramid is a fast Python web framework.<br>
It serves up things like templates and simple response generation say Json API.<br>
Things like that really really quickly.<br>
To the extent that I've tested it which is not massively, but somewhat you know look at the benchmarks and whatnot faster that Django, faster than Flask.<br>
So, that's pretty good right there.<br>
And, I also talked about serving thousands of current users on 10 dollars of hardware prior, we've done it on 5, easily.<br>
So these things are great.<br>
And although hardware is cheap you can scale out autoscale on the cloud.<br>
It's still overhead to maintain many servers, and sooner than you really have to.<br>
So the fact that this is fast and quick really great.<br>
Pyramid is reliable.<br>
Like I said, I've been using it for 4 years and it has been absolutely bullet proof.<br>
They have a 100% statement coverage for their unit tests.<br>
Their test coverage suite so I've never had Pyramid break on me.<br>
From upgrading from version to version Not directly, maybe some of the dependencies that I've sucked in but not Pyramid itself.<br>
So very reliable framework and they have the courage to ensure it stays that way.<br>
And finally, it's open source.<br>
You know, what would you expect, right.<br>
What would you expect in a Python space of course it's open source.<br>
But, it has a permissive license and it is open source so you can just grab it and run with it.<br>
Right here at github.com/pylons/pyramid Those are the principals.<br>
I bet they resinate with you.<br>
I know they resinate with me, and it makes for a really nice framework.
|
|
|
show
|
0:24 |
As you're going through this chapter if you'd like to hear a little more about the history, learn a little more about the creator of the framework, things like that way, way back on Episode 3 of Talk Python To Me I got the chance to interview Chris McDonough who is the creator of the Pyramid Web Framework.<br>
So if you want to hear the history and a little bit from the guy who actually created it check out talkpython.fm/3 and have a listen.
|
|
|
show
|
2:16 |
Let's talk about how you get started with a Pyramid project, creating a new one from scratch.<br>
Now this is a little bit more involved than Flask because Flask just says create a Python file but it gives you no help.<br>
You'll see that the way we start here is going to push us way farther down the line in terms of structure.<br>
We'll have static folder and places for our CSS places for our templates and so on.<br>
So we're going to get started by using this package called Cookiecutter.<br>
It'll let you install and create arbitrary templates for new projects.<br>
Some of these are Python, like there's some for Flask and Django and of course Pyramid but there's also stuff for even weird things like Atari.<br>
It just generates a bunch of files in a well-known structure by asking you a couple of questions.<br>
We're going to use Cookiecutter to start way farther down the path with the right structure for our project.<br>
Then once we have Cookiecutter installed and set up in our path, if it's not we're going to use Cookiecutter to create the starter site.<br>
There's about four or five different Cookiecutter templates that we can use, and I'll talk about those.<br>
We can use any of them to create our starter site depending on what we want to start from.<br>
Then we're going to create a virtual environment around this project.<br>
This is good advice for any of the web frameworks.<br>
They all have dependencies and things like that and you're way better off having a single dedicated Python environment for that web application so we'll do that.<br>
Pyramid is a little special in that it wants you to treat the website as a Python package.<br>
You don't have to know much about Python packaging but you do have to run a separate command basically to tell the Python runtime.<br>
CPython, hey when you're looking to run this website it lives right here.<br>
So we're going to run a certain command to do that.<br>
And then it's time to just start working on our site.<br>
The first four steps, we do that to get started then we serve it up figure out what features we want to add, test them and then serve it up again, see if that worked add more features, and we just keep evolving it.<br>
So this is the general workflow of working with Pyramid from the command line from a tool that doesn't have native Pyramid support.<br>
If you're talking about PyCharm well, that's like click a button and answer a question or two and you're off to the races.<br>
But I want to make sure we go through the command line version first so that you see everything that's happening just in case something goes wrong you will know kind of of what you need to do.<br>
And then of course if you just prefer to click the button in PyCharm, go for it.
|
|
|
show
|
6:31 |
Now as I said before, we can either use the cli or command line terminal, or we can use PyCharm.<br>
I'll take you through getting our site set up in the command line interface first and then we'll come back and we'll see it again in PyCharm because like I said, I really want you to see the steps and understand what's happening here.<br>
So let's go over to our demo folder here and see, nothing here yet, but there's about to be so the idea is we're going to go to this folder here and we're going to use Cookiecutter.<br>
Well, let's figure out what the Cookiecutter template is that we're going to need.<br>
If we come over here, I've already pulled up the docs Cookiecutter.readthedocs.io, and you can see here it is, better project templates.<br>
And there's a section called Pantry Full of Cookiecutters.<br>
And there are, if you look at the scroll bar here lots of different types of projects you could create there's C#, there's ELM, there's Kotlin but the majority is in Python, and there's a bunch around Pyramid, so we could start with the Cookiecutter SQLAlchemy version that uses Jinja2, and URL Dispatch.<br>
The one I like is the one that I've already visited here is the Pyramid Cookiecutter starter that's the one we're going to use we also could use ZODB, or substance or there's even one, look at this from the Talk Python course for the Python for entrepreneurs course, we built up we spent like 20 hours building this really elaborate application there on Pyramid and then this is the Cookiecutter that will generate you basically the end product, so this one takes you way far down the line but we're not going to start there we're going to start with the starter so you learn the framework.<br>
So all we got to do to use Cookiecutter is grab the GitHub template, or GitHub URL for the template and notice here, if there's a Cookiecutter.JSON in the root chances are this is a Cookiecutter project.<br>
So, now we've got to make sure that we have Cookiecutter so we'll say pip install --user cookiecutter you might also want to throw in a --upgrade just in case.<br>
Looks like I already have it, okay.<br>
The other thing is, you want to make sure that Cookiecutter is in the path.<br>
If you're on a POSIX system, Linux, MacOS, whatever you can say where cookiecutter, on Windows it's which cookiecutter, but notice, 'cause I did the --user it's in my library, Python, that version now I can type, I get to it, I find it because of this right, sometimes this just works out sometimes you got to modify your path so if you look at my path, you can see that that folder is in there, so all the stuff I pip install --user, it always finds.<br>
So you might have to adjust your path either on Windows or on Mac or Linux so that you can actually get to Cookiecutter when you install it.<br>
So we've got Cookiecutter installed we got it in our path, now we just want to create our project, and we'll say Cookiecutter and we're going to paste the entire URL to our template.<br>
So cookiecutter https://github.com/Pylons/pyramid-cookiecutter-starter Let's hit it with this one.<br>
Now this is asking what is your project name.<br>
Now remember I called this Bill Tracker Pro Demo Edition or something to that effect, and it says alright, well we're going to guess that the package name the code name, the name in code, is going to be bill_tracker_pro, we can just say bill tracker if we want to keep it simple, just to show you that it can be different.<br>
Now I strongly recommend that you use Chameleon templates.<br>
Jinja2 are more popular, I'll tell you why I prefer Chameleon later, but I think they're just way more HTTP friendly way less symbol noise, things like that so you can pick whichever one you want but if you want to follow along exactly Chameleon is what you should pick here.<br>
And it says we can have a back end, or no back end for now we're just going to go with none we'll do that more manually, and boom, look at that.<br>
It says we've created this directory and sure enough it has, it's created this directory.<br>
Here's the stuff to manage the project the package of our site, and here's the actual code like the views and templates and whatnot.<br>
Okay, and all of that was based on the answers we gave to Cookiecutter here.<br>
So the first thing we want to do is be able to run it, it says alright well you need to create a virtual environment and I have a better virtual environment command which is this thing here, because it will create the environment activate it and make sure we have the latest pip so we'll just run that, actually, careful careful we're going to be inside the bill tracker here same directory as the setup.<br>
Then we want to register this package so we can run setup.py, so say Python setup.py, make sure your virtual environment is activated remember that's what my little command did here in addition to just creating it we want to pass it the develop command.<br>
What that means is, instead of copying all of this stuff somewhere else which means we'll have to reinstall it every time we want to see a change it's just going to do a symlink over to this folder and say look right here, so as we edit the code live it's just going to constantly change as far as Python's concerned.<br>
So it's going to do that registration and install all the dependencies.<br>
We now have this egg info, that's a good sign that something worked here, so let's just try to run it, we'll say pserve, which got installed when we ran the setup, right, that installed the dependencies which included Pyramid which gives us pserve, and you can see pserve is now there, and we want to send it the development one, look at that.<br>
Let's pull that up and see what we got.<br>
Ta-da, we have a Pyramid starter project!<br>
Welcome to Bill Tracker Pro, a Pyramid application generated by Cookiecutter.<br>
Right, that's how we start our application and get rolling from the command line.<br>
If we now want to go further and just edit this let's say in PyCharm, we just take the folder that contains the setup.py as well and we drop it onto PyCharm here and notice PyCharm's already detected it's a Pyramid web app, and we'll be able to run it, if we look in the terminal you'll see that it's using the right Python, because of the convention of the name of the virtual environment there, and so on.<br>
The one thing that is a little bit off is when you create it this way, PyCharm doesn't necessarily know that that should be source root, it should also be a resource root, and that should be a template.<br>
Here we go, but, if I push the button, will it work?<br>
You bet it does, and I'll click there boom, it's running once again.<br>
Alright, so, that's our project from the command line next I'll show you how to do this in PyCharm.<br>
Spoiler alert, there's way fewer steps.
|
|
|
show
|
2:45 |
You've seen how to create a project using a command line.<br>
Now, I personally prefer that way.<br>
I like a lot of control over my projects, and so on.<br>
But when I was new to Python, I very much appreciated PyCharm's help creating these projects.<br>
So you may like that much better.<br>
So if you're using PyCharm, let's just go really quickly through how to get started with Pyramid, there.<br>
So this is actually going to be quite easy, right?<br>
So click on create new project and we get a choice, we can go down and find Pyramid.<br>
And it says we're going to create a new virtual environment and let's put this on the desktop/bill-pro let's just call it bill-pro.<br>
So it's going to create a new virtual environment for us right there, and it could even could have it use Pipenv or Conda if you rather we'll just let it do it this way.<br>
So that's going to be based on 3.7 that's what we want.<br>
So this is the go to the command line create the virtual environment.<br>
And then the cookiecutter part is down here so what scaffold do you want to use you don't get all of them here, you just get these three.<br>
We'll go starter, remember it asks us about whether we want to use Chameleon it also asks us what data later we wanted to use.<br>
It's not going to ask us that.<br>
And in templates, this is fine.<br>
We're all ready to go, we press the button we wait a moment I said it ran the setup, it actually doesn't, sorry.<br>
But it ran, at least did the install for the base requirements of Pyramid.<br>
Now, remember we ran Python setup.py develop where we could just click this and will take care of that for us.<br>
That'll also add the missing requirements above.<br>
It think that's about it everything's ready to go, let's check the terminal see our virtual environment is there, and press run.<br>
Boom, should be basically the same except for the word cookiecutter probably won't appear here.<br>
Right, welcome to this bill-pro app generated by PyCharm.<br>
Right, see we don't have quite as much control but honestly, that doesn't really matter that much we can go back and just edit HTML and so on, here.<br>
So we open this up again, it should look exactly the same except for the virtual environment is ignored templates are selected, and things like that.<br>
You still will be better off if you go and mark this as a resource root and a source root.<br>
You'll get auto-complete for like things in the static folder stuff like that in your templates.<br>
There you have it, that's how we get started with Pyramid and we've got some structure, but not terribly lots of structure to get started with.<br>
We've got views, tests we've got our templates, couple of those.<br>
This template is based on this sort of master template that lets us change overall look and feel of the site and then we've got our static folder.<br>
We'll add more structure as we go now we're ready to start building out our bill tracker pro demo app using Pyramid.
|
|
|
show
|
4:31 |
We'll begin our extended demo of building the Bill Tracker Pro Demo Edition by just looking at the overall structure of what a Pyramid web application looks like.<br>
So, recall we ran the cookiecutter template tool to create this project, and we named it Bill Tracker and things like that.<br>
Now, let's just look through what was created before we start changing it.<br>
Over here, you can see that we've got the main project.<br>
This is the overall source code for what we're building.<br>
And in this section we have a bunch of stuff to do with just managing Python Packages.<br>
Recall, Pyramid treats its website like a Python Package.<br>
So, here, for example, you can see the requirements that we're going to have, the name of our package and so on.<br>
You don't really have to change this.<br>
You're not going to publish it to PyPI, things like that.<br>
But it is necessary that you run this so that it actually scaffolds up and gets your website ready to go.<br>
The one thing you probably do need to mess with here is setting dependencies.<br>
So for example, later we're going to use SQLAlchemy.<br>
We need to come back and put SQLAlchemy here.<br>
You can either use a requirements.txt file or put it in the setup or some combination thereof.<br>
On my sites, I actually have requirements.txt files that are much more involved.<br>
You can use tools like Pyup.io and things like that to manage the requirement's files, but this is also a totally valid way to do it and it's necessary to get the thing started.<br>
So, there's the stuff we need to run our website as a package.<br>
That is the output from doing the Python setup.py dev and here's our virtual environment.<br>
We may want to go to these in PyCharm and just say you know what?<br>
Don't try to do any, like, indexing of those files they're not part of the project.<br>
So we want to come down here and we can see three directories were created.<br>
We have static, we have templates, and we have views.<br>
And these are sort of our default view.<br>
Here, it's just going to say here's our main defaul.html.<br>
Kind of wish they would name the template similar but there's also a notfound, and notice: everything has a __init__.<br>
So even the subfile directories here have this __init__, and that's to help treat these folders as subpackages.<br>
We're going to go over here and we're going to create this view.<br>
Let's go ahead and call this just home give it a slightly better name.<br>
We'll do a little more reorganization in a bit.<br>
We have routes.<br>
This route here defines the static view of this folder so allow files, static files, to be served out of there with 36,000 seconds cache and then it just says we're going to add a route to /home, notice there's home and then here we have the route name as home.<br>
So that means / maps to this method right here.<br>
Okay, so that's the views folder.<br>
I was kind of new to the template it's really nice that they did that, these templates but the template to create the project the cookiecutter template and then we have our templates here.<br>
There's an overall layout that has the overall look and feel of the site.<br>
Here you see what's called a metal slot.<br>
This type, here, the metal define slot as content.<br>
This is a hole in a template that can be reused.<br>
So you'll see over here, for example that we're putting stuff into that content slot by filling it out here.<br>
We're using this overall layout.pt to create a universal look and feel for our site.<br>
Same thing over here, in the 404, we just say sorry it wasn't found but take the look of the overall site.<br>
So that's what's in templates and then in static we just have things like the CSS and the various images that are used.<br>
Finally, one very important thing is to go to the __init__ for the overall package.<br>
This is the startup of your web application.<br>
So notice over here, calling this main want to come here and include the various things that we need, and then we're going to start the web app.<br>
Telling it to include the routes so if you go over here and look at the routes you can see it takes all the functions called include name passes the config to it and runs it, basically.<br>
So that's a nice way right here to have it call those.<br>
You could also just simply import that file and just call those functions, so you know whatever works for you, but that's how they do it so we'll stick with it for this particular application.<br>
So that's what our web application looks like.<br>
We also have tests, we can talk about that later if you want to write tests there's some example code in here on how to do that and because I changed this we need to change this back to home.<br>
That's just to keep it running for you.<br>
This one's missing because we didn't install the testing dependencies when we did the setup.<br>
So here's an overall look at what was created when we ran that cookiecutter template.
|
|
|
show
|
4:28 |
Now that you're familiar with what you get when we actually created a project using the cookiecutter template let's make it a little bit better.<br>
There's a few things that I really don't love about this.<br>
Although, they're doing a better job of organizing it within the latest cookiecutter template it still could use a little bit of help.<br>
This static folder in a real web application will have tens, maybe hundreds of images many different JavaScript files, CSS files, and so on and just blasting them in here Eh, its kind of yuck.<br>
So let's go and create some directories here.<br>
So let's call one for image, we'll call one css and we'll call one js, for JavaScript.<br>
Now I'm just hitting Command + N to get that new menu.<br>
You can, of course right click.<br>
So we'll come over here and we'll drop these into their place.<br>
We'll end up not using those too much, but that's fine.<br>
The other thing is we have this Bootstrap theme that's got, you know, plenty of stuff in here.<br>
I don't really want to mess with it or Bootstrap so let's go over here and add another style sheet called site.css.<br>
So this is where we're going to put our various bits of additional CSS to do our design.<br>
We're not going to have any JavaScript right now and, well we will have some images but we don't have them yet and we'll get to that design side of things soon.<br>
Okay, so that's all well and good.<br>
We're going to need to adjust our template over here to make that work.<br>
So if you notice, it says we have this static site, static URL to the package name and this and then of course, this should be /img but I personally am not a huge fan of this if that for some reason, that file's not there this ends up with like a runtime crash so I'm just going to put, you know, standard old, traditional URL here.<br>
And if you notice, if I go over here and I type this, we get auto-complete.<br>
So, that's pretty cool that we can do auto-complete there and that's because we marked this as a resource root.<br>
Okay, so let me just go through really quickly and fix all the other pieces.<br>
So here, this goes to static, and then we have /img.<br>
This is okay, this is external.<br>
This CSS file moved into the css folder.<br>
Those are good.<br>
This moved into the image.<br>
Everything else is coming off of a CDN.<br>
So, oh, wait, this part, I got to fix.<br>
There we go.<br>
Alright, let's try to run this really quick as we're going just to make sure everything still looks the same.<br>
It should.<br>
Yep, still looks great.<br>
The other thing that we want to do is up here where we're including this theme we also want to include our site.css after our theme so we can override settings.<br>
There's no values in there so nothing super impressive is going to happen.<br>
But there we have that, that layout fixed so we're using these pieces.<br>
We can close those bits up.<br>
The other thing that I'm not a huge fan of is having all the templates piled in here.<br>
Exact same story.<br>
You can have hundreds of templates in a large web application.<br>
Do you want to just pile them in here?<br>
Probably not.<br>
So let's go over here and make a few fixes.<br>
We have errors, maybe 404 or 500 permission denied, et cetera.<br>
We're going to have home so maybe put the stuff for our default layout there and then importantly we'll have a shared section.<br>
Let's put this one into shared, put this one into home.<br>
We'll have more of course, put that one into errors.<br>
And this one, let's rename it, mytemplate.<br>
Does that tell you anything about it being home?<br>
No, it does not.<br>
So let's go over here and just call this default is what they called the view, so let's call it that as well.<br>
Now if we go to these last things we got to change this is going to be ../, whoops.<br>
../shared, like that.<br>
Going in error, in your error page too.<br>
Alright, does it still work?<br>
It does not because its already running we got to click this used shared instance only Restart it, now it'll work, _default.<br>
Is that what I called it?<br>
Where is it getting called that?<br>
That is being called, up here in the view.<br>
I'll make that default and this of course needs to be /home.<br>
There we go, now it should work.<br>
Perfect.<br>
All that work and we're back to what?<br>
Where we were, of course.<br>
But, the benefit is, we have a structure that is much more ready to be a real full-blown web application and we're going to add a lot to it.<br>
Okay, I think this reorganization is good.<br>
And that might have seemed like a lot at first when you're just getting started with Pyramid but I think you'll find it is really going to pay off as we build out this app.
|
|
|
show
|
4:35 |
Now, in order to make this web application interesting we're going to have a real data model because building the data model is not really part of this lesson.<br>
We've already spent a long time on SQLAlchemy and modeling data.<br>
I'm going to go and just take some pre-built data and put it in here.<br>
Some SQLAlchemy models, and so on.<br>
What we need, I don't need.<br>
It would be nice to have interesting data.<br>
Not just random fake stuff but somewhat realistic data.<br>
So, let me introduce you to a place called Mockaroo.<br>
Mockaroo is a cool website that lets you generate these schemas.<br>
I think I might even have some saved schemas here.<br>
Yeah, this build tracker payments.<br>
Let's open that one.<br>
So, check this out.<br>
It lets you create the schema that says can have an ID, which is a auto-incrementing, basically, id.<br>
We had a created_date, that is going to be between those two years in this format of a description and it can actually come from retail items.<br>
You know, like shopping, electronics, whatever.<br>
Some numbers with min and max, paid amount, and so on.<br>
And then you can go and just generate this or preview it, if you wish.<br>
And look at that.<br>
Isn't that cool?<br>
So, for the data model, what I did is I generated a bunch of users and a bunch of payments bills, rather, like this.<br>
And they're going to have paid some not all of them, and so on.<br>
I'm going to copy over a little bit of the data model and then we'll talk through that real quick.<br>
Like I said, we've already spent so much time in the SQLAlchemy chapter.<br>
I don't want to spent another half hour modeling that out here.<br>
I just want to show it to you.<br>
You can use it, if you want to go back and study the SQLAlchemy section, go for that.<br>
So I'm going to come over here and paste three folders.<br>
I'm going to paste this one called db.<br>
And that has just the data generated from Mockaroo.<br>
Okay, it has these two pieces right here.<br>
Over in bin, it's just going to fix those errors in a moment but it's just going to go and load up that JSON file and then put them in the database.<br>
So, it's going to run, load that data put it into our SQLAlchemy models, and save them.<br>
Speaking of SQLAlchemy down here we have our database session.<br>
Again, it looks like I have to add that requirement and change that name real quick.<br>
And this is just like what we did before.<br>
We have this initialization function we call we're going to connect to a SQLite database that lives in this folder.<br>
Our repository is the pre-built queries that we might run, like, get me a particular user by id.<br>
And then here, we have our SQLAlchemy models for bill and our SQLAlchemy models for users.<br>
Let's tell it that that's saved.<br>
Let's fix these errors real quick.<br>
So, this'll be bill.<br>
Alright, looks like we've got that all fixed up.<br>
The other thing we need to do is to add SQLAlchemy and this one right here which is actually Python-dateutil as the two dependencies for our project 'cause see, there are new dependencies we're going to depend upon.<br>
So, we'll have sqlalchemy and we'll have Python-dateutil.<br>
Tell that all of these things are spelled correctly.<br>
Just run that again.<br>
Alright, it's back and working.<br>
The other thing is I'm not sure what's wrong with SQLAlchemy but that is okay, should be okay.<br>
So, last thing to do to get our data up and running is we want to import it into our database.<br>
So, we're going to call this at the start of our app just to load the starter data.<br>
And notice the first thing that it does it says if there's already any data here we're not going to import anything.<br>
We're just going to bail out.<br>
So, I'm going to just add that to the main startup here.<br>
So, we'll create a function called an init_db put that down here.<br>
And let's just start from existing code.<br>
So, we'll have our os, which we're going to use to find the path to that db folder.<br>
And of course, we're going to import that and we're going to import this load-based data.<br>
And that should do it.<br>
Let me make sure this got added correctly, from.<br>
Let's do it like this.<br>
There we go.<br>
Alright, so now when this starts up it should call this.<br>
Let's see one more time, does it run?<br>
As you can see, it's now using that database.<br>
And if we look in here, and we let it refresh we now have our bill tracker SQLite database.<br>
And I guess I could look at it over here, real quick.<br>
Now, if we run it, we now have, see some real-looking users.<br>
They're not real, right?<br>
They're made up by Mockaroo but they're somewhat real looking.<br>
So, it looks like our data model is in place and up and running.
|
|
|
show
|
4:04 |
Now we got the structure of our site in place.<br>
Let's go right some code and start making it do web things.<br>
Over here, this is the function that's called when we just go to /.<br>
When we go to whatever the URL is /, right there.<br>
See this bill tracker pro is that passed right there.<br>
So, if we change that to demo, when you rerun it you see, that's the data being passed over and shown there.<br>
Let's first look and see how that's happening.<br>
So, we've wired up, this render, this Chameleon template to this method, and then we're returning a dictionary.<br>
So the idea is we're going to take and write whatever code we have to write here to access the database talk to a web service, look at the cookies you know whatever you're going to do for your logic to generate a dictionary, a model that's going to be passed over to that template.<br>
So, let's go look at that template here.<br>
In the model, in the dictionary we have a thing called project.<br>
And it has this value.<br>
What we wanted to do, or what our little template wanted to do was say, welcome to the such and such project.<br>
So here you can see we have ${} and then the name of that value and the model.<br>
Not dictionary access, just straight up, the name project.<br>
So, we have project there, and we have project there.<br>
So, basically, our goal to create this web app is going to be to talk to the database figure out what interesting data we want to pass and then pass it over here.<br>
Let's look a little more here.<br>
So let's suppose we have items something like that, we'll just make this up real quick.<br>
And we'll put some kind of lists, this will be item one item two, looks like I forgot a comma we'll have item1, item2, item3, and item4.<br>
So, we're going to be working with particular user and when we go to that user's set of bills that they have we want to show those.<br>
Let's just demonstrate how we might work with this data over here as well.<br>
One thing you'll notice about Chameleon is it's a super clean language.<br>
And I'll show you some, call out examples at the end of this demo.<br>
But you'll see it build up over time.<br>
A lot of these template languages, you'll do things like $% for thing in that collection and then you'll put a bunch of HTML and then down here you'll say percent, end for percent and you just want to say that, right?<br>
Sometimes there's just so much structure around these things, like Jinja2 and what not.<br>
How does it work here?<br>
Let's go down here, and we're going to have your items.<br>
Little paragraph.<br>
And we want to create an unordered list and we'd like a list item in it we can do a little expand-o like that, ul angle bracket li so we want to have one of these for every item.<br>
Check this out.<br>
So we come over here on this thing called the TAL Template Attribute Language, and we can say repeat.<br>
This is more like the JavaScript front-end style programming, say like AngularJS or something more than it is like Jinja.<br>
We're going to come over here, and we're going to say i items, I wish it was i in items, but it's just i the in is silent I guess.<br>
We can just come down here and we even have this be an ordered list if we want.<br>
Come over here, and we'll do this little $ to say the value, and we'll put the i there.<br>
Even mix it in like that, let's say.<br>
If we rerun that, and we go reload it, by clicking on it 'cause I closed Firefox you can see here we have our items item1 is an item, item2 is an item, and so on.<br>
We have our ordered list of those items.<br>
Honestly, there is not a lot more to it than that.<br>
We're going to go to our database, which we haven't done yet.<br>
We're going to get our data, get it into the form of some kind of model that we can pass across and then we're just going to loop across it using this template attribute language.<br>
That's our little test version.<br>
And the next thing we're going to do is we're going to actually use the real database data to render it.
|
|
|
show
|
6:52 |
It was nice to render this non-trivial bit of data here but that's not actually what we want to show.<br>
We want to show our users, we want to show their bills, things like that.<br>
Let's go over here to our data section and have a look.<br>
So, if we look at our user, you can see we have an id and a name and an e-mail and so on.<br>
We also have a relationship over to their bills.<br>
Okay, we have some properties that will show us their paid bills, the ones that are still pending they still need to pay, how much money they owe.<br>
So, what we would like to do is go and get a user from the database, get them back and then use these relationships and these properties to get rich information and show it on that page.<br>
Turns out this is going to be ridiculously easy.<br>
So, I'll say user.id == 1.<br>
Now, this you'd probably get this from a login cookie or something, but we're just hard code it cause, even though this interesting and non-trivial web app we're building we don't want to go too crazy and just overwhelm you with all the details.<br>
So, we're going to go get a cookie that we set that once they login that has some form of a protected cookie that has their user id.<br>
Then, we're going to go get the user from our repository.<br>
Put that up here, and we'll say, let's import it like that.<br>
So, we're going to go and get our repository and the repository already has, let's go look at that that came like, paste this over, it has three queries.<br>
Three or four?<br>
Three.<br>
They're really simple, get me a user by id, do a join against their bills or don't, we're just going to let it do that because we want their bills.<br>
So, it'll come in to a query, a join on their bills find the right one and either give us nothing back if they don't exist or give us one back if we, the one and only one that has that primary key.<br>
So, our goal over here will just be get_user_by_id, or pass in the user ID, like that, and then we want to pass this user along, like this.<br>
Now, do we actually need to pass these things, no.<br>
We're not going to use them, you know maybe in some apps we might have to get the bills and do some other query to get them here, something else would go right here.<br>
We can just go to the user.bills and navigate that.<br>
Right, we've already joined against it with our repository.<br>
So, we don't actually care about it.<br>
How about that, that's the entire implementation of our homepage.<br>
Now, granted our real one may be a few more pieces of data would have to come along, but that's pretty much it.<br>
Also notice we're not using the request.<br>
We would use that, here, if we were getting a cookie.<br>
We'd go to request.cookies and so on.<br>
If you want, come over and say a request.<br>
and you get no help, right?<br>
None, and whatever you get nothing, but if we go over here and say this is their request, from pyramid, like this one.<br>
Then, we have things like, a cookie, a cookies dictionary all sorts of stuff that's in here we can work with.<br>
But, that said, as interesting as that is, we are not using it so we can use the convention in Python to say put an underscore there, which means, we mean to not use it but it has to be there for the signature to work.<br>
So, we got our user now, if we run it, it's not going to be so wonderful, let's find out why.<br>
Boom, this project, remember we said, here's your project and we put the dollar project name, well that doesn't exist anymore, we deleted it.<br>
Alright, so you'll see these values that appear in the template are required.<br>
So, let's go and rewrite our template a little bit.<br>
This thing we don't really need, I'll do an H1.<br>
We're going to make this pretty, in a little bit but we'll just go, a little tracker pro demo, okay, and the items is also going to give us an error so we're not going to show that.<br>
Let's just say, something like this, div welcome ${user.name}, and what do we want, we want to say their name.<br>
How awesome is that, that we have auto complete there, that is super cool.<br>
I want to say something like you currently owe, total owed.<br>
Now, that's a floating point number, we probably want to format that a little bit nicer.<br>
So, we come over here and say, call function you put standard Python in here.<br>
So, we're going to have something like {"${:,.0f}".format(user.total_owed)} something like that.<br>
Now this dollar is an instruction to the template, but won't appear so if we want a dollar to appear, we've got to put it like that or maybe it's more obvious if we put it like this.<br>
Let's rerun this and see what we get.<br>
Awesome, look, well welcome Danny Isum you currently owe 2,836 dollars.<br>
Well, let's print out their bills, so we've got a few more things we want to print.<br>
Let's do a div here of an H2, this will be opens, pending unpaid, that's called unpaid bills.<br>
So, we want to come down here and have just, list them out.<br>
So, we'll just do a quick list and then we'll bring over some HTML, when we do the design to make this prettier.<br>
So, let's just have another div and we'll have TAL repeat remember that, b and user.bills and it'll just say, b.description.<br>
We'll use the same little format trick and let's just do a, we got total minus b.paid.<br>
So, this is our unpaid ones and then lets do another for our paid bills, those are the ones we like.<br>
We don't want to do bills here, we want to do unpaid bills, open bills and paid bills.<br>
So, open bills and paid bills and this one will just show how much this amount pending, it will show that, how much is pending, this one just, this one is paid.<br>
Paid off at this.<br>
Alright let's try now one more time, see what we got.<br>
Boom, well the design looks like, well not terrible but it definitely is inappropriate of what we're looking for but down here, look at this, we have our unpaid bills all that money there, and then here are our paid bills we paid the games off at $23.00 whatever we did on the home categories, $622.00 and so on.<br>
Isn't that cool and you can bet if you add up those numbers and those numbers they should be the same unless they have a bug in my code somewhere.<br>
So, this is how we go and talk to the database we put it in the page and we use all the interactions that Pyramid provides us and really, what's left?<br>
Well, there's two major things left one this looks like crap right?<br>
You wouldn't, I mean it's a fine little starter project template but it definitely doesn't look like what we want our website to look like, that's one.<br>
Two, how do we work with this website, right now it's read only, I would like to say, maybe pay off my $568 of beauty and just pay that baby off, how do I tell this website that I've done it?<br>
Alright, it's not pulling this from a service it's kind of static.<br>
So, we need to add the ability to see the details of these and enter the amount we want to pay, and pay towards that amount, they're handling all that sort of stuff, so those are the two major things left, you'll see they're both pretty straight forward.
|
|
|
show
|
1:42 |
Here's our really simple site that just has our homepage.<br>
All right.<br>
It welcomes the user.<br>
It shows their unpaid bills and their paid bills.<br>
If we look at it, it looks like this.<br>
As what we just saw.<br>
Now, what we want, looks really different.<br>
Remember up here, there's a big picture that sort of welcomes you to the site.<br>
And there's some more information down here.<br>
On each of these bills there's a button you click and so on.<br>
So, towards both the design and the ability to have these buttons to navigate to the details let me just drop in some HTML really quick and I'll talk you through it.<br>
So, we're going to add this thing called a hero.<br>
And, doesn't have any style right now.<br>
It's going to be nice and big take over the top part of our site.<br>
It's going to have a background image and it's going to have this text on top of it.<br>
And then here's just a little welcome.<br>
You know, welcomes the user by name.<br>
And then we have a couple of things.<br>
Here's how much they owe in their unpaid bills.<br>
I'm going to loop through each one of their open bills and I'm going to have the date that it was for how much their total value was how much the pending value is and so on.<br>
So, we come over here and refresh this.<br>
Get a slightly different look.<br>
No CSS, no redesign.<br>
Just this HTML with these links here.<br>
And notice, going on each one of these to like /bill/344.<br>
So it'd be /bill/169 and so on.<br>
So we're going to have to add a route and a view method up here to handle that.<br>
That's where we're going to see the details and we're going to be able to add a form that we can post how much we paid things like that.<br>
Down here, we're just listing out the extra information.<br>
Nothing super impressive going on here.<br>
I think the next thing I wanted to work on is making this look pretty, and then we'll round it out with this form input aspect.
|
|
|
show
|
3:00 |
I think it's time to create a little bit more design feel and customize our site.<br>
So, the rest of the time we're working with it it feels really good.<br>
We need to do two basic things.<br>
Over here on the layout notice there's this copyright, pylons and what not.<br>
Footer, I want to use a different footer and a different title and so on.<br>
So, I'm just going to drop in a new layout here.<br>
Notice, that's a new copyright.<br>
It links to our 100 Days of Web project and it just says it's a demo.<br>
Right, then it has our content and that's pretty much it.<br>
Nothing else really has changed.<br>
Let's run that and see what happened.<br>
Okay, looks a little bit better stuff's not starting in the middle of the page it's going up a little bit higher here's our hero section.<br>
The hero section has no styling so it doesn't look very heroic but it's about to.<br>
The other thing that we got to do we're going to need an image for our heroes.<br>
Let's go over to our static image section and I'll paste in this one called finance.<br>
If you want to look at it real quick it looks like this.<br>
And by the way this image came from a place called Unsplash.<br>
Unsplash has awesome, beautiful images.<br>
I'm taking a moment and pausing to tell you about it because images are so important in how your site looks but often people either steal images, not a good idea or they decide to just not get them they use crappy clipart and whatever.<br>
So here if I want finance for example you can see there's all sorts of cool pictures which I can use royalty free.<br>
And then I don't see the one that I chose but it's in here somewhere.<br>
Right, so there's tons of things you can search for that's where this image right here came from.<br>
And we're going to use that in our hero.<br>
Now just having it in that image folder does nothing we have to add the CSS as well.<br>
Just like with the SQLAlchemy, we've already spent a whole section on design and CSS, so I'm not going to go through too much detail but let's just look at a few highlights.<br>
Changing the color of the body and the main content.<br>
The main body's going to be like a gray and the content is going to be white.<br>
So that means our footer and stuff will be gray but the main content will be a proper color.<br>
And then here we're setting some stuff on the footer and then finally the most interesting one probably is the hero.<br>
We're setting a minimum height setting a background image that covers it and things like that.<br>
Let's see how it looks now.<br>
Are you ready for the grand presentation?<br>
Get rid of this.<br>
Here we go.<br>
Boom.<br>
That looks good, right?<br>
That looks real good actually.<br>
So here's our site we just put a little more spacing around these things.<br>
Put a little background on our H1 up here.<br>
This is our hero, and our hero image.<br>
See as we resize it it does what it's supposed to do.<br>
So, here's our new design.<br>
That was pretty easy.<br>
Oh, and let's look at the footer.<br>
It's not the most amazing looking footer but it's going to have to do for this.<br>
I guess we could change the color just a little bit but we have a little de-emphasized footer at the bottom and we have our main content up here.
|
|
|
show
|
6:07 |
The last major feature of our site is to view the details of a bill and then pay off either some or all of that bill and that will update our database update our homepage, and so on.<br>
So, what we want to do is add a details method here.<br>
So, it's going to be really similar to this so let's start by copying and pasting.<br>
So be super careful to change that name because if you don't change the function name it's just going to replace it, it's not going to be an error.<br>
It's going to have details and we're also going to get the details show a form and let them potentially submit it.<br>
So this one is going to be a get, and there's going to be a post as in posting the form back, as well.<br>
We're going to need the request here, so we'll pull that out.<br>
Along here, let's go ahead and do the post one as well.<br>
Post and the route name is going to be the same.<br>
We'll just call this details.<br>
And this is also hopefully going to match up to be details.<br>
So how does pyramid select from this one to that one.<br>
Does it use the function name?<br>
I guess it could, but no, it does not.<br>
You have to go up here and explicitly say the request method is a get, if you can spell.<br>
And this one the request method is going to be post.<br>
All right, we're looking pretty good here.<br>
We're not going to worry about the post one for a while.<br>
We're going to just work on this one.<br>
The next thing we need to do is make sure we have a route named that.<br>
If we try to run it now, it's going to crash and say whoa whoa whoa.<br>
We went looking for a route called details and it doesn't exist.<br>
So we can't wire up that thing to Pyramid.<br>
So we come back down here to our routes and down here we're going to say, we have a details and this one is going to go to bill remember it's like bill/123 Now this 123 is really important here This one, two, three is what's passed as data to this function, it's not just something static.<br>
So how do we indicate that?<br>
We go over here and we put a curly and we say bill_id.<br>
Call it whatever you want.<br>
But I'm going to call it bill_id.<br>
That way we can go and grab this bill_id from there.<br>
So to round this out, we don't care about the user_id right now, we want the bill_id.<br>
And how do we get it?<br>
We go to the request, what's called a match dict and we get the bill_id.<br>
Now that comes back as a string, right?<br>
So we're going to convert that to an integer.<br>
Now, you probably wanted to put some error handling around this, but for now, we're just going to roll with it like this.<br>
All right, and let's just go and put...<br>
Now actually, let's just go grab it from the repository.<br>
So we'll be able to grab the repository and we can get a bill by bill_id.<br>
Imagine that!<br>
And we'll have the bill is here.<br>
And let's put the bill like this and I guess we may still want the user so we're going to pass them along.<br>
We could always use the bills.user, to go in reverse.<br>
So I'm not sure it's really necessary, but what you'd probably want to do is you'd probably get the user from the cookie and get the bill and verify the bill belongs to that user so they're not just randomly punching in stuff here.<br>
So you want to get them separately or at least somehow verify that that user and that bill are related or you would get some sort of leak just by people typing in ids up there, right?<br>
We probably also want to check that this bill exists.<br>
So we'll say if not bill, right, come back empty if they passed in an id that doesn't exist.<br>
We get a return a response from Pyramid.<br>
Say the status is 404.<br>
Something to that effect.<br>
Okay, well, we're close to running it.<br>
It should start now we've defined that URL.<br>
If we try to go to it, we're going to find a problem.<br>
Missing template.<br>
All right, there's no template called, well, home details.<br>
We better fix that.<br>
I'll say details.<br>
I'm just going to copy this.<br>
It's probably the easiest way.<br>
And then, we'll just rip out all the guts.<br>
So we're going to use that template we're going to punch in the contents.<br>
So what we're going to put there is what we're going to show for the details.<br>
So again, just for design, saving the time around design let me just grab this and throw it in there.<br>
Now see, it's kind of involved.<br>
So, here we have a bill, details, with our little header.<br>
I have some styles on that.<br>
And here we have a bootstrap grid, so it's going to have the ability to go back this cool little back arrow thing we grabbed.<br>
It's going to tell you the bills, what it's for and then all the details about creating payments scroll down a little bit.<br>
Here's the interesting part.<br>
We have a form goes back to double quote, empty quote empty string so that just posts back to the same URL.<br>
And it's going to do a post, and it has some text which is named amount.<br>
And it has a button that submits it.<br>
All right, let's see what that looks like.<br>
So you go refresh this.<br>
Oh, we're not passing along an error.<br>
And see what that's about in a little bit.<br>
But let's go ahead and just pass along None for now.<br>
When we get to this processing the input if the amount is like negative or something we might want to say "No, no, you can't post a negative amount." So there we go.<br>
Here's our bill details, and this is a bill for kids.<br>
This is a weird error that's starting coming up in the latest version of Chameleon.<br>
Let me fix that real quick.<br>
All right, here we go.<br>
We've got our bill details, using the same hero image.<br>
Of course we could pick different ones.<br>
Here's our back button that takes us back.<br>
Click on this.<br>
Which one did we have?<br>
Kids, that one.<br>
So it was on this date.<br>
This is the total bill amount, here's how much we still owe.<br>
And we could make a payment by entering some numbers here right, like we could pay how much we owe.<br>
We could pay 300, have only 14 left.<br>
Course that doesn't work yet, because we're posting back to that unwritten method that we're going to deal with next.<br>
But here's the details, right?<br>
We go look at another one.<br>
Let me go pick this one for games.<br>
There's the bill for games.<br>
Beautiful, right?<br>
Works really well.
|
|
|
show
|
5:49 |
The next thing we should do one of the final things we're going to do is to submit that form let the users pay part of their or all of their bill and then show them the updated details.<br>
And to do this, we're going to use our details_get and our details_post.<br>
We already have this working, this just shows the state of a bill as it is.<br>
This one we have not written yet but we're going to follow what is called the Get Post Redirect pattern.<br>
So, we're going to show the data, show the form that's the get and then they're going to let them post the form that's what this method does and then if everything is good, we're going to redirect them to a new view of the data.<br>
Either back to this page or back to the summary information probably back to that page.<br>
So, how do we do that?<br>
Well, let's start by taking the same data we're doing here because we're going to need a lot of the same stuff like the bill_id and what not.<br>
So we're getting the bill_id, this is part of the URL that doesn't exist, we're going to bail, we get the user and we also going to need to get the amount.<br>
How do we do that?<br>
Well, we again go back to the request and we're not going to use the match dict that's for the routing.<br>
We're going to use the post dictionary.<br>
Then we get the amount and I'm going to pass it and maybe -1 if it doesn't exist.<br>
And again, error handling here would be a good idea.<br>
We're going to skip it.<br>
So we'll say it's something like this if amount < 0 or amount > bill.total-bill.paid: So they're trying to pay too much or they're trying to pay a negative amount Set some kind of error, error equals nothing.<br>
We'll say: You're amount must be more than zero and less than what you owe.<br>
We can do something better than that but if we have that we want to return this error here, like so.<br>
Now if there's not an error actually let's do like this, I guess.<br>
If there is not an error, we would actually like not to just show them this.<br>
Just send them back somewhere else.<br>
So we're going to return our response.<br>
Let's do it this way, raise HTTPFound exception.<br>
I'll say the location is slash, details, sorry no that's bill and here we format with the bill_id.<br>
So, let's just try that, we are not actually doing the payment yet, there is still left to do let's just see there is something happening.<br>
So, if I go over here and I say we are going to make a payment of $100 or something like that.<br>
We'll come back and say; oh, we caught this error amount.<br>
Oh, I see we are making a mistake here, we are going to have to pass one more thing.<br>
Let's go to details.<br>
Now notice, if there is an error we want to pass along this amount, so we are going to need to return what they said they'd pass.<br>
That's because we want to keep the form the way they had entered it.<br>
So, over here, want to make sure we pass this amount.<br>
Let's try our validation again, we'll go back here look at it, pay $100.<br>
Notice there is an error, it says; Your amount must be more than zero less than what you owe.<br>
Fix that, spelling your amount, right there.<br>
So how do we get that to happen?<br>
Let's look over here at the details.<br>
There is one more cool thing we haven't done yet.<br>
Check this out.<br>
So here is the error and it is red because it has a class error.<br>
We said TAL condition.<br>
So this entire block of code, HTML is only showed if error is truthy in Python.<br>
So, a non-empty string.<br>
So, that only shows up if there is an error.<br>
Obviously, the value of that input we want to carry that amount around so that we can keep that there and only give them the error.<br>
So, let's say we want to pay $100, which should be valid.<br>
Go back here, everything is good.<br>
If we want to pay $10,000, it's going to be an error again, the amount you owe must be positive.<br>
It's kind of annoying this is below the fold, you like them to maybe see that but that's the error handling we've gotten.<br>
Final, final thing, super quick, let's just do a payment.<br>
And the repository has an add payment for, you go to the amount and they bill, the bill_id.<br>
So, let's see if we can pay off some of these bills here.<br>
Alright, I suppose we got some money, we going to pay off this gardening bill.<br>
We are going to come over here and we are going to start by trying to pay $100.<br>
$199, that's not going to work.<br>
Oh yeah right I would like to pay $100, so this amount should just be seventeen, hey look at that, seventeen, got some more money I'm going to pay off fifteen, now we are down to 2.<br>
Now, if we do this it goes to zero and also we put the same TAL condition on the same form so say if it's paid off don't show that form at all so they can't try to pay on stuff they don't owe or whatever, so it's gone.<br>
We go back here, our gardening is no longer up here notice the gardening is gone, now the gardening is right here as paid off.<br>
Awesome, right?<br>
How do we do that?<br>
Get, Post, Redirect.<br>
We have the get the details here is our get request method, just show the details.<br>
Down here we are saying is the post one that handles the submission of the form or getting the data this one from the form, if everything is validated we record the action in the database and we do the redirect by raising HTTPFound to the URL we would like them to go to.<br>
That's it, that's how we accept your input and let them interact with this data, nice right?
|
|
|
show
|
2:51 |
Now before we wrap up this chapter let's take just a moment and talk about the Chameleon template language.<br>
Like I said in the beginning Jinga2 is actually a more popular language than Chameleon.<br>
It's the one that works with Flask, for example Chameleon is not native to Flask when you install it without doing a little extra work.<br>
Why Chameleon and how does it work?<br>
Well, this one slide sums up both of those pretty well.<br>
The why is, if you look at this this is still valid HTML, right?<br>
It has these weird attributes that kind of are going to be ignored if you just load it in a straight editor but it's valid HTML.<br>
Whereas Django templates those have all sorts of extra non-valid HTML goo like the %for, %f all that kind of stuff.<br>
One, this is a simpler, cleaner language that is still valid HTML even in its template form.<br>
That really appeals to me.<br>
And that's why I like it a lot better.<br>
Now, how does it work?<br>
Let's look at a couple of things.<br>
If we want to have a loop we use the tal:repeat and the syntax is similar but sadly not identical to Python.<br>
Instead of c in categories, it's just c categories.<br>
Just tell yourself the in is silent.<br>
If we're going to spit out the value spit out some text, like the URL of an image so c.image, maybe that's a string that represents a URL of whatever that category is then we would just say ${} and then, you know, the Python expression that's going to go there.<br>
If we want to do an if statement that's a tal:condition.<br>
So we can have not categories and we're just use the truthyness so categories, not categories, and so on.<br>
You can see the two different conditions that we have there.<br>
But you can also do more complicated things like if this number minus that number is greater than seven, or, you know whatever it is you're looking for.<br>
And one other thing to keep in mind this ${}, right, like the c.image, for example that is HTML encoded, so by default this is safe from content injection, right?<br>
Like if we had a form, somebody could type in well, angle bracket, Java script, hack your site, right?<br>
It's just going to come out as like pre-formatted you know, $lte: It won't actually spit out Java script.<br>
If you absolutely trust the source and you need to put out HTML you can use structure:expression.<br>
So for example, structure:c.image and it will spit out unescaped HTML.<br>
So, only do that for input that you do.<br>
Maybe you and internal from your company.<br>
Only you can type this into the database or into this field.<br>
Then it might be OK to use structure.<br>
But if this is user input, you should never ever use structure on user input.<br>
That is just asking for somebody to do something bad.<br>
OK, so, this is quick flyover of Chameleon and how it works.
|
|
|
show
|
3:14 |
Now you've seen me build a website with Pyramid.<br>
It's your turn to choose a cool web app idea and build it yourself.<br>
So let's quickly talk through the four day your turn plan.<br>
Well, the first two days, you've already done that.<br>
Unless you're skipping ahead you've already watched the videos for the first two days.<br>
They were kind of long.<br>
I'm sure in the end when we edit them they'll come out to be enough to justify at least one and a half days of your time on this 100 Days of Code journey.<br>
So, watch the videos.<br>
Take some notes.<br>
Just get ready to do what we're going to do now.<br>
So that's the first two days.<br>
Like I said, you probably already did it.<br>
But if you didn't, start there.<br>
Now, you're going to go and pick an app from this cool blog post that lists a whole bunch of different ideas on sample web applications.<br>
Notice the scroll bar, there's a whole bunch of other things, not just simple apps but they say "hey look, you could build a weight tracker app and here's it's features." You could build a calculator.<br>
You could build a book data base, a recipe app.<br>
Some of them have video tutorials I actually have no idea what you're going to get if you click on that.<br>
But, anyway, here are a bunch of great app ideas and just go in here and pick one out.<br>
You don't have to do one from that list.<br>
If you'd rather make up one that's fine but hopefully those 18 or however many are there will give you a decent idea what the type and size of app that makes a lot of sense.<br>
Remember, you need to be able to build this app in two days of progress or two and a half days depending on how quickly you got through the videos.<br>
So it can't be too ambitious.<br>
It can't be too big.<br>
Alright, so day three, this is the first day you're actually doing some work.<br>
You're going to start by installing Cookiecutter and using Cookiecutter to create your product.<br>
If you're going to need some fake data use Mockaroo to generate that.<br>
In the demo code that I wrote for you and I copied over there's code in the bin folder that will take Mockaroo JSON data and import it into SQLAlchemy.<br>
It doesn't do that through magic.<br>
You actually have to say well these are my SQLAlchemy classes and these are the JSON dictionaries I'm going to read and just set the values and call save" but I'm sure if you get some Mockaroo JSON data you could easily replace what I have there to import that data.<br>
okay, so if you have fake, if you want to have like realistic fake data, go there.<br>
Create the website, answer the questions, okay?<br>
Now, on this first day, what you're going to do is setup the website so it has all the moving parts.<br>
So you're going to add all the URL's the corresponding view methods, and HTML templates.<br>
They don't have to pass real data around.<br>
They don't have to look like anything.<br>
But you should be able to at least navigate to the different URL's that you're going to have to make your website work.<br>
And you want to have your SQLAlchemy data model created.<br>
Again, keep this super simple.<br>
It should just be two or three data models.<br>
This doesn't have to be a real app.<br>
This is a demo, right?<br>
And you want to build it really quick.<br>
So what I propose, is that you copy the database behaviors and structure that I did in the demo.<br>
Copy that over, change the import name so things work and then just adapt those, right?<br>
You know, maybe throw away one of the SQLAlchemy classes.<br>
Change the other around and if you need more than one, you know, make a copy.<br>
Alright, so that's the first day.<br>
Basically, get everything setup and ready to go.<br>
Get the data model in place and get the website moving pieces working.
|
|
|
show
|
0:45 |
Then over on day four it's time to actually implement those view methods.<br>
So your going to write the queries against the database you're going to get the data back and then you're going to pass it as a model that is as a dictionary to the template and write simple HTML to show what you want to show on the screen.<br>
Remember this, if you make it too complex this is going to take forever so just keep it super, super simple.<br>
Also I threw in a little hint here if you want it to look a little bit nicer and you want to do that easily grab an image from Unsplash or some iconography type things from the Noun Project both really cool places that you can get images to use and spruce up your site.<br>
Alright, that's it.<br>
I hope you really enjoyed this introduction to Pyramid it's a super fun web framework you can build great websites with it.
|
|
|
|
1:25:30 |
|
|
show
|
2:10 |
Hello and welcome back to the 100 Days of Weapon Python.<br>
In the next coming four days, we're going to look at React one of the most popular JavaScript frameworks.<br>
What is React?<br>
React basically is a JavaScript library for building user interfaces.<br>
It's declarative, component-based and the "learn once, write anywhere" philosophy makes it easy to integrate it into your projects.<br>
Why would you want to learn it?<br>
Well, working with the DOM is inherently hard.<br>
And React not only makes it easier using a virtual DOM, but also more performant.<br>
The declarative style makes it relatively easy to define user interfaces.<br>
And maybe best of all, React is just JavaScript.<br>
It's not a full-blown framework.<br>
It's a pretty small API, you only have to learn a few functions, and you're good to go.<br>
It's also pretty popular.<br>
We reviewed the results of State of JavaScript 2018 and React was one of the most popular frameworks in terms of people that had used it and would recommend using it again.<br>
React also endorses software best practices.<br>
It is explicit and modular, which makes it easy to reuse across projects.<br>
This lesson will be very practical.<br>
I have two exciting projects lined up.<br>
First we're going to make a front end for a Tips API, which you see here including filtering and highlighting using a plugin.<br>
And secondly, a simple hangman game where we load in a random movie title and you have to guess it pressing the buttons.<br>
Instead of hangman, we use pictures of a monkey that's getting imprisoned and by guessing the movie we prevent that.<br>
Next lesson, let's first review some ES6 newer JavaScript syntax because you will see that a lot in React code.<br>
After brushing up modern JavaScript we dive straight into React, building our two projects.
|
|
|
show
|
7:38 |
Brush ups on ES6.<br>
You should understand at least the basics of JavaScript which you've seen in Day 25.<br>
However, you should go beyond and learn a bit about ES6 because that modern JavaScript syntax is often used in React code.<br>
If you go to your checkout folder, I made an ES6 directory and a couple of examples of modern JavaScript.<br>
Let's look at them one by one.<br>
First of all, you want to become familiar with classes in JavaScript.<br>
Here I define a simple Bite class with a constructor that takes a title and points.<br>
Where Python uses "self", JavaScript uses "this" and here I just assigned it to variables and here I used a method str, that returns those variables in a concatenated string.<br>
Then I instantiate two Bites with different strings' endpoints and called str method on both.<br>
Let's run this from a commandline using Node.<br>
Any arg get the two outputs, especially with the Hangman game we will be using state in our applications.<br>
And for that, React uses classes.<br>
Secondly, it's inheritance in React we will inherit from the component class and the syntax to do that is to use class extends base class.<br>
So here, I have an EnterpriseBite that extends from Bite.<br>
And I'm just overriding the str method to prepend EP to the string method we already have.<br>
So if I make a new EnterpriseBite make a new string and points I should get a different string And here we see ep bite because that's the method we overrode.<br>
Next up are variables.<br>
As I touched upon in my JavaScript lessons old-style JavaScript used the var keyword.<br>
In newer JavaScript, we have let which is safer because it block scoped.<br>
And for variables that don't change we use const.<br>
And we'll see const in a lot of React code so here are the hello string and that string is not meant to be changed so I defined it as a const.<br>
However, if we do some sort of calculation I could intialise count variable to 0 and I would use let because this variable is changed within the body With whatever we going to do.<br>
So for variables that change, you use let and for constants you use const.<br>
But don't use the var keyword anymore because it's not convenient.<br>
Next up, are arrow functions.<br>
A very exciting feature of modern JavaScript.<br>
So a classic function would be function, argument, and return.<br>
In newer JavaScript, we can remove the function keyword and add a fat arrow.<br>
Then we can omit the parenthesis if there's a single argument.<br>
And then we can even omit the curly braces if it's a single line function.<br>
And it is pretty compact.<br>
Let's see if this works by removing all the previous revisions and only use the arrow function.<br>
And that worked.<br>
In the sense that if I don't pass an argument it undefined and as we've seen in the JavaScript lesson we can even give it a default argument.<br>
Like so.<br>
And now when name is not given I get the default of stranger.<br>
Next is the destructuring and this you can see as tuple unpacking in Python.<br>
So here I got an object a Bite with id title at 1 points and I can extract those attributes using the syntax so I put the Variables inside curly braces and I get those individual variables extracted.<br>
Lastly, map and filter.<br>
When we print like an unordered list of list items a common technique is to use a map and maybe a filter to reduce the amount of items you want to see for example, the API where I can filter the tips So here, I got some ninja objects in an array and I'm going to filter the array by only ensuring that ninjas with more or equal to 100 points.<br>
And then, do an operation on each of the items.<br>
And that is wrapping them into list item a HTML tags So this should output only Mark and Mike and write their names in a li tags.<br>
Let's run this.<br>
And indeed it does.<br>
See it as a list comprehension or actually Python has names work for method filter.<br>
And though it also seems pretty regularly in React code To recap, if seen classes, constructor like they done to dunder init in Python, methods, and where Python uses self we use this.<br>
Inheritance.<br>
You can inherit from a base guys using the extence keyword and override methods.<br>
Just like in Python.<br>
For variable deceration, you want to use let and const.<br>
And shy away from var.<br>
In React, immutability is very important.<br>
So you will see the use of const a lot because that makes a variable not changeable.<br>
Arrow functions, classic function using the fat arrow omit the parenthesis in version single arg and omit the curly braces.<br>
And here's an example of how to look in React pretty concise Destructing, this compared as tuple unpacking in Python You have an object, you want to extract the variable.<br>
You put them in curly braces and we get the individual attributes as seen here with this Bite example map and filter commonly used when we need to manipulate a sequence of items.<br>
Here, we have an array of ninja objects and we filter them by ninjas with greater than or equal to 200 points and wrap them in li tags using map.<br>
There concludes an overview of modern JavaScript features.<br>
Next we're going to bootstrap our first project.<br>
The fronter of our tips API using a tool called create-react-app.
|
|
|
show
|
4:20 |
Let's start writing some React code.<br>
I'm going to use create-react-app, a Facebook utility that bootstraps our app, putting all the defaults in place.<br>
Pretty convenient as it says, set up a modern web app by running one command.<br>
You do need to have NPM or NPX so first you want to set up node on your system which I've already done.<br>
Node comes with NPM, which is the package manager.<br>
And starting Python 2 it comes with NPX.<br>
So into my demo folder I can just use NPX create-react-app and give it a name.<br>
And we're going to work with the tips API so just call it tips.<br>
And what it's going to do now is install react react-dom, and react-scripts, make a package.json file.<br>
This will take a while.<br>
I think this pulls like 250 megabytes.<br>
But once that's done I can just run npm start and we should get a fresh new React app we can dive straight into writing the code.<br>
Awesome.<br>
Okay, let me see the into the tips folder and see what we have.<br>
So we have the node modules.<br>
It's a bunch of dependencies pulled in.<br>
This is quite a big folder so you want to ignore that in your version control.<br>
You got the package.json, which is kind of the requirements file in Python.<br>
So we got react, react-dom, and react-scripts.<br>
In source we have index.css and the app.js which we're going to write our code in got a public folder with the index.html which renders the JavaScript, standard readme which explains a bit more about create-react-app that's done.<br>
And now we're installing dependencies so let's also install axios, which we're going to use to query the API, and react-highlight-words which is a plugin which we're going to use in the rendering.<br>
And when we filter tips by typing that the type bit is highlighted in yellow.<br>
Okay, that should have updated the package.json.<br>
So now we have two more dependencies.<br>
And the nice thing is that we can just hand off this package.json to another developer who then can install the dependencies using npm install.<br>
This point I open a second terminal and I type npm start.<br>
And that way I have my app running in one terminal and in the first terminal I can write my code.<br>
First run takes a little bit and here we have our bootstrapped app.<br>
But if I open up source app we see that this component is what is showing on the screen.<br>
So you're if the logo, let's define a constant page title, PyBites Python Tips API.<br>
And we can balance that right here in h1.<br>
And you will recognize this from your typical framework template code where we can embed variables in curly braces.<br>
Hit save and app now automatically refreshes which is a nice feature.<br>
And we see the new title displayed on the page.<br>
In the next video we're going to define our first component, which will be a Python tip.
|
|
|
show
|
6:49 |
Let's write our first component.<br>
A Python tip To remove the logo, end this with a semicolon.<br>
And the first way to do it is to simply define a function and call it Tip and every component gets properties or props and it can render something to the browser.<br>
Now as we already saw here what is this weird like HTML embedded into the code?<br>
This is actually called JSX.<br>
It's kind of a template syntax but with the full power or JavaScript which means that you can embed expressions and we'll see that in a bit.<br>
So, my tip will be wrapped in a div and in HTML I have classes like this but in react it's camel case and you have to say class name for class.<br>
Let's look at how a Python tip is structured So, in the next lesson we will actually see where we get the data, and it will be from this page.<br>
And every tip has a text, an optional code block a shareable tweet link and an optional link to the source.<br>
Which usually is Stack Overflow, in that case on this page we have an optional info icon.<br>
so plain text, code, which is wrapped in pre tag optional sharing, optional more info link.<br>
So I'm going into architect the component to comply with that data.<br>
So, all the attributes, they'll be in this props object.<br>
The tip will be in p tag, and there is an optional link.<br>
And there is this JSX, mostly looks like HTML you can actually embed JavaScript, which is cool.<br>
So you can do things like props, if props has the link and show that link in a span tag.<br>
Close to conditional.<br>
After the paragraph tag, I have my pre tags to actually show code which comes in props.code.<br>
And then there's another conditional for the share link.<br>
So if there's a share link show that in another paragraph tag.<br>
Then inside it a link.<br>
For this I define a constant.<br>
Which we can just grab from here.<br>
Copy image address.<br>
We don't really need this.<br>
So if there's a share link, wrap that in an href.<br>
It opens in a new tab, and show me a clickable image.<br>
And this is out first react component.<br>
And I made a typo.<br>
Because I'm still referencing logo.<br>
And here I made a typo, it's not render but I should return.<br>
And nothing happens, because I only defined the tip I have not rendered it in view.<br>
So let's do that now.<br>
Let's get rid of everything in this div.<br>
And that's actually define the page.<br>
So, first I want my header Okay.<br>
Then I'm going to set up a form input where we can filter the tips later.<br>
So I'm just providing the boilerplate code for now.<br>
Look at how convenient it is to write JSX because it's like HTML, but way more powerful.<br>
And value on change, reload to later populate which state and behavior.<br>
So this should render a form.<br>
And lastly, we're going to show the tips.<br>
So, again, I make a div.<br>
And here's how you would render react components.<br>
It's like having new a new HTML element at your disposal.<br>
Here I'm just going to put some bogus stuff in doesn't really matter for now because you will render this later with real data from our API.<br>
So, here's one tip, and there two more.<br>
Four, five, six, seven, eight, nine.<br>
Two, three, and look at the conditionals and actions, so this one doesn't have a link and this one has a share link rather.<br>
Let's see what this gets us.<br>
Nice, so this is the tip text, regular paragraph text, print one, two, or three are the made up code so you see that the font changes.<br>
Here is an optional source link, in parenthesis and here's an optional share link to Twitter.<br>
So, we're getting somewhere, the next video we make a quick detour to get the Python and Django tips API working locally so we can start queryng the data and populate a few with some real Python tips.
|
|
|
show
|
2:43 |
In this video, we take a quick detour to get the Python Tips API set up locally so we can query it from our front end.<br>
So I got this repo here on PyBites which is Python_Tips and we're going to clone it to our local directory.<br>
So I go to code and I clone it here cd into it.<br>
And to make a virtual environment install the requirements.<br>
Set a secret key for Django reactivate the virtual environment.<br>
I run my migrations which will be synced to a local SQLite3 database.<br>
I make a super user.<br>
And I have a script here in tips, management commands, sync tips.<br>
And that will reach out to the PyBites tips website and it's going to scrape it and import all those tips in the local database.<br>
So let me run that now.<br>
95 tips imported.<br>
Let's run the server and let's do a curl to 127:8000 API and let's say, Tip 10.<br>
Anywhere you go, you see a dictionary of tip code, and a link, and a share link.<br>
It could be 12, 85, et cetera.<br>
And this should get them all.<br>
This gets a whole bunch of tips.<br>
So this is cool.<br>
Now we have our API running.<br>
And I can now further build out the front end to query this API and show the tips on the website.<br>
But before doing that let's introduce classes in React and keeping track of state.
|
|
|
show
|
5:46 |
In this lesson we're going to talk about classes in React and keeping state.<br>
So back to our app, here's where we left it off before setting up the Django API.<br>
And the grid React app already came with an app class setup that extended from component and component is from the React library.<br>
And the starter code only provided a render method.<br>
So let's start to keep track of some state and in particular, three things: an array of all the tips, an array of the tips that will be shown based on a filter and the filter string that's inputted by the user in the search box.<br>
So how do we keep track of state?<br>
First I'm going to set up a constructor.<br>
And that's with the function-based component that takes a props object.<br>
As we inherit from component first and foremost, we need to go super and pass the props upstream.<br>
Then we're going to initialize this state which is an object or, in Python, you would say dictionary.<br>
And we're going to set the three objects we want to use: orgTips: [], showTips: [], filterStr: '', So this will hold all the tips as created from the API by Axios and we will do that in the next video.<br>
This is our pristine copy, so to say.<br>
And in show tips, we're going to filter the tips that are shown in the UI based on the string that the user types in the search box which is held in filter string.<br>
We're going to define two of my foot stops which we will work on in the next videos.<br>
And one is a standard method that comes with the React lifecycle and it's componentDidMount.<br>
And this method runs when the component output has been rendered to the DOM.<br>
And here we're going to call the API using Axios and that's for the next video.<br>
Then I define an onFilterChange method which gets an event.<br>
And it's going to filter the org tips into show tips.<br>
So the reason I have two arrays is that show tips will reduce the amount of tips shown as I keep my copy in org tips.<br>
To demo this, when this fires I'm going to log a message to the console onFilterChange called, so you can see when that hits.<br>
And I have a helper, filterTips and you receive the arrow functions in text that takes a filter string and it's going to help filter the tips.<br>
Now this is not doing anything yet because I have to use those methods and variables in the view, and as we've seen before you can use this template-like syntax and then in variables in tags.<br>
So you can reference this state filter string and if this input field changes by the user typing in a string I will call this onFilterChange and let's see that in action by opening up the console.<br>
And I don't need to put quotes here, nor here.<br>
Okay?<br>
You see, when I start typing, for every char I type into this input box, onFilterChange is called.<br>
So every time I type anything in this input box char by char, every time it's calling this event handler and it's going to filter the tips based on my inputs dynamically.<br>
So this is not very useful yet because we are missing the real data.<br>
So the next video I'm going to use Axios and the componentDidMount to call the API.<br>
One final resource: if you go to the React documentation there's a state and lifecycle page and it explains what componentDidMount does.<br>
This method runs after the component output has been rendered to the DOM.<br>
This is a good place to set up a timer and in our case, it's a good place to call Axios and retrieve data from an API.
|
|
|
show
|
8:06 |
One thing I forgot to mention in last lesson was the binding of our new methods.<br>
So in JavaScript, class methods are not bound by default.<br>
So an example here, we see the handle click which was defined as an extra method on the class.<br>
Got this bind this.<br>
So let's do that to make sure we don't run into any bug.<br>
Going back to my constructor.<br>
I just define if filter change this.onFilterChange = this.onFilterChange.bind(this); and we do the same for the other method that we defined which was filter tips.<br>
Page still loads.<br>
And with that out of the way let's go back to componentDidMount and start to call Axios to retrieve tips from the API.<br>
As shown in a previous video the API is now running on local host port 8000.<br>
So we can start querying that endpoint.<br>
First let's set up a constant called tips endpoint and you should remember it was under API.<br>
Next we need to import Axios.<br>
So I'm going to make a constant access variable require Axios and we already installed it at the beginning of this lesson and now I can use it in componentDidMount.<br>
It's pretty straightforward; we can call the GET method on Axios give it the TIPS_ENDPOINT and do a bit of method chaining.<br>
So if this works we are going to do something with the response.<br>
And if it doesn't work you're going to catch an exception.<br>
And I'm basically just going to log that to the console.<br>
Now, something very important, as I mentioned before immutipility is an important thing in React so that means that you would never set a state like this.<br>
You can do it technically but it's not how things are done in React.<br>
React has a special method setState and not only does it set the internal state as defined in a constructor it also re-renders the view which is the main thing with those single page apps that they refresh on the fly no page refreshes required.<br>
So setState handles that in the background.<br>
So whenever we want to update state we need to use this setState method.<br>
And you will see that in the second hangman project a lot as well.<br>
And this is as simple as giving it the new values in an object.<br>
And in this case I'm going to set both arrays the orgTips and the showTips to the full response data.<br>
Because remember this is our pristine copy and the showTips is the one we're going to filter based on what the user types in the search box.<br>
Now there's a lot more curly braces than Python so it's easy to make a syntax error.<br>
But having the console open in the browser I would easily spot that.<br>
This is not going to do anything yet because also here we want to render the tips in the view so going back to render where we had those static tips we're going to get rid of this.<br>
And we should remember from the JSX in the tip component, JSX supports embedded JavaScript which is very cool.<br>
So we can now define an arrow function to loop over the tips.<br>
So this state showTips on the filtered ones I can call map on that array doing something with each tip.<br>
And I just got map in the JSX refresher.<br>
And we want to do an enumerate to get the tip and the index.<br>
One thing I forgot to mention when I spoke about the structuring, is the ...<br>
notation which is similar in Python to the *.<br>
Remember in Python where you want to tuple unpack a list of five into three elements and you would say put the rest into c?<br>
Well JavaScript has something similar but instead of the star it uses ...<br>
And I'm going to use that to parse all the properties to the tip component writing this code.<br>
Pretty nice.<br>
So all the attributes of tip so the text, the code, the links I can parse into tip using ...<br>
The enumeration with index is because every tip in the list needs to have a unique identifier which will be the number of the iteration.<br>
And I'm also going to parse the filter string because later we will use that to do some highlighting on the matching string.<br>
And this should be it.<br>
Give it some indenting.<br>
And I have a syntax error.<br>
And as there's an arrow function I'm using the fat arrow.<br>
Awesome, look at that!<br>
All the tips are shown in our front-end.<br>
All with their text, code and optional links; sometimes there's a reference link.<br>
And this data is queried directly from the API.<br>
Which we can confirm because we got a 200 response from Django's app server.<br>
And it didn't require a lot of code.<br>
So we called Axios in the componentDidMount it was like ten lines of code.<br>
And then we set the state to update your arrays with the response data.<br>
Then in the view, only three lines of code we were able to loop over the tips using an arrow function and calling the component for each loop.<br>
And of course the tip component is way more code but that is now abstracted away which we not only can use here but we could also import it into other web pages.<br>
Which is a nice example of the re-usability of React components.<br>
We cannot filter anything yet so that's what we're going to code in the next video.
|
|
|
show
|
4:40 |
In this video, we're going to look at filtering tips by typing into the input field.<br>
We already defined stubs for onFilterChange and we edited to the on change event listener inbounded in the constructor and we have a helper to actually filter the tips and filter change kits in the event and sometimes that event can be empty so let's handle that first.<br>
So we're going to set a const filterStr again const, because it's not meant to change and if event has target value I'm using a ternary here.<br>
I'm going to get the value to lower case to make it easier to match the tips if event target value is null or undefined or if anything falsy, I just set it to an empty string.<br>
Again, to manipulate state we need to use the setState method passing it in an object.<br>
The filter string, of course, changes and it's one types so I'm going to pass that through as well as an update to the showTips array.<br>
And we're going to use the helper, filter tips to return a new array of tip objects.<br>
I'm going to parse in the filter string and that's it for the onFilterChange event listener.<br>
Now the filter tips is a bit more involved because we have to loop over the tips and match them both on the tip text as well as the tip code.<br>
So let's make a new tip array then we're going to return.<br>
And to match all the tips, we look over origTips array.<br>
And we're going to use the newer notation or const tip, which is a local variable of this state for tips, and here we're going to do some conditional matching of the tip and if it matches, we're going to push it onto the new array.<br>
And a conditional is a bit involved because tip turned out to be false sometimes so we have to make sure that it actually has a value so that we can call to a lower case on it and we can use the newer includes give it filter string.<br>
So I type, for example, itertools.<br>
If itertools is in the tip text, this returns true.<br>
But we also want to match the actual code so I'm going to do an or and to the same conditional for the code attribute.<br>
So first of all, it needs to be true because otherwise to lower case it'll be called on non- only to a crash.<br>
But the rest is the same.<br>
I'm going to look if the string that the user types in input field is included in the tips code.<br>
If either of those is true, I push the tip on the newly-created tips list or tips array and that tips array gets returned recalling the helper in the setState method.<br>
Let's see if this works.<br>
Cool.<br>
Now I type itertools.<br>
And we get all the tips that contain itertools.<br>
And type numbers and I get everything with numbers arg parse, Guido, you name it.<br>
However, there's one final thing I want to do.<br>
If I type this, I still have to kind of do an effort to see in the tips where the match was.<br>
So in the final video of this lesson I'm going to use the React highlight work plugin to make the matching of the work more visually appealing.
|
|
|
show
|
4:40 |
The last week I want to do is to highlight a word as it matches in a tip.<br>
We already installed the React highlight words plug in so we can just import that at the top, like so then I'm going to modify the tip component to use the highlighter to highlight the word that matches.<br>
Unfortunately I have to do that in two places because here we have the tips code and here we have the tip text.<br>
But even so the result will be pretty cool.<br>
The highlighter is a component that uses the regular syntax of a component and it has a couple of properties we can set.<br>
I'm going to define a class of highlight with search words as an array and I'm going to give it the filter string I passed in earlier.<br>
Where is this filter string coming from?<br>
Well, in the view when we did the loop over the tips we explicitly passed it as a property to the tip component.<br>
So filter string is now available as part of the props.<br>
We set outerscape to true and importantly text to highlight is the props tip and we are going to remove it here because its now handled by a highlighter component.<br>
We have to give it a default of empty because when I was preparing it could not handle an undefined value.<br>
And we close the component.<br>
So that's one and now we need to do the same for the actual code.<br>
So in pre tag I'm going to have another highlighter component and that's why I said it's a bit of a shame we have to do it twice because the code is almost the same.<br>
We've got the highlighter component, same class name same search words, same outerscape but the only thing that changed is the text to highlight and here of course it's the props code.<br>
Let's see how this works.<br>
Nice.<br>
I actually had a style ready but I don't even think we have to set it but lets do it just to see where we set the ETSS in the tips folder under source there is an index.css and if you want to have another style you can just define your class here, highlight and it directly detected the change.<br>
So now, apart from the default yellow background, we have a red colour.<br>
This way you know how you can treat the CSS of your React app.<br>
Again it's under source index.css.<br>
Which is linked under source index.js.<br>
Near you see all the imports of the app.<br>
I forgot to mention at the start that we wrote all the code in the app component.<br>
Right?<br>
And how that is actually displayed on the page is index.js and index.html as a root id index.js targets that root id and renders the app component inside of it.<br>
And that's where everything is coming together.<br>
So pretty cool.<br>
A fine end to our tips app with some nice styling.<br>
That concludes the videos of day one.<br>
See you tomorrow for the practical part of this lesson.
|
|
|
show
|
0:59 |
Congratulations, you made it to the end of the videos of day one, first nine videos, and now, it's day two welcome back, and it's all about getting practical.<br>
So, you got quite some React basics under your belt by watching the videos, and I encourage you to query an API of your own using the code that has been provided in the lesson, which you can find in the demo folder.<br>
npm installed axios for convenience.<br>
Try to make a front end using React.<br>
As I always say, the learning's in the practice.<br>
To make a quick start, I encourage you to use the create-react-app as I did in the previous videos to get your app bootstrapped so you can dive straight in writing your own components.<br>
Good luck and have fun and tomorrow, I'm going to teach you a second app, which will be a Hangman game.<br>
It'll be pretty exciting.<br>
So practice as much as you can and tomorrow, we do another set of lessons.<br>
See you tomorrow.
|
|
|
show
|
7:00 |
Welcome back to the 100 Days of Code Day three of the React four day lesson.<br>
In the coming seven videos, we're going to build a complete Hangman App from scratch using React.<br>
And, it's inspired by a Java game I made a long time ago called Free Monkey, which is a variant of Hangman where instead of hanging, the monkey gets imprisoned.<br>
And, the goal is to, of course, guess the movie and set the monkey free.<br>
But, if after five attempts, you didn't guess it the monkey gets imprisoned and we use different images to be shown in the view as the state changes.<br>
So, as last time, we're going to use to create-react-app bootstrap script so we get everything ready.<br>
So, head over to my terminal into the demo folder.<br>
npx create-react-app freemonkey Of course, their going to pull in the dependencies again because every app we create with this script is independent.<br>
Great.<br>
Cd to freemonkey.<br>
Open a new terminal, where I start the app.<br>
Again, the first time, this takes a little bit.<br>
Awesome.<br>
So, as last time, we can just start writing code in app.ks.<br>
But, I need a few things more in this case.<br>
I prepared a list of movies and a function to randomly get a movie which serves as the word to guess.<br>
So, here's some starter code, which I put in data.js.<br>
So, here's the list of movies.<br>
And, at the end, I got a function called getRandomMovie to get a random movie.<br>
Oops, this needs to go in sort, of course.<br>
And, in app.js, we can import this module.<br>
I'm going to skip the logo and import.<br>
getRandomMovie from data.js.<br>
And I will soon bounce something to the console to confirm that this works.<br>
The other thing I provided upfront is some customized styling which I'm going to write into index.css.<br>
And I'm going to import that here.<br>
We already have body in code and I added some styles which we will see later.<br>
Also, right at the box, I define some constants.<br>
So, I got a game title, Free Monkey React long and lost messages the alphabet, which will serve as we make the letter buttons a place holder, which we will use to hide the letters of the movie to guess the allowed number of guesses, which is five.<br>
This seems a bit like a lambda in Python So, there's actually an arrow function.<br>
It gets a number and it returns Javascript's equivalent of an f-string.<br>
So, backticks and the variable is embedded.<br>
And, this way, we can, later in the script just call it like MONKEY_IMG with a number and that yields the different images.<br>
So, to show you that depending the attempt the images, they'll change and I just have them stored on my server.<br>
Et cetera.<br>
Up until five.<br>
And if the movie is actually guessed within the number of allowed attempts which is five, we get this image.<br>
We can just give a number or string and it displays the right image and we will see that later.<br>
So, these are some constants we will use throughout this lesson.<br>
Let's verify if the getRandomMovie works.<br>
So, I'm going to delete this Bootstrap code and just make a h1 header and call the getRandomMovie function.<br>
I hit save.<br>
And this works.<br>
Every time I refresh, it shows me another movie.<br>
Now, let's do a bit of planning what's required to make this game work.<br>
I'm going to set up some To Do's.<br>
To Do one is to define a constructor and a component did mount lifecycle building method.<br>
Step two is to define a method to reset a game because whenever we hit a win or loss we need to go back to the initial state get a new movie, and reset the number of attempts and go back to the initial Free Monkey image.<br>
We also want to render the state variables at this point.<br>
Next, is the creation of a keyboard with letter buttons.<br>
So, each time a user clicks one of the letters it should see if it's part of the movie and update the mask, mask being the underscores.<br>
That will require some helpers.<br>
So, we need to match the char and the word or chars and update the state.<br>
We will also style the buttons.<br>
So, if the letter clicked or guessed was part of the word, we color the button green.<br>
And, if it was not, we color it red.<br>
Finally, upon every guess we need to see if the game ends and it can be a win or a loss.<br>
We need win and loss helpers and check state.<br>
And, that actually concludes the game.<br>
Six steps.<br>
It was quite some code to write.<br>
So, in the next video, let's dive straight into the first To Do.
|
|
|
show
|
2:52 |
Lets start off by writing our constructor.<br>
This is familiar from last time when we did the API.<br>
It gets the props object and we have to call the superclass passing on the props.<br>
We're also going to set up the state object which I leave empty for now.<br>
Then we're going to define a componentDidMount method which as we saw on day one make sure that whatever we do the component has been fully loaded.<br>
What we're actually going to do here is reset the game which will be a helper.<br>
Let me already stub this out resetGame() Oh, and it's actually an arrow function so, using fat arrow.<br>
And one thing I noticed that using arrow function it's not necessary to do the binding and constructor like we did last time so this saves a little bit of code.<br>
So, still some setup and lets also go to the render and define the structure of our app writing some JSX code.<br>
We're going to put everything in a game div.<br>
We will have a title which is the constant we defined Free Monnkey React I will have the state, or the monkey image depending on the number of guesses we're into the game.<br>
I'll call that state and the source will be that lambda thing we had at the top and we're just going to set that to zero the first image.<br>
Then we will have the mask which basically is the word replaced by underscores and finally we will have a keyboard or 26 letter buttons which we'll write in step three.<br>
See if this all renders and there you go the first image.<br>
Of course the mask and keyboard are not there yet so let's write those next.
|
|
|
show
|
5:18 |
The next to do is to reset the game.<br>
We already made a stub so let's code it up now.<br>
First, we get a new movie.<br>
With the helper function we imported.<br>
We must log it to the console to see what it is while we're developing.<br>
Then we're going to update the state, and again we should always do that with a setState.<br>
builtin method, because it not only updates the state it also re-renders the component which is often what you want.<br>
Then give it an object We're going to set various attributes.<br>
The header will be in the game title and you might think, "Well, the title will be already set" and that's true, but if there's a win or loss situation the header will have changed so we have to reset it back to the default Free Monkey React title.<br>
So we're using a header, both a header as well as flash or status message.<br>
The movie will be a random movie we picked above but broken into an array.<br>
Now I'm going to define my mask which will be the same array of movie characters but of course stripped down to place holders and that is what we actually will render to the page so the user cannot see the movie.<br>
And then we're going to use a regular expression and the only challenge is there are sometimes dots or numbers, apostrophes and those you don't want to use, or to guess.<br>
So I'm only going to replace the alphabet letters any irrregular expression.<br>
You can define those as A-Z upper case and a-z lower case.<br>
We're going to match those across the whole string and replace them by the placeholder which we defined as underscore.<br>
So that gets all the alphabet letters in the string replaced with placeholder and then we want to dump that into an array and we do the same as the previous line to split it by an empty string.<br>
Now see there's an action in a bit.<br>
Then I have a button bridge it and this will use a helper we define in the next video.<br>
We just create buttons.<br>
Then we have a bad guesses counter.<br>
These are the variables we're going to work with throughout the game and when we start a new game we want those to have sensible defaults.<br>
Again, we guess a new movie, we split that in an array we mask all the alphabet letters to placeholders split that in an array.<br>
This is private.<br>
This will be visible to the user and this will be updated as the user guesses letters.<br>
There will be a keyboard check hold button widget and there will be a counter of the number of bad guesses.<br>
Now we can update the rendering to use those staid variables.<br>
So the title will be this date header the monkey image won't be hard because it's a zero but to the number of guesses so which will be equally be zero right now.<br>
The mask will be visible here and the keyboard will be visible here.<br>
And of course, UI complaints not a create button it's not a function because we have to still define it and that's what we're going to do next.<br>
Then we still make sure that there's not any other syntax error by just creating a stop.<br>
Again, I am using an arrow function so we don't have to bind it in the constructor.<br>
Save this, and react is happy again and now we're seeing the mask and if I go to inspect into the console I see that "Cape Fear" matches the mask.<br>
Refresh.<br>
Contact.<br>
Matches the mask.<br>
Teases.<br>
That looks fine.<br>
"Tootsie" fine, "Peeping Tom" one two three three three.<br>
That looks correct.<br>
In the next video we're going to have the button widget coded up, and appearing right here.
|
|
|
show
|
3:15 |
The next step is to create the alphabetic letter buttons and we made already a createButtons stub which will be called when we set the state when we reset the game.<br>
So let's make an array of buttons and loop over the alphabet an alphabet we defined here as a constant.<br>
There are quite some things going on here.<br>
I loop over the alphabet, and I do it with enumerate and that's because every button has a unique key.<br>
So we give it the index or the number of the iteration, as a unique identifier.<br>
Again, HTML uses class, but JSX uses className camelCase to indicate a class so we can style the letter with CSS.<br>
And as you remember, I provided some CSS and here I give the buttons a width and a height of 50 pixels and a greater font size, a background a nice rounded border, and some margin.<br>
Every letter button has an onclick handler.<br>
This is going to call this matchcar which is a method I will define in a second.<br>
And I will uppercase the letter as shown to the user.<br>
Those are buttons so they natively support clicks in the browser.<br>
So now we have to define the matchcar helper to do something when a button in clicked.<br>
Again, I use an arrow function.<br>
And for now, just balance what we get upon click.<br>
So the event should have a target and the target should have an inner HTML.<br>
Let's see what this gives us.<br>
Nice, the alphabet has 26 buttons.<br>
I click a button, and it echoes the letter I clicked.<br>
Let's make the game a little bit more narrow which I probably forgot in the CSS.<br>
So let's give this a zero outer margin on the right and the left side and make the body a width of 800 pixels.<br>
You could even go lower, to 600, nice.<br>
In the next video, we're going to do the bulk of the work because when we click a letter we want this letter to be matched with the letters in the mask or the movie we guessed and reveal those letters if they match.<br>
And that involves, of course updating the state of the application.
|
|
|
show
|
6:06 |
Great!<br>
So the user at this point is able to interact with the application, making guesses which the application is able to retrieve.<br>
Now, one of the most critical parts of the application.<br>
When a user guesses a letter we have to match it against the movie that was selected.<br>
So let's set up some variables.<br>
We have guessed, which is the event target in our HTML which was the letter that was shown in our pop-up.<br>
Let's make it lowercase as well.<br>
Let's make a state variable to see if there's variables in the movie.<br>
And let's make a new mask.<br>
Basically, the placeholder's updated with the letter that was guessed.<br>
Next we're going to look over the private movie array see if the letter is in there, and if so, update the mask.<br>
In this case, it's convenient to write a classic style for loop to have the index integer available.<br>
For every letter in the movie we're going to see if that lowercase letter matches the guessed lowercase letter.<br>
If you have a match, you push the matching letter onto the new mask array.<br>
And in that case, asserted letter becomes true.<br>
And I use this state variable in a bit to update the bad guesses counter.<br>
So in this case, if it becomes true the user did not spend a guess.<br>
Beyond increment, the bad guesses count if asserted letter never turns true.<br>
If the guessed letter was not the same as the letter in position i we update the mask with the original char which is the placeholder.<br>
So this is all preparation work.<br>
At this point, you're going to set the state and update the mask to the new mask and update the bad guesses counter but only if asserted letter was false.<br>
So if asserted letter became true I'm using a ternary if statement then we just bounce the current count back.<br>
And if asserted letter was false we also reference the original bad guesses but add one to it.<br>
At this point, there's one final thing we should do because if the mask is fully exposed that means that the movie was guessed and the user won.<br>
On the other hand, if the bad guesses becomes greater than five, then it's game over.<br>
So we're going to use a callback to check win or loss and we're going to write that in our next video.<br>
Let's see this in action.<br>
Let's check my console in case.<br>
That's all good.<br>
F is not in that title.<br>
C is.So is H.<br>
So is B.<br>
So is E.<br>
A is not.<br>
And image updates, it looks like magic, right?<br>
But that's actually because in the render the image that shows is tied to the bad guesses count.<br>
So this case, bad guesses became two and monkey image two shows.<br>
Now if I do another bad guess, Q the count goes to three, and the image updates.<br>
And by using set state, which is the proper way to update the state of the app you get this rendering out of the box.<br>
So after setting the state variables this rendering happens again, and the variables I reference here are updated, hence show an updated view.<br>
Now there's one thing to address.<br>
At this point, it's game over, but there's not a limit here to recognize that I have guessed five times and updated view to show that I lost the game with a button to start over.<br>
So I can keep guessing, but of course I should be stopped at this point.<br>
We already see that this leads to bugs and that's because I went over the max count of five attempts.<br>
Now, before addressing this, in the next video I'm first going to give the button some styles because it's very hard to see now which letters I guessed and which are not.<br>
So what if we can update the buttons with some CSS to make it easy to see which ones I have picked and of the ones I picked, which ones are good versus bad.<br>
So that's what we're going to do in the next video.
|
|
|
show
|
2:32 |
Let's give the buttons some styling to give the user some more feedback which letters are used, and if the result was good or bad.<br>
You will be surprised how easy it actually is to do this.<br>
Just three lines of code.<br>
And we're going to do that in the match char method after the set state.<br>
I still have this event target available which was passed in as an argument and as we have seen in the Javascript lesson I can set properties on HTML elements.<br>
So, first of all, let's disable the button so the user cannot click it twice and that's actually convenient, because otherwise I would have to write code to actually look if the letter was guessed, but by just disabling the button I already let the UI prevent the user from clicking the button again so very little code, important step.<br>
Then let's add some styling and as we saw in the Javascript lesson I can use the dot style and then CSS property to override styles on the fly.<br>
Now I'm going to update the background color of the button and I want to give it green or red based on a successful guess.<br>
And we have this state variable asserted letter she used in a ternary statement here I'm going to do the same.<br>
So if asserted letter became true and make sure to remember when we were looking through the letters of the movie when the letter matched, the asserted letter became true which means the guess was successful.<br>
So if the guess was successful, give me a green background and if it was unsuccessful, give it a red background.<br>
Black font on green or red is not that nice so that's all right to color to be white.<br>
And that's all we need.<br>
If I guess a D, look at that!<br>
Now it's way more usable, 'cause I can immediately see I got one successful guess and two failed guesses.<br>
Now three, four, five, game over.<br>
This is, of course, the thing we still need to address.<br>
When we hit the five wrong guesses the game should bail out and I should get a button to try again.<br>
And that will be the topic of the next video.
|
|
|
show
|
8:05 |
We are almost done with the game.<br>
The only thing we need to now do is to write our callback, check win or loss because every guess we can hit the end of the game which could be a win or loss.<br>
So we're going to make another method.<br>
checkWinOrLoss, arrow function.<br>
Don't need to bind it in the constructor.<br>
And I'm going to do two checks.<br>
I'm going to check if won, if lost.<br>
So if this game won, and that's a helper we're going to write in a bit.<br>
I'm going to have a second helper if game over.<br>
Let's write those helpers first.<br>
And I can use arrow functions to have a nice view of them online, no arg is needed and when is a game won, well if the mask does not have any other score or placeholder, that means all the letters have been guessed so we can do an easy check to see if the mask has any placeholders left.<br>
So we can say if this state mask does not include, so this is the negation of include, so does not include placeholders, and that's actually a return because our functions, when you write them on the same line, return a value.<br>
Then when do we have the game over scenario?<br>
Well we have our bad guesses counter.<br>
So if that's greater or equal than the allowed guesses, then you're game over and we had set that to five, so if the bad guesses counter becomes equal allowed guesses then it's game over.<br>
So if game won, what do we want to do?<br>
Of course we want to update the state.<br>
And what do we want the app to do?<br>
Well, the header first of all, this guy should say something else, and now we need to find a constant with won message.<br>
Congrats, you freed the monkey.<br>
So that will show up here, why will it show up?<br>
Because in render, this state of error is displayed.<br>
And as we said before, when we update state it not only sets the attributes based on state, it also re-renders.<br>
The bad guesses is not only a counter but it also serves as a sub-string of the image to show.<br>
As we said before, the winning image has this on the wins sub-string.<br>
So by overwriting the bad guesses sub-string to win state, the winning image will show.<br>
Then the button widget I'm going to override to show a new game button, and that's to help what I'm going to define next.<br>
New game button and I give it a string, play again.<br>
So the keyboard's going to disappear temporarily and show a button called play again which when clicked resets the game to its initial state, so let's define a helper.<br>
Receives a button text because we're going to have different button text depending if the user lost or won.<br>
And we're going to return a button.<br>
We're going to un-click handler.<br>
And when that button is clicked it's going to call this reset game.<br>
And as we saw before, reset game is then going to guess a new movie then set all the variables to its initial state basically resetting the game just like if I would refresh the page.<br>
And that's it, when the game is won.<br>
Now for game over it's similar so I'm going to copy the set state method but instead of a won message we're going to show the lost message.<br>
Ouch, Monkey's locked away.<br>
Here we have to also update the mask because when a user loses, only part of the movie will be shown in the mask diff and at this point we want to reveal to the user what the winning word was.<br>
So here we're going to display the private movie array.<br>
For bad guesses we don't have to do anything here because the final imprisoned monkey image is already showing, and the button is the same, we're going to show the new game button, but instead of play again as the user didn't win I'm going to make that try again.<br>
Maybe that will trigger the user to keep playing.<br>
I don't know, but it's nice to set a different text on that button.<br>
Let's put some returns in to prevent a fall through from game won to game over.<br>
Of course you could also write if else if.<br>
And that should be all, let's see how the application now behaves.<br>
First let's do a loss, so I'm pretty bad at guessing.<br>
Wow, I hit five and it's game over.<br>
The text updated to ouch, monkey's locked away.<br>
The movie has been revealed because it's nice to show a losing game what the actual movie was, and there's a new button which when clicked should reset the game, awesome.<br>
Monty Python, that's funny.<br>
So I'm just randomly clicking.<br>
This is a pretty long one to demo in so I'm going to fail again.<br>
This one seems easier.<br>
Let's make a mistake.<br>
R.<br>
And an S, and that's the winning image which had this sub-string, and we have the same button to reset the game but now it says play again, and of course the header now says congrats, you freed the monkey.<br>
That's nice that we have a different picture.<br>
A complete game using React and it's not that much of code, actually.<br>
The whole app.js is just 127 lines and nearly 20 of that are constants and setup.<br>
Of course all of this code is in the demo Free Monkey folder if you want to play with it.<br>
This wraps up the lessons of today and tomorrow you're going to practice what you learned.
|
|
|
show
|
2:31 |
Congratulations!<br>
You made it to the end of this lesson that is, the video part, in summary building a complete Hangman variant, Free Monkey game, in React.<br>
And we accomplished quite a lot writing 120 or so lines of code.<br>
Now it's day four, and today's a workout day so I encourage you to go through the lesson's materials and see if you can build a game of your own.<br>
Again, all the demos are here under Demo.<br>
You got the API code and the Free Monkey game you can click in it, and the main code is under src/app.js or here.<br>
And here's the game we wrote in the previous lessons.<br>
It's always useful to have the code at hand especially when you're learning.<br>
And here are some of the common themes you will see when building React apps like working with classes, constructors componentDidMount, update state override CSS styles, defining helper methods using the arrow syntax, not required but pretty common and of course, rendering stuff to the browser.<br>
So you can log through my code or you can look at React's intro tutorial for how to build a tic-tac-toe game.<br>
It's just also an interesting exercise.<br>
Of course, build any game of your liking.<br>
I like games to learn programming because they often deal with state, hence classes conditions, and some design to make it look nice to the user.<br>
And as we've seen, it was a really great exercise to learn more React.<br>
Remember, the web runs on JavaScript and React is a solid choice as a UI component library.<br>
So getting some basics can pay off big time especially when you are or want to become a web developer.<br>
Final important note, we encourage you to share what you've learned because the accountability aspect of the hundred days is what gets you a greater return.<br>
So feel free to tweet out your work using hashtag #100DaysofWeb and if you at mention Talk Python and PyBites we see your work, and we will be really excited to see what you come up with.<br>
Good luck, have fun, and write a lot of React code.<br>
See you in the next lesson.
|
|
|
|
1:26:48 |
|
|
show
|
0:30 |
Welcome back to the 100 Days of Web in Python.<br>
Over the coming four days, we are going to build a simple Django app, and you will learn about the powerful Django framework.<br>
You're going to build a quote application, and as you see me do it, you're going to repeat that process, or build an app of your own.<br>
It will be very hands-on.<br>
And after these four days, you will have all the basics required to build a Django application.<br>
So, let's dive straight in.
|
|
|
show
|
1:28 |
In the course repo you have a folder called 45 to 48 Django Intro.<br>
And here in a Read Me, we can see the plan for the coming four days.<br>
Today you're going to watch the first half of the Django videos and you get all the basics to get up and running with Django.<br>
Then day two, you take a short break and really have to practice as soon as possible.<br>
You can follow along with my examples or start building your own app.<br>
And here are two co-challenges on our code platform that you can start during tomorrow.<br>
Then in day three, more videos building out app.<br>
You will see forms, the admin backend function and class based views templating, static files, and we even make the app look nice using CSS.<br>
There's a lot to cover, but it will give you a nice foundation to build more Django apps of your own.<br>
Then the last day, it's very free form.<br>
I mean, you can copy along what I did in the previous days videos.<br>
You can continue the app you started building during day two.<br>
The important thing is to practice as much Django as you can during these four days.<br>
The learning is in the practice.<br>
And as usual, anything you build please share it out with the 100 #100DaysOfCode and including Python.<br>
Now, let's dive into Django.
|
|
|
show
|
3:42 |
The Django starter, here's the Django homepage and it gives a nice overview what's awesome about Django, I like to quote at the top.<br>
Django was invented to meet fast moving newsroom deadlines while satisfying the tough requirements of web developers.<br>
That's true, although there's quite a bit to it to learn Django to get started.<br>
Once you know those basics, it becomes relatively easy and fast to build robust apps with clean code and good structure.<br>
It's fast, it's fully loaded comes with batteries includes just like they say about Python and the Standard Library.<br>
It has security builtin, so SQL injection, Clickjacking Cross-site Request Forgery, all that stuff is covered.<br>
I mean, you don't want to imagine even having to write your own code for those things.<br>
First of all, you might not even know how to second of all, that's the stuff you don't want to worry about.<br>
You want to build your awesome app.<br>
It's scalable which is important, because you're awesome app gets popular you need to handle more traffic.<br>
Scalable also see in terms of the structure of Django Django has a project and inside it has apps for example, for the code challenge 52, the other day I made an app in one Django project and I could easily move it over to another Django project which is great.<br>
A little bit on Django's architecture.<br>
This might seem complex, and at first sight it is.<br>
But as we start building our Quotes app, this will start to make a lot of sense and basically comes down to a client or web browser, making a request to the web server where our Django app runs.<br>
The Django project has one or more apps and every app has a URL router that routes the request into the view.<br>
The view then has one or more functions or classes that handles the request which commonly interacts with the database or Django's ORM and then sends a response back to the browser, which includes the template and the data that was retrieved from the database.<br>
That's basically all there is to it.<br>
But again, we will see this in more detail later.<br>
With this design, Django follows the MVT design better closer to rated MVC, Model-View-Controller or in Django's case, MVT, Model-View-Template.<br>
Lastly, how does this differ from other frameworks like Flask?<br>
As you see here, Django comes with batteries included.<br>
Django has its own ORM, it's templating engine.<br>
You get it all out of the box.<br>
Flask on the other hand is bare bones you can't get a hello world at working with seven lines of code.<br>
But then for templates and databases, you're on your own which gives of course, great flexibility you can use the ORM of your choice as well as the template engine.<br>
Django forces you to do it the Django way.<br>
Its own ORM and templating, which I like.<br>
But some people say I don't really like that.<br>
So I take Flask and build my own or use the components of my choice.<br>
Flask in that sense is called a micro-framework.<br>
It's easier to get started with but when you need to grow to more complex applications you have to rely on plugins and more customized design.<br>
Django might have a steeper learning curve because as you see here on the diagram there's a lot of moving pieces.<br>
But once you get that down, you can do it all in Django and you should be fully covered.<br>
I hope that gives you an idea of how Djangos architecture works.<br>
But of course we have a lot more explaining to do and by building a Quotes app you're going to see these pieces one by one.<br>
So let's see next what we are going to build.
|
|
|
show
|
1:54 |
Let's quickly look at the application we're going to build.<br>
Here I went to the demo folder.<br>
I made a virtual environment.<br>
I did the migration to the database and don't worry, in the coming videos we're going through all of this, step by step.<br>
And then I did a run server.<br>
I can now access my app on this localhost IP.<br>
And again, we go through this, step by step, later.<br>
I just want to show you the app.<br>
So, a nice design.<br>
All credits to mui.css.<br>
And we can add quotes so that gets measured, gets managed which I think is from Drucker.<br>
I can give it a source where I found it.<br>
I can give it a cover.<br>
Let's actually look for one.<br>
Alright.<br>
So the cover can be a JPEG link.<br>
New, and the quote got edit.<br>
I can go into the quote and here you see my background, which is pretty cool.<br>
I can go back.<br>
I can edit it.<br>
Let's say Peter Drucker and can commit it to the database.<br>
I can add some bogus.<br>
I don't like bogus.<br>
I can delete it.<br>
It asks for a confirmation.<br>
Done.<br>
So here you see, full krat operations.<br>
Create, read, update and delete.<br>
So, pretty basic krat app but will service to show all the components involved to get a Django app working.<br>
Alright, let's start coding.
|
|
|
show
|
3:00 |
Time to install Django.<br>
First, let's make a virtual environment.<br>
Activate it and install Django.<br>
Let's start a project and here on the slide you see the syntax for that.<br>
After installing Django I have a Django admin utility.<br>
And Django you always start with a project which is kind of the global project with it's configuration and all the generic stuff.<br>
And inside that project you can make one or more apps.<br>
And in this case we're just going to do one app called quotes.<br>
So first make a project.<br>
And I'm using the .<br>
because I want to create the main app of the project called mysite in this current directory.<br>
And I've grown accustomed to this because not doing it like this gave me issues when I deployed previous Django apps to Heroku.<br>
This gave me the manage.py which we will use later to do the database migrations and run the server.<br>
My venv is my virtual environment and mysite is the main app or the project app which has it's settings for the configuration which we will see in the next video.<br>
And I want to have my quotes as a separate app.<br>
So I do start app quotes.<br>
And now I have also quotes folder which is the app inside the Django project.<br>
Django comes with batteries included so the authentication model is already there.<br>
And I can now run the migrate command on the manage.py to get all those models synced to the database.<br>
And where's the database?<br>
Well, out of the box Django comes with SQLite.<br>
Usually I use Postgres for my projects but getting Postgres ready is beyond the scope of this video.<br>
So for now to focus on Django we're going to use the standard file base SQLite database, which you see here.<br>
And now I can run the same manage.py command again with run server.<br>
And that starts the Django server on localhost and I can now navigate to this address and it should see a landing page confirming that Django is installed successfully.<br>
Awesome.<br>
In the next video we're going to look at settings of py to look at some common configuration settings you want to add to a starting Django project.
|
|
|
show
|
4:10 |
Let's look at Django's configuration.<br>
In the main app, mysite, there's a setting.py file which administers a lot of settings.<br>
And in this video, we will do three important things we set the secret key and debug in the environment to venv/bin/activate.<br>
We add a new quotes app to the installed apps and we define a central template folder, mysite templates which we have to add to the templates constant.<br>
And we will see that later that's where the base template will live.<br>
So, going to settings, and notice that there are a couple of security warnings I want to address first.<br>
The secret key should never be hard coded so we're going to load that from the environment and debug set to True which is fine now.<br>
But when you deploy the app, it that be False so it's better to control the app from the environment and not hard code it like is done here.<br>
So let's load it from my environment.<br>
And, notice the difference, if secret key is not available it will just crash which is good and for debug, if it's not available I set it to false which you can do with the get method on a dictionary.<br>
So if debug is not defined, in my environment it is just set to False by default.<br>
A large host will probably also limit the hosts that can connect to the app but that's more relevant when we deploy the app so I'm leaving that empty for now.<br>
To load those variables, I'm going to go into venv/bin/activate, which is the activation script of my virtual environment so when I enable the virtual environment this activate script is called.<br>
So the variables I store in this script will be accessible in my environment.<br>
So go down and then do export SECRET_KEY.<br>
And export DEBUG=True for now because we're still building the app so want to see any error that occurs.<br>
Secondly, in the installed apps we see all the stuff that came with Django.<br>
When we build new apps, as we did with quotes we need to add it here so that's a manual step that's always required.<br>
And lastly, on the templates we have DIRS and APP_DIRS.<br>
APP_DIRS means if we follow a convention with the templates in the apps, they will be found.<br>
And we will see that later.<br>
But I will have a central template directory which I can actually make now.<br>
Which is mysite and you see it's not there so I'm going to make mysites templates and later we're going to create a base.html which I can already touch.<br>
Now this directory is no going to be found yet.<br>
Actually I was testing that and what happens is if you don't set that in dirs you get a template that does not exist ever.<br>
So, to prevent that, I'm going to set it here and I'm going to join that base here which is to find at the top.<br>
And going to join that with mysite templates.<br>
So again, this is to make sure that the base template we will define later, will be found.<br>
And that's it for now.<br>
These are the settings I usually set directly when starting a Django project.
|
|
|
show
|
5:17 |
Let's see something loading in Django instead of the launcher page.<br>
And at first we are going to define the mysite or the main app URL file.<br>
And as you see, Django is really awesome in their documentation.<br>
It comes already with a lot of guidance and instructions and some template code.<br>
So this should be relatively easy.<br>
And to meet the include.<br>
And here you have the admin backend.<br>
You can even rename this path because /admin is pretty known, so you can make this something lesser known.<br>
And that's just to prevent people trying to login on an admin backend.<br>
So it's that easy to change a URL.<br>
So now you would change this URL to not be admin anymore, but mybackend.<br>
So that's a quick fix.<br>
What I really want to do for the quotes is to redirect any request on the homepage, so blank to go to the quotes URLs.py file.<br>
So I'm going to include quotes url.<br>
So my main app is going to say any request to root or to the homepage, redirected to the quotes URLs.py which we need to write next.<br>
So inside the quotes app, there's not a URLs file defined.<br>
I'm not sure why Django does not provide that file but you surely want to have a URLs file fore every app.<br>
And later we will set up all the routes to the app so the routes will create a new quote the routes would get a list of all the quotes the routes would edit the quote, et cetera.<br>
But for now as we're looking at a hello world example we're just going to see how a URL and view would interact.<br>
And notice how it references views that's the next component we're going to write.<br>
A view would just have a couple of functions or classes receives a request.<br>
And returns a response.<br>
So this is the most basic view we can write.<br>
We make a URL pattern to the index function and we tell Django what to route to it.<br>
So in this case just the main page, or /, or route.<br>
So it's going to invoke the index function which is coming from views.<br>
In views.py we define an index function which as per view convention, receives a view request and returns a response.<br>
And later we'll use the render Django shortcut to render an actual template and embed variables in it.<br>
But if you just need a simple response you can just use the http response.<br>
We're just going to send a string to the browser.<br>
So let's see if this works.<br>
So I'm going to go to the main URL and there you go, welcome to Django.<br>
So what happened is, first it went to the main app URLs.py, it was matching the root.<br>
Then it included the quotes URLs.py file.<br>
It went looking there, and this is just the root URL or /, but this could have easily been welcome or something.<br>
So in that case, the main URL would not have been occupied or would give us a 404, and we would have had welcome.<br>
So you see it is pretty easy to manage your clean URLs.<br>
You can just define your slug, in this case welcome and you set that in your URL patterns as the first arguments to path.<br>
You point it to a view function and at view function you write here, again it receives a request and returns a response.<br>
So I hope this gave you a feel of the URL routing and your first view, and next we are going to write our first database model.
|
|
|
show
|
4:21 |
When working with a database in Django we use Django's ORM.<br>
It's a way to abstract the SQL away from us so that we can write Python to work with a database.<br>
Here I define a Quote class or model which inherits from models.Model in a specified couple of fields which will end up being the database columns.<br>
There are various types so TextField, CharField, URLField DateTimeField, and these will translate in various properties of the columns.<br>
So, the TextField will be variable length.<br>
CharField in this case will have a max length of 100.<br>
URLField will give us validation out of the box to only enter valid URLs.<br>
And DateTimeFields, convert the data into proper DateTime objects.<br>
The way in Django to make a field optional is to use null=True so the source and the cover fields are optional.<br>
blank=True are used to also make it optional when used in a form.<br>
The difference between added and edited is that added I want to add the DateTime up on adding the record.<br>
And, I'm using auto_now_add for that.<br>
Edited though, I want to be updated every time a change is made to a record.<br>
And to do that is to use auto_now.<br>
So, auto_now updates with the DateTime every time a record is edited.<br>
Added does that only the first time.<br>
By looking at quotes in the app and backend later or in the Django shell, there's not that much information displayed by default.<br>
You just would see Object.<br>
And to have the object show more meaningful information I defined __str__ and gave it self quote and self author and lastly the metaclass is just a way to define more properties of the model and in this case I just define the ordering attribute to sort the quotes by when they were added.<br>
So the most recent quote will appear at the top.<br>
Back at the app, in the quotes there's a models.py file and I'm going to add the code here.<br>
The next step is to make a migration file before Django can sync anything to the database it needs to make a conversion from Python to SQL.<br>
So I'm going to use manage.py with the flag makemigrations you see the file that Django created this is something you want to include in your version control because this that you can replay the various modifications to the database.<br>
So here you see the intermediate code that Django created and when we now type migrate Django is going to use this to create the table in the database.<br>
So apply the migration file and now I can open a database.<br>
And I'm using DB Browser for SQLite.<br>
Again the database file is in the root directory of the project.<br>
I can drag it over.<br>
So here we see what Django created.<br>
The table name is always the app name underscore model name lowercased.<br>
You have a primary key of id we didn't have to specify it.<br>
Django does that for us.<br>
We have the TextField we have the author CharField we limited to 100 sort and cover which are URLFields and Django limits URLFields to 200 characters and we have the added and edited as DateTimes.<br>
Next I'm going to use the Django shell to add, edit, and delete objects with Django's ORM.
|
|
|
show
|
6:27 |
One final note about the last video when we did to make migration.<br>
It only worked because Quotes was now in installed apps.<br>
And I already put it in installed apps when we did the configuration video.<br>
So just keep that in mind.<br>
In order for the migrate to work you need to have the app in the installed apps and you have to go to make migration first to make the SQL file.<br>
Okay, let's move on to the Django shell and work a little bit with Django's ORM.<br>
ORM standing for Object Relational Mapping.<br>
So, we cannot just open a Python shell right here.<br>
We need to load in Django's environment.<br>
So in order to work with Django's objects you need to do Python manage.py shell.<br>
And now we can import a model we just created.<br>
And we have to specify an absolute path.<br>
You will see that quotes is indeed a model and now we can create some quotes.<br>
And to make a quote, you can use the quote model as a class.<br>
And pass at the values in the constructor.<br>
Now we have the quote object but it's not stored in the database.<br>
We have to do that explicitly with quote.save Now we can retrieve objects with the quote objects all.<br>
And here we see one quote.<br>
You remember in the last video that I mention the __str__ method to make the objects more readable?<br>
Well, here you see that in action.<br>
If I wouldn't have defined a __str__ I would just see object and would not really see what the object was.<br>
So defining that __str__ with self.quote - self.author now gives me a reasonable return and I can see what the queries set holds.<br>
Now let's add two more quotes.<br>
And now I have two.<br>
And for this one I will add a cover.<br>
So now I have three Can get them all like this or I can filter on all queries.<br>
That works too or I can even filter with any object that contains the letter K.<br>
K is insensitive.<br>
I guess me too.<br>
And for R, I want to get Roosevelt.<br>
Right, now, how can we edit a quote.<br>
Editing is as simple as retrieving the quote.<br>
So the Roosevelt one.<br>
And just overwrite it's attributes and save it back.<br>
So let's add a cover for example.<br>
And save it.<br>
It's interesting, assigning the filter object to quote, got me actually a query set and not an individual object.<br>
So when I did this I got a list object or a query set.<br>
And you can use slicing to get the first one.<br>
So now I get an actual object.<br>
So now I can do the assignment of the cover.<br>
And now I can do the save.<br>
I query it again, you shouldn't see any difference because the __str__ method only prints the quote and the author but if I look at the cover it did store it to the database.<br>
Ah, to delete similar.<br>
We're using the delete method, on the quote.<br>
And now I'm back to 2.<br>
So that's add, edit and delete using the Django ORM.<br>
And we will see this again in the views when we start to retrieve and edit data from the database and load them into our templates.<br>
It would be good at this point to start a shell and try out ORM for yourself.<br>
Again, you can use quote objects all or filter to retrieve.<br>
You can use slicing to get the object.<br>
Once you have it save to a variable you can modify it as if it was a class instance.<br>
So you can just assign to the attributes.<br>
Then you have to use save to persist it to the database.<br>
For delete, use delete and there's not an extra save needed.<br>
That will come in to the database, as we saw here.<br>
So that's the basics of the ORM.<br>
I mean the querying goes way further so it's worth it to read up Django's ORM.<br>
But at the very basic level this is how you interact with objects using Django ORM and the Django shell.<br>
And that concludes the video's for day 1.
|
|
|
show
|
1:19 |
Congratulations, you made it through half of the videos of Django.<br>
And instead of moving on and introducing more concepts I mean, there's still some work to do to get that Quotes app working I think we should pause now and start touching some Django yourself.<br>
So, after going through the videos yesterday I suggest that you get Django installed do these common configuration settings I showed you.<br>
Try to follow along with the example app you are building or if you have something cool you want to build for the web start your own app.<br>
We have two code challenges linked in the ReadMe.<br>
You can start those on the platform and the idea is just to get setup make your model, send it to the database and play around with Django, play around with the ORM start adding, editing, deleting objects.<br>
See how that works.<br>
Get a good foundation.<br>
And starting tomorrow, we continue the lessons by making the full CRUD application interacting with the database building out the views, using templates and more.<br>
Good luck, have fun.<br>
And feel free to share your progress using #100daysofwep and copy us @talkpython and @pybites.
|
|
|
show
|
6:16 |
Welcome back to Django One, day three.<br>
The coming days, we're going to further flesh out the quotes app and we're going to look at forms the admin backend function-based views.<br>
So we're going to go from the URL mapping to the view to the templates and of course that involves querying the Django ORM as we learned at the end of day one.<br>
And we're going to refactor it in class-based views which is a bit more advanced but I just want to make sure I cover it because in Django you really can opt for the function-based or the class-based views and you might like one or the other.<br>
It's just good to know about them.<br>
Actually it's here already on the slide class-based view is pretty concise.<br>
And finally when we talk about templates of course you want to make it look nice so we're going to integrate the mui.css framework.<br>
And that will be covered in templates and static files.<br>
So there's a lot to cover, let's dive straight in.<br>
The idea is to first cover the URLs needed for the quotes app in this video.<br>
Next we're going to look at forms then we're going to look at views to get our templates and finally we add the quotes app to the admin backend.<br>
Which is convenient to be able to handle quotes, objects from the admin interface.<br>
Back at my terminal to recap we have a quotes project, the file-based SQLite database is sitting at the top we have our manage.py to run the server and handle migrations as we saw at the end of day one.<br>
We have the main app or central project app under my site which contains the configuration in settings.py We have our quotes app which we're going to work with in the coming videos so I'm going to cd into that and here we see all the components that make up a Django app.<br>
So let's start with URLs.py here we still have the hello world code.<br>
So I'm going to wipe that out.<br>
And here we want to define all the routes for our quotes app.<br>
Quotes is a typical CRUD app.<br>
So we have five different things we want it to do: List all the quotes list an individual quote add a new quote edit an existing quote or delete an existing quote.<br>
So we have to set up five routes to the corresponding actions.<br>
Which will be functions in the view.<br>
The way to do that is to use path and the first argument is what the URL pattern will be.<br>
So if you have main app.com/something that something is what we define here.<br>
Leaving it empty means that the page URL will just hit that view.<br>
And to clarify that the page URL when the server is running is just this and a URL pattern could be for example we talk about quotes We can have quote number eleven In the functions we will write in the views we reference them like views function.<br>
I should see the views we import here so we're going to write a quote_list function in the views in an upcoming video.<br>
And we also pass it to the name argument.<br>
So what this means is when we hit the main URL again that will be this the URL mapper is going to call quote_list a function that's defined in views.py and similar to that for the other four actions I mentioned we're going to have a similar pattern.<br>
So for an individual quote for example quote eleven, we need to specify that like this in less than greater than signs type integer and here we can call it anything like variable name which typically is a PK or primary key.<br>
And we can pass that to the view function so this will be called quote_detail and here I can just repeat quote_detail.<br>
So when we hit base URL slash eleven this URLs.py mapper will match this pattern and route it to the quote_detail function in the views.<br>
And the other three are similar if we match slash new it's going to call quote_new if we match edit/int primary key it's going to match quote_edit and the same for delete.<br>
If you match a URL called delete integer you're going to match quote_delete.<br>
You're going to match quote_delete.<br>
Finally I give it a namespace of quotes.<br>
Just as a way to isolate if I have many apps to make sure that none of these routes or functions clash.<br>
Now all these patterns are tied to a namespace.<br>
Which you might remember namespaces are one honking great idea.<br>
Let's do more of those.<br>
Okay, so we have our five routes defined.<br>
And the next step is to start writing those funtions so quote_list, quote_detail quote_new, quote_edit, and quote_delete.<br>
But first I take a quick detour to show you how to define forms because when we add new quotes and edit existing ones we want to work with Django forms to save a lot of code and make it very convenient.<br>
So next up are forms.
|
|
|
show
|
1:58 |
Next we're going to use Django's ModelForm class.<br>
And this will be a short video.<br>
So it will be pretty easy to set up.<br>
Because the form we can just model after our quote model.<br>
So let's open both.<br>
First I need to import ModelForm.<br>
I need to import my model.<br>
Which you see here.<br>
Then I'm going to inherit the ModelForm to make my own.<br>
And I'm going to make a meta class.<br>
Now don't worry, you don't need to know meta programing.<br>
I also need to define a model and the fields.<br>
And they magically will later work when I use this quote form in the views.<br>
I'm going to reference Quote model.<br>
And I'm going to define fields that need to show up in the form.<br>
Notice that I don't specify edit and edited because the auto_now_add and the auto_now attributes will update those fields automatically.<br>
So I only need quote, author, source, and cover as the fields of my form.<br>
And this is a bit abstract.<br>
I cannot show it in action until we get to the views, which is in the next video.<br>
But this is all there is to define a form in Django.
|
|
|
show
|
2:48 |
Okay, finally we get to the views.<br>
And here there will be quite some work.<br>
We're going to write five views.<br>
And again let me open URLs.py to guide us.<br>
First I need to import a couple of things we're going to use.<br>
So let's make some stubs.<br>
Here we will receive the primary key argument we defined in URLs.py.<br>
So this is the basic structure of the view.<br>
We can close this out.<br>
Save this and here we want to go back to the ORM of what learned at the end of day one.<br>
And we want to query the code model.<br>
So first I need to import the model.<br>
And I'm using the relative import because models is in my folder.<br>
And I'm already going to import the QuoteForm we made in the last video, because we will need that in the create and update functions.<br>
So now to get all the quotes we can use the ORM.<br>
And just remember we can do an objects.all and that gets us all the quotes.<br>
Easy right, we don't have to write any SQL.<br>
That's all abstracted away thanks to Django's ORM.<br>
Now I need to introduce another construct to pass that in to a template.<br>
And Django comes with a handy render function which I can pass into request which we pass into the function.<br>
So every view function gets a request by default passed in.<br>
I'm just passing that through to render.<br>
Then I specify a template, which we will create in a bit.<br>
And we're going to pass in a data that we will access in that template.<br>
So I'm going to quotes and here pass in quotes.<br>
And quotes is of course the list or the query set of all the quotes we got from the ORM.<br>
This is it this is a valid view function.<br>
The only thing we now need to do is to create a template.
|
|
|
show
|
4:54 |
To get to the actual quotes template, we need to take a couple of steps back.<br>
All of the quotes templates are going to inherit from a base template, so we first need to make the base template And the base template will access static files like our CSS and a Favicon icon so first I actually need to explain static files.<br>
First I want to go in my main app or global project app mysite, and we're going to make a static folder.<br>
And inside of that I'm going to create a js folder although I'm not going to use Javascript in this app.<br>
You will have CSS and image.<br>
Straight away I'm going to download a favicon I created into images and I'm going to copy my style sheet over.<br>
To style our app nicely, I'm going to use MUI CSS and I took some CSS from one of the template pages and it's something like this.<br>
I'm not going to focus on CSS in this lesson so I'm just copying this over to style.css which lives in static/css.<br>
After box static directory, I noticed it's not detected and that's because I'm missing a setting in settings.py.<br>
So we have already defined STATIC_URL but turns out that was not enough.<br>
I actually need to set STATICFILES_DIRS.<br>
So first I'm going to define project root and I'm going to abstract the current path that the app is running.<br>
So take the absolute path of this file.<br>
And that actually will be the directory that I'm in.<br>
Then I need to set the variable that defines where Django's going to look for static files and that is called STATICFILES_DIRS.<br>
And here I define the directory name of my static folder, so I join my project root with static.<br>
And that should get us the whole path up til static.<br>
It's important that this constant receives a joo-ple.<br>
Alright, that's it for static files for now.<br>
Now let's create the base template.<br>
I already have that file in my project app, my site on our templates and in a base dot HTML.<br>
And to avoid a lot coding I'm going to paste that in and here you see why I needed to first explain static because right off the bat we want to load in static.<br>
And why do we want that?<br>
Because to load in the favicon and the style sheet, I need to reference the static folder.<br>
And I do that like this: curly braces percentage static keyword and a relative path starting from inside my static folder.<br>
Alight, so that's what this part is.<br>
The other link and script tags reference the movie's CSS and JS files which are a CDM.<br>
There is some other logic in this template which I come back to later.<br>
For example: when a quote is passed into this template and has a cover, we specify that with CSS on the body so we'll show the cover in full-length as the background with a couple of links, with a header and here you see how we make links in Django again we use a keyword called url and here we see the namespace, quotes, colon and then the name of the view.<br>
Again, any logic goes into curly braces and percentage.<br>
On the other hand, if we want to display a variable we us double curly braces.<br>
Messages is part of Django and it's easy to show messages to the user based on the actions they perform.<br>
That's it for the HTML, here we close it out and the important thing is the content block.<br>
This is a block we set up for inheritance.<br>
So, the next video we'll see how to quote template inheritance from this base template, and put its own content in this reserved content block
|
|
|
show
|
6:40 |
Next we can finally create the quotes list templates.<br>
So I'm going back into my quotes app and in my view I defined quotes/quote_list.html.<br>
Now first going back to settings I just want to make sure we're clear on the templates.<br>
So we just defined our base template in mysite/templates and Django finds that because I added it to DIRS.<br>
The other dir setting is APP_DIRS=True.<br>
And that makes that templates dir that are in our apps so in this case quotes, will be found dynamically.<br>
And Django's convention is, in an app so in this case quotes, to make a templates dir.<br>
And inside the templates dir I make another directory with the name of the app, in this case quotes.<br>
It's a bit redundant, but it's how Django works it's how it auto detects templates.<br>
So now I can make a template inside templates quotes we're going to call it quote_list.html.<br>
And here I paste in our HTML.<br>
I touch upon humanize in a bit.<br>
The most important thing here is we're going to extend the base.html.<br>
And this is where it all ties together with the pathing defined in the settings Django knows where to find base.html.<br>
And what this does is, it loads in all the HTML and where we have this content log defined I open that up here and then add my customized HTML content for that log and then close it.<br>
So it's like displaying this whole template and where I see content here, it inserts this HTML which is specific to our quote_list template.<br>
So that's pretty cool.<br>
So quote_list inherits from base.html and has its own content.<br>
And around this we get all the generic stuff we want to have for all the pages.<br>
So we make a table, we use MUI classes to style it nicely.<br>
We have a table header.<br>
And here we see the quotes data we got passed in.<br>
So again, in the view, we call render with the template.<br>
And the dictionary see as the third argument is the quotes data we loaded from the URL.<br>
And here we look through that query set I was going to say list, but it's actually a query set.<br>
And for each quote in that query set we can access the attribute, so author, added, quote id.<br>
And here make a link to go into the quote which will be another function in the view.<br>
So we have the quotes namespace and the quote_detail which we will write next in the view.<br>
So here you can see that it's coming together.<br>
We have the quote, author added and we have two buttons to edit quote and to delete the quote.<br>
And those again lead to quote_edit and quote_delete which are views in our quotes namespace.<br>
And we will write those, in a later video.<br>
And finally, outside of the table, we have a link or button to add a new quote.<br>
And that's linked to URL quotes namespace quote new.<br>
And that's of course then this view which we will write, in the next video.<br>
Again, any logic is in curly braces percentage and balancing variables is in double curly braces.<br>
And that's it, that's a quote_list template.<br>
Ah, lastly, I use humanize to instead of printing a date time, make it like human readable.<br>
So make it like the social media websites where you see like posted three minutes ago posted one hour and 37 minutes ago.<br>
Posted three days ago.<br>
Posted just now etcetera.<br>
And I can use a filter, and I use a filter in Django by balancing the variable name pipe, and then I use the time since filter.<br>
And that converts the date time into a more readable timestamp.<br>
And humanize is what enables that.<br>
The other thing that I need to do though is go back to mysite settings.<br>
And enable it in installed apps.<br>
Which is not so, by default.<br>
So I have to edit here, just as other building blocks of Django.<br>
And to add humanize so we can use it in our template.<br>
And then I can dynamically load it here and then I can use it.<br>
All right?<br>
Save that.<br>
Let's try this out.<br>
Look at that!<br>
Cool right?<br>
We got nice designs, we got the base template here.<br>
Inside we have the quotes template we have the quotes showing up with links to their detail pages.<br>
Which is not working yet because we have to define that view next.<br>
We have an add new button that's not working because we have not defined a view yet.<br>
But it links properly.<br>
We have the added also links properly.<br>
And delete again we also need to write a corresponding view.<br>
And we have humanize going on so we have four days and eight hours ago.<br>
That this quote was added, that's much nicer than just showing a raw date time object.<br>
So pretty cool, right?<br>
Ah, and the favicon is displayed here.<br>
And the fact that it's looking nice, also means that the CSS was found.<br>
So here those files are working.<br>
Those are properly linked.<br>
This is my CSS.<br>
Excellent.<br>
So next we're going to write the views to look at an individual quote and to add a new one.
|
|
|
show
|
3:59 |
Alright, let's write some more views.<br>
Again, I go in to my quote app and open the views and let's first write our quote_detail.<br>
But first, let's let do it the way and then I'll show you a nice shortcut.<br>
We're going to try to get a primary key that's parsed into the view and if that ID is not found, then typically it raises a quote does not exist exception.<br>
And in that case, you would raise a HTTP 404.<br>
Now this is so common, that we look up an item by primary key, that Django has a nice shortcut and it lives in django.shortcuts as get_object_or_404.<br>
And it reduces these four lines to just this.<br>
Pass in a model and the key word PK, or primary key which again, is parsed in, and that's it.<br>
If the quote is found, it's stored in the quote variable.<br>
If not, it raises a 404 for us we don't have to worry about it that's what the helper function will do.<br>
So that's pretty cool.<br>
Now we're going to make another template and use render again with request the second template, which we'll write in a second.<br>
And of course we get a t quote.<br>
And that's it, that's all that's needed for detail.<br>
And to make a new template, quotes quote_detail.<br>
And to avoid too much typing of HTML I'm going to paste that in.<br>
And we see this nice inheritance going on with again, extending from base.html.<br>
So you get all the HTML rounded.<br>
We use Humanize again for the date and here in content, we put the stuff that is relevant to this template.<br>
So we have a bit of a different view here because it's a single quote, so we put the quote in the block boat, we put inside special HTML.<br>
Again, we have an edit button.<br>
Now we make a link back, to go back to the main page where all the quotes are listed.<br>
So here we link to the quote list view and that's it really.<br>
We can save this and try it out.<br>
Awesome, look at that.<br>
This one does not have a background; the other one has.<br>
And how is this background loading?<br>
Well, if you remember in the base template we added this to the body.<br>
If there's a quote parsed to the template and I know that the quote variable was parsed to the quote template, but has an inheritance from base HTML, this template is effectively is culled as well, so the same goes here.<br>
The quote is actually parsed to this template as well.<br>
So here in this case, the quote was found it has a cover, so the background is set on the body element and it makes that the background cover scales to the whole website.<br>
So that's the view of the individual quote.<br>
Next, let's write the view to add a new quote.<br>
You may fill or use the form we defined earlier.
|
|
|
show
|
6:44 |
Now it's time to start working with forms to add new quotes and in the next video edit existing quotes.<br>
So back to my views.<br>
I'm still in my quotes app.<br>
And back to my view.<br>
I have a quote new function.<br>
And just we remember if linked found new in the URL.<br>
This is a bit more code because we have to work with the form.<br>
We imported the form here.<br>
Again, we defined the form in a previous video which was as easy as extending model form defining a meta class, referencing the quote model, and defining the fields.<br>
Now we can use that form and we can use it like form equals QuoteForm.<br>
And I pass in the request.POST or None.<br>
What does that mean?<br>
Every view gets a request passed in and if a form is submitted you typically get the payload in either GET or POST.<br>
We have a form that's POST so request.POST holds all the form fields that are passed into the view when a form is submitted.<br>
Then generally it's very easy to work with the form because it knows from the model what the data types and the requirements are of every field and because the model form looks at Django's model to comply with that.<br>
So I can just call if form is valid, save it.<br>
And here we use the messages framework.<br>
So I can pass message success, edit quote.<br>
And again, the messages are displayed in the main template, in the base template.<br>
So any messages we pass from the view will be looked here with the color.<br>
So I have green and red-based if it's a success or a error message.<br>
So in this case we have a success message but if you want to have an error message it would use error.<br>
And we have redirect back to quotes, quote_list.<br>
That's where we add a quote.<br>
If there's not a form is valid that's not a submission so it just render the empty form.<br>
And we're going to write a new template called form.<br>
And I'm going to give it the form.<br>
So when quote_new is called I instantiate a new QuoteForm that has payload or will submit it when the user click on the submit button off of form.<br>
Or instantiate an empty form, which will have the required fields as defined in forms, okay?<br>
If there's a post submission I check if the form is valid and save the values.<br>
The nice thing is that form works closely with the model so if I call form saves it actually saves a new record to the database.<br>
So the form actually talks directly with the database using the model as a proxy.<br>
That's why I always recommend to use Django's model form because it gives all that behavior out of the box.<br>
At that point we know it's a success so we pass edit quote as a success matches back to the user.<br>
And in the base template that's styled as green.<br>
And then we do the actual redirect to the quote list view, which basically loads this back to the user.<br>
So it shows all the quotes again.<br>
If it's not a form submit it will be an empty form which we will load in with a new quote form HTML template, which we will write now.<br>
So I'll go to in templates, quotes, quote form.<br>
And again, we're going to paste this in.<br>
So again, it extends from the base.html template and insert its content into the block content or make a header.<br>
And if you have a quote variable that's an existing one so it's an edit action.<br>
Otherwise it's new.<br>
So for now it's only new because we're only going to, we're not passing in quote yet.<br>
We only passing in form.<br>
We will see that later when we do the edit view.<br>
Then we have the form which has method post not yet.<br>
And this is important.<br>
We always should add a CSRF token and that's for security.<br>
So Django does provide security out of the box but you still have to define it in the template.<br>
So always add this token.<br>
Then the form will be comprised of a set of fields.<br>
And to respect the muay CSS tiling I did a bit of manual work here to make sure that every field is wrapped in a diff with class muay text field so the styling will be nice.<br>
So this is the display of the form.<br>
And as this template will serve for add as well as edit the form can be empty or it can be filled in with data if we're editing an existing quote.<br>
Then we have our buttons, so the submit button triggers the form to post, and we have a go back button that just goes back to the quote list.<br>
That's it, that's my form.<br>
That's my view.<br>
So let's try it out.<br>
Oh, that's not working yet.<br>
I'm using a comma and this should be a dictionary so I should use a colon.<br>
That looks better.<br>
So let's do some focus.<br>
Sort and comfort should be optional.<br>
So they should work.<br>
Awesome.<br>
Cannot delete it yet.<br>
That's a view we have not written yet.<br>
Loosely translated from Wigner, probably not 100% accurate but this works.<br>
Have to edit a second quote.<br>
Any of you see the message, edit quote?<br>
That's coming from the base template and it's styled green because it's a success message.<br>
In the next video we're going to edit an existing quote.
|
|
|
show
|
2:57 |
Next we're going to add an existing quote.<br>
And the code is actually pretty similar so we can just copy this over.<br>
And there are three small differences.<br>
First I need to get the quote.<br>
I'm going to copy over the get_object_or_404 from the quote_detail.<br>
And it receives the primary key as passed into the function.<br>
This should retrieve our quote.<br>
We want to add it.<br>
And the second small change to this function as compared to the quote_new, is to pass it as an instance.<br>
So I'm going to pass it to the form as an instance and the QuoteForm, or Django's ModelForm then knows that it needs to edit that quote as opposed to adding a new one.<br>
This logic is the same, the only thing I'm going to say, updated quote.<br>
The redirect is the same, I'm going to list after a successful update and a small change to the render I'm going to use the same quote form template.<br>
And additionally, I'm going to pass in the quote object.<br>
Line it up as per PEP 8, and that should be it.<br>
Let's try it out.<br>
Wow, look at that, I went to edit four.<br>
This code called a get_object_or_404 on primary key equals four, retrieved the quote and now I can just edit it.<br>
And nice, that persisted, and the message changed.<br>
Let's add a source, look at that some JavaScript saying, please enter URL.<br>
This is definitely CSS, I mean the styling is but this is all stuff that comes with Django if you use the forms.<br>
So let's give a URL doesn't really matter for now.<br>
And it got accepted.<br>
And here from the view, I can also click Edit and it persisted.<br>
Great, look at that.<br>
Almost the same code, just a few tweaks.<br>
And we got our Edit View function done.
|
|
|
show
|
4:06 |
Lastly, we need to be able to delete a quote and again, this is pretty similar.<br>
So I'm going to copy this code over and this copy-pasting of code is a bit uncomfortable.<br>
But we will see later, with the class-based view that we can abstract this away and it will look a lot cleaner.<br>
In this case, we want to retrieve the quote with get_object_or_404 again.<br>
We don't need the for because we're just going to delete the quote we're not going to edit it and here I do an if request method equals post and we're going to quote_delete and remember from our Django ORM lesson that if you load a quote object in a variable and you call delete upon it then it's gone it's committed to the database.<br>
You don't need an extra save that's all done within the delete method.<br>
The success message then changes to deleted quote we're going to redirect to the quote list that's the same the only thing is I want to have a new template to actually confirm that the user really wants to delete the quote so we prevent that a user by clicking delete immediately deletes the quote I want to go to a separate template to really make sure that that's what they want I'm going to paste back the quote and no form here so actually this works the following if the quote_delete view is called the first time we're going to render this quote_delete HTML which is basically a confirmation template containing another form if that form gets submitted you get a post request and then we know the user confirmed the action and we need to delete the quote once that's done we reroute to the quote list so next up we need to generate this template intofor the HTML I'm going to copy that in again we extend from the base.html we occupy our block content we have a header of confirm delete quote we have our second form which again needs our security token and we print the quote and a question are you sure if you want to delete it?<br>
We make a danger button which will be read that says delete and a go back button when this gets submitted that means we hit this post request in that case we delete the quote let's try this out great I go to the new page you can go back nothing happens I can try it again delete.<br>
Bang.<br>
Gone.<br>
there's no deletion here you have to do it here yes gone great so that is a fully create read update and delete app and we've come very far I mean this is a fully working app and the only thing left now is to go back to these function based views which are great but there's some repetition here going on we do this get_object_or_404 every time the edit code was pretty similar to the new code and in the next video I'm going to show you how we can rewrite this using class based views and we will see it dramatically reduces the code needed to accomplish the same thing
|
|
|
show
|
9:38 |
Class-based views.<br>
As we saw in the last video writing all these function-based views some repetition sneaks in like, getting the quote object with get_object_or_404 and we did that at least four times.<br>
Same with the form.<br>
Form is valid save that happened both in new as in edit.<br>
Let me introduce you to class-based views.<br>
The main takeaway from class-based views is that it allows you to structure your views and reuse code by harnessing inheritance and mixins.<br>
And in this video I will re-write the views you've built so far and you will see that that reduces the code dramatically and that is because we will inherit from Django's class-based views.<br>
So let's open a class-based py file and we will later move that back into views, but just do see that side-by-side.<br>
First, I need to do some imports.<br>
And here you see the generic class-based views we're going to inherit from.<br>
So we have list, detail, create, publish and delete which closely matches the five functions we wrote here.<br>
You need our model.<br>
And now we can write out the class-based views.<br>
And here I'm inheriting from ListView.<br>
And to get a list of all the quotes you only have to give the model.<br>
That was easy, right?<br>
Well, it gets even better.<br>
I'm starting to like these class-based views.<br>
I mean, I don't have to write all this logic and we'll see the magic in a bit.<br>
So actually by naming these templates consistently Django just knows what to do.<br>
So I have to highlight that you have to use those conventions.<br>
A quote_list, quote_detail.<br>
Here we have a CreateView.<br>
And here I have to specify the fields.<br>
It's just very similar to the forms up high we created earlier.<br>
And I have to give it a success_url.<br>
And I'm going to use the reverse_lazy helper.<br>
That's the QuoteUpdate.<br>
It inherents from UpdateView.<br>
That's actually the same.<br>
I'm less worried about this duplication which is only three lines instead of this whole code block.<br>
And we have QuoteDelete.<br>
And that's it.<br>
Those are my class-based views.<br>
In the repo you will see the underscore cb, or class-based and now we'll just leave both versions in function-based and class-based.<br>
Now to test it out, let's move this into place for now.<br>
And we need to update the URLs to point to the new views.<br>
And we need to use the as_views method.<br>
And the rest should be the same.<br>
Let's try this out.<br>
Typo here.<br>
That's okay.<br>
And a quote and that didn't work yet because the class-based view expects a specific query set so I have to go to templates list, and here it expects a quote_list because in views I only had to type model=Quote unlike the function-based view.<br>
I didn't return like a quote's query list object.<br>
So class-based view works with model name underscore list so quote_list.<br>
After having fixed that, it should work.<br>
And it works.<br>
I can edit it.<br>
That works too.<br>
And that confirms that the view works as well as the update view.<br>
And by the way I found out that we can shorten this a bit further by writing and importing it.<br>
I think this is a bit more elegant.<br>
Try that again.<br>
The view works and the edit works too.<br>
And this doesn't work yet because I need to rename my template.<br>
So here we have quote_delete, quote_detail, quote_form, quote list.<br>
But Django expects in a class-based views actually a quote confirm delete.<br>
So I have to just rename this to be quote confirm delete.<br>
And with that change all the magic of confirming the delete now works.<br>
Awesome!<br>
Great!<br>
So as you see, class-based views are pretty elegant.<br>
It only takes a few lines of code, really to build a fully cracked application assuming that you have your model and your form set up correctly.<br>
The template was just the same as the class-based view.<br>
You only had to make a little tweak to expect a Quote on the script list and the list view and a rename to work with a quote confirm delete HTML template.<br>
And lastly we had to update our URLs to call those class-based views with the class view method.<br>
And for the rest, was pretty similar to the function-based but we saved a lot of repetition and code.<br>
In the last video we do the last step and that's editing the model to our admin back end.
|
|
|
show
|
3:10 |
This last video I want to show you the admin backend.<br>
To start off this module, we define the admin site of my-backend, so that's why admin is not responding.<br>
And I did that, a bit of a best security practice because admin is the default in Django it's also easier to guess.<br>
First let's make a super user which is a special user that has the greatest level of permissions on Django which will be able to access the backend.<br>
In the root folder of my project I'm going to use the manage.py utility again.<br>
I have to enable my virtual environment.<br>
And here's a create super user flag.<br>
So I'm going to use that.<br>
Going to leave it as pybite.<br>
Set a password.<br>
And that's it.<br>
Now when I go to Django backend I can log in with that user.<br>
Right, now the thing is that we have the default groups and user models, which came with Django.<br>
There we have the users that are in the system.<br>
This is the user I just created.<br>
And I see that it has staff status enabled so it means that I can use the backend.<br>
Actually have staff status and super user status.<br>
So as staff I can log into the admin side but I gave myself super user access to get all the information, so that's the difference.<br>
The only thing what I want highlight in this video is that we don't have quotes here.<br>
And that's because we have not filled in any code for the admin.py file.<br>
So let's do that now.<br>
Go into my app.<br>
And admin is blank.<br>
And to add the quotes app to Django admin backend it's actually very easy, just have to import a model.<br>
And do an admin side register of the model.<br>
And you can actually do a lot more here but that's beyond the scope of this video.<br>
This is the bare minimum to get a model working in the admin backend.<br>
So refresh and there you go.<br>
Here we have the app and here we have the model.<br>
So you could have various models under each app.<br>
So here's the before.<br>
And I can just update stuff here as if I were at the front end, but here I'm doing it at the backend as an admin user.<br>
You can delete it.<br>
I can add, et cetera.<br>
So that's the admin backend and how you add apps to this interface.<br>
And that concludes the second set of videos for Django module.
|
|
|
show
|
1:30 |
Congratulations, you made it to the end of the second part of the Django videos.<br>
We covered a lot of stuff so it's more than time to start practicing yourself.<br>
Because remember, the learning is in the practice.<br>
So, for this fourth day I encourage you to, if you already started an app in the second day, to continue that work or if you were not really ready there or you just limit it to the configuration now's the time to start a new app and try to implement as much of the stuff you learned over the videos.<br>
Again, you can use Challenge 29 and 33 on our platform to follow along and pull the Challenges Repo.<br>
Your instructions how you can create your own branch and pull requests to our repo that's an opportunity to submit your work as we did here, for example.<br>
But that's not required.<br>
It's just a nice way that you can share your work with @pybites but what we do encourage is to always tweet out your progress with the grid feature we have on the platform use the #100DaysOfWeb hashtag include us in your work.<br>
We are like super-stoked to see what you guys build based on the stuff you're learning throughout this course and other than that, have a nice play today.<br>
Spend your hour practicing as much Django as you can have fun, as well, and good luck.<br>
See you in the next module.
|
|
|
|
43:49 |
|
|
show
|
1:17 |
Hello and welcome back to The 100 Days of Web in Python.<br>
The coming four days there'll be four miscellaneous items starting with Selenium.<br>
It's just one day per topic and it will mostly be video watching.<br>
So, today will be Selenium.<br>
We're going to write some tests for a web app.<br>
Here we have our PyBites, my reading list and we're going to test this app with Selenium.<br>
And we're going to make sure that future development will be sunny and safe.<br>
Selenium Python.<br>
It's really a binding providing a simple API to write functional tests using the Selenium Web Driver.<br>
And another definition I really like is Selenium is a framework for the automated testing of web applications.<br>
Using Selenium, you can basically automate every task in your browser as if a real person were to execute the task and we'll see that later, when we run our test.<br>
It's like an invisible person logging into your site, clicking around, doing stuff.<br>
It's really cool.<br>
So, just sit back and relax, and watch the videos over the coming days, and you will learn a new skill.
|
|
|
show
|
6:00 |
First we need to get set up.<br>
We're going to create a virtual environment activate it, pip install the dependencies and then we're going to use pytest in combination with Selenium.<br>
We need to have the chrome driver in our path and we can download it from the link shown on the screen.<br>
Heading over my terminal, I made a new folder and we're going to run penv, which is an alias for Python3 -m venv venv.<br>
So venv is the module and venv is the name of my virtual environment and I activate it.<br>
Fresh new virtual environment, nothing installed.<br>
So pip install pytest and selenium.<br>
Alright and thirdly let's download the driver.<br>
First of all, my path is currently set to this.<br>
Which includes my bin folder so I'm going to put the driver there.<br>
So I'm going to the chrome driver downloads page and then click on the latest.<br>
And I'm going to get the mac version.<br>
Alright, that's done and the last thing I forgot to mention on the slide is if you actually want to follow along on the code, you can head over to my reading list and create an account, here's the direct link or you just go to login register.<br>
Then you get a username and password which you can set in your virtual environment because part of the test will log in the user and log out etcetera.<br>
So I'm going to do that now for my existing user.<br>
Go back to my project folder, into my activation script, go to the end and I set those two variables in my environment.<br>
Of course, I will set this to the real user and password and click save.<br>
I have to deactivate and reactivate, so I use ae because I'm doing this a lot but you can also type source venv/bin/activate and now we should have those variables available in the shell.<br>
Lastly I made some starter code because there's some pytest in there that should not be the focus of this lesson.<br>
So let me create a test_pbreadinglist.py and copy in the starter code.<br>
Before explaining let me quickly run this to see if that works.<br>
Alright, I'm going to break that because the one passing test is good enough for now.<br>
Quickly, so I do my imports of the standard library modules, I import pytest and I import some functionality that we'll need from selenium.<br>
Then I load in the username and the password from my virtual environment we just set.<br>
I set some constants for the homepage, two book pages and a link title my books.<br>
And then I write a bunch of fixtures.<br>
Again it's not a pytest lesson so I linked an article here where I explain how fixtures work what they are and how to set them up.<br>
So just quickly a fixture, you usually need some set up and tear down code.<br>
So a code you run before and after a test.<br>
So in this case, the repeated code before each test is getting an instance of the web driver and going to the home page.<br>
I also need some tear down code to quit the driver.<br>
Which means that we've all closed the browser which selenium opens.<br>
The neat way of pytest, or doing this is to build a driver, so this will run before the test this will help us into the test code and then we come back to this final tear down code after the test.<br>
So again, closing the browser.<br>
So I made a fixture to go to the homepage.<br>
I made a fixture to go to the first book page which we defined in this constant above and I also made a fixture to login a user, because that's code that I needed for various tests so to keep it DRY or don't repeat yourself, I abstracted that code in this fixture, so we only need to write it once so we can use it for various tests.<br>
Then, the way to use the fixtures is just to pass them into the test functions as an argument.<br>
So here, I'm using driver_home, and further down I use driver_first_book and driver_login.<br>
Then, as we will see when we write it test, we can access that fixture.<br>
So all the set up and tear down code has been provided to really focus this lesson on the selenium and over the coming five videos, we're going to implement those ten test functions, one-by-one.<br>
Teaching you how to write selenium code.
|
|
|
show
|
6:58 |
Let's dive straight in with the first test.<br>
And that will be to check the logged-out homepage.<br>
So the test should navigate to the homepage and should check the title of the page assert that there is a login button and count the number of thumbnails.<br>
So on the homepage we have 100 thumbnails of the last books that people have searched for.<br>
And we should assert that those are indeed 100.<br>
Before writing some code, I want to point out that the documentation of selenium-Python.readthedocs.io is very decent and especially you want to read through chapter four, locating elements because as you will see a lot of the code that we will write deals with finding elements on the page, by name, by class, by link, even by XPath.<br>
So if you want to become serious at writing test in Selenium, the find element by whatever or the plural, find elements, so to return lists of items by whatever, those are very important methods you want to master.<br>
So back to the code, back to the first test.<br>
Test the homepage title.<br>
And first I'm going to paste in what's actually expected.<br>
And that will be PyBites my reading list because we love books because when we go to the site and we check the title here on the tab that's what we should assert.<br>
And one of the things I love about pytest is that code is just shorter and more concise.<br>
And one example of that is the use of the assert statement.<br>
So here I can just type assert driver home and driver home is the fixture we passed in which is an instance of the web driver which just visited home.<br>
So when I'm here, the Chrome headless browser that Selenium opened, should be sitting on the homepage already.<br>
At that point, the driver home contains a title attribute, which I can match with expected.<br>
Cool, so that's one test.<br>
And to run just one test, you can use the -k of pytest and give it a sub-string.<br>
And here I gave it the name of the test.<br>
So here we see the headless browser opening.<br>
It went to the homepage and boom, it passes.<br>
So it asserts that the homepage has this title.<br>
Awesome.<br>
How do we then look for the number of thumbnails on the homepage?<br>
Well, we can look for the tag name img which is HTML for image tag.<br>
So images will be driver home, find_elements and notice I used the plural because we want to retrieve all the elements, not just the first one.<br>
I tag name, image, and then we're going to assert that the length of the return list equals 100.<br>
Again, you can just filter on one test with -k.<br>
See if it works.<br>
Great.<br>
And the last thing we wanted on this slide was to assert if there was a login button.<br>
So let's make a test for that as well.<br>
Test has login link.<br>
And I'm going to use a little bit of try and accept logic here.<br>
We imported an exception from Selenium called NoSuchElementException.<br>
And what I'm going to do is I'm going to try and assert that the login link is there at this point.<br>
So at the point where the driver went to the homepage and is sitting there in a logged-out state.<br>
So I'm going to do a driver home find_element_by_link_text.<br>
And here it is, singular because it is only one link.<br>
And the link is called login.<br>
And that should not fail.<br>
If that throws an exception called NoSuchElementException then something is wrong because when I'm logged out I always should have the login link.<br>
So then I do pytest fail, should have a link called login, and then the test will fail.<br>
Let's try that.<br>
And that passed as well.<br>
Perfect.<br>
Let's see if the tests work all together.<br>
And notice how it launched the browser again.<br>
And that's due to the scope of my fixture.<br>
And when I finish this, I will explain why that is.<br>
Okay, I can break now because there were only three tests and it's passing those as well.<br>
I don't need to see that now because they don't have actual code yet.<br>
So the fixtures, here you can actually find a scope.<br>
For example, module, and then this code will only run once for this whole module or file.<br>
It would probably work on especially the later tests we'll log in and log out, I might pollute the state of the driver.<br>
So I'm going to go with the default, which is test by test.<br>
So I want the driver to start fresh every test so that we start with a clean state.<br>
So that's why you saw the browser relaunching before every test.<br>
But again, it's not about pytest fixtures.<br>
We have a whole article about it that explains the scope.<br>
So if you're interested go to that link and read all about it.<br>
All right, so we have three tests already done.<br>
That's awesome.<br>
And in the next video, we're going to test an individual book page.
|
|
|
show
|
8:07 |
The second task is to check a book page.<br>
First we're going to navigate to a book page.<br>
We're going to check the page title and its metadata.<br>
You're going to see if there's an add book link.<br>
Then we're going to test the search box which has a nice auto-complete.<br>
We test it out by typing fluent Python and clicking on the first match.<br>
It should redirect us to that book page.<br>
The last video I noted that we had this helper and we will use that later, so that we move that down for now and go straight into test_book_page_title.<br>
Notice that we use another fixture.<br>
And there's only a slight difference so both initialize event driver, but home is going to home and try your first book is going to first book, which is defined as this one.<br>
And that's actually the Hitchhiker's Guide to Python.<br>
So now we're going to focus on testing this page.<br>
So again, this fixture makes that we are already on that page.<br>
So here I can just test the title.<br>
I'm going to copy that over from the page.<br>
So I do a view page source and I'm going to copy over the title.<br>
And as its a very long string, we can wrap it over two lines by using parentheses.<br>
And although this single quote is encoded it's not what the title would give me in the script.<br>
And now I can just assert driver_first_book.title == expected Let's save then.<br>
And just run that single test.<br>
Now it passes, cool.<br>
So let's look at the metadata of that book.<br>
So a nice way to get the source of the page is to use the page_source attribute.<br>
And that's dumping this whole source code into a variable.<br>
So then I can just look for sub-strings.<br>
For example, we should have this.<br>
And for example, the page count.<br>
Let's try it out.<br>
Awesome.<br>
Next test, test_book_page_has_add_book_link.<br>
So now we're going to assert that logged-out view of this book, we have this link.<br>
And that's actually pretty similar as last time.<br>
So I can just copy over this code Make sure I use the right driver and the right name of the link.<br>
It should be add book title cased.<br>
If the link is there, this will succeed.<br>
If it's not there, it should raise a no such element exception, and then we run pytest to fail.<br>
Great.<br>
Now, let's test the auto-complete.<br>
And that should be a little bit more involved because we're going to type in a title in the search box.<br>
Let me show it here.<br>
Then we should target the response HTML retrieve the first element, click on it which then should cause the page to redirect to that title.<br>
So there are a few elements involved and what you probably will be doing a lot is right-click on the element and use inspect.<br>
That goes straight to the matching HTML of the source, and here we want to target this input field.<br>
And we're going to target it by name, so search titles.<br>
So first step is to find that element.<br>
And before that actually, I'm going to also store the text we're going to enter in a variable.<br>
Then we get that input field, so we call it search box, driver first book and use the find_element_by_name.<br>
And we just saw that it's named search titles.<br>
Then another cool new thing you're about to learn is the send_keys method, and that's a way to get text into a form field.<br>
So this code, search box send keys text to enter which is Fluent Python will be the equivalent of me clicking into this input field and typing Fluent Python.<br>
On here I had a little bit of trouble because the drop-down would not show up in time so I need to do a little bit of a sleep to make sure that the titles pop out.<br>
And I could do one second, but just be safe and do two seconds.<br>
Sleep already imported here at the top.<br>
Now we can assume that the drop-down is visible.<br>
And again, let's see what that looks like in HTML do a right-click inspect, and we see that it's an unordered list of list items which are named ac_even, ac_odd, ac_even, ac_odd.<br>
And look at how nice our web toolkit is these days.<br>
That definitely has come a long way since the old days.<br>
So we're going to get the list items, and get the first one and click on it.<br>
So the way to do that is use the find_elements_by_class_name, but we actually want to have the plural in case we want the whole list.<br>
The list item class is ac_even.<br>
I'm going to grab the first one and click on it.<br>
And you shall see Selenium, it's pretty readable.<br>
That click on that item will redirect to the Fluent Python book page.<br>
Once there, I'm going to see if the URL matches what I expect.<br>
And the way to get the current URL, so this one is to use the current URL attribute and then to assert that it pends with id, which you see here.<br>
I'm also going to assert the title.<br>
And that's just as before.<br>
Let's run this.<br>
We can see it in action.<br>
Beautiful.<br>
And that concludes the testing of the logged-out page.<br>
In the next video, we're going to log into the site and test more features that are only available when logged in.
|
|
|
show
|
6:19 |
Alright next we're going to test the log in to the site.<br>
We're going to click the log in button in the header log in with the user we set in our virtual environment assert that the log in link changed to log out and check the additional private links that should appear in the navigation bar at the top.<br>
So going back to my terminal to the code.<br>
First of all, we are using another feature which is driver_login and we actually already wrote the code to log in so when we get to the homepage we're going to find a link that's called log in.<br>
And to show you that, if I do inspect and here we didn't actually have a class name or CSS id attribute, so we're going to look for the link text, which should be log in so that's why we did find_element_by_link_text of login so we're going to click that, the test will be doing this and then I'm going to target the username and password fields, which are conveniently named username and password.<br>
And going to enter data, which we saw before can be done with the send_keys method and we're going to give it the username and password.<br>
And importantly, after filling in the password we want to hit return.<br>
The way to do that is to append Keys.RETURN to the input.<br>
Alternatively you could also target the log in button and hit click, but a form can also be committed by just hitting enter.<br>
And again username and password are loaded in from my environment as shown in a previous video so once we get into this test function as well as the next ones, the log in should already be done.<br>
And let me actually show you that in action and one trick I want to show you is to put a break point in there, which is new in 3.7, on 3.6 or before you would actually have to write import pdb; pdb.set_trace but I'm on 3.7, so I can use the new shorter syntax and this will pause the execution and I want to do that to show the view after logging in because what we're going to test in this function is the presence of the private links.<br>
So let me run this test.<br>
It should login, and then it should hang there because I put a breakpoint in there.<br>
Great, so here I'm at my pdb prompt and this is actually pretty convenient to poke around at the code as well.<br>
Not only is this good to see the state of my headless browser, it's also nice to inspect the driver at this point.<br>
For example, I can just write my code here and later paste it into the test.<br>
For example, I should have an element now called logout, and that's true.<br>
I should not have a login anymore and that indeed raises a NoSuchElementException.<br>
Another link I should have is, let's see, my books and that's true, so I can now just copy this information and use it in my test.<br>
So we can assert that there is a logout link but let's do it like I did before to try this.<br>
And if there's a NoSuchElementException I'm going to say, pytest fail missing private links in nav bar so it should not get to here when logged in otherwise the test will fail.<br>
On the other hand, the login link should not be there anymore so this code should actually hit and if it's not, I will fall through to another pytest fail saying should not have a login link when logged in, so again, I should not hit this because this should already raise an exception.<br>
Now just to complete this, let's add my books and the five hour challenge, that's another nav bar item that's only visible when I'm logged in.<br>
So when I'm logged in, which is the case here because I'm using the driver login fixture this should all work, and when I get here it's definitely not good.<br>
On the other hand, the login link should be gone so I will hit this, which is fine, pass.<br>
If this actually does not raise an exception this test should fail.<br>
And that's our test for the login transition and the linking in the nav bar, let's run it again.<br>
Awesome, and in the next video we're going to add and delete a book and see how that updates the counts on my books page.
|
|
|
show
|
9:45 |
In this video, we're going to test the addition and deletion of a book when logged in.<br>
So we're going to navigate to "My Books" and to see what the number of books are that I've read which is a headline on my profile.<br>
I'm going to navigate to the book of my choice and click "Add", then I go back to "My Books" and see if the counter of the books read increased by one.<br>
Then we delete the book again to make sure that the next time I run the test we start from the same state.<br>
Let me show the GUI.<br>
So the test would navigate to "My Books," and this is just to tester account.<br>
So I have zero books added but when I add a book the counter should be one.<br>
For simplicity I'm only going to look at the books to this first counter not to the pages to keep it simple.<br>
And at the end of the test we're going to delete the book to get back to zero.<br>
So how would we code this up?<br>
First just let me go into my profile twice to get the number of books.<br>
So to keep it DRY or don't repeat yourself we're going to build a helper to address that first.<br>
I call it _get_number_books_read.<br>
I pass in a driver.<br>
First I'm going to go to My Books which we just select by link text.<br>
Actuall we already have a constant called MY_BOOKS and I'm going to click on it.<br>
So that will go to My Books.<br>
I already was there.<br>
And we're going to target this div which does not have an id but we can target a class.<br>
So I can take either this one but let's go with subhead.<br>
And I think that's the only one on the page.<br>
Alright, so that's good.<br>
So I'm going to define the variable stats and I'm going to call find_element_by_class_name, Movie Text Subhead.<br>
And then I'm going to use a regular expression to extract the number of books from that.<br>
So I want to have this integer so I can.<br>
I already have my import re.<br>
I'm going to do a re.sub with raw string bear with me.<br>
First of all the stats variable is an object and the text in this piece is in the text attributed.<br>
And then I can do.<br>
A regular expression match of all actually starts with Status and match Everything up till the end.<br>
And this number of books will be the variable part.<br>
Which is one or more digits.<br>
And here I use parentheses to capture this data.<br>
So we can reference and in the replacement section so what this is going to do Is match the full string Capture the integer or the number of books.<br>
And that's the piece we want to extract from it.<br>
So it's going to throw everything away.<br>
Before the first number and everything after that number.<br>
And let's cast that to an integer.<br>
And that's what a return.<br>
So I need to do this lookup twice.<br>
So now we have a nice helper function.<br>
We can use in our test function.<br>
Now let's write the test function.<br>
First I get the number of books read from the start I can use our new helper.<br>
And that gives me zero.<br>
Let's actually see if that works.<br>
And let me not only use -k to filter the test but also -s to capture standard output to bounce that number to the screen.<br>
And it grabs the zero successfully.<br>
Great.<br>
So we need to code to subtasks which is adding a book should increase the book counter by one in the ratings.<br>
Deleting the book should bring the counter back to the initial count.<br>
In the initial count use this one.<br>
First I'm going to navigate to the second book and the second book was defined as this one doesn't really matter can be any book.<br>
Once I'm on a book I'm going to target this button to add it to my reading list.<br>
And again I use inspect to see what the name of that button is.<br>
And it is bookSubmit.<br>
So I'm going to find_element_by_name bookSubmit.<br>
So that finds the button.<br>
And then in the same statement I click on it.<br>
Then I'm going to calculate again what the number of books read on my profile is now.<br>
And this helper actually does the navigation as well.<br>
So this goes to my books page.<br>
I don't have to do that here.<br>
And what we're going to assert then is that the number of books after addition equals, the number of books from the start plus one.<br>
Let's test it out and put a breakpoint in here to see how we get rid of the book.<br>
Again the break point is to pass the execution.<br>
So we have the headless browser available to inspect the HTML.<br>
I'm logging in Navigating through the book adding it and I have one on my profile which is trying to assert.<br>
Here I met the current state of the execution the test got into the debugger see how I can get rid of this book.<br>
So the next step is to hit the delete button.<br>
So that the book is deleted from our list.<br>
So I need to target a button with name deleteBook.<br>
So I copied this name actually deleted here as well so I have a clean slate back for the next test.<br>
And the test worked So our code is working.<br>
And the final part then is to navigate to the book again.<br>
Target the delete button click it.<br>
Calculate the new count.<br>
Number of books after delete.<br>
And again the helper takes care of navigating to my books and the assertion then is that the number of books after delete should be the same as the number of books when we started.<br>
So adding book number of books goes to one.<br>
Deleting the same book.<br>
The counter goes back to zero.<br>
So let's try it out again.<br>
Awesome, that worked.<br>
On the final video we write one more test to log out the user and see if the navigation links are going back to the public ones.
|
|
|
show
|
4:16 |
In this final test video, we're going to logout the user.<br>
Clicking the logout link we verified that the navigation link is down to one, which is login.<br>
Finally we checked the HTML if there's a message logged out.<br>
First we're going to target the logout link.<br>
From memory it's called logout.<br>
Let me verify that, it indeed is logout and we're going to just find that by the name of the link.<br>
Because it doesn't have an ID or CSS class.<br>
So we find it, this will work because we're using the driver login fixture.<br>
Which gets us into a logged in state.<br>
So in that case there should be a logout link which you're going to click and then we're going to grab the page source.<br>
And we can do that with the page_source attribute and then we can assert that logged out is in the source.<br>
And that failed because I have to use link text because element by name we used for an input field that had a name set.<br>
So here we want to use the link text, let's try it again.<br>
And that worked and secondly you're going to check the logged out links.<br>
And we're going to copy a bit of code from the first test case and go to modify that.<br>
So this is the other way around.<br>
When I'm logged out, I should have a login button again.<br>
So this should not trigger an exception and let me update the message.<br>
Should see logon link in navbar and logged out.<br>
And for the private links they should all raise an exception, because when I'm logged out I should not have a log out button I should not see the navigation links my books and five hour challenge, because these are private.<br>
And the message then would be should not show private links when logged out.<br>
Any of these should raise an exception which is fine, if they don't, I fell through to pytest fail with this message and the test fails.<br>
And let's try this out.<br>
And it worked, so that's the complete test suite for this app.<br>
You made 10 test cases and let's just run 'em all together.<br>
And I will speed this up in the recording because this will take a minute.<br>
Awesome they all passed and that concludes the videos on testing a web app with Selenium.<br>
The next video we have an optional code challenge.
|
|
|
show
|
1:07 |
Congratulations, you made it to the end of the Selenium videos and you now should be able to test a Web App using Selenium.<br>
Pretty powerful stuff.<br>
Again, this is one day miscellaneous item so if there's not too much time.<br>
So, if you made it to the end of the videos, awesome.<br>
You might just want to move on to Day 50 today or tomorrow.<br>
However, if you still have time left and you feel inspired check out the README that contains a link to a PyBites Code Challenge.<br>
You can head over to our platform and go to PyBites Code Challenge 32 which is to test a simple Django App with Selenium.<br>
Remember, you can always code more on our PyBites platform.<br>
Again, maybe just bookmark it for reference.<br>
There's a lot of video content to digest these days.<br>
Either way, good luck and have fun and I hope you learnt a lot from this first miscellaneous item.<br>
And I'm eager to teach you more in an upcoming lesson.
|
|
|
|
28:58 |
|
|
show
|
0:49 |
Hello and welcome to Day 50.<br>
We're going to spend this one day chapter on Responder a new async web framework created by Kenneth Reitz.<br>
Maybe you've heard of Responder, but very likely not.<br>
It's quite, quite new.<br>
It's a great async-capable web framework.<br>
Why are we only spending one day on this and not diving deep into it?<br>
Well, it's really quite new and I'm not sure if it's going to survive or if it's going to gain all the traction so right now we're just throwin' it out there as another topic that you can cover.<br>
Something that you can use.<br>
I really like the API even just building small apps with it it's made me smile.<br>
It seems like there's some really great stuff happenin' here.<br>
So we're going to build a quick, simple API and website within Responder and I think that'll make you smile as well.
|
|
|
show
|
2:10 |
Before we start building our application with Responder, let's talk about a couple of the key features.<br>
We're not going to be able to cover the majority of these things.<br>
We're going to build a pretty simple app in this short chapter.<br>
I want to highlight some of the other things that Responder does for you.<br>
You can go check it out.<br>
Well, you'll definitely see the API.<br>
So there's a pleasant API.<br>
This is from Kenneth Reitz and he's pretty good at putting together nice API's.<br>
Things like requests are considered some of the better API's out there.<br>
It has class-based views but you don't have to use inheritance.<br>
You can just use a decorator on a class, basically.<br>
It has a nice ASGI framework.<br>
So these are the Async web Service Gateway Interfaces.<br>
This is, we talked about this when we talked about the Quart framework.<br>
This is the essential element that allows us to use async and await for our web view methods and actually use asyncio to do more concurrency.<br>
And that's one of the key foundations of Responder is it's built on top of an ASGI and natively and first-class supports async web view methods.<br>
That because of that it's pretty easy for it to support WebSocket.<br>
It also has the ability to take any other ASGI or WSGI app and make that a sub part of the application.<br>
So imagine there's some Flask app and you want to make that part of your sub application.<br>
Or you want to take a Pyramid app and make that part of some CMS section, or who knows.<br>
You can mount these other apps as sub routes and sort of combine them together.<br>
That's pretty cool.<br>
It has nice, simple f-string-like ways to declare routes.<br>
So you don't have to do regular expressions and stuff like that.<br>
It has a mutable response object that's passed to each view.<br>
So you don't have to return anything.<br>
You just set some properties and then it just picks those up as it goes.<br>
One interesting feature is it has support for background tasks.<br>
So instead of running those as part of the request you can actually just register stuff to run in the background and that's actually internally done with a ThreadPoolExecutor.<br>
Also has support for GraphQL, OpenAPI schema generation and documentation, and even special support for single page web apps or SPA's.<br>
That's quite a few cool features so it's a really neat framework.
|
|
|
show
|
0:48 |
When you first look at Responder, you might think of it as an entirely new, from scratch, API.<br>
But the reality is, is it's more of a reinterpretation of existing frameworks.<br>
So, for example, two of the main building blocks of Responder are Starlette and API Star.<br>
We've talked about API Star already.<br>
It's a cool way to build APIs of course from Tom Christie also of Django Rest Framework fame.<br>
And then Starlette is an ASGI framework that really works well.<br>
So you'll see a lot of the features of Responder are really coming from, especially Starlette.<br>
These two things are foundational elements for working with Responder and that's kind of cool because that means it's not entirely new and from scratch, but it kind of builds on the work and the growth of these other frameworks.
|
|
|
show
|
1:07 |
Before we open up the API of Responder and start writing code with it I want to give you a quick tour of what we're going to build.<br>
We're going to rebuild this service the Movie Db service from Talk Python.<br>
You know this is a demo type of API that I took and built long ago for another one of my courses.<br>
It allows you to search for movies so here you can see we're searching for "run" and we search for say "job" we get, you know The Italian Job and things like that.<br>
So, we have this nice API here that we can work with.<br>
We have this sort of landing page here at the front and you can also search by director or even pull up the details of an individual movie by IMDB code.<br>
So, we're going to take the data backend for this which is really a Python file and just like a simple CSV and we're going to recreate this in Responder.<br>
This one is actually running Pyramid on one of my servers but for our demo, we're going to take this and just recreate the same concept using the same data source with Responder.<br>
Should be a lot of fun and you can check this thing out here of course or just check out the after code as we go through it.
|
|
|
show
|
1:44 |
Are you ready to write some code?<br>
And build an API, that movie search service with responder?<br>
Well, let's get started.<br>
We're going to over here in our GitHub repo create a folder called movie_svc and I'm going to go into the service and just create a virtual environment as we have been all along.<br>
So we'll run Python3 -m venv venv and that'll create an virtual environment and activate it.<br>
Now the next thing to do is install Responder so we'll say pip install responder.<br>
There we go it's all installed and if we also install a little tool here called pipdeptree you can see how all this stuff fits together.<br>
You can just say pipdeptree and it shows you all of the moving pieces of Responder so you can see Responder is using aiofiles, API Star graphene, Jinja2, requests uvicorn for the async web server and then Starlette we already talked about.<br>
So here's all the pieces that we got working.<br>
Now let's open this up in PyCharm.<br>
And now we are going to get started by just having a Pyhton file and I'll call it app.py.<br>
You can actually call it whatever you want but that's fine.<br>
Okay, we make sure everything is working by just saying import responder and then we can go ahead and just run this.<br>
Okay loads up looks like everything is configured correctly.<br>
Now we got to get started with the API create some view methods and then run our server.<br>
Now before we do run that server though lets do one more thing lets create a requirements file here.<br>
And here we'll just put responder as well okay great so we got our requrements.txt and we got our starter code that we're going to build our app right here.
|
|
|
show
|
1:46 |
Let's get started by just defining the most basic web app that we can with responder.<br>
And then we're going to add some templated views and some API methods.<br>
And also, when we get started we're going to build it all in this jammed-together app.py file, and then I'll show you one way at least to restructure it in a much much better way with API views broken out, and page views and routes and all the stuff that you would probably want to do for real apps broken apart in a much better way.<br>
But we're going to start by jamming it in here.<br>
So, let's get started.<br>
Now, when you think of this API it's Flask-inspired but it's not exactly the same as Flask.<br>
A lot of what you do, before mirroring Flask we did like Flask.app like this, Flask app.<br>
Here, we're going to say responder.api, like so.<br>
We're going to create this and then on to various methods we can say app.route, to add a route.<br>
So let's say we want one for the home view and this will be index and this is going to take a request, and a response.<br>
This is unlike Flask, which doesn't take these.<br>
And then, what we can do is we can just say response.content = "Hello world".<br>
Alright, now if we run this it's going to be not so inspiring, it just exits.<br>
The last thing we've got to do is we've got to go down here and say app.run.<br>
If we do this, clean it up a little and we run it it's up and going, let's see what we've got.<br>
Hello world, there we go.<br>
Hopefully you can tell this is a pretty simple API and it's also quite Flask-inspired in the way that it works.<br>
Obviously, we want to replace this with some kind of templated view maybe an overall layout page and individual page details like we have in some of the other templated frameworks and things like that.<br>
We'll get to that but here is a really nice way to get started.
|
|
|
show
|
2:25 |
Here's our target application.<br>
It's going to look like this.<br>
Now what I want to do is have a template that we can use.<br>
A standard, dynamic HTML template.<br>
Now this one I told you was Pyramid and so it's using Chameleon but Responder, as far as I know doesn't support Chameleon it supports Jinja2.<br>
So what I'm going to do is I'm going to put the HTML already here and we're just going to look at it.<br>
Because it's not really that interesting and we're just trying to recreate the same thing.<br>
So we're going to create a templates folder and let's go ahead and actually mark that as a template directory.<br>
Here in the _layout.html we have the overall look and feel for our site.<br>
And it's going to be the same across everything.<br>
And importantly notice right here we have our content block and then over here we're just saying this extends /shared/_layout.html and here's that content block And this parts pretty static honestly but you could imagine putting additional Jinja commands and so on.<br>
Gives you enough to work with.<br>
So these are in place now how do we use this?<br>
Obviously that's not going to work.<br>
I'm going to say the app and actually I kind of want to rename this.<br>
Let's rename this to api.<br>
There we go since it's an instance of the api.<br>
So we'll say api.template and we can give it the name of the template.<br>
And this is going to be relative to the working to the template folder here So we're going to say it like this.<br>
We'll say home/index.html, okay.<br>
And then this should get that content and any data we wanted to pass.<br>
We could pass user equals Micheal or whatever you want.<br>
Alright you can do keyword values.<br>
I'll expand the dictionary there.<br>
And it'll be passed to the Jinja template.<br>
Alright let's run this and see what we get now.<br>
Well it kind of looks good.<br>
It looks okay.<br>
If we compare these though notice there's some formatting that's missing.<br>
Alright, for example, this is not so good it's suppose to be the right.<br>
What's happening?<br>
Well the static files over here if we go and inspect element and look at the network we'll look at all of it.<br>
You can see we're getting 500 errors trying to get access to these static files that don't exist.<br>
These really should be 404s I've actually submitted an error report like a Github issue, to the project saying those should be 404s but whatever it is the point here is that these are not working.<br>
We got to now add a static route so that's what we're going to do next.<br>
But we're already pretty close right?<br>
We've got the template up and running.<br>
All we got to do is say api.template and give it a relative path within the templates folder.
|
|
|
show
|
1:35 |
Our template file is working but the static files are not there.<br>
Well, that's not surprising because we haven't created any.<br>
There's a couple things we have to do.<br>
Notice already it's adding this static folder that's just by running it creates the templates in the static folder.<br>
So we're going to copy some stuff over copy some CSS and so on and you'll see that those are actually being imported right here at the top right there.<br>
So, I just got to make sure those are available.<br>
Now if we run this again click here, hey look at that.<br>
It looks a lot better.<br>
Our formatting is here and of course we still have this view which you can look at it like this go over to the network, go to requests you can see now we're getting good stuff for our static resources.<br>
Let's go see just CSS, there they are.<br>
304 even they're cached, which is great.<br>
For this we don't have to do anything.<br>
The static folder is already mapped with caching but if for some reason you wanted to control it I could go over here and say api.static_route then I could say /static and potentially add additional details so if you wanted to have another static folder, other things and then come over here and say static=true.<br>
Okay so you can add additional routes.<br>
I'll comment it out so you have it but it already creates one static folder for you to get started with.<br>
It also does this templates thing which I've mapped as a template folder that's why it's purple here in PyCharm.<br>
Okay it looks like this thing is up and running.<br>
We got our web view working great.<br>
How 'about this when we try to search not found, not working so well, huh?<br>
All right well that's something we still got to build but we do have our static files working and we have our template working right here.
|
|
|
show
|
2:51 |
The next thing to do is to define the API routes.<br>
Probably the easiest way is actually to go on and run this.<br>
And grab them off this little description page.<br>
We're going to do a GET to search for movies.<br>
Like this.<br>
Want to have that here.<br>
That's something we're going to do.<br>
And I'll put the others.<br>
So this time we need to define three additional routes.<br>
So, let's try it in the methods first.<br>
And let's just call this search_by_keyword.<br>
The name and the method is really just for us not for them.<br>
Request and response, that's what we're going to pass in and let's just do this for a moment.<br>
And search_by_director then movie_by_imdb.<br>
Great, so these are the things that we're going to build.<br>
Now we need, see what we want here.<br>
So, we want /api/search, and we want to grab some data out of the route and we want to pass it through.<br>
Well it turns out this is super nice.<br>
We say api.route and we give it as a string of this bit right here and then that actually gets converted to a string and passed automatically.<br>
So we just say that's a string right there.<br>
And that's it.<br>
That's easy, right?<br>
Now, how do we show or return some sort of json data?<br>
Well, it's going to be pretty easy.<br>
We'll say response and you're going to say the media is equal to a dictionary.<br>
So let's just say 'searching'.<br>
I'll just put the keyword here.<br>
So just have it echo it back.<br>
Notice there's no return value.<br>
This is mutable, these requests here or responses.<br>
And you just set values like headers and media and content and so on.<br>
So we should be able to call this already.<br>
Let's try.<br>
Go over and click this.<br>
Look at that.<br>
Searching for run.<br>
And if you actually view the raw data that's the json value that was turned back.<br>
Perfect!<br>
So this is pretty easy.<br>
Let's do the other two.<br>
The route for this one is going to be api/director/{director_name}.<br>
So @api.route.<br>
Put this into a string.<br>
This is a variable as a string.<br>
And so we get better intellisense or autocomplete let's go ahead and decorate out our response object as well.<br>
Okay and then this one is going to be somewhere.<br>
We're going to pass in the variables from the route and that's always going to be a string.<br>
It'll clean up and it looks like we're pretty much ready to go.<br>
We're going to do some kind of response.<br>
Let's just echo back the values here.<br>
We're going to have director and this one will have imdb_number and let's just tell it that's spelled correctly.<br>
Alright, we can test the other two real quick now.<br>
Searching for run, great.<br>
Now we're searching for Cameron by the director bit.<br>
And here we're searching by the IMDB code for api/movie.<br>
Perfect!<br>
So we have our stubs pretty much built.<br>
And to be honest, this is kind of it for our API.<br>
What's left?<br>
Well what we have to do is we have to implement some kind of data backend and some kind of searching mechanism to actually search for the keyword or the director or whatever.<br>
It turns out that's pretty much pre-baked.<br>
So we're going to do a little bit of work to fill out these methods and then we'll be done.
|
|
|
show
|
3:03 |
Now, in order to actually implement these methods we need some data so I'm going to give you the data that actually powers that search that movie service that I showed you at the beginning so I'm going to just drop that in here, going to be a data folder and in the data folder we're going to have a movie.csv super-exciting, right and we're going to have this DB, database.py and it's going to return this named tuple which looks like that so it could be a class but we just got this simple thing that we're reading from that CSV so the main important thing here is that we need to call global_init.<br>
It's going to go find where the actual CSV file is.<br>
It's going to iterate over the rows and convert them into these movie objects and then put them into a lookup, by IMDb code so we can kind of index into our in-memory database here so we can ask it things like search for them by title and get a list back search by keyword and get a list back or just get an individual movie out of our little fake database here.<br>
Okay, so that's super-easy.<br>
We come over here, and we're going to say from data import db.<br>
Now this one, this one looks pretty easy.<br>
Actually, let's do the IMDb one.<br>
This one looks easiest, I think so we'll say movie equals db.find_by_imdb and we're going to give it IMDb number.<br>
If this is none or it doesn't exist we're just getting None back for the movie so we could do something like check whether or not the movie's there, return a 404.<br>
For now I'm just going to try to return the movie just the details of the movie.<br>
I don't think it's going to work but let's find out what happens.<br>
Oh, I think we forgot to call the global_init.<br>
This is probably going to fail, but let's try.<br>
Yep, it got us nothing back and it should have given us something.<br>
It didn't crash, it just said there's no data found and the reason is somewhere along the way maybe in the startup here, I'm not sure we need to call db.global_init once.<br>
Okay, try again, server error.<br>
Okay, remember I told you I didn't think this was going to work.<br>
What's wrong?<br>
This object is not JSON serializable so the important thing to note here is the entire object graph like if it's the list, everything the list contains and the items within that list point to, and so on have to be JSON serializable.<br>
This movie is a class.<br>
It's not, so we need some way to convert it to JSON.<br>
If we look over here actually wrote a method somewhere here at the top movie_to_dict, right, so it's going to create a dictionary and dictionaries long as their elements are serializable themselves, are so that'll be nice and easy so all we got to do is say db.movie_to_dict and then this should work because the important thing is that that's basically a Python dictionary or a list of dictionaries, or something along those lines.<br>
All right, ready?<br>
Boom, look at that.<br>
The Abyss by James Cameron.<br>
How cool is that?<br>
So, we've already implemented our method, our first method.<br>
We went to the database, found our movie converted our movie from a movie object into a dictionary set the response media.<br>
Boom, already knows that's JSON.<br>
Off it goes.<br>
How cool is that?<br>
This is pretty easy, right?
|
|
|
show
|
4:11 |
Let's implement search by keyword here.<br>
We saw that it's pretty easy if we have our database.<br>
We just got to make sure everything is a dictionary, and off it goes.<br>
One other item I want to be careful about here is I want to make sure we don't have too many responses.<br>
Right?<br>
If you search for the letter A you might get basically the database back.<br>
So up here I want to set some kind of max response count like to 10 or something along those lines.<br>
So a little bit of a complicating detail but at the same time you don't want to dump your database back if they search for nothing or space or, you know, some weird thing like that.<br>
Alright, so let's say we're going to get our movies and again we're going to go back to our database and say search by keyword this time.<br>
And the keyword is already coming in.<br>
That's cool, right?<br>
So right away we get a list of movies back from the database, and then we'll say limited.<br>
We want to know and report to the user whether or not there's more responses.<br>
So we'll say is the len of movies greater than the max response count there.<br>
I'll say, if it is limited like there's too many movies here what we're going to do is we're going to trim it down.<br>
So we'll set the movies to just the first 10 using slicing.<br>
Remember, this is just in memory.<br>
It's kind of silly, but it works.<br>
Now, what happens if we try to return a movie?<br>
Well, we already saw down here is goes this is not JSON serializable.<br>
It's not going to work.<br>
So we have to do a little bit of magice right here.<br>
We'll say movie dicts, because this is the list but the things in the list are not serializable.<br>
So we're going to go and create a new list where the items in the list are, so we'll say db.movie_to_dict(m) for m in movies, and now here we're going to just return our movie dict along with a few other things.<br>
So we want to say what the keyword was, we'll say hits that's what it says in the other api so it's going to say here it's going to be movie dict and then truncated results is going to be indicated by whether it was limited yes or no.<br>
Alright so here's our search and we can even do a print statement searching, we'll do a print, get the results out scale one more time, click over here on search.<br>
Hmm, look at that!<br>
Our search for run returned The Rundown, The Runaway Bride Run All Night, Chicken Run, all sorts of stuff.<br>
Cool, so what if we search for Superman.<br>
Boom, Batman versus Superman, Superman Returns, just straight up Superman, Superman 2 Yeah, so it's working really well, it's pretty straight forward right.<br>
We're going to do something super super similar with the other one.<br>
So I'm just going to copy this down here, and I'm going to use director name and, instead of searching by keyword we'll search by director.<br>
A little database thing, knows all about that.<br>
So director will pass along the director name and the keyword is going to be director name.<br>
Alright, let's run it again.<br>
This time if we click, lets clean this up a little.<br>
If we click right here on director, it shows us just Cameron, Avatar, Titanic and so on.<br>
If we search for someone else like Berg, Peter Berg.<br>
We get Battleship, Indiana Jones all these.<br>
Great right.<br>
Hancock, so we can search by whatever we want Cameron, here we go.<br>
So I think that's it, we have them all implemented lets just double check, keyword, seems like that works.<br>
Director, seems like that works.<br>
And IMDB code where we get one back, well that one's been working for a while.<br>
It was pretty quick right and look, this entire thing is implemented in PEP 8 style, 58 lines plus the static HTML and CSS, and I guess maybe the db as well.<br>
But the API side of thing is really really quite simple one thing you might want to do, like in PyCharm saying this is not used in Python, a way to say, I have to pass a thing here but I don't want to use it, is put an _ So that might make you feel better if you want to put underscores, but then you also maybe don't remember what that's for.<br>
So it's up to you, but I wouldn't put those there so it doesn't look like they're errors.<br>
Here we go, so it's totally working.<br>
Is it totally beautiful?<br>
No, I hate having all this stuff crammed in this one file but these Flask like api's, because they allocate this thing and use it in, sort of nudge people down that path.<br>
We're going to clean this up but I think this is working really really well.
|
|
|
show
|
4:28 |
The last thing we want to do is just reorganize this.<br>
Now, if this was the entire application I'd be fine to leave it the way it is.<br>
But I know how real web apps are.<br>
They have hundreds or maybe thousands of these view methods, and templates and all sorts of things.<br>
So you want to reorganize it and set yourself up for growing into a bigger app than this if that's at all possible.<br>
So how are we going to do that?<br>
Well, the data thing is fine, the templates you can see I've already organized them in a way that's pretty good.<br>
Similarly, for the static files here.<br>
So those three are going to be fine.<br>
What we're going to focus on is just this file.<br>
Now the one thing we need to do is this thing, you can see it's used here, and here, and here and it's an instance.<br>
So it's a little silly, but what I'm going to do is I'm going to create just a file that basically has that one single line in here.<br>
So I'll come up with something like api_instance and we'll import responder, and I'll say API equals responder.api, like that.<br>
And that's it.<br>
So over here, we're not going to do this.<br>
Instead, we're going to say from api_instance import api and that puts us back.<br>
But what that means is other files can also import this and share that instance.<br>
If I put it here, and then this file has to import some other files, but those files need access to that instance, so they got to get back here first it gets really complicated.<br>
So this kind of breaks that circular dependency.<br>
The next thing i want to do is I want to have some views here.<br>
Let's have a whatchacallit, like a home view hence the name home right there.<br>
And, woops I didn't want that to be a directory.<br>
I want that to be a file.<br>
Have a home set of views, and I'm going to have API views.<br>
You could just call it API but it's kind of highly confusing that this is also called API, so let's call it api_views.<br>
So then we're just going to say well, this kind of stuff is what's going to go over in this part and we're going to have to say from api_instance import api and this one's done.<br>
Now, again pretty simple, but in a real app you have tons of these and they'll build up.<br>
So that'll be good to have that out of the way.<br>
And then here's our API methods, these three.<br>
Let's take those and put them here.<br>
And again we need the api, you can see the arrow there from api_instance import api.<br>
We're also going to need responder, and this thing really was only defined here for that purpose so I can put that up there.<br>
We also need our db, so it looks like we have that all up there, everything's cleaned up.<br>
Now if I try to run this, how well is this going to work?<br>
Well, we initialize our database and we call run.<br>
How's the responder going to know about these routes?<br>
Probably not very well, let's try.<br>
Yeah, not found.<br>
Didn't know so well.<br>
So what we need to do is basically let Python more importantly the decorator see these and the way you let that see it in Python is you just import it.<br>
So we'll say this, from views.home import * we'll use star which is normally discouraged but we'll use it because as we add new ones it's just going to get everything.<br>
And what else we want here?<br>
api_views.<br>
So we can go say, don't do this.<br>
Don't tell us these are not used because they are used.<br>
Alright, great.<br>
Now if I run it, it's not looking great.<br>
We still got one more thing to do, but it's getting there.<br>
Back to work.<br>
Woo hoo, everything's working again, see that?<br>
But now if we want to go and add something we know where we go.<br>
Here's more HTML template based views here's where we put some more API methods.<br>
Those are all separated from say, the app start up like creating the global_init, importing the views creating the app sort of over there and then calling run.<br>
So you might want to add a little bit of extra work here to make this, I don't know, look a little better.<br>
We can put his into a main, or something like that and then use our Python convention one more time.<br>
Here we go.<br>
Alright, so I'm going to call this much more cleaned up and ready for big boy web application that actually does a whole bunch of stuff doesn't just cram everything into that app.py file like so many of the Flask apps do.<br>
Alright, well that's Responder all put together for you.<br>
It's a pretty cool little web app.<br>
One of the important things we haven't spoken about is because it's an ASGI framework based on Starlette we could put async here and use say like await right here, if the database actually supported async behaviors.<br>
It doesn't.<br>
That's why I didn't talk very much about it.<br>
But one of the big advantages here which some of the others do have as well is that we can use async on our view methods which is pretty awesome.<br>
Alright, that's responder in a nutshell.
|
|
|
show
|
2:01 |
Let's close down our chapter on Responder by quickly looking at some of the core concepts.<br>
Incredibly, what you see on the screen here is a complete Responder application assuming that you don't count that index file that's just the static HTML or dynamic HTML.<br>
So, what are we going to do to get started with a templated HTML page-based view?<br>
Come in here and create an API from responder.api similar to Flask's app.<br>
We're going to add a route as a decorator through api.route and we saw that you can even use curly braces like f-string like syntax to define places where data is passed in the URL.<br>
Then we're going to use api.template and pass the relative file name of the template we want to use.<br>
It assumes that you're talking about the template's folder, so within there it's the home directory in the index.html file.<br>
We're also here passing a user key which has the value u.<br>
It didn't really say where u comes from but, you know, you get it from somewhere, right?<br>
And you're passing along values like this that can be used inside that Jinja2 template.<br>
And then, what we do is we just set the content of the response.<br>
It's a mutable object, so we don't return values we just change response.<br>
Gives us a bare one, we set some values in it uses that result to generate the page.<br>
That was for a page backed by a template.<br>
What if we want a JSON-based API view?<br>
Well it's pretty similar.<br>
We're going to have the route again and see we're passing the keyword this time.<br>
And that key word appears in the search methods signature.<br>
Then, we're just going to create a JSON serializable thing.<br>
The simplest is probably a dictionary or list of dictionaries, things like that.<br>
And we're going to set the media element right there.<br>
And by setting media, we're telling it here is a JSON object.<br>
I want you to serialize and send back as part of this API response with the content type being JSON.<br>
That's it, that's Responder!<br>
Remember, all the key features I told you about at the beginning, that are not shown or covered here.<br>
Web sockets, async capabilities, background tasks.<br>
All that kind of stuff is in there but we don't have time to cover it.<br>
You can go explore it yourself, it looks really cool.
|
|
|
|
15:39 |
|
|
show
|
0:54 |
Time for a quick one day chapter.<br>
This is a crash course into Twilio.<br>
What we're going to do over the next, well, this day is actually have you look into the Twilio API.<br>
Not in any real depth or too far, I should say but rather just to get you set up on the platform and also get you sending text messages, so SMS messages from Twilio to a mobile phone number of your choice.<br>
This is the bread and butter of Twilio what we've all used it for what companies tend to use it for.<br>
So I'll get you started on that.<br>
This is just to wet your whistle and then you are free, obviously after the 100 Days of Web, to come back to Twilio dig into it, and see what else it has to offer you.<br>
But for now, let's just move on and quickly dive into Twilio.
|
|
|
show
|
1:49 |
Very quick overview of what we are going to do using the readme.<br>
As you can see, there's not much here because this is just the one day.<br>
In this single day chapter, you're going to create and configure your very own Twilio account.<br>
So follow along as we do that.<br>
Make sure you get that set up correctly.<br>
Keep in mind that if you do experience a screen that does talk about your address it does need a proper address and that would be because your country has anti-spam laws as we do here in Australia.<br>
You shouldn't if you follow along the way we have but now, aside from that, pop through the videos learn how to send an SMS or text message to your mobile phone using the Twilio API.<br>
It's really easy.<br>
I would encourage you to have a quick read of the restrictions of the trial account that we will be using for this.<br>
If you look at those restrictions you'll see what you can and what you can't do with your free account.<br>
Now, one last thing, because this is a very quick and easy set of videos if you have time at the end, just go ahead and think about how you can make this better.<br>
What could you send out from Twilio?<br>
I'll give you an example.<br>
I created a screen scraper, something that went through the stored up Steam-powered website and got me the titles of all the newest games that came down every day.<br>
And what I had my app doing was sending me a text message.<br>
It got very expensive so I turned it off.<br>
But sending me a text message every day of what the latest games were.<br>
So that's just one little example.<br>
Come up with your own if you have the time.<br>
Otherwise, think of this as a nice easy day right around the halfway mark of your 100 days of code.<br>
Move on and watch the videos.
|
|
|
show
|
2:59 |
Right, let's make this snappy.<br>
First things first, head to www.twilio.com T-W-I-L-I-O .com, and click on the sign-up button that you see there on the right.<br>
Now, go through and enter your first name, last name email, and password to create your account.<br>
Do that now.<br>
You'll then move across to verify your identity.<br>
And this is so Twilio can send you a text message just to verify that you are a real person and not some sort of a bot or anything like that.<br>
Let me enter my number in and we'll move on to the next screen.<br>
Once you've entered your activation code you will be asked a question here saying do you code?<br>
Click on yes I code because we do.<br>
And then, click on Python as our preferred language.<br>
And what is your goal today?<br>
We're going to use Twilio in a project.<br>
What do you want to do first?<br>
Send or receive an SMS.<br>
You can look at all of the other features that Twilio has on offer.<br>
You can make or receive phone calls, send WhatsApp messages but I believe that at the time of this video that is in beta.<br>
You can build a contact center, add videos so on and so forth.<br>
Let's just go to the basics, send or receive an SMS.<br>
And what this will do is this will set up our project.<br>
Check this out.<br>
So, get a trial number.<br>
And the reason we want this is because we want to send a text message from a phone number.<br>
Right?<br>
Our application that we're going to be using.<br>
We'll send a notification from a number to a number of your choice.<br>
So, click on get a free phone number.<br>
This will then pop up.<br>
It'll automatically generate a phone number based on your location, so I'm hoping you are in a country where this works.<br>
I know there are definitely some countries that this is not accessible and so I apologize if you cannot do this.<br>
But for all intents and purposes, you should be able to.<br>
Most countries are covered.<br>
So being in Australia this is the format of our phone numbers here.<br>
I'm going to just choose this number because it's random.<br>
I don't care.<br>
That's that.<br>
It then assigns this to my account.<br>
We'll stop this video here, but what you can see here on your dashboard for this trial application is our balance.<br>
Twilio very kindly gives us 15 dollars, 50 or whatever it is in your local currency for us to play with because yes we are sending text messages yes, we are actually spending money.<br>
So for now, hang on there, let's look on the next video for our actual API keys.
|
|
|
show
|
1:07 |
A very quick video on your authentication tokens.<br>
The first thing we have here is the account SID this is needed for your code so make sure you copy that and save it somewhere.<br>
Just maybe if you have a password manager or anything like that.<br>
Authentication token now I'm not going to show you that because that is like my secret key.<br>
Go ahead and copy yours and again save that somewhere special and that's pretty much it.<br>
We won't bother going through this SMS Python Quick Start or this Web GUI Quick Start or this Web GUI thing no let's actually do this on the command line.<br>
So pop into a directory.<br>
I have a Twilio directory created just for this let's do our virtual environment, get that created.<br>
And all we need to do is pip install twilio.<br>
So they've got a nice Python module for us to install.<br>
It really is amazing how simple this is to send a text message.<br>
So and with that installed we're good to go.<br>
So move on to the next video.<br>
Let's quickly create our script and run it.
|
|
|
show
|
4:40 |
Now you will think I'm a bit crazy but this is going to be the world's simplest script.<br>
Twilio really makes it easy for us to send SMS's with Python, using their API.<br>
So let's pop in to a file we'll call it twilio_sms.py.<br>
And surprisingly, we have to import Twilio.<br>
No, I'm kidding, that's not a surprise at all.<br>
Let's do from Twilio dot rest because we're using their rest API.<br>
Import client.<br>
That is the only function that we need to import.<br>
It's pretty crazy, right?<br>
Now remember those two IDs that we collected before the SID and your authentication token?<br>
This is where you specify that.<br>
So we could use an OS variable we could just throw this in there, whatever.<br>
I'm obviously not going to put that in right now.<br>
And let's actually put in auth token as our second object here.<br>
You'll pop your token in there as well.<br>
Now, the really really difficult simple part.<br>
We have to set up the client object using the client function that we imported at the top.<br>
To do that, we call it client and we give it the account SID.<br>
So I was being sarcastic when I said this was difficult because it's really not difficult.<br>
Next, we call on client, and this time we're going to say use messages.create.<br>
Really simple, right?<br>
Now let's just make this human readable.<br>
We could do this all on one line, but let's just pop down give us our four spaces and the first thing that we need to set is to.<br>
So who are we sending this to?<br>
So remember I said you needed to use a phone number here?<br>
This is pretty much it.<br>
Now keep in mind, for this to work we need to use the phone number that we put in when we created our account.<br>
Remember it asked you to verify your phone number?<br>
Well, that wasn't just to prove you're a person with a two-factor key.<br>
This is also to allow you to receive messages.<br>
So if I wanted to, perhaps, spam Bob right now with a few text messages Twilio wouldn't allow me to do that.<br>
And that's because Bob has not verified his phone number with this Twilio project.<br>
I'll explain that in another video, but for now just enter in the phone number that you put in there.<br>
I'm obviously not putting my number in right now for the sake of this video, but we'll put in my area code.<br>
I'll edit this off recording.<br>
Now we also need to put a from object in here.<br>
Now this is the phone number that our application used.<br>
So mine was +61, this is the free number that Twilio set up, four eight zero zero one five three two five.<br>
And you'll do the same for yours.<br>
Syntactical error there, forgot to put the comma.<br>
Remember this is still technically one line.<br>
And then we have the body of the text message we're sending.<br>
So what do we want to say?<br>
We want to say, oh I don't know, welcome to the one hundred days of web course using Twilio.<br>
That's it, nice and simple, right?<br>
Then we can close that off, and that is our script.<br>
Your job here is to give me two seconds I'll use the magic of the recording tool to add my stuff in here without you seeing it and then, we'll run it on the command line.<br>
And with my SID, my auth token, and my phone number inserted into that, we can simply run Python twilio_sms and we should actually not get anything but a returned empty line.<br>
And that will mean that our script successfully ran or had no errors.<br>
And then, at this exact moment my phone should be going off and it is.<br>
And I have a text message on my mobile saying sent from your Twilio trial account welcome to the one hundred days of web course using Twilio.<br>
And that's literally it.<br>
We just used the Twilio REST API with Python to send ourselves a text message.<br>
Really simple, really effective and a lot of stuff we can do with this.
|
|
|
show
|
2:13 |
Now just to show you a quick view of the user interface of twilio.com.<br>
On the console, you can check who you've been sending text messages to.<br>
This is actually relevant because, as you start to use this for any sort of business use or anything you kind of want to see what you're sending text messages for in case something is using up all your money or all of your balance, anything right?<br>
The other thing I want to show you is the verified numbers so if you follow this link you can see here your verified numbers.<br>
And this should be that number that you tested or that you entered at the very start.<br>
Now this number is probably your mobile.<br>
But if you wanted to add someone else's number you would click on this little plus here and you would add their number and the name.<br>
And that would be your way of being able to test sending numbers to friends or colleagues such as Bob who will probably not accept any verification message from me now after this.<br>
But, I digress.<br>
This is where you add numbers and this is how to contract all of that.<br>
And when we go to usage, down the bottom there on the left we can see how our mobile number's being used.<br>
If we click on view all product usage, here it would take us to a page where we can see the summary, expand it out, CFO numbers see what's costing the money.<br>
Head down to programmable messaging logs.<br>
Go to SMS logs and there are the text messages that we've sent.<br>
I've obviously sent a couple, but there's all of them there along with the two number.<br>
So it's nice and easy, they let you track everything.<br>
There's not too much to check our here to be honest once you start working with the API and the command line you shouldn't really need to come back to this website at all other than just to check your usage or how much money you have left on your account.<br>
That's sort of admin work but not for the programming stuff.<br>
It's pretty easy to use the command line so just stick with that.
|
|
|
show
|
1:57 |
And that was the super simple Twilio API.<br>
You've probably watched all of these in one day.<br>
Let's breeze through this.<br>
Sending an SMS with Twilio.<br>
What we did was, we imported the client function from Twilio.rest.<br>
We then specified our account SID's and authentication tokens.<br>
Now these could be specified in an OS variable or an OS environment variable but you can probably just hard code if no one's going to look at this just for this simple exercise.<br>
Next, we used our client function to take the account SID and the authentication token and create ourselves a little client object and we use that object to create ourselves a message.<br>
And finally within that message we had our two phone number which we had to make our own mobile because that was the number that was verified with Twilio and then we had the phone number and our body.<br>
Now, moving onto this unverified phone number error.<br>
So if you tried to send a text message to a number that you did not verify yourself you would receive this message on the command line as an error.<br>
So, unable to create record.<br>
The number is unverified.<br>
Trial accounts cannot send messages to unverified numbers.<br>
This is something I've mentioned before so what you would need to do is actually get that number verified.<br>
And that would mean letting that person know and getting it on that page and you go from there.<br>
That is it.<br>
Your turn.<br>
Try and put something interesting in the body.<br>
Try to automate that.<br>
So again, see if you can, if you're pulling data from web scraping or something like that and pop that into the body text field of our SMS and see if you can text yourself something interesting.<br>
Again, keep calm and code in Python.
|
|
|
|
58:11 |
|
|
show
|
0:42 |
We're going to build a really cool interactive web application.<br>
And we're going to do it the easy way.<br>
You've already seen Flask, and Flask is super powerful, and super flexible.<br>
In fact, we're going to come back to Flask again, maybe one or two more times in this course still, but I want to show you an alternative way to build web apps, and especially if you think to yourself, I'm not a web developer, I'm not super good with CSS, I'm not great with HTML, layout doesn't work for me, I can't put together the web pieces, these tables are crazy, I'm not great with databases.<br>
All of these things?<br>
I'm going to show you a way to build quite a wide spectrum of apps in a super easy and accessible way that you can be up and running, literally in a day or two.
|
|
|
show
|
2:06 |
The title of this chapter is Full Stack Web Apps Made Easy.<br>
So, what the heck is Full Stack anyway?<br>
You may have heard this term.<br>
It's definitely floating around there as a buzzword out in the industry, but let's try to put some structure to it so you really know what I'm talking about.<br>
Now, let's look at the pieces involved in a standard Web App.<br>
We got our browser, we have some kind of cloud hosting, there's really some sort of server, maybe it's a virtual machine or set of virtual machines we manage, and there's typically a database.<br>
A request comes in, goes over to the server, goes off to the internet; somehow finds its way magically through the magic of the internet to our server, our server talks to the database, and so on.<br>
For most deployments, most applications you build, what do you need to know?<br>
It's actually incredibly daunting, I mean you're taking 100 Days Of Python here, but there's a lot of languages and technologies involved.<br>
We have tried to help with this, but still, let's see.<br>
On the server side, we got to know Python, we have to know HTML and CSS, some kind of templating like Jinja2 or Chameleon, some web framework like Flask or Pyramid, a data access layer like SQLAlchemy or MongoEngine or something like this.<br>
The actual infrastructure, typically that's Linux, and if you aren't in Linux, probably you got to configure the front-end web server, which is NGINX.<br>
You also got to configure the app server which runs your code itself, which is uWSGI or Gunicorn, or something like that.<br>
There's just like, "That is just the server!<br>
Do we forget about the database?" Nope.<br>
There's more stuff that goes over here; you got to know the server that is the database, SQLite or MySQL or something like that.<br>
Got to know the query language, the SQL query language.<br>
In practice, you got to know migrations, how do we evolve your database?<br>
Are we done?<br>
No, We still got the front-end code.<br>
Over here, we've got Javascript, HTML, CSS, Bootstrap, a front-end Javascript framework like AngularJS.<br>
This is an insane amount of stuff to know, and this is why building web apps is both really fun but also really challenging because you don't just learn the one thing and then go build the app; it's all these technologies put together.<br>
Once you master them, this is a super fun way to build applications, but it can be really daunting.<br>
Whatever it is, it's not quick to get started.<br>
We're going to see that what we're using for this set of three days takes many of these things and makes them nearly trivial or automatic or just puts them behind the scenes for us.
|
|
|
show
|
1:00 |
Let's take a look at the app that we're going to build.<br>
The app is called HighPoint, kind of like SharePoint but with Python.<br>
So it's just this knockoff off on a really simple document management application.<br>
But you'll see that it's quite involved.<br>
So here on our homepage, we've got a couple operations.<br>
You go view all the documents or create a new document.<br>
Here's the most recent ones.<br>
You can click and see the details.<br>
So when it was created, all the info about it, and so on.<br>
You go over to all the documents and you could filter.<br>
For example, one of these has the word atoms in it, that one.<br>
Another one has grass-fed request for example.<br>
So really nice and again you can see the details.<br>
And then finally you want to add a new document, you come down here, you pick a category, create it, you have validation, all this kind of stuff.<br>
So we're going to build this in a really short amount of time.<br>
And then put it on the internet with a full deployment.<br>
How about that?<br>
Hopefully you're looking forward to it.<br>
It's a cool technology and it's going to be a lot of fun.
|
|
|
show
|
0:54 |
Now that you've seen the application that we're going to build, our SharePoint document management knock-off thing, you might be thinking there's no way we'll be able to build that in like 30 minutes or whatever this is going to take.<br>
Well, it turns out, if we use this thing called Anvil, we can.<br>
So Anvil is this new product that came out that lets you write Python code for everything that you do, and it's really this cool visual designer and application builder for Python web applications with both the service side and client side component.<br>
Now there's a free version of Anvil that you can get, and it has some restrictions.<br>
And so I was a little bit hesitant to use it for this course because for it to really take full advantage of it, you have to pay for it.<br>
But on the other hand, it's so powerful.<br>
I think a lot of you will really appreciate what you can do with it and might actually find it super useful and not mind paying the small bit that you pay anyway.
|
|
|
show
|
2:42 |
Before we start building our application with Anvil, lets look at the building blocks, all the pieces, the little Lego bricks that we have to put together because they're really easy to fit together and use.<br>
So, let's do a quick survey.<br>
Probably the first thing you'll notice is forms.<br>
And forms are the HTML pages and components.<br>
You have a nice visual designer with a set of components you can drag over and visually line up and click on them and set their properties and so on.<br>
So, that's really nice.<br>
There's also a code behind thing that goes with them that you can run some code as part of interacting with the form.<br>
Now, some code doesn't belong within the UI, it belongs elsewhere.<br>
Maybe it's shared across forms or it just doesn't really belong there and so, that would be in this client module section.<br>
So here you can create these Python modules that you write arbitrary Python code that can be called from within the forms, can interact with each other and so on.<br>
So, it's kind of a nice way to separate stuff out there.<br>
We'll also have server modules.<br>
So, this client code in the form code behind actually runs on the client side.<br>
Think about that for a minute.<br>
Python code running a client side.<br>
That means in the browser, so it actually converts to JavaScript and runs there.<br>
Sometimes you need code to run on the server to interact with your database in certain ways or to work with secrets, or validate stuff that nobody can mess with.<br>
So, that's server modules.<br>
And there's nice integration here.<br>
And of course you need data, a database.<br>
So there's this concept of data tables which is really nice and easy and integrated.<br>
On top of these four things we have services.<br>
So, things like user management, storing users with passwords and registration and stuff like that.<br>
Secrets like API keys you don't want to put in your code but still make accessible to your web app.<br>
And Google and Facebook APIs, so if you want to get to say like Google Drive, for example.<br>
Stripe if you want to accept payments.<br>
And finally, this thing called uplink.<br>
Now, uplink, we talked about a thing called uplink, a Python package for services but this is not that.<br>
Put these entirely out of your mind they're totally unrelated.<br>
This is just the same name they have here as the thing that we played with earlier.<br>
The idea is, if you would like your web application to reach out and get inside some other thing and interact with it you can do this thing called uplink.<br>
Here's an example.<br>
Suppose I have a Raspberry Pi that's running some Python code that controls my house.<br>
Inside that Raspberry Pi, I don't want to have a service that things integrate with but I would, somehow, like my web application to initiate a call into that Raspberry Pi.<br>
Like, let's say to turn on the lights or open the garage door by clicking a button on my web app.<br>
Uplink would make that happen.<br>
So, really, really cool.<br>
We're not going to use it at all.<br>
We're not going to use any of these services for what we're doing but we are going to work with the top four items for sure.
|
|
|
show
|
2:09 |
Alright, are you ready to get started?<br>
It's time to build something now that you've seen what we're going to build, and some of the building blocks, let's go over to Anvil.<br>
Now, I suggest you go to talkpython.fm/anvil to get started, I'm working with the guys there and maybe I'll be able to get you some kind of discount if you do decide to sign up based on this.<br>
I'll put more details in the readme in the your turn, but be sure to go there this way, talkpython.fm/anvil.<br>
Here's their site, you want to just log in, you'll probably want to sign up.<br>
Now, it should take me right there, I think I've logged in in this browser session already.<br>
Now, I find when I'm working with Anvil that I really just want to go over here and get the web application to go away and just get it full screen, because everything's going to happen inside here.<br>
Here's my HighPoint trial test thing that we were just playing with.<br>
You can actually go down here and click on this, and get to some of their interactive tutorials if you want to look through them, that's pretty cool.<br>
They've got a lot of helpful little videos and walkthroughs, things like that, so really pretty nice support to get you started.<br>
But we're just going to create a new application.<br>
I can see we have three basic looks, and this one looks a lot like the app we just build, didn't it, so we're going to go with the material design app.<br>
And once you pick material design, you need to pick your layout, there's a lot of options, just blank or custom, or single page, we're going to go with what's called a card-based layout with a sidebar.<br>
So here we are in our application.<br>
We only have this one view right now, but if you click app browser, you see we can have more than one form, we have our modules, server modules, the services, and things like that.<br>
Okay, so I'm going to put this away for now, but that's the way we get started.<br>
And what we do is we just go over here and we way, I would like a label over here, for example, on the title.<br>
Or I'd like a button to be right there.<br>
And we're going to drag the stuff around, arrange it, and then we can flip over to the code side, so here's the code that runs when our form is shown.<br>
So we're going to hook the events from these components and they'll call functions back on that code that we just saw there.
|
|
|
show
|
2:28 |
Alright, here we are.<br>
Let's begin, this is going to be our home_form.<br>
Let's begin by renaming this thing, that's not amazing so we can come over here and we can rename it to home_form is what I'm going to call it.<br>
Since my resolution is so small, I'm going to hide this thing back.<br>
I typically work with that open but for recording I made my resolution really small which means I'll try to compact things.<br>
Alright, so let's go over here and put a title.<br>
And we're going to give this a name, so in code we refer to these things as you know, whatever their name is here.<br>
Label1 is not super helpful, is it?<br>
So let's call this label title.<br>
And let's set it's default text as HighPoint Home, something like that.<br>
Alright, so what we want to do is we want to take some links, some hyper links and put them over here.<br>
So we're going to have three of them and let's just set the properties.<br>
Give them a name.<br>
It's going to be link home, it's text is going to be HOME all caps.<br>
This is going to be all_docs and this is going to be add_doc for creating a new document.<br>
Now, one thing you may have picked up on in our little demo app was there were some cool icons here and Anvil is integrated with what's called font awesome which I love it, font awesome is so cool.<br>
I use it.<br>
You've seen plenty of these fonts in the player that you're working with right now I'm sure.<br>
So we can come over here and say I'd like to have a home icon, actually this is the ad so let's have a plus.<br>
And it's a little plus that appears over here, let's do it for docs.<br>
Now if you're going to make a knock off on SharePoint obviously you've got to use word, right?<br>
So we've got a word icon down there and for home let's go over here and add an icon and type home.<br>
That looks nice, right there.<br>
Okay, so we've defined our UI, we've got these pieces here.<br>
Now the next thing to do is to actually add the contents.<br>
Now the way our navigation is going to work is we're actually going to load up this one page and we're not going to navigate away at all as far as the browser is concerned.<br>
So this is kind of what you'd consider a single page application which has a lot of benefits, means every time you interact with this stuff it doesn't necessarily go back to the server.<br>
Once the thing is downloaded, it runs really really fast which is a great way to run Anvil apps.
|
|
|
show
|
2:06 |
Now notice, if we were creating a top level item, this might be good, maybe this, but for stuff that's nested inside other forms, then this blank panel is probably what we want.<br>
Give it a name.<br>
add_doc_form.<br>
So this is going to be the one we'll see for when we add a document.<br>
Now for each one of these, I'm going to put a title on them, but I'll skip over in the next set, so you don't necessarily need to see how to put a title every time.<br>
So we're going to put this over here, and let's just put a nice little title, called this label subtitle.<br>
Make it a line center, make it bold, make the font size 28 points, and the text will be add a new document.<br>
That's not going to change so we don't need to do any code, but we want to be able to see what form do we have active.<br>
So, we'll have this here.<br>
Next up, we're going to add a doc_details_form.<br>
So once you click on a particular one, we'll get that.<br>
We want a place where we can filter and see all the documents.<br>
So let's create an all_documents_form.<br>
Now you might think we're done.<br>
We have our home_form, we have the ability to add a doc, go to doc_details and see all of them.<br>
However, we also want to put something here.<br>
And the way the interaction's going to work, its better of what goes into this section, even on the home page, is encapsulated as one of these little sub-documents.<br>
So, let's add one more here.<br>
And for lack of a better name, I'm going to use home_details_form here.<br>
And there we have it.<br>
We have all the forms and they have a little bit of information on each one of them.<br>
The next thing we need to do is actually make this navigation work.
|
|
|
show
|
4:20 |
So we have our cool little app here, we've got our various forms, and we've got a navigation.<br>
Let's go ahead and actually run this, we've not run it yet.<br>
So, what happens when you run it?<br>
Well it actually just kicks off, I think, a docker image on the Anvil servers.<br>
So let's click this and get started.<br>
Oh, before we do, let's give it a name.<br>
I'm going to call this HighPoint-100days.<br>
Now we can hit run.<br>
Now notice it's running right here, this little helper thing up at the top, and then press stop and get back.<br>
But anything below this, this is our app, this is what people will see.<br>
You can even expand and collapse the little side thing.<br>
But if we click on these notice, not so much is happening, right?<br>
Our forms are not showing.<br>
But still, look, our app is running.<br>
And if we wanted to see it on other browsers or on our phone or something you can even go over here.<br>
But we're not going to that yet, we're just going to hit stop.<br>
Now remember, don't close your browser, you're not going back to an editor, you just want to hit stop, you're already here.<br>
So how do we link these things together?<br>
Well, this is where this goes from kind of interesting to really different and interesting.<br>
Watch what happens when I hit code here.<br>
We've already seen that we have our code in the background, okay, and let's open our app browser for a minute.<br>
So what we need to do is import these other forms, in Python, so here's how it goes.<br>
From add_doc_form, import add_dock_form.<br>
So this is the standard way you get access to these other forms.<br>
You're going to need this for all the various sub forms here.<br>
All right, so we have them all imported, now what?<br>
So we're going to write a little bit of code here, that when the page loads, after init components, when the page loads we want to show the home details form.<br>
So notice we have a content panel here, and what we're going to do, is we're going to put instances of these forms into the content panel, and that's the thing contained in the middle.<br>
So we'll say self, notice the nice Intellisense, cotentpanel.items, not items, what you want to say clear, like that.<br>
So, in case something was here, we want to get it out, and we're going to do this every time we navigate, but also at the beginning basically.<br>
Say self.contentpanel.addcomponent, and we're going to create, we want to create a home details form like that.<br>
And that's going to do it.<br>
All right, now let's run this and see if it works.<br>
Boom!<br>
Look at that.<br>
HighPoint Home.<br>
Now none of this is working, so let's go link those three things up and replicate it for the various operations we have here.<br>
So we go back to design, and we just double click home, and notice link home clicked, and here's a function.<br>
Go back to design, do it for all docs, do it for add_doc.<br>
So notice, here are the various things that we can do.<br>
We can go home, and let's actually, do this over here.<br>
Call self.link, clicked, home, like so.<br>
Do the same thing with the other little forms for the various other pieces.<br>
So what have we got here?<br>
The all_docs.<br>
And this would be add_doc.<br>
Okay, great, it's almost finished.<br>
Let's run it and see where we are.<br>
Notice up here our title, HighPoint Home, HighPoint Home, and we click here, we get all documents, add a new document, but notice this is not changing.<br>
This is subtitle, but this is label title.<br>
Let's fix that.<br>
Now one thing that's cool, is notice over here on the right.<br>
These are all the stuff, things we can work with, and if you expand it, it shows you you can set the icon, text, etc., etc.<br>
So what we want to do is set the text here.<br>
So we'll set it home there.<br>
This one let's say All Documents.<br>
And this one be Add a document.<br>
How cool!<br>
Look at that.<br>
Very, very nice, I love how this is coming together.<br>
So, I think our navigation is basically done.<br>
The next thing that we got to do, is let's focus on adding a document.<br>
Because it's not super interesting to show the documents, until we have the ability to add them.<br>
So we're going to focus on adding a document next.
|
|
|
show
|
2:08 |
Alright, our next goal is going to work on, to be working on this add_doc_form here.<br>
So what we want to do is we want to be able to drop in some pieces, so we're going to come over and add a little sublabel, and this is going to control, this is going to basically be the label in our form.<br>
We don't really program against it, so we don't need to set the name, but this'll be document name.<br>
And let's make it a little more standout, make it bold.<br>
Okay.<br>
And then, we're going to have a text area where they can type.<br>
Notice I can drop it in these different locations.<br>
I'll drop it right here.<br>
We can tighten that up by dragging that bit over.<br>
Now this one, let's give this a name, such as, like, textbox_doc_name.<br>
And let's give it a placeholder document_name like that.<br>
I'll do exactly the same thing for the rest of the elements.<br>
Okay, so I've done a little draggy droppy magic, and gotten this far.<br>
We have a document name, we have a category, and this is going to be a dropdown, we'll fill that up.<br>
This is going to be a text area, and we should go ahead and give this a placeholder so people see and document this little placeholder, which'll only be there until they type text, and we have this button, create document.<br>
Let's do a little more work on this.<br>
We want this to align to the right over here.<br>
We want an icon.<br>
Little plus sign, and let's change the color here.<br>
Go with this blue, which I just grabbed off somewhere on my screen, and let's make this, you can type hex here if you want.<br>
Three F's for white.<br>
Okay, so there's our create document.<br>
Let's go ahead and run this, see how it works.<br>
Again, we can click around.<br>
And now we can add a new document.<br>
It says document name, the name, look how cool that is, it's got nice little bootstrap forms, nothing in our dropdown yet, contents here.<br>
Nothing happens when we click, but that's going to be what we do next, is we're going to make this interactive and do a little validation.
|
|
|
show
|
4:44 |
We have our ad new document form here, and it's working pretty well in terms of UI, but it has no responsiveness, nothing happens right?<br>
So let's go to the code side and add that.<br>
First thing that we want to do is we want to populate this combo box here.<br>
Now you can go type in the items, if this was like a set of things you knew, like what color of items you want?<br>
we only have three colors, type it in here.<br>
Or what month of the year?<br>
that doesn't change just type it here.<br>
But, when we're working with things that are going to change, like categories out of our database, we want to do that in code.<br>
So, let's write some categories.<br>
Now, for just until we get to the database part, I'm going to just type them out here.<br>
Let's suppose we have four categories that we're ultimately going to store in the database that can change and grow.<br>
Then we'd able to do things like go to the database and say show me all the documents that have science, that are tagged with science or something to that effect.<br>
So we'll go over here, and we'll go to self.dropdown.items I want to set that to two things.<br>
What we need to do is give it a tuple, for everything in the categories, we want to give it a thing to show, and then the actual value.<br>
So I actually want to have two things, I want it to start out selected with just nothing.<br>
So let's say something like this.<br>
So, this is what's going to appear, the words select the category with the value of None, so we can test that they're selected nothing.<br>
And in here, we're going to create a c, c maybe we'd use ID or something, for now we're just going to use this.<br>
For c categories, I'll test that.<br>
Select a category, oh yeah that's sweet.<br>
Okay, so this is good.<br>
Now the next interesting thing really has to do when we click on this button.<br>
I'm going to click on button six, so if I just double click right here, it's going to add that code.<br>
Let's tighten that up a little.<br>
It's going to call this function.<br>
So we either want to save the thing and maybe navigate away, or if there's missing data, like they haven't given it a name, they can't save it right?<br>
So let's do a little validation bit here.<br>
Now let me just type this out and then I'll talk you through it.<br>
Alright, so we're going to do a quick validation.<br>
And the way we get the values, out of say the text box, is just the dot text properties.<br>
And we're also going to strip that down, make sure they didn't just put white space.<br>
For the drop down, it's selected value right, that's the second element right here.<br>
Either the text of the category or nothing.<br>
And if they haven't typed anything into this textarea, a multiline text box, then we're going to say you can't create empty documents.<br>
So let's go over here, we don't have to pass anything along, because these are all part of this object here.<br>
Now if there are errors, more than one, we want to show them all.<br>
So we'll say if errors, and then what do we do here?<br>
Let's add a label where we can put an error, maybe give it a nice color.<br>
We can use a little divider here like this.<br>
Here we go, made it a little bold, put it in the center, give it a nice red color, say this is an error.<br>
Now when it runs, before there's errors, we don't want that to show up right?<br>
We don't see this is an error.<br>
So let's go and have that removed.<br>
Also, I put a divider, but for the sake of size, let's do this.<br>
So at the beginning, we're going to come over here and just say clear this out.<br>
But if for some reason there is an error, we want to set this.<br>
And let's actually do a cool little trick here.<br>
We'll say join on the error.<br>
So when they get a list of errors, and then we're going to separate them with new lines, which preserve themselves from when this ges to the web.<br>
So let's try this, try our validation.<br>
So if I just hit go, we should get three errors.<br>
Bam, look at that.<br>
Document name is required, document category is required, and cannot create empty documents.<br>
Let's pick science.<br>
Now just the name is required.<br>
The name, now some details have to be provided.<br>
Now that almost worked, didn't it?<br>
Actually, there's no more errors, we just need to call this at the beginning every time.<br>
So let's go over here, and zero that out every time we validate, or we could maybe do it here, take your pick.<br>
Or do it else, whatever.<br>
I'll leave it like this.<br>
Now once I fill this out, boom, it's gone.<br>
That would've created the document if we had implemented.
|
|
|
show
|
2:32 |
Our add document form is taking us through the steps here, it loads up looking nice.<br>
We click the button and it validates and then down here we'd have to write to do create document to do go to home or something to that affect.<br>
Well let's talk about these, go home is easy we'll figure that out in a minute.<br>
Create document, that means we need a database and we've talked about SQLAlchemy, we've talked about SQLite and all of those probably didn't feel super super easy.<br>
So let's see how it is over here.<br>
Alright this is probably that full stack made easy thing I talked about.<br>
So we go over here to services, expand that out and go to data tables.<br>
So create a datable service and take it back out if we don't like it and we're going to add a table.<br>
Let's create a new table.<br>
Let's call this categories, lower case.<br>
And then you define a schema, this is just going to have a text column called name and it's just going to be text.<br>
We could add another column like id and so on but I think name is actually enough.<br>
Let's go over here and have another table called documents.<br>
So these are, the documents that our little document web app manages.<br>
Let's give this also a name.<br>
Give them a date time called created.<br>
Let's give them a text column called content.<br>
We could even add, like, a numerical thing for like views, how many times they've been viewed or downloaded.<br>
And now, do this last one that gets pretty interesting.<br>
Go over here and add link to categories one or many rows.<br>
How's that?<br>
Call this category.<br>
Isn't that awesome?<br>
So this is your foreign key relationship back over there, that's automatically taken care of for us.<br>
So this is pretty much ready to go, let's go and check this part out.<br>
Let's just add a couple things like science science news press release documentation.<br>
So there's a few items.<br>
Now check this out here, permissions.<br>
Do you want your server code to be able to get to them?<br>
Which is pretty safe.<br>
Or even your client side JavaScript which your Python code becomes to get access to them.<br>
This is not super safe.<br>
People can mess with the JavaScript in your browser when they view the page and potentially, especially if this is edit, mess with it.<br>
So we're going to say only this, only server modules.<br>
Okay so server modules can talk to this and we can talk to those server modules that operate on our behalf.<br>
We have no documents yet but we have our categories.
|
|
|
show
|
3:26 |
We have our data and we know we can get to it from the server modules, but not the forms cause we want to make sure that's safe.<br>
How do we write a server module?<br>
Let's go and add one.<br>
So it's called server_module1.<br>
Not a super name.<br>
Let's give it something better.<br>
Let's call it data_layer or something like that.<br>
Now check this out over here.<br>
It says okay we are going to import some server and data stuff.<br>
And all you really have to do is just create any function that is callable, has parameters, and return something and we can call it.<br>
So for example to say hello, how would we get to that?<br>
Let's go to our home form really quick.<br>
And let's just in this lib we'll say print.<br>
anvil.server.call Now look what just happened here.<br>
It takes a string, the server name, but Anvils integrated to know what server methods are available and is helping us right here.<br>
So say, say hello.<br>
And then I could put my name, which if you look back here it accepts a name.<br>
It should say, "Hello there." So that'll be the input in return 42 as it should.<br>
So let's run that.<br>
See some output.<br>
Server is yellow.<br>
Client is clear or white.<br>
It says, "Hello Michael 42." How awesome is that?<br>
Alright that is an incredibly simple way to have a service.<br>
Put that on there, done.<br>
Then already host a service, host a client, connects them, done.<br>
So we don't want this.<br>
We want code that talks to our database.<br>
We put that here and I'll talk you through it.<br>
So we're going to come over here and we're going to talk to our app tables and we say dot.<br>
You see we have our 2 databases that we created.<br>
Our 2 data tables and the data table service we created, and we can go to them and we can say, "Search" and we can even do an order by.<br>
And I'm going to convert that to a list and then we'll turn it back.<br>
Over here I'm going to do something similar for categories.<br>
And categories we're doing by name so it's alphabetical.<br>
Also can find individual documents by name.<br>
Instead of doing a search, you can do a get.<br>
So here we're doing a where the name is equal to what we pass.<br>
So we're going to leave 4 categories.<br>
Okay so these 4 functions are now available to our code.<br>
Let's try to add them into our add_doc_form.<br>
So up here, we got our categories.<br>
Let's go over here and say, "Categories", call them all_categories.<br>
We're going to go anvil.server.call Now look.<br>
All categories takes no parameters.<br>
Now these are going to return rows which are dictionaries which have things and so what I really want is categories is going to be c, it's going to be one of the rows.<br>
And it's going to be named, remember we had that in there, for c in raw_cats.<br>
So now we have Docs, Science, News, and Social, but remember we put like press releases and stuff.<br>
Let's see what we get now.<br>
Oh, whoops, I got to take that out, don't I?<br>
It's really cool how you can click that to get back.<br>
Alright that was just test run, forgot about that.<br>
Let's go to add a document, and look at that.<br>
That's now out of our database.<br>
How slick is this?<br>
Okay super, super cool.<br>
One of the challenges there, this is going to keep reloading it if I do this, and do this.<br>
Hitting the database again.<br>
Turns out this is probably not going to change that often, so we'll be able to do something slightly better, but this is really really cool.<br>
Add the name.<br>
Add some stuff here.<br>
Hit create.<br>
And then we should be able to call one more function on that server.
|
|
|
show
|
2:53 |
All right, looks like our categories are working, so we can delete that bit.<br>
Now, here we have the To-Do, Create a Document.<br>
What we need to do because the security we put on our document, our database, we need to put over here.<br>
Let's get rid of this output so we have more room...<br>
...to our data layer and add one more function, and just for time's sake, I'll paste this in, it's really simple.<br>
So we're going to call Add a Document, and it's going to take a Category Name, a Contents, and a Views.<br>
We also have that created which we're going to generate on the server, and a little print of what we're going to do.<br>
And then we'll come over here, and we'll call Category by Name, give it a category name 'cause when you have these linked tables, you can't just put a value that would determine their relationship, you actually have to put the row, so we're going to get the row back, and then set the relationship this way.<br>
And we have...<br>
Make sure we have this right here...<br>
Name, Created, Content, Views, and Category.<br>
So this needs to be Name, Content, Views, Created, and Category.<br>
It looks good.<br>
So we're just going to go and create this.<br>
Now, all we have to do is call this Add Doc here.<br>
There it is.<br>
And what does it take?<br>
It's going to take- Look at that, it's pretty awesome to show this- it takes the document name, Name, Category, Contents, and Views, and let's just put zero for views when we create it.<br>
So Name, something like that, So this selected value here, that's just going to be the name, and that's what we'll use in our look-up on the server site, and the Content.<br>
Something as well.<br>
All right, so that should do it.<br>
Let's see if this works.<br>
So this is going to be some documentation.<br>
All right, let's see if this works.<br>
Create Document, ha-ha, datetime and Data Layer.<br>
Yes, yes.<br>
Import datetime.<br>
So close, let's try again.<br>
Alright, let's try it with this.<br>
Boom.<br>
Look at that.<br>
On the server it says it's creating the new document.<br>
Does that really mean it was created?<br>
Let's go to the database.<br>
Oh my goodness!<br>
There it is.<br>
Look!<br>
That's it.<br>
And we linked it over to the documentation.<br>
Now even the categories.<br>
That's so super awesome.<br>
Love it.
|
|
|
show
|
4:52 |
It's great the we created this document but the experience wasn't super, like it didn't tell us the thing was created, we put a bunch of code right into our form, things like that.<br>
So let's clean this up a little bit and let's begin by going over here and creating a new module.<br>
I'll call this...<br>
I'll just call this utilities.<br>
Now over here we right code, this runs on the client-side and it's going to do...<br>
This basically lets us put these methods wherever we need.<br>
So one the things we're going to need to do, this will take a moment before it's obvious why, but we need to, when we're over here When we want to go home, we need the home form, which we don't have access to, to basically run this code again, okay?<br>
How do we do that?<br>
Well what we can do is we can come over here and say, import utilities We can go the utilities and say, home_form = self so that we can always get back to it from within code over here.<br>
So we'll have a home_form as None but of course it will be set soon the application starts.<br>
And let's just add a method, "Go home".<br>
How do we do that?<br>
We say, home_form.<br>
Now it doesn't know what this is.<br>
We want to call this function here.<br>
Like that.<br>
That's all we got to do, super easy right?<br>
We just wanted to call this function go here from wherever.<br>
So we need this import utilities over in our add_doc_form as well.<br>
And let's go over here and we can just say, .go_home We've already created the document but let's take some of this code and make a little simpler.<br>
Let's go over here and say, utilities.create.<br>
And let's pass that in there, okay?<br>
So we basically need to call this function over in this utilities.create_doc, but there's a reason I want to do this.<br>
You'll see in just a second that it makes sense to try to put these together.<br>
So it's find this.<br>
Remove that one simple call over here.<br>
Like that.<br>
And it's going to accomplish the same thing, but we also would like to have one more function.<br>
refresh_data Now what I want to store is I want to store the docs as a list and the categories as a list.<br>
And when we call this, I'd like to write that code that we had over here again.<br>
Remember I said I didn't like this?<br>
Let's take this code and get rid of it and put it over here as well.<br>
So here we're going to go to the server and we'll also do this for the documents.<br>
If you had a ton of documents that's not a good idea, but since we only have a few we'll go like this.<br>
Okay, so we're going to set the categories and the documents and that means over here we can just go...<br>
We've got our list, let's say utilities not categories.<br>
Now how do we know this is refreshed?<br>
Let's call it once when the app starts up and that's all we're going to do.<br>
Alright so that should refresh the data and then any of the sub-forms will have access to the utilities dot categories or documents.<br>
And here we'll call create_document and then we'll call go_home.<br>
And within create_document, final thing, the reason it's nice to have this here is we can call refresh_data again and make sure that whenever the data is modified, we automatically get it updated but otherwise, it just stays like it is.<br>
Let's go and test this, that it's still working.<br>
Apparently spelling is hard.<br>
Alright, what happens when I click this?<br>
It's going to go to the utilities client-side module, call the create_document.<br>
On the server it's going to create and insert the document, it'll come back and then it'll call Refresh so if for some reason the categories, definitely the documents will have changed, we'll get those new ones.<br>
And then it's going to go to the home form, call go_home, it should reload this and it will all work.<br>
Let's try it.<br>
Boom!<br>
On the server we created this new document, now we're home.<br>
We can add more of course.<br>
I think it's about time to do the other ones where we can actually see the documents right?
|
|
|
show
|
6:55 |
Let's go mess with the old documents, recall what we had before we had a little filter thing, and I'll go ahead and put the text of it up here.<br>
This isn't going to do anything yet, but we'll have our little filter there, and let's put a spacer.<br>
And then what we need is, we want a list of all of the documents.<br>
How do you do that?<br>
So far we've set like the text value and so on, so what we need for the next thing is actually called a linear panel or a repeating panel, we'll go for repeating panel.<br>
Now, there's an item template that we've got created right here, and I don't like that name, so let me rename this to doc_list_item_template.<br>
If you go down here, we'll see that we have the doc_list_item_template, right there, sorry.<br>
And let's set the name to docs, like that.<br>
Now, if we actually want to edit that item template, we can double click here or just go there, we'll double click there and it says what items would you like to display?<br>
Right on the table, how about documents.<br>
And that means there'll be a little item property for each one that comes through here.<br>
Alright, so within this, how do you want to show it?<br>
Well, let's go do some more stuff, let's set into this thing, we're going to put the title, make that bold and go left.<br>
Put another one right there, that's when it's created, and then let's put a link in here, so you can click the link to say navigate over and edit it, and this is going to be details.<br>
Alright, make that smaller at that side, that created we can make it a little smaller, leave some room for the title, which is going to be the main thing.<br>
This is pretty interesting, but how do I get the data wired into this?<br>
Now, we get a little data binding here, check that bad boy out right there.<br>
Self.item of what?<br>
Well, that is the scheme of our database.<br>
How cool is that?<br>
Okay, this should be name, and that's looking good.<br>
Oops, I don't want this one.<br>
Self.name and the created, we're going to set that up a little bit different, but let's just see what we can do to make this work.<br>
Come into code here, go to our utilities, remember it's already loaded the data so we shouldn't have to download anything, this is all a single paid app, it's amazing.<br>
So all we have to do is say self.repeating_panel.items = utility.docs.<br>
Let's see if this works.<br>
Alright, moment of truth, wow, it doesn't look like much, but that is out of our database right there.<br>
Super, super cool.<br>
Let's work on our created date right here.<br>
Now, if you look over here at the bindings, I could try to add a binding, and I could have created, but I really wanted something like, kind of complicated for how I do this, like stuff that's happening here.<br>
So, instead of doing it this way, let's remove that, and let's actually go and write some code for our doc template.<br>
Right, so we come over here, and this little item thing has been set, actually, I believe it's not set yet.<br>
We got to be a little careful when the thing is shown, or the doc list is shown, then the item has been set, so we come down here and say self dot label, created dot text, and then we want to use this nice little expression here, where we say item.created, this is the document, that's it's created field, actually, sorry, we got to do it like this.<br>
Created, and then store format for the friendly month, then the day, then the year, let's try that.<br>
Try all the docs, there you go, March fourth, that's today, that's when I created these things.<br>
Super, super cool, I mean we could make those fonts a little bit bigger.<br>
Last thing is what happens when we click this?<br>
Right now, nothing.<br>
So, inside our template, when we double click on these details, something is going to happen.<br>
What we want to do is, again tell the home form to navigate somewhere, so what we're going to do is we're going to write one more function here, kind of like the go_home.<br>
And we'll tell the home_form to do this thing we're calling go_details, and what is that?<br>
Well it's going to show this details form.<br>
We haven't put that in place yet, because it's not a top level navigation item you can do, but we'll write it now.<br>
It's almost the same, going to add the doc_details_form.<br>
Let's pass the doc along, and to kind of keep with the pattern when you do this binding or something is associated with it, it's typically item, so I'm going to say item equals this.<br>
Alright, in our doc_details_form, let's just do something like this, print self.item name, just to make sure that we got the name here, so, like that, let's see if the details now work.<br>
It doesn't, what are we missing?<br>
Let me check.<br>
Why didn't it work?<br>
Well, it doesn't take a genius to figure that out does it, look at this, forgot to call it, alright, so let's do our import again.<br>
Go to details and pass the document that they clicked.<br>
Remember, the one I clicked was self.item, that's the thing that's bound to this particular row of our repeating table, so self.item, pass that along.<br>
Click it, what happens?<br>
Run demo ReadMe, oh we didn't pass enough, what's happening here?<br>
I forgot to put the self parameter.<br>
Okay, one more time.<br>
Ready, let's go see the demo ReadMe.<br>
Boom, we loaded the document demo ReadMe, want to try the other, live doc, loaded live doc.<br>
Yes, it's working.<br>
So we pretty much have our app all in place, the last thing we need to do is sort of replicate this view over here on the home, as well as filter the documents.<br>
So what I'm going to do is, I'm going to go add a bunch of documents so we have things to work with, and then, we'll finish out these last two small pieces.
|
|
|
show
|
1:32 |
Now, off scenes, behind the scenes, I've put a bunch more content into our little document server.<br>
And when we run it our all forms shows all the documents, but I'd kind of like, at the front here, or home, I like the recent, like the most three recent ones.<br>
So let's put the little thing like this, so it'll show the recent documents there.<br>
Now, we're going to do again one of these repeating panels.<br>
Now check this out, let's go down here, and say, you know what, use this template that we already had, right there.<br>
Notice how it's like this.<br>
All we have to do is put a different sent of documents, and we'll have this thing totally written.<br>
How awesome is that?<br>
Let's do this.<br>
Like, a few seconds this page will be implemented.<br>
Self.repeating_panel1.<br>
Don't love the name, but for now I'm going to go with it.<br>
Items is utilities.docs.<br>
And let's just say, we'll just take the top three, use this twice, try that.<br>
That is incredible, isn't it?<br>
With literally one minute I wrote this page, because I was able to reuse these components, both in code and draggy droppy style, and how awesome.<br>
Look, if I click on it, it even takes me to the one that we clicked on.<br>
So this is super cool.<br>
We got our all documents view with all of 'em, and our home view, there.<br>
And then, the last thing we want to do in this part is to basically let us search within here, if I type things like science, or I type week, I want this to filter down.<br>
Let's do that now.
|
|
|
show
|
3:04 |
Now what we want to do is go to our all_documents_form.<br>
Which is hiding.<br>
Let's make some room here.<br>
And when you type in this thing, which is called TextBox Filter, we want this to change.<br>
So, we need to hook the change event down here.<br>
Check this out.<br>
Change event.<br>
And what we want to do is we want to basically set the south.repeating_items equal to filtered_docs.<br>
We don't have this written yet.<br>
We're going to write that.<br>
And what we're going to do is I'm going to have a function that'll take a document and turn it into text.<br>
So, if I have this function, and I give it one of these documents and it just says convert into a string.<br>
I can do a string search on that.<br>
So, let's write this filtered documents leveraging this little bit of code here.<br>
Here we go.<br>
So, what we're going to do is going to go to our TextBox Filter.<br>
Grab the text.<br>
And if they're not searching for anything, we're going to return all the docs.<br>
We're going to return all the documents.<br>
Otherwise, we're going to create a list of documents that if we converted to text and then lower case it, and we do a find on the txt here, then, then we're going to get it.<br>
I guess we want to also say txt = txt.lower().<br>
Like that.<br>
In case you type something upper case that wouldn't work well right there.<br>
Would it?<br>
So, we' re just going to go through and say literally as a string, does that piece of text you typed in the filter, does it appear in the document?<br>
And then we're going to give that back right there.<br>
Whew.<br>
Okay, and let's see if our filtering works.<br>
So, here's our home.<br>
It's got all the documents.<br>
Some of these, like the space photos and Higgs, these are in the science category.<br>
They have things like exotic materials.<br>
This one is logging.<br>
So, this is logbook.<br>
Let's just look where we talked about logbook.<br>
Oh, filtered docs.<br>
What did I do wrong here?<br>
Ah, self.<br>
Self, self, self.filtered_docs.<br>
So, let's try this again.<br>
How about logbook.<br>
Oh my goodness.<br>
Is that cool or what?<br>
What about the ones that have to do with science?<br>
Oh, I think the ones that have to do with science might not be coming in there quite right.<br>
This part right here, we have to get the name out.<br>
Okay.<br>
One more time.<br>
'Cause the category is actually a row.<br>
Right?<br>
So, now let's try our science.<br>
Those are the ones with that tag.<br>
And about the ones with documentation.<br>
Those.<br>
What about the ones have to do with datetime.<br>
Which is what we talked about in Day 1.<br>
datetime.<br>
How about the word the?<br>
That appears a lot.<br>
How about RSS?<br>
Feedparser?<br>
See how incredibly easy that is?<br>
Watch how quick it is to go back and forth between all of these.<br>
Because we've downloaded this, we're not hitting the server again.<br>
It's just all running off of that cash thing.<br>
Right there.<br>
Super cool.<br>
So, we can come over and just search for RSS.<br>
Bam, find it.<br>
Go pull out the details.<br>
I guess the last thing for us to do is put the details page in here.
|
|
|
show
|
2:48 |
Alright, let's fix up this document details page.<br>
I did a little draggy, droppy magic to put title category and labels.<br>
Labels and then another label to have their text that will programmatically set in the contents here as well.<br>
There's no point in you seeing me drag that over, you would have done that a bunch.<br>
So let's just go over here, and go like this.<br>
Talk equals self.item.<br>
In fact, I think we could probably go over here and do a data binding if we really want.<br>
This could be name.<br>
This we're going to set in codes, we're going to take that away.<br>
This one we also, I think need to set in code.<br>
This one we could add a data binding of contents.<br>
We'll just run it and see how we're doing.<br>
Click on one, boom.<br>
How awesome is that?<br>
There it is.<br>
Okay, so really, really close.<br>
We got to set those two cause we don't want to transfer them over directly.<br>
Maybe we could do the created category, but we'll just do it in code.<br>
Category is going to be doc of category.<br>
From the category we'll get the name.<br>
Oh, don't forget that's text.<br>
Text, text, text.<br>
The text here we're going to set that to what we had in our item template.<br>
Like that.<br>
And, it'll be consistent I guess we'll say doc.<br>
Okay, that should do it.<br>
Maybe one thing really quick here.<br>
Let's take this away, make this font a little bit bigger.<br>
Same thing for the title, make it a little bit bigger.<br>
Alright, let's run it.<br>
Let's see, are we done?<br>
Let's try the feed parser.<br>
Wow that is cool, isn't it?<br>
So document details here probably got to line that up a little, but we got this, here's your nice date.<br>
It's under the documentation category, and then, there it is.<br>
Let's go find another.<br>
Let's go find the Higgs one.<br>
There's the Higgs with a little bit of science stuff, has the crystals and it's under science.<br>
These are the things we search for and it showed up over here.<br>
Like Higgs.<br>
Pretty amazing.<br>
Let's go check out the day one read me.<br>
There's the stuff about day times.<br>
Okay, so our application is pretty much done.<br>
I'm going to call it done.<br>
This is really nice.<br>
Of course, there's a lot more we can do.<br>
We probably want to save this version, and I'll call this final version.<br>
You know I actually I have a really cool version history, that you can publish and roll back versions, all sorts of cool stuff, even clone it with git which I'll do and put into the repository for you guys to look at so you can look at the code but you'll have to come back to Anvil to actually use it.
|
|
|
show
|
1:55 |
Well, our app is basically working.<br>
Let's publish it.<br>
Let's make it so you can get to it.<br>
'Cause right now, when you click run, there's no URL I can go to.<br>
Now, I probably won't publish this and leave it live for you.<br>
Maybe I will, we'll see.<br>
You can check the URL when I get there, but notice right now there's publish this app while it's running, and we can either copy this private link, or I could share it via public link.<br>
If I do this let's call this.<br>
That seems decent, right?<br>
How about that?<br>
You could use your own custom domain, but I'm not going to do that.<br>
I'm going to just hit OK.<br>
Now, if we close this, and we go open something else, actually let's just open this in a private window.<br>
Go to Anvil app.net.<br>
What do we get?<br>
We get our app, up and running, on the Internet!<br>
It is now hosted as a web server, as a back end, all of the stuff, super cool.<br>
So we go over all docs, pull this up, we can search, everything is working.<br>
It's really fun, right?<br>
Obviously so are those.<br>
We can even add a final document.<br>
And where are we going to put this?<br>
Let's put it under press releases.<br>
The amazing app is now alive.<br>
Pair document, boom, takes us home right there at the top, a final document.<br>
The most recent one.<br>
And we click on it, there's the details.<br>
It was a little more than half-an-hour, but not terribly long.<br>
I mean we've built a non-trivial application, and published it to the Internet in a pretty short amount of time.<br>
So, hopefully this application platform is inspiring to you.<br>
I don't know if it makes sense for all of your apps, but for certain types of apps it's really, really a cool one.<br>
That's Anvil and full stack web apps made easy.
|
|
|
show
|
2:55 |
Let's review some of the core concepts around Anvil.<br>
We saw that we start be defining these forms.<br>
We drag the components over, we set their properties, their names, their bindings, all that kinds of stuff.<br>
Here's our add document UI and we also have the code, so on the flip side we could look at the code behind in the form and hook into the events for like the button click or link click or page load or this thing shown all sorts of cool tuff.<br>
And this Python code is actually converted into Javascript and runs on the client side.<br>
So all the code you write here doesn't ever touch your server at all.<br>
It's just, we write it in Python but it actually runs locally which is actually really amazing and takes a lot of the load off your server.<br>
One thing we wanted to do was navigate between sub forms, so to load a different sub form but effectively in this case navigate the home_details_form.<br>
We go to the content panel and clear out whatever happens to be there and then we add a new instance of the sub form that we want to show.<br>
Sometimes it's parameterless like this one, other times like our document details we actually passed in the particular document that was selected and then it showed the details of that.<br>
It's a really really nice way to navigate between these.<br>
Of course you're going to likely need a database.<br>
You can go to the data table service and create these tables and fill them up with data.<br>
It's really easy, you can even link between them.<br>
Don't forget to set the permissions, in this example it's no access from Javascript but on the server side there is access.<br>
To do that server side code, we're going to write a server module and make it callable back on the client so here we created all docs method and we added a callable decorator, we just write whatever code we want and return it and this magically finds its way back linked in with all sorts of auto complete in various places back on the client side code.<br>
Speaking of client side code, here's a little bit of our refresh data we just say anvil.server.call and we type in the name and then we put in the perimeters if they're more after that.<br>
Now we just work with the documents, right?<br>
So it's just a list of dictionary's, off we go.<br>
Once you get your app built, you want to put it on the internet.<br>
It's so amazing.<br>
So you can click publish and it pulls up either a little trial link, you want to try the mobile version on your phone or I clicked share via public link.<br>
We also saw that there's version history which is really nice, you can clone that with git but what's relevant here is you can click publish at the different save points.<br>
So you name these like to present, that's one I named and if for some reason you make a new change you don't like it just go click publish and instantly roll it back to an old version.<br>
Really awesome, right there.<br>
Finally, if you want to get the whole story, the back story on Anvil, I had Meredydd Luff on Talk Python on Episode 138 and we talk about all the internal workings of how this is built, how he makes all the pieces work together and it's pretty cool.<br>
So if you enjoyed this and want to learn more, check out that episode of Talk Python.
|
|
|
|
48:54 |
|
|
show
|
1:14 |
Hello, and welcome back to the 100 Days of Web in Python.<br>
Day 53, Django, Part Two, Registration and Login.<br>
This will be an important module and a very useful skill to add to your Django toolbox and that is to have a registration and a login to your application.<br>
In this lesson, we're going to further extend the Quotes app to add login and registration to it and we are going to link the user model to the Quotes model, so that quotes have an owner.<br>
And we're going to make sure that a user can only edit her or her own quotes.<br>
That's quite a bit but luckily we have the Django registration plugin that takes a lot of this complexity away for us.<br>
In this lesson we're going to look at the brand new 3.0 version that just came out last month and walk through it, use it, implement it go through some of the struggles I had so you will even probably save some time by following my steps.<br>
And you will also see me using Sendgrid an email delivery service to handle the emailing from Django.<br>
So, I'm exciting to teach this because this will really get your Django app to the next level.
|
|
|
show
|
5:16 |
So we made a cool quotes app in the Django one lesson there's one issue though.<br>
Anybody can add quotes to our app, no signup or login required.<br>
No users are associated with the quotes that are being added, and again anybody can edit everything.<br>
We don't want to re-invent the wheel so I'm going to use Django registration 3.0 to add a registration system to the app and use Djangos authentication system alongside it.<br>
3.0 was just released, I'm recording this in October 2018, this blog post, announcing the upgrade is from September, so just last month.<br>
And for those that have been using Django registration there's a nice upgrade document on the documentation site and there are some major changes, for example the template directory was renamed from registration, to django_registration.<br>
It's actually interesting, some of the changes the author had to make, were related to Djangos more modern way of writing class based views so it's worth reading this upgrade guide especially this blog post.<br>
And to make the sign up process more secure I'm going to teach you two step activation work flow, and what's cool about it is, it sends an an activation link by e-mail,that the user has to click on before the account gets created.<br>
For that we need some e-mailing as well I'm going to set you up with SendGrid to make that work.<br>
So the for four days, is a bit lighter than last time, so I take two days for you to watch the videos, it will be approximately thirty minutes a day, and I left a little bit of space there, because Django part one came out almost at ninety minutes of video content and that's not even including the practice session you probably had building your first app.<br>
So there's a bit of leeway, if your going through these videos fast, that's good.<br>
You might want to have a bit of catch up on Django one, and then day three and four is really to practice yourself, so you can check out the quotes app, your starter code, and follow my steps.<br>
But it might be more interesting to pick up the app you built in the first lesson, so on days 45 to 48 and try to add Django registration to your own app.<br>
'Cause then, your app will be more serious with users having to log in in proper session management.<br>
And here are a sneak preview of what we're going to build, so we will have a registration end point.<br>
Where somebody can sign up with username e-mail and a password, that triggers an e-mail with an activation link and again, SendGrid will handle the e-mailing behind the scenes, it's pretty nice we only have to set up an account with SendGrid and add some configuration parameters to Django settings at Python, and it'll work out of the box.<br>
Which is nice.<br>
Then when the user clicks activation URL they get a complete end point, or confirmation and then the account got created.<br>
So then the user will use the login end point and there's even a password reset functionality.<br>
So you can enter an e-mail, and that then sends a reset link to your e-mail.<br>
Lastly we have to update the quotes app to actually associate quotes with users.<br>
So no more anonymous quotes, every quote that gets added gets the user added to the quotes model.<br>
So we have make the foreign key relation from the quotes model to the user model.<br>
And as you see I'm logged in here as well and I can only edit that last quote because, that's mine.<br>
I cannot edit the others, and if I log in as Brian.<br>
Another user I made, I can only edit his quotes.<br>
So we have some nice data protection there, going on.<br>
And of course we have to make sure that we code that properly in the views in the quotes app.<br>
And that means, of course, that if we hit a quote that's not one of ours, we get a 404.<br>
Steps to get there, we need to install Django registration we have to add some configuration to our settings at Py.<br>
We have to add new routes to our URL.s at Py.<br>
We have migrate the new model that comes with the plug in.<br>
We have facilitate the required templates.<br>
We're going to add a login and logout link to the header of the website.<br>
We're going to set up a SendGrid account and add the corresponding e-mail configuration to settings of Py.<br>
We're going to edit the quotes app to encapsulate the user data, making sure users can only edit their own data.<br>
And lastly we're going to protect the editable views using Djangos login required decorator.<br>
All right, lets dive straight in
|
|
|
show
|
4:56 |
Alright, let's first install Django registration.<br>
But first I'm going to pull down the code from the last lesson, Django one, in case you don't have it.<br>
So I can clone the course repo.<br>
CD into it.<br>
Day 53.<br>
But it's actually 45.<br>
And I can copy minus R to the copy directory.<br>
Demo and I'm going to store that in code django2.<br>
CD into that last directory so I'm in home code Django two.<br>
Of course I lost my virtual environment so I'm going to set up one.<br>
I made this.<br>
I'm going to edit the requirements to add Django registration.<br>
And then I'm going to pip install the requirements.<br>
Let's see if Django runs.<br>
And of course I have to also add my secret key because I just made my new virtual environment so it doesn't have it by default.<br>
You probably want to have longer on the production and I'm on debug equals true.<br>
Then I need to deactivate and activate my virtual environment again to have those variables spring into life.<br>
Right, let's see if Django still runs.<br>
And of course I need to apply the migrations because we use this SQLite database, which is file-based which I did not pull in because it was git ignored.<br>
So let's migrate and run the server again.<br>
And now it should all work.<br>
Excellent.<br>
Great.<br>
With requirements updated, when I did a pip install pip install django_registration.<br>
And one final step in this video is to add a setting.<br>
So as you remember from last time Django's configuration is in the main app which in this case is my site slash settings.py.<br>
Go to the end.<br>
And I'm going to add ACCOUNT_ACTIVATION_DAYS = 7 That's the Django registration setting of the amount of days that an activation link will be valid.<br>
I'm also going to put a logout redirect URL.<br>
I'm going to define that as quote lift and quote lift is in my quotes app and that is just a default view of the listing of the quotes.<br>
And I'm also going to specify that as login redirect URL and we will see that later.<br>
An importantly, we also want to add Django registrations to our installed apps.<br>
I'm going put a before quotes and actually it comes now with an extra migration so I have to run this again.<br>
And here we see that there's a Django registration migration being run and next we're going to look at the URLs.py to add new routes to it to support registration.
|
|
|
show
|
2:58 |
As I said in the introduction we're going to implement the two-step activation workflow which is more secure because it sends an activation link to the user to their email which they have to click first before the account becomes active.<br>
It's pretty easy to set up.<br>
We basically have to add those two URL patterns and not much more, the only thing where it got complicated for me was the templating.<br>
And, I'm going to show you that in the next video.<br>
So, what you now want to do is head over to general registration documentation under the two-step activation workflow and I'm just going to copy those two URL patterns.<br>
And, I'm going to test it in my main mysite URLs.py file.<br>
So, back at the app.<br>
The main app again is mysite and I have URLs.py.<br>
We have the root folder linking to the URLs with the quotes app.<br>
We have my backend which I renamed from the default app into my-backend to make it a bit more hidden and secure.<br>
So here I'm going to add those URLs.<br>
I think URL is still the old format so I'm going to rename URL to "path".<br>
And, I don't think we need the leading card.<br>
So, this should work, let's quickly verify that.<br>
That's fine.<br>
And now let's go to account/login, sorry, it's accounts.<br>
And, I don't have a template and it's expecting registration-login.<br>
Let's try, register, and here it got confusing for me because this template is expected to be under django_registration.<br>
So, the classic login, logout which comes with django's authentication system expects a template character name of registration.<br>
And, the part of registration signing up which is part of the django registration plugin.<br>
It's not using the registration directory anymore they renamed that to django_registration.<br>
And I got a lot of struggle with this to get all those "template does not exist" errors working that's why I have all the templates prepared in a zipfile.<br>
And, in the next video, I will show you how to get it all in the right place.<br>
And, really save some time and struggle.
|
|
|
show
|
4:38 |
Last video we ended with the template does not exist exception and to make this simpler I'm going to provide you with a set of templates that you can just put into place.<br>
Here in the general registration documentation quick start guide it's actually mentioned that you will need to create several templates and possibly additional templates required by views in django.contrib.auth.<br>
So as we know by now Django comes with its own authentication system.<br>
So if we're going to use the log in and log out we're actually using the contrib.auth.<br>
And the registration plugin you can see has a shell round it to handle the sign up of users.<br>
So there are two systems at play.<br>
And before both were using the registration directory and now the latter has changed to use django_registration.<br>
And here it outlines all the templates you will need and I was a bit surprised that no defaults were provided.<br>
You kind of have to build those from scratch and that's why I'm providing a zip file with all the right stuff in place.<br>
Two things about that, I kept it pretty generic so I'm not mentioning quotes.<br>
So you can use it for your own app.<br>
And secondly I did endorse write stylings.<br>
So there's some MUI classes in there.<br>
So styles nice but the MUI CSS framework that we're using throughout this app.<br>
So let's get the zip file into place.<br>
So here at your hundred days of web with Python course repo...<br>
in days in the 053 directory there's a zip file.<br>
And you have to copy that into the templates folder into the mysite templates folder.<br>
So I'm going to take note of this path and back to my app I go into my main app, into templates.<br>
And we should have the base.html file from the first Django module.<br>
And I'm going to copy the zip file into this directory, so again I'm in mysite/templates, going to unzip it and you see that it nicely puts everything into place.<br>
I even have a README, with the instructions.<br>
So we did this, we unzipped it, and now we can remove the zip and this README file.<br>
And here is a tree and this tree should match what I'm getting.<br>
So let's remove the README let's remove the zip file.<br>
And let's do a tree, and yes I got two directories and 18 files.<br>
It's important to have the base.html at the top level templates directory.<br>
And then have two directories Django registration with all the required registration templates.<br>
And these should match the ones listed here.<br>
Actually, I was struggling here because some of these templates were renamed going from 2.0 to 3.0.<br>
So these are templates that work with Django registration 3.0 and the registration directory is for the actions related to Django's native authentication system.<br>
So log in log out and we will see password reset in action later.<br>
So with this in place let's see if it all still works.<br>
And see if I can now navigate to these templates And that's awesome I can.<br>
On this log in screen, there's also a reset password functionality.<br>
And of course the register action which nicely routes to accounts/register and not getting template does not exist exceptions any more means that all the correct templates are in place.<br>
In order to demo this I need email working because signing up will trigger an email to the email address that's filled out here.<br>
So now it's time to set up an account with SendGrid, which is an email delivery service.<br>
And then we put in the right configuration in Django and then we got email out of the box.<br>
So let's do that next.
|
|
|
show
|
1:20 |
Sendgrid is a great service to deliver emails and it has a pretty extensive free tier.<br>
So I can go to the sendgrid.com website and try it for free.<br>
I'm going to choose a username and a password and an email.<br>
And I'm accepting the terms, create account.<br>
They ask for some information.<br>
Nice loader.<br>
And that should be it.<br>
At this point, make a note of your username and password and in the next video, we're going to set that in the Django configuration.
|
|
|
show
|
7:21 |
Here I'm at the Django's email documentation and Python overall makes it relatively easy to send email, thanks to the SMTP module.<br>
And I'm going to the SMTP backend section we see that it's actually the default backend and it turns out that defining these constants in settings.py is basically all we need to get SendGrid running.<br>
My first attempt was Gmail, but I ran into some security issues that Gmail was not very easy about sending automated emails.<br>
Way easier with SendGrid, so I'm using that now for all my Django apps.<br>
So we want to go to our app and go to settings.py.<br>
But actually first, I want to deactivate my virtual environment and set my user and password in environments and variables because they should never be checked into version control.<br>
So I'm going to the end and I'm going to export SendGrid username.<br>
And that's the username I used when I signed up in the previous video.<br>
And I'm going to set a SendGrid password.<br>
Uppercase.<br>
That's, of course, a fake password.<br>
So if you follow along export those to environment variables to feature our own username and password.<br>
Then I'm going to use my script which is a sort of deactivate script; I'm using that so often I made an ads.<br>
And now my environment variables should be active in my virtual environment.<br>
I go back to settings.py so again, that's under mysite/settings.py all the Django configuration is there.<br>
I go towards the end.<br>
I'm now going to set up the configuration variables which we saw in the documentation we don't need all of those.<br>
We're going to use five of them and then the email configuration will be available when Django is launched and the registration plugin will use that to send emails.<br>
So first of all, we need an EMAIL_HOST which is SMTPsendgrid.net.<br>
We need an EMAIL_PORT which is 587.<br>
We need to use TLS.<br>
Not going too much into email and protocols but we need TLS.<br>
And then I need my EMAIL_HOST_USER.<br>
And that's in your virtual environment.<br>
And as we've seen before with the secret key and debug those variables can be retrieved at os.10 environ.<br>
I'm not going to use the get method I really want the program to exit when this key is not available because it's a requirement.<br>
And lastly, we want an EMAIL_HOST_PASSWORD.<br>
And that's the sendgrid underscore password redefined.<br>
Just to show how it would look if such an environment variable was not there I can make a typo Django and it complains, so that's good.<br>
Of course, that was a deliberate mistake.<br>
So this is all there is to it an email hos, port and tls protocol and the user and password I defined when making my SendGrid account.<br>
Let's test it out.<br>
So that worked.<br>
And now let's sign up to my app.<br>
Wow, nice, it didn't crash.<br>
You've now registered, activation email is sent.<br>
So let's retrieve that email, which should have come with an activation link.<br>
And my PyBites blog user account was linked to our tml so I'm going to retrieve it there.<br>
And here I've got an email with an activation link; perfect.<br>
So I can copy that over.<br>
Thanks for signing up, your account is now activated.<br>
Enjoy.<br>
Great.<br>
That's actually my template text.<br>
I have yet to define a login link that's in the next video so I'm just going to hit the login path manually now.<br>
And here's the redirect we defined earlier but I made a mistake there, so let's fix that.<br>
And I actually forgot to name space this so I cannot just say quote list because in quotes in the app in the URLs.py, I set an app name and this effectively is a name space so if I reference these views quote_list quote_detail, etc.<br>
I have to prepend them with the quotes name space to avoid any conflict.<br>
So in another app, I would have another quote_list for some reason, it's not likely then I make sure that this one is bound to this app.<br>
So let's quickly fix that.<br>
Try this again.<br>
Awesome, now it works and I got logged in.<br>
Of course we should be able to log in and log out from the header and that's what the next video is about to add that here, to the navigation bar.
|
|
|
show
|
5:00 |
So you saw on the last video the login is not working yet, it just at that link, so let's implement it now to get that working which means first of all it becomes a link, second of all it detects if I'm logged in and if so, it changes into a log out link.<br>
The header HTML is in the base template, so I'm going to open my side templates based at HTML and I'm searching for login and here's what we need to update.<br>
And we need a condition, and you know in Django that's if something else and if and we're going to have two different list items.<br>
Okay.<br>
And this something is something useful that I want to teach you and that's every template has the request object, and it comes with a user.<br>
And the user object has a property, is authenticated.<br>
And that tells us if the user is authenticated or logged in.<br>
So in that case, I can show a logout link, and I need to point to the logout URL.<br>
And we can actually see when I make a mistake in my path so for example I type wrong URL, this is fixable because debug is turned on, and here I see my login and logout links and they have names, login and logout.<br>
And that means that in the template I can reference 'em with the URL name logout.<br>
And this will dynamically transform an invalid URL which will lead to the log out action or view.<br>
And we didn't write that because that's part of Django's native authentication system.<br>
And very similarly we can reference the login URL with login and let's change that actually to a login to add quotes and one final change let's welcome back the user.<br>
Welcome back.<br>
And we can access the user name attribute on user so request user.username, welcome back username log out link or not logged in, show the link as login to add quotes.<br>
And again I'm not passing requests explicitly into this template because the request object is always available.<br>
And you should recognize that as it's also passed into the views.<br>
So let's try this out, we've got the server running here.<br>
Let's go back to the main URL.<br>
And that worked, I was logged in from the previous video so I got welcome back pibytes logout so let's try logout.<br>
And here I messed something up with the URL.<br>
Probably why the syntax coloring was off.<br>
And now I see what I did.<br>
I forgot my percentage here.<br>
It's always nice to set up your editor with color coding because then you get an indication that something really is wrong because this text should have been yellow so I was definitely having a syntax error.<br>
It's also the reason why I'm leaving this in the recording to emphasize that how you set up your tools in this case, your editor, can really help you in developing your software.<br>
So save again.<br>
Let's go back.<br>
Refresh.<br>
Logout worked.<br>
This session was ended so request user is authenticated became false hence I got the new login link and log in and routes me to the login link, so notice how this URL login was dynamically transformed into the right account/login link.<br>
I can login again.<br>
And now request user is authenticated became true and I got the corresponding text and link.<br>
So now we have a nice way for users to login and logout from the navigation bar.
|
|
|
show
|
3:29 |
Great, now that we have login in place we can start working on adding the user to the quotes model so that we have quotes associated with the user and then we can set up that only the user that is logged in can edit his or her own quotes.<br>
So let's cd into my quotes app.<br>
Open models and import the User model which is provided by Django out of the box.<br>
Add this django.contrib.auth.models.<br>
And then I need to make a ForeignKey relation to that user model and the way to do that is to say models.ForeignKey specify the model that we link to, so user.<br>
And on delete we can do two things so if the user gets deleted do we want to cascade the deletes so when the user gets deleted, delete all the quotes or do we want to put a no value into the quotes.<br>
On this case I'm going to choose the former and that's specified as models cascade and I'm going to allow default of blank is true and no is true 'cause I already used some quotes in the database which are not having the user associated.<br>
This makes it easier to have a migration without asking us questions or asking us for defaults.<br>
Again the models cascade is to make sure that if the user gets deleted all the linked quotes get deleted as well.<br>
Then I'm updating the str method to also put information in here who submitted the quote.<br>
And that's it.<br>
Now we need to make a migration because our model changed.<br>
So I'm going to the outer terminal window and I'm going to type Python manage.py makemigrations And that made this migration.<br>
And we see here that the field was added to the quote model.<br>
And it's a ForeignKey.<br>
Then we can migrate to actually commit it to the database.<br>
And that relation now exists.<br>
Can even check that.<br>
And here under quote's quote we have a new field user id of integer.<br>
Let's run the server.<br>
And nothing will happen yet.<br>
Other than that, this is still working and in the next video we're going to update the views and templates to accommodate this change.<br>
Users will be associated with quotes and we'll make sure that users can only edit their own quotes.
|
|
|
show
|
6:30 |
Okay, let's start making the changes required to have users submit and edit their own quotes.<br>
So, lets check at the files we have in applications.<br>
We have forms, views, the model we did in the last lesson.<br>
Let's first review forms.<br>
This is okay.<br>
Because I define 'quote', 'other', 'source' and 'cover' as the fields that should show up in the form.<br>
But I actually can shorten this a little bit.<br>
Because instead of stating the fields explicitly we can just say, "Give me all the fields," and exclude the new user field.<br>
And that's because in the view, we will set the user upon save, or add.<br>
And we load the user then in from the request session.<br>
So, I want all the fields in my form except user.<br>
Okay?<br>
Then, the views.<br>
We have quote_new and quote_edit'.<br>
Here we need to do a little bit of ORM magic.<br>
So, when the form is valid this is saved to the database.<br>
But we don't save the user yet.<br>
So what we want to do here is to do a commit=False' so don't commit it yet.<br>
Write the user to the user field And then save the form.<br>
And here I want to actually assign it to a variable.<br>
So save the form like a draft, so to say.<br>
Add the user to it.<br>
And then save it to the database.<br>
And this code is actually the same in the edit action.<br>
So you could actually factor this out because it's duplicate code, but for now we leave it like this.<br>
So upon save, on add or edit, the request user which is the current user that's editing that's in the request session variable that's passed into every view.<br>
That user gets set on the form object and saved to the database.<br>
Now I need to update the templates.<br>
And let's start with quotes_list.<br>
First of all, there's this 'Add a quote' button.<br>
But that should only be visible for logged-in users.<br>
So let's wrap this in a conditional.<br>
And we saw that before, we can do if request.user.is_authenticated we can show this button.<br>
Else, we can actually show a log-in button.<br>
So the same HTML.<br>
But the link changes.<br>
To login.<br>
Let's see this in action.<br>
So, here I'm logged in, let's quickly log out.<br>
Still shows edit quote.<br>
Ah, because I didn't update the link text.<br>
Let's try it now.<br>
There you go.<br>
Login to add quotes.<br>
And I can login and the button changed to add a quote.<br>
Great.<br>
Here I need to make two more changes and that's to show the edit buttons only for the current user's quotes.<br>
And I want to show the user that added the quote and we can do that, for example, in the same column as the time-stamp.<br>
So the quote object will have a new user field as defined in the model.<br>
So I'm just bouncing that here.<br>
And here, I make another conditional if quote.user == request.user Then show me the edit buttons.<br>
Else, to have a proper layout of the table I'm just going to show the table cell with colspan = 2.<br>
So, 2001, so to say.<br>
And that's just that the table still flows if there's no buttons.<br>
And we get proper styling.<br>
Okay, so this looks for all the quotes and if the quote was added by the user that's currently logged-in, then we provide him or her edit and delete buttons, otherwise, nothing.<br>
Okay, and this won't work out of the box because there's not a user associated to this quote yet.<br>
Let me quickly make a super-user.<br>
To run the server.<br>
Right, now I'm having permission to go to the back-end.<br>
Let me just delete this quote.<br>
And start fresh, add a quote.<br>
So here's it's my quotes I can edit and delete.<br>
Let me log-in as the other user.<br>
Add a quote.<br>
And that works.<br>
So, here I'm logged-in as PieBob, so I can only edit my own quote, and the buttons won't show up for quotes added by another user.<br>
And that's because of the template changes we just made.<br>
Perfect.<br>
There's only one final thing we need to fix.<br>
And that's that I can still go in to other quotes when I know the URL.<br>
So, here, obviously can go into three, because that's mine.<br>
But I can hack the URL and hey, here I can edit somebody else's quote.<br>
That should never be possible, of course.<br>
So in the next video, we're going to protect the edit and delete quote end points so that they only will work for the current user.
|
|
|
show
|
4:48 |
In this last video we're going to make sure that a user can only edit or delete his or her own quotes.<br>
In going back to the views we have an attended lead fuse that retrieve an object or 404.<br>
And those are now wide open to all users.<br>
I'm just going to make the query a bit more specific to make sure that the user that's retrieving the quote is the user that owns the quote.<br>
I don't need to add in quote detail because any user can view the quote.<br>
It's only necessary for edit and delete.<br>
Again, request gets passed into each field.<br>
And here we update the query.<br>
Save that.<br>
And let's try the thing again we did last time.<br>
So three.<br>
That's my quote, that's fine.<br>
And now we get a 404 because quote ID 2 is not my quote.<br>
Finally when I log out these URLs are accessible.<br>
They fill with anonymous user because at this point there's not a session.<br>
So there's non a request.user It will be a lot more elegant if these routes would redirect me to a log in.<br>
So let's do that next.<br>
We're going to use Django.contrib.auth.decorators.login_required And what's nice about this decorator is that it can decorate views.<br>
So quote_new I can use it like @login_required.<br>
Now this a great example of a decorator because here's my quote_new function.<br>
And I can wrap it with login_required decorator which takes the view checks if the user has logged in.<br>
If so, returns to view.<br>
If not, it redirects to the log in page.<br>
So that's very nice because this is repeated behavior and we all abstracted it away in a decorator that comes with Django.<br>
And that's it.<br>
Let's try it now.<br>
I'm not logged in.<br>
Boom.<br>
It redirects to accounts log in.<br>
To the next URL parameter of the relative URL it needs to go next to.<br>
So I'm going to log in and there you go.<br>
If I would have done this on quote two I get a 404.<br>
So that still works.<br>
Awesome.<br>
So we have a fully working app with log in and registration and even with some protection of the user's data.<br>
I can edit a quote.<br>
I can delete a quote.<br>
It's all working.<br>
I can add a quote.<br>
Again it only shows delete of my own stuff and not on somebody else's.<br>
But of course it can still view the quote and actually I should get rid of this edit button here.<br>
So let's also fix that quickly.<br>
And that's in the quotes/templates/qoutes/quote_detail.html.<br>
So this edit button actually should only show if the quote is from the user.<br>
And we have seen this if before.<br>
Let's try it out again.<br>
This is not my quote so I don't have an edit button.<br>
This is my quote so I have an edit button, great.<br>
So now the app is done a full-fledged Django app with registration and log in.<br>
You can log in reset password, we didn't try this.<br>
It will send an email.<br>
I can register.<br>
We saw that this sends an email, etc.<br>
So that concludes the videos of this day.<br>
And now you're ready to get into some practice.
|
|
|
show
|
1:24 |
Congratulations, you made it to the end of Day 53 and 54 which was about watching the videos and seeing me go through the Django registration plugin and add users to the app, to the Quotes model and assuring that they can only edit their own quotes.<br>
Now it's time to practice yourself.<br>
So, I encourage you to follow along with my lesson and pip install django_registration get the templates into place update your model to add a user foreign key and the templates to make sure that a user can only edit and delete his or her own quotes.<br>
You can do that just with the Quotes app with the materials provided or maybe if you started already your own app in the first Django model you want to further expand that one.<br>
That might be more exciting because it's probably something you really care about and need.<br>
So, again, remember that the learning is in the practice so the more that you use these two days to get practice, the more you get out of it and the better you will get at Django and hopefully you can use it in many of your future projects.<br>
As always, please share your progress using #100DaysOfWeb, and of course feel free to include @talkpython and @pybites.<br>
We are very excited to see what you come up with using the materials of this lesson.<br>
Thank you for watching and see you in the next module.
|
|
|
|
1:04:10 |
|
|
show
|
0:32 |
Welcome to the next installment of Flask.<br>
This time we're looking at the infamous Flask-Login plugin for Flask.<br>
This one's going to be a bit of a tricky one because to get Flask-Login working there's quite a few other things we have to do first.<br>
So the next video is going to just explain the expectations I'm setting from this.<br>
There will be some stuff missing but the core of this is to get you through everything you need to do to get to Flask logins.<br>
So, let's get cracking.
|
|
|
show
|
3:24 |
We're going to look at the app structure now over the next few days.<br>
There's quite a bit of prep that you have to do to get to the ability to log in to your Flask app.<br>
So I wanted to run through that really quickly now and just set that expectation of what I'm going to include and what we're going to exclude from this course for these four days.<br>
So the first thing we are going to do is have our base Flask application code.<br>
What you'll notice straight away is that this is going to be pretty bare bones.<br>
We're not using the same apps that we've created so far.<br>
We're not going to touch on the Pokemon API or the Chuck Norris API or any of that similar app.<br>
We're actually going to chop out all of that complicated stuff and get us right back to the bare bones of just simple text on a website.<br>
Then, we're going to go through creating a user model for use in the database.<br>
Now this is half of the whole SQLAlchemy method that we're going to use for our database.<br>
And the first part of that is to create a model that SQLAlchemy then uses to create our database.<br>
I'll get into that a little bit later.<br>
Then, once we've actually taken that model we create the database.<br>
And in our case, this is going to be a database of users who access our website.<br>
Obviously we need that because if you're going to log in you need to have users that are allowed and what-not.<br>
Then, we actually have to create some users and I was thinking, you know, we could just put dummy users into the database, but that's not really applicable to real life, right?<br>
And that's what we're all about here.<br>
This is all usable stuff.<br>
So we're going to create a page on our website a template where people can browse to it.<br>
They don't have to be logged in to do it, obviously.<br>
And they can then create users and a password.<br>
Once they've done that it's stored in this SQLAlchemy database.<br>
And then, we can finally move on to the actual Flask login component.<br>
And this is where we can then access the SQLAlchemy database and we can pull on that data to see if the person trying to log in is allowed to, as in do they exist in the database or not.<br>
Okay, and that's as simple as we're going to go.<br>
We're not going to go much more advanced than that, if at all.<br>
We're going to stick to that core concept does a user exist in the database?<br>
If they do, they can access the website.<br>
All of that wrapped in Flask login.<br>
Okay, we are not using the non-Flask login method.<br>
I know it is out there you've probably Googled it and seen it before.<br>
We're going to use specifically Flask login for this.<br>
And that's pretty much it.<br>
One other thing I'll touch on really quickly here is I am not hashing passwords.<br>
Now, I know that's important.<br>
I know that's something you will have to do.<br>
But in the interest of keeping this simple keeping it within the couple of days that we have to do this, we are actually going to leave that out.<br>
And that's because that is a really quick Google search and something you can actually figure out in one of your days if you have the time.<br>
Just keep in mind we have a limited time here.<br>
I'm respecting your time, so this is how we're going to do it.<br>
So, let's move on, get some application code together and then start on the database.
|
|
|
show
|
3:15 |
Let's just take a quick look at the next four days.<br>
It's a bit different to the other chapters that you would've seen to date.<br>
What I'm actually going to do is break it into days one and two, and three and four.<br>
And that's just because there are so many videos in this chapter, I really want to respect your time and don't want to overwhelm you.<br>
So, for the first two days just pop through videos one to nine.<br>
That's going to be covering of the SQLAlchemy database and creating the initial application.<br>
There's a lot of data in there.<br>
Follow along and just focus on understanding the concepts and really cementing this.<br>
Okay, so play with it, code it yourself and just try and get it working, okay?<br>
And once it is working, you should hopefully be ready for days three and four.<br>
Days three and four complete the rest of the videos.<br>
That's videos ten to sixteen.<br>
They will cover of adding users to the database and then building the actual Flask-Login functionality using the Flask-Login plugin.<br>
Once you have done that, again, focus on getting it down try and make sure you understand it before you attempt anything extra.<br>
What I've done is I've kept it very bare bones as I've mentioned before.<br>
And I just want you to get it right.<br>
Once you get it right, if you actually happen to have spare time, which is fantastic, just give some of these extra things a try.<br>
As I mentioned, we didn't cover password hashing in this which is quite important.<br>
But it does take extra time and I wanted you to actually figure that our for yourself 'cause it's not too difficult, it's quite simple.<br>
Wasn't really relevant to getting the actual login system working.<br>
It's just an additional thing, obviously necessary.<br>
See if you can get that next.<br>
Then, I'd like you to start stress-testing your application.<br>
Look for bugs and exceptions that we haven't that we aren't catching things that haven't been accounted for.<br>
Think of incorrect data types that may have been entered in.<br>
So if someone enters in a symbol what's going to happen if you enter in a character in an integer field, that sort of thing, right?<br>
So try and test for that.<br>
Also test what happens if you have identical user names.<br>
Is it a problem?<br>
Test it out and try it.<br>
So try lots of different things see if you can catch something that needs to be fixed.<br>
Then, if you really feel like it, make the app beautiful the usual stuff, get your CSS on and really pretty up the web page.<br>
And right now, it's just very basic HTML.<br>
And finally, implement some other functionality you can think of.<br>
Get creative and just think about some of the cool things you might be able to do with the data that's in the database.<br>
You have the username, right?<br>
So, why not have the username appear at the top of every page once they log in?<br>
Try something like that.<br>
Try doing something different with the logout page and flashing and anything else you might come up with.<br>
That should keep you busy for the four days of this chapter.<br>
Let's get cracking.
|
|
|
show
|
3:01 |
All right, let's start this section off by creating our environment, and pretty much installing everything we need for this chapter.<br>
First things first, let's install our virtual environment.<br>
We do that using Python -m venv venv, so we're actually going to call our virtual environment venv as we have in the other videos.<br>
Once that's installed, let's activate it.<br>
All right, and let's do some pip installing.<br>
The first thing we're going to need to install is obviously Flask, so let's pip install Flask.<br>
We are also going to need to install flask-login.<br>
We're going to need to install flask-sqlalchemy.<br>
And let's install Python.env That should be enough for us right now and we'll let that install nice and quickly.<br>
All right, with that installed, let's actually quickly check that out, so pip list.<br>
There's all the stuff we're going to need and we can then do a pip freeze.<br>
Pop that into requirements.txt There we go!<br>
All right, that's everything we're going to need to run this.<br>
Now we're not going to create too many files yet we're going to look more at the folder structure.<br>
I decided, let's call this project, "Project Awesome" so we'll go make the project_awesome and everything we need for our application is going to be in that folder.<br>
And if you recall, this is going to be different to everything we've created in the course so far.<br>
We're going to be creating a brand new project.<br>
In here, inside the project_awesome directory just create a templates folder, that's where all of our Jinja templates are going to go and that's all we need for now.<br>
We've created the environment.<br>
We have installed everything that we need.<br>
And we've created the folders.<br>
Last but not least, we'll just throw that in now just because this is probably the best time to do it.<br>
Let's throw in that .flaskenv file and in this file we're just going to quickly throw in that Flask app environment variable and it's just going to reference the Python script that we are using to launch our application That way, if you recall, we can actually just type in flask run and that file is going to live in the directory above this one so I've actually created it in the wrong directory here.<br>
Let's move it back up, so we'll move .flaskenv back one folder.<br>
And there we go.<br>
Now we are ready to rumble.<br>
So let's move on to the next video and start some coding!
|
|
|
show
|
6:21 |
Alright, now I'm going to skip over the things that we sort of covered in the previous Flask sections of the course.<br>
I won't go into too much detail but for now what we're going to do is we're going to create the launch.py file that I referenced in our Flask env doc file so just vim launched.py this will actually be the script that launches our app.<br>
And we do that going from project awesome import app and that's it.<br>
Not u w q right there there we have our file.<br>
Now if we go into project awesome we need to create our init.py file.<br>
Now this is the script that contains the details of our Flask app instance and anything else that needs to be imported.<br>
So let's quickly create that now.<br>
this is everything needed to initialize.<br>
So init.py.<br>
And if you're looking at the repo for this chapter you're going to see there's quite a lot more in this file then you see me writing now.<br>
And that's because we're going to add to it as we get to those sections.<br>
So don't be alarmed if you only see a little bit here.<br>
So from flask import flask and we can then go app equals flask name, double underscore name.<br>
The only other thing we want regarding this app is the ability to import our Flask script to the file that's going to contain all of our routes and all of that config.<br>
Now we called it something else in the other app.<br>
This app we're actually going to call it project pause, import.<br>
We're just going to call it routes.<br>
I thought we'd keep it simple.<br>
Just it's got all the routes in it.<br>
So we'll call it routes.<br>
So from project awesome import routes.<br>
Now let's create that routes file.<br>
And same thing.<br>
This is going to look really bare bones compared to what you see in the repo.<br>
So just roll with it.<br>
Let's create the absolute base app the framework that we're going to build on for the rest of this.<br>
So to do that we just need to import a couple of things, not everything.<br>
So let's import everything we need from Flask to be able to render some templates.<br>
So from flask, import, render_template.<br>
And we'll leave it there actually.<br>
We'll leave it there for now.<br>
Nice and simple.<br>
Next, we need to import our Flask app instance.<br>
Okay, and we use the same thing we use the other file.<br>
So from project awesome import app.<br>
Now again, if you're looking at the repo there's a lot more there don't worry about it, we'll get to it.<br>
That's all we need to build the base app.<br>
And the very first page that we're going to deal with here in our app, the first web page is the Index page.<br>
So we need to create an index route.<br>
And as per the other apps that we've made to date we're just going to create two app route decorators here to cover the different URLs that this will cover.<br>
All right, so route and index.<br>
And we're going to go index return render_template.<br>
And as with the other apps let's call our template exactly what it is and that it is index dot HTML.<br>
All right, that's pretty much all we're going to create now because any of the other pages they're going to start touching on some of the more complex stuff.<br>
So the last thing we need here is and pass.<br>
Let's just throw that in.<br>
And that's all we're going to have here.<br>
All right, let's hop into our templates directory.<br>
And we're going to quickly throw in the code for index.html.<br>
Now, you will notice that all of these files that I'm creating, all of these templates that I'm creating are going to be really, really, really basic.<br>
I'm going to have little to no CSS in there.<br>
They're going to look really old with the lack of styling.<br>
So we'll start this file off with the HTML tag.<br>
We're throw in the head tag throw in a title, and we'll just call it homepage.<br>
That's it.<br>
Close off the head.<br>
And then we'll trow in a body tag, h1.<br>
This, now this is very specific text because I want to make sure that we know when we're going to be on this page in a logged in and logged out view.<br>
So obviously, anyone who accesses your page from the very beginning is going to be logged out.<br>
Okay, so we're going to demonstrate that here.<br>
So this is the homepage.<br>
You do not need to be logged in to access this page.<br>
So anyone who hits this page can actually access it.<br>
Then we throw in the clothed body tag and we close in some HTML.<br>
Oops.<br>
All right, now that we have that we can actually just quickly demonstrate that the app works.<br>
And on port 5000 of local hosts one two seven dot zero dot zero dot one.<br>
You can see that we have, this is the homepage you do not need to be logged in to access this page.<br>
So that's all we need to do in this specific video.<br>
We know we have an barebones app that
|
|
|
show
|
5:35 |
So we have a very basic app.<br>
Now, as this web app is going to allow users to create user accounts on our website and then recall them for the sake of being able to log in, we need a database.<br>
That's the next thing we're going to set up.<br>
And for that we're going to use Flask-SQLAlchemy.<br>
Now SQLAlchemy uses the models system that is to say we create a model class that defines what our data structure is going to look like it defines what our database is going to look like.<br>
So lets create a models.py file and I'll show you what this looks like.<br>
First we'll begin by importing Flask SQLAlchemy so from flask_sqlalchemy import SQLAlchemy And next we want to actually define our class.<br>
So there are other things to import here which we'll get to.<br>
But first let's just stick with the SQLAlchemy stuff.<br>
So we want to create our user class because this is the data set that we're playing with we're playing with user data.<br>
So our user is going to actually require a database model and we'll do that by importing db.model.<br>
Now obviously I haven't actually imported any db or we haven't made reference to db yet and we'll get to that in just a sec.<br>
But we need to do this first so, user, db model.<br>
Next, we're going to actually create an id for our data so every time someone creates a user account they're going to get a unique id.<br>
And this is, you know, standard across most databases that you're going to create in the future.<br>
This also allows us to have users with the same names.<br>
So obviously there's not just one Julian one Mike, one Bob in the world.<br>
There are many of us out there so we need to be able to account for multiple users with the same name and this is what helps.<br>
So id, and now we define what this column in the database is going to contain, what it's going to look like.<br>
So, our database column is going to contain an integer, so a number, and that as we know is the id.<br>
So your id's are just generally four numbers you don't have an id of 1.753 it's an id of one, two, three, and so on.<br>
And this is going to be the primary key of our data.<br>
So, primary key equals true, and that's that for id.<br>
What else do we need our user class to have this database model class to have?<br>
It needs to have a username so when you sign in and log in to the website you're going to a username and you'll need a password.<br>
So these two are going to be quite similar so we're going to need a username and it's going to database column again and how are we going to define this column?<br>
It's going to be, the data will be defined as a string because the username is a string.<br>
And does it have to be unique?<br>
No.<br>
So we'll say false.<br>
This 80 here, is how many characters that string can be so we're going to allow them to enter up to 80 characters, okay?<br>
Next, nullable.<br>
Now we're entering this in here because we don't want people to be able to enter nothing.<br>
It actually has to have some data there.<br>
And for our password we're going to do almost the exact same thing.<br>
So db.string and it's going to be 120 characters this time.<br>
And if you're asking why, that's just arbitrary for this use.<br>
I'm just making those numbers up.<br>
So nullable equals false as well we don't want people to have a blank password.<br>
And unique is false as well because, you know, who knows?<br>
Maybe there's a chance someone will have the same password as someone else.<br>
And finally we want to be able to define a method inside our database model class.<br>
And we're going to call on repr, R-E-P-R which is just a dunder method for representation.<br>
Okay this is what a str, S-T-R dunder method actually calls in the background.<br>
It's just a way of presenting raw data as it is.<br>
And we're going to get it to return user self.username, okay?<br>
And all that does is, when you call this user when you try to call this user class when you try to return the data, it's going to return it in the format of user and then the username.<br>
Alright, that's just one little method we can call on this.<br>
We could obviously create more, but we're keeping it simple and that is our models.py file.<br>
One last thing here, is we need to actually get the database that we're going to be referencing here.<br>
So where does this db.model.<br>
come from?<br>
Well, we'll create the actual database object in the next video, but it will be imported from our Project Awesome App.<br>
And we get from that Project Awesome App we're going to import db.<br>
And you'll see where we import that in the next video.<br>
It's going to be from our _init_.py file.<br>
And just one last thing, I've realized I have actually put through the unique flag for the username as false.<br>
That's actually supposed to be true.<br>
We want our usernames to be unique, that way when we search the database we only land on one.<br>
Because if you have two that are the same our query to the database isn't going to know which username to pull.<br>
So let's delete that now and quickly change that to true.<br>
And the last typo I have here is just this little apostrophe here.<br>
We want to move that down there so user, and then your double brackets and then format, self, username.<br>
That' it.<br>
Let's move on to the next video.
|
|
|
show
|
2:45 |
With the models.py file created we now need to actually create that database object that DB object, that we used in the models file and as I mentioned, that's actually defined, created and linked with our Flask app, in the init.py file.<br>
So let's edit that into there, now.<br>
And you can see that this is the really basic structure the bare bones that we had to get that raw app going and now we're going to add some extra stuff to it.<br>
In order to use Flask SQL app, we need to import it so same thing we did in the models file.<br>
from flask_sqlalchemy import SQLAlchemy Now, we need to create that database object and the way SQLAlchemy works is that it needs to run against the app to create the database so we only use that DB object that we used in the models file so DB is SQLAlchemy app the actual Flask app.<br>
This is where that linking happens.<br>
This is where the link to the app occurs.<br>
One thing we haven't actually covered up if you think about it, is we haven't actually told it what the database is called.<br>
We haven't said what file to create.<br>
We haven't done any of that.<br>
What kind of a database is it?<br>
Is it SQL?<br>
What are we using here?<br>
And in this instance, we are using SQL, obviously so app.config, because we're now configuring this into the app, into the Flask app.<br>
Flask SQLAlchemy right.<br>
And we have to use this here.<br>
SQLAlchemy database URI.<br>
And this is where we define what type of database we're using and what it's called.<br>
All right.<br>
So SQLite is what we're using and it's going to be a database that we call siteUsers.db.<br>
All right, you can come up with whatever name you want this is the place you reference it and this will end up creating a database called site users.<br>
And last, but not least, in order for all this to work with that user model that we created we need to actually import or be able to import the models file.<br>
As well, just like we import routes now everything can talk to each other.<br>
Everything within this same view.<br>
So, from project awesome, import routes and models.<br>
Save that, and now, we can actually create the database.
|
|
|
show
|
0:53 |
Really quick one before we continue on to create the database I'd like you to install this DB browser for SQLite.<br>
This is something you may already have installed or you may have your own version of a browser to check out your database once it's created.<br>
If you haven't, this is a nice easy lightweight free one that you can install and once you've downloaded it from sqlitebrowser.org you've got Windows, you've got Mac you've got other options there.<br>
Once it's installed, you should see something like this or more likely for us, a nice empty one here.<br>
This is it installed on my Windows 10 machine and once we actually create our database we're going to open it up in this app and you'll be able to see the columns that we've created in our table.<br>
Alright, so go ahead, install it and let's create the database.
|
|
|
show
|
3:16 |
And now, for the fun part of actually creating our database.<br>
We've defined it, we've defined the data that's going to go in it, which was that user class.<br>
And now, we create it.<br>
When you're working with databases in this sort of an environment you don't actually manage them from within your primary script as you may have done before with SQLite3 in your Flask apps or anything like that.<br>
No, in this instance, we actually manage it on the command line or within the Python shell.<br>
Specifically here, we're going to pop into the Python shell and we're going to actually create our database there fro the very first time.<br>
Now, it doesn't matter where you do this from.<br>
If you do it within this current folder, the Project Awesome within this Flask view, it will not be able to create itself because it can't call all of the dependencies and all of the files.<br>
The pathing just isn't there.<br>
So we need to actually run it from our Flask.login folder up here, the parent folder.<br>
And by doing it from here, it will be able to talk to the init.py file and create our database call on the right libraries and what-not.<br>
So launch your Python shell from your parent folder.<br>
Now, this is going to seem really simple and it's because it it.<br>
We're actually just going to import that database object from that init.py file from our project.<br>
And when we import this, we run create_all against it and what this will do is it will create our database based on the models that we defined in the models.py file.<br>
So let's import that.<br>
So from Project Awesome, import db.<br>
And just ignore that message, this is something you can look into later.<br>
It doesn't really affect us now, to be honest.<br>
And we can now run dp.create underscore all and that will create our database with all the columns and everything that we need.<br>
So exit out of the shell.<br>
You'll see there's nothing here so pop into Project Awesome and there is our site users.db file.<br>
What I'd like you to do now is open up your SQLite database browser that we installed in the last video and then take a look at that file.<br>
So open that database in your program and you should see something like this.<br>
There we go.<br>
We have a table, we have a single table and it is called user.<br>
Now, this is based on us creating that user model file.<br>
So within our models file, we created a user class and we ended up with a user table here.<br>
If we click on the browse data tab we then have those three columns that we defined.<br>
We have ID, we have username, and we have password.<br>
Now when we use our actual Flask app, we will be able to see all of these get populated as data is being pumped in from the web
|
|
|
show
|
5:01 |
Now let's create some users.<br>
In order to do this, we will create a template.<br>
So, hop in to your templates folder and all we should have in there is index.html.<br>
This time, we're going to create one called create_user.html.<br>
Now, I'm just going to do a little bit of magic because I'm sure you don't want to watch me type all of these out so let's just get the code in, the HTML code and we'll go through it.<br>
And that's the template.<br>
So, in this, let's walk through it.<br>
We have a couple of things here to note.<br>
First, there's your title at the top, Create User Page.<br>
That's nice and simple, self-explanatory.<br>
We then have a header that's going to appear on the page that says, this is a page where we can create a new user.<br>
Now, for the meat, here is a div that has a form and this form is using the POST method as we've discussed before to push data back to our web app backend.<br>
And the action upon posting so after it's finished posting the data we're just going to redirect the user to the same page.<br>
They're going to stay right here.<br>
Okay.<br>
Label is going to be user creation.<br>
The label for this table, create your user.<br>
And the input, we're going to have an input field and as you can guess, it's going to be called username.<br>
And the placeholder text that will appear in that box is The Real Bob.<br>
And then we have a second input field for our password placeholder, Not ABC123.<br>
And finally, it ends with a Submission button.<br>
Now, the special thing about this are these names.<br>
This is what we are going to reference in the backend of our Flask app as we have done before in the previous apps of this course and we're going to head over to that file now.<br>
Let's save that, head back, vim route.py and there is our basic, basic app.<br>
First things first, we are using the render_template so we have to make sure that's imported which we do have already.<br>
And then we need to actually import request.<br>
Now, why are we importing that?<br>
That is to allow us to import the data from our template.<br>
So, request.<br>
Now, let's create the actual route.<br>
We'll add an extra space there.<br>
I know, technically, we don't have to, but let's just do it.<br>
This is going to be an app route.<br>
So first, let's surround the decorator, app.route and it's going to be called create user.<br>
And the methods, if we remember from our previous videos are going to be GET and POST because we're able to interact with this page both ways.<br>
And then we close it off.<br>
All right.<br>
And let's create the user.<br>
So, def create_user.<br>
If request.method, so this is very similar to all of our other apps, so let's make this quick.<br>
In fact, let's skip forward to me not typing all of this.<br>
And there it is, you didn't have to watch me do it but let me explain it quickly.<br>
So, similar to our apps before if the request method is a POST method and username is in that request form that's being posted back to us then we're going to collect that data.<br>
So we're defining a variable here or an object here called username and it's going to be assigned the value of username that was entered by the person into our form that we defined in the previous template.<br>
Same with password.<br>
We're collecting that data, the username and the password based on those two name labels that we gave those fields.<br>
And then we're actually going to call a new function which I have yet to write and it's going to add a user to our database using both of those objects, username and password.<br>
And then we close off our function here with return render_template create user.<br>
So remember, this stuff here is only going to work it's only going to be called and used if there is a POST method.<br>
For loading the page you're just going to simply call on this render_template and load the create_user.html page that we saw before, and that's that.<br>
So now, let's go down and create ourselves a function to add a user to the DB.
|
|
|
show
|
5:46 |
Now in order to add our user we need to be able to talk to that database object that we defined, right?<br>
So, let's import that, now.<br>
To do that we would just add it onto the end here.<br>
From Project Awesome, import app_db and now we should be able to talk to it.<br>
And we will do so in just a second.<br>
But first we need to create this add user.<br>
This one here.<br>
We need to create that function.<br>
So, this is not a route, this is simply just a little code function.<br>
That's going to add our user to the database.<br>
So, we paste it, username and password up here.<br>
So let's take those, right now we'll just keep them the same, for simplicity sake.<br>
And now, if you remember from our model's dot profile we defined the user.<br>
Didn't we?<br>
So we defined the user model.<br>
So let's call on that now.<br>
We'll assign that to the user object.<br>
So, user is, assign a user class that we're creating here.<br>
Username equals username.<br>
Now, I know this might seem bit confusing.<br>
But if you remember the columns that we created in that database model they were actually called username and password.<br>
So, we're assigning the username object here this variable, to the username column.<br>
So, username column is going to take the username that someone's entered into our page.<br>
And likewise, the password column, is going to be assigned the password that someone's entered in on this page, alright?<br>
And because of the beautiful magic of alchemy.<br>
We don't have to really put in any special funky stuff to add this stuff to the database.<br>
Because we formed it within that user model.<br>
We're keeping to those columns, right?<br>
The idea's generated.<br>
But this, this stuff here, we're assigning to it.<br>
We're keeping honest, we're keeping true to it.<br>
We just have to simply add.<br>
So, db.session.add(use).<br>
That's it.<br>
That's exactly how we add data to our database.<br>
And then we commit.<br>
So, db.session.commit.<br>
Done.<br>
And this will add that user to the database.<br>
The last thing here, which I'm going to throw in 'cause it takes two seconds to explain is we want a message to pop up on the screen to tell someone that a user been created, right?<br>
So, that's called flash, in Flask we call that flash.<br>
So let's flash a message to the screen and obviously in order to use that, we need to import it up here.<br>
So import flash from flask.<br>
And after doing that, before we forget is we actually need to import that user.<br>
So the actual user class that we call down here we need to import that from our model's file.<br>
So I'm going to throw that down on a new line here.<br>
From Project Awesome dot models, import user.<br>
And now we can actually use that and that will work.<br>
So let's pop over as well, to our create user template and just for the sake of this flash at the top, we're going to add a little bit of code there that will take the fact that we've added a user to the database and actually flash it to the screen.<br>
And I'll show you that in just a sec.<br>
Let's move over to the file now.<br>
And this code is actually going to go within our head tag.<br>
The actual flashing of that successful addition will show up in the header.<br>
And to do that we need to enter in some funky Flask code.<br>
Let's do that now.<br>
And I will explain it in just a second.<br>
And there's the code.<br>
So, what we have here looks a bit confusing.<br>
But, just go with it.<br>
This here is all within flash, within Flask.<br>
So you don't actually have to define any of this.<br>
Flash and Flask take care of it.<br>
So what we're doing is opening up a width statement within our actual template and we say with messages, "Get flashed messages".<br>
So that means any messages that are flashed to Flask, is going to use those and it says "If they exist".<br>
So the very first time we load this page they're not going to exist because no user was added.<br>
Therefore, you'll see none of this stuff.<br>
But if the add user function is run from our routes apply file and it pushes the flash off to the Flask cap, this will appear on the refresh of the page.<br>
So if the messages exist, let's create a class.<br>
An ordered list class called flashes.<br>
And for the messages in the messages let's just have a little for loop here that lists the mount in the list tag.<br>
So, if you have more than one message that will return to the page, they'll all appear here one by one under each other.<br>
Just like a normal for loop.<br>
So form message in messages, let's print the message and then we're going to end the for loop end the if and end if.
|
|
|
show
|
1:15 |
In order for any of this to actually work and to stick it all together we need to actually create a secret key for our app.<br>
And this is what it uses to talk to the database and add users, and that data to the database.<br>
And we do that in our __init__.py file so let's get back to that.<br>
All right, and we're just going to chuck it in under here so app.secret_key.<br>
Now you can make this whatever you want.<br>
Obviously this can be as insecure, or as secure as you want but, one of the cool things I've seen done, is import os and let's use a function from OS called urandom.<br>
So, os.urandom, and this pretty much just generates a series of random bytes that are as long as we specify.<br>
So let's just use 12.<br>
So, os.urandom, 12 bytes long and we are going to get a secret key based on that.<br>
And that's all we need to be able to create a secret key which Flask is happy to use and then we can run the app.
|
|
|
show
|
2:40 |
Okay we're finally there.<br>
We have created database and we've created the create user page.<br>
We've done all the routing in the background.<br>
We've got the function in there to throw the data in.<br>
Everything's linked.<br>
Everything's done.<br>
Let's actually add some data.<br>
So let's run the Flask app.<br>
Flask run.<br>
One set's running.<br>
Let's bring up the website.<br>
And we should see that this is the homepage.<br>
You do not need to be logged in to access this page.<br>
And that's intentional.<br>
We'll get to that later.<br>
And let's go to create underscore user.<br>
And on this page we have...<br>
This is a page where we can create a new user.<br>
So let's create that user.<br>
Let's call him Julian.<br>
And let's make the password ABC123 because we're rebels.<br>
We hit submit and if you notice the page is actually going to reload and we get that user created Flash message.<br>
This is the message that we obviously specified.<br>
We did the HTML and the template to get it to show up.<br>
And that means the user was added to our database.<br>
So bring up your SQlite database if you have it.<br>
And open up our site users.db file.<br>
And lets see what's in there.<br>
And looking at that database file we have our table, our user's table.<br>
And we browse data and there we go.<br>
There's the user I just entered.<br>
Let's see if we can add some more.<br>
Now we can say, bob.<br>
We can say, not ABC123.<br>
Submit.<br>
We can throw in Mike we can say what's wrong with you guys it's a great password.<br>
Then we can throw in some other random people.<br>
Let's bring the database back in and when we refresh it we see all of the data in there.<br>
We have Julian, we have Bob, we've got Mike we've got Jason, and we've got Brian.<br>
All of these people were added in by our web app.<br>
And that's really cool.<br>
So we've created a web app.<br>
It takes user data, it dumps it into an SQlite database using SQLAlchemy and now with this data we can actually finally get to Flask log in and use these people to log into our website.<br>
And you'll be able to see how the views change based on whether you're logged in or not.
|
|
|
show
|
8:33 |
As you can imagine with a Flask login page you would need a page that would appear once you're logged in.<br>
So to get to it you have to be authenticated and if you aren't, it doesn't work.<br>
So we're going to create one of those and it's going to be called pybites_dashboard.html.<br>
We are also going to create the page called login page and that's your login page.<br>
That's where you enter in your login details it gets verified against the database and then lets you log in or blocks you.<br>
I've already done this for us.<br>
Here's one I created earlier and quick run-through, login_page.html.<br>
There we have it.<br>
There's your login page.<br>
This is the page where users will log in to the site, got a simple form down here uses the post method, and it simply takes a username and a password, submits it through to the backend.<br>
Nothing crazy there that we haven't seen before.<br>
And simply let's just cat out pybites_dashboard.<br>
It's quite literally just a H one tag that says "This is the Pybites Dashboard.<br>
"You can only access this page once you're logged in." And that's our proof that the login system works.<br>
So we'll call that in our routes.PY file.<br>
So let's head back, let's clear the screen make it look lovely, and hop into our routes.py file.<br>
Now, don't be alarmed.<br>
I can see some extra code there that we didn't have before.<br>
It's just easier if I explain rather than making you watch me type 'cause I'm sure you're sick of it by now.<br>
So let's begin by importing flask_login.<br>
So from flask_login import login_manager.<br>
Now, let's use that before we move on to importing the other stuff.<br>
What we need to do here is we need to create a LoginManager object from login_manager.<br>
And what this does is it then initializes our Flask app and can then work with it, all right?<br>
So login manager.init underscore app and we specify the app that we've imported up here.<br>
And then we just do one last thing, we create a login view for it to all work in and we're going to call that login view login page.<br>
You can make that whatever you want.<br>
So let's pop down here and the first thing you will see is this newly-created app.route for pybites_dashboard.<br>
That's our logged-in page.<br>
Now, what's special about this is that it has a login_required decorator.<br>
That means anything in this function anything that is here on this pybites_dashboard route requires a successful login.<br>
So let's import that now from Flask login as we use it, of course.<br>
And that's simply it.<br>
It's only returning if you go to this route here.<br>
You're just going to get the pybites_dashboard HTML page returned.<br>
Nothing special, happy with that.<br>
Mind you, Flask does take care of all of this so if you weren't authenticated and you tried to get there, you'd just get one of those simple forbidden messages.<br>
Let's save what we've done now.<br>
Okay and let's open it up again.<br>
Now we have this login page route.<br>
This is going to be the code that manages that login page.html.<br>
So let's run through it really quickly.<br>
It's actually not too complex.<br>
I know it looks a bit crazy but just go with it.<br>
So app.route login page, we're using the methods get and post.<br>
Nothing new there.<br>
There's our function and now what we're doing here in these lines here if the form posts.<br>
If that form on that page clicks submit this is the code that's getting activated, okay?<br>
So if there is a post from the page, and username is in the form, what are we going to do?<br>
Well, let's look at this side first.<br>
We're actually going to query our database.<br>
So this here user is our database, right?<br>
We have a user database.<br>
And we're going to query it and we're going to filter it by username.<br>
And what we're looking for here is from the request form, get the username assign it to here, to this username object get the first return, all right?<br>
That's all we're doing here.<br>
This is SQLAlchemy code.<br>
And we're assigning that returned object to a user object, lowercase U, all right?<br>
And then we're saying, "Well, if user," we're using truthiness here, the Python truthiness, "If there is a user returned "from this, if it does exist, then what do we want?" We want to grab their password and does that password match the password that was sent through our request form?<br>
If it does, well then yes, let's log in that user.<br>
Let's get him through, let's get him done let's tag this user object as login user.<br>
So to use that let's scoot up the top here.<br>
And import that as well from flask_login.<br>
Login user.<br>
Let's pop back down here again.<br>
And after we've logged them in, what do we do?<br>
We redirect them, we redirect them to the pybites_dashboard.<br>
Now, these are two functions we need to actually bring in from Flask.<br>
So we need to import those as well.<br>
Pop up the top and there we go, I've already imported that.<br>
We have URL four and redirect.<br>
So we'll pop that down here and now if there is no user, if the user that someone's entered is incorrect and it doesn't match our query to the database then watch how this lines up.<br>
It lines up with the if statement, right?<br>
So then we just return invalid username or password.<br>
We don't care, we don't want to tell them what's wrong.<br>
That's fine, they can figure it out themselves.<br>
And last but not least if no one has actually entered anything into the form, well then we're simply just returning the render template for the login page.<br>
So as soon as you browse to the website or the URL for login page, you are going to get login page.html.<br>
That was the template we filled out earlier.<br>
And that's pretty much it.<br>
That is Flask login.<br>
We've just logged in using flask_login as long as the details are correct.<br>
There's one last little thing we need to do.<br>
And we'll pop down to the bottom here.<br>
We'll throw him down here.<br>
Let's give us some space.<br>
And what we need to do is we actually need to query the database for the user ID, all right?<br>
And that is so that we can have a user callback so that every time Flask log in, every time the login manager plays with this user it knows what it's doing.<br>
So it knows what user it's grabbing I should say.<br>
So manager, login_manager.user_loader.<br>
This is the decorator we need for this.<br>
Def load_user.<br>
We're going to grab the user ID of that user and all we're doing is returning it returning the query.<br>
So we're going to query the database.<br>
So user.query.get and we know it's an integer from our database from that field of the user ID column.<br>
And we want to grab the user ID, close it off.<br>
That's it.<br>
This is a function used by login_manager.<br>
We don't really need to do anything with it.<br>
So after this let's save and run it.
|
|
|
show
|
3:40 |
One last thing I just want to run through quickly is the fact that our user class does have a few pre-defined methods and properties that we can implement a lot easier without having to specify them manually if you we use, user mixin from Flask.<br>
So let's quickly pop into our models file here and let's add user_mixin into our class here.<br>
And this will allow us to actually authenticate the user, check to see if the user's active that stuff without having to manually code it in.<br>
And this works sort of hand in hand with that login required decorator that we saw previously.<br>
So, in our user class definition here let's have user mixin and we need to import that from Flask logins.<br>
From Flask login, import user_mixin.<br>
Simple as that, let's get out of there and let's also add that in to our routes.pi file pop on the end here.<br>
Append user_mixin onto that and that will allow us to actually authenticate a lot easier.<br>
Last but not least, before we really get started.<br>
Let's pop down here to our login page.<br>
What I wanted to call out that I failed to note in the previous video was this here.<br>
Login manager login view.<br>
This here, login page, what we call here needs to be the same name as our function that people log in with.<br>
All right, these need to be the same here.<br>
So login page and login page will match and then we're actually able to log in.<br>
So with that said, let's actually log in.<br>
Close out of that.<br>
Flask run.<br>
Did everything work?<br>
Yes it does work so let's bring up our browser.<br>
Load the home page.<br>
There you go, this is the home page.<br>
You do not need to be logged in to access this page.<br>
So let's head over to login page.<br>
There we go, this is the page where user's will log into the site.<br>
Now let's throw in a bogus name.<br>
Let's throw in, you know, test, log in, Zelda.<br>
Only because I'm looking at a Zelda picture on my left.<br>
Submit.<br>
Invalid user name or password.<br>
So, one other thing to point out here let's go to our dashboard before we log in and notice because we're not logged in it actually redirects us to the log in page.<br>
Now this is because of that log in page view that we set up with the log in manager.<br>
So the log in manager controls all of this.<br>
It takes care of all of this for us.<br>
It noted that we were trying to access a page that was behind a login.<br>
So it took us to the page we've defined as the log in page.<br>
Now let's actually enter in a username that exists in our database.<br>
Julian ABC123 Submit.<br>
And now we're logged in.<br>
So I can go back to the index page.<br>
Yep, you do not need to be logged in and I can go back to the Pi bites dashboard and we're still logged in.<br>
And there you have it.<br>
There is our Flask login.<br>
We can create another page, you don't have to but we will create another page in the next video.<br>
Really quickly, just to log us out and then we'll demonstrate how this all works.
|
|
|
show
|
3:43 |
All right, to quickly create ourselves a logout page, I want you to just think about this for a second.<br>
We don't need a physical page, right?<br>
We don't need that actual page to browse to rather, we just need something to force the user to log out.<br>
So if you hit the URL of logout page, it will log you out.<br>
It doesn't actually need to render a page.<br>
It could redirect you back to another page.<br>
So let's head into our routes.py file.<br>
Let's just pop down here pop it in here next to login page, makes a bit of sense and let's create app.route for logout to page and login required.<br>
This is important because what we're saying is you can access this page until you're logged in so there's no point clicking logout until you logged in.<br>
So, let's create a route a function, sorry, called logout page.<br>
And all it's going to use is called call another beauty from Flask login called logout user, that's it.<br>
Return, redirect, as I alluded to before we're just going to redirect the person to another page.<br>
Let's take them back to index and that's it we've just logged the user out.<br>
So we're logged in.<br>
We will browse to logout page, /logout page.<br>
That will log us out, and let's demonstrate that now.<br>
Bring up our browser once again.<br>
All right, let's go to the home page, right?<br>
Now, we can go to pybites_dashboard redirects us to the login page throw in my username, Julian, logs us in.<br>
Now we'll go back to index you can see that we're still able to access the website go back to dashboard, yep, we're still logged in.<br>
Now, let's go to logout page.<br>
And of course, I fell into that trap of not actually importing logout user.<br>
So let's do that now.<br>
Pop up the top, we've got login user, we've got user_mixin.<br>
The last thing we have is logout user.<br>
Start the app again.<br>
Let's log ourselves in.<br>
Julian and abc 123 logged in and now watch what happens.<br>
Log out page and it redirects us to index.<br>
And if I try to go back to the pybites_dashboard it redirects us to the login page.<br>
So that's how I can prove to you, I suppose that we were logged in.<br>
Then once we clicked logout or typed it at the top it then logged us out, our session was null and void and when we went back to our dashboard it then redirected us to log in again.<br>
And that, after this many videos, is Flask login.<br>
I know it's complex, I know it's crazy.<br>
So just continue playing.<br>
Let's do a quick wrap-up and then you can move on.
|
|
|
show
|
4:30 |
That's it, we're at the end of the chapter Flask-Login, all done.<br>
Thank you for sticking with it this long.<br>
It was a pretty technical chapter and I'm sure there were problems along the way but hopefully you've figured them out.<br>
Let's cover off what we learnt very quickly.<br>
This is just the technical stuff we haven't really seen before in the course and the first thing we did was we created our database definitions, the model using Flask-SQLAlchemy.<br>
And what we did was we defined the user class which was used to store all of our user data in and it actually uses UserMixin from Flask-Login and that contains predefined methods that we were able to use without having to actually run through it manually and this class was the model for our SQL database.<br>
In the class, we defined the actual database columns and attributes so we had our database.column.<br>
We're able to say it was a string, an integer for username and ID and we're able to say whether it was nullable or unique.<br>
And in the case of the ID we're able to say it was the primary key.<br>
And finally, we were able to create a simple class method that just returns the username.<br>
Now, while we didn't use it, I wanted to keep this here just so that you could see the possibilities and that you can actually use it elsewhere in the program.<br>
Next, we wanted to add users to the database.<br>
In order to do this, we had to create a user object which use the user model or class that we created in the previous slide.<br>
And we assigned the username and the password to a user object.<br>
And this object was then actually added to the database using db.session.add.<br>
And finally, as with most things, once it was added we needed to commit it.<br>
One little quick thing we added in as well was Flask flash, and that was to notify that the data was entered successfully.<br>
That was just the little message that appeared on the screen to say, hey, user created.<br>
The next thing we did that was different was to set up the actual login manager.<br>
Now, before we even started that we need to actually link SQLAlchemy to our Flask app.<br>
Then we needed to actually create the login manager object using LoginManager from Flask-Login, pretty simple.<br>
Then we just had to initialize it against the actual app.<br>
So, initialize the app using the LoginManager.<br>
And then this was the specific part.<br>
We actually had to tell LoginManager what the login view was called and this was the same name as the actual function that ran our login page where the login would be instantiated where it would be called.<br>
Finally, we actually performed the login.<br>
To do this, we just took the actual request form check to see if there was a username sent back.<br>
And if there was, we then query the database this is all SQLAlchemy now and we queried the database for that provided username.<br>
If there was a username, we would then check to see if the password that was attached to that user object in the database, the password matched what the password was that was sent back from the form.<br>
So, if you entered the password we check it against the database.<br>
If it was successful, we would log in the user and redirect them using the redirect URL for we'd redirect them to the PyBites dashboard.<br>
That's it.<br>
So, that was Flask-Login.<br>
I really hope you enjoyed that one.<br>
It was one of the more technical ones you'll see but hopefully you got something out of it.<br>
Play with it, head back to the README to just cover off some extra things you can do if you have extra time.<br>
I do anticipate this may have taken you all of the days depending on how much time you have.<br>
Either way, it's your turn, so keep calm and code in Python.
|
|
|
|
25:45 |
|
|
show
|
2:28 |
Hello and welcome to our next 100 days project in our 100 days course.<br>
This time we're going to talk about SQLAlchemy database migrations.<br>
Now, we've previously spoken about SQLAlchemy.<br>
It's a really great way to create classes they map to your database and you can work with Python objects and just magically read and save those into read from save them into your database.<br>
However, that's the perfect starting from scratch story.<br>
In practice, your code evolves over time.<br>
The chances that your SQLAlchemy classes which generated your database will stay that way, the chance that you got that database structure exactly right the first time is very small.<br>
Right?<br>
Code evolves over time.<br>
So in order to evolve our database along with our code using SQLAlchemy or other ORMs, like Django ORM you have to use this concept called migrations.<br>
It's a database migration.<br>
It takes our database from one schema one shape, into another.<br>
And the goal of that is to keep our database in sync with our ORM classes.<br>
So, what's the problem?<br>
Well, we're starting with our application in one form.<br>
We've made some changes, and we want to run our code again, this time with a different database schema.<br>
Well, sometimes you can get away with the schema not matching exactly.<br>
But generally what's going to happen is when you go to run your site you won't have this beautiful working application any more.<br>
You're going to have this error page.<br>
SQLAlchemy exception, operational exception no such column, whatever it is.<br>
So, how do we fix this?<br>
Well, we could by hand manually go in there and continuously change and evolve our database schema, that's one option.<br>
Or, we can use some kind of package that will do that for us.<br>
So enter Alembic.<br>
Alembic is a database migration library created by Mike Bayer.<br>
Mike Bayer is the same guy who created SQLAlchemy.<br>
So, those two go really well together as you can imagine.<br>
And the idea is, we're going to set up our web application with Alembic tell it about our SQLAlchemy models tell it about our database and then we're going to say, "Alembic, keep our database in sync with our code." And this is great because as we move from dev machine to dev machine maybe the database looks different so we move from development to staging to production we might need to make different changes to those different databases to get them in sync.<br>
And Alembic handles all of that for us.<br>
So throughout this chapter we're basically going to focus on using Alembic to make changes throughout our code and keep our database in sync.
|
|
|
show
|
2:32 |
So let's get started with Alembic.<br>
And I don't actually have any code to get started with.<br>
So what we're going to do is we're going to take the last bit of code that we wrote from the Pyramid chapter.<br>
Remember, we did SQLAlchemy and then we did Pyramid and our Pyramid app had our database stuff in there.<br>
Clear this bill tracker thing.<br>
So I'm going to copy this over.<br>
Maybe I'll copy that part over for you so you can just see how to how I got totally started from scratch.<br>
So we need to do just two quick things to make sure that this is a fresh copy and we didn't break it by moving basically our virtual environment and our installed stuff.<br>
So we're going to go to this folder.<br>
Going to set it up so everything will runs well.<br>
Might as well update that.<br>
So when I go over here, and we're going to run our venv command, which will create a virtual environment.<br>
You're going to see the command at the top it's creating the virtual environment, updating it and activating it.<br>
And then, down here we need to run our setup in development mode.<br>
Okay, everything should be in place.<br>
Should build a runner app.<br>
Looks like we can.<br>
Alright, so let's get out of the terminal and go over to PyCharm here and run it.<br>
Super, we have our app here and we should build a run it also in PyCharm.<br>
See, it's running our migration one and does it work?<br>
Course it does, it works like a charm.<br>
So it looks like everything is working great.<br>
First thing we want to do is like let's just observe that what I showed you in the slides there, that's actually a problem.<br>
Let's go over to our models and let's say we're just going to change something super simple about the bill.<br>
Like we've had paid, we've had the total we had what's created, let's do this.<br>
Let's have one more column here called last_payment.<br>
Maybe we want to track this.<br>
Like, show me all the things I haven't paid in 30 days or something to that effect.<br>
I have an index, but let's not have a default value.<br>
So I guess we should set null ability to true.<br>
Alright, seems like that should work.<br>
Let's run our code again.<br>
Boom, it's crashed.<br>
There's the dreaded operational error I just told you about.<br>
Bills.last_payment.<br>
Doesn't exist.<br>
Right, so our model believes there's a last payment 'cause it's right here, but our database doesn't have it.<br>
And some databases are more flexible but relational data bases, they're generally very, very strict about their schema and their relationship.<br>
And remember, SQLAlchemy won't update existing tables.<br>
It will create new ones but it will not update existing ones.<br>
So we're stuck, we have to fix our database to make this work.<br>
Alright, so we can't even get started.<br>
Right, we can't even get our website to load much less to get an error out of one of our web pages.<br>
So that's where we are and we're going to fix it with Alembic and database migrations.
|
|
|
show
|
3:45 |
We saw this last_payment column being in our SQLAlchemy model but not in the database causes problems.<br>
Boom.<br>
No such column bills.last_payment.<br>
So we've decided to use Alembic to keep our SQLAlchemy classes in sync with our database.<br>
Now, in order to use Alembic there's two things we have to do.<br>
First, we have to simply install the package.<br>
Right?<br>
Like any other package in Python, we have to install it.<br>
So, we can come down here and we don't have the requirements for this project but we have our setup.<br>
So let's go down here and say this is going to require Alembic.<br>
Put the closing comma there to avoid more diffs.<br>
We can install this, we don't want to install it there.<br>
Probably the easiest way is just to say Python.<br>
Make sure your virtual environment is active.<br>
Python setup develop, and that will reinstall the one thing that we need which is Alembic.<br>
If we do a pip list, let me get it scrolled in right you can see we have the current version of Alembic.<br>
And so, great.<br>
So, that warning's going to go away.<br>
Now, that's part one.<br>
There's actually another part.<br>
Notice over here, there's nothing to do with Alembic.<br>
There's not an Alembic folder, things like that.<br>
So, in this directory the one that has the development.ini the production.ini, and so on.<br>
In that directory, we want to run the command alembic init alembic.<br>
Now, it looks kind of symmetric and whatnot.<br>
Redundant.<br>
That's the command, that's the subcommand, init and then this is the directory.<br>
So, we're going to create a directory called alembic and that's where Alembic is going to keep track of all the stuff happening.<br>
So, we run this, we see it's generated a couple of things.<br>
At the top level, we now have alembic.ini right there.<br>
Okay?<br>
And we open this up, we see generally, you don't have to mess with this but you can configure Alembic this way.<br>
There's one thing we have to change there.<br>
And we have an Alembic folder that has versions and a bunch of other stuff.<br>
Versions, right now, is empty.<br>
We're going to work on that in just a second.<br>
This versions folder is where various changes in form of Python files that need to be applied to our database.<br>
Those will be generated and stored and tracked there by Alembic.<br>
Okay, so we do see a little warning down here that says you need to mess with this file before proceeding.<br>
We need to set that up.<br>
So, we do have it open and the thing that we need to set here is the sqlalchemy.url.<br>
So, what is that?<br>
Let's go find that.<br>
Remember, in our DB session, we had to come up with this and we said, connecting to our database at such and such.<br>
If we go back and we ran it way at the top before it crashed, that big sucker right there if we get all the way to the end that is the URL that we need to put right here.<br>
However, how generic does this look?<br>
Would this also work on another machine if another developer checks it out?<br>
Probably no.<br>
So, what we can do is we can go over here and if I get this right you can put a dot there.<br>
And so, the scheme is always specified by database type colon three slashes.<br>
And then, this says current working directory down to build tracker, into db, and so on.<br>
Alright, so, this folder this folder, there.<br>
Okay, hopefully we have everything right.<br>
So, let's give this a quick test.<br>
We come down here and we can say Alembic, we can ask what current version of Alembic do we have installed?<br>
Now, it spit out some information and then said nothing.<br>
So, this info stuff you can ignore but basically, the fact that it did not say a version with a little parenthesis head or what step it was on means that there've been no migrations applied to this database.<br>
Alright, so, just to verify things are still broken, but we do have Alembic setup.
|
|
|
show
|
1:47 |
Before we move on I actually just saw a weird error happening here.<br>
And I honestly don't know why Python's not figuring this out but I want to just make a quick change in case you also run into this error.<br>
So we added alembic here as a dependency of this thing and we of course installed it as you can see.<br>
We have alembic installed right there at the top but when I run it, we get this weird alembic distribution was not found and is required.<br>
It's like the requirement statement of our package somehow is telling Python alembic is required and Python thinks it's not there and yet it's there.<br>
Anyway because we should be able to say import alembic and guess what, it's there.<br>
Anyway, let's get around that problem.<br>
We've already installed this, so let's just go over here and shift away from entirely using the setup file and to over to a requirements file so we'll say pip freeze, which gives us a list of all of our things.<br>
We can pip freeze into requirements.txt if you look here we have our requirements.txt which looks just like that.<br>
And now we can pip install -r requirements.txt like that.<br>
Of course this is a little bit crazy 'cause the one other thing we want to change is it thinks it's trying to reinstall this.<br>
There we go.<br>
Now we should be able to pip install our requirements everything's good and if you did this you need to rerun one more time the setup development.py now if we run it we still get an error but the error we're hoping for.<br>
Okay, not sure what was up there but I wanted to make sure I put this video in here because I could've mislead you or maybe you ran into the same problem, so just take that alembic out of your setup, should be fine but for some reason it wasn't.
|
|
|
show
|
2:03 |
Let's review getting started.<br>
You can follow along on Mike Bayer's tutorial which you can see the link at the bottom.<br>
But the short version is we're going to get started by installing Alembic.<br>
So here, we're just typing pip install alembic.<br>
In our example, we actually put it into the setup requirements.<br>
That didn't go so well so we put it into our requirements file.<br>
So, we'd run this, it's going to install Alembic and then we're going to run the init command.<br>
Alembic init, and then we give it a folder.<br>
The convention is also to call the folder it's going to create alembic, does a bunch of stuff.<br>
See it creates these alembic folders it creates the versions and so on and then finally says, hey you need to edit the alembic.ini before you get going.<br>
Alright, we'll come back to that but let's first talk about the project structure.<br>
So, as we work with it, you'll see it starts to develop a structure that looks like this.<br>
So we have our alembic folder that's the folder that we specified in the init command and it has versions.<br>
These are, the change that take our base model our base schema, and then migrate through the various changes over time.<br>
Each one of these changes, or levels is recorded in the database, as we'll see.<br>
So, Alembic can look at your database look at the various changes, and it says well I'm starting from here and I want to get to the latest.<br>
What path do I have to take?<br>
What set of changes do I apply to do that?<br>
That's what's in these files, and we'll see how to work with them in a minute.<br>
We have some more setup we can do here.<br>
We're going to mess with this env.py in just a second and we also have our alembic.ini.<br>
That's where we specify the configuration settings.<br>
Most importantly, how do we talk to the database?<br>
What's the connection string?<br>
Speaking of which, in that alembic.ini we're going to say sqlalchemy.url is a relative path in this case maybe a server name in more production type of cases, over to our database.<br>
So we said it's in the bill tracker directory db/buildtracker.sqlite, and of course we use the sqlite schema; this is a sqlalchemy connection string not a pure sqlite connection string.<br>
So we specify that there so we let Alembic know how to connect to our database and of course if you have authentication that has to go here, all that kind of stuff.
|
|
|
show
|
5:09 |
Our goal is to have Alembic look at our SQLAlchemy classes in our database and make any changes that it needs to make in order to migrate our current database schema to be in sync with our class schema our SQLAlchemy schema.<br>
Now, in order to do that, we need to tell Alembic a little bit more.<br>
Here, we've already told it how to connect to the database and we need to connect Alembic to the other side of the story our SQLAlchemy classes.<br>
So, with things like our bill and whatnot.<br>
So, we're going to go over here to this env.py and we're going to set the target metadatas.<br>
It says if you want to run auto-generate and trust me you probably do you're going to need to something like this here.<br>
Okay, now there's a couple of things we have to do.<br>
We have to import all of our models and then we can set the metadata.<br>
So, that should be easy because we've already set our code over here, to have this, all models.<br>
Of course, we named it like this.<br>
So, let's import it like so.<br>
We'll come over here and we'll say From billtracker.<br>
Close but no.<br>
from billtracker.data.models import * Remember, the SQLAlchemyBase has to quote see all of these and then we can say from billtracker.data.modelbase import SqlAlchemyBase And then finally, this is .metadata.<br>
Whoo!<br>
And, this comes up as a warning but you actually do not want that to go away.<br>
Saying this stuff should be up at the top.<br>
I'm kind of okay with that.<br>
Here we go, everything's good.<br>
So, we've imported all of our models.<br>
We've imported the base.<br>
And then we're going to say the meta base.<br>
Metadata is that metadata.<br>
That tells SQL out coming about all the models.<br>
We've already told it about the database so we should be able to connect those two.<br>
Let's do that now.<br>
So, remember, we still have this pending change and if I try to run it, it's still not working.<br>
Nope, there's still this last_payment.<br>
Let's copy this.<br>
So, the goal is to add that, right?<br>
Let's go over to our terminal here.<br>
And, we can run a new command.<br>
alembic revision --autogenerate.<br>
That's the nice part.<br>
And we can give it a comment.<br>
So, the message will be adds bills.last_payment column.<br>
Something like that.<br>
Now we run this, it looks over it and it says, we detected a new column was added and a new index on that column was added and it's generated this file, right there.<br>
Now, that hasn't made any changes to the database.<br>
Again, if we still run it.<br>
Over here, it still doesn't have that but we're almost there.<br>
So, let's look at this and see what this is about.<br>
So, what it's done is said there's no previous migration that we've known about but this is a new migration called this.<br>
As we add additional ones they'll have, you know this value will appear here and so on.<br>
So, it says, if we're going to do an upgrade we're going to go to the bills table and we're going to add that column and we're going to create an index.<br>
If you want to roll this back which is totally an option it will drop the index, drop that column, great.<br>
So, now that we have a change, we can apply that to the database.<br>
So in order to actually get the database in the right shape.<br>
To use Alembic to fix our code, fix out system so that it will run again, we say simply alembic upgrade and then we can say, just upgrade all the way, head.<br>
To this, it says, we're running an upgrade from nothing to this, 219.<br>
And, now we can ask Alembic, current and it should say, your current version is the latest, it's that.<br>
Beautiful!<br>
Did it do the fix?<br>
Is our code going to run again?<br>
Oh, it's running, it's running!<br>
Let's see, if I click here, what do we get?<br>
Yes!<br>
It fixed it.<br>
We no longer have that missing column error we have our app running, and it's working again.<br>
You can see it's reading lots of these bills right here.<br>
Including that other column that was missing.<br>
So, we've used Alembic and its auto-generating changes to take our database and keep it in sync.<br>
Let's add one more silly little change.<br>
Let's just go over here, I'll just add another column.<br>
Let's call it other.<br>
sqlalchemy.Column, just go like that.<br>
Then, let's say, default, 0.0 just so it doesn't crash.<br>
All right, now again, we don't have the others so let's go one more time through this.<br>
What do we do?<br>
We say alembic, we're going to pull up some stuff here and we're going to generate a new one and this will be new, other column.<br>
See, it's found the other column, bills.other.<br>
And, now we can apply.<br>
If we ask, current, it says that this one but it no longer says that it's head.<br>
So, no we're going to ask to upgrade.<br>
It's going to upgrade it to the new other column and now again if I ask current now, is this other one and that's the head.<br>
If we run it again yes, it still works.<br>
And, by the way, if I ran it in the middle no, it would not work, it would be crashed.<br>
And, here you can see we have out new other column.<br>
Depends on the previous version.<br>
Here's it's new one, and so on.<br>
So, that's how Alembic works.<br>
Takes a look at our SQLAlchemy classes looks at our database and then it does it's best to keep everything in sync.<br>
These changes, these files here.<br>
You can edit this, right?<br>
This is now frozen in time.<br>
It'll be stored in source control and if you want this to operate differently or do other work as it's making these upgrades and downgrades, just write the code right there and you'll be all set.
|
|
|
show
|
1:44 |
We saw the we can go to the terminal and we can ask Alembic for the current.<br>
And when you run that it says, "this is the head." We could actually run a downgrade on this to get to another one then this little head part would be gone but this is the latest.<br>
So how does it know what version the database has?<br>
How does it know whether that's the head or not?<br>
All these things are interesting questions.<br>
Well, the way it knows which is the head is it parses all the files here and figures out how to order them based on their dependencies so it knows what one is the last one there.<br>
But how does it know what number it's on?<br>
So we're going to look at that real quick.<br>
So if we go over to our database here and we go to our DB file, and we open this up Oh, we already have it open.<br>
So we go over here to the schemas.<br>
Make sure you refresh this.<br>
And now we have a new column called alembic_version and it has just the version number.<br>
It's super, super simple.<br>
So we can open this in a console and say select * from alembic_version.<br>
We run this, we get a very impressive one row, one column in this table but it is not surprising that it is this 99977 which we saw right there.<br>
It's that version.<br>
So there's simply a table in our database that has a single row in a single column that is a varchar32 which is this.<br>
So we just, that is the stored version of the database and then these are all the possible versions and Alembic syncs those too and figures out what changes it should apply what changes already apply.<br>
It's important you don't make changes to the database directly, but that you always use Alembic because it doesn't completely analyze the database I don't think.<br>
I think it just looks at a number and go okay we're going to apply those changes that are tracked in Alembic.<br>
So that's where this is stored and how you can find it.
|
|
|
show
|
3:01 |
Let's review how we configured and used Alembic to have it automatically track changes to our code and then migrate our database accordingly.<br>
So we had already connected the database to Alembic now we need to connect our SQLAlchemy models over to our database.<br>
So here you can see that we're importing the package and we're importing all of the models from our data and then we're going to go and actually get the modelbase SQLAlchemyBase, and set the metadata to the target metadata in the env.py file.<br>
This is in the Alembic folder.<br>
So it's that line right there that connects our ORM models to Alembic, so it can do the comparison and figure out what's changed.<br>
Now, in order to make a change we simply run a single command, alembic revision.<br>
Normally we're going to give it this -m message here so it can always track what the change was.<br>
This is going to help name the file that's going to appear in that version's folder.<br>
But we're also going to give it the --autogenerate.<br>
So it's going to go and say, Oh, look we found this in this case, user last login, and it kicks out that file into versions and some hash there and then basically the name of the comment in a file friendly way, and it's done.<br>
If you open up that file you'll see something kind of like this.<br>
Oh, we've added a column to the users and it was the last login with a string and nullable and so on.<br>
This discovered the change, but this doesn't actually do anything for our database.<br>
It's not until we run the migration that that works.<br>
So the next step is to run alembic upgrade and you give it some version.<br>
If you just want the latest it's almost always what you want anyway you say, alembic upgrade head and it spits out a couple pieces of information.<br>
But the most important part is running upgrade from one version to another and then it prints out the comment.<br>
If there were more changes, you would see more output.<br>
Finally you can ask, What version are you on?<br>
alembic current, and you'll see now that we're on this one which is the head.<br>
That means it's the latest.<br>
We also saw that this version is stored in your database so there's a new table that will be there called alembic_version.<br>
It's super simple.<br>
If you open it up, it's one row, one column named version_num.<br>
Those are the versions.<br>
That corresponds to one of the entries in the Alembic versions folder, and Alembic knows how to figure out where that is in the whole set of changes and what other changes need to be applied.<br>
So it's this one simple little bit of information in your database that tells Alembic where it is and what changes will need to be applied to it.<br>
Best of all, after we run that migration our website works again!<br>
We saw by adding a column or making changes to the SQLAlchemy models can easily easily break our code.<br>
If those become out of sync, SQLAlchemy checks that and freaks out and says Whoa, there's something different here.<br>
I can't talk to this anymore.<br>
So Alembic was able to determine those changes apply them to the database and now our website works again.<br>
Hooray!<br>
If you're using SQLAlchemy or some other ORM I definitely recommend you check out Migrations.<br>
It's really really important and makes it so much easier to keep your code in sync.<br>
The alternative is to do it by hand and that's error prone and not always going to go well.
|
|
|
show
|
3:16 |
I hope it was fun to watch me use Alembic and write some code and do some migrations, but it's your turn now.<br>
Let's walk through really quickly what you're going to do on the rest of the days that you have for working with Alembic in a hands-on form.<br>
Here we are on our DB Migrations section.<br>
Of course these numbers could always change but I think they'll ...<br>
We're pretty sure about them, but you never know.<br>
Let's go over to the Your Turn section.<br>
Notice we have this hover share project in here.<br>
This is a copy of a previous one we worked on in SQLAlchemy.<br>
We're going to use that.<br>
We're going to start by just watching the videos on the first two days.<br>
Watch the videos, play around with the code things like that.<br>
Then when we get to the third day that's when it's time to start playing with Alembic yourself.<br>
We're going to take that copy of hover share you saw and we're going to configure it so create a virtual environment, update pip install the requirements, things like that and then just run it to make sure it works.<br>
You should be able to run this of course with the virtual environment and then you should see it running.<br>
Everything should be great.<br>
The other thing to do is remind yourself of the SQLAlchemy classes and how SQLAlchemy is working.<br>
In that folder, we have all of our SQLAlchemy classes that we're mapping to our database.<br>
Have a look around there once you get this going and that's pretty much day three.<br>
I think that one will be pretty quick actually.<br>
If you want, you can just do a little work ahead on day four I guess.<br>
Final one to wrap up this chapter on Alembic.<br>
We're going to make sure that we have everything installed.<br>
We've already run this command but the goal here is to add Alembic to your requirements.txt and then rerun it.<br>
Of course that's just going to be equivalent to installing Alembic.<br>
Now we need to create the file structure as we saw.<br>
We're going to alembic init alembic on the command prompt or terminal there.<br>
Remember, again, this has to have the virtual environment activated.<br>
When you're done with all that, you should have a structure that looks like this.<br>
We have our hover share code and we have Alembic and its versions as a sibling folder.<br>
The two steps that we're going to have to do in order to get Alembic to automatically generate these migrations is to teach it about the connection string.<br>
In the alembic.ini, we've got to set that value and we need to import all the models into this.<br>
That was pretty straightforward.<br>
Let's import all the models.<br>
But it turns out that was actually simple because our Pyramid app was an installed package.<br>
When it's not an installed package, this gets harder.<br>
But I wanted to show it to you here and have you go through it because not everything we work on in Python is a package.<br>
But it's a very valuable skill to have.<br>
We're going to look through here, and it tells you how to basically add the root of your project this project, to the path, to Python path.<br>
Then we can go and import the files as if Alembic was working at the top level of our project, which it's not actually.<br>
But this will make it think that it is.<br>
Once you get that all done we'll do a few migrations down here.<br>
Just follow along and you should be able to add some features to your SQLAlchemy classes see that it no longer runs auto-generate a migration, apply the migration and your new code should be running on your new version new scheme of your database with everything working.<br>
That's what we have in store for you for the next couple of days.<br>
Play around with Alembic.<br>
It saves you so much trouble and takes so many things that are manual and error-prone and scary and makes them easy and automatic.
|
|
|
|
43:30 |
|
|
show
|
0:59 |
Good day, this is Julian again and welcome to Heroku deployment.<br>
If you haven't heard of Heroku before it is a cloud platform app pretty much that allows you to host your web applications in the cloud so you don't have to worry about hosting any servers running your own hardware.<br>
It's all hosted on the Heroku server end.<br>
You just upload your code, configure app and your application's running, your website's running.<br>
So we're going to cover off in this set of four days how to launch some of the fast apps that we've already created in Heroku.<br>
We're going to transfer the code from those apps up to Heroku and we're then going to run it in the Heroku cloud.<br>
It's actually not too complicated so you're going to enjoy a couple of easy days here which is great because the flask stuff was pretty heavy.<br>
Watch the read me video get an idea of what we're going to do and let's get deploying.
|
|
|
show
|
1:33 |
Now, for the overview of the next four days these are going to be pretty easy compared to some of the other days you've done so enjoy the break.<br>
You probably deserve it.<br>
With Heroku, all we're going to do is for the first two days we're just going to look at how to set up your Heroku Git environment locally and how you will work with the remote Git repository on Heroku.<br>
Once you've done that, you can then set up your very first Flask app in your Heroku dyno and get that running.<br>
That's pretty much days one and two.<br>
Feel free to take it however way you wish.<br>
Watch the videos day one, get the environment set up and then play with some code on the second day.<br>
You might even consider installing your own applications in there, stuff you've done so far in the course rather than just the quick demo that we have here.<br>
Days three and four, just complete the rest of the videos.<br>
Feel free to watch them all on day three and then on day four, go through the actual add-ons yourself and see how you can customize them for your own apps.<br>
Essentially we're just looking at Heroku Scheduler and the SendGrid add-on.<br>
Once you have those installed, feel free to play follow along with the videos but then try and customize those.<br>
Incorporate them into your existing Flask apps so you have to be creative.<br>
They are pretty fun, the automation.<br>
So definitely see what you can tack into your existing apps.<br>
And that's pretty much Heroku deployment for these four days.<br>
Just watch the videos, deploy an app and play with some add-ons.
|
|
|
show
|
2:38 |
Naturally to get started you need to have a Heroku account.<br>
If you have not done this yet please head over to www.heroku.com and click this very pretty sign up for free button if you can catch it.<br>
Or this little sign-up button here on the right and simply go through and enter your details.<br>
You can sign up for a free account where you don't have to pay.<br>
Heroku does offer whole free-tier you can read through that in this page here and go through the documentation I will leave that for you to do.<br>
When you are ready finished signing up get your account setup and login.<br>
Now, once you've logged in, you'll be greeted with a screen like this one, welcome to Heroku.<br>
Now that your account has been setup here's how to get started.<br>
What I don't want you to do is create a new app.<br>
We're going to actually do that using the Heroku CLI from operating system.<br>
If you wanted to really, you can start creating your own app here with the create new app button but that's not how we going to do it in this video.<br>
You can feel free at this point to explore the interface.<br>
You can head over to the Python documentation down the bottom there and that will open up the Dev Center and tell you what you need to get started with Python.<br>
It does say Python version 3.7 installed locally and that's because Heroku has updated its back-end with Python 3.7.<br>
So preferably try and run that on your system.<br>
See the installation guide for your OS on the right here and how to get that going.<br>
You don't really need to have Postgres installed for what we're doing, so we'll just leave that for now.<br>
What I'd like you to do is head over to another help page so devcenter.heroku.com/articles/herokucli.<br>
That'll be on the screen right now and go through the download and install section here.<br>
If you click that, you will then be able to choose for your operating system, macOS, Windows and Ubuntu down below.<br>
I have Windows obviously.<br>
I'm going to go through the 64-bit installer which I already have.<br>
I'm hoping you know how to install software on your platform of choice.<br>
Please just follow the instructions on Heroku.<br>
They are actually very straightforward.<br>
Go ahead, install the CLI and move on to the next video.
|
|
|
show
|
4:37 |
Hopefully you have installed Heroku CLI successfully.<br>
Once you've done that we can get cracking on the application.<br>
The first thing you need to do is actually log into Heroku and that's using the account details you set up in the earlier video.<br>
If you are to do that through Commander which is the app I'm using here you actually won't see the prompt.<br>
So, just to demo quickly if you do Heroku login from the command line you should see a prompt like this.<br>
Enter your Heroku credentials.<br>
So the first thing it asks you is your email and then your password.<br>
On Commander here I actually don't see that.<br>
So Heroku, login and I simply just get a blank prompt there.<br>
It doesn't actually show the word email.<br>
Obviously I had to show you that for demonstration purposes.<br>
What I'd like you to do is login.<br>
I'll do that quickly and I've now logged in.<br>
On your side if you're not using Commander you should see a message that says logged-in as, and then your email address.<br>
All right the next thing we need to do is we actually need to choose a directory to, I guess, have our app in.<br>
We need to get some code ready and then push it off to the Heroku servers to run in the Cloud.<br>
Now I've created a quick directory here in my 100DaysOfWeb folder and in here is a very very basic Flask app.<br>
I will quickly show you.<br>
You are welcome to just copy this off the GitHub Repo app.py is a single file Flask app.<br>
This is different to everything we've covered before where we were using the larger scalable method.<br>
This is again just for demonstrative purposes.<br>
We have Flask imported there.<br>
We have the app being defined.<br>
We have an index route created and we just run it.<br>
Okay, and that's it.<br>
We then have a templates folder with an index.html file and simply in there we have a title and h1 header that says my test Heroku index page.<br>
That's all we want.<br>
I'm not getting complicated because we want to keep this simple.<br>
We're focusing on the actual deployment The virtual environment is here.<br>
I have not installed anything yet.<br>
The only dependency we need for this script to run locally is Flask.<br>
So we will install that and as I alluded to, that is to run locally.<br>
So lets clear that out.<br>
If we want to run this on the Heroku servers we actually need a little more.<br>
What we need to install is a Python Web Server that is designed for UNIX based operating systems and this is what Heroku runs on their end.<br>
So for Flask to run we need to install the web server and the web server that we're going to install is called Gunicorn.<br>
Okay?<br>
So we'll go pip install gunicorn.<br>
and now that that's installed we simply just need to pipe everything into our requirements.txt file, like we normally do.<br>
What Heroku does is it will consult that requirements.txt file and on the server end will then install all of the dependencies that you need to run your application.<br>
So we'll do pip that's not it pip freeze into requirements.txt.<br>
And if we kept that file we have everything required for Flask and we have Gunicorn.<br>
Now, we are ready to start pushing some code.<br>
So to do that we need to actually initialize our directory as a Git repository and we can simply do that by just doing Git init.<br>
So let's deactivate our virtual environment and store a Git init in this folder.<br>
and now that that's initialized we can do an ls -al.<br>
You see we have a .git file there so this is all ready to go.<br>
And this will make sure that this folder itself is recognized as its own repository.<br>
And with our directory initialized as it Git Repo we are now free to create our Heroku app which we will do in the next video.
|
|
|
show
|
7:39 |
Time for some fun.<br>
Now to create the actual Heroku application.<br>
This is the one that you could have created in one of the first videos where you had the web GUI and you could have clicked that button we're going to do it over the command line 'cause that's awesome, but one thing to keep in mind is that the app name needs to be unique.<br>
This is going to be a unique URL with the Heroku domain added on to it.<br>
So you have to give this some thought.<br>
What I'm going to type here, you can't copy to follow along.<br>
So let's come up with something interesting I will try throwing pybites in front of it which should actually give me something unique.<br>
So let's go Heroku create, pybites100days.<br>
Now let's just try that and hopefully this will work.<br>
Says it's creating it, done, bingo.<br>
That's what it looks like if your app was unique.<br>
If your app name was unique and it actually worked.<br>
Clearly I've tried this before recording and I came up with something that was not unique.<br>
That's why I'm laughing.<br>
Now if we actually browse to this URL which I'm not going to do because there's nothing there to see yet we would see our website, we would see everything that's stored in the Git repository for this app.<br>
Now, we initialized our local folder as a Git repository but we haven't pushed that code off to the Heroku cloud.<br>
We will do that in just a second.<br>
To see that we are going to be pushing our code to that we can actually use the Git remote command.<br>
So git remote -v and it tells us that we are pushing it to this URL here this Git repo here, which matches what we put up here.<br>
So perfect, we know we're going to be pushing our code to that correct place.<br>
Now, how do we push the code?<br>
We use our standard Git commands we can go git add.<br>
ignore those Windows messages and then we can do a git commit.<br>
And this will be our first commit of our code to the repo we can put that in the message, like so.<br>
Git commit -m "our first push of code" to Heroku excellent.<br>
And we'll commit that, and now we can push it.<br>
So, git push heroku master.<br>
And that's it, you've just pushed your code to the repo.<br>
It should end, if everything was successful with verifying deploy done to https and your Git repo.<br>
You would've seen all of those packages installed that you had in your requirements.txt file.<br>
Now obviously with the magic of editing I have skipped through all of this, but you would have noticed that this took quite some time to install.<br>
And to actually upload, so.<br>
Now that we've been patient, and we've seen through that there's one more little thing that we need to do.<br>
And that's actually tell Heroku how to run our app.<br>
Now, we create a file called a Procfile.<br>
And all it does is simply tell Gunicorn, that's the web server what script to run, what file to run how to run our application.<br>
In our directory we have an app.py file.<br>
Now that's the script that runs our app.<br>
So we need to put in our Procfile that that's the name of the application.<br>
So, vim Procfile, just create this in the parent directory so where your applications run from.<br>
So vim Procfile, and in this file all you need to run is web: Gunicorn so this is saying that we're using Gunicorn for our web server.<br>
And app is our app.<br>
Now which app is which?<br>
The app on the left hand side of the colon is the name of the file that we will be executing.<br>
So if the name of our application was let's call it, if it was, julian.py we would run our application as web Gunicorn julian app.<br>
But in this case our app is named app.py so let's keep it as app:app.<br>
That's all we need to put in there.<br>
Let's save the file.<br>
And last but not least we have a runtime file that we sort of don't have to put in but it's probably a good practice to do.<br>
This file runtime.txt will simply tell Heroku what version of Python we want to run.<br>
This is important if your app obviously has dependencies on the version of Python.<br>
Now, as I mentioned before, Heroku does have Python 3.7.<br>
So you can simply put in Python 3.7 in there for the sake of this you can actually specify whatever you want.<br>
So I can do 3.6.0 because that's the version of Python I'm running at the moment.<br>
Right, that's that.<br>
All we have to do now is actually push that code off to Heroku again.<br>
And that's done in the same fashion, let's do that quickly.<br>
git add.<br>
git commit -m and we'll say Procfile and runtime file.<br>
And then git push heroku master.<br>
And with the code up there, it's time to run the app.<br>
Let's just clear all of this out.<br>
For our app to run, we need to tell Heroku to run it.<br>
And we do this by spinning up what they call a dyno.<br>
It's pretty much, if you've worked with AWS before it's an instance of our application.<br>
Now on the free tier, we can only have a couple of these running at a time, so this won't matter if this is the first time you've done this.<br>
So we'll do heroku ps scale we want our dyno to be scalable.<br>
And we want web=1.<br>
And what the one indicates is that we only want our dyno or our application instance, to scale to one dyno.<br>
And we're limiting that just because we're on the free tier.<br>
Once we have that we can hit enter and this will actually spin up our dyno for us scaling, done, now running web at one free.<br>
And the exciting part is we now open it.<br>
We do Heroku open and this will open a web browser to our application.<br>
And there it is.<br>
pybites100days.herokuapp.com, my test Heroku index page.<br>
Everything that was in the index.html file.<br>
Perfect, you've just deployed your first app to Heroku.<br>
So exciting, be proud of yourself.<br>
And now think of all the wonderful possibilities ahead of you.
|
|
|
show
|
3:53 |
We have our app pybites100days.<br>
Hopefully, you enjoyed getting a basic app into the Heroku cloud and seeing your app come to life in the web browser.<br>
It's pretty cool, right?<br>
Out on the internet.<br>
One of the things that will come up eventually as you start to do this more and more is you'll need some more advanced functionality from Heroku itself.<br>
And to get that, Heroku actually provides a series of add-ons.<br>
There's actually heaps of them.<br>
So let's have a quick look at the list before we jump into a couple and see what we have.<br>
So just click on the actual app and on the left the first thing you'll see is installed add-ons.<br>
Now, why does it have the zero dollars a month?<br>
Because the add-ons actually run in dynos.<br>
Not all of them, but most of them.<br>
So what we have here is this app is using free dynos so our app, pybites100days is using the free tier, essentially.<br>
Nothing we do here is going to cost money.<br>
But the add-ons, they may actually do that.<br>
So let's first go into configure add-ons before we jump ahead, and we can click on find more add-ons.<br>
On this screen here, you would see any add-ons you have already installed for your app.<br>
As you can see here, there are no add-ons for this app.<br>
So let's click on find some.<br>
That'll open up elements.heroku.com/addons And straight-away here, look at this gigantic list.<br>
So everything is organized in categories here on the left.<br>
And we can then go straight through, and you'll find pretty much add-ons for anything you can thing of.<br>
And if you can't, well then, you can suggest some.<br>
You can actually send feedback to Heroku and ask them to create something for you.<br>
So popping through this list, there are too many here to name, I'm not going to bother.<br>
What I will show you is the one we are going to touch on in the next video, and that is Heroku Scheduler.<br>
And this is essentially, if you're familiar with Lynux or Unix, this is essentially Cron.<br>
This is something that will run a scheduled task every ten minutes, every hour, or every day.<br>
When we click on this Heroku scheduler we can then go through and get some detail on what it does.<br>
And, as they say, this will actually run through a Heroku dyno, so may potentially add some cost to your account.<br>
Now, what we're doing shouldn't do that, but just in case if you would click this install Heroku Scheduler button you will notice that it's actually going to ask us to enter our credit card details, a payment method.<br>
So first, let's add the app to Provision 2.<br>
There's our app pybites100days which using the free add-on plan.<br>
Okay, it wants to add that to our pybites100days app.<br>
And then we click on Provision add-on.<br>
And we'll get this pop-up here that says please verify your account to install the add-on.<br>
And the definition of verify means enter a credit card.<br>
And again, that's because this can potentially cost you money, so what you should do is go through Heroku Verify.<br>
So I'm not going to do this, obviously, for privacy reasons.<br>
So, but what you should do is go through, edit your credit card number.<br>
You will not be charged for really basic stuff here.<br>
This is talking about excessive use.<br>
So just pop that in here and continue forward and we'll have a look at the Heroku Scheduler in the next video.
|
|
|
show
|
2:45 |
Now that Heroku has our credit card numbers let's pop back into the app here and now we can actually canfigure out add-ons.<br>
And as we've discussed we're going to be working with Heroku Scheduler.<br>
So you can either click in Find More Add-ons to get that big list or we can simply search for it here.<br>
And there is our Heroku Scheduler there.<br>
And now when we click Provision we will actually be able to do that because we've entered the credit card.<br>
So Provision your application now.<br>
And there we have it.<br>
It's now installed so the add-on Scheduler has been installed.<br>
Check the documentation in its dev center article to get started.<br>
We're not going to bother doing that because I'm going to show you and to get started we just have to click Heroku Scheduler.<br>
That should open a pop-up which will then log you into the Scheduler.<br>
And really simply, we just have to click on Add New Job.<br>
Now, what do we type here?<br>
Now, for those of you familiar with Unix or Linux or anything you'll recognize this little dollar sign that indicates this is a shell prompt.<br>
What we are going to do here is we're going to enter in any shell command or script command that we want Heroku to run with our dyno.<br>
We have a dyno here.<br>
We're using our free tier.<br>
We can choose how often we run this script.<br>
We can do ten minutes hourly or daily.<br>
And based on a certain time, UTC.<br>
Now whenever this day-time hits whenever we meet this criteria your script is going to run.<br>
Now if you're familiar with running your own scripts which you should be at the command line you simply type in Python and then your script name without the little brackets there.<br>
But, the point is this all we're doing.<br>
We're telling Heroku now you run this on our behalf.<br>
This would save us having to log in and run this every day at a certain time.<br>
You could use this for emailing you could use this for, you know, generating log files and saving that off to some sort of persistent database.<br>
You could do all sorts of things.<br>
And if you are a Unix buff you will, this will remind you a lot of Cron because it's pretty much a Cron job that we're running here.<br>
Now in the next video what I'm going to do is I'm going to show you how to automate sending an email through Heroku.<br>
I won't walk you through too much of the email script because that's not the topic here but we will go through it very basically and we will send ourselves an email or scheduled using Heroku Scheduler.
|
|
|
show
|
6:25 |
Let's take a look at how you send an email using the Heroku Scheduler.<br>
If I look in this folder here I have emailer.py.<br>
This is a script I've just quickly banged together using SMTPlib.<br>
We'll look at that really quickly.<br>
I'll run you through it, I won't explain this too much because this is stuff we've covered before in previous courses and multiple articles but the gist of it is we're using Gmail.<br>
We're using the SMTP server from Gmail.<br>
We're using smtplib which is imported from the standard library, we then start TLS and we login into our SMTP server.<br>
Now this is the tricky part that you will customize for yourself, hopefully you have a Gmail so you can follow along.<br>
You need to get your email address.<br>
That is what goes here in the first section of this command, and then you need your application password, this is something you can get from your Gmail account when you go on to the Developers section.<br>
So grab that and pop that in here.<br>
And then in your actual sendmail section this is where you create your message to send.<br>
And in this case, the first field here is for your actual email that you're sending from.<br>
The second field is for the email you're sending to.<br>
In this case pybitesblog@gmail.com and finally it is your actual subject plus message.<br>
So we are changing the subject to subject.<br>
Hello from Heroku, we have a new line to say that we're now dropping down to the message.<br>
Test email from Heroku, cheers, Julian.<br>
And then we close out SMTP server connection with a quit.<br>
And that's it, this is a really simple script to send an email, and what we now have to do is plug this into Heroku and use the Scheduler to automatically run the script.<br>
And with my data in there we can actually test this script before we push the code up to Heroku.<br>
Obviously, we can test it running just Python emailer.py but what we want to do is we want to simulate this actually being run from Heroku and this is the equivalent of the command that Heroku Scheduler will run when we enter it in there.<br>
We can actually type in Heroku Run because we're telling Heroku to run something and what we want it to do is we want it to run the Python command that we were going to execute locally.<br>
So again, if we were executing Python emailer.py that would be running it locally.<br>
Now we're telling Heroku to run the actual script from its end but obviously this is not going to run because this script does not exist on the Heroku server end yet, so let's push that up now to git add, git commit Emailer script addition, and we do a get push Heroku master and the code goes up.<br>
And with the code pushed up, now we can run accurate commands so Heroku run Python emailer.py and now see how it's telling us that we're actually running that on the pybites100days dyno so let's span up our dyno, which means it's counting toward our free dyno hours.<br>
That's why we had to enter our credit card.<br>
And let's run the script, now if I go to my actual PyBites email I will have an email from myself saying hey, hello from Heroku, and there you go.<br>
Test email from Heroku, cheers, Julian.<br>
Kind of weird getting an email from myself.<br>
So we can close that off and pop back in here and now we know that by running that Python emailer.py script or that line that shell command, that we are actually going to send the email, and we know the script works so now if we pop back into Heroku Scheduler the web GUI, we can click Add New Job and we simply type in that same command.<br>
Emailer.py, the reason we're not typing in Heroku Run is because that was something required for the command line and by running it here, it is already assumed that Heroku Run is being run in the background, now, dyno Size we're going to keep that as free.<br>
We don't want to charge you any money yet and frequency, this is where you set up how often you want it to run, as I said.<br>
You can have it run every ten minutes and it tells you when it's going to be run next.<br>
UTC Time, so at 11:35 UTC Time March 18th this will send me another email.<br>
Now obviously in this instance I'm going to need to turn this off because I don't want to get an email from myself every ten minutes, but you can get the gist of it, you can see where this is going, right, so this is where you do it, you set it up and you click on save, and then you'll now see this little job located here.<br>
Now when this runs again, so this now has changed to 11:42, and when this runs again, we will see it in the last run field here, and then we'll see another next due line here, and we let a little bit of time pass, we refresh the page now and there you go, last run March 18th, 11:42 and the next due is March 18th, 11:52 UTC and again if I head back to my email there you go, one from 10 minutes ago when we first sent it and one from one minute ago.<br>
You can see the time difference there.<br>
So that is Heroku Scheduler, you can pretty much automate anything, just anything that is in a script send it out and there you go, you can make log files, you can write to databases, you can send text messages, send emails.<br>
Anything you can really think of that can be spun up in a quick dyno achieved and sent and ran, whatever you want to call it, and then complete, close off.<br>
So single run scripts, and that's Heroku Scheduler.<br>
Let's take a look at another one.
|
|
|
show
|
3:45 |
While we're on the topic of email let's look at another add-on for Heroku called SendGrid.<br>
This is a really simple add-on, it's just sending emails but in a much more structured way than the Gmail way we looked at prior.<br>
This is actually more of a marketing thing so something very useful if you have your own little business or webstore or blog, whatever.<br>
What'd I'd like you to do is in the add-on section search for SendGrid and you'll see it there SendGrid right there.<br>
Install that, use the free tier, the free provision and then, you'll get your little button down here for SendGrid.<br>
Click on that.<br>
This will actually log you into SendGrid itself so it sort of redirects you away from Heroku.<br>
But the special thing is that it takes your Heroku app that you've created and uses that app and the login details that you've used for Heroku to create a sort of account on SendGrid and that's what you use to send your emails.<br>
You don't actually need to configure anything else.<br>
What you can then do, on the left is scroll down to settings, expand that out click on API keys, and then, create an API key.<br>
On this screen, the first thing we want to do is click on API key name here and throw it a name.<br>
Just come up with something random we can call it SendGrid test and then, we are going to click on full access.<br>
Now, full access allows this API key or anything using this key to get full access to the account.<br>
We don't care about that just for now.<br>
You can look into the restricted access that you may want later.<br>
For now, just to demonstrate we are going to use the full access.<br>
And scroll down and then, click on create and view.<br>
When you get your API key make sure you save it somewhere secure and that's why I'm not clicking the button now.<br>
Once you have it, save it because we are going to use that in the next video.<br>
Before we finish this video we'll bring up our actual code here our little repository of our app and we're going to launch the virtual environment and then, we're going to pip install SendGrid.<br>
And what we need to do is actual we need to push this install of SendGrid this package up to Heroku, so pip install sendgrid.<br>
And then, we can just put that into requirements so delete the existing requirements just to make it easier.<br>
pip freeze > requirements.txt.<br>
We can cap that.<br>
And there we have SendGrid in there.<br>
And with that done, we can then do our git add.<br>
Let's just deactivate just to be sure.<br>
Git add .<br>
git commit.<br>
pip install sendgrid.<br>
And then, we can do a git push Heroku master and that will push the SendGrid files off to our Heroku diner, to our little repository in Heroku.<br>
And then, in the next video, we can actually get coding.<br>
There's not too much to the code, it's quite simple.<br>
And then, we can send an email using SendGrid.
|
|
|
show
|
6:23 |
With SendGrid imported into Heroku into our repo up there, let's actually go ahead and create the script.<br>
So this is the script that's actually going to use SendGrid itself to send our emails.<br>
And when you take a look at this you'll be able to see just how this could be changed to suit many different purposes.<br>
So let's create the script now called Sendgrid emailer.py and we need to start with import send grid, obviously.<br>
That's all we really need to import from Python rather than email or mime or anything like that and we just need to import from SendGrid helpers.mail.<br>
We're importing email, we're importing content and we're importing mail.<br>
As you can imagine, we are going to need our api key to do anything, so let's set that up first.<br>
We use the same type of syntax the SendGrid documentation uses, why differ?<br>
And we'll go sendgrid equals or is sendgrid.sendgrid.api client.<br>
This is all straight from the docs nothing special, api key.<br>
And in this space, between two apostrophes there that's where we actually put the api key.<br>
So the one that you saved when you set up your SendGrid account, put that in there and you should be golden.<br>
Now, here's where we set up our email.<br>
So we have a from email address and we then hook that up in email here.<br>
Now, I'm using test@example.com if that'll allow me to send the test email.<br>
You can set in whatever you want.<br>
Subject.<br>
I'm going something a little more with a theme because I can't wait for Game of Thrones!<br>
And then we go to two email, and this is where you simply chuck in whoever you want to send this email to.<br>
As you can imagine, as your product or whatever it is you're using here this SendGrid add-on for, you can put in a list you can put in multiple email addresses it doesn't just have to be one.<br>
I'm going to use the PyBites blog email that we used to set up Heroku.<br>
Oops, just close that off.<br>
And then we throw in some content.<br>
And you can do whatever you want with this content.<br>
I'm going with plain text.<br>
And then I'm entering in my actual content.<br>
So text, plain, and the string I'm going to put in there with a little lame, terrible joke.<br>
And that's it.<br>
Next, we set up mail.<br>
So this is where we take all three of these things or sorry, I should say all four of these things from email subject to email and content and we put it all together into a mail object.<br>
So from email, subject to email and content.<br>
And then we do our response.<br>
This is where it all gets sent off and pushed off or posted, I should say, to SendGrid itself.<br>
So sg.client.mail.send.post.<br>
There's a lot of dots there.<br>
Request body equals mail.get.<br>
And again, I will repeat, this is just straight from the SendGrid documentation.<br>
Now, for local purposes, we probably want to print some response codes, just to show that this has happened and if this has worked or if it's failed we'll see it here.<br>
If you want to actually collect these codes you would probably pipe them out to a file that would then be stored in some sort of database or persistent database.<br>
So response.body print response.headers.<br>
This is all recommended from the docs.<br>
And that's our script.<br>
So we can run that locally.<br>
I'm going to save it and quit it here.<br>
If I just save it for now and I will enter my api key when the video's not recording.<br>
And with the api key entered, let's just list this out we'll launch the virtual environment, already launched and we have SendGrid installed, pip installed so now we can run Python sendgrid emailer.py.<br>
And that will actually send the email.<br>
The way it works is this will actually send the post of this message through to the SendGrid service and they will then push it out.<br>
So, once this is sent out, once we've got this response here, we can then go to our actual SendGrid page and we can see whether this email has been sent.<br>
So let's check that now.<br>
And there's SendGrid there, we've launched that it tells us hello sender, here's your recent email activity.<br>
We popped down and left here to activity and we can see the emails that were sent.<br>
Once it loads, just look for the timestamp because you probably will see quite a few of these over time.<br>
You can see this one here, 5:25 am.<br>
That's not actually the time here it's just the time zone I have set I haven't configured it.<br>
And delivered 5:26.<br>
So within one minute of processing our script request or our post request, it then sent the email to the PyBite's blog Gmail account.<br>
And we can bring that up now and have a look at that as well.<br>
And there it is!<br>
Winter is coming and the lame joke which I won't repeat out loud, out of self-respect.<br>
And we can see it came from test@example.com and was delivered to PyBites blog plus 100 Days.<br>
And that is SendGrid; it's actually really simple, isn't it?
|
|
|
show
|
2:53 |
And that was a couple of days of Heroku deployment.<br>
Nothing too intense, I hope.<br>
This one's intentionally a bit easier just to give you a break.<br>
Which I hope you appreciate.<br>
But moving onto what we covered This is just a simple overview list of how we deployed our first Heroku app and we did that by first downloading and installing the Heroku CLI.<br>
So I'll breeze through these quite quickly.<br>
We then initialized a directory of our app as a git repository so we could push that code up to Heroku.<br>
We pip installed the gunicorn web server we created our requirements.txt file this had all of the dependencies that our app needs in order to run and we can push that up to Heroku.<br>
We then created the actual Heroku app.<br>
This is the sort of URL that our app is going to use and it was Heroku create app name that we used to make that.<br>
We created the proc file which told Heroku how to launch our app.<br>
We created the runtime.txt file which specified the Python version we were running.<br>
And when we were done, we committed and pushed the code to Heroku.<br>
That was pretty much it.<br>
Really simple process, once you've done it once or twice you should be able to get this down pretty quickly so not too complicated there.<br>
And skipping over the actual Heroku scheduler, just because that was pretty straightforward, it was as simple as just putting your script name into that line and running it.<br>
We'll skip straight to sendgrid and with the sendgrid script, we just imported the modules.<br>
That's how we began.<br>
Imported email content and mail from sendgrid.<br>
Then we defined the sendgrid API key.<br>
So that was super important.<br>
This is what links our script back to that sendgrid account.<br>
Then, we populated all of those required fields to make the email.<br>
So we had our from email, we had our subject to email and content that had everything we needed.<br>
We used test@example.com to send the email from and then you can put in whatever you want for the to email.<br>
Then we packaged it all up into our little mail component there and we used the mail object to send it off to sendgrid self, and they then forwarded it off to your recipient.<br>
And that's it, that was Heroku.<br>
Nice and simple.<br>
Really simple way to get some apps in the cloud and a couple of simple plugins that should make your life a lot easier.<br>
So I hope you had fun.<br>
Keep calm, and code in Python.
|
|
|
|
42:39 |
|
|
show
|
2:00 |
Hello, and welcome back to the 100 Days of Web in Python, day 69.<br>
You're almost 70% done, keep on going.<br>
The coming four days, we're going to look at Django REST framework, which is an awesome framework which makes it very easy to build API's for Django.<br>
Some reasons you want to use Django REST framework it has a great web browsable API, a very nice front end which we will see in this chapter, it's easy to implement authentication, serialization in just a few lines of code to get your ORM data into JSON, common format for API's.<br>
Just like Python, it's easy to get started but it has very robust customizations, great documentation and it's used by some very big players like Mozilla Redhat, Heroko, and EventBrite.<br>
So what's the plan for the coming four days?<br>
We're going to build an API using the quotes app we have been building in the previous Django lessons.<br>
So we get our virtual environment setup and our dependencies installed.<br>
Syncing the database.<br>
It will be empty, so we're going to build a Django admin command to parse a CSV file to import some quotes to have some data.<br>
Then we're going to build an API with Django that fully supports CRUD operations, so read create, update, delete.<br>
We're going to lock down permissions, we are going to work with two users, and we will see that users cannot edit quotes from each other.<br>
We take a brief look at schema and documentation generation and for documentation we will use Swagger, and day three and four will be your turn to put into practice what you've learned and you will build your own API.<br>
So let's get started.
|
|
|
show
|
5:02 |
Alright, let's get started.<br>
Let's get our Quotes app up and running to build it out with an API.<br>
In this day's lesson, I included a starter_code.zip file so you can just download that.<br>
I'm already extracting it so just going to move this extracted zip file into Quotes new directory inside Quotes near my Quotes app.<br>
So the first thing I'm going to do is to create the virtual environment and I have an alias for that just to check I'm using Python 3.7.<br>
So I'm going to create the virtual environment and I'm not going to activate it yet cause I see I have some environment variables that I have to set.<br>
So, let's copy this over.<br>
Get into the virtual environment.<br>
Go to the end.<br>
And I'm going to set those 2 variables.<br>
SendGrid I'm not going to bother with and you're not going to use E-mail for this lesson.<br>
And SECRET_KEY, you can just use an random text string and we're going to set the debug=True.<br>
You'll want to do that at production, but we want to do that here to catch any errors while we're in development.<br>
Then, I'm going to activate virtual environments which I have an alias for ae.<br>
If you're working in a Shell, it's very convenient to have these aliases.<br>
Because typically, you'll be creating virtual environments and activating them all the time.<br>
So at this point, we don't have the requirements installed.<br>
So look what we have and I already put in the Django REST Framework in there.<br>
Registration from the last lesson so I can just pip install -r requirements.txt.<br>
Right, you have the dependency to install and now we can see Django server response and as we've seen in previous lessons.<br>
We get a message that we have 20 Unapplied Migrations.<br>
So Django looks into our source code, sees all of these migrations that are not in our database.<br>
So that's actually the first step to get that database synced.<br>
And we'll just migrate and that syncs all of the migrations from our source folder into the database.<br>
And we're just using SQLite.<br>
So this SQLite file base database has just been created.<br>
You can see that.<br>
You're going to find and to open this with DB Browser.<br>
I can just load this in and here we have all the tables these come with Django.<br>
And we have our own Quotes model that you'll remember from the previous lesson.<br>
And that's actually the only customized model we have.<br>
And we're going to turn this into an API.<br>
Let's see if we can get to the server.<br>
Go to my browser.<br>
localhost.<br>
And there you go.<br>
Last thing we need is the User.<br>
manage.py has another switch to create a Super User and it's called Create Super User.<br>
So it's called pybites for now.<br>
And I have User and I can now login to run the server again of course.<br>
Let's actually do this in a separate terminal.<br>
This will bite me again.<br>
Let's enable the virtual environment.<br>
Let's have the server running second terminal.<br>
Just very convenient in developing.<br>
So I can login with the Super User and that's all done.<br>
As you see there's no data in here.<br>
So in the next video, we're going to make a Django Admin command.<br>
It's pretty cool like crumb jobs you can run with the manage.py utility we just used.<br>
And we're going to write one to process these CSV files with Quotes and load them into the database to have some data to work with.<br>
So see you in the next video.
|
|
|
show
|
7:54 |
All right so we have quotes set up and the next thing I'm going to do is to load in some quotes to have some data to work with.<br>
And in Django the manage.py command you can write customized scripts to run via that interface.<br>
And in this video we're going to parse a CSV file with a bunch of quotes and load them into our ORM into our quotes table.<br>
So I got this file prepared which is quote author genre and we're going to parse this with the CSV module and load them into our database.<br>
The first thing we want to do is to make the require directory structure.<br>
So in my quotes app so again this is the project root folder and every Django app has its own directory with the requires files.<br>
And in order to use Django commands we need to have a management commands folder structure.<br>
So I'll use the minus p to make that recursively then I'll cd into it and let's make a script import_quotes.py.<br>
Alright here is the code.<br>
In this is a Django REST framework lesson I'm not going to go into too much detail but just go quickly over it.<br>
So I'll do the standard library imports the external modules.<br>
We need the user model and the BaseCommand which is the class we're going to inherit from to write our own command.<br>
And we need requests and that actually is a good point because I did not have that installed because it was not in the requirements.<br>
Let's do that quickly now.<br>
Then we import the quote model.<br>
We define where the quotes.csv is.<br>
We set a default user and a default for maximum quotes.<br>
Those are actually the two arguments we can call the script with.<br>
So we give it a user to be associated with the quotes that we're importing and we define the maximum quotes we want to import 'cause in that CSV there are a lot of quotes and I just want to have 20 by default to make it manageable for our lesson.<br>
Two rules, the new command has to inherit from BaseCommand and it needs to override the handle method.<br>
And this is actually the meat of the command.<br>
So let me just explain.<br>
First we look at the quote model to see how many rows there are in the database and if it's greater than zero, we bail out because we don't want to import the quotes again.<br>
And an alternative way to do that is actually to set unique on the table on the quote column but we didn't do that so I have to kind of safeguard that here.<br>
Then we retrieve the command line arguments so username and limit and of course we check if the username is in the database and if not, we bail out.<br>
Same for the max quotes we need to make sure it's an integer and if not, we bail out.<br>
And then we will use the requests library to get the inspirational quotes which again is this CSV on my GitHub repo.<br>
We split the lines and actually split lines here so we get the text attribute on the request response object.<br>
Strip any white spaces from both sides and we split it by a new line which we too can better then doing it like this.<br>
We're going to define the headers called author and genre.<br>
And we are going to use csv.DictReader and we pass it in the lines and headers.<br>
And we say that the delimiter is not comma but semicolon.<br>
Then we make a quotes list and we loop over the reader object convert it into a list.<br>
And I do that to use slicing to get the maximum quotes.<br>
The first row is the header so I'm starting my slice at one the second row.<br>
I go up to next quotes which by default is 20.<br>
And as this is exclusive, I add one.<br>
So I take the first 20 rows after my header.<br>
So going up til row 21.<br>
Then I'm going to make a quote object in which we saw in the previous lessons the way to make objects in Django admin in the model is to define instances of classes.<br>
So here I make quote instance and I'll give a keyword arguments so the quote, author, and the user.<br>
I keep a list of quotes.<br>
I could also do quote save here.<br>
And it would be committed to the database.<br>
Another nice technique is if you have many records to insert is to do a bulk_create.<br>
So you can do a Quote.objects.bulk_create and you could give it a list of quote objects.<br>
And that's it.<br>
Then we print a message saying we create n quotes in this case 20 and that should be it.<br>
So again any logic goes into handle and any command has to inherited from BaseCommand.<br>
So let's try that out.<br>
So we use the manage.py we give it a -h.<br>
Sorry, I need to give it the command.<br>
Here we see our command line, arguments and help messages we defined.<br>
So we need the user name and a limit.<br>
Let's give it some bad data.<br>
Okay, log is not in the database as expected.<br>
Well we add that wrong 'cause we even get to the second one.<br>
So let's correct that and do limit.<br>
ABC.<br>
And we need a number let's actually do 30.<br>
And let's create a 20.<br>
That's not good.<br>
Okay.<br>
I was using the constant here and I need to use the actually variable.<br>
First of all, we can not do this again hopefully.<br>
Yup, not an empty DB, currently exiting.<br>
Perfect.<br>
Just to make sure we actually have 30 quotes let's just print the count before exiting.<br>
And we actually have 30.<br>
Yeah, that's great.<br>
Save this, run the server, go to the page, and boom.<br>
A bunch of quotes.<br>
I can of course add quote because I'm logged in as pybites.<br>
Actually going to log out.<br>
I can not add a quote, so I have to log into add quotes.<br>
Can edit them.<br>
Great.<br>
Alright, so now it's time to start building our API with Django REST framework in the next video.
|
|
|
show
|
8:06 |
Alright, so we did the Django command we imported quotes we have data in our database so we can start building our API.<br>
We also already installed Django REST framework into our virtual environment.<br>
So, let's start by building a new app.<br>
And the way to do that in Django as we saw in previous lessons is to use the startapp switch of the manage.py command.<br>
So in my root folder of the project I type startapp api.<br>
That makes a new folder or app with the standard Django files.<br>
And next, we want to make a route into the main URLs file.<br>
So at the project level in the main app, mysite and go to URLs.<br>
And I'm going to add a path here to api.<br>
And that's going to include the api.URLs file.<br>
Next, we want to set REST framework in our settings.py.<br>
So, let's distinguish them by Django native, external and own apps.<br>
And we've made api.<br>
And then to make a basic API, we need three files.<br>
URLs.py for the routes, a serializers.py to transform the ORM data into JSON and a views.py which is already there.<br>
So, let's start with the routes from Django.<br>
URLs input path from our views, import quote API view, and we still have to write that.<br>
That's next.<br>
We set URL patterns.<br>
Just a list, path and at the root of the api subdirectory.<br>
You will load in a quote, API view as_view.<br>
That's it.<br>
Next let's write the serializers.py file from rest_framework import serializers from quotes.models import Quote We're going to inherit from serializers.ModelSerializer.<br>
We call our own class, QuoteSerializer.<br>
Similar to forms, as we saw in previous lessons you can just define a couple of attributes in a meta class.<br>
And we don't have to really know much about meta classes just syntax.<br>
We just have to define the quote model and the fields we want to have in our API, which is quote, author, source, cover, and source and cover are optional fields but we should still present them as possible want to add.<br>
And user.<br>
So that's it for serializers and then we going to use that in our view.<br>
from rest_framework import generics Then we're going to load in the QuoteSerializer and we're going to need our model.<br>
And we're just going to do the listing of the quotes to start simple.<br>
So we're going to make a class-based view QuoteList inherited from generics.ListCreateAPIView And that's the nice thing that generics from the REST framework has all these classes already defined and that makes us that are view can just be two lines of code which is the query set just all the objects and the serializer class which is QuoteSerializer.<br>
So, generics gives us ListCreateAPIView which defines two attributes we need to set on our inherited class which is queryset and serializer class, query set loads all the quotes from the model.<br>
And the serializer takes care of transforming the data into compatible API format which is JSON.<br>
And that's it.<br>
So I got URLs.<br>
I got views which work with the serializer we defined.<br>
And the same as I said about views.<br>
The serializer is also very little code thanks to the abstraction in the framework.<br>
So we have serializers, a ModelSerializer.<br>
We just inherit from that.<br>
And it's all defined and we re-use all kinds of nice behaviors defined in the base class.<br>
That's really elegant.<br>
Okay, let's see if this works.<br>
Actually, this was my run server terminal, so let's go back.<br>
Okay, I got some syntax issues here in URLs.<br>
And that's because I actually call this quote list and quote list.<br>
That works.<br>
Let's, this is still the base page but if I go to my new endpoint voila, this looks nice.<br>
Look at the rich front end that Django REST ships with.<br>
And here are all my quotes.<br>
I cannot do specific quotes yet because we have not defined a second class-based view to work with details but that's what we're going to do in the next video.
|
|
|
show
|
3:40 |
All right.<br>
Now we're going to add a view to look at quotes individually.<br>
Because as we've seen this is not working yet.<br>
So let's go over to my app.<br>
And let's go into view.py.<br>
It's actually pretty awesome because in our web app we actually had to write quote detail, quote new, quote edit and quote delete views all separately.<br>
But with Django REST framework we can just write three lines of code.<br>
We can just make a class based view which we're going to call QuoteDetail and we're going to inherit from generics.RetrieveUpdateDestroyAPIView.<br>
And the code is actually the same.<br>
We need a queryset and a serializer class which are the same as in the QuoteList class based view.<br>
And the only second thing we need to do is to make a new route.<br>
So I can save this.<br>
And as we've seen in the browser we're going to reference the primary key integer in the URL.<br>
And we point out to the new class based view.<br>
All right.<br>
Let's check the this out.<br>
And look at that!<br>
Quote number two we can edit and delete.<br>
Same for four up till thirty.<br>
And add a source.<br>
We can delete the quote.<br>
It's now gone if you deleted the cache at 204 that's correct.<br>
And I can add a quote 201 for creation.<br>
Perfect.<br>
And I probably made 31.<br>
Exactly.<br>
18.<br>
Awesome.<br>
One final thing.<br>
I cannot really log out from this page.<br>
There's an easy way to support that: Adding another route.<br>
So let's got to URLs, again.<br>
And let's add REST Frameworks URLs.<br>
Hit refresh.<br>
And now I can log out.<br>
And here we see a program as well that when I'm logged out I can edit this data.<br>
So next video's all about permissions.
|
|
|
show
|
7:42 |
Just to recap, we have our Django REST API up and running.<br>
Supporting listing and supporting full CRUD by using the ListCreateAPIView and the RetrieveUpdateDestroyAPIView.<br>
Now let's move on to permissions.<br>
And we have a big problem now.<br>
As we saw in a previous video, when we logged out the quotes were still editable.<br>
Which is of course something you would never want.<br>
So we're going to lock that down.<br>
First we're going to apply the IsAuthenticatedOrReadOnly setting in our settings.py.<br>
And that makes the quotes read-only when logged out and editable when logged in.<br>
And secondly, we're going to protect the user's quotes to make them only editable to the user that's logged in and is owning the quotes.<br>
So that will look something like this that when I'm logged in as pybites I can edit my own quote but when I'm logged in as another user I cannot edit pybites' quotes.<br>
So first we look at authentication to make sure that nobody can edit stuff when not logged in.<br>
And secondly, we make sure we have authorization that ensures that we grant access to objects to the right user.<br>
All right, so let's write some code.<br>
Now first of all actually just to point out how great the documentation of the Django REST framework is there's a whole chapter on permissions and it explains exactly the levels you can use.<br>
So actually, at first I was using IsAuthenticated but that locks down the whole API and let me actually show that.<br>
So what we first want to do is go to settings and use the REST framework dictionary where you can define project-wide settings.<br>
So I'm going to copy this and I will show you first what IsAuthenticated will look like.<br>
If I refresh the page, I can not even look at quotes.<br>
So the whole API is now locked down.<br>
And it gives me a 403 saying authentication credentials were not provided.<br>
But that's not really correct right?<br>
Because, we surely want to allow users to look at quotes without editing them.<br>
And actually at the end of this page we see the different settings explained so default is AllowAny and that was the reason that everything was editable, when I was not authenticated.<br>
Now we set it to IsAuthenticated but that's kind of too strict.<br>
So it's best to go with IsAuthenticatedOrReadOnly in our case.<br>
And that will allow unauthorized users to have access to "save methods" which are get head and options.<br>
So let's change this now.<br>
And now, I can actually look at the quotes but I can not edit them.<br>
So that's the ideal setting for our API.<br>
I will log in again, I can of course edit the quotes.<br>
Now the second thing is authorization.<br>
So now we're going to make a second user.<br>
And we're going to make sure that users can edit only their own quote.<br>
So go to users, and you add a user.<br>
And let me go to the site.<br>
Log out pybites.<br>
Log in as the new user.<br>
And that's cool, I cannot edit the quotes from pybites.<br>
So let me add a quote of myself.<br>
And I can only edit my own quote at the frontend we implemented this well.<br>
Not so much in the API, because if I go to quote list, I go to my new quote which I think is 33, 'cause I've been doing some adds and deletes before.<br>
So the primary key is at 33 now I'm logged in as bob, I can edit my own quote.<br>
So that's good.<br>
But if I log in as pybites I can also edit that quote, and that's not good.<br>
So we need to lock down the detail view to be editable only by the user that owns the quote.<br>
And the way you can do that is to write your own custom permissions.<br>
And they actually provide an example here which we're going to use.<br>
And it's called IsOwnerOrReadOnly.<br>
So we can, in our API app we can make a permissions file.<br>
And we can use this permission so we do have to import permissions Let's customize this a bit.<br>
So if it's a save method like get head or options then I return true.<br>
I can always access that.<br>
However, if it's something that potentially destroys it so if it's a request to edit the quote I'm going to match the user of the quote with the user that's making a request.<br>
And here it's using owner but in our model that's actually called user.<br>
So we have to use...<br>
We have to match this field.<br>
So the user field we define that as user.<br>
So we have to use the user attribute.<br>
So we match the user of the quote with the user that's making the request.<br>
If those match, this results in true.<br>
Give access to added.<br>
Otherwise we don't.<br>
Now the second thing we need to do is to reference this new permission in our view.<br>
So I'm going to import it, at the top.<br>
And I'm going to use it in the detail view that has that update and destroy capability.<br>
So I want to lock this down.<br>
And I'm going to define permission classes.<br>
Which is a pre-defined attribute.<br>
On the REST framework.<br>
And that requires a tuple of the permission we just defined and that should be it.<br>
Let's try that out.<br>
And there you go.<br>
It's now locked down.<br>
I'm not able to edit quotes of bob.<br>
But I'm able to edit my own stuff.<br>
Yeah.<br>
On the other hand if I log out and log in as bob I'm not able to edit pybites' quote.<br>
But I'm able to edit my own quote.<br>
Perfect.<br>
So as we've seen, with very little code we have been able to implement authentication.<br>
Supporting read-only access to locked out users.<br>
And also authorization to protect quotes from being editable to users that do not own the quotes.<br>
And again, Django REST framework makes it very easy to set this up with very little code.<br>
In the next video we're going to look at making beautiful documentation with the Django REST Swagger plugin.
|
|
|
show
|
5:16 |
Alright, we're coming to the end of this chapter and a final topic I want to briefly discuss is API documentation.<br>
And there's a whole documentation section on the Django REST framework page and looking through this there are a couple of plugins you can use and one of those is Swagger which, let me see here.<br>
First of all the definition, Swagger's a powerful yet easy to use suite of API developer tools and you can check it out at swagger.io.<br>
Here in the REST documentation I found this plugin Django REST Swagger and it's pretty neat so let's go with that for now and look at the nice interface that it should give us.<br>
And the set up was very easy so I went to the README on GitHub and we just have to click install it.<br>
So let's do that first.<br>
Then we just add it to our installed apps in our settings.<br>
And then to use it, we just have set up a route and to define and get Swagger view.<br>
So in our URLs.py or for our API app.<br>
So first we import get Swagger view then we need to define the Schema view and let's give it appropriate title.<br>
And then we can just set the URL.<br>
And let's make a endpoint called Docs that points to the Schema view.<br>
Now going through that endpoint, look at that.<br>
Looks very nice.<br>
And get all the endpoints, I can try them out.<br>
You get all my quotes.<br>
I can get a individual quote.<br>
It's a new one we just added in the last video.<br>
I can delete a quote.<br>
Actually I cannot because I'm not logged in so I can start a session and let's try that deletion again.<br>
And I got a 204, which means the quote is not longer there.<br>
Great.<br>
Now one final thing.<br>
As this is a video on documentation and you might be thinking, where's the actual documentation?<br>
This is looking pretty bare-bones.<br>
Another great feature of the Django REST framework is that it's smart about how you structure your commands.<br>
So if you go into a class-based view which we have two of and you structure it by API methods.<br>
So get post, retrieve, list et cetera.<br>
The internal mechanics knows how to structure that and the Swagger plugin then knows how to filter that and put the right command in the right place here.<br>
So let's actually show that and I already have some documentation on my clip board.<br>
So on the list, create API view we can have a get method that gets all the quotes.<br>
Or we can do a post of an awesome new quote.<br>
And on the detail view we can have get of an individual quote an update or put of an existing quote or a deletion of a single quote.<br>
So structuring our docstrings like this like how it's recommended in the documentation.<br>
Look at what happens to the Swagger UI.<br>
So let's save this.<br>
Refresh this.<br>
And look at that.<br>
Cool, right?<br>
So the list view extracted these two commands and the second detail view extracted those three commands.<br>
Return, update, and delete.<br>
Return, update, delete.<br>
And return and create, return and create.<br>
So again, Django REST framework and its plugins are pretty smart and elegant.<br>
And I think that's a nice way to wrap up this video on Swagger documentation and this chapter on Django REST framework.<br>
So this concludes the video content of this chapter and starting tomorrow you're going to get practical and implement your own API.
|
|
|
show
|
2:59 |
Awesome.<br>
You made it to the end of the video content of this chapter.<br>
And we learned a lot, right?<br>
I mean, we met our API, we supported full CRUD we looked at permissions, both authentication and authorization and we even looked at the Django REST Framework package to support documentation.<br>
So, it was a lot to take in and I really hoped that you followed along with the demo code to get the most out of it.<br>
Now, for the remaining two days I encourage you to practice as much as you can yourself build your own API.<br>
As we are at day sixty nine you probably already made your own web app during this course.<br>
So, now would be a good time to turn it into an API.<br>
If you don't have data, I recommend looking into Macaroon.<br>
It's this site that makes it very easy to generate remnant data.<br>
And if you still like inspiration or you want to submit your work to PyBites I recommend you log in to our code challenge platform at codechallenge.es and head over to PyBites challenges.<br>
Look for Django, we have a couple of Django co-challenges and the one I'm looking at here is thirty-four.<br>
Fill this API with Djano REST Framework.<br>
And here we give some additional ideas of APIs you can build and we also provide get instructions to pull down a repo make your own branch, and pull request work against our community branch.<br>
And the community branch we used to merge all the community contributions and it's quite a repo lot of code that has been written by our community for our code challenges.<br>
So that's pretty exciting.<br>
And if you submit your work through our platform we will make an effort to look at that code and possible give you suggestions.<br>
Yeah, that's totally optional as an add-on.<br>
It's just some extra ideas if you like inspiration.<br>
And the whole point again is to get as much practice as you can to really drive the points home that you learned throughout this lesson.<br>
And finally, you should be really proud when you make your apps, and book progress throughout this course so when you do, please share out your progress to your Facebook or your favorite social media using hashtag hundred days of web and consider including us so we get a notification and we can look at your work and share it with our following as well.<br>
With that said, good luck, have a lot of fun and really practice a lot because APIs are an important skill.<br>
They're all over the place, so really make use of this time to master Django Rest Framework.
|
|
|
|
42:27 |
|
|
show
|
0:45 |
Welcome back to the next set of Four Days.<br>
We are going to look at web scraping, a very well-loved and well-hated aspect of Python programming, but it's something we all have to do at some point.<br>
So, for the next couple of days, we will look at Beautiful Soup 4, probably the easiest web scraping method for Python.<br>
And then we will actually look at quite interesting package or library called Newspaper 3K.<br>
I won't go into too much detail on that just now, you're going to have to wait for that day.<br>
Don't Google it, don't ruin the surprise.<br>
Let's move on to our next video, the ReadMe, and then we'll get cracking on some Beautiful Soup 4 code.<br>
Excellent, let's do it.
|
|
|
show
|
3:56 |
Let's have a quick look at what we'll be learning over the next four days on web scraping.<br>
The first two days will be spent on Beautiful Soup 4 and we'll be looking at a simplistic way of scraping the Talk Python course listing page.<br>
This is to get you into web scraping.<br>
This is a very important aspect of Python coding we all end up having to do it.<br>
So just enjoy the first day, doing the videos three to five and then following along with the content.<br>
At the end of day one you can try your hand at scraping additional data from the Talk Python page.<br>
Don't go too far into it, just have a play try and keep it relaxed, have a bit of fun.<br>
Now day two, this is where I want you to dive deep except what I want you to do is go and find your own websites to scrape, so not anything that we cover in this I want you to go and look at something like steam powered so for steam games, look up any used websites you can think of look up any blogs, you can look at Pybites, you can look at GitHub, you can look at Talk Python, anything else that isn't the exact page that we've been looking at.<br>
Go ahead and scrape them and try and apply what you've learnt in day one and apply it to those websites to pull down things like the title, pull down content based on tags and so on and so forth.<br>
That should keep you covered for the first two days.<br>
Now on days three and four we are going to look at Newspaper3K.<br>
I won't go into too much detail on what that is but it's essentially a web scraping tool that allows you to specify a newspaper article online like a news article and scrape from that.<br>
Go through the videos on your third day so the first day of Newspaper3K, day three of this chapter, go through the video six to eight to finish off the course and once you've finished those videos just have a play again, practice on other news articles, practice on the same articles that we looked at, just find your rhythm of learning this tool.<br>
Day four, this is something really complex and I'm really looking forward to seeing what people come up with.<br>
At this point in the 100 days of web course you'll have had exposure to a lot of Flask so I would like you to go to this newspaper demo Heroku app that you see there on your screen now.<br>
We demonstrate that in day three, go and have a look at that and I want you to try and reproduce that page using the Flask skills that you've already learned in this course.<br>
So this is something that's really important with web scraping, it's easy to scrape data, it's something really easy to, you can learn that very quickly.<br>
It's what you do with that data that makes web scraping special and really takes it into its own.<br>
So I want you to take Newspaper3K and I want you to scrape articles, that's fine, but I want you to put that functionality into a Flask app just like that Heroku app demo that you see there.<br>
So that's going to need a few extra little bits of effort looking at the tips there you're just using the parsing from Newspaper3K, the authors, the published date, the text the image and you're just getting those to be presented on a webpage.<br>
So how you do that is up to you.<br>
You can have it all work on one page or you can have it redirect to a new page every time it scrapes.<br>
Either way don't get distracted by the HTML and the CSS.<br>
It doesn't have to look pretty, it can look like a dogs' breakfast that's fine, all we're looking for here is the functionality of the Newspaper3K mixed with some Flask to get it as a usable app.<br>
So that's it, that's days one to four of Newspaper3K and Beautiful Soup 4 for web scraping.<br>
Enjoy.
|
|
|
show
|
2:27 |
We'll do a quick, simple setup video here quick overview of what we're going to do.<br>
Python -m, venv venv inside a new directory six-webscraping.<br>
This is within our 100 Days of Web projects folder that we've been using to date.<br>
Now, once you've got your virtual environment installed go ahead and launch it.<br>
Get it going, and then we're going to pip install the two modules we're going to use.<br>
We're going to use bs4, which is Beautiful Soup 4 and then we're going to install the requests library as well.<br>
These two are required to web scrape.<br>
Requests will pull down the website and bs4 will parse it for us.<br>
Right, there we go.<br>
And next up, before we actually do anything let's take a look at the website I'd like you to scrape for this day.<br>
We're going to actually scrape the training.talkpython.fm course's webpage.<br>
So, what the intent is, is to show you this is what the website looks like on the front end and then we're going to scrape it pull it down, and pull out specific bits from this page.<br>
If you right click on your page and click on a view page source it will open up a new tab and you'll be able to see all of the HTML.<br>
Now, we're really lucky Mike has made this a really simple website to scrape.<br>
It's nice and neat, nice and tidy.<br>
I really like it, that's why I've chosen it to teach you bs4.<br>
Open up a view source.<br>
Also of use to you is to click on inspect when you right click on the page and that will open up a little inspect window here where, when you mouse over the code your HTML, it actually highlights it on the screen so if we hover over the div here we can see that that is actually containing our h1 tag and that says online video courses at Talk Python Training.<br>
That's where I'm going to leave this video.<br>
Get yourself your browser set up.<br>
I'm using Chrome, obviously, but you can do this with any other browser.<br>
Firefox is just fine.<br>
So get yourself set up, get the website up get your view source up and get your virtual environment installed with your two libraries.<br>
Move on to the next video.
|
|
|
show
|
8:32 |
The way we're going to work through this is to first actually do it within the Python REPL.<br>
Think of it, yeah, the Python command line if you haven't used it before.<br>
So from your virtual environment simply type in Python.<br>
And that will bring up the shell.<br>
That's what we see here with the three little greater than arrows.<br>
And all we're going to do is we're going to play with the website.<br>
We're going to pull it down and then just do some quick code against it to see what we get and then we can write our script.<br>
This is a really good way of doing any code.<br>
Play with it in the REPL and once you sort of figure out what you're doing and massage your code, then write your script.<br>
It's much easier that way.<br>
We'll begin by importing bs4 and we'll also import requests.<br>
Now, let's specify the URL that we're going to actually play here.<br>
Let's just copy that from our website here.<br>
It's https://training.talkpython.fm/courses/all Let's pop that into there, close it off.<br>
Right, we have our URL.<br>
So the first bit of code we're going to do here is actually requests.<br>
It's not bs4.<br>
So requests is used for web scraping.<br>
It's for pulling down the raw site content, okay?<br>
And so we're going to call it raw_site_page.<br>
And we're going to assign it requests.get so we're doing a get from the website, and the URL.<br>
That will return with nothing, which is good.<br>
It's assigned, essentially that entire webpage to raw site page, to that variable there.<br>
Now, what we want to do, what is a good practice is to do raw site page, so that object, raise_for_status.<br>
Now, what this does is this actually checks to see that the request worked properly.<br>
If it did work we'll get no output.<br>
If it didn't work you'll get some errors and you'll know that something went wrong.<br>
Perhaps the URL was broken, maybe you don't have an Internet connection, who knows.<br>
Now, what we need to do is actually massage this site.<br>
We need to pass it.<br>
So now we're moving away from requests and we're moving into beautiful soup 4.<br>
So let's create our soup, right?<br>
This is our soup object.<br>
And we're going to use bs4.BeautifulSoup And we're going to take the raw_site_page.text and we're going to hit it with the HTML passer that is built into beautiful soup 4.<br>
Now what that does is it goes through and it takes the plain text and it runs the HTML passer against it, dumps it all into our soup object.<br>
And now we get to do some fun stuff.<br>
What we have here, and just do soup, you can see all of the HTML for this website.<br>
Now, obviously it's not formatted correctly with all the tabbing but this matches what you see here, right, on our view source for the talk Python webpage.<br>
So what we want to do now is start playing with this.<br>
We want to pull things out.<br>
When you're doing web scraping you generally don't want the entire page, right?<br>
You don't need all of this extra code all around everything, right?<br>
Let's close this X and take a look at the page.<br>
Generally what you actually want is some sort of specific set of data.<br>
Sometimes you'll just want the header of every page.<br>
Sometimes you might want what's in the nav bar.<br>
Sometimes you might want article updates latest RSS feed updates.<br>
You might even just want to get all of the individual headers of certain things or collect all of the hours that each of these courses could add up to.<br>
Either way that's the beauty of web scraping.<br>
You sort of have to dig into the HTML code that you want to pull.<br>
You need to dig into it and find out what it is that you need, what it is that is going to give you what you need.<br>
Now for this exercise let's just have a play with a couple of the options here.<br>
If we wanted to get the title of the page we could go soup dot title and that'll give us our title tag.<br>
So you can see it searched for the title tag and it's given us the title of the webpage online course catalog and so on.<br>
These are really cool shortcuts to get to specific data without you having to go and parse it in any complex way.<br>
One of the other interesting things you can do is you can pull all types of one tag.<br>
So this is a bit crazy but let's say we want to pull every div.<br>
We could do soup.select and we could just type in div.<br>
And that brings up every div but also everything inside it.<br>
Now, we can get all of the lists.<br>
We could do li.<br>
And that'll give us every list that appears on this page.<br>
Now, we're getting this so many, isn't there?<br>
So this is where certain factors start to come into play.<br>
Take a look at this code here.<br>
Take a look at the HTML on the website.<br>
One of the interesting things is that we have CSS.<br>
We have classes for our divs.<br>
So we don't want every div but let's say we wanted just the nav bar.<br>
We can actually specify the class.<br>
So here's our nav bar header class for the div.<br>
Let's try and pull that.<br>
If we put that there this is actually not going to work.<br>
It comes back with nothing because there's no HTML tag that goes by nav bar header.<br>
What we want to do is we want to put a dot there to indicate that this is a class.<br>
Once we do that then we get all of the HTML that falls below the class nav bar header.<br>
Notice that we didn't have to specify div.<br>
We just had to specify the class.<br>
And by doing that we get the button we get everything else under that.<br>
Let's try that again with a different class just to demonstrate.<br>
We can get the bundle list.<br>
So div class bundle list.<br>
This will give us just the list of the everything bundle on Mike's page.<br>
This part here, right?<br>
Let's hop back in here.<br>
We'll change nav bar header to bundle dash list.<br>
And there we go.<br>
We get just that HTML code and we'll find that it matches, right?<br>
It matches what we see on that source page.<br>
There's everything bundle.<br>
There is the head of four, there's the image alt for it I should say, here is the h3 header tag and so on.<br>
Right, now the final part of this exercise for this specific video, I want to get every title of every course.<br>
I want to get these headers here, Python gems start by building 10 apps.<br>
Now if we dig through this we'll find something unique to each of those headers.<br>
When you're looking through your own website you'll probably find that people have specific classes that will indicate headers.<br>
In Mike's case here with the talk Python website all of our headers for the actual course names are simply within h3 tags.<br>
So if we pull down our h3 tags just the HTML, we don't have to put the dot there are all of our names.<br>
And they're all in a list, nice and handy.<br>
So that's that.<br>
This is where we want to be.<br>
We now know the code that we need to write our script and we can then write some more code around that to make it readable, make it nicer.<br>
So let's leave it here.<br>
Feel free to keep playing if you'd like and try to pull out some other information.<br>
But in the next video we are going to write the script.
|
|
|
show
|
7:31 |
Now that we've figured out what we want and we've figured out what commands we need to run to get what we want let's actually pop it into a script.<br>
Just quickly mention that if you are stuck in that Python REPL or shell whatever you want to call it just type in exit with the double brackets there and that should get you out of it and back to the command line.<br>
Now, in our folder we only have a virtual environment, right?<br>
So, let's create a file and we'll call it talkpy_bs4.py In our file, the first thing we need to do is import.<br>
So we'll import requests, remembering what we did on the command line, in the REPL there.<br>
And the next thing we did was we specified the URL.<br>
So let's throw that in there now.<br>
https://training.talkpython.fm/courses/all Easy peasy.<br>
Now we have our, let's just call it a main function.<br>
You know what, let's just call it main, it's just easy.<br>
So def main and this is going to be a nice simple script so let's not go overboard.<br>
Let's just keep it simple stupid alright.<br>
So we have our raw site page remembering the first thing we need to do is actually pull down the page.<br>
So request.get and in the brackets we were going to say pull the URL.<br>
So this is the code to pull down that webpage.<br>
Now we need to make sure that the webpage pulled down correctly.<br>
So, web raw site page raise_for_status.<br>
And again, if we see output from that that means we have a problem.<br>
And next, we need to create that soup object.<br>
Soup is bs4.BeautifulSoup raw_site_page.text so we're taking the text of the page and we're hitting it with our HTML parser.<br>
Next, what we want to do is we want to take the headers remember that our headers of these course names are all tagged with h3.<br>
So if we pull down, if we select h3 then that's what we get.<br>
But, the problem here is that we're talking about a script we're no longer talking about the Python repl.<br>
So, typing in soup.select is not going to necessarily get us what we want.<br>
What we need to do when we pulled down soup.select for h3 for the header, we actually got to list.<br>
So let's create ourselves a list.<br>
Call it HTML header list, soup.select and remember we choose the HTML tag that we want and we're choosing h3.<br>
You could also choose a CSS class of your choice, whatever.<br>
This is just where you are adding that output or whatever you pulled down into a list.<br>
What we'd like to do is we now need to do something with that.<br>
We need to take this list and we need to get the headers out of it.<br>
Because if you remember soup.select gave us all the HTML code with it.<br>
It didn't just give us those headers by themselves we got all the tags and everything around it.<br>
And we can do that, and I'll show you, with.get text.<br>
So let's do a quick for loop here.<br>
Let's parse through all of the headers in our HTML header list.<br>
So for headers in HTML header list so for headers in HTML header list, what do we want to do?<br>
Well, we want to actually take the headers out and add them to another list.<br>
So let's create ourselves a list we'll specify this up top in a second.<br>
So we create a list called header list.<br>
So we have our HTML header list where we had all the tags and all the rubbish that came along with it and we're going to create a header list that is just the headers without all the HTML tagging around it.<br>
So we do header list.append headers, so this here, so all the entries in this all the list entries in there, .getText.<br>
And what this does is it actually goes into our h3 header tags and it strips out just the text between the HTML tags.<br>
So if we do that, we'll now get a nicely formatted list.<br>
We won't have all the rubbish around it we'll have just the text that we need, okay?<br>
So let's actually specify this list up top.<br>
Let's define it up here, we'll just create an empty one.<br>
So by creating this empty list up here we can then append to it down here.<br>
So, let's go back here.<br>
Now once we have this list created once we have our header list here populated with just the text from getText let's parse it again.<br>
For headers in header list, print headers.<br>
Nice simple for loop there.<br>
And that's it, that's all we need from this script because this script will print out the headers that we want.<br>
Let's just quickly call the main function pop that in there if name is main and we'll just run our main function here.<br>
So def main, we'll just call that here.<br>
And that's it.<br>
Let's go through this script really quickly one more time.<br>
Import request, import bs4, set up our URL make our empty list that we're going to populate.<br>
Then, in the main function that we're going to call we have the raw site page that we pulled down the request.get of the URL so that's pulling down the Talk Python page.<br>
Check to see if it was successful, yep.<br>
Create our soup object by parsing that raw site page with the HTML parser.<br>
We then pull out just the h3 tags and anything that came along with it pop it into the HTML header list.<br>
We then parse that and use.get text to pull just the text out of those h3 header tags and then we print it.<br>
Nice and simple.<br>
Let's save that and run it.<br>
Python talkpy_bs4.py.<br>
That will go out, do our requests, parse it and print it.<br>
There we go, the everything bundle, we saw that.<br>
We have Python jumpstart by building 10 apps and we have the rest of the courses and we will find that these match our Talk Python website here.<br>
Going down here, mastering PyCharm, is that in our list?<br>
Yes it is.<br>
Mastering PyCharm there and you can go through the rest yourself.<br>
But that's it, that's how we've written our script.<br>
This is a very simple exercise for web scraping.<br>
Hope you enjoyed it, let's move on.
|
|
|
show
|
3:31 |
We're going to change pace just a little bit here.<br>
While we were looking at specifically scraping web pages before we're going to try a different library that we found here.<br>
It's called Newspaper3K.<br>
It did exist prior to this, it was a Python 2 library.<br>
But now it has a Python 3 library which is why its called 3K.<br>
And it's actually a really useful Python module Python library that is specifically designed to interrogate news articles.<br>
So if you go to your favorite news site and you look up a specific article, that's the sort of thing that this module looks at.<br>
That's why it's called Newspaper.<br>
Now, the best way to show you how it works is using a demo they've created themselves, the makers of the tool but first let's just get your environment set up.<br>
So, again, I'm back in our 6-webscraping directory.<br>
I've got my virtual environment set up.<br>
Let's just simply pip install newspaper3k Now you have to specifically mention 3k because Newspaper still exists as an older library.<br>
So let's pip install that.<br>
It does use requests but because we already have that installed we don't have to worry about it.<br>
Okay, now that that's installed we can sit here and have a play but we'll do that in the next video.<br>
The first thing I'd like you to do is actually see it in action.<br>
So I've got my browser here.<br>
If you go to newspaper-demo.herokuapp.com you'll get to the Newspaper demo app.<br>
And I've just picked a random article from news.com.au.<br>
This was the first article that I found that wasn't just you know, doom and gloom.<br>
I'm just going to copy the URL, CTRL+C.<br>
Head back to our Newspaper demo and watch what this does.<br>
Watch how it scrapes the page and look at what it returns.<br>
Look at the details.<br>
So, straight away on the page you can see we have a whole lot of rubbish on this page, a whole lot of fluff in our face, we have the bar, we have ads, we have these pop-ups down the bottom.<br>
Just all sorts of stuff that really takes away from the experience, right?<br>
We just want the content.<br>
So, Newspaper allows you to actually pull out all of that detail that you want.<br>
So, at the top of this app it's given us our URL.<br>
We can get the title, the authors, the body text.<br>
Now obviously this is not formatted anything remotely readable but that's something we can tackle later that you can play with.<br>
And it gives you the top image, meaning the first image on the page.<br>
There you go, this one here.<br>
This here is a video so obviously it's not going to give us that straight away.<br>
And then it gives us key words and anything else that it can pull that the article actually has tagged in its HTML.<br>
And that's it!<br>
So it's really simple.<br>
Now if you were to go through and do this scraping manually yourself, there'd be a lot of work involved.<br>
So it's almost like magic this works and they've done the back-end work for you.<br>
It's really cool, it's really impressive, and it's a really nice tool to add to your toolkit.<br>
So let's have a look in the next video on what we do on our end on the command line in the Python REPL to get the information that we need.
|
|
|
show
|
8:07 |
Now that we've seen newspaper in action let's actually break it down to the individual commands that will pull out this specific data from the webpage at will.<br>
Now, the first thing we need to do is bring up our Python Shell, our REPL.<br>
Again, good practice just to play in here first before you write any scripts.<br>
Not that we're going to write a script for this because this is free form fun.<br>
Now when we import newspaper, you'd think that we would import newspaper3k because we installed newspaper3k but newspaper3k is just the Python 3 library name, for newspaper.<br>
When we use it, for the actual using of the library we still import the newspaper module just like the old-fashioned way in Python 2.<br>
We still call it newspaper it's just we needed to pull down the Python 3 version of it and that's where the 3k comes from.<br>
With newspaper imported we now want to pull out article so import...<br>
sorry, from newspaper import article.<br>
Now what article does is, the sub-module of newspaper is it actually allows us to pass our article the actual web page, the newspaper article that we're pulling down, and this is similar to it's almost like a combination of BeautifulSoup 4, and requests all right, because we're going to specify the URL and we're going to use article against that and that's going to allow us to pull it down, and pass it.<br>
You'll see in a minute.<br>
Fist, let's actually specify that URL so URL is assigned the web page.<br>
That's the one we looked at before and now let's actually pull it down.<br>
So we create an article object and we specify URL so article will run the capital article against that and assign it to the article object.<br>
Now we have to actually tell it to download, right so article.download will pull down the page.<br>
This is like requests, right?<br>
And if we want to see what this looks like we can go article.html, and this prints all of the HTML that we pulled down.<br>
Right, everything in that page.<br>
Now, the article was able to pass and pull down.<br>
If we actually looked at this in a nice, simple way you can break down and see the little flags that newspaper actually calls on but we're not going to bother, it's too...<br>
this is obviously too poorly formatted so what we need to do is we need to pass it to article.parse and this will parse the article for us and allow us to start pulling out all of the relevant data.<br>
If you remember, on their web page they had the authors there.<br>
Right, they had the authors, they had the title they had everything there.<br>
What we can do is, we can actually run that so article.authors will pull down the name the author of the article.<br>
So, this newspaper article is written by Lauren McMah.<br>
I hope I've pronounced that correctly and now we can pull down other details.<br>
article.publishdate: there's our publish date in date time format and you can print that nicely Publish date, and there you have your nice format there of that.<br>
Date, so 322 on the ninth of the fourth and what else do we have?<br>
We have the text, so if you remember that giant text block that we saw on the page, let's pull it all down.<br>
article.text and what you could do is you could also do some splitting.<br>
You could split this on new lines but for all intents and purposes on that page they simply ran article.text and that gave them that massive dump there.<br>
Next, we have article.topimage: and what that does is this gives us actually the URL of the image that was on that page so you can imagine if you wanted to present this image when you return this data you would need to be, say, on a webpage of your own hint hint, and I'll give you a clue.<br>
You would need to specify this URL to display it on your page.<br>
What else do we have?<br>
We have article.movies.<br>
Now you didn't see this on their page 'cause there wasn't anything to present back but if you're on article.movies this should give you videos.<br>
So obviously our newspaper article here doesn't have the right flags specified for a movie so that's why we're not getting anything.<br>
We can do article.summary and if there is a summary associated with our article in the HTML we would get, I guess the heading overview summary of that page.<br>
And last, but not least we actually want the title, right?<br>
So, article.title: that will give us the actual title of our newspaper article.<br>
So seeing how this works now you can pretty much imagine if you use cases here you can see you might want to scrape certain web pages daily just to get the titles of all the newspaper articles.<br>
You can do all sorts of stuff.<br>
This is web scraping, but it's almost too simple.<br>
It's almost really simplified because someone's done that hard work in the background of analyzing what newspaper article tags look like and HTML tags look like to be able to make this simplified for you and finally to look at something a little more simplified.<br>
I thought I'd show you this.<br>
We have this giant block of text here, right?<br>
It's not great.<br>
It's a pain in the butt to play with.<br>
You really can't present it nicely if you're simply going to use article.text but one thing you'll notice if we take a look at this closely we have these new lines in there so this is something we can actually work with.<br>
So let's take a look at this.<br>
If we do article.text.split so we're going to split that text on our new line.<br>
What do we get?<br>
Well, we actually get a list.<br>
Look at that!<br>
We have that square right bracket and at the top of that we have a square left bracket.<br>
So this is a list, and the list is now split based on new lines.<br>
The first entry in our list is this line here the second entry is a space, or a carriage return hopefully and then the next one is that sentence ending in decades, and so on and so forth through the article.<br>
So now we've split up our article by new lines into a list, which means we can cycle through that list we can pass that list.<br>
So let's call it for i in.<br>
You know,We'll just type it out again: article.text.split new line.<br>
Let's just do print i, let's see what we come up with and this should print in a nicely formatted way.<br>
There we go.<br>
Look at how much more readable that is so if you were putting this on a web page again, another hint for you you'd be able to present the text much nicely pretty much by paragraph so there's your first sentence and there's that space that we had there's your next sentence, and so on.<br>
So there's a lot you can do with this but you've seen how we can use newspaper to break down and pull out specific things we want from the webpage.
|
|
|
show
|
7:38 |
Well, that was web scraping a very brief overview of web scraping in Python.<br>
We used Beautiful Soup 4 and we used newspaper3k to do some very interesting things and I really hope you enjoyed it.<br>
Let's quickly go through everything that we learned.<br>
First, we're going to look at Beautiful Soup 4 and requests.<br>
We import the module bs4 that's how we get started, and requests as well.<br>
Everything that you do with web scraping will pretty much involve requests, so that's a default.<br>
Now, specify the URL of the site we're scraping.<br>
That was the training.talkPython website.<br>
And the reason we specify that in a URL is just purely to make it readable in our code.<br>
We use requests.get, so we're doing a GET request.<br>
To pull down the URL, we actually pull down the entire page.<br>
And then we check to see if that was successful using the raise_for_status.<br>
And finally, we use Beautiful Soup 4 to create a soup object and that simply takes the page that we pulled down takes the text of that and runs our HTML parser against that all part of Beautiful Soup 4 and creates our soup object that we can then interact with.<br>
And now, to interact with that we have a whole bunch of different functionality here.<br>
To start with, we can return the title of the page using soup.title, very easy.<br>
Then we can use select to pull down all of a specific tag and we used the div tag to demonstrate that so we were able to use select div and we returned all of the divs and the content within that page.<br>
Next, we can use select again to return all items but this time, we were able to specify a CSS class.<br>
So, that's what the dot denotes there, so .bundlelist and we're able to pull down anything in our article or in our page, I should say that had .bundlelist as the CSS class.<br>
Select again.<br>
We actually did it for our production purposes of our Talk Python script, we did .select on the h3 header to get all of the headers or the titles of our courses.<br>
Now, I wanted to add something different in here that we didn't actually go over but I thought this might be interesting for you to see was we can use soup.find.<br>
And find allows us to pull down the very first iteration of what we specify.<br>
So, ul in HTML is an unordered list.<br>
So by using soup.find ul we pull down the very first ul tag on the site.<br>
So, that can save a lot of effort because select will pull down everything find will just pull down the first match.<br>
Likewise, we can use .main.ul meaning we can use specific tags.<br>
We can actually go down through the HTML tree.<br>
So if we do soup.main what soup is searching for is it looks for the main tag.<br>
So, soup.main, and then it looks within the main tag and pulls down ul.<br>
So, the very first ul tag, or unordered list within our main tag in our HTML is going to be returned using this command.<br>
So, if we wanted to take our first div with the first list item within that div we could do soup.div.li.<br>
See what I mean.<br>
Next up, we can use findAll.<br>
Now that operates similar to select in that it will actually take all of the tags that we search for.<br>
So, expanding on what we saw just there with soup.main.ul we can do a soup.main.findAll meaning find all of the coming tag in main.<br>
So, soup.main.findAll of li will get us all of the list objects within our main tag, within the HTML.<br>
So that's just some extra functionality there you can use with bs4.<br>
Really makes it usable, makes it a lot of fun.<br>
So, just keep those ones in mind as well.<br>
Next, we did some work with newspaper3k.<br>
First, we import newspaper.<br>
Now notice we don't import newspaper3k.<br>
So I touched on in the videos, we just import newspaper.<br>
The 3k denotes Python 3 and that has to do with installing the module not with actually using it.<br>
So, when we use it, we still use import newspaper.<br>
Next up, we import the article function from within newspaper and that function allows us to actually initiate er, initialize I should say, our article but we'll get to that in a sec.<br>
Next, same thing we did with bs4 and requests we specify the URL.<br>
I've left the URL out of this slide just because it's way too long to include that it would go between the quotes there.<br>
Then we initialize the article.<br>
That means we're getting ready to work with it so we would substitute the URL within there.<br>
And then we use download to actually download that article.<br>
It's similar to our requests.get.<br>
Next, we actually start to parse all of that article.<br>
First thing we can do before we parse is we can return the unformatted HTML on the page.<br>
If you recall, that actually looked really disgusting it was unreadable.<br>
So, what we do is we parse it first using .parse and then we can actually extract data from there.<br>
And the first one we can extract here is authors.<br>
That will return the name of the authors of the article.<br>
The publish date.<br>
The body text, which is a huge block of text.<br>
The top image, which is the first image that occurs in the article.<br>
The movie, so if there is a YouTube or Vimeo or other embedded video in there that the page actually does the article actually does allow us to scrape we can get the URL from there.<br>
And the same thing goes with that top image we get the URL of the image.<br>
And finally, we can get the summary line of the article if it has one.<br>
Now obviously, there's a lot more we can do but this is just the sort of stuff that we touched on and that's that.<br>
So, if you're at the end of day three and moving into day four this is the point where you will be creating a Flask app.<br>
So for day four, create a Flask app that allows you to scrape a page using newspaper3k pull it down, and then present the data that you want to display on your Flask app.<br>
So, similar to the one we used in the Heroku demo app you should be using, you should be returning, sorry authors, publish date, the text, and perhaps an image.<br>
So, see if you can do that.<br>
That's your day four, enjoy.<br>
I really hope you enjoyed web scraping.<br>
Obviously, there is a lot more to it and this could take an entire course in itself but this is just a quick overview for you for the #100DaysOfWeb.<br>
Enjoy, keep calm, and code in Python.
|
|
|
|
57:33 |
|
|
show
|
1:20 |
Hello, and welcome back to the 100 Days of Web in Python.<br>
Day 77, you are almost 80 percent in.<br>
And over the coming four days we're going to look at one of my favorite topics which are bots.<br>
First, we are going to automate the tweeting of our 100 Days of Code by making a simple Twitter bot and secondly we are going to make a Slack slash command that, when invoked, like slash book sends a random recommendation or random book, to the Slack channel from where it is invoked.<br>
It's very fun stuff, and with the rise of the Chatbot it's a very relevant skill to learn.<br>
And it's easy to implement in Python.<br>
Just to emphasize how important it is to know something about Chatbot it is estimated that by 2020 Chatbot will be handling 85 percent of customer service interactions.<br>
They're already handling about 30 percent of transactions, now.<br>
Apart from those interesting projects you will see logging, conflict parser requests, Beautiful Soup, a library called Tweepy.<br>
So, there's a lot of good stuff you can get out of this module.<br>
So, let's dive straight in.
|
|
|
show
|
1:21 |
So, here's what we're going to do over the coming four days.<br>
On Day One, you watch me build the Twitter bot to automatically post #100DaysOfCode updates and then on Day Two, you get to play with it yourself.<br>
Or, if you don't want to use Twitter for some reason feel free, on Day Two to use the service of your preference.<br>
So, that could be Facebook Telegram.<br>
We had an awesome Chatbot being submitted that was made with Telegram, for example.<br>
Then onto Day Three.<br>
Again, you watch me in the videos build a Slack tool a slash command.<br>
Going to keep it pretty simple.<br>
It should give you all the basics to start building Slack tools on your own.<br>
And that's exactly what you're going to do on Day Four.<br>
I provide some extra links you build your own creative Slack project.<br>
Again, if you want to use another API, that's fine.<br>
The idea is to get all the basics you need through the videos and then start building your own stuff because that's how you learn.<br>
Whatever you build, feel free to share it on Twitter using #100DaysOfCode, and include our Twitter handles @talkpython and @pybites.
|
|
|
show
|
3:43 |
All right, starting with Twitter API these days you have to apply for a developer account so I would recommend if you want to follow along with Twitter to pause the video and do that right now.<br>
So you head over to Apps.Twitter.com you should see the same message and you can apply for a developer account.<br>
You probably want it for personal use.<br>
And here it's important that you give a solid reason why you want that access so I did it for my other account two days ago.<br>
I basically said I'm building apps on Twitter and to automate some of my tasks.<br>
I want to auto-tweet the thing we're going to do in this lesson and a bunch of other reasons.<br>
For example at PyBites we have an other bot that auto-tweets the free Packt title everyday.<br>
We have an auto-tool to make our Twitter digest et cetera.<br>
So I listed them all up and they approved it.<br>
So again, you're not required to do it you can still follow along with this lesson not applying and just looking at my code and learn about other libraries like logging and config, parser and Requests but I would recommend to do it.<br>
Twitter's pretty significant, also among developers and I think it's nice to automate your 100DaysOfCode tweets.<br>
I mean, it's a hundred times you have to go online.<br>
We automated when we did 100DaysOfCode and it did put some pressure on us but it was definitely a nice tool.<br>
Having said that, of course, it's already pretty advanced in the hundred days but a lot of people repeat their 100 Days so it can still be useful if you choose to do another round of 100 Days.<br>
And here's our 100DaysOfCode grid on our PyBites code challenge platform.<br>
You should be familiar with this grid as at the start of the course we introduced you to how to set it up to follow along with this course.<br>
But you can use it for any project.<br>
We are going to crawl this URL and match the date so if today was 23rd of September I would get day eight and a corresponding activity tweet.<br>
It's going to grab that content and post it to Twitter given that you have a private key as loaded in from an environment variable.<br>
Important to note, on their settings you need to turn on public URL sharing otherwise this URL's private and the script cannot access it.<br>
And this is how we interface with the script.<br>
We can call it minus U, user, and minus P, grid ID or project ID, so you can even use it for other grids but most sense makes to, just for your own stuff.<br>
There is logging going on and below you see how to look on your timeline.<br>
The same as you probably are tweeting right now but this is fully automated.<br>
Standard library modules we're going to use are parse configparser, datetime, logging, a lot of good stuff you will often use in your Python day-to-day.<br>
And external libraries you will need are Tweepy to interface with Twitter, Requests to load in the created URL and Beautiful Soup to parse the grid, the HTML, to get out specific elements.<br>
There's quite some code to write so let's do that in the next video.
|
|
|
show
|
3:59 |
Alright, time to write some code.<br>
But first, let's make a virtual environment.<br>
And I wanted to use Python 3.7 but tweepy throws an error so I'm sticking with Python 3.6 for now which I have both installed on my system.<br>
Let me verify that.<br>
And you see it takes the Python that's in my virtual environment.<br>
Now let's list the requirements in a requirements.text file.<br>
Beautifulsoup, requests and TweetyPy and then I do a pip install -r requirements.txt And let's make a Python script file tweet_100days.py.<br>
And we're going to do a couple of things.<br>
We're going to import all diaries.<br>
We're going to load in the config with configparser.<br>
Then we're going to set the twitter key and secret we're actually key secret and access token.<br>
We're going to define some constants set up a logger and then we're going to complete three functions: get the date tweet; twitter authenticate; and tweet status.<br>
Then if this is executed as a script which is the main use we're going to put something on our main and we're going to make, we did some hard parse here so we set up a command line interface that takes the -u of user and the minus p of project command line switches and handles those.<br>
We're going to call these functions.<br>
Alright, so this is more or less the skeleton.<br>
So let's go step-by-step.<br>
We're going to use quite some libraries in this lesson And in the next video, we're going to import config information with the configparser module.
|
|
|
show
|
4:14 |
First we're going to load in the Twitter config information from our config.ini file and let's write that file actually first.<br>
And it's going to look like this section and consumer key which I abbreviated to cs key consumer secret, access token again I abbreviate it to acc token and access secret.<br>
And here you put in the keys you got from Twitter.<br>
So again, consumer key, consumer secret access token and access secret.<br>
When you make a app on Twitter those are four tokens you should get.<br>
Let me put that in a config.ini file.<br>
Best practice is to hide this file immediately from your version control so I'm going to make a .gitignore and I'm going to put my config.ini in here.<br>
Also put my venv in here.<br>
Those are files that I don't want to commit to version control.<br>
I'm just making sure I have a git ignore right away so I'm not accidentally putting my config.ini file under version control.<br>
What I do want to put in version control is a copy.<br>
And in this case, it's fine because I put fake tokens in here.<br>
So you want to have two files config.ini and config.in.example.<br>
In any, you want to have your real stuff which is hidden from version control and the example you want to include in version control which is bogus but that's useful for somebody that's using your repo or script so they can then copy the config.ini.example into config.ini and just fill in the blanks.<br>
Alright, back to the script.<br>
Now I'm ready to load in the config.ini file.<br>
And let's see if that worked.<br>
Got an error.<br>
I have a checker up on saving in my vimrc to check syntax and URL was not defined so I decided to none to get around that.<br>
Okay, I get a config parser object.<br>
That's good.<br>
Let's see what's in there.<br>
It should have a Twitter section.<br>
It does but it's not really printing it to pp that's fine.<br>
I will just do a quick test myself.<br>
Perfect.<br>
So now I'm going to store all these secret keys and tokens into constants.<br>
So starting with consumer key.<br>
Perfect.
|
|
|
show
|
3:47 |
Logging is a robust standard library module in Python.<br>
It's one of those examples where Python comes with batteries included, in that you have all this great functionality out of the box.<br>
I started using it recently, on the karma bot and it has been very useful especially when stuff runs from mode you're not watching the console.<br>
Logging writes all the stuff you want to a file and you can then later inspect that.<br>
So it's very easy to set up.<br>
It's just this logging basic config.<br>
Which I will demo in our script in a bit.<br>
And then you can send logging events like this and based on priority.<br>
So this is an info event but you can also send debug or error based on the level or urgency of the event.<br>
So here we have an info retrieving a file here we use logging again, to send every thing that's posted to Slack to the log file.<br>
There's a nice how-to on the documentation page that's worth reading through and it explains logging pretty well.<br>
Back to the script, this is done.<br>
Let's first define the remaining constants we will need.<br>
All right, generated URL that's the URL we're going to scrape.<br>
It has a variable username and project which you will fill in with the format command.<br>
Help text that's for arg parse that's when we use the script from command-line.<br>
To show a title, so the purpose how to tweak your 100 days progress.<br>
And this is for the logging so this is the format of the log message.<br>
So it will have the time, the name of the module the level of the message so debug, info, error, etc.<br>
and the message itself.<br>
Check out the logging how-to and the change in the format of displaced messages section for more information.<br>
I'm going to write the logs to bot.log and I have a today constant.<br>
Now let's set up the logging.<br>
And this snippet you can just pop into any project.<br>
I mean, you give it a log file you have logging out of the box.<br>
It's pretty neat.<br>
All right, level means the starting level.<br>
So everything from debug which is the lowest level up to info error.<br>
So basically log everything.<br>
The format we defined here.<br>
The date format, hour minute seconds as per date time formatting.<br>
Log file, defined here.<br>
And this is important, append.<br>
File mode append, 'cause otherwise you will wipe out the previous log file.<br>
Let's see if it works.<br>
All right.<br>
That seems good.<br>
A bot log file got created.<br>
And here you see debug info error.<br>
Awesome.<br>
So we got logging enabled.<br>
In the next video, we're going to get the daily progress tweet from the challenge create URL using requests and BeautifulSoup.
|
|
|
show
|
6:35 |
In this video we're going to scrape the code challenge grid to scrape URL and extract the data to it.<br>
I'm going to use this URL for my pybot user and this grid ID.<br>
And today it's first of October so we should end up extracting this tweet.<br>
Run back to the script.<br>
I have my stub function which takes the URL.<br>
And later we going to use argparse to create that URL based on the user name and project that are passed into the script.<br>
So for now I'm going to just hard code the URL to get this piece of the script working.<br>
First we use requests to get the content of that URL.<br>
And I already imported all the dependencies here.<br>
And if that fails for some reason I'm going to raise_for_status.<br>
Let's check if this works.<br>
Awesome.<br>
No need for the extra call because it was called already here.<br>
Next step is to use beautiful soup to get the table rows of the page.<br>
As you look at the HTML the 100 days are wrapped in table rows.<br>
So let's extract those next.<br>
The request response object typically has content and I have to define HTML parser.<br>
First I go to the T body.<br>
I get the first element and do a find all of TR.<br>
It should give me a list of all the rows.<br>
Let's also print it just to see what it gives me.<br>
And I have to type this correctly.<br>
Awesome.<br>
And it didn't fail with an assert error so this also was true.<br>
Now we need to match the tweet that is for today.<br>
So let's look through the table rows.<br>
And let's extract the date string.<br>
Let me just quickly look at the HTML again.<br>
In every table row there's a small tag which includes the date in parentheses.<br>
So I'm going to find that small tag get the text, and strip off the parentheses.<br>
And the nice thing about strip is that it can takes multiple characters.<br>
And going to convert this date string into a daytime object.<br>
And remember this was the exercise we kicked off the last 100 days with.<br>
It's a useful utility, STRP time.<br>
Extract the daytime from a string.<br>
And for that I need to specify the format which is day, month name, year.<br>
And month name is percentage P.<br>
And a four-digit year is an uppercase Y.<br>
Then we can see if date is today or if it's not is today we can just continue to look.<br>
If it is today, and again today we will find at the top.<br>
If it is today we can find the 100 days activity field, which is this guy.<br>
And if I get the text of this table cell or TD I should get the activity, this piece.<br>
And of course we're going to get this one because today's the first of October.<br>
And I want the text extracted from that.<br>
And I returned the tweet.<br>
Or this can match today and finds the text or it never gets to here because none of the daytimes is today.<br>
Then I just return none.<br>
Let's see what that gives me.<br>
It takes a little bit because I'm doing a request of course.<br>
Awesome, day three.<br>
And this is exactly what we wanted to achieve in this video.<br>
In the next video we're going to authenticate with the Twitter API and tweet this out to my timeline.<br>
Exciting stuff.
|
|
|
show
|
7:08 |
Next we're going to authenticate with the Twitter API and post this Tweet to my timeline.<br>
First I'm going to complete Twitter authenticate which is a helper function to connect to the API.<br>
And we're going to use the Tweepy module which has an OAuth handler.<br>
The auth object I created gets the set access token which takes the other two keys we set up before.<br>
And it returns a Tweepy API object.<br>
So now I have this nice utility function to authenticate me with the API.<br>
On to the exciting stuff, posting to my timeline.<br>
This becomes very easy with Tweepy.<br>
So first of all, I make my function so that I first authenticate, that gives me an API object and I'm passing that into the function.<br>
So here we got the Tweet then I call Tweet status, an API, and the Tweet text.<br>
And with Tweepy, the only thing I have to do is call api.update_status Tweet.<br>
I'm going to log that.<br>
I'm using fstring, which I can do starting Python 3.6 which makes it possible to embed variables.<br>
I probably should refactor this to raise an explicit exception but for now I'm going to catch any exception and just log that as an error.<br>
The only thing that we need to make sure of is that we Tweet the status one time cause I don't want to spam my timeline with the same day over and over might it happen that this script runs various times.<br>
So I'm going to make a helper function, already posted and if that happens, then I'm going to say warning get post to Twitter.<br>
Tweet already posted.<br>
I'm going to early return.<br>
Now how do we know if a Tweet already is posted?<br>
I'm going to go through the log file because every Tweet we post is logged so I should have that Tweet string in the log.<br>
If it's in the log I assume that's because it was already posted.<br>
So I'm going to open the log file.<br>
Log file which we define here.<br>
And here I give you a nice Pythonic construct can do any, so we can do for line in read lines.<br>
So this gives me an iterator of all the lines and then I can say Tweet in line for all the lines in the log file if the Tweet is in any of these lines in any of these lines this returns true.<br>
If Tweet is not found in any line this any returns to a false so this just returns true or false.<br>
So this will be the same as writing in a function.<br>
Instead of four lines, we do it in a single line.<br>
So if already posted we log a warning, return else we post to my timeline, log the Tweet if any problem, we log an error.<br>
Here you see the nice thing about logging is you can say error, info, warning according to the event you want to log.<br>
So let's try this out.<br>
All right, no errors, because they would have been logged.<br>
So let's check the log.<br>
I notice we get a lot of stuff here.<br>
So here is stuff from, I think Tweepy stuff from requests, urllib.<br>
So all these modules have logging enabled and we get that as well.<br>
And I got an error, which is great for a demonstration.<br>
So I put the wrong secret key in so let me fix that in the background and try it again.<br>
All right I fixed my consumer and secret authentication tokens so let's try this again.<br>
Successfully posted to Twitter, cool.<br>
Let's see how that looks.<br>
And there we go, 12 seconds ago.<br>
Day three, 100 days ago progress.<br>
Great.<br>
And 100 days of code bop directly auto Tweeted, beautiful.<br>
Okay, let's try that again let's see if it actually prevents me from posting again.<br>
And I get a warning, skip post to twitter day 3 was already posted.<br>
So that's great.<br>
So we have a working script.<br>
In the last video for a coding demo we're going to use argparse to pass in the username and the project dynamically.
|
|
|
show
|
5:47 |
All right, we're almost done with this exercise.<br>
The last step is to use argparse to receive username and project from the command line to call this script for any user and project ID.<br>
So let's setup a parser.<br>
Which is the argparse module very useful for any command line application.<br>
I import it here at the top and argparse as an argument parser adequately named.<br>
And here I can give the program a help text which we defined in the constants.<br>
So how to tweet your hundred days progress.<br>
When we -h of help we see this text at the top.<br>
And then we have a parser object and we can add one or more arguments.<br>
So the first one is -u or that's nice you can give it the short form and the long double dash format so I can call my script later with -u or --username.<br>
I give it a type, with 'str', and it's required.<br>
And I give it a help text.<br>
And I give it a second argument.<br>
-p, or long format, --project.<br>
That's actually an 'int', it's also required.<br>
And that will be your hundred days project ID.<br>
And again, those match the username and the ID of the grit, which can be variable.<br>
And then only thing that's left is call args args.<br>
Let's try that out.<br>
So I've not specified username and project which are required, so I get this error message.<br>
I still need the -p I can do 'p' or project and that gives me project and username args.<br>
I can give it a -h and you get this nice help message.<br>
Notice the help text we stored in a constant and this nice table of options, or arguments.<br>
Next we need to log these arguments into the URL.<br>
So at the top we defined challenge URL and that will be not an fstring but a classic string format where we're going to replace username and project with the variables we get from argparse.<br>
And the way to do that is URL, this challenge URL and I can use format with named arguments which I always find more readable.<br>
Might be possible with fstrings but I grew accustomed to this form.<br>
So that looked pretty good.<br>
So now we should have the URL.<br>
Perfect.<br>
And this is the URL, I mean if I was Pyglite with a grit of 999, I could call the script like this.<br>
If it was my other user, or my main GitHub user I could call like this, and I always get the right URL.<br>
Perfect.<br>
So then we're kind of done the only thing I have to undo this URL is equals none.<br>
And I had it somewhere else you know this is not necessary anymore.<br>
The get day tweet will always get the URL not an optional.<br>
So if we call it again I kind of call it again like this with arguments.<br>
So I'll have to call it like this now.<br>
And this of course gets me the warning again because it's still the first of October.<br>
If I run it tomorrow, it will tweet day four.<br>
Congratulations you made it to the end it was quite some code but I think we have a very useful utility to assist you or somebody else with the hundred days of code to automate the Twitter part.<br>
That wraps up the videos of day one and tomorrow you get to exercise yourself.
|
|
|
show
|
1:37 |
And now it's your turn.<br>
Day two of the Twitter and Slack bot module.<br>
I hope previous days videos have given you a lot of pointers and inspiration.<br>
In the README, I pointed you to some other resources mainly based around Twitter.<br>
Again, you're not required to use Twitter you can use any API, the point is to automate some test, make a bot of any kind.<br>
I mean, this lesson was all about auto-posting but you could even make a bot that interacts with the user, that would be really cool.<br>
You can go to code challenge 43 which is linked at the bottom of this screenshot which is the code challenge we hosted around chatbots.<br>
You can follow along on the platform with instructions to get your Git setup so you can pull request your work.<br>
And I'll especially mention this adbot how I built a chatbot with Telegram and Python which was an awesome submission about a chatbot that helped people in need when the earthquakes hit in Mexico.<br>
So there's some really cool stuff you can build.<br>
And again, I hope yesterday's videos gave you all the basics to get started.<br>
So today, do your workout, and tomorrow we're back with Slack API with a new set of videos to show you how to built that.<br>
Good luck and whatever you guys build by the way, feel free to share it out 100 days of web hashtag and Cc us at @talkpython and @pybites.<br>
All right, have fun!
|
|
|
show
|
1:40 |
Right, back on day three.<br>
I hope you had fun yesterday with Twitter or any other API and in the coming two days, we're going to look at the Slack API.<br>
First of all, Slack API is huge, so in this lesson as we only have two days scheduled for this, I'm going to keep it pretty simple and we're going to use a slash command.<br>
Slash commands are nice because you can just type slash command with some text that we can parse on the backend and do something and this one will be very simple.<br>
So we have our pubites reading list app and I made an API end point, API slash random.<br>
It fetches a random book that was added by one of our users in a dictionary and we're going to grab that and post that to Slack and here you can see it in action.<br>
We're going to build a small flask app that receives the request from the slash command.<br>
We're going to run ngrok to expose my local host to the internet and then we're going to call slash book from Slack and here you should see the app returning a response.<br>
Here's a random title for your reading list and it displays that random title and it does it in a nice format with a big image and a link back to the reading app.<br>
The letters you're going to use, flask, again request to pull in the random endpoint of the reading list app and ngrok, which again, makes my desktop available to the internet temporarily.<br>
Before we can start coding, you first need to create a Slack application and submit it for approval to the admin, so let me do that first.
|
|
|
show
|
3:13 |
What we first want to do is to make a Slack application.<br>
I go to add an app build, start building and I get a popup to create a Slack app.<br>
And let's call it Book.<br>
Actually, if you join PiBytes in Day 4 you can test this out by adding an app to a workspace.<br>
Although, maybe I might regret it if I get 100 app requests now, but it's fine.<br>
I've created the app and we're going to do a slash command create new command and we're going to call it /book.<br>
And this will be the server endpoint that will be called when I call my slash command.<br>
So, /book, this is what's getting called and we don't notice yet, because it will be localhost.<br>
That is where ngrok is coming in.<br>
That will convert my localhost to a IP or hostname that's accessible via the internet and that's the address we're going to put here.<br>
If the book would have arguments I could list it in here but that's not really the case because it's really only /book.<br>
We're going to keep it very simple and in Day 4 you can expand the app, or build another one.<br>
So, this is it for now.<br>
Okay, cannot be empty so let me just put a placeholder for now.<br>
And I'm going to replace that with the ngrok address later.<br>
Next I go back to basic information and we see that the features and functionality bit is done.<br>
Now I need to install the app in my workspace and for that I need to request approval because the nice thing is that any user on our PiBytes Slack can add apps, but of course the admins need to approve it.<br>
So, I'm going to click request approval.<br>
And I go to my admin account and get back when I approved it.<br>
And just for your information I made a print screen how that would look on my PiBytes admin account and I got this notification from the bot tester user.<br>
He likes to install an app, I clicked approved.<br>
And as the user I get a message that the app now has been approved.<br>
So, let me go back to the Slack page, refresh and now I got an installed app to workspace.<br>
Authorize and that's also done.<br>
And we don't really need to manage distribution.<br>
I'm not going to share it to other workspaces for now.<br>
And that concludes the requirements to build an app and a slash command so now we can start writing some code.
|
|
|
show
|
5:13 |
Back at my terminal let's make a virtual environment first.<br>
So I made directory book bot.<br>
I'm going to create a virtual environment like this.<br>
And before activating this virtual environment I'm going to store the Slack verification token in the activation script.<br>
We're going to go down and then type.<br>
And we need to retrieve that from Slack.<br>
So I'll go back to my app in basic information and here is the verification token.<br>
Paste that in and we're done.<br>
Next I source it so now I'm in my virtual environment and let's install the modules we're going to use.<br>
And as for best practice I create a requirements file may I upload this code to GitHub at some point others know what's required.<br>
Good.<br>
Next I prepared a little bit of template code to reduce the typing.<br>
So we're going to use os, Flask and request and have some constants set up, book thumbnail which is a string we can later put the book ID into to get a thumbnail for our message to Slack and a random book endpoint.<br>
And you saw this on the slides.<br>
And here I get a random book upon every request.<br>
First we need to log in to Slack though can't be just stored in the environment.<br>
And a way to do that is with os.environ.<br>
Next we need to instantiate a Flask application.<br>
And then all that's left really is the endpoint.<br>
So when we run our server, the server address slash Slack is our endpoint and it needs to receive a published request.<br>
Then we set up a function and call that anything.<br>
And it's going to receive the payload inside request.form.<br>
And first of all I'm going to see if the valid token is sent.<br>
So we're going to only allow payload that has a token that's equal to our Slack token.<br>
If not we abort.<br>
So we cannot get any type of post request.<br>
It needs to come from Slack.<br>
Next let's load in the random book from the random book endpoint and request makes that very easy.<br>
And I'm going to grab that JSON response which the response object conveniently has in JSON.<br>
Then we're going to make an image link and we're going to call format on that book thumb string constant.<br>
Then I'm going to pass in book ID.<br>
And that's coming from the book JSON.<br>
And it will be book ID.<br>
And you can see that here.<br>
The JSON will have, it's like a dictionary so it'll have book ID title, URL, authors et cetera, and we can just grab those attributes as if it was a dictionary.<br>
Next I'm going to set up a message using F string.<br>
And notice the on this course, it's nothing to do with Python, well, the on this course Python, but in this case it's something else.<br>
I'm using the Slack formatting.<br>
So using on this course the author's string will be in italics.<br>
That's it for this video and in the next video we're going to format the message back to Slack and use end grok to test it out.
|
|
|
show
|
3:13 |
Now lets construct the data object to pass back to Slack.<br>
And this is the standard response like you would expect I have a response type and channel a text which is the main text of the message.<br>
and attachment.<br>
And by the way you can read about slack message formatting here.<br>
And the attachment is this kind of stuff and I got this index from here so I'm going to use title title link, an image URL and a text and a color.<br>
And a color basically is this vertical bar here.<br>
So do some reading for on this because if you know how to properly format slack message you can make messages there pretty cool and here you see what I mentioned about the formatting so we have triple back takes for code, single back takes for inline code, italic, bold so you can use that in the message and it will come out as if you were typing a message on slack.<br>
Here we us the image link we made here.<br>
Here we use the message we prepared here.<br>
And we give it a nice blue color.<br>
close this, close this close this and that's best practice, as per PEP 8 to align this well vertically so to read well and that's almost it I mean then you can just use jsonify which is a utility from flask to return this in a proper format.<br>
So to receive stator and that's my response so this should be all that is to it.<br>
To make a slack command work.<br>
Set up a nine point to receive a post request for security or just best practice check if the request has the slack token.<br>
Get some JSON or run in book format the data on image and the message then make a data object consisting of response tack tags and attachment, attachment being optional and return it Jsonified and in the next video we're going to test out our app with ngrock
|
|
|
show
|
3:22 |
First I need to run my Flask app.<br>
And as per the Flask documentation site the way to do that is flask app=book.py flask run But let's make sure we run it in debug mode to catch potential errors.<br>
And now debug mode is on.<br>
Now, I cannot hit this local URL from the internet.<br>
So let's use Ngrok to expose this to the internet.<br>
Let's go to ngrok.com and download this utility.<br>
And let's run it and the only thing we need is HTTP and we need to match the port of the Flask app which is 5000.<br>
And here we see our temporarily internet address that's mapped to our localhost 5000 which is our Flask app.<br>
And this is probably good news, it's not a 404.<br>
This is saying, doing a GET where we only setup a POST for that reld.<br>
So let's try directly from Slack.<br>
First I need to go back to my slash command and setup the new endpoint.<br>
And I can go to Slack and see if it works.<br>
That's good.<br>
Wow, look at that.<br>
Here is my app.<br>
Here is my message.<br>
Here is my link which links to the URL we specified in the attachments.<br>
So I can click here and it indeed goes to the page of the book.<br>
The author formatted in italics pages and the picture of the book which makes it really look nice.<br>
And that's all there is to it.<br>
So of course when we stop this server it's not going to work any more.<br>
At this point you would deploy it to a server.<br>
And again change this slash command to point to that server and have it running permanently.<br>
Run it again, we should get another book.<br>
Great.<br>
This is a really great book by the way.<br>
All right I hope you enjoyed this, and again this was all the code to get a slash command running.<br>
It's pretty amazing.<br>
All right this wraps up the videos for today and tomorrow you're going to build your own Slack tool.<br>
Right see you then.
|
|
|
show
|
1:21 |
All right, congratulations you've made it to the end of the Coding demo and we have a working slash command.<br>
Now, we challenge you, Day Four your turn to build your own Slackbot.<br>
Again, it's not required to use Slack but we highly recommend it especially because PyBites is in Slack and this way you can contribute and build cool tools to use on our workspace.<br>
I put a couple of links in the ReadMe a special notice Karmabot which we use to give Karma to people that respond to questions and do good for the PyBites community that's a super-fun project.<br>
The code is on GitHub.<br>
You can go through it, get inspiration look at the code, use it yourself.<br>
And who knows what cool tools you build?<br>
I think this is really beneficial for you.<br>
A lot of enterprises move to Slack as their primary communication tool so if you can build any apps in that environment you will set yourself apart.<br>
Apart from that, it's super-fun and people are really stoked about these tools.<br>
So, you can build something that really resonates.<br>
As usual, if you build something cool, share it out #100DaysOfWeb, and please do copy us @talkpython and @pybites.<br>
We are eager to know what you're building and to support you along the way.<br>
Thanks for watching and see you in the next lesson.
|
|
|
|
58:04 |
|
|
show
|
1:28 |
Hello and welcome to the next chapter in your 100 Days of Web in Python.<br>
We're going to focus on unit testing and testing web applications.<br>
Let's jump right into it by answering the question why test?<br>
Well obviously we want to make sure that no bugs get into our code.<br>
You'll also see that code that is well tested is often factored better, it's structured better so it strengthens your application and makes it easier to evolve over time.<br>
Obviously not having bugs in our code this is really important to us and ideally what would like to set up is the ability set up some kind of continuous integration and it just says your, you know, checks out our app.<br>
It builds it, verifies everything works and then sends it off to maybe a container or off to some cloud service or something like that.<br>
Well, with Python, we don't even get verification of syntax, and there's all sorts of moving things in the web, moving parts you got to deal with.<br>
We've got the database, we've got SQLAlchemy we've got the routing definitions, we've got the views we've got the web framework, all these things being tied together.<br>
So we want to make sure our app will at least run and work mostly okay when we send it out.<br>
Alright, the quality of our test will depend on what mostly means, the better the test the more the tests we have, the more likely our app is going to work over time as we ship it.<br>
So, testing on the web, very, very important and that's going to be exactly the topic that we focus on in this chapter.
|
|
|
show
|
2:34 |
You've seen that it's really important to test our web applications, but it also turns out that testing web applications is especially hard.<br>
How's that for a double challenge for us, huh?<br>
The reason is our web applications are often interacting with other resources.<br>
They're interacting with databases, other web services and they're interacting with the web framework itself which typically would rather run in a web server instead of inside of some kind of unit test.<br>
Let's look at this code.<br>
Remember our bill tracker application, this lets users they're our users, they can log in there's users that have bills, these bills can either be paid, partially paid, or unpaid.<br>
And so what this view method that we're looking at here does, this is looking at the details for a particular bill, and it lets the user enter payment towards that bill.<br>
Okay, so, if we look at it like this you might wonder well why is this extra hard to test?<br>
Remember there's things that we might want to interact with like web services, or databases, or so on.<br>
All of those make it hard, and actually working out the web framework itself, those web frameworks don't like to just be created and called they've got to sort of be started up and all that kind of stuff.<br>
So, if you look carefully at this you'll see there's a lot of things that make working on web apps hard.<br>
So, here we have this read logged in user cookie from a request object.<br>
Okay well first of all, apparently you have to be able to work with cookies, and we have to be able to pass a proper web framework request.<br>
But how do you get one of those?<br>
Normally that's automatically done, right the framework does that when a HTTP request comes to it.<br>
Well not this time, not in your test you got to figure that out, 'kay?<br>
So, that's line one, line two we're passing this bill details view model thing which we'll talk more about view models in a little bit it's a concept that we can use to simplify our code and we'll cover it, but I know we haven't talked about it yet, we're going to cover it next but I want to talk about this concept first.<br>
So we're going to pass this request off to this view model and it's probably going to do database access inside itself, as well.<br>
Okay so that's a challenge, 'cause we don't want to talk to the database, we don't want to actually issue a real HTTP request, we want to just run a unit test but then we're going to return a response, that's not so bad but it is one of these web framework objects.<br>
Here we have our view model working with this post dictionary, that's the form that was submitted okay well how do we do that in a test; we have our repository which talks to the database adding a payment, well how do we call that function without actually interacting with payments 'cause we just want to call those details post function all this is going to happen, we can't control that.<br>
And finally, we're going to return a redirect and we want to check those kinds of things.<br>
So you can see testing on the web is hard 'cause there's so many dependencies.<br>
Other web services, databases, files and of course the web framework itself.
|
|
|
show
|
1:47 |
Now when we think of testing our web application there's actually different layers of our app that we might want to test.<br>
At the lowest level, we might want to test these things called View Models, we'll talk more about those but they're basically involved in the data exchange between the view and the template.<br>
And we're going to introduce those next.<br>
We also might want to just call those View Methods and we might want to call them directly or we might want to let all the functionality of the web application run and then create a sort of fake request against it.<br>
So you'll see there's these different levels of testing within our web application and these different levels require different amounts of scaffolding or support structures to make them believe that they're actually running in a web request in a web server.<br>
Now all this ignores the external types of testing.<br>
Load testing, performance testing automation with selenium, things like that.<br>
But we're talking about using unit testing frameworks and interacting with their web app and testing it that way.<br>
So in this world, we have these three types.<br>
We might test the View Model and in our world the View Model probably requires a request.<br>
And this request comes from the web framework.<br>
From Pyramid, Flash, Django, whatever, right.<br>
We got to create a way to get that request there.<br>
We might call the View Method directly which may interact with this View Model we're going to define and again, that requires a request object at least within the Pyramid framework to be passed over and sort of ambiently in Flask and finally we might want to create a fake web request that calls the main method of our app it starts it up, it configures all the things the routing and everything, it actually runs through the routing so it'll create a fake HTTP request and test it that way.<br>
So we'll see with the first two we have a limited amount of scaffolding we have to create mostly around the request and not interacting with the database, things like that.<br>
The one on the right here actually requires a little bit more work.<br>
So we're going to do all of this in this testing chapter.
|
|
|
show
|
1:50 |
All right, it's time to start writing some code.<br>
So, what app are we going to work with?<br>
Well, of course, one that we've already been working with.<br>
Here we are in our 81 to 84 unit testing chapter and you can see, there's nothing.<br>
So, what we want to do is take our demo code from our migrations chapter, that's our bill tracker app.<br>
We want to use it here.<br>
Now of course, copying this over does not work well with the virtual environment and the egg and things like that, the package registrations.<br>
So, let's go over here and start this from scratch.<br>
Once again, I will create a virtual environment and then we can go and open this in PyCharm.<br>
Now, it looks scary 'cause everything is red but that just means it's not yet committed but it already has the runner and it looks like it's already configured.<br>
Let's just see that this runs, one more time.<br>
Oh, of course, we have to install our project, make sure it's using the virtual environment that we created.<br>
It looks like it's on the wrong one, super let's fix that real quick.<br>
Here we go, we have our local one from the unit testing one we've just created.<br>
Now, let's go ahead and set up our project so we'll say Python setup.py develop.<br>
We also have our requirements that we need to deal with.<br>
Super, okay so it looks like everything is ready to roll.<br>
Alright, let's go ahead and run it and there we have it, our app is working once again.<br>
So, you can tell, obviously from this we using Pyramid to write these tests, but the idea is very very similar for Django, it's very very similar for Flask.<br>
So we got to pick one of web frameworks we're going to use this one that we've been building up over time, but the ideas you learn here obviously apply to all the frameworks.<br>
Okay, our app is up and running.<br>
Next thing to do, actually is to do a little bit of reorganization so it's easier to write and control and manage these tests.
|
|
|
show
|
5:25 |
Let's begin by digging into this idea of a view model, and you might wonder why am I introducing this now?<br>
Why didn't we talk about earlier?<br>
Well, one, I wanted to stay focussed but two, I want to bring this up in the context of testing because what you'll see is this idea of a view model is a class that is the go between the HTML templates, the HTML forms and your view methods, and what that means is all the data that's exchanged there as well as most of the validation that happens will be moved out of those web methods into a separate class that we can test all the validation super easily.<br>
It also means you can have crazy amounts of validation and other data exchange code without making your view methods ridiculously long so our goal will be to add this concept of a view method to our web application before we start testing because it will let us separate certain types of testing to one area or the other, and both of them will get simpler.<br>
With that in mind, let's get started.<br>
Create a new Python sub-package called viewmodels and we'll create a file called viewmodelbase.py Now this is going to be a super simple class.<br>
The goal is to have some class that get some data and then gives it to the template, the HTML view and remember what we're exchanging here if we go look real quick, is we're returning dictionaries.<br>
So we're going to create this thing called a class ViewModelBase, like that just empty, and it's going to have a function to_dict.<br>
That returns a dict, and all it does is return self.__dict__.<br>
If you're not familiar with this this is just the fields as a dictionary for this class.<br>
The other thing that we need to do is, often these view models need to have hold of the request to interact with, like cookies or the forms or whatever, so we'll have an init function here it's going to have a request and we explicitly type that make everything a little easier, like so and we can let PyCharm assign the field.<br>
One more thing, often you have to return an error so let's go ahead and add an error property that's empty maybe even be better to be None for starting out so we're going to have our request, it's going to have this empty error, which we may decide to set in derive classes.<br>
Okay, this is our view model base.<br>
Next, we want to create a view model for the various piece that we have our default part of our application, this is going to be our home and our details, so let's go ahead and create a sub-folder, or even a sub-package called default.<br>
So all that stuff that's in here is going to have it's view models in here, so let's have a new view model.<br>
Now let's start out with the simplest one the index_viewmodel.py So this will be a class called IndexViewModel which derives from a ViewModelBase.<br>
I'm going to put an init method here and we'll go ahead and make a call up to super in a second.<br>
Let's see what data that we're going to need to pass over.<br>
If we look over here at our index, we'll see that this user_id is being passed along, is like being used in here.<br>
So let's assume that this is getting passed in, in some way.<br>
Now we're kind of hacking it right, this would come from a cookie, maybe the view model would actually grab the cookie, something like that, but let's just go over here and say it's going to have a user_id, which is an int.<br>
We can add that field, PyCharm's also warning that we need to call the super by passing that request in.<br>
Good, so what do are we doing in here?<br>
We're working with this repository so notice this data access bit right there, let's move that over here say self.user as this repository, which we can import at the top, and for some reason, PyCharm wants to put it like this relative form, so let's say billtracker.data, so we got our user and our user_id.<br>
Now if the user's not found maybe we want to specify an error message, we'll say if not self.user: self.error, or something like this.<br>
Okay well how does this make things simpler?<br>
Let's come over and use this, finally, in our code.<br>
So we'll start out and I'll say the view model is one of these and we need to import at the top again let's do it more explicitly and it says you need to pass in the request and the user_id, we're just going to say it's equal to one.<br>
Probably like I said, you'd get that from a cookie all of this database access is happening there this exchange is happening here so we'll say, to_dict.<br>
Now notice originally we weren't using the request, sort of hidden it there let's put this back.<br>
Okay, well first of all, notice this is simpler.<br>
If we want to test it or put more validation or whatever we can extend this other class without complicating our view, but let's verify this actually still works.<br>
Stars, that's a good start, and look at that here it's pulling back the user, it's pulling back the user's bills, all of these stuff is still working.<br>
Let us separate these things, now you might think Michael, that's a lot of work for that little bit of improvement, yes here it is, but let's look at this one.<br>
Let's look at this one about the post.<br>
All of this stuff about returning the errors and setting the errors in this situation or that, and returning this and then adding all of these payments, all of this stuff that's happening down here turns out to get much simpler and we actually are missing some validation like on this one here, for example what do we do if say the user's not found?<br>
What do we do if the bill is not found?<br>
Well we do return to 404 here, what about if somebody tries to hack it?<br>
They're logged in but they try to put in someone else's bill ID, there's a bunch of validation and things like that, that we still need to add that would make this more complicated.<br>
So we're going to come over here and look at this next and it will make concept of view models even better.
|
|
|
show
|
2:43 |
Now let's simplify our details page with ViewModels.<br>
We saw in our IndexViewModel well there wasn't really that much happening so maybe it's justified maybe it's not.<br>
But certainly over here you'll see that there's a lot going on and this will be really helpful.<br>
So again I'm going to create a class here.<br>
It's going to derive from ViewModelBase.<br>
Like so.<br>
It's going to have an init PyCharm is being quite helpful here to bring all this stuff in.<br>
Well let's see what information we're working with here.<br>
So in the request we're getting we're just working directly with the match dictionary.<br>
So it turns out that that part right there will be quite helpful so we can just grab this and say you know what we're doing this.<br>
We need to import this again like so.<br>
So let's go ahead and store all these on our item like so.<br>
You want to come in we're going to get the request use the request to get the bill_id use the bill_id to get the bill.<br>
I'm going to do something similar for the user.<br>
Let's pass in the user_id.<br>
Go and hold on to it in case we need it for somewhere.<br>
Now we've got our bill_id and we've got our user_id now let's go back and see what else is going on.<br>
We'll pass that over we need to return this we're setting the error to None at least at the moment we're validating this okay.<br>
So we'll go over here and we'll say this is the BillDetailsViewModel and pass in the request.<br>
And then we need to pass in the user_id and right now we're just hacking it to be one but it could be anything.<br>
So now we can say vm.bill and all this stuff down here is getting passed just by vm2 dictionary.<br>
So notice this was doing a lot more but now it's barely more complicated then just the home page.<br>
That's good.<br>
Let's see did that work.<br>
If we click on one of these is it going to still work?<br>
Tada, there we go of course we still have our details for kids and all that.<br>
Super.<br>
Now the other aspect is we want to do the same thing down here.<br>
So let's go ahead and take it as far as we can with this idea.<br>
We've got all of this and now we can still work with our vm.bill like so and we can also return vm.to_dict but notice there's this amount that we were passing around here.<br>
We're going to need to work with that amount in just a second.<br>
But this is getting closer I guess we need to probably say something to that effect.<br>
So we're passing around.<br>
So notice it's gotten simpler but now were doing this extra thing we're working with the form and this amount and so on.<br>
So we're going to add one more layer to our ViewModel to not just basically look at the request but also to take the form get the data out of the form and then do a little validation.<br>
That'll be the last thing we do with the ViewModels before we actually start writing tests.
|
|
|
show
|
3:19 |
Our view models have been simplifying things.<br>
They've been isolating this data exchange between the templates and our view methods here but we've run into this part where we need to get some information from the form.<br>
Remember, request.post, that's the submitted form.<br>
This is the method that runs when they submit the form to add a payment.<br>
Let's just look real quick there.<br>
So, we come down to one of these and we click on it.<br>
When we go to make a payment, let's make this 700 come down and say, well, it didn't accept it because it was the wrong amount, but that's okay.<br>
It was too high, right, but this is the thing being executed when we submit this form to bill 986.<br>
All right, so the last step is to make this part work here so we'll go over here and we'll say from form and we need to pass it this.<br>
You know, I guess we could probably even we already have a reference to it so we'll just leave it like that.<br>
Let's go in here and add this function.<br>
Let PyCharm write it.<br>
It doesn't need anything so we can say the amount, self.amount and generally you only want to define fields like so so this would be a self.request 'cause it's the and that back.<br>
There's a validation with a few too many dots.<br>
We're going to set self.error.<br>
Super, so this lets us grab the amount convert it to an integer.<br>
Maybe we would even like to do you'd have an error here, something like this like if they pass in ABC for the amount we want to tell them amount must be an integer or a number, and let's go ahead and put that here.<br>
There we go so either we're going to get the amount to a proper value or we're going to tell them they couldn't you know, they, it's got to be a number.<br>
Great, let's try this one more time and make sure we're calling it.<br>
Here, we can get rid of this so in the case that there's an error which was that, we'll just say vm.error otherwise we're going to add the payment.<br>
All right, this is looking good, so we're calling it from form checking whether or not it succeeded and if it did we'll submit the payment.<br>
Now we can see it work, so let's go pay this: toys for $72.<br>
Now, let's start by making a valid payment: $2.<br>
This should go down to 70.<br>
Beautiful, beautiful, it did.<br>
Let's say we want to pay $7,000 on this $70 bill.<br>
It's going to come down and say, no, no, there's an error.<br>
The amount must be more than zero and less than what you owe, right?<br>
We could also check the negative case real quick and then, if we go ahead and pay it exactly off boom, paid off, amount owed is zero.<br>
Now let's go back and look at our post method here.<br>
Notice how much simpler it is, right?<br>
We can add more and more validation and it's just going to pile up in this section over here which is dedicated to validation, and this data exchange no matter how much data we have to exchange it's mostly going to happen right here so that means there's kind of this upper bound on the complexity of this.<br>
Also, we can just create one of these and test it without trying to deal with all the other stuff happening in this method to test the data exchange validation.<br>
All right, so we don't have too much of a complicated application here so communicating across how much value these view models bring it's a little bit challenging but I think if you try this in your web applications this idea of these view models for data exchange and validation you'll find really quickly that they keep things simple and make it easy to work with this data exchange.<br>
Now let's go do some testing.
|
|
|
show
|
1:56 |
Before we go on to testing.<br>
Let's quickly review this concept of a ViewModel.<br>
So this is a pattern that I borrowed from other places but I think makes a lot of sense on web applications.<br>
The idea is, typically, this is most useful when you have forms and some user data but it also works when there's just straight GETs.<br>
So in this case we have a HTML form and it's going to submit some data to register the user on the site.<br>
Traditionally the way web applications might be written is there's one huge, long view or action method that has to do all the work.<br>
And it's all crammed in there, all the validation all the data exchange, everything.<br>
And that makes it hard to see what's actually happening.<br>
And actually test that separately from all the things going on around it instead what we're going to do is we're going to exchange this one huge method doing all the stuff with a couple of pieces of code that do more single responsibility-style programing.<br>
One core thing.<br>
So let's change this up a little bit.<br>
Make a smaller viewer action method in the ViewModel that does this data exchange invalidation.<br>
And then the action method is just going to work with the ViewModel.<br>
So where's the value?<br>
Well you'll see that our code we write in this case the register method, is much simpler.<br>
The GET one is incredibly simple.<br>
So we just call this two dictionary and in the POST we'll create our registration ViewModel's case.<br>
Do some validation from the form.<br>
Check to see whether there's an error.<br>
The data that gets exchanged, it's always consistent.<br>
Cause this to_dict always returns the same thing that can cause an error if you omit a key from a dictionary, for example.<br>
And then we can just check.<br>
Just do the simple code we're suppose to do.<br>
Are they registered?<br>
Yes or no.<br>
Did that work?<br>
Yes or no.<br>
If it didn't we're going to need to set an error and return that.<br>
Otherwise we just take them on to where they were going.<br>
Alright take them to the homepage.<br>
Great, you're logged in now.<br>
So as you can see this would be much more complicated with lots of reading and converting values out of dictionaries and checking that they exist and things like that.<br>
But all of that has been moved over to this registration ViewModel.<br>
It's beautiful.
|
|
|
show
|
5:43 |
Now let's go write some tests.<br>
In fact, if we look over here we'll see there's already a test file in our project.<br>
Where did this come from?<br>
Well this was created when we ran the cookiecutter to create the project long, long ago.<br>
And if you look at it, it's kind of, well it's helpful, but it's really jamming way too many things together.<br>
So this says let's take all the possible types of tests you might create for a pyramid and cram them into this place.<br>
So there's these view tests.<br>
These are what you would maybe do when you try to call like this method here.<br>
And then there's functional tests which are, I would like to specify a URL and a status code and then run that through the entire routing Pyramid infrastructure into your view method get the response, and then see what's happening.<br>
So this is more of the functional tests and these are more of the direct view tests.<br>
And with this new concept of the view model we've added we also need to have this idea of the view model tests.<br>
And the view model tests are going to look similar.<br>
So I'm going to copy that over here.<br>
Although this part, this part is going to look different.<br>
Okay?<br>
So we have these three things.<br>
Now obviously, if you cram them all into this one file in a real application it's going to be a thousand lines long.<br>
It's going to be very confusing and you'll have lots of merge conflicts and all sorts of stuff.<br>
So this is not how we want to organize our code.<br>
So, lets' start working on that.<br>
Create a package here called tests.<br>
And then in there we're going to create one for each of our main views.<br>
So we have a default set of views.<br>
And we some about account, some about store.<br>
So each one of those we would create a folder or sub-package here.<br>
This one called a default, so we'll stick with that.<br>
And then in here we're going to put the things associated with this.<br>
So the view tests, called this default view tests.<br>
And we're also going to put another one in here called default view model tests.<br>
That's one way to organize it.<br>
You can pick another.<br>
But something like this rather than all of it crammed into one file.<br>
That would be no good.<br>
So let's go over here and work on the view model tests part first.<br>
See what we got.<br>
So we're importing unittest.<br>
No, yeah could use pytest but this is what comes out of the pyramid cookiecutter.<br>
So we're going to use unittest.<br>
Honestly, there's very little difference in a lot of use cases here.<br>
Now, this statement here is a little bit interesting in then it's trying to do an import of views inside the function.<br>
So the idea is we're not even going to import the other code that might interfere with like another test we've written.<br>
So instead of putting the imports up there we do them down here at least in the view version.<br>
Okay, so what might we test here?<br>
Well let's test the index view model.<br>
Now, we're going to need to import the view model to test it.<br>
And we're going to need to provide it a request.<br>
Now remember, back over here, not that one.<br>
This one.<br>
To create one of these, we need to pass it a request and a user ID.<br>
So let's try to make this work.<br>
So when I come over here I'm going to say our view model is going to be one of these.<br>
Again we got to import this.<br>
I think it's okay to import it at the top.<br>
And it's going to want this dummy request.<br>
So we're going to make a minor tweak there maybe.<br>
And then what else?<br>
We need to pass the user_id, we are using one for that.<br>
Now what might we want to assert here?<br>
Well, there's couple of things.<br>
Some down here, let's go into it's place.<br>
Self.assert, now you're writing a test we're going to have to assert various things.<br>
This value is equal to that.<br>
This thing is not None.<br>
This thing is None, and so on.<br>
So first let's say that it's the case that there are no errors.<br>
So there error is None.<br>
And then, I'm going to say that the user is not None.<br>
So we can assert those two things.<br>
We might also want to test something else but let's just go ahead and get this to work.<br>
Now you'll see a little warning here and that's because we put this request and said it was a real request, not a dummy request.<br>
So what we can do is we can just come over here and say this type is defined to be Pyramid request don't mess with us, we know it's going to work.<br>
Now this looks like it's going to work.<br>
And it follows this cool pattern called the three A's of testing.<br>
Which I like to write down when my tests are starting to look a little unclear or I'm kind of getting started.<br>
So the three A's of testing.<br>
The first one is going to be arrange.<br>
So get everything set up.<br>
Then we're going to act.<br>
Now this creation, this object, does all of the validation.<br>
So it's going to act.<br>
And the third part is the assert.<br>
So arrange, act and assert.<br>
This is what we want to do, but it turns out that there's a challenge here.<br>
So we're going to try this but it's not going to work out so great.<br>
If we go in here, you'll see it's going to call this function that's trying to go to the database.<br>
Do you think that's going to work?<br>
Maybe, probably not so much actually.<br>
So let's just go and run this test right here.<br>
Actually this one.<br>
I'm coming over here and if there's a test definition PyCharm will find it and say run the test for it.<br>
We'll see a better way to centralize this in a second.<br>
But let's just run this.<br>
It looks like it worked, and then ugh, darn.<br>
No, what happened?<br>
Well, come along here, and it said this didn't work.<br>
DBsession.factory calling that.<br>
Well how did that get set up?<br>
Let's look over here.<br>
Well we called global_init.<br>
And we passed it all the database stuff and it created the database and validated it and connected to it.<br>
Now I could go and actually call this function in our test setup.<br>
But we don't want to depend on the database.<br>
What we want to do is test our view model.<br>
Test its validations and its interaction.<br>
It turns out we want someway to say do what you normally do but don't actually talk to the database.<br>
So we need to do a little bit more work in order to make this actually run okay.<br>
And not talk to the database.<br>
It's going to require a new concept but this is the test we pretty much have to write to test most of our view models.
|
|
|
show
|
3:41 |
We have this beautiful, view model test.<br>
We thought everything was so good.<br>
We used the testing infrastructure to create a dummy request, and then we called it here, and then we're going to search some stuff.<br>
But when running it, we saw, actually, no.<br>
It's trying to work with the database and the database is not set up.<br>
We don't even want to set it up.<br>
We'd rather have it not talk to the database at all.<br>
So in order to make this work we're going to do something that's kind of mind blowing.<br>
So let's go up here, and import unittest.mock.<br>
So the idea is if we look down at the view model the problem is that we're calling this function right here.<br>
If we go into that function, you'll see that's actually doing all sorts of database access.<br>
Great, but we don't want to do it.<br>
So how do we get around this?<br>
What we can do, is in this section we can say with, unittest.mock.patch you got to spell things correctly for that to work, okay.<br>
So we're coming in here in patch and what we pass in, is actually the full package name of the function that we want to alter.<br>
So this is going to be billtracker.data.repository.get_user_by_id and then what we can do is we can also come down here and say returns, equals, for now just write None.<br>
But we're going to put something there oh, sorry, excuse me, that would be return value is something there.<br>
So the idea is, we can say look when you call this function get_user_by_id I don't care what it does, don't actually call it.<br>
Instead, just pretend it was called and return this value instead.<br>
So let's go over here and say test_user.<br>
It's going to be a new user, which we're going to import that from our models.<br>
Say test_user.id = 1.<br>
And I believe the test user also probably needs some bills, so we can say bills it's going to be, we'll import the bill and just give 'em like, three bills so there's non-trivial information there and now what we can do, is we can say hey, somebody call this function just give 'em back that user, ok?<br>
So it's as if this came out of the database with that id equals 1, and three empty bills in it.<br>
So that should be enough to make this all come to life, and work.<br>
Remember what happened before was this function, threw an exception trying to interact with the database.<br>
But now, when it tries to call it this mock is going to change what that means.<br>
Now, it's in a with clause, because we want other tests to not be affected by this change.<br>
It means only within that block of code do we redefine what get_user_by_id does, and then it'll put it back.<br>
Alright, let's try to run our tests again.<br>
Here we go, now like I said, remember I keep putting this back to this full space.<br>
There's a weird problem, like if I don't have this here watch, you'll see, there's this weird error about bills already being defined, it's like, it's redefining what the SQLAlchemyBase is.<br>
Let's not worry about this just put the full name space there.<br>
But if you do that notice, now it runs.<br>
Our test results here, I'm going to expand this out and we can see it ran, it worked in 10 milliseconds.<br>
How cool is that.<br>
So we were able to test this validation that we got this user back, there's no error.<br>
If for some reason we pass in None, like for some reason the users not found, you'll see that this error is no longer, nothing comes back as something.<br>
Here you can see: user with id 1, is not found.<br>
Right, no user with id 1.<br>
So that validation is happening.<br>
It's not a crash, I mean obviously our assert is crashing but the index view model is doing it's job correctly.<br>
Alright so you'll see that when you work with these web apps, you often need to use patching to avoid talking to databases to avoid talking to web services like I would like to interact with the credit card API without actually calling it.<br>
This is the way to break free from that.
|
|
|
show
|
5:25 |
So you've seen how we can test our view models and that required patching some of our data access code.<br>
There's a couple of other tests we could write but they're all similar.<br>
So I want to just put them in here and let you have them as reference.<br>
We'll talk quickly about them.<br>
But I want to take too much time write a whole bunch of little detailed tests.<br>
So let's see what we got here and we'll just talk through them.<br>
So this tested our index view model.<br>
Let's go and test the details one.<br>
This one is more complicated.<br>
I remember we go, we get a bill we get the bill back and then we actually also get the user just like before.<br>
And typically there needs to be a proper relationship between the user and the bill.<br>
So here's the test that we can write.<br>
I don't think it's going to run yet but create a request when I create a test user and a test bill and importantly we are going to set the user_id to be the bill_id and then we're going to need to patch two bits both the repository for getting the user and getting the bill.<br>
And we're going to return these mock users and next test bill and then we can do our with clause and all of our mocks here and create our bills details of view model should be no errors.<br>
It should be a user.<br>
There should be a bill.<br>
Okay, so we'd run that one.<br>
That would be nice.<br>
We also have our tests that there's a possibility of not having a bill.<br>
So if I come back here if we enter a URL that goes to a bill_id and the bill_id doesn't exist well, we're going to try to do a query for it and we're going to get None.<br>
We want to make sure that the right error message rather than a crash is handled at the detail view model.<br>
So here we're going to come in and get all this.<br>
It's going to try to get the bill for id 200.<br>
Notice we're actually setting the dictionary that it uses off the request and it's going to come back and say "No, no, there's an error." And the error is the bill with id 200 was not found.<br>
Okay.<br>
And then we also want to check if there's no user.<br>
If we're going to return None for the user a user with an id is not found.<br>
We saw that error before.<br>
And then finally this one is a security test that if we go and try to request a bill as a logged in user but it's not our bill, it's another one.<br>
We've gone to the URL and we typed in some random number or URL.<br>
We don't want that still to just show it to us.<br>
Just the fact there is a user and there's a bill that's not enough.<br>
So we're going to come down here and we're going to say the bill that we're looking for does not belong to this user belongs to another one.<br>
What should happen then?<br>
Or we should get an error to say "No, no, no, that bill doesn't belong to you.<br>
"You can't see it here." Alright?<br>
It does not belong to the user.<br>
It also should None out empty out the bill here so that there's no accidental case that we accidentally show it to them.<br>
This will trigger a view to do a 404.<br>
Let's run it and see how we're doing.<br>
Not so well.<br>
Let's expand this out and see what we get here.<br>
So we have these three tests none of which are passing yet.<br>
So we come down here to this line it says we got None here for the error and we thought it wouldn't be none.<br>
So let's make sure that we're doing this test to say that they're not found.<br>
So are we checking to see if there's no bill that generate an error message And look at that, we're not.<br>
So we need to add more validation to our bill details view model.<br>
So we'll say this so we don't have a user.<br>
We'll say the error, something like this the user with id whatever it is not found.<br>
And we want something similar.<br>
Say elif not bill bill with id such and such was not found.<br>
Here we go.<br>
All right, so now we're down to just one test that doesn't work and that is right there.<br>
But we said we would like if somebody tries to request a bill which does not belong to them they should be some kind of security leak seen other people's bills and data and so on.<br>
That's bad.<br>
Well, there was no error but it said there should have been an error.<br>
So let's go and do one final test here and we'll say if self.user.id is not equal to bill.user_id.<br>
And what error message are we looking for?<br>
The bill is not belong to the user we'll say something like that, okay?<br>
So our unit tests were able to uncover some security issues that we are now hopefully able to fix.<br>
Now the other error right here is saying, well, there was an error and probably it says that but you still pass the bill back and if the view's not really careful it's going to try to show that bill to the user.<br>
So that means we've got to do one more thing back here.<br>
So if self.bill equals None, okay.<br>
If you try to request a bill and there's a security issue, get rid of it.<br>
That's it, Tada!<br>
All of our test run.<br>
So there we have all of our view model tests written and working over here.<br>
So you can see they all follow this general pattern arrange .<br>
We typically have to patch out access to things like the database interact with the view model and then assert the right things.<br>
What's beautiful about this is we didn't have to go and rewrite our views back to default.<br>
We've just now made this method more secure and have better error reporting without touching it.<br>
We only changed their bill details of view model and now it no longer lets users request bills that don't belong to them, for example.<br>
So I think we're going to put the view models to rest and call them good.<br>
And we have two more levels of test to write.<br>
But there'll be much quicker.<br>
We want to call these function as view tests.<br>
And we also want to send requests entirely through the entire application through the routing through pyramid into these methods and back using functional tests.
|
|
|
show
|
1:18 |
Let's review this concept of testing view models.<br>
The idea is we have to provide a little bit of infrastructure to them.<br>
They typically take a request object and they often work with databases or other services.<br>
So, here's what this generally looks like.<br>
Now, let's supposed we would like to test that a user's trying to register for our site but they're not providing an email.<br>
That means we want to give them an error saying "Hey you have to give us an email." rather than letting them register with no email.<br>
So how would that looks with view models?<br>
Well, we want to do this test, so we're going to arrange.<br>
Remember the three A's, arrange, act, and assert.<br>
We're going to create a testing request.<br>
We're going to set the post dictionary to what the form fields would be.<br>
There's an email they didn't enter and a password which was very secure it's pw, they did enter that.<br>
We'll go and do the action create the view model and validate it from the form.<br>
Then we want to assert that in the error message first there is an error message and that in it, there's an email string.<br>
So, something about the email is wrong here.<br>
So this let's us do a very very simple test of the validation being performed by the view model for logging in.<br>
Now, in reality, we saw that it's probably talking to the database.<br>
Maybe here it's not because there is no email at all.<br>
But in reality, we also have to use the patch object to avoid talking to the database if that's a goal we have.
|
|
|
show
|
4:13 |
We've tested the view models, now let's test the views.<br>
And this gets a little bit simpler because we're using the view model.<br>
So if you look here, there's less going on in each one of these things.<br>
There's still stuff happening.<br>
For example, in this one we're still calling add_payment.<br>
We're still doing a 404 when there's no bill, for example.<br>
We would like to check those things.<br>
But there's actually a lot of validation that's already been done on those steps, right?<br>
So that's really good.<br>
Still, let's go ahead and copy what we've done here a little bit.<br>
It's not going to be exactly the same but it's going to be similar.<br>
Come over here and let's import unittest stuff.<br>
We're going to need to import unittest.mock.<br>
We're going to import testing.<br>
Okay, so we're getting close.<br>
Now let's say test index, not view model, just like so.<br>
Well, this request is going to be similar.<br>
We're going to create a dummy request and let's first just avoid this for a minute.<br>
And we're going to come over here and this arrangement from billtracker.views.<br>
default import home.<br>
So let's go, we're going to call this home method, and let's take that out for a minute.<br>
And just say our goal is to call home and we have to pass a request to this method.<br>
And we're going to get some kind of info dictionary back.<br>
And let's just test that what we get back is going to be a user.<br>
So we're going to get back a None user from here.<br>
Remember, when you hit that page that's one of the things the view model gives us back.<br>
So, theoretically this will work, maybe.<br>
Let's go here and say we're going to run this.<br>
Now it turns out, mmm, not so much.<br>
Again, trying to interact with the database.<br>
So we got to put our patch back in and we'll move this down here.<br>
And we need our test user again.<br>
'Cause if we're going to patch out this method it's got to return something which means we're going to put these, also, back at the top.<br>
Now we still have it, if that's not the full name right there that freaks out.<br>
Okay, now let's try it once again.<br>
Tada!<br>
Everything worked.<br>
So we're able to call this method here.<br>
If I go to definition you'll see it's the route one right here.<br>
Now of course it worked because not much else was happening.<br>
We've already tested that line so the line below it, pretty likely going to work, right?<br>
Let's go and write one more of these tests for the details.<br>
Instead of having you watch me type it in let me just start from an existing one.<br>
Okay, so if we're going to call the details view we have to pass along something in the match dictionary.<br>
This is going to be the URL or where the parsing of the URL goes where we're supposed to pass the bill_id, right?<br>
And we still have to return a user user has to have some bills, and so on.<br>
So we want to get details, get here.<br>
And let's call this.<br>
Okay, so run it one more time.<br>
Oh, something's not quite right.<br>
An object is not callable.<br>
Well, that's because there's one more layer of validation here.<br>
Let's move this up.<br>
All right, so we'll say patch1 is going to be this.<br>
Equal sign.<br>
Patch2 will be that.<br>
And this is going to be get_bill.<br>
id on this will be bills.<br>
No zeroes.<br>
You get back the first bill there and we'll say with p1, p2.<br>
All right, let's try to run it.<br>
I think there's one more thing we need to do.<br>
Oh, yes.<br>
So we got a response object, not a dictionary.<br>
What's going on?<br>
Well it turns out that this thing returned a 404 response, rather than a dictionary.<br>
And that's because our bills do not belong to this user.<br>
And so it's saying you don't get access to that bill, remember that?<br>
So we need to say bill.user_id == user_id.<br>
All right, let's try it one more time.<br>
There we go, tada.<br>
Our details have passed.<br>
So we're testing our views and we could actually also go and test the post.<br>
Create a bill.<br>
Make sure that the value that's still owed on the bill is less after we call the post with some certain amount.<br>
Things like that, all right?<br>
We'd have to mock out the add_payment and capture that information, maybe, but we could do it.<br>
All right, so that's how we test these view methods.<br>
We're going to stop at just these two but of course there's lots of views to write in our web app and lots of 'em need testing.<br>
Hopefully you saw, there's not a whole lot left to test here because so much of the testing was already done in the view models.
|
|
|
show
|
1:50 |
Now we have these two files that have tests.<br>
Here's our view tests.<br>
Here is our view model tests and that's just for the ones that are in the default view.<br>
Of course in a real app we'd have like a store section and an account section etc, etc.<br>
So we'll have a whole bunch of these different tests these test files, these test cases.<br>
Now, we would like to just run them all really easily.<br>
There's a couple things we can do but nice integration with PyCharm is we can just get it to run all the tests.<br>
So if you notice if I click on this it'll say run unit test in that file.<br>
So what we can do is we can come over here one option is just define all tests give us a little more control.<br>
Here we can just say from billtracker.test.defaulttest.thisone import * and do the same thing for the view test.<br>
Of course tell PyCharm that this is not a problem.<br>
So now if I save this and we right click on it it'll say run, but not run unit tests in.<br>
Why not?<br>
Well this little right click menu actually looks and says are there tests in here?<br>
And it thinks actually no.<br>
So let's do this.<br>
So if we just create like an empty test here so we say class, all tests and it's unittests.testcase we say pass, save it.<br>
Now if we right click, guess what?<br>
Run all unit tests.<br>
There we go, look all of our tests are test details here are running.<br>
Oh, you know I think we made a mistake actually let's go to this view model test here in the view.<br>
So this should be view test, ah!<br>
Good thing I caught that.<br>
Run it again now you can see we're running all the different tests.<br>
There's all of our tests, all of them working.<br>
Now all we got to do when we add more tests is just make sure we import them there actually we want that right there, a little bit higher.<br>
Everything still works, good.<br>
So whenever we add something to our test folder we just import it there, everything's good.
|
|
|
show
|
1:44 |
Now you've seen testing views in action let's review the core concepts.<br>
The idea is, we're going to need to supply a real, legitimate request object from the web framework, over to the view method.<br>
Probably that view method is already working on the view model which ideally has its own set of tests.<br>
So these should be pretty straightforward.<br>
So here's a straightforward example let's test the homepage.<br>
So we're going to do our three As: arrange, act, and assert.<br>
So we're going to import the index.<br>
We're going to make a dummy request.<br>
We'll call the index method, passing the request.<br>
This is the view method the thing the URL generally goes to.<br>
What we get back is one of two things: either a response object, or a dictionary.<br>
Here, this particular one, under this circumstance is going to give us back a dictionary.<br>
So we're going to grab the user out of it and we're going to assert some things: that they're not none, that they have some bills things like that.<br>
Here's the ideal world.<br>
In practice, it's a little messier as you can see from the size of this box and the size of the fonts.<br>
In reality, we're probably talking to a database and some other things that make this more complicated.<br>
So, again, we're going to import our index.<br>
Now, we're going to create a dummy request but we're going to also setup some additional information to pass along.<br>
We're going to create a mock user here and then the big thing is, we're going to patch out the get_user_by_id, to return this mock user.<br>
Otherwise, we'd have to have the database actually setup, and actually talk to the database.<br>
So here we're going to call index.<br>
Again, we get back our info, but this operation here calls now the fake, the mocked out, get_user_by_id and then we're going to the same asserts that we got back the user, that we got back their bills and so on.<br>
So in practice, it's not quite as simple as we saw that first time, but not too bad.<br>
Once you learn how to use mocked up patch you're in good shape.
|
|
|
show
|
5:18 |
Now let's test our whole application end to end.<br>
More of a functional test.<br>
So over here, we've got all of our tests and we've got our view tests and view model tests for just the default section.<br>
Let's go add some tests over here.<br>
We'll call this site test or something like that.<br>
Now, instead of starting from scratch remember we do have this test thing that was generated by the template, by the cookie cutter when we created it.<br>
And we have this little bit right here.<br>
Let's take that and put it into our site test.<br>
We should really get rid of this we don't really need it anymore.<br>
So what's going on?<br>
Well, we need to import unittest obviously.<br>
We also need to have web tests, not just imported but actually installed.<br>
Notice over here, in our requirements we only have the run time production things.<br>
We don't have an additional development or testing set of requirements.<br>
Let's change that.<br>
Add a new text file, called requirements-dev.txt.<br>
Here's a cool trick.<br>
Say we're going to use the requirements.<br>
.txt file, in that mode and then we're going to have webtest.<br>
And that's it.<br>
Now, if we pip install -r requirements-dev.txt It's everything else except for our new web tests.<br>
Okay great, so that error went away.<br>
Although it says, we have this issue going on here.<br>
Let's just call this app.<br>
Cool, so we've got this all set up.<br>
We're going to basically call the main method.<br>
Remember what this does, it's been a while.<br>
This is the entire start up for the web app.<br>
We're going to create it, and start it up configure the database, anything that happens there.<br>
Then we're going to wrap it in a TestApp instead of a WSGI app.<br>
That will let us do things like app.get, to this URL.<br>
Now, notice it's looking for Pyramid in the body.<br>
This is, not going to work so well.<br>
So let's call this, first of all, site tests and test roots, that's probably okay.<br>
Let's go to our tests, all tests and go over here and just do one more import.<br>
Import all of those.<br>
Once again, if we've run all of our tests let's see what happens.<br>
Well, everything's good except for that one not so much.<br>
It says false is not true.<br>
Hmm, it's being sort of philosophical isn't it false is not true, that's so amazing.<br>
Well, what it's really saying, is if we go back to the right place is that Pyramid is not in the body.<br>
Well what is, let's look for some more interesting things that we might to look for in homepage.<br>
So we come over here, and we can look, and it says okay we have this Dannie Easom, and we have unpaid bills.<br>
Let's look for those two things.<br>
So we'll have this one, and we'll have unpaid bills.<br>
Let me just check on the capitalization.<br>
Yes, this all looks good.<br>
Now our tests, that is not our test our tests should all work, perfect.<br>
You see a little red here but that's just a warning, actually if you look inside inside of webtest, I don't think we care about that.<br>
But it looks like everything we're doing, is working.<br>
So the last thing to do to sort of summarize this before we get to it.<br>
This lets you go and issue requests which goes through the routing through the entire infrastructure.<br>
And this actually, right here, is hitting the database.<br>
So this is more of a functional test.<br>
Now, one other thing that we might do is we had a site map, that listed out all the data driven URLs then we could just request every single page on there.<br>
Why would we do that?<br>
Well it would be a great way to just make sure at least the pages don't crash.<br>
You'll often find, if something's wrong with the page it's really wrong.<br>
So for example, we could go to here to site map.xml.<br>
As you can see, there's a ton of stuff here.<br>
We could just go through and you know in this example, hit each one of these.<br>
We don't have a site map.<br>
I'll give you a quick example of that later.<br>
But, lets just sort of simulate something to that effect.<br>
Let's suppose, you're going to test the site map.<br>
And over here, we might have instead of using the site map we'll just come up with a list of URLs.<br>
Okay, so we'll have / and let's see, what else do we have...<br>
We have the details for that bill and let's go details for that bill.<br>
So we just had each one of these you could say for url in URLs.<br>
We'll go over here, and just make sure we get a 200 back.<br>
And we actually don't care about the response.<br>
We could check it out if we want.<br>
But in this case, we don't.<br>
If we run this one more time notice that we hit a bunch of stuff.<br>
Alright, we're already loading the data so this is just the app startup speaking here.<br>
But it looks like that worked.<br>
You could put as many URLs in here as you want.<br>
If you have a site map, you can just take the site map and verify the entire site is hanging together.<br>
Let me just drop a quick example in here.<br>
So in another course, we actually did this I call this other, and this over here we actually go thorough and talk about.<br>
So I'm just going to leave you with this link.<br>
That actually shows how to get the site map how to generate the site map, how to go through it in an efficient way, all sorts of things like this.<br>
If this is helpful for you, go ahead and grab it and run with it.<br>
Maybe this is enough to give you an idea.<br>
So here's how we can do functional tests end to end tests on our web application.<br>
That's it, we've tested all three levels.<br>
We've tested the view models.<br>
Then the views, then the functional tests.<br>
That's most inner to most outer in terms of how things fit together.
|
|
|
show
|
1:41 |
The final type of test we want to look at are functional tests for testing the whole web application.<br>
So remember, we're going to issue a fake HTTP request to the entire web framework, completely started up and initialized the way our app is going to run.<br>
So it'll call, application initialize, the request is going to go over to, in our case, the Pyramid web framework but it just as well could be Flask or Django and it's going to use the routing framework to find the right view method and execute it and in return, a full on response.<br>
So this is the type of thing we're going to do and it takes a little more structure and supporting concepts than we had before.<br>
So we're going to set up our app by importing the main method creating the app, which gets, this is WSGI app that gets returned from our app start up and then we're actually going to use webtest to create or to import the test app Wrapper, and we'll create an app object by wrapping that.<br>
This will let us issue direct HTTP requests or simulated ones by saying, "I want this URL and I expect this status code, and if I don't get it, it's an error." So this is going to run in the start up the setup, for this test case.<br>
And then for each test we want to run, there's no real arrange not in the three As, we don't have to do anything there that's just the start up, the set up of this test class.<br>
Then we're going to do the act, and that's simply getting a URL and specifying a status code.<br>
If it doesn't match that status code, that's an error.<br>
Like if you get a 404 that's going to crash the test and fail it.<br>
And finally, we get a response back, this is like an actual response object with an HTML body that's gone through all the templates and all that kind of stuff, so we can do things like assert that certain bits of text are contained within it.
|
|
|
show
|
2:56 |
The last main concept I want to cover in this chapter is something called The Pareto Principle.<br>
And Pareto Principle is this idea that you get 80% of the value out of 20% of the work.<br>
This applies to many things.<br>
It applies to start ups, it applies to software it applies to all kinds of stuff.<br>
And so this is an old principle from a philosopher-type person long ago named Pareto.<br>
The view I take for the Pareto Principle with web apps is if you're starting from nothing if you have a web application and you've already built it and it has no tests, and you're like "Oh my gosh, how am I going to take all this time to go back and add all sorts of tests to my code?" One thing that you can do really, really easily is just do a basic request to every page that should be available.<br>
If it doesn't crash, you're like 80% of the way there because, like I said, it doesn't often just give you a little bit of a wrong answer.<br>
Often what you'll get is, you know "This database connection is wrong." "This object doesn't have this property." It'll completely crash the server.<br>
So Michael's variation of the Pareto Principle around webcasting is if you just request all the pages you've already tested quite a bit.<br>
How do we know how to do that?<br>
How do we know what those are?<br>
Well, if you have a site map that is XML file that looks kind of like this.<br>
Here's an example from another course that I did and basically it has a bunch of data-driven pages and a few static ones.<br>
So we put the static ones in there and then use the database to generate all the other pages.<br>
Hundreds of thousands of other pages, potentially.<br>
And that helps Google and Bing search our sites.<br>
That's great, but we can also go through this list and go, "alright, well, what are the URLs?<br>
Let's go and request those." So we probably have a view model that generates those and then we have a controller that we'll use to generate those.<br>
Super easy and if we have this, we can leverage the site map.<br>
I already showed you how to do a get request against url so here we could do a get against the url to get the XML document.<br>
And, by the way, here's a tip.<br>
If you don't want to deal with name spaces in XPath queries and you probably don't you can just do a quick replace to get rid of that and then we can just go through and test each of them.<br>
So we'll load it up into an XML element tree.<br>
We'll loop over each one of those and then we'll test them, just like we did before.<br>
For each url, we'll do a test.<br>
And here notice, we're assuming that there's going to be some project page that has some data-driven elements.<br>
There might be a thousand projects or a hundred thousand projects.<br>
We really only need to do one request.<br>
That's our thinking.<br>
One request to that type of page or that particular view.<br>
It doesn't matter that we test every single potential project.<br>
That's what we're saying.<br>
So we're going to skip out and make this run much faster even if there is tons and tons projects and so on.<br>
Alright, and then we just go do a test.<br>
Go to your app, call get, give it the url say it should be at 200.<br>
Alright, so here's my Pareto Principle of testing web apps.<br>
If you just request every page you're kind of like mostly there.
|
|
|
show
|
3:13 |
It's your turn to try your hand at testing some web applications.<br>
Here we are in our GitHub repository in 081-084-unit-testing/your-turn.<br>
There's four days of things to work on for you of course, as usual.<br>
The first one, just watch the videos.<br>
We spent a fair amount of time on that.<br>
Check out the videos.<br>
Make sure you understand it all really, really well.<br>
On the second day, we're going to work our way from the inside to the outside of what you might think of as the onion that makes up our web application.<br>
The first thing that we're going to look at is testing the view models.<br>
This has a couple of challenges.<br>
First we have to get our web app setup.<br>
If you'd like to use the bill tracker and test it it already has view models.<br>
It's good to go.<br>
Go ahead and test that.<br>
If you'd rather create view models for one of your other web apps and try your hand at that and then test those, feel free.<br>
You can do whichever you like but we're giving you the bill tracker to work from.<br>
Here's some examples on what you can do to test.<br>
Remember, when we're testing our view models often that view model wants to talk to the database.<br>
In this example here, what we're doing is we're saying we want to mock out the repository.get_user_by_id and tell it to return this fake user.<br>
Remember, if we didn't do that we got the error None type is not callable when I was trying to execute the factory to create a new session in SQLAlchemy.<br>
We don't want to fix it by making SQLAlchemy and the database active, we want to fix it by not talking to the database.<br>
That's a good practice in general when you're doing low level unit testing.<br>
Day three, we're going to move from view models to views.<br>
Here we're going to test the views.<br>
The example we give below, we're doing a test against just the index, the home.<br>
You might wonder, "Why are we testing this?<br>
We already tested the view models.<br>
It kind of does everything." But there are some things left to test.<br>
For example, you might want to check that if you pass a particular user and a bill and the bill does not belong to the user that that turns out to be a 404.<br>
We verify that in our view model tests but that doesn't mean that it's dealt with properly in the view.<br>
What it should be is a 404 it might be a 500 when the thing crashes when it tries to render something on the bills in the template.<br>
You can verify that.<br>
We have not verified when we post a payment that that actually gets done correctly so you can check that out as well.<br>
These are a couple of things that you can test if you'd like.<br>
And then on the last day, we're going to get to the outside of the onion and test the entire web app, including interaction with the database as it's going to be.<br>
What we're going to do is we're going to use webtest and we're going to wrap up our application.<br>
Then we're going to call certain URLs.<br>
Here we're calling just the root of the website.<br>
We're expecting a status code 200 and we're asserting a couple of things.<br>
We'll leave it up to you to decide what URLs to test and what to look for but write a couple of these functional tests.<br>
After you've gone through all of these you've done most of the type of testing that you're going to do in a web application certainly at the unit test level.<br>
You might use some Selenium against the live website to, say interact with the JavaScript and click some buttons but you're going to go a long, long ways with what you've learned here, and maybe this is enough.<br>
When you're done, of course share what you've done and let the world know you're still on track with your 100 days.
|
|
|
|
52:31 |
|
|
show
|
2:29 |
Hello, and welcome back to the 100 Days of Web in Python.<br>
It's day 85, you're almost there.<br>
In the coming four days, I'm very excited to teach you about AWS Lambda.<br>
That's an awesome serverless technology that allows you to run Python in a sandbox and work with APIs to get some payload over to AWS, do some calculations or run Python against it, and get a result back.<br>
And I prepared two interesting lambdas for this lesson, a simple calculator, and then a bit more advanced PEP 8 checker.<br>
And we're going to implement that using the Bottle framework at the front-end and some CSS to make it look nice quickly.<br>
AWS is all about running code without thinking about servers.<br>
This is the homepage.<br>
I am going to work with an existing account.<br>
You won't be required to make an account because it requires you to enter credit card, but this technology is so cool and useful.<br>
I do recommend you to do it, because it has a great free tier.<br>
You can make one million free AWS Lambda requests a month.<br>
So you can really put something cool out there and have it be used quite intensively without paying.<br>
For a definition, what is AWS Lambda, AWS Lambda is an on-demand compute service that allows you to run code in response to events or HTTP requests.<br>
In other words, you can run scripts and apps without having to provision or manage servers in an infinitely scalable environment where you pay only for usage.<br>
So that's awesome right, you don't have to worry about servers, or any of the infrastructure, and you pay just as you consume.<br>
And that's code from code challenge 36 which at the end of this four days you'll look further into so you can start building your own lambda.<br>
Because with this course it's all about you getting practical, because unless you practice, nothing really sticks.<br>
With that said, in the next video I will quickly demo how we use AWS Lambda in our code challenge solutions.<br>
So you have an idea of a real-world use case.<br>
And after that we jump straight into Bottle to make our web app that's going to talk to the lambda we're going to set up after that.<br>
So a lot to learn, let's dive straight in.
|
|
|
show
|
2:20 |
And here I'm logged into codechalleng.es PyBites Coding Platform.<br>
And one example case where we use AWS Lambda is for our Bites of Py Exercises.<br>
So if I click on one.<br>
I already did this one so let's try it again.<br>
If I hit save and run test, the code I type in here together with the test, are sent over to AWS Gateway API which is the interface to get to our lambda and we will learn all of that in this chapter.<br>
When I click on this button the lambda function is invoked and it passes back the output.<br>
So here I didn't do any coding so the test obviously failed but yeah that's pretty cool so if you allow a user to submit any random code there's of course, a security issue but we have the lambda as a sandbox where we execute Python and it's totally isolated from our Django web app.<br>
So if I code this in...<br>
The exercise was about returning a range of one to 100 if the numbers argument was not provided.<br>
Now it's calling the lambda again...<br>
Still not right.<br>
Probably have to look for it non-specifically.<br>
It's calling the lambda again and now I pass pybite.<br>
The test, pass.<br>
So all this code execution actually happened on AWS Lambda, calling its API with a payload and providing back the output which we consume here and we make a decision based on if it's correct or not.<br>
So again: exercise, code, save and run test button reaches out through a Lambda Function executes the code and gives back a result.<br>
We really love AWS Lambda and I hope this gets you excited for the stuff you're going to learn in this chapter.
|
|
|
show
|
4:35 |
All right, here's the plan for the coming four days.<br>
The goal is to create a Lambda to PEP 8 check submitted code.<br>
So first, we're going to make a small web app with a microframework that's called Bottle that has a form that can post code to AWS.<br>
Then we're going to create a first lambda function to run PEP 8 on the submitted code.<br>
To reach the lambda, we need to setup an AWS endpoint.<br>
We're going to use AWS gateway API for that.<br>
Once we run the lambda we get back the response to the user which will show in the Bottle front end.<br>
Actually when preparing this lesson the PEP 8 example was a bit more complex because we needed the external PEP 8 package.<br>
so I made a second more basic lambda to do calculations.<br>
So, I will show that one first.<br>
But the end goal is to make the PEP 8 checker.<br>
And this is how it will look.<br>
So we have to Bottle app, the form the verified code button makes the trip to the lambda and it gets back the result.<br>
And here I missed the line because between constants and functions are classes.<br>
We need two lines and the PEP 8 checker spotted that and we showed the output.<br>
And we do a bit of checking in the template if it's a good or a bad result and according to that we show a red or a blue bar right on top of the output.<br>
Here's a another example of a PEP 8 violation.<br>
Here I left spaces in this return dictionary where PEP 8 says that there should not be a white space after an opening curly brace and before a closing curly brace.<br>
Once I fix that, I have a passing PEP 8.<br>
And actually in the final version I make two columns because I should see the code is truncated here.<br>
So we will have the code on the left and the PEP 8 results at the right.<br>
So how it works, We have to Bottle app.<br>
The user enters some code into text field.<br>
User hits verify code which makes a post request to the AWS gateway API.<br>
We're going to use requests for that.<br>
So this is the AWS gateway API which invokes the lambda.<br>
Lambda saves the code to a temporary file because the PEP 8 checker needs a file cannot just run on a string.<br>
And lambda then returns the response object.<br>
So, basically a dictionary containing the status code, 200 if okay 400 if an exception, and the body with the actual PEP 8 output.<br>
Let's get set up in a virtual environment and install Bottle and requests.<br>
So, we're going to do that next and we're going to set AWS endpoint in a virtual environment.<br>
Because once we get the endpoint URL where we're going to post our code to it's probably something you want to keep private.<br>
So, we're going to load that in from the virtual environment not committed to the source code.<br>
We're going to make a new directory.<br>
And that's an alias for creating a virtual environment and activated it.<br>
So, I'm in my virtual environment.<br>
The type Python it's using the one installed in my virtual environment and we're using Python 3.7.<br>
So, I'm going to pip install requests and bottle.<br>
Now we're going to temporarily deactivate the virtual environment to set my AWS underscore endpoint environment variable.<br>
So I set that and then activate It takes the activation script that runs when I activate my virtual environment.<br>
I go to the end and I do an export AWS endpoint and for now leave it blank.<br>
Once we set up our AWS gateway API we're going to populate this variable.<br>
Activate again and that's all required for setup.<br>
So, we have requests and Bottle and some additional dependencies.<br>
In the next video, we're going to build our Bottle app.
|
|
|
show
|
9:17 |
An introduction to Bottle.<br>
Bottle is really a micro-framework it's very similar to Flask.<br>
And here you see how the work looks I'm pulling.<br>
It only takes five lines of code.<br>
And it looks very similar to Flask.<br>
So we're going to see this in action.<br>
I learned Bottle myself when I was writing this article on Real Python.<br>
If you want some additional reading it might be interesting to read through it there I built this simple web app with a database backend using Bottle.<br>
So that starts building our PEP 8 checker frontend.<br>
And then to make an app.py.<br>
And I already wrote up some boiler plate code to focus on the Bottle pieces.<br>
I import the modules we're going to use.<br>
So we have Bottle, we have all the functions we're going to use requests to make a post request to AWS.<br>
I retrieve the API URL from the environment variable we set in the last video, I define the title, and here's the meat of the web app which we're going to write next.<br>
First you're going to set up a route, which is basically the end point at where we enter our app.<br>
And we just need one, which will be the root of the web server.<br>
And we're going to give it methods.<br>
Get.<br>
And Post.<br>
And this basically means that at the root URL we can read data but we can also post data by the form we're going to build.<br>
Then we're going to load in a template called index.<br>
And actually let's create a template right now.<br>
Bottle has out of the box support for templating if you make a sub-directory called views.<br>
There we're going to make a template called index.tpl as per Bottle convention.<br>
And I'm just going to paste in the template we have.<br>
So we have basic HTML.<br>
And then to load in some MUI CSS to make it look nice.<br>
You're going to balance the title and we will see in a bit how we pass in variables from our view into the template.<br>
I got some CSS.<br>
And I got a form where you can enter your code and a button to submit it.<br>
And the field's name is code, and that's relevant when we retrieve the data from this field.<br>
Then I have another section that will look if there's code passed into the template.<br>
And if so, it looks if it has PEP errors and it will show a red bar and the errors.<br>
Or it shows a primary which is a blue bar and a message that everything is OK.<br>
So that's the template.<br>
Going back to the app, the way to load in a template in Bottle is to use the add view decorator.<br>
And defining the name of the template.<br>
And index matches the name we gave this file.<br>
And the second thing we need to do is upon submitting the form we need to retrieve the value.<br>
And as we named the text area code with the name attribute we can get that data like this.<br>
Forms.<br>
Get.<br>
Code.<br>
And if that's not retrieving anything let's set that as a default of empty.<br>
Because as we saw in the template there's logic in there to show one thing or the other based on code being populated.<br>
Then we're going to keep a return list called pep_errors like this.<br>
And then I'm going to do a post request to the AWS Gateway API we have yet to define.<br>
But that's only going to happen if there's valid code.<br>
So if code is true, so there's was something submitted in a form.<br>
I'm going to define a payload dictionary of key code and value code.<br>
And then I'm going to use the requests library which we probably all know, it's very well known and it's awesome, one of our favorite packages.<br>
And to post to the API URL, again we're going to populate that in the environment variable once we get to the section of setting up our AWS Gateway API.<br>
And to pass in the payload we just defined.<br>
So this posts to the API and as we discussed in a previous video, the Lambda will return a dictionary of status code and body.<br>
So we can easily retrieve the response in the same line, calling the JSON method on this response object.<br>
Then we pull out the status code in the body and we'll see that later in the Lambda where we actually return those values.<br>
So this will only work after we set up our Lambda and all that but we have to write this code at some point.<br>
And if the status is not OK or 200 we're going to call abort bouncing the status and giving an error message of Lambda function returned status and then the number.<br>
Then we bail out.<br>
Lastly, we need to return a dictionary to the template.<br>
And as we've seen the template takes a couple of variables.<br>
So we have the title.<br>
The code, that's basically just bouncing it back into the form.<br>
And the pep_errors result list.<br>
So Title.<br>
Code.<br>
pep_errors.<br>
Now Title is defined at the top it's just a constant.<br>
Code is defined here.<br>
Or it's the submitted code or it's empty, but we always provide something back to template.<br>
PEPerrors, as we will see when we implement the Lambda is a list of lines.<br>
So I will join that on new line.<br>
And this will make more sense when we get to the Lambda section.<br>
This is quite long.<br>
And this is our complete web app.<br>
Just one route.<br>
Retrieve the form values.<br>
Call the Lambda.<br>
Check the status.<br>
Retrieve the response body.<br>
And pass it into the template.<br>
Lastly, we need to have the web app running.<br>
So we're going to call the run function.<br>
And we run it on local host port 8080 debug=True I want my depth environment to be as verbose as possible.<br>
Of course in production you would turn it off.<br>
And reloader=true So I can just run this app in a separate terminal and when I make changes it will reload automatically.<br>
I'm going to run the server.<br>
I have to first activate my virtual environment.<br>
And then I can just Python run the app.<br>
And if I now navigate to localhost:8080 I have a working app.<br>
Look at that.<br>
Looks pretty cool.<br>
Let's actually scale it down a little bit.<br>
But have our form.<br>
We have our submit button.<br>
And some nice styling.<br>
And we have debug turned on which is nice because any errors in development is shown here.<br>
And of course this doesn't work because we're making a post request to an empty API URL.<br>
But we will fix that later.<br>
And see that in action.<br>
And that concludes the creation of the Bottle web app.<br>
I've not gone into too much detail because the focus was on AWS Lambda and in the next video we are going to build our first Lambda on AWS.
|
|
|
show
|
4:39 |
Now it's time to get to the core of this lesson and that's to define a Lambda function.<br>
I'm logged into AWS Web Services and I'm at the management console.<br>
I already have some Lambdas here.<br>
To create a new one, use the create function button.<br>
There are several options but I usually author them from scratch.<br>
You have to give your Lambda a name so let's call it Calculator, because as I mentioned in the previous video we're going to go with the simple one first because the fact check will require external dependencies so that will be a more advanced use case which I'm eager to teach you as well.<br>
For the run time, recently they upgraded to 3.7 so that's the preferred Python I would use and I already set up a role previously but if this is the first time you visit AWS Lambda you can create a new role from one or more templates.<br>
You can call it then anything you want.<br>
For example, Lambda role and for policy you can use simple microservice permissions.<br>
And that's it.<br>
Then we click on Create Function and we get into this new screen and AWS gives us some default code.<br>
And it's pretty simple.<br>
A Lambda function is just a function that receives an event and a context if not really used context, but event is where you get your payload from and you do your implementation, calculations whatever you want to do, and you return a dict like object with status code and body.<br>
And we've seen in the Bottle app that I was parsing out those two elements.<br>
Now to do a simple calculator, I define one.<br>
So we import operator, we define a couple of calculations: adding, subtraction, multiplication, and division.<br>
Here's your Lambda handler as well as provided with the default code.<br>
We get the code attribute from the event object that's passed in.<br>
Remember from our Bottle app, when we made the post request?<br>
Here's the other side of that equation.<br>
So the Lambda receives the event and here we extract that code attribute from that dictionary.<br>
So here the Lambda receives the data that's passed in we set a default status code of OK 200 and then we try to do some calculations.<br>
So the code passed in will be something like two plus two.<br>
We try to split that into the first number the sign, and the second number then we get the actual operator from the dictionary.<br>
So we look up the sign, plus, minus, etc.<br>
and we get back this function which we then call with the first and the second number.<br>
So this basically, if I give it two plus two it's almost like an eval of two plus two.<br>
And basically that's the math.<br>
And then, start a return value but if that data was provided so we get a key error or a value error sample.<br>
If we provide a, b, c, then this split, of course will complain that there are not enough elements to put into these three variables.<br>
I can also have a zero division error, if I pass it for example, one divided by zero.<br>
So those are tested exceptions and I catch 'em all on this line and if there's an exception, I just return the exception string to get our status code 400.<br>
Then I return a dict of status code with whatever came out which could be OK or not OK, and the body which is the return value, which could be the result of the calculation or the exception string.<br>
And that's it, really.<br>
I mean, there are more options.<br>
You can tweak them but usually the defaults are just what you want.<br>
A memory consumption of 128 meg and a time out of three seconds.<br>
If your calculations are more intensive for example, in code challenges we recently supported PEMDAS, and we had to bump up this time out to 20 or even 30 seconds because that library just takes more time to run.<br>
So we can tweak that here under Basic Settings.<br>
For example, this should suffice.<br>
So we click Save and next video we'll see how we can define test events so we can test our Lambda from this GUI interface.
|
|
|
show
|
5:04 |
We cannot test this yet in our app because there's one missing link and that's the AWS Gateway API.<br>
It will be the API endpoint where we can post our payload to and that will trigger the lambda, what we can do though is define the test event here.<br>
So I go to configure test events and I can define my payload and so here we expect a code one plus one.<br>
And let's call this sum create and test.<br>
And awesome, this works, I got status code 200 and the body said two which is the result of one plus one.<br>
Let's try another one.<br>
Subtract 99 - 19 Create, test, 80.<br>
Perfect.<br>
One more.<br>
3 * 5.<br>
And it gives 15, alright one more.<br>
Let's check some bad data.<br>
That's actually interesting, so it turns out that the way AWS Lambda handles exceptions is to return an error message and an error type as we've seen here, so we will update our Bottle app to actually look for those keys and that means that in our code the exception handling is not really needed.<br>
Because this will do the same.<br>
so let's quickly update our Bottle app to account for this new data.<br>
So here we check the response back from Lambda for error message and error type.<br>
If both keys are there, we define a message Lambda function raised a, for example, value error exception and we abort with error code 400 and the message.<br>
So now that we have updated this on the fly let's do one more scenario.<br>
Divide by zero.<br>
This should also trigger an exception and yes.<br>
Then the message would say Lambda function raised a zero division error exception.<br>
So this now matches correctly what Lambda will return.<br>
Of course when stuff works, you get status code 200 and body, and it's the body that we are then interested in.<br>
All right, so the next video we're going to set up the AWS Gateway API to tie the Bottle app and the Lambda function together.
|
|
|
show
|
4:07 |
Alright, we've built our Bottle web app we've set up our Lambda and now we're going to implement the missing key which is the AWS gateway API.<br>
And that's the thing that glues the two together.<br>
So our Bottle web app makes the post requests and this API will trigger the Lambda and you'll see that everything comes together in this video.<br>
So, going back to the AWS management console I'm going into API gateway.<br>
And we're going to create a new API REST new API give it a name.<br>
Then I'm going to create a new method which will be post.<br>
Integration type will be Lambda.<br>
And here I can define the Lambda function we wrote in the previous lesson.<br>
I click save.<br>
So now we've got an API defined that can receive payload and it will invoke the Lambda.<br>
Now I'm going to enable CORS which basically means that the API allows for other domains to post to it.<br>
And then I'm going to deploy the API.<br>
New stage, version one.<br>
Deploy.<br>
And now I get this invoke URL and that's the AWS gateway environment variable we set up at the start.<br>
So I'm going to copy this I'm going to go back to my app to make sure that all the virtual environments are deactivated because now I'm going to set it up in my environment.<br>
I'm going to enable it and start our app again.<br>
And let's see if this works.<br>
Of course this is not yet the PEP checker we're still having the calculator Lambda but let's see if this works end to end.<br>
Okay, fair enough, we're excepting a list which will be the return type for the PEP checker so let me temporarily just make that a string.<br>
Try this again.<br>
Wow, nice, of course this validation does not make sense because again, we're working with a temporary more simple Lambda to make the point, but this works.<br>
Awesome.<br>
Our Lambda calculator, up and running.<br>
And what happens if I put in that data?<br>
Will I get my 400 bad request with a message Lambda function raised a value error just as we defined in the previous lesson?<br>
Lambda function raised a zero division error.<br>
Awesome!<br>
So, that was pretty quick and easy.<br>
I just did a define API post method, enable course deploy it and copy the invoke URL into our environment.<br>
And in the next lesson, we're going to write our second Lambda, to implement our PEP 8 checker.
|
|
|
show
|
11:38 |
All right, we made our first calculator lambda.<br>
We set up some test events.<br>
We detected the AWS lambda raised its exceptions earlier than we thought.<br>
So we adjusted the Bottle code a little bit.<br>
And we set up our AWS gateway API and that allowed to receive post requests from our app and to invoke our lambda.<br>
So we have an end to end working solution which is cool, but the calculator at lambda is not really excited.<br>
So let's work on a second lambda to submit code through our web form and run PEP 8 on it.<br>
While preparing this lesson I noticed that the PEP 8 package was renamed to pycodestyle.<br>
And I've been using PEP 8 for a while.<br>
I got an error on my terminal that said that we should really switch to this new package.<br>
So I'm going to pip install that and we're going to write our lambda.<br>
All right.<br>
So lets start building our new lambda.<br>
Bear with me for a sec.<br>
I'm going to import a couple of libraries we're going to use, and explain to you in a bit why.<br>
I need some constants.<br>
And we have our default lambda handler.<br>
Actually, I can call this function anything but I'm just going to stick with lambda handler.<br>
Default signature.<br>
All right.<br>
So, what's the deal?<br>
I order to run PEP 8 checks or pycodestyle as the new package is called, we cannot receive a string.<br>
So we need to run it on a file.<br>
And actually, let me show you that first.<br>
For example, if we run it on our app I actually get a message that I have one line where it expects two.<br>
So let me actually fix that on the fly.<br>
Into line 10 and we see here one blank line.<br>
And as per PEP 8 we should have two blank lines between constants and new classes or functions.<br>
So save this, run it again.<br>
And no news is good news.<br>
This means all is okay.<br>
So this is run from the terminal and if you want to run PEP checks from Python code, pycodestyle has a checker class we can use.<br>
However, that checker receives a file not a string.<br>
So we're going to set up a temporary file.<br>
We cannot just save it in the current directory because that's not writable in the AWS environment.<br>
So I'm going to make that temporary file in /temp, which is writable.<br>
So now we're going to run the checker.<br>
The other complication is that it's output is redirected to standardout.<br>
So we need a way to capture the standardout and throw that into a variable we then return.<br>
So that's why I'm using these modules.<br>
Temp files are standard library module to create temporary files.<br>
So the nice thing is that files created via this method get automatically destroyed when done.<br>
So we don't have to worry about that.<br>
And while preparing this lesson another interesting thing I found was the redirect stdout from the context lib which will help us greatly in redirecting standard output to a variable.<br>
With that said, lets code up our lambda.<br>
So this is the same as last time.<br>
We need to retrieve the code from the event date.<br>
I'll just make it default of empty.<br>
And I'm going to write to our temporary file as defined in the constant.<br>
You have to give it write mode.<br>
And give it a file handle.<br>
Now, to write the code to the temporary file.<br>
And I found that we need to add this final new line.<br>
Otherwise it wouldn't work.<br>
And instead of opening it again for reading we can just...<br>
So we could open it again to read over the content.<br>
But you can also use seek.<br>
Remember those tapes from the early days?<br>
That you rewind the tape.<br>
It's kind of the same.<br>
So you can rewind it and your pointer is at the start again, and then we can consume the content.<br>
So it basically is rewriting the file.<br>
Now the next thing that we want to do is redirect the standard output.<br>
And in the Python 3 documentation I found this context manager that makes it pretty easy to redirect the standard output.<br>
So I can use this snippet directly in my code.<br>
Don't use anything you already have as a file handle.<br>
So I'm going to use another variable name here.<br>
And in this body of this with statement we're going to do the actual PEP 8 checking.<br>
So we're going to use pycodestyle which comes with a checker class which can be initialized with the file name.<br>
So f is the file handle which has an attribute name.<br>
So f.name will be something like /temp/ some random string.<br>
And we give it showsource = True.<br>
And lets call this instance PEP.<br>
And on PEP then we can call checkall.<br>
So this gives a bunch of output that goes to standard output.<br>
But as we're using a redirect standard output will be captured in the out variable.<br>
Then out has a method called getvalue which gives a string of the output and we want to split that by new line.<br>
And as we saw earlier, in our web app we then consume that content which comes back in the body.<br>
And we then join it together on new line.<br>
Actually we can just consume the string.<br>
We might not even have to do the split and join.<br>
So let me just make this string.<br>
Default is to empty string.<br>
And then we don't need to split this.<br>
We just take the full string.<br>
And we need to return from the lambda so we're going to return our status code of 200.<br>
And I believe we can do that because as we saw in the previous video the lambda will raise exceptions early.<br>
So if something is wrong it would already bail with the error message and error type we set up earlier.<br>
So we're already handling that.<br>
Getting here means all went okay.<br>
And we're going to return the body again as expected in the web app.<br>
So we have to return the body and that will be the output, and I don't think we really need this temporary variable.<br>
So we can just do this here.<br>
And lets do some local testing here.<br>
So if name =.<br>
Lets do an okay scenario.<br>
So starting with some valid code.<br>
Return = lambda handler passing in the event in empty context, and print the result.<br>
Oh, I made a typo here.<br>
This actually has to be name.<br>
And for we get a body empty which is as expected.<br>
That's how the command line app worked as well.<br>
Let's do a second case where we do have a PEP 8 violation.<br>
Let's get to some indenting.<br>
Cool, so here we have the scenario.<br>
We have an E111 indentation is not a multiple of four.<br>
So body has content, which means that would show up in the web app.<br>
I'm going to test that next.<br>
So we have a lambda.<br>
What we now just can do is paste that into AWS.<br>
We don't need the name.<br>
We just need this body.<br>
Let's actually make a new one...<br>
Called PEP checker.<br>
Python 3.7.<br>
Existing role.<br>
My role.<br>
Create function.<br>
And let's put this code in here.<br>
Save.<br>
And lets set up a test event.<br>
Okay, let's fix the quoting.<br>
Create.<br>
Test.<br>
Ah, okay.<br>
And I did expect this.<br>
There's one last thing we need to work around and that's to make our lambda function work with external modules.<br>
As we saw at the start of this lesson we pip installed pycodestyle and in AWS we don't have this module yet.<br>
But AWS perfectly supports uploading lambdas with external packages.<br>
And in the next video I'm going to show you how you can do that.
|
|
|
show
|
5:36 |
Right so we have our PEP 8 checker lambda in place there's only one problem there's no module named pycodestyle and of course we did keep installed in our local environment but in our AWS Sandbox it's not there by default so we need to take some extra steps to pip install the module in a separate virtual environment zip the package up together with the lambda and upload it as a zip file to AWS.<br>
So we're going to run these steps to make a lambda zip file including the pycodestyle package and upload that to AWS.<br>
So back to my terminal I'm going to deactivate my current environment and I'll make a new one.<br>
Let's call it AWS.<br>
Going to enable it.<br>
I should not have any packages and I'm going to pip install pycodestyle.<br>
And then I need to go into the virtual environment lit Python 3.7 side packages folder and I need to do a zip -r nine lambda.<br>
Let's call it package zip and let's take this specific pycodestyle files and I have to move the zip file up four directories because we are four levels deep.<br>
Then I go up and here I have my zip file now the only thing I need to do is add the lambda to it and I can use zip -g lambda package.zip and add the lambda we wrote in a previous lesson.<br>
Now we go back to my lambda and instead of embedding the code that won't work anymore I need to use the upload a zip file option.<br>
You can also upload it from s three but let's just work with a local zip file for now.<br>
That's a valid point.<br>
My module is called lambda.py so I need to update this as well.<br>
Try that again, can still see my code that's not always the case but now we have the pycodestyle module there as well.<br>
Let's test again with the events we setup.<br>
Nice, now it works.<br>
Let's do a second event.<br>
With the famous indentation and test that as well.<br>
Awesome, we get output.<br>
Now it's time to test the new lambda out with our web app but the AWS gateway API is still pointing to the old lambda.<br>
So let's fix that first.<br>
So go to post, click on integration request and we modify the lambda to point to pet checker.<br>
Click okay.<br>
I believe you need to redeploy.<br>
All right, let's test it out.<br>
Wow, cool.<br>
Let's do some real code.<br>
Let's leave off that second new line.<br>
Look at that, expected two lines on line 10.<br>
Let's fix that.<br>
Let's do some other violation.<br>
Let's make this a very long line and maybe we have some spaces in a dictionary.<br>
Look at that, how cool.<br>
That line was indeed too long according to PEP 8 and as per PEP 8 we also cannot have white spaces before and after curdecurly braces.<br>
Awesome.<br>
That concludes the lesson materials.<br>
We built two lambdas we fully integrated it with AWS and API gateway, you have some interesting code you can play with and with that it will be your turn to come in two days and in the next video I will walk you through how you can spend those two days getting as much practice as possible.<br>
I hope you enjoyed this and see you tomorrow.
|
|
|
show
|
2:46 |
Congratulations, you've made it to the end of the video content of the AWS Lambda lesson.<br>
And we learned a lot, we made a Bottle web app lambda functions, integrated it with AWS Gateway API and we got a fully working useful application that takes code, runs the pycodestyle package on that code and returns a response.<br>
And it's about time that you start practicing yourself because it's the amount of practice you do during this course that will make all the difference how much you get out of it.<br>
I wrote up some instructions here and I have to say that to create an account on AWS you need to enter your credit card.<br>
You have to decide for yourself if you want to make an account.<br>
I do recommend that you do, it's very useful technology we use it on our platform making many calls verifying a lot of code and they have a very generous free tier.<br>
So you can make one million free requests per month.<br>
Either you make an account or not you can always write lambda functions because as you saw me doing in the previous videos I could just test them locally running my script.<br>
So that's fine too.<br>
We have a PyBites code challenge dedicated to AWS Lambda so I suggest you head over there read through the instructions.<br>
Special thanks to Michael Herman who actually moved on from Real Python to Test-Driven IO.<br>
And if you want to submit your work to our community branch I suggest you follow this Git setup guide where we provide all the instructions to fork our repo, clone it, and make your own branch.<br>
And then pull request it against our community branch which is the branch where we merge all the community contributions.<br>
And it's a pretty cool repo, because we've got 60 challenges right now and a lot of code has been written by the community so there's a lot of good stuff you can find there.<br>
So that's the plan for the coming two days and if you lack ideas, actually in the code challenge there are a couple of scenarios that may give you some inspiration of the stuff you can do.<br>
For the rest, you're totally free to write the lambda function that will suit your needs.<br>
Whatever you build, you should be really proud and share it on Twitter, Facebook or the social media of your choice.<br>
Especially on Twitter you can use the hashtag #100daysofweb.<br>
When you include @talkPython and @pybites we get a notification because we love to see what our students are building.<br>
So, consider doing that.<br>
Other than that, I wish you good luck and a lot of inspiration.<br>
Practice as much as you can and write your own awesome lambda functions, and have fun.
|
|
|
|
44:58 |
|
|
show
|
1:20 |
Welcome to your next chapter Deploying you web application on to Linux.<br>
Now if you don't have any experience with Linux don't worry, I'll walk you through it.<br>
I'll give you a nice script that gives you every single step.<br>
Course, it'll take a little bit of getting used to but Linux is where the majority of web application is run and it's the vast majority of where Python web applications run.<br>
So knowing how to deploy our web application of Linux is super important.<br>
There's a handful of ways to deploy our web app.<br>
Some of these involve things called Platform as a service.<br>
Something like Heroku, for example.<br>
But the cheapest and most flexible really has to do with Linux.<br>
So that's what we're going to focus on in this chapter.<br>
So you've seen we've created our demo application and it is really working well now.<br>
It has unit tests, it has migrations it has a nice data access layer it has a decent design.<br>
It's ready for deployment, I would say.<br>
You know, in reality, you can't actually register for the site, so maybe not so much.<br>
But roll with it here, okay?<br>
However, there's this problem so far it's been running on local host, our machine.<br>
We don't want it on local host we want it out on a domain on the internet like billtrackerprodemo.com or whatever we decide to buy.<br>
So in this chapter we're going to take our pyramid demo web application, Bill Tracker Pro Demo and we're going to deploy that to a cloud hosted Linux server.
|
|
|
show
|
2:58 |
Let's look at some of the architecture and technologies involved in this deployment.<br>
Now, this big gray-ish box here, this has the Ubuntu logo.<br>
This is our Linux machine where we're going to deploy our Python web application.<br>
Now, a couple of pieces of software are going to be involved.<br>
We're going to use something called Nginx.<br>
Nginx is the thing that your browser will talk to.<br>
This will be what people consider to be your web server when they hit your domain.<br>
The domain will say, the response will indicate this is an Nginx server.<br>
All the SSL will go through here.<br>
All the static files will be directly served by Nginx.<br>
But anytime a data-driven request comes in, one that's going to hit a Pyramid view method, then it's going to run in this other process called uWSGI.<br>
WSGI, W-S-G-I, stands for Web Service Gateway Interface.<br>
This is a common interface, a common API that all the Python web frameworks speak.<br>
Pyramid, Flask, Django, and so on.<br>
The micro, I'm guessing, is it's lightweight.<br>
These are the two applications we're going to run and they're going to run our Python code.<br>
There's going to be one Nginx process and it will delegate these data-driven requests over to the uWSGI process.<br>
Python doesn't have amazing single-process parallelism.<br>
It's async and await features, it's asyncio features are really awesome, but these frameworks don't have that typically.<br>
Flask, Pyramid, Django, none of them at the time of recording, do.<br>
Remember, we talked about Quart, for example.<br>
Instead of just running one process and even if we had the parallelism we get better scalability if we run more than one process.<br>
So, uWSGI will operate in this Emperor mode where there's one process of uWSGI that controls a bunch of others.<br>
In those other worker processes that will be where the actual Python code runs.<br>
These little processes with the Python icon that is where your Pyramin, Flask, and Django actually runs.<br>
Let's see how a request might be processed.<br>
Comes in, probably over HTTPS, hits Nginx.<br>
That decrypts the traffic that starts processing the request and then it's going to foreword that over to uWSGI.<br>
uWSGI's going to say, okay, which one of my worker processes is not busy, or is less busy, right now?<br>
How 'about this one?<br>
This one on this particular request is going to process it.<br>
Now, another request comes in, it's going to say actually, let's let that one process the next request.<br>
While those two are running, maybe a third request comes in it says, oh, this one, this time is going to get to process it.<br>
You'll see, we'll actually have multiple copies of our web server running and it's super easy to configure how many of those you have.<br>
This is the overall workflow and the set of software we're going to work with.<br>
Our first task is going to be to set up Ubuntu.<br>
Our second task will be to set up uWSGI.<br>
And then finally, we'll set of Nginx.<br>
Once we have Nginx running everything will be listening on the public internet and we'll be able to actually deploy our web app.<br>
That'll be awesome.
|
|
|
show
|
1:37 |
We're ready to start our deployment.<br>
But, what are we going to deploy?<br>
We don't have any code yet and we're certainly not going to start over.<br>
We're going to take this app we've been building and building and building over the last couple of chapters.<br>
And that's going to be the Bill Tracker Pro app.<br>
So we're going to just take the one from the unit testing chapter and we're going to put it over here.<br>
Now, notice this one has a virtual environment and it has been registered.<br>
There's a couple of other things that we also want to work on.<br>
So let me just clean this up and then create a new virtual environment.<br>
Why do we care about writing it locally?<br>
Well, we want to make sure it works locally obviously, before we try to make it run on a brand new machine that takes even more setup.<br>
So let's go over here.<br>
And notice that there's a couple of things we could remove.<br>
So first of our all, we could remove the idea.<br>
I'm going to start from scratch.<br>
We've already deleted the virtual environment.<br>
We've also deleted the registration.<br>
So, let's go and create a new virtual environment.<br>
One for this folder.<br>
It's activated.<br>
Now we just have to run the setup and development mode and then install the requirements and we should have it running locally.<br>
The setup ran okay.<br>
Let's go ahead and also install the other requirements.<br>
Just to be sure.<br>
We don't need the...<br>
I guess we can run the dev once here but I'm sure that we won't run the dev once.<br>
Now we should be able to run our app right here.<br>
Give it a shot.<br>
And, tTada!<br>
It looks like everything is running okay.<br>
All right, super.<br>
So our app is up and running.<br>
We'll just go ahead and throw that into PyCharm and we'll get started.<br>
All right, looks like everything is here.<br>
Let's just check our virtual environment is all good.<br>
It is and it's already detected this so it should be running.<br>
Perfect.<br>
Looks like we're ready to start working on the deployment for this web app.
|
|
|
show
|
2:18 |
The first thing we need to do before we can set up our server is to create it.<br>
And, maybe even before then is to decide where and how to host it.<br>
I'll give you three solid options.<br>
There are many many ways to host our Python web app and what we're going to do is create a Linux virtual machine.<br>
When we create this Linux virtual machine beyond that point, it's all the same.<br>
It's just down to which host are we going to create it on.<br>
I'll recommend three for you all.<br>
So the first one, and the one we're going to use is Digital Ocean.<br>
So Digital Ocean has great support for running your code your web apps, everything on Linux virtual machines and the pricing is just ridiculous.<br>
So I feel like Digital Ocean has really been driving the pricing that the other folks are also following.<br>
I'll give you some examples.<br>
So for example over here, we can create a decent server with one CPU and 1 Gig of RAM that's actually plenty and a terabyte of traffic, which if you were to just pay straight for that through Azure or AWS S3, that's $93 worth of bandwidth right there and you pay for all of this, five dollars a month.<br>
It's pretty awesome.<br>
For my servers I'm running them more on these or maybe even these but that's just mostly for a little extra traffic but you could totally run, you know a serious website right on that.<br>
Okay, so we're going to go over here and use Digital Ocean but another solid, solid recommendation that I really like is Linode.<br>
Linode is very similar to Digital Ocean in its positioning.<br>
Great Linux virtual machines.<br>
They all have SSD's, plenty of ram plenty of network, and so on.<br>
You probably have heard of Amazon Web Services but maybe you have not heard of Amazon Lightsail.<br>
So Amazon Lightsail is AWS's answer to Digital Ocean and Linode.<br>
If you go and just create an EC2 machine that's way way more expensive it comes with no bandwidth and so on but as you can see over here oh look, on AWS Lightsail you get an EC2 backed Linux virtual machine with the same amount of traffic and all that.<br>
Basically, you know, you just look at the same there you go, you get the same amount of transfer all that kind of stuff on Amazon's hardware so this is also a really good option.<br>
So these are three really solid options for creating Linux virtual machines.<br>
Maybe you would have one for your web app and one for the database, things like this.<br>
So probably a couple in practice, we're going to use one.
|
|
|
show
|
3:00 |
Here we are, logged in to DigitalOcean and like I said, the process is going to be really similar regardless of which host you choose.<br>
So, I've created a project called 100 Days Web and we're going to create a virtual machine in here.<br>
In DigitalOcean parlance nomenclature they call these droplets.<br>
So we'll go over here and say, Create a Droplet we'll come down here and we're going to pick our distribution and you also have things like one-click apps if you want to, say, set up a disk or server or something.<br>
We're just going to do this.<br>
You also have containers but we're not doing containers we're just going to do straight deploy.<br>
We're going to pick the Ubuntu the latest Ubuntu with long term support.<br>
That's 18.04 at the moment.<br>
So, we're going to pick that and then we go down here and we pick the size.<br>
It defaults to this, but unless you have a whole lot of traffic you don't need this.<br>
You could run, I believe on this one certainly on this one, you could run a website backed with Pyramid that does millions of requests per month.<br>
To the data back end.<br>
Not all the CSS and whatnot.<br>
Totally fine on either of these.<br>
Alright, we're going to pick this one just to get started.<br>
Actually I'll go ahead and pick this one.<br>
You choose which mix-in's for you.<br>
Give more CPU oriented stuff, and if you're database server you can pick one of these but we're not doing that.<br>
Don't need back-ups, don't need extra cloud.<br>
I'm going to pick the data center closest to me.<br>
That's not what I would pick if I was actually deploying this for production.<br>
All of my stuff lives in New York.<br>
Why New York?<br>
Well, most of my customers are U.S., or European, based.<br>
And East Coast of the United States felt like a good compromise.<br>
'Course you can do multiple servers and multiple regions.<br>
If you turn on monitoring you get cool graphs about what your server's up to.<br>
And then we're going to check off our SSH keys.<br>
A few of you probably don't have one of these.<br>
And so you click here and create a new one or upload a new one.<br>
If you don't know how to create SSH keys just Google Create SSH Key, your operating system and follow along.<br>
So I checked off an SSH key and here we're going to choose a host name, so we'll just call this Bill Tracker Web.<br>
You can call it whatever you want.<br>
We could add tags.<br>
We don't need to.<br>
It's going to go into this 100 Days project.<br>
Whoo, ready to go.<br>
We can create a bunch.<br>
Don't think we need to.<br>
I think one is good enough.<br>
Alright, double check you got all the stuff that you're hoping for here, and click Create.<br>
Now, during this process, I won't speed up the video of course, sometimes, during like, dev install and stuff we've been speeding up the video, but here I'm just going to show you how quick this goes.<br>
Alright so here it is, setting up.<br>
It's creating the machine.<br>
Getting everything configured.<br>
Copying it over.<br>
Assigning an IP address.<br>
Starting it up.<br>
We're almost there.<br>
Usually takes about 20 to 30 seconds.<br>
Final stretch, here it comes.<br>
Boom, done!<br>
We have our server.<br>
We have our Linux virtual machine set up.<br>
From now on, whatever we're going to do is the same across all these different providers.<br>
Once we go over here and copy this we'll be able to connect over SSH and it'll just be straight Ubuntu from here on out.
|
|
|
show
|
1:48 |
We have our server created running on Digitalocean.<br>
We have one of the $10 servers we created.<br>
Now we need to connect to it.<br>
So, we're going to use the SSH command and I already copied the IP address so there it goes.<br>
I've also added the SSH key to my Mac using SSH add key.<br>
So, it won't ask me for how to connect but you'll have to add your SSH key potentially or it'll ask you for it.<br>
The first time you connect it'll say 'we've never seen this host before, are you sure you want to connect?' and of course we do.<br>
We just created it.<br>
It won't ask again.<br>
And here we are.<br>
We are connected to our brand new Ubuntu 18.04.1 and right off the bat it has 11 security updates.<br>
So, when you create these things the very first thing you want to do is immediately log in and install the updates.<br>
So we'll say apt update to make sure it has the latest view of its software.<br>
An apt upgrade to get things going.<br>
Spelling is hard.<br>
Here we go.<br>
Now give it a moment to do its magic.<br>
Every now and then there's some file that needs to be upgraded but there's some kind of local change versus the update.<br>
Just take the default.<br>
If you don't know what you're doin or you're new to this just take the default.<br>
It almost always works.<br>
Okay, everything should be updated.<br>
Do we need to restart the server or do we not?<br>
Sometimes you have to.<br>
Sometimes you don't.<br>
An easy way to find out at least on Digitalocean is just to log out and log back in and it'll say 'system restart required' if that's true.<br>
Give it a quick little reboot.<br>
It should take about ten seconds and it'll be back ready to go.<br>
Let's try to connect one more time.<br>
Boom.<br>
It's already back.<br>
So now we have no security problems going on.<br>
And everything is ready to roll.<br>
Congratulations, you have a brand new updated latest version of Ubuntu running on some pretty awesome infrastructure.
|
|
|
show
|
5:21 |
It's time to set up our server.<br>
We've got to new, empty server that's all ready to go but what software does it need?<br>
We saw it requires uWSGI.<br>
It requires Nginx.<br>
It's going to require Python.<br>
And, actually a couple other things as well.<br>
So let's do that right now.<br>
I have a script that I typically run and we're going to just work our way down that script.<br>
We also have a couple configuration files which you typically get by copying from the Nginx website or uWSGI website and filling it out.<br>
We're also going to just copy that in and dock it over and adjust it for what we're doing here.<br>
So we have three new files.<br>
If you go up here and look at our structure we have our Alembic, we have our main web code with like static and view and stuff, and then we have this server bit that we're having here.<br>
So, to configure Nginx we're going to use this file.<br>
To configure uWSGI, this one and to configure our server, this one.<br>
Now, technically this is a bash script but I don't really plan for you to run it.<br>
Although, you probably can.<br>
It's more just a bash script so we get syntax highlighting verification and things like that.<br>
So the first thing we do when we create our server is we're going to want to update it's software and then upgrade it.<br>
You saw it comes out of the box with eleven security problems; that's not amazing.<br>
The next thing we're going to need to do is give it some of its build tools and source control tools git and build essentials.<br>
That's so when we pip and solve things, that goes better.<br>
So we're going to go through that here.<br>
Let's go and reconnect to our server.<br>
Now, when you see apt here, that's configuring the system.<br>
Later we're going to use pip and configure just a virtual environment for this version of Python.<br>
Here we are installing the build tools.<br>
That installed quite a bit of stuff, but that was good.<br>
The next thing we want to do is install Python3.<br>
So we'll do that here.<br>
See at the moment, we're getting Python 3.6.7.1 which will give us whatever the latest version of Python 3 is.<br>
Which is probably what you want.<br>
Next, we're going to install a couple of things here to enable better support for compressed responses in uWSGI.<br>
So we're going to install that.<br>
Great, that works.<br>
Now, we're going to install Nginx as a system wide thing later uWSGI is a Python thing so we're going to install that into our virtual environment.<br>
So now we're going to install Nginx.<br>
Now it's also nice to be able to monitor your server and see what it's up to.<br>
One of the things that I really like is this utility called nload, and it let's you basically see inbound and outbound network traffic.<br>
So we're going to install that as well.<br>
And we can run nload, and it will show us...<br>
Well there's not a lot going on right now but if we were running a real web app with real traffic to clients and databases and stuff you would see this thing was slamming.<br>
So you can use that to check that out later.<br>
Not technically required, but very helpful.<br>
So this is basically our Linux requirements.<br>
The next thing I want to do is make sure that no one can get into our system except for on the few ports we would allow them.<br>
So we're going to install this thing called Fail2Ban which will block people attempting to log in over SSH and failing.<br>
Mostly this is for passwords.<br>
We don't have passwords enabled but just in case it gets turned on let's stop the dictionary attacks.<br>
So we'll run that.<br>
Alright, Fail2Ban is set up.<br>
That's all good.<br>
The next thing we're going to do is use a built-in fire wall called Uncomplicated Firewall, uwf.<br>
And, we're going to allow only three ports to be opened on the server.<br>
The two web ports http and https, even if you only serve https traffic, you probably still need http open because if they just type your domain.com, enter the first request is going to hit http and then you can just redirect it over to https.<br>
So these two allow that.<br>
You can see it updated the firewall rules.<br>
And we're also going to want to be able to log back in.<br>
If you don't allow SSH, you're never coming back.<br>
Alright, so we're going to allow that.<br>
And then finally, we're going to turn on the firewall.<br>
This gives us a scary warning saying you may not be able to connect if you got this wrong.<br>
Right, but you can see right here, we're allowing SSH so we say yes.<br>
And right now is probably a good time to log out and log back in, making sure you haven't broken anything.<br>
Whoa, alright things are still good.<br>
So we've got our firewall set up our dictionary attack blocker set up our software set up A good thing to do, let's just really quickly configure GiT, and then I'll call it done.<br>
So, we're going to use git to put our source code and update our source code on the server.<br>
Basically, we'll check it out there and just do a Git pull on it.<br>
Now, you could log in every time or we could even register an SSH key on our server with GitHub and things like that but we can set up this cache so that it will remember our password for, I don't know that's like a month or something.<br>
So, let's do that.<br>
We enabled a cache, and then we enabled to run with a longer time out.<br>
I guess this is probably duplicate.<br>
A good thing to do is if you are ever going to check anything in you have to put in your email here or it won't let you check in.<br>
It won't let you do a Git push.<br>
So email as well as your name.<br>
Okay, looks like Git is all set up.<br>
The next thing we're going to do is set up our source code and our web app structure login files and things like that.<br>
We'll do that in the next video.<br>
So, hopefully, even if you're not familiar with Linux that's not a whole lot of commands to run.<br>
We technically could have just run them all at once but I like to go through step by step and talk you through them.
|
|
|
show
|
5:20 |
The next thing we need to do is get our source files on the server and things like that.<br>
So we're going to create a root based this is on the root of our drive a folder called webapps.<br>
Call it whatever you want.<br>
Just making this up in a way that works well for me.<br>
Then we'll have logs section and we're also going to have a web app source code sub folder here but we're going to use git clone to create that.<br>
So let's just start by creating the structure, like so.<br>
I'm going to run that, and now you can see we're in /webapps.<br>
There's nothing in here.<br>
Oh I like to use tree to explore stuff.<br>
So we'll put tree on here.<br>
Then you can do things like tree your home, and tree what it is.<br>
We'll see that in a moment.<br>
Okay, now what we're going to do is we're going to create a Python virtual directory.<br>
Now there is Python on here.<br>
We set that up already but if you ask which Python3, it's the system one and we don't want to mess with the system.<br>
Instead, we'd rather create a Python virtual environment that's entirely stand alone that we can upgrade, we can install stuff to.<br>
It won't affect the overall system Python 3.<br>
That'll be a little easier for us.<br>
It won't require sudo, and all those kinds of things.<br>
So the next thing we want to do is come over here and create this virtual environment just using that command.<br>
We're going to activate it, we'll go to install or upgrade pip and setuptools.<br>
So let's just do those steps right now.<br>
As you can see, pip is super out of date so is setuptools.<br>
I see that.<br>
It also asks which Python again.<br>
Now we have the one in our virtual environment.<br>
Okay, super.<br>
So that's a good step.<br>
We're also going to install a couple of tools.<br>
First we're going to need uWSGI, obviously.<br>
That's the other part.<br>
We already installed Nginx.<br>
That's a system thing.<br>
uWSGI is a Python thing.<br>
So we'll install it here.<br>
Just a heads up, installing uWSGI can take a little while.<br>
Super, we installed the latest uWSGI successfully.<br>
So if you try to run it, it's not going to run 'cause we haven't configured it yet but we're pretty much good to go there.<br>
The last thing are two little utilities.<br>
One called HTTPie, HTTPie, I guess I don't really know how to say it correctly and that lets us do requests.<br>
Its like cURL or Wget but it's much nicer and it's a Python library.<br>
So we'll install that.<br>
That'll let us test our app as we install, as we kind of get our servers up and running and we're going to use Glances, which is a really awesome way to get a quick look at how your server's running where the process is, how much memory they're using CPU, et cetera.<br>
So install those two things.<br>
So just to show you, we can say http talkpython.fm.<br>
We see it downloads it and even color codes it for us.<br>
That's pretty sweet and we could run Glances and see what's happening on this server.<br>
Here if we make it better, you can see a little better.<br>
Get little graphs.<br>
So the CPU, not much is happening.<br>
Mostly Glances itself here is doing that.<br>
Doing all the work.<br>
And you see what else is running.<br>
We'll have more processes running as we set up uWSGI and Nginx.<br>
So we get our IO time, our memory used, memory free all that kind of stuff.<br>
So that's it, all of our Python stuff is set up and configured.<br>
Next thing to do is to get our source code our web app source code on the system and we're going to just do that by git cloning 100daysofweb-with-Python-course 'cause that's really long.<br>
We're going to put it into a shorter directory.<br>
It's called app_repo.<br>
So we'll just do those two things.<br>
Now because while I'm recording this course my GitHub repo is private I need to log in but if you do this later you won't have to give your username and password because I'll have made that repo public.<br>
So there we go, we've not gotten all of our files here.<br>
That's not super helpful.<br>
So here you can see we've checked out our app_repo.<br>
It's got the days, and here's the code that we got all ready to run.<br>
We're going to mess with that in a little bit.<br>
Here's our log file.<br>
We're going to put our app logs here and whatnot.<br>
And then our virtual environment.<br>
So we're just about ready to get started.<br>
We got our source code here.<br>
We've got our Python set up and we've got our Linux set up.<br>
The last thing to do, before we get onto actually configuring the web app so it'll run let's just do one quick little thing.<br>
So notice if I come over here and I exit and I log back in and I ask which Python, or which pip, or whatever it says the system one but I never really want to mess with that.<br>
I almost always when I come to the server care about configuring the web app.<br>
So here's a cool little trick, which it might be helpful.<br>
Got to find the right directory.<br>
So hold tight.<br>
There we go.<br>
So we want to run this command at the very end of our login.<br>
So let's put in our RC file.<br>
Now if we exit out of the server and we log back in notice our virtual environment ready so any commands we give it or whatever will be targeted at the virtual environment that our web app is using.<br>
Which, like I said, is almost always the reason we're logging into the server is to configure our web app.<br>
So I like to make sure, by default I don't accidentally install something or change something about the system Python and the easiest way to do that is just to have it always activated.<br>
Of course, if for some reason you need the system Python you could just deactivate real quick and you're back to system file.<br>
Okay, super, so now our system is set up our Python environment is set up.<br>
We just need to put the configuration files in place so that our Python code can actually run.
|
|
|
show
|
5:49 |
We have our server all set up, and our source code there and it's pretty much ready to run.<br>
What is left is actually getting our web app to run on the server.<br>
So, we've already cloned it into our app_repo the next thing to do is to actually go and do what is required to get the requirements on the server, and register the Pyramid web app as a package, because that's how it works.<br>
So, let's go do that.<br>
Come over here, and we're in this directory with our setup.py, so we've got to do a couple of things.<br>
Install our requirements.txt notice we're in our virtual environment because that's how we set up our login to be.<br>
So here we're installing our requirements then we'll run setup then it should be pretty much ready to go.<br>
Okay, great.<br>
We'll see if we can pserve it.<br>
That looks more or less like we can.<br>
There it is, it's running on our server.<br>
Now, we don't want to use pserve as our backing server we want to use uWSGI.<br>
It's a much better server.<br>
So this is not how it's going to run but this verifies that it's generally in place.<br>
So we could even use HTTP, HTTPie, on it.<br>
We open up another one of these, and go here and just HTTP against that you can see this looks like our webapp.<br>
Excellent.<br>
So, things are looking good.<br>
Get out of here.<br>
So, we need to configure, first thing, is uWSGI.<br>
You can see, there's actually some plugins for Nginx and these unit files so let's go ahead and install those real quick.<br>
Sweet.<br>
Now, after restarting PyCharm you can see we have little icons we have some code highlighting, things like that.<br>
So it's a little bit better.<br>
So, for these units, these are things that run system daemons on Linux.<br>
And the idea is, we give it a little description let's just say the bill tracker server the target, when it's going to be able to start has to wait on sysog but after that it can start and we give it details about the service.<br>
So, we want to run our uWSGI instance out of this virtual directory we're going to use the INI file over here, actually we want to change this to that, okay that's looking good and we want to set our working directory here.<br>
Notice, one weird thing about these runtime directories if it doesn't have the trailing slash, it doesn't work.<br>
I don't know why, should be able to put that on for us but whatever, just make sure the trailing slash is there.<br>
Now, this, in order to test this we want to see if this command itself will run.<br>
And it turns out it will not.<br>
So here we are, over in our server.<br>
If we try to run this command it should find a uWSGI, we've installed that.<br>
It should find the INI file.<br>
But it won't start.<br>
Notice it's exiting here and we're back at our prompt.<br>
The problem is, there's where's it say what the error is I don't actually see where the error is in here but it's not working, because it should block the process and just keep running, block the terminal.<br>
And the reason is, over here in our production.ini we need to put information about running in uWSGI.<br>
So, let me grab that real quick and stick it over here.<br>
So when we run our code normally it's going to run this bit and it's going to use this server part.<br>
But we're not going to use that server.<br>
Instead we're going to use the uWSGI server.<br>
So we need different config settings in here.<br>
I'll just paste them in because they're always the same and you just edit the details.<br>
So, over here, we have a uWSGI section and let's just tell PyCharm that this is spelled okay this is spelled okay.<br>
So this is going to be read by uWSGI to configure it.<br>
It says, well, we're going to run on localhost port 9055.<br>
Now you might say, hey Michael, the web is on port 80.<br>
Yes, and that's what Nginx is going to listen on.<br>
Internally, though, we're going to listen on this port and pass through.<br>
Running this master mode, use five processes enable threads, all those things are good.<br>
We're also setting up our logging to go to this file and I think this would be pretty good.<br>
So now, put in, checkin these changes run on uWSGI going to push those back to Github which, when that's done, we can come over here and do a git pull and we get all those changes.<br>
Beautiful.<br>
Now, if we just try to run that command again it should work.<br>
Might not, but it should.<br>
Let's try.<br>
Ooh!<br>
Look at that.<br>
No more warnings.<br>
And let's go over here and command and we can just look at the log file here and you can see, now, it's running it has all these workers it's running in a multiple interpreter mode here's our webapp, startup all that kind of stuff.<br>
So that's pretty awesome.<br>
And if we try our HTTP localhost that new port, 9055, boom!<br>
Our site's running!<br>
Perfect, it's running on a uWSGI.<br>
But uWSGI itself is not set up to run as a system process which is what we're going to need to do because we don't want to have to come in here and type this command we want it just to start with the web server.<br>
So the final thing to do will be to register this unit file as a system service which is what we're doing over here.<br>
So now we've tested our command we're going to copy this file over to systemd, and it should run.<br>
We run this command, that looks like it works and then the next thing to do is just to enable the bill tractor, beautiful.<br>
And then we'll try to start it.<br>
That's good, you don't see an output, that's good.<br>
And then you can ask what it's up to.<br>
You see all the processes, they're all still running everything's still working great.<br>
And we can also verify that in glances.<br>
So now you see, over in glances all of our web processes are running, it's all good and we could do one more request, so that's good.<br>
The final test will be if we reboot the server, will it come back?<br>
Well, that's easy.<br>
We're not in production yet we're just setting up the server.<br>
So let's restart it.<br>
And see, if we log back in, if we have our server running.<br>
If we have our web server running.<br>
Not quite up yet.<br>
A few more times, there we go.<br>
Now, if we just hit localhost again.<br>
Perfect.<br>
So, every time our server turns on our web service under uWSGI is up and running in all those processes.<br>
We have the main coordinating process and the five, as we specified five in our production.ini five worker processes.<br>
All right, perfect.<br>
Last thing to do is get Nginx working and we'll be all set.
|
|
|
show
|
4:14 |
We're in the home stretch now.<br>
All we have to do is enable Nginx.<br>
So the first thing we do is just run this enable command over here on our server.<br>
It looks like that's good and maybe go ahead and start it.<br>
And it's going to start and serve up some things.<br>
So we go to this IP address here, like that.<br>
It'll say, "welcome to Nginx." That's great, this is this default file.<br>
But let's go ahead and get rid of that and have it serve just our files.<br>
So first of all we can remove the default site by deleting that file.<br>
So we'll do that.<br>
Now there's no more default site.<br>
Instead we're going to replace it with a different config file called billtracker.nginx.<br>
This file format's pretty simple.<br>
This is how we can configure Nginx and we're going to tell it to listen on this fake domain name that we don't know.<br>
But many different server's websites running on the same server under the same Nginx and they all trigger off of that name there.<br>
But since we deleted the default and we only have one it didn't really matter but that's important in practice.<br>
And what we're going to do is we're going to set up a few things.<br>
We're going to say the location for static files are going to be served directly out of Nginx.<br>
And it's going to do gzip on them and things like that.<br>
It's going to have them be cached for a year and so on.<br>
Now, along here we're going to just say this /static is really this folder.<br>
This static folder that had previously been served by Pyramid but now is actually being served It sort of skipped, it never even goes to Pyramid or Web App, or uWSGI or anything like that.<br>
Then it says, otherwise, / and on.<br>
We're going to go and just do what's called a proxy pass.<br>
Just pass over the request internally to uWSGI Get the response and then send it back.<br>
So all we have to do to enable this file is to copy it in the right place which is /etc/nginx/sites-enabled/default Then just give it the name.<br>
You want to copy it there and we just Nginx restart.<br>
Big moment of truth.<br>
Deep breath.<br>
What did we get?<br>
Refresh.<br>
Bam, how about that?<br>
Now of course we need to register the domain or put it into our host file or something like that.<br>
We're not going to do that in this class.<br>
That's sort of beyond the scope.<br>
You all can figure that out as really just a matter of your name provider's setup, okay?<br>
But here we have it.<br>
It's running, look.<br>
Here's our BillTrakerPro.<br>
We can click over here and we can go make a payment.<br>
Put 45 bucks towards this.<br>
It should be 300 left.<br>
Boom, it is.<br>
Our site is working.<br>
Let's go ahead and pay off this clothing.<br>
Here, where is it in this list?<br>
Let's pay off the first one.<br>
So we add clothing.<br>
We still have 300 left.<br>
Let's go pay that final 300.<br>
It's paid off.<br>
Now you see?<br>
It's gone from our list and is now moved down somewhere to there.<br>
It's like our site is working wonderfully on our DigitalOcean Server.<br>
Running through Nginx.<br>
Things like that.<br>
If we go over here and it's back to element we can look at the actual request.<br>
A couple interesting things here.<br>
First let's just go to HTTP.<br>
Notice the response time.<br>
42 milliseconds.<br>
42 milliseconds and if we ping the server.<br>
You notice it's 30 milliseconds round trip time to ping it and it's only 41 milliseconds total in response time.<br>
So that means we're only spending about ten milliseconds per request in our server.<br>
That is just awesome.<br>
So we do a whole bunch.<br>
Now if you go over here and pick one of these, you might see sometimes ...<br>
It's all up and running.<br>
In the very beginning as the worker processes process their first request this could be a little bit longer.<br>
Once it kind of gets warmed up and it's nice and zippy.<br>
Another thing to note if we click on here ...<br>
I could pull this up.<br>
There we go.<br>
We look at the response headers.<br>
Look at this.<br>
The server is Nginx 1.14.0.<br>
Remain on Ubuntu.<br>
It looks like it's working just like I said, right?<br>
Our web browser talks to Nginx and it think that's it.<br>
We're done.<br>
I talked to the server.<br>
It said it's Nginx.<br>
Here's the CSS and HTML and all that.<br>
In reality, it's passing that back to uWSGI.<br>
uWSGI's finding a worker process.<br>
The worker process is running our Python 3 App.<br>
It does the work.<br>
It makes it's way outside of that ...<br>
Inside, out into that onion comes back and goes back to Nginx to here.<br>
Now our web app is up and running in the Cloud on an Ubuntu Linux machine.<br>
We used but like I said, any of the three choices that I laid out for you are pretty similar and really awesome.
|
|
|
show
|
1:47 |
Let's do one final quick check in on the server.<br>
I'll SSH over there.<br>
Have a look.<br>
So, no security updates again it's only been a few minutes, but still good.<br>
Now we'll do a quick check in with Glances here.<br>
Our web app is up and running.<br>
We can even sort by memory usage by pressing M or my CPU usage by pressing C there's a whole bunch of commands here.<br>
So here you can see all of our servers running they're each taking about 100 megabytes, 120 megabytes but if you add all those up you might think we're using way more than that a lot of the processors can share memory or read the same shared files off disc and stuff like that.<br>
So we actually have a ton of memory free we only used 374 megs, we have 1.5, 1.6 gigs left.<br>
Now in another browser window, on a separate screen I'll go click around and you can see the CPU here.<br>
I'll sort my CPU.<br>
I'll go click around and just refresh these.<br>
You can see some of the microSD worker processes not the same one over and over but it's kind of being fanned out across them are doing a little bit of work.<br>
But even as these requests come in it's only 1% CPU.<br>
They're easily handling this talking to the SQLite back database and things like that.<br>
Serving it up, it's great.<br>
So, looks like our server are...<br>
What do we pay, $10 for this server per month?<br>
It is absolutely handling it.<br>
I mean here we're getting two requests per second something like that, and the overall CPU is only 8.4.<br>
And remember a lot of this, right now 1.8 1.6% of the CPU is actually just Glances.<br>
So Glances actually adds a lot of overhead talking about five versus 3% type of thing.<br>
So our server, I think this thing is good.<br>
We could easily run on the $5 server and have plenty of headroom for this site to run.<br>
Super responsive, lots of worker processes.<br>
We're golden.
|
|
|
show
|
2:57 |
Let's review just a few concepts about what we did before we move on from this deployment.<br>
Obviously, we set up Linux gave you the script, you can go through that but don't want to talk too much more about that.<br>
But I do want to touch on the uWSGI setup the uWSGI settings in Pyramid's production.ini.<br>
Remember when you run cookiecutter and you create a Pyramid Web App, it actually gives you a development.ini and production.ini.<br>
We've been running the development one forever.<br>
Now, we're in production, we're on the internet, woohoo!<br>
And it's time to use that production.ini.<br>
It's really, really important that you use that one not the development one, because it has certain settings, like disabling the debug toolbar which can give away too much information and obviously you don't want it there on your web app anyway right, it's for development.<br>
So we're going to use the production one it's faster, it has some settings for optimizations and we're going to put in this uWSGI section here at the top.<br>
So we're going to say, listen on this local port that we're going to proxy pass over to from Nginx.<br>
You can use Linux socket but it turns out that that's a little bit more complicated so I'm just going to leave it like this this is totally fine for us.<br>
Run in master mode, five processes, enable threads that makes it go really quick.<br>
Then this harry carry is if it takes too long to respond right now a minute, it'll kill itself and restart.<br>
Okay, we also have logging setup.<br>
There's two levels of logging, we could do logging within our app, and we can do logging from uWSGI right now we're just doing the uWSGI logging and all the print statements from our app go there as well but it would be better to separate them.<br>
Anyway, we're going to save log to this file and we made sure that that folder had a write access from our process.<br>
Okay, that was part of script we ran along the way.<br>
This has to be in our production.ini and this is how we control uWSGI from our code.<br>
It's really nice, if we want to make a change to how uWSGI runs, we just change its file do a git pull on server, restart the worker processes and then it just picks up the new changes, it's great.<br>
Here's how we configure and control uWSGI.<br>
The way it actually runs is we set it up as a system service We can create this unit file.<br>
So here's our unit file, and the two most important things to pay attention to here are the exec start that is the command that we basically run.<br>
If you're going to run Flask or Django, that's the place where this would be different.<br>
You put a different command there, I'll show you that later but for now, this is the command we give to uWSGI to run our app, and when this unit starts it just does that, until it's done.<br>
Also, set the runtime directory if you want that can be helpful.<br>
Okay so, this is pretty easy, you can see the place where this file goes at the bottom /etc/systemd/system/billtracker.service The bill tracker part here tells you when you say to start or ask for the status of it through system control use the bill tracker name of the service, it's basically the name of the service, which is the name of the file.<br>
You do those two things, now you have uWSGI running your web app as a system service that starts on boot with your Linux machine, wonderful.
|
|
|
show
|
1:36 |
The final layer, the outer layer of our onion was Nginx.<br>
So, here's how we set up Nginx.<br>
We have a configuration file and we have a server-level setting.<br>
There's actually, they're building up multiple ones like we can have one for port 80 one for port 443, for HTTPS, things like that but we'll keep it simple for this example.<br>
So, we say listen on port 80 and listen for the domain name billtrackerdemo.com or whatever your registered domain is, it goes there.<br>
The first part is, we wantin' to make sure that the static requests that don't require Python don't ever make it over to uWSGI.<br>
Python is not great at serving up those files anyway.<br>
Nginx is super good at it.<br>
It doesn't have the concurrency issues that you might run into over on the Python side.<br>
So, let's just let all the static stuff only go to Nginx.<br>
So, we just set up this alias here over to the static folder that we're working with.<br>
Set the expiration date, stuff like that.<br>
So, here's the first part.<br>
Listen on the port for this host name and serve up the static files.<br>
I'm going to put that into /etc/nginx/sites-enabled/billtracker.nginx.<br>
The other part is to say we'd like to pass all the other requests so slash after application which means go over to local host 9055 and just pass it along, get the response and return it back.<br>
So, this will mean our Python code will be running all the other requests that don't go to /static in this particular case and I think that's more or less how we want it.<br>
So, that's it for Nginx setup and then we just have to enable it and it also becomes an auto-starting system daemon when we turn on our service, turn on our server all the services start up off to the races.
|
|
|
show
|
1:01 |
Now I'm aware, not every web app is written in Pyramid.<br>
The two other major frameworks that we talked about in this course are Flask and Django.<br>
Of course, there's others as well but you should be able to generalize from these three.<br>
So we can of course deploy Flask under uWSGI in a very very similar way.<br>
All the stuff that we did creating a virtual environment setting up Linux, setting up uWSGI setting up Nginx, all the same.<br>
The only thing we have to change is the command that we put into this unit file the billtracker.service file and that's shown at the bottom here say -s and this time as using a socket.<br>
Give it the script name and then we just mount the application.<br>
So you check out this documentation on the Flask page on how to actually get that to run with your Flask app but like I said it's really really similar.<br>
The only change that you need is how'd you actually run your unit that is your uWSGI app and it's that execution in the run execution command that you got to set which is basically below.
|
|
|
show
|
1:01 |
If you're not using Pyramid and you're not using Flask you're probably using Django.<br>
So, Django also runs under exactly the same configuration Nginx, uWSGI running your Django.<br>
In fact, Django is much closer to Pyramid than Flask is to Pyramid in how you control it and set it up.<br>
So, here is the documentation page for working with Django in this deployment model.<br>
And, the command you give it is just uWSGI --ini uWSGI.ini.<br>
And this uWSGI.ini is a special file very much like our production.ini that controls how our Django app runs.<br>
So, when we talked about the production ini you basically create something very similar to that not identical, but similar, for Django and you point at it here like this.<br>
And then you check out this page for the settings that go in there, but like I said it will look really familiar to you because they're a lot like what we put into our production.ini.<br>
So there you have it.<br>
If you're using Pyramid, using Flask, using Django or one of the other frameworks you can set it up and deploy it on Linux on all these different hosts and have complete control over the system.
|
|
|
show
|
2:51 |
Now that you've seen me deploy one of our web applications, it's your turn your turn to deploy some app that you built during this course.<br>
So, let's talk through what you're going to do during these four days.<br>
The first day, if you've made it this far by watching the videos, is done.<br>
It's just going to be watch the videos.<br>
They're about an hour long that should pretty much take up your first day.<br>
And then the rest, I've broken into three major pieces.<br>
On day two, what you're going to do is you're going to create the server and you can use DigitalOcean, Linode Amazon Lightsail, or even a local VM.<br>
Here's some options: you can see, you get credit if you use these links these are from my podcasts don't have to use them, but, you know why not get free credit if it's out there?<br>
The goal is to create an Ubuntu 18.04 server.<br>
The version's kind of important because some of the commands won't work on older Ubuntus, things like that.<br>
What we're going to do is just create the server on one of those hosts log in, patch it right away before it gets hacked and that's it.<br>
Just create the server, make sure it's up running up to date, all those kinds of things.<br>
On the next day, we're going to get your site on the server.<br>
We're going to get it running by itself and then running under uWSGI.<br>
If you're going to deploy the Bill Tracker here's some information about exactly how to do that.<br>
If you're going to deploy something else you might have to tweak this a little bit, right sort of a choose your own adventure if you go down that route.<br>
So here's the commands to basically get what you need to run Python under uWSGI and Nginx on the server right, so we're also going to set up the firewall and also set up Git just so it's easier for you to log in, access your reposts, things like that.<br>
Then you're going to set up the structure for the source code so, again, if you use the Bill Tracker follow along exactly.<br>
If you don't use the Bill Tracker, you need to adjust this slightly, of course.<br>
And then finally, here's the command to run our app under uWSGI.<br>
Okay, and this works for Pyramid for Bill Tracker, you have to tweak it differently along with a description here, if you're going to run a Django app or a Flask app.<br>
And then finally, we're just going to enable uWSGI to run as a daemon, that autostarts with our Linux machine.<br>
After this day, you should have your app running at least internally, not exposed to the outside but running in a web server in uWSGI on Ubuntu.<br>
Last day is to put it on the internet using Nginx.<br>
So we've already installed Nginx, previously and what we're going to do, is we're going to set up our website to be publicly-served on Nginx.<br>
Follow along on these steps, if you can run this command in the end, with your virtual environment active so you have that command.<br>
If you can run this command, and you get source code back HTML code back, you're probably good, otherwise here's a little bit of help on how to track down some of the errors, check out the log files things like that.<br>
And that's it.<br>
I hope you find deploying the Linux easy and a really cool way to host your web app.
|
|
|
|
1:00:48 |
|
|
show
|
1:56 |
Hello, and welcome to this 4 day section on Vue.js.<br>
So much of this entire course has been around back-end web development, and of course, dynamic templates that return HTML.<br>
In this chapter, we're going to have a rich web application that theoretically has no backend whatsoever.<br>
As long as we can serve up static files we could have a very interactive web app that maybe just talks to external services database as a service, those types of things.<br>
So, we're going to talk about my favorite front-end Javascript framework which is Vue.js.<br>
Why Vue.js?<br>
Well, there's a couple of things that are really awesome about Vue.js.<br>
One, I just like the API.<br>
It's nice.<br>
It's easy to use.<br>
The other one is, it's incremental.<br>
You can use it as a rich, single page application framework that has all sorts of stuff like routing and local storage and all kinds of stuff.<br>
Or, you can do just a little bit of interactivity by bringing in a single HTML file.<br>
There's not a whole bunch of tooling you have to run.<br>
Literally, there's no tooling.<br>
You link to a Vue.js file on a CDN and boom you're off to the races.<br>
Well, you got to write your own Javascript but then, you're off to the races.<br>
It's also small, it's fast and you don't have to know other things.<br>
Some frameworks expect you to know things like TypeScript or other languages.<br>
You can know TypeScript for this but you don't have to.<br>
So, we're going to talk about Vue.js and we're going to build a cool little application in it.<br>
One more thing I'd like to add though.<br>
It turns out, Vue.js is popular.<br>
I mean, really popular.<br>
If you think about the most popular web frameworks and web technologies in Python this is way more popular than that.<br>
For example, Flask has about 41,000 stars on Github right now compared to Vue's 127,000 stars.<br>
So, absolutely lots of activity lots of support, a lot of people working on this framework.<br>
It's a fun one and I'm excited to get started.<br>
Hope you are too.
|
|
|
show
|
2:20 |
Before we start writing our Vue.js based application I want to give you a quick flyover a little bit like a hello world but a little more than that right?<br>
What does a really simple functioning Vue.js app look like?<br>
Well as you can imagine there's a JavaScript part and there's an HTML part.<br>
Let's start with the JavaScript side of things.<br>
So over here when I have a file called site.js I create a new view class.<br>
And to this class we're going to pass a bunch of options as a JavaScript dictionary anonymous object.<br>
So we pass el.<br>
This is going to be the CSS selector that is going to find the part of the page that our app controls.<br>
We don't just run Vue.js on the entire page.<br>
We pick a segment of the page and save this part.<br>
That could be the whole page or it could just be a little part of it.<br>
Then we're going to have two things here.<br>
There's more we could bring in to work here but just two for now.<br>
We're going to have data.<br>
So we're going to have variables that are synced to the page so we have search text.<br>
We can have many more.<br>
And this is going to be a two way binding.<br>
We're going to take whatever the value here is and put it in what it's synced to and if that changes in the page it changes this variable.<br>
If this variable changes it changes what's in the page automatically.<br>
Also we're going to have functions that can be called methods.<br>
So we have a search function that when a search operation is called or triggered it's going to call search and search of course has access to the search text and this is the same object.<br>
Alright that's the JavaScript side.<br>
We're going to inject that onto some HTML.<br>
Over here we have an app.<br>
It has an div with an id of app, that's the el that maps over.<br>
We have an input that's like a text box right?<br>
Type equals text and two things are happening here.<br>
We're saying we'd like to have a two way data binding between search text and the value of this input.<br>
So v-model is how you say that in Vue.js.<br>
And we'll just say search text and it's going to keep those in sync either when the text box changes or when the value of the variable changes it'll change the text box.<br>
We also want to catch when somebody hits enter to trigger the search.<br>
We don't need a button.<br>
You can just press enter and off it'll go.<br>
So we're going to hook the event keyup.enter and we're going to call the search function back on the same object.<br>
That's it.<br>
That's an entire app that actually does all the data binding.<br>
You know if we had the search details implemented it could do the search and theoretically show it on the page somewhere.<br>
Just include Vue.js.<br>
Include our on JavaScript and that's it.<br>
We're off to the races.<br>
Nothing else has to be done.<br>
Cool right?<br>
Let's build something like this but way more interesting.
|
|
|
show
|
3:19 |
Are you ready to start writing some Vue.js code?<br>
I hope so 'cause here we go.<br>
Now let's go over to our repository here and down into our days and talk about what we're going to either work on or get started from.<br>
What we're going to do is we're going to build an app I'm calling Movie Exploder.<br>
And this is going to search a movie database show you the popular ones, let you sort them or find them by genre.<br>
Get the top ones off the database and things like that.<br>
So it's going to interact with this HTTP service and we're going to call it Movie Exploder.<br>
We also have the service here if you want to run it so you can talk locally in case, for some reason you don't have access to the internet.<br>
While your working on this you can just change the URL to a local host and the whatever it is here.<br>
Just run this after installing the requirements.<br>
And then what you're seeing me start with is going to be a snapshot right here starter Movie Exploder.<br>
That is an exact copy of this at the moment of course when we're done we'll have a much more interesting app.<br>
Great, so this is the app we're going to work with.<br>
Now there's going to be no Python.<br>
So there's no go create a virtual environment install the requirements because let's see we have some CSS, some JavaScript and we have some HTML, only one page for now.<br>
Of course we could have more.<br>
So we don't need all that.<br>
Now I could take this over here and run it in PyCharm.<br>
Just as I have been.<br>
PyCharm is a great web editor as long as you have PyCharm Pro it does all sorts of good stuff.<br>
You will want to, in PyCharm Pro, install the Vue.js plugin.<br>
As we'll talk about later.<br>
But I'm going to show you WebStorm because WebStorm comes with a few more web features that might be interesting to you.<br>
Basically WebStorm comes bundled with PyCharm.<br>
But just to give you a chance to see a little bit more we're going to see WebStorm.<br>
Now the service, let's talk about it real quick.<br>
You've seen it before with this one but notice over here we've added some more features that let us explore.<br>
Like what are the genres?<br>
Given a genre, what are the top movies there?<br>
What are the top ten movies just by score overall?<br>
And that's it.<br>
movie_svc.talkpython.fm So we're going to work with this and if you want to get WebStorm you're welcome to check it out over here and download it.<br>
But like I said if you have PyCharm Pro, it's all good.<br>
If you have just a regular community PyCharm you might want to check this out.<br>
Anyway we're going to get started with that and to do so we're just going to drag and drop this onto either PyCharm or WebStorm.<br>
And there it is.<br>
So everything's up and running we have our CSS, we have our JavaScript, and our views.<br>
Now we're just starting with a little bit of HTML here so we're importing the CSS and we're importing the JavaScript, things like that.<br>
If we run it, we can actually come over here and right-click and say Run index.html and there it is.<br>
Movie Exploder.<br>
It's kind of boring but there it is.<br>
You can see we've got some styles.<br>
Some of the styles come from our CSS some come from Bootstrap and so on.<br>
So we're starting from here, and in fact if you wanted to you could even come over here.<br>
Just run it like this.<br>
Straight off the file system.<br>
You don't even need a web server for what we're doing with Vue.js or any of those things to work.<br>
Okay so now it's up and running.<br>
This is what we're going to be starting from.<br>
We're going to go interact with this service.<br>
Most importantly those APIs that API, well pretty much everything but director is going to be involved in our API.<br>
It's going to be a lot of fun and I think you'll be really impressed with what we can build with Vue in a really short amount of time.
|
|
|
show
|
4:27 |
So you saw Movie Exploder had some starter code but let's get started writing some actual code.<br>
The first thing we need to do is to create our Vue.js application.<br>
So, we're going to go over here and we're going to allocate a new Vue instance.<br>
And in here we're going to put just a settings object, like so, an anonymous JSON object.<br>
So, we're going to put it in here and going to have a couple of things, we're going to have el which is going to be the element that is the root of the application.<br>
You can actually target only subsections of your page if you'd like.<br>
And so, in here we're going to have something called an app and we want to specify that by id.<br>
So the element with id app.<br>
Great, we haven't created that yet we're going to do that next.<br>
And then we have data that we want to synchronize with our HTML in a two-way binding style.<br>
So we're going to come over here and we're going to put a little another sub object here and we're going to have things like search_text.<br>
And in the beginning, I'm going to put nothing but we can have many more things not colon, that equals colon.<br>
So we go like this and then, I think that'll probably be a good start.<br>
We can go with this, there'll be a lot more that we can do WebStorm it's just, it's PyCharm has, would as well.<br>
Propose that we would want to include this, we want to say don't worry about that, don't tell us there's an error.<br>
So, everything is good here.<br>
Another thing, I think this is my Python tendencies these days, JavaScript will auto-close all the lines by adding semicolons.<br>
So, we could put a semicolon here but you'll see that you really don't have to.<br>
In fact, almost all of JavaScript can be rewritten without semicolons and have no effect.<br>
So that's my preference, if you want add a semicolon there.<br>
Okay, so here's our application in the JavaScript side.<br>
Now for this to do anything interesting we have to come over here and update our code.<br>
So we have our Vue stuff at the bottom basically thing with an id equals app has to have been defined in the DOM prior to those two scripts being included the way we've written it.<br>
Okay so, inside here everything we do with Vue has to be within this part 'cause remember this is the root of our application.<br>
So inside of here, let's just have an input.<br>
Type equals text and let's have a div and let's just give it, we're going to delete this so just be kind of crazy here, we'll say color is green.<br>
Alright now, we would like to show the string, search_text and we're going to show it in two places actually.<br>
In order to do that we put double Handlebars double Mustaches, and then we have the value.<br>
Now right now there's no help we know there's, that it's not highlighted there's no help, you'll see a way to make the tooling work better with Vue.js in a moment but let's just do our little starter app here.<br>
Okay so, we've got our search_text here and if we actually had put a value and then we go over here and we refresh it you can see here's our initial value.<br>
Pretty cool, so we were able to use the double the double Handlebars syntax here and just say the value of the data.<br>
And we can also go over here and bind it to the input but the input we want a two-way binding that's more interesting.<br>
Change the input box, it changes the text.<br>
You change the text, it changes the input box.<br>
So here we can say v-, almost all the Vue.js commands or attributes, start with v-.<br>
So I'll say v-model, equals search_text.<br>
Now if we run that again, you can see it's over here it is now bound.<br>
And see how when the text box changes the value of the thing changes we can do that in reverse too, like check this out.<br>
If we had written some code, somehow, somewhere that had gotten ahold of our Vue.js app and we can't quite do that yet.<br>
Let's just throw this in here as app equals go refresh this, now we can say app.search_text equals ABC, boom.<br>
So you notice, if we change it in JavaScript it changes up here and go, change it up here and now we ask again, this time we ask for the value alright it's bidirectional.<br>
Really cool, so we've got our binding going here and we're going to use this as a search field to drive a results of movies, a whole series of movies that come out as we interact with it.<br>
It's going to be super fun.<br>
So that's our first step in getting our Vue.js app created.<br>
Now notice, we only wrote that line right there so that we could interact with it.<br>
We can install some extra DevTools that will make that line not necessary but for now it's really it's not that big of a deal, so I'm just going to leave it.<br>
Alright, so that's it, we have our Vue object we allocate it with specifying the app root and the data being bound.<br>
And then, we go over here and we specify the model and we can also do double Handlebar expressions to basically string, just get the string output of these elements.
|
|
|
show
|
2:23 |
Well we got our Vue.js app up and working.<br>
Remember it was working really well right here.<br>
However we look at this in our editor and it looks kind of broken right?<br>
Like it says oh this thing is totally busted this view model is not HTML we don't know what this is.<br>
So, we can fix this if we go either we have WebStorm and it automatically comes with Vue.js support.<br>
Or we have PyCharm, and if we go to the plugins section.<br>
We search for Vue, over here.<br>
You can install this into PyCharm.<br>
And then you have the same behavior, okay?<br>
However one of the caveat of making that work super annoying to me, its not enough to include Vue.js.<br>
The way it works is it kind of treats it as a npm package.<br>
And only then will it turn on Vue.js support.<br>
So in order to get auto complete in Pycharm or WebStorm doesn't necessarily mean other tooling, like for example Visual Studio Code or something, need this.<br>
But for us right now to get auto complete here which is really vaulable.<br>
We have to go over and basically convert this folder here.<br>
This folder right there, into a Node.js package.<br>
How do we do that?<br>
Well if you have a node installed you type npm init and it asks you a bunch of questions you don't care what the answers are because you're not going to publish this, right.<br>
However what that does is that generates a package.json and from there we can say npm install -s vue.<br>
And we do that and we wait a moment.<br>
Its installed, and now we should see over here we have Vue and actually here's the distributed bits an all.<br>
So, we're not technically using that version although maybe we could switch to it.<br>
Might make sense, but something really cool happened when we did this.<br>
Look up here now.<br>
This warning went away but this turned purple.<br>
Why did it turn purple?<br>
Well if I Command + Click on it, watch this.<br>
It knows its a property which is a string defined inside js And in fact, it takes you right to it.<br>
It understands how this all fits together.<br>
So we also get, if we come over and we type v.<br>
Look at that, v-.<br>
Here are all of your Vue.js attribute commands that you can use.<br>
So we're going to do this, we're going to turn this into a Node.js package, or a npm package.<br>
Just so that we can get this plugin in to help us because it's so worth it when you're doing Vue.js.<br>
But we don't really want this to be an actual package, right?<br>
Anyway, there it is.<br>
I think this was really a step worthwhile in the JetBrains tools to make that plugin work.<br>
Your editor, if using something else may require some other steps to make it work.
|
|
|
show
|
2:20 |
So far what we have is not that exciting.<br>
We have this search text up here and it has its initial value that is synced.<br>
That's cool, but the real idea is we're going to go over here and we're going to search right here and then in this bottom section we want movies to appear.<br>
A whole bunch of movies, and those are going to be coming out of a web service and when we eventually get to that part.<br>
So let's go ahead and forget this for a moment.<br>
And what I want to do, is I want it to put a div that has a class movies, then in here I want a div that is a movie, and I'd like to have maybe the title, okay?<br>
We're going to use another view directive that lets you loop over a collection.<br>
So first let's have a collection.<br>
So in our data, let's have movies and let's define that to be a list to say like, movie1, movie2, movie3.<br>
So we want to have these three movies listed out down here.<br>
I mean we could even put this into a div that has a class title like this.<br>
How do we do that?<br>
Well, we've got this little bit down here and that looks like something you can see some of the CSS styles are being picked up here a movie and title and so on, however how do we get it to loop in Vue JS?<br>
Alright, this is not server side we can't generate that the way we had been in say, Chameleon.<br>
So we go over here and we say v-for and then it's very Python-like it's for m in movies, like so.<br>
Notice that this turns purple because it knows where it comes from and down here, remember the way we say text is we double curly brace it, then we just say the value.<br>
Alright, this defines a loop variable it's something we can work with.<br>
Check this out, boom.<br>
Movie 1, 2, and 3.<br>
So easy.<br>
It's incredibly easy, right?<br>
That's all we had to do is just type that out.<br>
And in these expressions, you can actually do interesting things, like I could let's suppose I want this, the titles, to be all caps I'd come over here and say toUpper toLocaleUpperCase like this and actually call that on the string boom, just like that, okay?<br>
So, we're going to loop over these items and I'm going to generate a little piece of HTML more than that, but not too much more for each movie we get back from the service.<br>
Eventually we're going to get to the service but we're going to actually just take some fake data until you sort of help design the site and get everything working and then we'll implement the HTTP layer as well.
|
|
|
show
|
1:03 |
Let's review this idea of rendering repeated data.<br>
We saw that we used the double handlebars or double mustaches to render just plain text.<br>
But, if we've got some kind of loop some kind of iteration that we need to do, for example here we have these movies and we want to show some piece of HTML for each movie.<br>
Well, you can use the v-for.<br>
Remember, most of the commands start with v- as in view, and then the for command.<br>
So we can loop over the movies from our model from our data, it's an array in Javascript and then we're going to get a local loop variable called m which we can then use over here.<br>
So we're going to render the title and we're going to even uppercase it by calling a function on m.title.toLocaleUpperCase.<br>
Pretty straightforward, right?<br>
I guess one additional thing to emphasize here is the element that actually has the v-foron it is also replicated.<br>
So, what we're going to get is a div with the class movie and then containing a div with class title for each movie and when we do the v-for.<br>
There you go.<br>
You've got data you got to repeat, well, v-for.
|
|
|
show
|
1:55 |
So this is pretty fake, right?<br>
We saw that we have our service over here and we can get some movies.<br>
In fact, if we go over here let's just say we would like the top 10 movies rated by IMDb score.<br>
There they are.<br>
And if we actually look at the raw data there they are.<br>
So this is actually what were going to call when implement the HTTP layer.<br>
But for now, let's just take some of this data copy all of it and we're going to drop this into our site.<br>
So we can work with it without worrying about HTTP yet.<br>
There's a whole nother layer of complexity calling these services, and so on.<br>
So what I'm going to do is I'm going to come over here and I'm going to create a fake data thing.<br>
We're going to go back and delete this potentially.<br>
And we're going to define movies temp or fake or somethin' like that.<br>
Just paste.<br>
Now I could go and grab just this array but what I want to do is get exactly what comes back from the service and then work with that.<br>
So I think that'll be a little bit better.<br>
So we're going to take this.<br>
And we're going to say when movies start up we're going to put movies temp.<br>
Now in order for this to work, of course our site is going to have to include in the right order our fake data there.<br>
Let's just try this again and see what happens.<br>
Something bad happened.<br>
It's because what we tried to do is over here we called upper case on an object.<br>
If we take this away we'll get something that is not that interesting, right.<br>
There's like the guts of each movie sort of.<br>
So what we want to do actually is come over here.<br>
And we're going to say the movies are actually the hits.<br>
Let's try this again.<br>
There we go a little bit better.<br>
We the chase on of each movie.<br>
And then, you know, what we would like to do is come down here and say we're going to get the title.<br>
And then we want to toLocaleUpperCase that.<br>
Boom, look at that.<br>
So quick and easy.<br>
Towering Inferno, Shawshank Redemption Godfather, and so on.<br>
So now we've got this fake data in here and it's comin' out lookin' pretty good, right.<br>
Obviously it's very live and it's not super interesting.<br>
But, not bad.
|
|
|
show
|
3:02 |
Let's see where we are.<br>
We've got our movies, and they're being displayed here but we don't have all the details, right we just have the title and let's show things like their rating their IMDB score, rating as in PG or R or whatever.<br>
So let's put a little bit more design into this section.<br>
So this block of HTML is repeated for each movie.<br>
We're going to add a couple of things.<br>
So we have the title and that's pretty good but let's come down here and we already have the CSS in place so I'm going to choose certain CSS classes that'll make it look good.<br>
You can go look at the CSS at this point you've been doing many, many days of web and CSS is not really worth taking into.<br>
So we're going to have a div that has attributes in here and this is going to be things like the year and so on.<br>
So we're going to have a span, that has a class year and let's just put m.year, and we'll have something like this that has a rating for the rating.<br>
If you go back and look at the data you'll see each movie has a year, it has a rating sometimes.<br>
This one doesn't, most of them, let's go down this one has a year and rating and so on.<br>
They have an IMDB score so we're going to try to display that stuff here.<br>
They have a class score and this is going to be score and then actually let's put the word score right there so we know what that's for, okay.<br>
That's a good start.<br>
This needs to be IMDB score.<br>
Thank you, wow, I caught that error, that's crazy, how cool.<br>
Okay so, what we're going to do is let's just see how that looks.<br>
Remember, I applied some CSS styles to those classes so we should get a little bit of design here so we've got this, we've got our R got our score, pretty good.<br>
And notice this is from highest to lowest IMDB score.<br>
Alright, great, we have one more thing that we can do down here.<br>
We're going to have a genres section.<br>
So if we go back and look at our data you'll see, like this one has to do with drama and crime and this one has to do, the same with that one this one just drama.<br>
A lot of drama in the top here.<br>
So here's a thriller, action, crime, and so on.<br>
So what we're going to do is show those in little badges using some Bootstrap stuff, so that's really easy to do.<br>
We're going to have our genres we want to have a bunch of spans that have the class, it's going to be a badge.<br>
And let's have this badge of info.<br>
If we want to have this repeated remember there's not just one genre but there's a lot so we'll say v-for g in genres and here we're just going to put g.<br>
Let's see how that looks.<br>
Oh, this needs to be m.genres.<br>
Of course, 'cause it's in a loop, there we go.<br>
Check that out, we have Towering Inferno.<br>
We have Shawshank Redemption.<br>
Oh, here's drama and crime.<br>
Got some action, what else.<br>
It's all about the drama, isn't it?<br>
Drama and thriller, I guess comedy's at the top but everything else seems to have similarities in the genre for the high rated ones.<br>
This was pretty easy to do, I think.<br>
I did already do the CSS for this but other than that, it's really, really simple.<br>
If you're familiar working with any of the Python templates like Chameleon or Jinja they should look pretty familiar with you.<br>
It's a really comfortable framework for server side developers.
|
|
|
show
|
1:32 |
Now there's one thing you may have noticed it's not super great and we saw it when we looked here.<br>
Not all of these have a rating or a year set however, when we render it you can see this was published in that year and that one I guess has a score but also a no rating but the ratings showing up there are like kind of in that bit as just an empty space.<br>
How do we deal with that?<br>
Well we can use conditional rendering in view in our HTML.<br>
So let's go back here so maybe I want to only show this if the year is greater than zero.<br>
So we say v and we look and see what's in here.<br>
Is there a v-if, I can look or something to do with if statements or conditionals, yes there is and then we can just put a JavaScript statement like so v-if="m.year > 0" and notice it automatically finds that value that's pretty awesome.<br>
Now, let's do the same thing for rating and we can just use the truthiness of strings so we'll say just m.rating like so.<br>
Now let's try and just refresh this.<br>
Look at that.<br>
The rating and the year went away because we don't have that information but when we do, there's the year, there's the rating.<br>
Cool, right?<br>
Super, super easy so we have these conditionals and we could also put something like this we could say v-else just like so, say no year so there we have no year for the first one and all that.<br>
Now, I'm not sure that looks great.<br>
I'm not sure that's what I want to put there but it does show you that we can have these conditional statements and we can even have fallback other statements right.<br>
If you don't want to show the year what do you want to show them?<br>
So pretty cool the way that we can use that for conditional rendering and totally straightforward.
|
|
|
show
|
1:04 |
Let's look at this idea of conditional rendering.<br>
Sometimes we want to show part of our page part of our HTML DOM only if something is true.<br>
So in this case we had a year that was part of the description of each movie.<br>
But sometimes the movie didn't have a year.<br>
And then it was set to zero which you know it's a integer what are you going to do?<br>
Set to zero.<br>
See what we did is we added this v-if.<br>
We said if the year is greater than zero then show it.<br>
So then we just put the m.year there.<br>
And that's great.<br>
We can put any truthy JavaScript statement into these v-ifs.<br>
Sometimes you also want to show something when it's not true.<br>
Show the year if we have it.<br>
Otherwise, say there's no year.<br>
So we can use the v-else command.<br>
We're using it one time to say no year.<br>
But if there's no rating we're just not going to show the rating.<br>
Alternatively, we could've put a little not rated or something to that effect.<br>
Pretty straightforward, but really really powerful to define concise, little bits of HTML that tun on and off dynamically because they're bound to these objects and kept in sync.<br>
So even if you change the year in code it's going to toggle that setting right there.
|
|
|
show
|
3:18 |
Let's turn our attention back to this search here.<br>
So far we just have at the top something that says initial value.<br>
Well we could like something a little bit better than that.<br>
We would like maybe a placeholder where we can type here that says "search for movie" and then as we type and hit enter we generate a list by searching our remote service eventually and we have that searching our remote service for these values and then displaying them there.<br>
So first thing to do, let's go over here and have just this initial value be nothing.<br>
That way when we set a placeholder in the HTML we'll have something meaningful there so we can say things like placeholder equals search.<br>
Search for a movie by keywords.<br>
Now if we refresh it, you can see this.<br>
We can make it look a little bit better if we set the class to be form-control.<br>
We got it looking a little bit better.<br>
Not 100%.<br>
Let's put this into another bit here.<br>
Let's have a div.<br>
That's controls.<br>
This is some of the pre-baked HTML.<br>
There we go.<br>
That lines it up with these a little bit better.<br>
So we've got our controls here.<br>
We're going to add some other things like combo boxes and buttons and so on but let's just focus on this.<br>
We have our placeholder which goes away as you type.<br>
And we're going to be able to use that to hook when somebody types and then presses enter to actually do the search.<br>
So we've already seen that there's a view model taking care of whatever is in that value is exactly equal to what is displayed in this input.<br>
So what's left?<br>
Well there's a couple of things.<br>
I guess the first one is we want to know when somebody presses enter.<br>
We could have a search button but then we'd have to know when somebody clicked the button.<br>
So we might as well just let them click enter.<br>
Maybe not super mobile-friendly but we're going to go it for now.<br>
So what we can do is we can go back over here and we can not just have data, we can have another section called methods.<br>
And in here we can define JavaScript functions that are going to be called like search.<br>
This is going to be a function and it's not going to take any data.<br>
You don't have to say what the value is because you can just grab it like so.<br>
And then we're just going to log and how are we going to get this text?<br>
Let's say this is going to be a constant, maybe a let.<br>
So we say this.search_text.<br>
Oops, let text = this.search_text.<br>
There we go.<br>
So now how do we tell this thing this input box that we want to capture the key down event the enter key, not just any key, just the enter key we want to search on that?<br>
So we could say something to the effect of this.<br>
We can come over here and say dollar key down up press, whatever you want let's go with keyup.enter.<br>
There's a couple of built-in ones here.<br>
And we just give it the function that we want to call search.<br>
And when we press enter, it's going to call that function and of course we have navigation back.<br>
It's going to go to here, grab the value.<br>
Actually it's going to come to this function.<br>
It's going to call search, which will grab the text out of whatever has been synchronized there and instead of really searching for it we're going to print it out.<br>
Hang tight with that search part.<br>
We'll be there really soon.<br>
So we come over here and say this is a test.<br>
Write enter.<br>
What I've searched for, test.<br>
Go to two.<br>
Hit enter again.<br>
We'll just search for that.<br>
Beautiful.<br>
So we have our searching going really well.<br>
The other thing we want to do is have a button or some mechanism for actually just pulling back if we go to our movie service just pulling back the top 10 which is what we were faking already.<br>
And then also, showing the genres.<br>
So let's come up with a button for the top 10 next.
|
|
|
show
|
1:34 |
So we have our searching working well but what I'd like to do is also have a button that'll say 'Show me just the top ten movies by IMDB score,' and also we're going to get one for genre later.<br>
So we're going to have a couple of controls down here.<br>
Let's work on that.<br>
You'll see, sort of a real similar thing to what we just did.<br>
So in this section, I would like to have a div subcontrols, like so.<br>
And then we're going to put a couple things in here.<br>
We're going to have a hyper link.<br>
That doesn't have anything there.<br>
It's going to have a class equals top_10, like so and here it'll just say top ten.<br>
Come over here, now we can see our button but, clicking it doesn't do anything.<br>
Well, that's because we haven't added any sort of event.<br>
So here we capture the key up event.<br>
We can be more general, it can say @click and capture a whole bunch of them and what we want to do is have a function called top_10 We don't have this yet, let's go write it.<br>
I noticed, the Vue plug in is helping us.<br>
Now, it knows about search it knows that that's not there.<br>
That's awesome.<br>
So we'll go over here and just for now we'll just duplicate this, real quick.<br>
Let's call that top_10 and let's just change this text here to what would've loaded top ten, like so.<br>
We come back over here, refresh it.<br>
If we come back over here, refresh it, and view console.<br>
Come in here, and see if our test is still working but if we click here, would of loaded top ten, test two.<br>
So we can cycle between these different views.<br>
The search results, the top ten we also want to have the genres but we'll get to that in a little bit.<br>
Alright, so, really really close.<br>
We're going to be able to take these functions point them at our web service and not just get this fake data here but get some really cool behaviors.
|
|
|
show
|
3:06 |
We have our top ten.<br>
Let's add our genre.<br>
Now, it's going to start out looking crummy and then I'm going to change up the code just a little bit and apply some really nice styles to that.<br>
So the next thing that we want to put down here is we want a drop-down, or a select.<br>
So, we're going to say we want to select.<br>
Don't need to worry about the name right now or really the id.<br>
And in here we want some options.<br>
So, there's really two things we need to track.<br>
One is, what item is selected in the drop-down and when did that happen?<br>
The other is, what are the options that are available?<br>
And here, let's work on options first, option singular.<br>
So what we're going to do is we're going to bind a set of options in here.<br>
So, we'll say v-for g in genres, like so.<br>
We're going to define all the genres and show them.<br>
And then we want to set the value, say v.bind value equal to just the text.<br>
We could show different text like maybe the index or, of there or something.<br>
But we're going to just leave it like this.<br>
There's also a shortcut here that we can use.<br>
If we want to say v.bind you can or you just say : and it will bind.<br>
Now this isn't great, we don't have the genres yet.<br>
Lets go over here and say we're going to have genres are going to be a list of sci-fi, drama, comedy.<br>
Here we go.<br>
Let's go run this.<br>
Check that out, got our little drop down already working remember that came from our view model not from our HTML, right, we just pulled those all out.<br>
So that's pretty cool, it's a good start.<br>
We would like something a little bit better.<br>
We would like to know what one is selected and when is it selected.<br>
So we can come over and have some more data for that we'll come over here and say selected genre equals nothing at the beginning.<br>
Here you can say the model the data you want to keep in sync with this select box, is this.<br>
So let's go look at that real quick.<br>
Looks like I broke something here.<br>
Oh woops, I put an equal, put a colon in there.<br>
Alright, try again.<br>
So here, we go like this and we go view our element here we can go to the console, come back to those messages later and if we say app.selected_genre, there it is it's drama, okay we'll select something else like comedy, it's comedy, how cool is that?<br>
So, this part, being in sync, works great.<br>
This, not so much.<br>
Let's do something very similar to sort of fake out our web service then we'll get to using the real web service.<br>
So now we have an all genres, its going to return an array let's stick that into our fake data as well.<br>
Equal to that, make sure we're online, okay, great.<br>
So we're going to use this list instead of these couple we typed in and in the end we're going to get that from the web service.<br>
But for now we'll just fake it.<br>
We refresh, nothing selected but look it's wider.<br>
That might mean there's something in there.<br>
Hah, there is, there's all of our data.<br>
Of course, fake data, stick with me here but we can now go and select crime we can select something else but, its looking really good isn't it?<br>
We're almost there actually our app is surprisingly close to done.
|
|
|
show
|
2:58 |
Our app is looking pretty good.<br>
We have our search box all wired up and working well.<br>
We have our top 10 button it's hyperlink and it's working pretty well.<br>
The design down here, I wish we had posters but the database doesn't have 'em so you know, we're going to go with what we got there and we would drop that, but that's something else.<br>
But I think the design is pretty good at this point however there's one glaring thing.<br>
What is this?<br>
Why is this ComboBox, this drop down box even here?<br>
Like what does it do?<br>
There's no description of what it is and if I click it oh it looks like these might have to do with genres, okay.<br>
We want to change it also to not look like this weird drop down box but to look like this until you click it in which it becomes a cool drop down.<br>
So we're going to do two things to make that work.<br>
First we're going to give it some kind of text when it's brand new and you haven't seen it haven't touched it to say here's how you can find these by genre.<br>
So let's go over and do this in our JavaScript.<br>
First thing we're going to do is we're going to put into our temp data we're going to change this when we get the data from the service.<br>
But we're going to go over here say top movies by genre.<br>
Okay, so this is going to be the first element of this list and then what we also need to do is come over and somehow associate the selected genre with that.<br>
So we just come over here and say the selected genre is this and it's also going to be helpful later when we don't have this fake data, it has that in it to know what the value for resetting that ComboBox is we'll have no genre is also going to be that first item like so well lets go refresh it now.<br>
Boom, why did this one get selected?<br>
Remember we have over here the v-model.<br>
The selected item is whatever the value is for selected genres.<br>
So that's going to be the thing here and that's why if we set it to the first one it's going to be selected.<br>
This we're going to use later on when we get the data from the service.<br>
Here we go, cleaned up a little better extra code that wasn't necessary at the bottom.<br>
So now we've got it working in terms of functionality.<br>
You load the page, it comes like this.<br>
You got to select something, load it again.<br>
However it looks pretty bad, right?<br>
So I'm going to do a little trick bring in a lot of code that'll make this a lot nicer but we don't have to write.<br>
So let me just show you about this.<br>
I already included here this CSS and this job description and notice there's a link to a bunch of cool CSS Select boxes.<br>
So this JavaScript is just the JavaScript that will take and make basically a label turn into something like a much nicer select box.<br>
So there's not a whole lot to it we're just going to drop it in, it does its magic and it literally just styles this.<br>
There's no more to do than that.<br>
So for the top let's put the CSS and at the bottom let's put the JavaScript.<br>
Now if we just refresh, boom, look at that it's that cool looking?<br>
So you can go read up on how they did that with the drop down here, but there's really not too much to it and the details are not super important.<br>
When we click on it, look, there we go.<br>
Here's our drop down we can pick film noir or documentary, or we can refresh the page and it resets.
|
|
|
show
|
1:14 |
So, our genre dropdown is looking really well.<br>
It's looking great, but if we click it how do we know that somebody clicked on that?<br>
That should refresh this list.<br>
So, we need to add an event over here.<br>
An event is at change so we're going to have a function called load_genre and we're going to go ahead and pass in whichever one they selected here.<br>
All right, that's great.<br>
You can see WebStorm's saying, "Hold on.<br>
Hold on.<br>
That function doesn't exist." So, let's go write it!<br>
So, over here in the methods, we're going to define the load genre to be a function like so.<br>
We don't necessarily have to pass this in.<br>
I could grab it from up here, but just to show you we can pass data, I'll go ahead and put that in here like so, and then let's just log it out.<br>
All right, let's go refresh this.<br>
Show our console so we can see what's going on.<br>
And now, if I click on documentary would load documentary animation family.<br>
Beautiful!<br>
So, it looks like we're doing really well.<br>
I think we have all of our stuff up and running.<br>
We can search.<br>
We can top 10 it.<br>
We can go with the family.<br>
The design is good.<br>
So, I think really all that's left is trying to get this to talk to the live database.<br>
You can also look at a couple other tools that will make our life easier as we get deeper into Vue.js.
|
|
|
show
|
2:05 |
Now you probably have noticed we're doing a lot of inspect element give me the dev tools in Firefox could also do this in Chrome and see what's happening with our JavaScript and Vue.js.<br>
But we can take it a little farther.<br>
For over here on vuejs.org, you can click on Ecosystem and see under the tooling, there's dev tools.<br>
So, there are these dev tools that you can get and we can install them as either Chrome or Firefox.<br>
And you go ahead and add that.<br>
Don't really need it up here all the time I guess we can leave it here, it's fine.<br>
So we come over here to our Movie Exploder notice that this is lighting up, right?<br>
It's detected that there was some vue.js stuff where over here it's gray, right?<br>
Because there's no vue.js apparently on that page.<br>
So if we go and click on that, it says it's all good.<br>
So now I got to go and open up our dev tools, and there's something hiding at the end here because my screen is kind of crunched.<br>
If we open that, notice we have a root we can click on this, and we have an array of genres and hey, that looks familiar, right?<br>
And we can even add a genre.<br>
Another one here if we wanted, right?<br>
We can change these values, here are our movies.<br>
Maybe we could take the search text and change this to be fun searches.<br>
Oh, I got to put that in quotes.<br>
Here we go, look, now fun searches is up here.<br>
So you can do all sorts of cool stuff to interact with our vue.js object.<br>
If you double click it over here when you come down here, notice how we have a little dev tools and if we say dollarvm0 that looks like something.<br>
Let's see if it has genres.<br>
It does!<br>
Perfect, so before we head create an in-app object so that we actually could get a hold of this via app right, same thing, but with the vue.js tools here you don't actually need to create that variable you can get them this way if you prefer, it's up to you.<br>
Oh, it looks like there's a small error.<br>
I also need to import some jquery for my little drop-down actually, the drop-down seems to be working fine, so.<br>
I'll include it, but it seems like we could probably edit out whatever that bit is because it's more or less working.<br>
So these vue.js dev tools are definitely helpful when you're working on your app, right?<br>
Encourage you to install them as you go.
|
|
|
show
|
2:04 |
You've made it to day two, now it's your turn.<br>
For this chapter, I've broken this up into two blocks.<br>
Watch some of the presentation due on your turn day watch some more presentation, and then round it out with another block there.<br>
So we're part way through the presentation but time to take a break and work on this yourself.<br>
So we come over here to the repository.<br>
You can see that, of course, day one which you just now are finishing is just to watch the videos, get caught up learn about Vue.js and so on and then on day two we're going to build the app up to the point where we're using fake data that we can save off of our movie service.<br>
Now I won't go through all the details but we've created a starter project for you over here called Your Movie Exploder, and it's been set up a little bit more as an npm package with Vue.js installed so that the tooling works a little bit better and so on.<br>
What we're going to do on this part is we're actually going to use the same service and build roughly the same app.<br>
The reason is these services, they come, they go their schema changes, their terms of service changes they're just, it's tough.<br>
So I want to have something really stable for you and something kind of like what we did.<br>
So basically you're going to rebuild the same app that we built through the videos.<br>
The first half today, we're going to build it up to using fake data, and then in the last day we'll bring in the service and the real data and so on.<br>
So here's a few code snippets that you're going to need to build out the app.<br>
So we're talking about creating the Vue app so here's a little bit of starter code for that.<br>
Here's how you show HTML data in a string do some bi-directional binding, looping conditional rendering, adding functions booking events, setting attributes.<br>
And that's pretty much it.<br>
You're going to use those little code snippets the starter code that I gave you and grabbing some fake data off of the service by just loading your browser and saving it and then you build out the app to just using that fake offline data.<br>
Once you're done with that, you're done with day two of this chapter.<br>
Day three is going to be watching the second half of the videos.<br>
Day four is going to be using the real service.<br>
We'll go into more detail on that when it's time.
|
|
|
show
|
5:22 |
With our app working well with its local data that we don't have to worry about getting asynchronously and all the details about web services, it's time to focus on exactly that the web service.<br>
So here we are at the service, and notice we've got all these API endpoints.<br>
We've got movie_service.talkpython.fm/api/search /run, and of course this is the search term.<br>
So there's, like, Blade Runner and all that.<br>
And we also notice over here we have all genres oops, not all genres, but top 10 movies or movie by genre.<br>
And if you look at the data, they all return the exact same structure.<br>
So that's going to help us a lot.<br>
Like, this one, all these return the same basic structure over here.<br>
So we don't have to change how we'd write that code.<br>
We're just going to go and sort of write one general get me some movie data, and we're going to pass it different URLs.<br>
So let's do that.<br>
And how are we going to call this service?<br>
Well, if we look at our code over here Vue itself I don't believe and to the extent I know comes with any way built in to work with HTTP services.<br>
And the suggestion is to get some other HTTP library, like even with Python, yes you could use the built-in stuff but most people just use Requests or Aiohttp Client, things like that.<br>
Same here, so what we're going to do is we're going to use this thing called Axios a really nice system here.<br>
We can just install it super-easy by listing that right there, put that in there.<br>
And here's an example of how it works.<br>
You go and create an instance of it.<br>
You can get a URL.<br>
Then you process the success, the error and then whatever else you want to do.<br>
And that's pretty much it.<br>
So we can do that, right?<br>
Let's go over here, we need to add one tiny change, like so.<br>
We're going to install that.<br>
And then we shouldn't have to touch our HTML anymore.<br>
It should be totally done.<br>
It's just going to be the different data that we run and work with here.<br>
So what we want to do is let's go ahead and write a function called load movies.<br>
And it's going to take a URL, and we'll do it like this, of course.<br>
So we're going to call load movies from various things.<br>
Like, for example, up here, instead of saying we would have searched for this, whoops instead of saying we should've searched for this we'll say this.load_movies.<br>
And then we just need to give it a URL.<br>
So let's go up here and say, put a base_url up here.<br>
And we can just grab that from our movie service.<br>
And these are all look like, something like this to start.<br>
Okay, so then if we want to go and load the movies, we can just say base_url plus we put search and then the search term.<br>
So we've got the search and then the text.<br>
Now, we probably should URL encode that but we're just going to roll with this now, okay?<br>
So this is going to go and call that.<br>
And what we have to do to get going is put that little bit of code here, and, you know let's just grab what they got as a quick little start.<br>
We don't need the then, we'll just do that.<br>
So what we've got to put here is our URL.<br>
And then we're going to get some kind of response.<br>
Let's just say, success.<br>
And it turns out what we're going to have on here is a data item that's coming in.<br>
And then down here we'll say something like, oh no, error, like so.<br>
All right, well, if we go and search for something it should go and try to call it.<br>
Let's see if we got this working.<br>
Get our little console up so we can see what's happening.<br>
Clean things up.<br>
And let's go search for runner.<br>
Oh, probably got to refresh it, runner.<br>
Look at that, success.<br>
We caught an object back.<br>
And what we got back, let's go look at our fake data, is actually this whole thing right here.<br>
And what we really want are the hits.<br>
So we want to get to the data and we want to say hits.<br>
Those are the movies, that's how it works.<br>
All right, so we run it again and we say blade we get a whole bunch of stuff back.<br>
Cool, right?<br>
So those are the movies coming back.<br>
All we got to do now is change that content.<br>
Well because of the binding that we have happening already with Vue.js, this should be super-easy.<br>
We're binding to, you know, this.movies.<br>
So we should be able to say something entirely simple like, instead of success we'll say this.movies equals that data.<br>
Now, welcome to JavaScript.<br>
This almost works.<br>
This is so close to working.<br>
But let me just do something real quick.<br>
This is this.<br>
If we refresh that and I say test, this is window.<br>
Ah, it's one of these this pointer means something different in the callback than it does in the original calls.<br>
So we have to say let that equals this and then that.<br>
So we capture that, it's a closure.<br>
Thank you, JavaScript.<br>
Refresh this now, watch this.<br>
I go over here and search for blade.<br>
Look at that, how awesome is this?<br>
Do you see what happened?<br>
All the movies changed.<br>
Basically it's working, right?<br>
Let's search for runner.<br>
I got that.<br>
Let's search for cap it all, let's search for Santa, whatever.<br>
You can see it's going to the service.<br>
It's no longer using the fake data.<br>
And how incredibly easy was it?<br>
Well, we had to put, maybe get rid of the comment out of there.<br>
That's it, we wrote that code.<br>
We also have to have error handling which we're, you know, not doing too much with.<br>
We're not, like, really showing the user, like oh, we couldn't get to the service or something but that's okay.<br>
This is it.<br>
We passed the URL, we've captured the data and then we just set the movies on the object back to this and we're good.
|
|
|
show
|
1:06 |
We saw on our application that to do anything interesting we needed to interact with our remote service.<br>
Yeah, we're able to copy some fake data but that's not the real app, right?<br>
So we needed to call the API.<br>
And here's the function that we wrote to get that data and convert it back into the movies that we wanted.<br>
Turns out to be super simple because we use this thing called Axios.<br>
With Axios, we can just call the get function and give it a URL, and that returns a JavaScript promise.<br>
We can do a then for a success call and a catch for an error call.<br>
So over here we, in our then we just grab the response, get the data and on the data we wanted the sub-element that was returned from the service called Hits.<br>
That's a list, so we just muster away so we just say that.movies equals response that dated a hit.<br>
One other little caveat here notice that we're actually capturing the this value before we call the get and then we're using it I'm calling that that variable gettin in here because the this pointer is not the same in the call-back as it is on my start.<br>
So if we want to get access to things like the movies property of our view app we've got to capture it before the call.
|
|
|
show
|
3:09 |
Well, we've seen where we can search now but we want to get these genres also from the service, that's one of the next things we're going do and notice I've cut a bunch out of the fake data so it'll be obvious when the real data comes in.<br>
Alright, so let's do that next let's go over here and have another function load_all_genres.<br>
Really only going to call this once at the beginning, shouldn't need to call it more than but we go and do this.<br>
Now you can imagine these are not terribly different.<br>
So I'm going to come over here and instead of calling just this URL we're going to say base_url plus let's go look at the service, see what we get.<br>
For genres we just want /movies/genres/all.<br>
So that's going to be our API and point and then the data that's coming back is just going to be JSON, list of genres.<br>
So we'll just put genres like so.<br>
Now notice this is not called right let's call that, that's even something it can tell but that function is not being used.<br>
So, how we're going to fix this?<br>
Well, down here is the app starts up we want a trigger, maybe the try one more function because it's going to do two things.<br>
We'll have to call it in later or something like that.<br>
This is a function that's going to load Starter Data so it's going to say this.load_all_genres.<br>
It's also going to say this.top_ten now top ten doesn't do anything yet but you know, if we don't have our fake data we're going to have to pull up those movies.<br>
Okay, so let's just, we'll fix that in a minute.<br>
We'll make the top ten work in a minute but now we need to say app dot in it like so.<br>
So, when we refresh this here should go hit this, pull those things down and this is just going to show the fake data still but this should work.<br>
Let's refresh it, It worked.<br>
How do I know?<br>
Because that little selection thing went down but look there's all of them How cool is that?<br>
Now, we do need to do one other thing here we get this data here these are going to be genres let's say let genres equal that.<br>
Remember before we had that fake data we had movies as no genre thing was top movies by genre, right?<br>
Now we're going to say nothing.<br>
So what we need to do is we need to do that trick again of getting that into the front of our list.<br>
But now, and the way it's going to work is just say genres.unshift.<br>
Yay, JavaScript!<br>
That, we're going to need to do that.no_genre.<br>
We also need to say we're going to set the selected genre to be that so we'll say, that.selected genre is that.no_genre.<br>
Actually, maybe the order matters there.<br>
Okay, let's do it like that, try again.<br>
Boom, look it's back!<br>
Top movies by genre and there we go so our genres are working coming off of the API.<br>
Top ten doesn't work yet be we have searching, searching works, this works.<br>
Although we're not loading data we're getting at least from there.<br>
So the next two things we ought to handle is what happens when I click drama and what happens when I click here.<br>
They're both super easy follow on's from what we just did.
|
|
|
show
|
2:12 |
Next, we want to make sure that we're getting the top ten when we click this button but more importantly almost is when the app loads we want this to show the current top ten movies right away with no interaction whatsoever.<br>
So how are we going to make that happen?<br>
It turns out, we've basically already written that.<br>
Oh, and notice, I've deleted a bunch of the fake data so it's not the same as what we'll get from the service that way you can tell when it's working.<br>
So let's go over here now remember we already wrote this load_movies thing and we said, well the way we search is we get the text and we set this url.<br>
Same over here, so we're going to say it's going to be even simpler, we're going to just say this.load_movies, url is base_url plus let's just go see what it is it is movies/top.<br>
That's it.<br>
movies/top, well we've now implemented get the top ten.<br>
How cool is that?<br>
Isn't it a good idea to have that as a separate function?<br>
Cuz we're going to use it down here as well.<br>
So let's go ahead and see if this is working.<br>
Refresh, we should get the top ten data right here.<br>
Boom, look at that.<br>
Turn, Inferno, Shawshank Redemption, and so on.<br>
Now, one thing, if you notice there's like a little flicker where Shawshank and then it goes away and the reason is up here we have the movies set already we can set that to nothing.<br>
In the beginning it probably should do that the same for that.<br>
So in this sense, we're no longer working with the fake data at all.<br>
Let's try it again.<br>
Here we go, we got our data.<br>
One more refresh, you can kind of see the little curly braces something I don't love about these frameworks but it is what it is.<br>
Cool, it looks like it's working.<br>
So now, if I search for test and then I click top ten, it's going back.<br>
One quick little caveat here is when I say drama and I click top ten.<br>
Get this to come up again I click on this, you really want that to reset.<br>
So let's take care of that problem real quick.<br>
So we're going to say this dot selected genre is no genre and same thing there.<br>
Actually, and we do it right away.<br>
See if I got that right.<br>
Okay, so we go down here hit top ten, goes back don't know why Web Soren thinks there's an error cuz it looks to me like it's working.<br>
If I have this selected on family, then I say test it goes back to unselected.<br>
Beautiful.<br>
Alright, the last thing to do is just make this work and I think our app is totally done.
|
|
|
show
|
2:28 |
We are so close to done with this demo app that we're building here, our movie exploder.<br>
Remember, we can search.<br>
That works great.<br>
We can get the top 10.<br>
That works great.<br>
We can cut this cool drop down.<br>
But when we click on this, nothing.<br>
All right, so let's go and fix that.<br>
We need this load genre function.<br>
Now you can imagine the search one was easy to implement the top 10 was easy to implement, same here.<br>
So what we're going to do, is we're going to need to get the genre.<br>
And we'll have to say, let's just create the URL.<br>
It's going to be something like base URL plus something plus this genre here.<br>
Let's go see what that is.<br>
When we want a movie by genre we say API movie genre and then what it is.<br>
So like that.<br>
That should do it.<br>
And then all we have to do is just call tbhis.load_movies with the URL.<br>
Again, we do have, oops.<br>
I guess we're passing in.<br>
Let's just go ahead and use what's being passed in.<br>
Now we also, we saw that it was a problem about the selected genre being a little bit messed up when you click this.<br>
It turns out that the same thing is happening with search.<br>
So if I say test and then I click a genre or let's just click top 10, well is that the top 10 or is it test?<br>
We need to clear that out as well.<br>
So that's super easy.<br>
this.search_text = null.<br>
Not up there but on these two.<br>
Okay.<br>
This is looking good.<br>
I think it's ready.<br>
Let's give it a quick refresh.<br>
First to do that little fix.<br>
Get some data.<br>
There you go.<br>
Went away.<br>
Now let's try to get just the comedy.<br>
Oh yeah.<br>
Forrest Gump.<br>
Let's try to get fantasy.<br>
Lord of the Rings.<br>
Oh my gosh, how cool is this?<br>
So awesome.<br>
I want to do one more thing to take this up a notch.<br>
So I want to be able to quickly interact with genres from this list as well.<br>
And we have these right here and notice I even gave them a style that makes them look clickable.<br>
Let's do one more thing here.<br>
Here's these little badges.<br>
And we're doing an R v-for.<br>
Let's just say that's on click we want that to be equal to load_genre.<br>
Ah is that what it is?<br>
Load genre.<br>
And we want to pass in G.<br>
There's comedy.<br>
There's drama.<br>
I guess we probably need to do one more thing to make this all work the best possible way.<br>
Say this dot selected genre equals genre.<br>
Like so.<br>
Now if I click on comedy you can see it showing comedy.<br>
If I click on drama, it's showing drama.<br>
Very cool, right?
|
|
|
show
|
2:32 |
I want to round this whole app out by just one more thing with these genres.<br>
So we saw that we can click here and that works really well and I can click even here and see it's history but I'd like to know that if I'm down here the reason this is in the list is because history was the thing I actually selected.<br>
I'm in genre, not just happened to be something in a search result or something like that.<br>
So what we can do is I can come over here and already have a CSS style for that.<br>
So we could come down here and say "You know what, this is going to be danger." Right, that's bootstrap.<br>
And that makes them red.<br>
And if it's not red, it makes them blue.<br>
But what I want to do is I want to toggle between this info one and the danger one based on whether or not the selected genre is this.<br>
And it turns out to be super easy to do.<br>
So we already have a class setting up here.<br>
And let's take this out.<br>
I'm going to put it down here.<br>
So what I can do is say, :class : to set an attribute.<br>
So I could set like the H or F for other types of things.<br>
And what I want to do is I can put a list of classes I want to be applied and those can be evaluated in JavaScript.<br>
So I'll say G triple equals selected genre.<br>
There it was, like that.<br>
If that's true, I'll do a if thing here.<br>
If it's true it's selected it's going to be something other than that.<br>
It's going to be danger.<br>
And if it's not selected it's going to be info.<br>
And will not replace but will append onto what we have here.<br>
Ready?<br>
Let's go see.<br>
If I go click on action, oh sweet.<br>
Thriller, there's all the thrillers.<br>
There's drama, crime.<br>
Let's go find something that's different.<br>
How about sci-fi?<br>
Bam, sci-fi.<br>
And if I search for something, if I just get the top 10 or if I search for cats, boom nothing selected.<br>
How cool is that?<br>
This app is built 100% with no backend other than external APIs, right?<br>
This movie service that we're reaching out to but it's not really part of this app and it's running just HTML off my file system, right?<br>
We could de-bug it over here in WebStorm and get a little more help but beautiful, beautiful fully client side JavaScript app.<br>
And look at how much HTML is here, right?<br>
With all the design and all that stuff, not so much.<br>
I mean, 67 lines, similarly here 60-so some lines of JavaScript as well.<br>
And the whole app is basically these two plus external dependencies and styles.
|
|
|
show
|
0:54 |
Well, that's it for our Vue.js app.<br>
We wrote a fair amount of JavaScript and HTML and I hope you learned a lot.<br>
In most of the code that we wrote, and you see there's some few little dot dot dots that were hiding but most of the code that we wrote is over here on the left.<br>
Notice something?<br>
There are no semicolons.<br>
JavaScript says you have to have semicolons but then JavaScript also says but if you don't, we'll fix it for you and it turns out that you can write entire interesting applications with no semicolons.<br>
There are certain cases where you need to be more careful and tell JavaScript, hey you need a semicolon and you can use it then, but you'll find that almost all the time, that's not even necessary.<br>
So, I like my code this way, because hey, I'm a Python developer, so I don't like semicolons that much.<br>
They seem unnecessary, and they are in Python and they're also unnecessary in JavaScript.<br>
So, write however you like, but I think that's a pretty interesting observation.<br>
Hope you enjoyed this section; go out and do something cool with Vue.
|
|
|
show
|
1:25 |
Well you finished watching all the videos for this chapter.<br>
Now it's time to round out the app that you built in day two.<br>
In day two we built it out to basically be more or less what we did in the presentation with fake data.<br>
Now it's time to start using the Axios library right here to make HTTP calls and use the real service over at movie_service.talkpython.fm.<br>
Alright, so again, like before we're going to give you little code snippets for example here's the code snippet you need to run axios.<br>
Axios is included already installed as an npm package but you need to include the HTTP library so just go into the node modules find axios and grab the main javascript file and just include it before your site.js.<br>
Then you're going to need to do a couple of things you're going to need to implement search using this api you're going to need to implement top_10 and load_genre so those are the three interactions right?<br>
You can search through that text box you can click the top 10 button or you can load a genre and display the movie.<br>
They all return a set or a movie search results.<br>
You also might want to get the genres from the service right?<br>
So that these things all line up.<br>
Once you have that working you'll be all done.<br>
So hopefully you enjoyed this look at Vue.js I think it's a cool, cool framework and if I was going to pick any front end framework this would definitely be the one I'd go with.<br>
Alright, don't forget to share your progress on Twitter or Facebook or wherever you do that sort of thing as part of the 100 days of code.<br>
And thank you for being a part of it.
|
|
|
|
1:26:26 |
|
|
show
|
1:34 |
Hello and welcome to this chapter on Containers and Docker.<br>
What are Containers and why do you care about them?<br>
Containers allow us to pre-configure a little tiny lightweight Linux like or Windows like machine just the way that we want.<br>
We can run it locally, we can run it in QA.<br>
We can run it in testing.<br>
We can run it in continuous integration.<br>
And maybe most importantly, we can take that working version that we've had the whole time ship it up to the Cloud and run it on one of our servers or on one of the Docker or Kubernetes like Container services.<br>
Containers are importantly not virtual machines but a lot of what virtual machines do you can think of as Containers.<br>
These are ways to abstract away the file system and abstract away the network and other processes and things like this.<br>
So that your application runs as if it was totally isolated.<br>
It can't talk to or interact with other stuff on the main system or other Containers running much like a virtual machine.<br>
But it doesn't actually run the Kernel the entire other operating system, not a copy of it.<br>
It passes that through using Container technology which we'll talk about through the underline host whether that's Windows or that's Linux.<br>
Turns out Containers are super powerful for certain types of workflow and for building applications your going to ship off somewhere else like to a server to run because you can get it entirely working locally, sign the thing off and your pretty confident its the same environment that you tested and you developed in that your actually running in.<br>
So it solves that hey, it works on my machine sort of problem.
|
|
|
show
|
3:09 |
I want to kick off our conversation about Docker and containers with something totally related, like boats.<br>
Well, it doesn't seem totally related but there's a very interesting analogy between the transformation that happened in the shipping industry and the transformation that happened in the software and DevOps industry when containers came around.<br>
So let's look at the shipping history and then we'll talk about containers.<br>
So imagine that it's long ago and you'll be surprised how recent long ago actually turns out to be.<br>
But long ago we have a ship and we want to load it up with things and get all that stuff somewhere far away another country across an ocean something like that.<br>
So we have some items that we want to put into our ship here.<br>
Maybe we have some produce and it's all packaged like this in these little boxes.<br>
Maybe we have some baby furniture and maybe even have like a horse carriage type thing and we're going to find a way to cram it all into this boat.<br>
How much time do you think that'll take?<br>
How often think we'll show up and go whoops, the carriage was bigger than we thought and it won't fit in the boat the right way or, the produce and the baby furniture don't fit together and we thought they would so now there's not enough room on the boat.<br>
All right, we tried to ship this stuff and it won't go or it gets damaged or lots of things.<br>
Loading up the boat used to be a super pain.<br>
Is that how we do it today?<br>
No.<br>
If something like this rolls up and we're going to load it up with a bunch of cargo we're not going to go and individually pack it like we've rented a moving van and we're trying to load up our house when we're moving, no.<br>
We're going to do something entirely different than that.<br>
What we're going to do is we're going to pull into a place that looks insane, it looks like this.<br>
Here is a modern port and it is full of containers.<br>
Almost every one of these is exactly the same size or maybe it's a couple of sizes.<br>
There might be a half-long and a full-long container.<br>
But all of these things are the same.<br>
I can have a boat and say, my boat can carry 500 containers.<br>
I don't need to worry about what's in those containers.<br>
Sure, each one was carefully constructed, carefully packed and maybe the carriage went in there and then the baby furniture and we had to wrap it in plastic or whatever but once it's packed, once it's built we know it's going to go on the ship because containers go on the ship.<br>
We load it up, off it goes to sea looking something like this and we're sure it's going to work.<br>
It's not a mystery, it's going to work.<br>
And that's a little bit like what happened with containers.<br>
Traditionally, we had built bespoke systems custom one officer reconfigurations and we get stuff running and maybe two years later we want to make some kind of change and well, nobody who set up that server is actually still here and we don't even know if we can get the code to run on a different machine than that one.<br>
I've literally seen this in real life.<br>
People had to ship super expensive single machines around for demonstrations because they couldn't get the code to run on another machine.<br>
How insane is that?<br>
So just like shipping containers made the shipping industry very predictable software containers make running our code and production super predictable.
|
|
|
show
|
3:29 |
Let's talk about some history.<br>
Now I told you that the shipping industry's container transformation was not that long ago.<br>
In fact it was 1956.<br>
And it turns out our software container history is pretty recent as well.<br>
So let's serve some important dates up here.<br>
We can go back to 2000, when FreeBSD had what they called jails.<br>
And jails were ways for administrators to partition FreeBSD systems into smaller, independent little things called jails, which have the ability to have their own IP addresses for each system and their own config and so on.<br>
So that's kind of a early idea of this container.<br>
Take one system, break it up into smaller isolated pieces.<br>
Around this time we also had Linux Vservers.<br>
And Vservers were a way to partition things like file systems and network addresses and memory and so on.<br>
And this was actually implemented by patching the Linux kernel itself.<br>
So Google came up with this thing called process containers which were later renamed control groups or cgroups.<br>
This is back in 2006, and it was a way to isolate things like CPUs, memory, disk, and network you know, for a collection of processes.<br>
And keep separate set of resources for each process.<br>
You know, Google, they have a couple servers.<br>
They do tons with containers.<br>
Now this started out as a custom Google thing but eventually was merged into the Linux kernel at 2.6.24.<br>
Not long after that, we have LCX containers and LCX containers were the most complete container management system using the cgroups that Google invented.<br>
So it's a way for you to manage, control, and run these groups, right.<br>
Think of this as like an early Docker or something like that.<br>
So Google comes up with these groups they get merged into the kernel and then LCX is a way to control and manage your processes on it.<br>
Then the biggest event in container history for software is that Docker came around.<br>
So Docker is a way to run these containers as well and it's an entire ecosystem around running and maintaining and building these containers and these images.<br>
And originally it was based on LXC but then they actually converted it to be their own system.<br>
It's something called LibContainer.<br>
It doesn't matter that much but it started out building on the same LXC stuff but now Docker's really it's own thing.<br>
And Docker is the de facto way for creating containers I would say these days.<br>
Now, it's not the end because once you have a real application an application with say a data layer middle tier layer with services that need to scale out front end bits with a bunch of servers that you want to scale out and keep them running and update them in real time with zero down time things like that, that gets hard to do just even still with Docker.<br>
So Kubernetes came along as a way to orchestrate and configure and connect all of these different things running in Docker containers.<br>
So Kubernetes is a great way to build sort of clusters of these cooperating containers built on Docker.<br>
Alright, so here's the history.<br>
We're really just going to focus on Docker in this chapter but it gives you a perspective of where everything lands and even if you're interested in Kubernetes, which you may be, I'll show you some things you can run cooperating Docker containers without Kubernetes.<br>
But if you are, still you're going to need to understand Docker super, super well.<br>
So, let's get to it.
|
|
|
show
|
2:26 |
Your system probably doesn't have Docker installed you can tell by going to command prompt or terminal and just typing the word docker and see if you could get help or you know command not found but luckily if you are on Mac OS or if you are on Windows it's super easy to install Docker.<br>
So you just visit this URL here at the bottom and you can either click download for Mac download for Windows and you downland either a .apt file on Mac or you download a .msi or exe which internally has an embedded msi installer.<br>
It's going to install docker for you.<br>
Now, when you run it on Mac it's going to run basically a little hidden Virtual Box version of Linux So your operations run on Linux.<br>
When you run it on Windows you have little more flexibility.<br>
The Window's one only works on Windows 10 and is been using built-in Hyper-V virtualization for virtual machines and network and things like that.<br>
So that actually supports running on Window and on Linux.<br>
And recently Docker somewhat recently Docker's been upgraded with the ability to do Windows containers as well as Linux containers.<br>
Now Python and Windows in terms of deployment Docker are not that common.<br>
it's much more common to do this on Linux.<br>
So we're going to focus on Linux but if you want to use Windows you know that's fine it's little bit different setup but same basic idea.<br>
If you are on something like Ubuntu well, then go over to this URL here and it takes you through the steps so you kind of use the aptitude installer package manger to install a bunch of things and register some stuffs like you typically do on Ubuntu right?<br>
apt install this and that.<br>
Now I've already installed Docker on my system and I did that in the very fancy way of opening up the package and dragging that docker.apt over notice that it's quite large here its 1.8 gigs which sounds huge that's because it has that virtual machine of Linux in stuff embedded in it.<br>
So we open this up you'll see it runs.<br>
up here it does a sort of container piling thing for a moment.<br>
It's starting up that virtual machine in the background and doing all of its magic.<br>
So give it a second.<br>
You see that it says Docker Desktop is starting.<br>
Alright, the little container starts moving it's up and running.<br>
We should be able to do Docker stuff like I should be able to come over here and type Docker ps we will talk more about this later.<br>
More Docker images you don't have anything yet but this is what we're going to working with in just a mom
|
|
|
show
|
4:02 |
Let's talk about some Docker terminology.<br>
There are few core concepts and words that you need to learn to work in the Docker space.<br>
So the most fundamental one the starting point is going to be what's called an image.<br>
An image is basically as what you think of as the hard drive of what would be the virtual machine that's going to run your system.<br>
You're going to start out with some kind of base image like Ubuntu or something maybe built on top of that.<br>
Then your going to configure it like I want to copy these files here and I want to set up this service and I want to set these config files over here.<br>
Then when its all ready that's your image but that's not actually the execution of it this is just the structure of it on disk, right.<br>
This is what would run.<br>
So then when we run it it's going to run in a container.<br>
Kind of like a virtual machine but it starts in millisecond instead of minutes or seconds depending on what kind of machine you've got.<br>
It takes that image and it virtualize that on top of the regular operating system its running on.<br>
All those changes you made to the image they are going to affect how this container runs but it's not a full featured full virtual machine that's running its just a little tiny process.<br>
So for example if we are running uWSGI to serve up some web content maybe the only thing running in that container literally is uWSGI.<br>
That's it, could be something else but probably not actually but it was configured when we built our image.<br>
Okay so we have our image and we run those and we create instances of containers these are much like processes but isolated.<br>
One of the challenges of containers is they are stateless.<br>
They are little virtualized operating system which is great because they can't get to anything else and the changes they make affect nothing but when they go away, guess what?<br>
So does their data and imagine that this container is the web server and the database.<br>
Maybe it's okay if the web server goes away you might loose the logs but you that's up to you.<br>
But you definitely cannot loose the changes the users made to the database like creating accounts and buying stuff.<br>
That needs to stay.<br>
So what you can do is map folders inside of the container actually to real folders on the host.<br>
That means changes to that particular folder or that volume will stay across executions of the containers.<br>
These are ways for you to add little persistent file locations for your containers.<br>
We also have ports just like the file system is isolated so is the networking around these containers.<br>
Typically they can talk out to the network but they can't listen on a port.<br>
Those are not exposed, think of them as kind of like blocked with a firewall or something.<br>
But if you have a web server or a database it only makes since if people can connect to it, right.<br>
So you might want to expose some ports which we'll see that that's super easy to do.<br>
Also this idea of what's called an entry point when I run the container what does it do?<br>
I described the uWSGI example before well maybe the entry point is to run uWSGI pointed at your app files and configurations and stuff so it served your web app.<br>
That would be the entry point into our container.<br>
Finally the way we build the image and bring this full circle is we create what's called a Dockerfile.<br>
The Dockerfile is very much like a series of commands that you would do to the Linux machine starting from the base image to the configured image that you want.<br>
So maybe you start with Ubuntu and your like well I'm going to apt install the latest updates then I'm going to apt install Nginx and then I'm going to copy this Nginx configuration file over here then I'm going to copy my source files over there.<br>
All those steps would be put into the Dockerfile and they'll be layered.<br>
So if you make a change to like the fifth step the first four will be cache, you won't have to rebuild.<br>
So the first time it can be kind of slow but after that typically its really, really fast and of course you only build the images when you need to make changes typically you have the image prebuilt and you just run the containers.<br>
So that brinDockerfilegs us full circle to our Docker nomenclature
|
|
|
show
|
2:27 |
Well I think that's enough theory.<br>
It's about time to write some code, isn't it?<br>
So let's start by configuring our little repository here.<br>
So here you can see where our final section our days 97 to 100 Docker.<br>
What we're going to do is put some code in here.<br>
So, we are going to need a little bit of structure and we are also going to need some application to run.<br>
So, let's do this structure thing first.<br>
We're going to create a folder called frontend.<br>
And I'm going to create a folder called services.<br>
So, this is going to be our Vue.js front ends our static files and this is going to be the backend services that drive our Vue.js front end.<br>
And then we're also going to have something else we'll add here in a little bit.<br>
So, what we're going to see is each one of these is going to get a Dockerfile but it's also going to need access to the source code to run it.<br>
Let's go to our previous section here and take these two things and move them around.<br>
Over here we are going to have movie exploder.<br>
And this one we're going to have a movie service.<br>
Remember this is a responder application.<br>
Our little code that we copied over implements our movie service we have over here.<br>
It's actually going to run it locally in one of our Docker containers.<br>
So the idea will be that this front end app is going to serve up the static HTML and Vue.js stuff and then it's going to talk to this one back here.<br>
Alright, well that's going to get us started for our demo.<br>
Let's go ahead and open this in PyCharm.<br>
And we can configure this out a little bit.<br>
Here we go.<br>
The source root and resource root.<br>
Same for this one.<br>
And we can go ahead run this actually, we are going to need to install our requirements.<br>
But we can go ahead and run this and make sure that it works.<br>
And it's probably something we'll want to do.<br>
But we're going to have this structure like this.<br>
It's really helpful because the Dockerfile way you build, most easily has access to the stuff under the directory from where it's working so subdirectories and so on.<br>
So that's how we're going to build our code and that's how we're going to structure it.<br>
I'm not super thrilled about the way this works but it's probably the best structure I can find for Docker.<br>
I did some looking around, what other folks are doing and it seems like no one can really agree on what's best.<br>
There's always a few little hoops you got to jump through because of this subdirectory requirement.
|
|
|
show
|
1:55 |
The first thing that we need to do to get started is choose an image.<br>
We could choose something real low level like Ubuntu or some other Linux distribution or we could choose something very high level like Nginx or something built but how do I even know what those are?<br>
Well, much like GitHub has repositories for source code DockerHub has repositories for these images.<br>
So if we scroll through here and you see here there's CouchBase, here's Oracle here's MongoDB and Redis and here's Ubuntu, for example, or Nginx.<br>
So we have a choice here, our static finder thing is really going to serve up stuff using Nginx.<br>
We could pick this one and that would probably be the best choice but what I want to do is really show you how to create these images so you don't have to hope that there's one out here go find one that you can work with but you can take something foundational and work from there.<br>
So we're going to use Ubuntu, but like I said maybe, maybe Nginx, I dunno.<br>
It's honestly not much of a difference when you get going.<br>
So, we'll go over here, and you can see that what you work with is just going to go Docker pull or even just run it, if it's not there it'll first do a pull to download it and then run that images, or, if you're going to do a build it's going to build stuff based off of that and you can also see that we can get the latest version we can get other things, if we look down here for example, we have a latest, so we can go and ask for the latest, or we can ask for 18.04 which might be what we do, I dunno looks a little scary, says this image has vulnerabilities.<br>
While that is true, it's not that big of a deal.<br>
So, it has vulnerabilities because, I believe this was built a little while ago.<br>
Ubuntu just released some security fixes.<br>
So, you might look at this, go, oh I can't use this, it has vulnerabilities but in fact, our very very first thing we're going to do is to patch all the vulnerabilities and then start building on it, okay?<br>
So we're going to use 18.04 as our base image.
|
|
|
show
|
3:17 |
Let's try to run a container.<br>
Notice up here we have our docker app running, so we should be able to run docker and have some commands happen.<br>
Great, so the first thing we can do is we can try to run an image, let's just try to run that docker image so we'll say docker run ubuntu, could just say it like that or we could say latest, or we could even say :18.04 let's just go with this.<br>
Now, before I run that, let's do a docker images and it's going to list all the images on my system.<br>
They're none, right, empty.<br>
So, let's go back over here and try this again.<br>
What's going to have to happen is this is going to have to download, at least the Ubuntu image maybe the Ubuntu image is based on other things and we might have to download like a whole series of dependent images here.<br>
We're going to run it, turns out the outcome of it is going to be a little bit underwhelming but it's going to be the first step.<br>
Didn't find it, so it's going to go and download it.<br>
Some kind of weird network glitch.<br>
Okay, so we downloaded a newer image for Ubuntu.<br>
And then, I guess we ran it, like let's try to clear the screen, we'll say docker run, it's local so it just ran, so how long will that take.<br>
It didn't take very long, started the whole thing up basically what that's saying is just starting up the system and then waiting for, well nothing and then it exits.<br>
So, we can do a little bit better, we can do things like go in here and say I want to run it in interactive mode and interact with it, and the thing I want to run is bash instead of just the main shell.<br>
So now here I can say ls, I can say ls hostname all the things that happen in Ubuntu you can see the host name here, is this container name.<br>
And I could even ask for all the running processes.<br>
How exciting, the only thing running on this process is bash and ps, which was running temporarily to figure out what was running, which was only bash.<br>
So there's really nothing else running here it's a super super simple version of Linux.<br>
It didn't have a bunch of services and demons and suffering it's just this.<br>
Whatever you ask to run here, well that's what's running.<br>
Later on, we're going to run Nginx, and we're going to run our web server, and things like that.<br>
But for now, we're just running on bash.<br>
Finally if we say docker images, you can see over here that we downloaded this, which created 25 hours ago so it's pretty new, but the timing is still off with those vulnerabilities I showed you, so we're going to have to fix it but it's mostly a brand new one.<br>
Now, we could also ask docker ps to ask what images are running, and if we say -a, it'll show you the ones that ran, so you ran it like a couple of times when we were messing with it.<br>
And when they run, they each get a container id and you can work with them, and they also get a funky name like trust in nightingale, or vigilant noble things like that so you can refer to them either by their name, or by their container when you work with them with the commands.<br>
So that's how we run a docker container.
|
|
|
show
|
1:00 |
Before we get started actually writing our Docker container build files I want to talk real quickly about configuring your tooling.<br>
So if we look over here and we go to plug-ins if I search for Docker in the installments you can see that I have Docker integration already built into PyCharm.<br>
This may, I think this already comes with PyCharm but you might also want to add Kubernetes which I'm sure you have to download separately.<br>
So, make sure that you have the Docker one installed and configured, and maybe go ahead and add the Kubernetes one as well.<br>
So, what you're going to see as we work with these files is you're going to see syntax highlighting.<br>
Good.<br>
But all sorts of auto-complete.<br>
Very good.<br>
Super helpful in creating stuff to make sure it doesn't get the wrong keywords or the formatting gets off, or whatever.<br>
So, if you're using this, you definitely want to make sure that the Docker plugin is installed in PyCharm.<br>
Using something like VS Code, it also has the Docker plugins, but I don't think you get the auto-complete.
|
|
|
show
|
6:13 |
Now it's time to build our own containers.<br>
It was fun to run Bash on Ubuntu on my Mac but it was kind of useless, okay?<br>
So really to take advantage of these things you pretty much have to do a little bit of customization.<br>
Sometimes just a tiny bit.<br>
You just want to fire up a database server but maybe you need to say here's the volume you're going to use to save your files or something like that.<br>
Or maybe you need to copy your source code and install a bunch of package dependencies and things like that.<br>
Remember back here in the deployment section when we deployed our bill tracker and we had this server script here and it had all these steps.<br>
Well what we're going to do is we're going to go apt-update, then we'll go apt-upgrade.<br>
Then we're going to install the build essentials and then we're going to install Nginx and we're going to do all those things.<br>
We're going to do the same thing over here with our dockerfile.<br>
So what we're going to do is we're going to have a new file called Dockerfile, like that.<br>
We're going to come over here and say associate that with a Dockerfile like that.<br>
Now PyCharm, because of that plugin I told you about can actually run these things and do all sorts of interesting stuff, and in addition to giving us help like you can get a little run thing that will build and run it and update it and so on.<br>
That's pretty cool and I actually kind of like it.<br>
But I'm going to stick to running stuff over here in the terminal, so it's super clear for you what's happening.<br>
Okay, so the first thing that we need to do when we're building a Dockerfile is we need to go and actually say, this image that we're building we're defining a set of steps, layered steps that build; each layer is going to build a new image based on the previous one, okay?<br>
So we have to start out with from, so we're going to say from Ubuntu...<br>
latest, or whatever image you found over on DockerHub or you built yourself here and is on your system you can put that here as the foundation.<br>
And then we're just going to go step by step by step to update things and make it go.<br>
So we're going to run some commands on the container.<br>
We're going to run apt-get update and we're going to run apt-get upgrade.<br>
Remember those vulnerabilities?<br>
By the time we get to line four, this is going to be updated and fixed at the time of the build.<br>
Now there's also a couple of little nice utilities that I like to have on my systems.<br>
Let us log in, let us ask more information about the running processes and so on.<br>
So I'm going to add those here.<br>
We're going to have some more apt installed and do another run apt-install y, so if there's any questions You sure you want to install?<br>
Yes.<br>
We do that and then quite.<br>
We're going to install a few things.<br>
Out of the box we don't get sudo.<br>
We're going to have Fail2ban in case people start hacking away on it.<br>
We're going to have HTTPie because I like it much better than Curl.<br>
We don't have Curl either, so you'd have to install that.<br>
The last one, Glances.<br>
We're going to hold off on Glances for just a minute.<br>
So let's go ahead and run this and let's see first if we go over here again.<br>
I'm going to try to docker run, remember we had this?<br>
Let's try to do HTTP.<br>
Command not found, of course because it comes from this install.<br>
So let's go and build instead let's go and build this one.<br>
So I'll do a little save.<br>
And let's change into the front end.<br>
We have our Dockerfile.<br>
We'll just say docker build.<br>
There's probably better choices here but this says Build this Directory.<br>
It goes and finds the Dockerfile and then off it goes.<br>
So, notice it didn't go and get Ubuntu again.<br>
We already had it, and now it's running an update and it's finding the issues.<br>
Oh, we need a -y here.<br>
So what you're going to find this is kind of an iterative process.<br>
You make your way through Oh, we've made it to line three something went wrong with line three we try again.<br>
Reset, run it again.<br>
So we're running apt-update.<br>
Now we're running apt-upgrade.<br>
And these are going to be persisted into a new image.<br>
That worked, so we're installing.<br>
We're installing Fail2ban right now.<br>
I'm not sure actually if Fail2ban is going to run in the background, so maybe it's not use useful but certainly HTTPie is going to be helpful and Glance is if we want to install that.<br>
So when we log in, if we would try to debug it it's a little easier.<br>
So notice it's built this container right here.<br>
So now if we say docker images sorry, not a container, an image called E8 something.<br>
So we have two, but notice each step there was some...<br>
Here we did a little step up here.<br>
We built an intermediate container and so on here.<br>
So if we go over here and we do a -a you can see some of these intermediate containers no one ever asked for, but they were built along the way.<br>
So now, if we try to build this again it should go super fast.<br>
Look, all these steps are already done.<br>
Well good, it's cached.<br>
We can go ahead and run it, so let's go and try to run; you don't need the whole container id you can just say E8 as long as it's distinctive so we could say Docker run in interactive mode that bash.<br>
Okay, it's running.<br>
The name here is going to be the container ID.<br>
And we can ask things like, what's running which is Bash, but we could do HTTP.com.<br>
Hey look, it works!<br>
Why does this system all of the sudden have HTTP installed?<br>
HTTPie?<br>
Because one of the layers was created in the Ubuntu system based on the layers above, that has this installed.<br>
So we don't have to do that again.<br>
So here's how we build one of these images.<br>
And what we're going to need to do is install some more stuff.<br>
How are we going to get our movie exploder code over there?<br>
How are we going to get Nginx installed, and so on.
|
|
|
show
|
3:52 |
Now I said I also want to install Glances.<br>
If you're not familiar with what Glances is it's a cool little command line terminal app that shows you all the processes running on your system gives you little graphs and so on.<br>
So if you want to log into your docker container and see like what are the worker processes and how do they all connect together that's a pretty sweet thing.<br>
But it turns out, I believe there's going to be a small problem here.<br>
Now let's try to run it and then I'll show us something cool on how to fix it.<br>
Okay, so over here we say, docker build.<br>
and I un-commented the Glances bit so you saw I quickly got to the first part and then here's a whole bunch of stuff that's going to be installed because of that.<br>
Now Glances kind of adds a lot of weight a lot of files if that's something that matters to you then, you know, maybe skip it.<br>
But it's useful for me now.<br>
But notice it stopped and it's asking me a question about time zones.<br>
That's no good.<br>
Technically I could type this in now but what about when we run it automatic in some sort of automated build or something?<br>
That's not cool.<br>
So how do we fix that?<br>
Well what we're going to do is we're going to set an environment variable up here.<br>
Now just to show you what can happen let's set this a little bit sooner so we're going to say we want to set an ENV, notice the awesome auto-complete there I set the ENV to values TZ our key is TZ, value is Los Angeles.<br>
And then we need to write that to a file.<br>
So we're going to run a command here which I'm just going to copy and paste to add a line to time zone info and run this and echo it out.<br>
So what that's going to do is register in Linux the time zone is LA in which case Glances won't ask for it again.<br>
But notice I put this change, these two changes before those three.<br>
Now maybe that's not the right place for it but I did it so that will actually show you a little bit, how this builds.<br>
So if we say build again, it's going to run this part and say, we already have that cached it's going to make these changes and it's going to say well that one we had something that was the upgrade of Ubuntu and then sudo itself but we've never seen anything that was upgrade and then change the time zone and then sudo.<br>
So we've got to start over, right, this is totally different.<br>
So you'll see the first two are good but now it starts going through and running the install for sudo and those again.<br>
I'll skip ahead here cause you don't need to watch it again.<br>
But this idea of if I make a change before it invalidates the cache for the previous the subsequent ones so we got to rerun that.<br>
Okay it built this time.<br>
Glances didn't ask us any questions it was totally happy and it built all the way through.<br>
So we go back here now this is kind of the foundation of our server and the next thing we want to do is we want to run something like I'm going to put a little space here cause we're later going to refactor this.<br>
But the next thing I want to do is install nginx.<br>
Well how do I do that?<br>
Not too hard.<br>
apt-get install nginx.<br>
So we're going to run this one more time and like I said this stuff could actually be factored into a core foundational image that's based on Ubuntu and then our other work could be based on top of this one.<br>
So here we go, let's do this again.<br>
Notice most things were cached we just have to install nginx.<br>
Super, so we have our container built and I say docker run interactive for the moment this, we're going to run Bash and now I can ask nginx -v for what version it is.<br>
And look at that, we have the latest vanilla nginx that gets installed if you don't go and reconfigure your system to get a newer one.<br>
So look, nginx is all set up and we have Glances running over here.<br>
Not super interesting, we have Bash and we have Glances running but it does tell us about our system which is kind of cool.
|
|
|
show
|
5:47 |
For us to do interesting things with Nginx, we need to give it interesting configuration files.<br>
We could somehow cram that in here, but what makes a lot more sense is to just have an Nginx configuration file and then copy it to the server.<br>
So, let's go over here and have a new file called site.nginx.<br>
So we have our Nginx, and I'm just going to paste this in and talk you through it real quick.<br>
So what we're going to do is we're going to listen on port 80.<br>
We're going to listen on movieexploder.com.<br>
Now, that doesn't really exist.<br>
Maybe it does, but it's not going to, it has nothing to do with us.<br>
But we can hack our host files so that we can test with this.<br>
We're going to create a directory where we copy all of our working code to slash app.<br>
We don't need to be super-careful about where this goes, because this Linux configuration is literally only for running this app.<br>
And it's a container and it gets thrown away.<br>
So, we could have our gzip buffers on, but we can leave them off.<br>
So we need to configure a few things.<br>
css is just static, js is static, and node modules are static.<br>
And over here, we're going to say we would like the index/ to actually map over to /view/index.html.<br>
Now, this is super-confusing.<br>
That is a web root, not a file path.<br>
This is not like /views in the hard drive.<br>
This is / in the virtual, sort of relative sense, to where the app root is.<br>
Okay, so when you ask for a /, that's going to be treated as an index command, which just returns HTML, which is that relative to the root.<br>
So debugging this stuff turned out to be pretty tricky, but I think this will be good.<br>
I've already tested it out.<br>
So our goal is to copy that over to the server.<br>
So we're going to issue a copy command relative to the directory here.<br>
And notice we automatically get auto-complete even for our files, I so love it.<br>
And then what are we going to copy it to?<br>
I copy it to etc Nginx sites enabled /site.nginx.<br>
Okay, this got created on our server, or not on our server, on our Docker machine because we installed Nginx.<br>
So we're going to copy that over there.<br>
And this is how you configure Nginx is what we talked about in the deployment chapter.<br>
We're just taking those deployment commands and putting them into Docker commands.<br>
All right, so that's fine.<br>
That'll copy that over.<br>
We're also going to need our code to do anything interesting when Nginx runs.<br>
So we're going to do another copy, and this time we're going to copy the directory.<br>
We're going to copy Movie Exploder to /app.<br>
Okay, so that is pretty cool.<br>
And see if we can get this to run.<br>
Let's go ahead and make a change here.<br>
Now, notice these copying of files probably should come after the installs as much as possible, right?<br>
These, you want to cache that stuff.<br>
That takes a long time.<br>
If a file changes, like if that file changes, these steps down here have to be re-run.<br>
Okay, let's do this.<br>
Rebuild it, a bunch of stuff was cached.<br>
See how quick those copies were?<br>
That's great.<br>
So now we can say Docker run interactive E five bash.<br>
Okay, and we can see what's here.<br>
Oh, look, there's your application.<br>
And we could go and do a request against it.<br>
Now, Nginx is not running.<br>
So what we need to do is we need to issue it a command.<br>
And the command that we can give it is nginx -g "daemon off;" Previously what we did is we'd registered as a system service, but that's not how Docker containers work.<br>
There's one thing that runs.<br>
And the container's alive while it's running.<br>
When it's done, it goes away.<br>
So we're going to use this command to run Nginx.<br>
Before we do that, let's do a test.<br>
Yeah, it looks like our configuration file is okay.<br>
Now if we do a slash T, and that found it.<br>
Okay, well, let's go ahead and try to run this, see what happens.<br>
Looks like it's working.<br>
Is there a way to get out of it?<br>
Yes.<br>
All right, so this is a blocking command, right?<br>
We want to run this on our container.<br>
It's going to just block.<br>
If it exits, the container goes away.<br>
But I want to be able to make a request really quick, so let's do that.<br>
Ampersand on the back here and run it in the background.<br>
We run Glances, now you can see there's a whole ton-load of worker processes for Nginx doing their thing.<br>
So that's pretty sweet.<br>
So if we go over here, now we see ACP local host.<br>
Look at that.<br>
Well, now you're seeing the Nginx configuration page.<br>
Close.<br>
If we could change our host file to go to Movie Exploder, we could probably get what we're looking for.<br>
But let's just do one more thing here.<br>
Instead of copying a file, we want to remove a file.<br>
So we're going to remove the default file so that all traffic, even to just the IP address, goes to our site here.<br>
So once again, run this.<br>
And do our build, and now we can Docker run.<br>
What do we need to put here?<br>
Let's put 80, see if that'll work.<br>
Let's try again.<br>
We're going to give it our command and give it that ampersand so we can stew other commands.<br>
And now into HTP, and that's from our little install of HTTPie, local host, fingers crossed.<br>
Yes, look at that.<br>
There it is, that's our app.<br>
So maybe we could do something cool like this.<br>
Maybe we go to local host here.<br>
Uh-uh, what's happening?<br>
Remember, this container is super-isolated.<br>
Within it, we can hit HTTP local host port 80 and it gives us this back.<br>
But the port is not exposed outside of our container.<br>
So effectively our web server, well, it's useless.<br>
So we need to do that, but we have it more or less working.
|
|
|
show
|
3:58 |
It seemed like we had our web application basically working.<br>
Remember we ran the command HTTP for local host inside the container and it worked?<br>
But alas, this is what we actually got when we tried to interact with our website from the outside of the container.<br>
That's because we're not serving the port.<br>
So let's go and do that.<br>
Now, one of the things we have to type here is we have to type docker run and then an image name.<br>
Well, what is the latest?<br>
What we've been doing so far we say docker build ., and we grab this little bit here at the end and go, oh right now it's 80.<br>
But if we make a change, then that shaw changes again.<br>
Make a change, it changes, it's always unstable.<br>
So it would be better if we could name this.<br>
So we can go over here and we can say we're going to tag this.<br>
Let's just call this front end and latest.<br>
All right, again it's super fast but now it's tagged it, so instead of just saying well how do I figure out of all of those which one of those is the one I actually want to run?<br>
By the way, it's that one.<br>
But how do you know if you don't have a name?<br>
So now we can do this a little bit better.<br>
We say docker, run, let's just go back to this IT bit for a minute.<br>
And we can say front end, latest, batch.<br>
There, now we have a name, we have something predictable.<br>
And we're going to need this later anyway.<br>
So we did things like running Nginx but again we're not going to be able to access this from the outside.<br>
Instead of just passing this here I want to go over here and I want to give it this command Nginx -g "daemon off;".<br>
First, let's just see if we can get it to run.<br>
It's stuck; what is it doing?<br>
Let's open up another thing and say docker ps and it looks like it's doing this.<br>
Well, it would be great if we could access it.<br>
Remember, we've already seen you can't access it yet.<br>
So let's one more time, let's do a docker stop, I guess, generally?<br>
So we'll do an F8 for the beginning of the shaw.<br>
All right, it echoes out the thing that it did stop and now if we do docker, oops, docker ps, all gone.<br>
Okay, and this comes back.<br>
So what we to do is we need to specify the ports to share.<br>
We're going to specify where locally, on this machine on my Mac we're going to list them and where on the container we're going to map that to.<br>
So we're going to go from port 80 outside to port 80 inside.<br>
Just like before, everything is running but, check this out.<br>
Refresh, boom, it's working.<br>
Look at that, that is it running over here.<br>
It's hard to tell but this is actually the thing we want to be happening.<br>
All right, we'll go over here, musical and drama you see it's definitely, definitely working.<br>
How do we know?<br>
Because if we go over here and we say docker ps to see what's running, then we say docker stop this is, if we try again that was it, that was our thing running.<br>
Now, you saw that it actually had all the data in the back-end services because at the moment, it's going to the public one not the one that's part of this container deployment.<br>
So we're going to adjust that a little bit but how about this?<br>
We use the -p port, to map an external port, 80, to an internal port.<br>
We could do that differently if we wanted but the way Nginx works and the way our local server, our local browsers work that was really what we wanted.<br>
Okay, so this is how we map external ports and this is how we'd run the server as an external command or as the entry point of our docker container.
|
|
|
show
|
2:34 |
We saw once we got our docker container working, it was out talking to movie_svc.talkpython.fm, and that's cool but what we're trying to model is a frontend talking to a backend within two containers because that kind of represents most web apps most deployments, you can factor out from there.<br>
So, let's go real quickly and change our frontend code here, over in this this is in the javascript bit, where instead of going like this, let's just put this as local host and let's put it on port 7007.<br>
Why that?<br>
Well, over in this character here that's what we have right there, okay?<br>
So the idea is that we want to run this service and then talk to it, so let's see how that goes.<br>
I come over here and I say run this notice all the data is gone, right the page loaded up but we're not giving to the service.<br>
And that's because it's not running.<br>
Let's real quickly add a virtual environment here.<br>
Okay, so we have a new virtual environment and let's just make sure it's active it looks like it is, perfect.<br>
And then we need to run the requirements to get started.<br>
Great, so it looks like those installed and now I should be able to just run the app and see what we get.<br>
Super, it's running.<br>
Now if we just go back and refresh this, tada!<br>
It's working, and you can see it's working because right there, it's going back to our service.<br>
So now we have this using our local host, 7007 data and it looks like it's working again, just as it should.<br>
The test is working, okay.<br>
So that's great when we run it here but if we don't have it running again it's broken, right?<br>
Our goal is to make this, we got our frontend bits running, the next goal is to run the movie service in its own docker container and have those two communicate.<br>
That'd be a little bit more challenging because as you saw, we have to do things like install pip install the requirements, and that sort of stuff.
|
|
|
show
|
10:56 |
It's time to move over and get our Python-backed services running in another container.<br>
Now, you know what?<br>
It's going to be a lot like this one.<br>
Same, this is all the same.<br>
We're not going to use Nginx, so we're not doing that little bit.<br>
But from here on is going to be the same.<br>
Let me duplicate that for a minute and then we'll go back and fix this to make it a little bit better.<br>
So we'll create a Dockerfile here and we can go ahead and add those little utilities I like.<br>
Like I said, if you want, take 'em out, it's no problem.<br>
But we're not doing any of that stuff.<br>
What we're going to do is we're going to copy a movie_svc like so to /app.<br>
That should be good.<br>
I'm going to also go and create a virtual environment.<br>
Do you have to do this in a Docker container?<br>
No.<br>
It's kind of completely dedicated to just this app.<br>
But for example, like, this uses Python also is going to mess with the global environment.<br>
So what I'd like to do is have something a little bit more isolated.<br>
So I'm going to come over here and I'm going to try to put my copy as late as possible 'cause those files are going to change as I work on my app.<br>
All this other stuff can cache much, much more often.<br>
So what we're going to do is we're going to create a virtual environment.<br>
Now, we're also going to need a few other things up here at the beginning.<br>
We're going to need some Python tools like we need Python-pip and Python-dev and build-essentials, so we're going to add that in here.<br>
And then we're going to run a command which is going to be Python -m venv /venv.<br>
So it's going to create a virtual environment right in the root of our system.<br>
Now remember, when you create virtual environments they get out of date immediately, right?<br>
They for some reason come with an out-of-date pip.<br>
Like, this step doesn't bother to upgrade it even if it's somewhere else on the system.<br>
So the next thing we want to do is we're going to make sure our virtual environment has the latest pip.<br>
So we'll just say this in /venv normally you would say source or we need to run the full path and that works out better for Docker.<br>
So /venv/bin/pip install -U pip setuptools Let's go and see how this runs.<br>
So we're over here in our services and we're going to run Docker build this directory see what we get.<br>
See how a bunch of this was already cached?<br>
Great, here's our Python-dev and pip and all that that we're installing on the system.<br>
Oh, I forgot, we're going to need do Python3, okay?<br>
So we need to make sure that we have this installed but Python, I guess, means Python 2.<br>
Try again.<br>
There we go, that's much better.<br>
That's cool, we're only 10 versions out of date on pip.<br>
But not anymore, okay.<br>
So our virtual environment is all set up.<br>
What else do we have to do in order to run our app?<br>
Well, what did I do when I ran it over here?<br>
I went it down here and I said pip install -r requirements da-da-da, right?<br>
Same thing on a server.<br>
So we're going to go here after we do this.<br>
We're going to run, well, let me put it down here and then I'll do another little example.<br>
So we're going to run that, and where's their requirements?<br>
It's going to be /app/, so we have a movie service and that's just going to be right there.<br>
So requirements.txt.<br>
That should be good, let's give it another try.<br>
Here go our requirements.<br>
It looks like it found the file.<br>
Okay, super, that's all set up and it looks like we have our app running.<br>
I guess we could go and log in and just see if we can get it to work.<br>
So let's go over here and say I'm going to do the -t.<br>
Remember before, we said that.<br>
We're going to do services like so.<br>
I'm going to build it.<br>
I'm going to give it a name, knowing say docker run.<br>
For now we'll do -it.<br>
Services latest and bash.<br>
Great, so what is the command we would like to run?<br>
We would like to run venv/bin/Python and we're going to run /app/app.py.<br>
Now, this in some situations may work.<br>
It's not going to work now 'cause we need to change something really minor about how everything works.<br>
Let's see what happens.<br>
Oh, it runs here but you'll see it won't run, oh, later.<br>
So it looks like everything's listening on our port.<br>
And I'll show you one more tweak we got to make.<br>
You want to say docker run.<br>
So we could try to do this and see what we get.<br>
And it's off and running.<br>
How 'about that?<br>
Okay, well, if it's happy, I'm happy.<br>
Let's see what we get if we go to this.<br>
Well, can we go to that port?<br>
No.<br>
Because, of course, we haven't opened the port.<br>
So when I come over here, say -p 7007 goes to and from port 7007.<br>
Let's try it one more time.<br>
It's running.<br>
Let's see what happens if we go to this URL.<br>
It was reset.<br>
Now, I want to show you this error.<br>
I left this in on purpose.<br>
It's a little annoying but debugging these things is very challenging.<br>
So let's go back here to.<br>
Well, it looks like it works.<br>
It says it's serving, right?<br>
Let's go back here and run this.<br>
And then we'll run our command that we ask it to run.<br>
And I'll put an & on the back so that we can still interact with it.<br>
And we could do, hit local host on port 7000 and it's not working.<br>
So here's the error that I was actually expecting us to get earlier.<br>
But notice it's not even listed.<br>
This is not a server 500.<br>
This is no connection.<br>
What's going on?<br>
Let's look a little more carefully up here.<br>
When we look at the message, it's running on local host.<br>
That maybe usually sounds like, oh, it just it's running here, it's fine.<br>
But that means it's only listening on the local loop back.<br>
In order for us to get Responder to actually work we have to come over here and say an address equals, by the way, just pet peeve of mine, what you type in there I have no idea.<br>
How do I know it's address?<br>
I had to go dig through the source code several layers down to find out the keyword argument is address.<br>
It never has to be this way.<br>
You can always use default values in keyword arguments, but they're explicit.<br>
Anyway, let me type address.<br>
It's going to be the string, either a full address or everything.<br>
So now, notice our application has changed.<br>
Our Docker file has not changed.<br>
But we need to get a new Docker container based on our new code.<br>
How do we do that?<br>
We're going to build like this.<br>
And you'll notice those files have changed.<br>
And notice it copies those over and then it reruns the installer for the requirements.<br>
So one little trick that we can do is we know that we're based on Responder.<br>
There may be other things that we're also based on but Responder is a pretty good bet.<br>
You know, like, if you're doing Flask you can just say Flask.<br>
If you're doing Django, Django, whatever.<br>
So we can just say Responder right here and then we can rerun the rest of the requirements 'cause most of the stuff that's slow comes from Responder.<br>
Why is this valuable?<br>
This output, this calculation, this work, will be cached.<br>
So if we make little minor changes to our code we won't have to redo this every time.<br>
So let's do that again.<br>
One more time, Docker build, just going to go through installing it one more time because we're now doing that new layer.<br>
Of course that takes a while.<br>
But let's see what happens if we change our code again.<br>
So suppose I make a super important change like that and we re-run our build.<br>
Watch this, done.<br>
Yep, everything's all finished.<br>
So this is a nice way to let your rebuild happen much more quickly.<br>
It's your call whether or not you want to kind of hack it a little bit like that but I like to do this.<br>
I think it's running now.<br>
Let's try this again.<br>
There we go.<br>
We're going to run it, we're going to expose that port.<br>
It's running, and now notice, listening in on 0000.<br>
Now there's a server error, okay?<br>
That's progress.<br>
It doesn't sound like progress, but it is.<br>
And what is the server error?<br>
It's that it can't find the template file that it's trying to work with 'cause its working directory is broken.<br>
So we have one final change that we need to make over here.<br>
Let's go over here and we're going to I guess I'll do it after.<br>
Sure, we'll do it after.<br>
We can say working dir is /app.<br>
So when our subsequent commands run either here or these ones here like this command right there that's running, when that runs it'll be running from the perspective of that working directory.<br>
In fact, we could even write it like this if we want.<br>
So let's do a Docker build one more time.<br>
Now we have our working directory applied.<br>
Let's try this one more time.<br>
Server error, is it going to go away?<br>
Course it does, course it does because it's beautiful.<br>
So here we have our full Python app running right here.<br>
If we go back we can get movies by IMDB number we can get the genres, and so on.<br>
So we have the movie service working and if we were to re-run the container we would also have this working.<br>
Notice it's now going to talk to our local notice MCL right here, little API calls.<br>
Okay, great, so it looks like we have our Python app running as well.
|
|
|
show
|
3:40 |
It's time to put it all together.<br>
We want to run the front end.<br>
We want to run the services and have them talk to each other.<br>
We pretty much have the communication working if we expose the ports.<br>
But how do we run them all?<br>
And how do we do this is a nice reproducible way?<br>
So, I know we said docker run and then we said if there were a services latest.<br>
And what was the command for that one?<br>
Was it /app?<br>
Then app.py?<br>
Or just app.py?<br>
I don't recall.<br>
So, we still have one more concept to make this a little bit cleaner here.<br>
So let's give over to PyCharm.<br>
And the file thing we haven't touched on yet are entry point.<br>
And entry points are the command that is going to run if you just run the container without any options.<br>
For this one, this is a service one, what we wanted to do is say /venv/bin/Python.<br>
And we're going to run /app/app.py.<br>
That's what we want to do.<br>
So, first thing we have to do is we have to do a docker build.<br>
We're in the services.<br>
Notice it's built this entry point bit here.<br>
Okay.<br>
That's all good.<br>
Now lets do the same thing for front end.<br>
And it's over in this file.<br>
And we can add an entry point on this one.<br>
Now for this entry point, remember what we are running is nginx -g "daemon off;" Don't forget the semicolon.<br>
Right?<br>
You don't want to have to remember to type this.<br>
So those are the commands that we're just going to run.<br>
And now I got to do a docker build.<br>
Frontend's great.<br>
Looks like it added that entry point.<br>
So we're going to say run for services.<br>
Remember we did the ports.<br>
Seven out of seven.<br>
Seven out of seven.<br>
Good.<br>
Now it's docker run.<br>
Frontends.<br>
And on the front ends we'll do 80 to 80.<br>
Super.<br>
And if we do a docker ps you can see we have the frontend listening on port 80.<br>
And we have the services listening on port 7007.<br>
This should work.<br>
Let's help it up here and we'll go local host.<br>
Just like that.<br>
Boom, look at this.<br>
It is absolutely working.<br>
So we've got our crime.<br>
We've got out drama.<br>
What else we got?<br>
Thriller.<br>
All right we can search for success.<br>
Bamboozled.<br>
Doesn't sound successful to me.<br>
But this website, that is absolutely successful.<br>
And if we go over here to seven out of seven you can see our service running over here talking to it.<br>
And on this one we're just going back to those same services.<br>
We now have our movie exploder front end and our service running in the background working in these two docker containers.<br>
Just like that.<br>
Well, that was a lot of work.<br>
Wasn't it?<br>
We had to remember to start maybe the services first and then the frontend.<br>
We had to, even though we set the entry points which is great, we still need to figure out all the details.<br>
So while this is pretty good we need something better.<br>
This is where things like Kubernetes or Docker Compose or Swarm or those things that orchestrate across containers comes in.<br>
We're going to talk about Docker Compose.<br>
And we're going to put this thing together into a single cluster, single command.<br>
It's going to be beautiful.<br>
But we're just not quite ready yet.<br>
But we do have our individual pieces working together if we're willing to type out the commands by hand like this, right?
|
|
|
show
|
2:15 |
Feels like time for some celebration.<br>
We got the whole thing working, right?<br>
Well, there's a few little clean-up things we could do here.<br>
So if we look at what's running stop the containers nothing's running.<br>
Seems like everything's fine.<br>
Except, well there is a lot of junk we built up on this system.<br>
Now these containers are kept here so you can restart them go look at their logs or interact with them.<br>
But we don't want to do that.<br>
And if we similarly look at images we see there are these images and if you look at that and say show me all the intermediate ones woo, there's even more.<br>
So there's a couple of things we can do to clean that up.<br>
First of all we can work on let's work on the containers first because they may have references back to the images.<br>
So you might think there's a cool command like docker delete containers --done whatever, like no.<br>
There's not.<br>
So there is a docker rm command which will remove a container but it only works on individual ones so a way we've got to do a little UNIX-y magic to say docker remove all the containers whose names are you know, all of these whether they've been quitted.<br>
They've stopped.<br>
Okay, so we do that, woo.<br>
That's better.<br>
docker ps -a, ooh.<br>
All of them.<br>
Now there's a little better one for image.<br>
You can say prune.<br>
It says this will remove all dangling images.<br>
It'll say do you want that yes, we want that.<br>
And we reclaimed almost 200 megs.<br>
So we still have a couple of images that were built here.<br>
But we're in a much better place having cleaned all of those up.<br>
Oh it looks like I could do one more thing as well.<br>
prune -a to get rid of all of them.<br>
That's okay, no effect.<br>
But that'll get rid of even more potentially.<br>
So now if we just look at all the images that's good now we just ask what are here.<br>
Right, a nice clean set of just the working ones.<br>
There you go so don't forget to clean up after yourself.
|
|
|
show
|
3:15 |
Let's review our two dockerfiles we've created so far.<br>
Hideaway our movie service.<br>
So here we're both basing them on Ubuntu, right?<br>
They're the same, and if I switch back you can see it doesn't really make any changes or deviations, until we get to line 11.<br>
Same here.<br>
So what I would like to propose is that we have one more thing I would call this a base_server, for our project.<br>
And I'm going to put the dockerfile over here, like so.<br>
And on this one, we're going to take away the stuff that is extra is added for each one of those and we're going to build it.<br>
So let's copy this path over here.<br>
Now, when I say docker build, now remember we were giving it, let's say we'll say base_server.<br>
So we give it a name so that we can reliably refer back to it.<br>
And it says, hey, we already built that.<br>
We know about all of these things.<br>
And what we can do over here then is we can say you know what, we don't need to repeat ourself here this one is just based on the base_server.<br>
Same thing as over here, just based on the base_server it's just that delta.<br>
Now we got to rebuild those other two and at first, it's going to be more work because it's got to reinstall Nginx and do all of it's things but in fact, it's going to make it a lot better so that we have this sort of commonality across all of our servers, and what not.<br>
So it's kind of pre-configuring it for us, right?<br>
So let's go do that.<br>
So we look at docker images.<br>
We have now this base_server we can refer to.<br>
So at docker build, front end like that now it's based on the base_server, not on Ubuntu and it looks good, and do a build, like that?<br>
Everything's going, guess we can do one more test.<br>
Run the front end.<br>
Run the back end, and hit it one more time just to make sure I didn't break anything and sure enough, there it is working away.<br>
You can see it interacting and it gives me the server side output there.<br>
Obviously the front end is working, and we have Java.<br>
Ah, coffee, can we go for that.<br>
Javascript, that's what it's going to say.<br>
I really doubt that that's a thing, I was hoping for some coffee reference, but there we have it.<br>
It looks like we were able to clean that up a little bit.<br>
Now it's annoying, we have to remember to first build the base_server and then build the other things.<br>
That's one of the things, one of the challenges that will be solved when we get to docker compose that will allow us to treat these three different containers and container images as one whole unit.<br>
But for now, manually, we've removed some of our repeated specifications and code and moved it down to a base image.
|
|
|
show
|
2:08 |
Let's review the Dockerfile.<br>
In this case, we're going to look at the one we used for the front ends for serving static content through Nginx.<br>
So the Dockerfile always starts with from some image, maybe some tag.<br>
So from, Ubuntu, and the tag is 18.04.<br>
So that's how we start.<br>
Now, pretty much always you're going to want to update your Linux.<br>
You saw that the latest version was on DockerHub already detected vulnerabilities.<br>
You want to start from the best place you can so make sure you run apt update and then apt upgrade.<br>
So apt update gets a fresh list of changes for all the installed packages and then apt upgrade actually does the upgrade.<br>
We installed a couple of little helper utilities.<br>
As you saw, I'm a fan of htpy and Glances, things like that.<br>
So we're going to install those and then we're going to begin installing the stuff that we actually need to run our code.<br>
So we're going to install Nginx on this one.<br>
That's going to be our web server.<br>
We also want to make a change to the host file on this particular machine.<br>
So we're going to have a local host file that's going to overwrite the one over there.<br>
So we're going to use this copy command.<br>
Here we're copying a single file, host.txt to rename it to /etc/host and replace that file.<br>
Then we're going to remove the default Nginx file so that we don't just get, like, welcome to Nginx but, in fact, you get just our site.<br>
We configure Nginx by having an Nginx config file and putting it in this location.<br>
So we're going to do a copy, get our local one move it over there.<br>
Then we need to copy all of our code our Vue.js code, our JavaScript, our CSS, our images.<br>
So we do that by copying this directory to /app.<br>
Now this container is ready to run.<br>
We're going to add an entry point here at the end to say, well, if you just run it without any command you're going to run Nginx -g daemon off.<br>
As long as Nginx is running, the container is running; as soon as it stops, the container stops.<br>
So, that's how we get our site set up and ready to go for Docker serving static content.
|
|
|
show
|
3:48 |
You saw a ton of docker commands through this whole thing and throughout these demos.<br>
And if you are like me the first time I saw that whole experience your head was probably spinning.<br>
You're like docker ps, docker images, docker build docker run, docker -it, what is this it?<br>
Ah, what are all these commands mean?<br>
So here's a video to try and put those all together and really highlight the few essential ones that you need all the time.<br>
And then the ones that maybe you use less often well, there's Google right?<br>
Okay, so we're going to start out with some kind of dockerfile here.<br>
And we're going to say docker build.<br>
And that's going to build whatever dockerfile is in here actually in this listing.<br>
I have it in the wrong location.<br>
But, it's going to build that file, whatever's right there.<br>
So docker build.<br>
that's going to build some kind of container and it's going to give it a name, 9F111533, super name.<br>
And any changes to the container definition will change that.<br>
So docker build, helpful and you can just run you know 9F and it would go but sometimes you need something more stable like one docker file is going to refer to another one that you're building.<br>
So we can say docker build and put a -t here we'll call it movie services colon latest.<br>
So name and then tag.<br>
So now when it builds it, you're going to see it's going to build like this.<br>
And it's much easier to have a set of commands that always works against it to look at a command history and know what the heck it meant 'cause docker run 9511, what does that mean?<br>
Yeah, after a few moments you won't remember.<br>
Okay, so be sure to name and tag your images.<br>
Now if we want to run it, we're going to say docker run and then give it that tag name.<br>
This case, it ran and I exited.<br>
That was kind of cool.<br>
I mean I guess something happened, docker run.<br>
That was fun, it didn't have an error.<br>
But it's not very practical, right?<br>
So let's try again.<br>
So we're going to say docker run and now we're going to say in interactive mode with a terminal attached, we want to run bash.<br>
When we do that, we end up over here inside our app.<br>
Notice that now the prompt has changed and we're basically inside the container able to type and work with it and debug it and try commands and just see what works.<br>
So any time you're having trouble, give it one of these.<br>
You can drop inside and try some commands and play around till you figure it out.<br>
Now it was great that we ran it with bash to play with it but it's a web server.<br>
It's intent is to you know, serve things.<br>
So here we come over and give it an entry point.<br>
We didn't try to run the container with the alternate behavior after setting the entry point explicitly so the little run doesn't help us much.<br>
You got to set an explicit entry point to override the entry point.<br>
So here, here's how you do that.<br>
And we're saying run app V and V band Python and give Python the command app.py.<br>
That'll make it go.<br>
We also expose the port, so -p 7007: So on the local host, on the server, the host machine.<br>
Support 7007 is going to map to the inside the container, 7007 as well.<br>
Okay that's all good.<br>
And then finally, once you have all these running you might open either a new prompt.<br>
Or if you've run them in the background you might wonder, well what is running?<br>
So you can say docker ps.<br>
That's most of the commands that you're going to need to get started and get things going.<br>
Of course, there's always Google and there's a good reference on docker's website, itself.<br>
I don't want to go through and overwhelm you with too many things.<br>
Hopefully this little take away will give you enough to work with for the most part.
|
|
|
show
|
2:37 |
Well you're not all the way through all of the lectures for this chapter.<br>
But you've gone far enough that it's time for you to try your hand at Docker.<br>
So let's review the first part of the Your Turn stuff here.<br>
You've watched enough of the videos to see everything we're going to talk about with regard to Docker itself.<br>
So now it is your turn to try to Dockerize one of your applications.<br>
We're going to give you a few tips to help guide you along.<br>
You have the videos.<br>
You have the source code that we've already submitted to the Repo and you have a choice.<br>
So you can either choose the easy path and just re-create re-Dockerize the Vue.js application just like we did in the video.<br>
So you can follow along and that way you can always go and check back and that would be totally great.<br>
Or you can choose the more adventurous path which case go back and choose one of the Python applications either you've created during this course or one of the other demo applications that we've created throughout this course and load that up configure it to run in a Docker container.<br>
That might require more than one Docker container.<br>
It might require just one.<br>
So whatever it takes you know build it up that way.<br>
Now for the tips.<br>
Here are a couple of tips on building Docker containers.<br>
Here are a couple of the commands you need to run it.<br>
So you always need to start by building it.<br>
Maybe you specify a tag for the name so you don't always have to run it by container id.<br>
You run it with a container id if you want to login to it this is basically the way you do it here.<br>
See what's running, Docker PS into stop a running line you do this kill container id.<br>
Remember you don't have to type the entire hash or sha from the container id just enough to be unique and that's all you need.<br>
And then remember that Docker files are mainly just commands that layer on configuration or changes to a given Linux machine.<br>
So we start with a base image.<br>
You could pick a picture related or something else whatever makes since for you.<br>
And then we run commands.<br>
We modify the environment.<br>
We can copy files or we can copy directories.<br>
Then you set an entry point to have it run if you want or you can simply pass this command to the container as well when you start it up.<br>
That's it.<br>
So in this first day you're just going to watch the videos up to here.<br>
The second day you're going to containerize something.<br>
Either something we built or something you built.<br>
We'll come back after we talk about building multi-container systems with Docker Compose and layering on a little bit of orchestration with Docker Compose for what you're building here.
|
|
|
show
|
2:20 |
To introduce you to Docker Compose let's review what we have been doing.<br>
We had a couple of docker files one like this, and we'd issue commands at it, individually.<br>
So, docker build this, and we had some other dockerfiles and maybe we want to build those so we'd say, build this one and it's based on that one that you had to manually remember to build or it'll get out of sync before.<br>
Well so, maybe you have another one and we're going to build it.<br>
And if we want to run the container for the first one we have to type docker run the container name or container id.<br>
Well, did you make sure you built it before you ran it?<br>
Oh, and this one also depends on the other one so don't forget to run that, and it can be challenging to run these multi-container applications.<br>
And yet, that's exactly what most real applications are.<br>
They've got some database stuff, they've got some front-end web server stuff, they've got logical web server bits and something like the Python backend, you know maybe Pyramid, Flask or Django, something like this.<br>
So, all this coordination, this is not good.<br>
Doing this manually is super error prone and it's not fun.<br>
It would be nice if there was a way to say you see this system here on the screen build it, run it and control it as a single unit.<br>
That is Docker Compose.<br>
So, if we look at this differently we still have our three docker files that we defined exactly as we had before but now we have one supervisor file if you will, called docker-compose.<br>
And Docker Compose can do things like build all of those and run all of them and monitor the resulting containers that are running.<br>
So, we just issue a simple command to our docker-compose file, docker-compose up and it says okay, in our file we refer to these three docker files, so we're going to build them and then we're suppose to run them and it's going to run and now their running as a single unit.<br>
The builds happen in the right order the runs happen in the right order and then we can even monitor the running containers and control this entire system as a single thing.<br>
So, these are often refer to as services within Docker Compose.<br>
You'll see we're actually right on the door step of already being able to do this.<br>
In fact, all we have to do is define a single docker-compose.yml file that talks about the various components in terms of the individual docker images and containers and so on and then we just say docker-compose up, it's going to be great.
|
|
|
show
|
8:27 |
It's time to build our dockder-compose set of services that are going to control the base server the front-end server and our services Python web application.<br>
So let's go over here and create a new file.<br>
I'm going to call it just docker-compose.yml.<br>
Here we are.<br>
Now, this has a certain format that you have to follow.<br>
You can just look it up on the Docker website but, it's pretty straightforward.<br>
So the first thing we have to do is specify the version.<br>
And, by the way, why is it straightforward?<br>
Because we're using the Docker plugin for PyCharm.<br>
Watch this.<br>
I want to have the version.<br>
Oh, that's how I put it.<br>
And then the value's going to be a string and the value's going to be 3.<br>
Now, the way this works it's kind of like a dictionary in Python.<br>
If you have the key, you have the value.<br>
And then if you have sub-dictionaries, you indent.<br>
And, if you're going to have a list of items like this would be A and B that's how YAML works.<br>
I'll show you a website where you can learn more about it later.<br>
But for now, let's just keep going.<br>
So we're going to have our version and we're going to have services.<br>
Okay notice the help.<br>
Notice that it shows the dictionary thing right here.<br>
So, we know that this is going to be a set of key values not a list or something like that.<br>
So, what are the values?<br>
Let's have the base_server remember we're going to build the base_server this is where we just make up the name.<br>
And then we're going to put some values in there.<br>
And then we're also going to have the front end put some values in there and then we're going to have the services.<br>
Kind of unfortunate that I named it this and that.<br>
But, that's what it's called.<br>
So there's the web services.<br>
So over here, how do we describe how we want it to build it?<br>
Well, if you type B, you can say there's a build.<br>
Okay, and what are we going to do for build?<br>
We're just going to specify the server.<br>
Over here it's going to be this folder.base_server.<br>
That's it.<br>
Specify the directory it finds the Dockerfile.<br>
Off it goes.<br>
And then, we also want to give it a name.<br>
If you recall, over here we say this is based on base server latest.<br>
Well how does a thing over here know as we did on the command line that we want to specify that name?<br>
So what we're going to say is, image.<br>
It's going to be that like so.<br>
So that'll specify what the image is supposed to be.<br>
And for this one, we're not going to run it or anything.<br>
Technically it'll run, but it'll just exit immediately.<br>
We just need it to be built previously before we get to the front end one.<br>
So for the front end one, we're going to do a build and the build is going to be frontend like that.<br>
Let's do the same for services while we're on the build stuff and it'll be dot slash services like so.<br>
Now, we want to make sure that when the front end starts that the services also start and maybe even start before the front end starts.<br>
We can say, this depends upon notice the little square brackets means this could be a list of things and it already puts in the list indicator for YAML.<br>
And what's it going to depend upon?<br>
Notice the autocomplete.<br>
Oh my gosh, that is awesome.<br>
So those are the other services defined in this YAML file.<br>
So it depends on services.<br>
Now remember, this one also had to expose a port.<br>
So what we're going to do, trying to say, port and what we're going to do is go from AD in our machine to AD on the container like so.<br>
So we just say this.<br>
And that's it.<br>
This is all we got to do to define the frontend one and we have to make sure that the base server is here as well.<br>
So let's say this also depends on base_server, right?<br>
In order for a build to happen.<br>
Next we have our build here.<br>
Let's do our depends on base_server.<br>
And we're going to need our ports.<br>
And it's going to be 7007 mapped to 7007.<br>
Now, this is close, and I believe the way we set up these containers, let's double check.<br>
This one has an entry point.<br>
And this one has an entry point.<br>
Let's go and be a little bit more explicit.<br>
We can specify custom or override the entry points right here.<br>
So what we can do is we can come down here and say the command for service one is just that.<br>
Run Python from our original environment against our app.py.<br>
And we go in and also specify the command here which is this nginx thing We could run it without, and let it run however it's going to run but I kind of like to have it all, you know mapped out right here, what's happening in our docker-compose.<br>
Well that wasn't so hard, was it.<br>
You know all the cool benefits we talked about in the concept video?<br>
Let's see if we've got them.<br>
Going to find out.<br>
If we install our Docker desktop here, we should also have a Docker compose, and it looks like we do.<br>
Now if we run this in the directory that has the docker-compose.yml file, first let's say DockerPS Nothing running.<br>
And then we could say Docker compose, and we just say bring the system up, it's going to build it it's going to run the containers, and all that.<br>
And we could also say down to shut it down later.<br>
So we say this, it's doing all the building for all the pieces In a little while, so it decided it was going to make new instances of the service.<br>
Now look at that.<br>
It's created the demo base server, the demo service one and the front end service one, and now there's nothing for the base server to do, so it woke up and said "Ah!<br>
Nothing to do here.<br>
Go away." But the other two are running.<br>
So if we say docker ps you can see that those two are running.<br>
If we say docker-compose ps Oh, got to be in the right directory.<br>
Sorry about that.<br>
It looks at the Docker compose file, docker-compose ps It looks, and it says "Okay, these things are up and running, this thing exited and that's okay, we don't care." But these two are running.<br>
Let's just open up our browser and see what we get.<br>
If we go to local host, what should we see?<br>
We should see our movie exploder app, and it should be talking back to the other local server.<br>
And beautiful.<br>
It is!<br>
Look at that.<br>
So let's go to comedy, and look at drama and if we look at the network behavior down here and just look at XHR, for the Ajax stuff.<br>
So we click here, you can see it's going back to local host, and if we go back here, you can see it's actually processing the requests as we do them.<br>
So, we don't really need this to see that that's happening.<br>
Go over here, top movies by genre as crime get the top ten, search for Cats Notice you can see the search for Cats right there.<br>
So this is running entirely in our set of Docker containers.<br>
In our two services managed by Docker Compose.<br>
Well, what did we have to do?<br>
We had to define the YAML file, and say docker-compose up Let's shut it down real quick.<br>
Docker compose down, this has to happen where the Docker compose file is.<br>
You see it stopping them.<br>
Gently.<br>
Gently now.<br>
In the left terminal, you can see the two services exited.<br>
Perfect!<br>
It's all done.<br>
We do PS again, nothing is running.<br>
Of course, we check here It's all gone.<br>
Doesn't work.<br>
Now if we just say compose up again, it should actually be a lot faster than before.<br>
Look, it already knew that all the builds were successful it had all the images it's needing, so it just goes boom!<br>
Start right up and get going.<br>
And guess what?<br>
We're back online, and we've got our biographies all that we want.<br>
It's pretty cool.<br>
And that's all there is to it, Docker Compose.<br>
There's a lot more you can do.<br>
You can do scaling and things like that, like having three web front ends, and two service back ends.<br>
The challenge has noting to do with Docker Compose but that is a little tricky, because we have to somehow do the load balancing ourself, like set up an nginx that speaks to those various pieces, and it can be done, but it's beyond the scope of this short version of our course here.<br>
Anyway, there's a lot you can do with Docker compose and it's kind of a gateway to the bigger Kubernetes story as well, if you want to go down that path.
|
|
|
show
|
1:17 |
Welcome to day four, for this chapter.<br>
Day three was just to continue watching the videos so, that's great, you can do that.<br>
For day four, now you've seen all the videos and now you know about Docker Compose it's time to explore this idea of multi-container applications.<br>
Now, the application you built may or may not have multiple containers, and that's fine.<br>
You can still run it and orchestrate it and work with it with Docker Compose, and you would see more or less how it's going to work, even if you do have multiple containers.<br>
So, you're going to go and create a ./docker-compose.yml file.<br>
And organize this however you want, I like to have it just above all the Docker files themselves but you can figure out how you'd like that to be.<br>
And this is going to orchestrate or compose the thing you built on day two.<br>
So you already built some kind of Docker container that runs an app you selected.<br>
We're going to build a ./docker-compose.yml file that's going to let you say Docker Compose up and Docker Compose down, it will build it, run it link those things altogether, it's going to be great.<br>
If you need some help with the style of the ./docker-compose.yml file, just go check out the one we built in the demo, it should be right next to this README in the GitHub repo.
|
|
|
|
5:50 |
|
|
show
|
0:31 |
Look at that, you've done 100 days.<br>
You've made it!<br>
Can you believe you've actually done 100 Days of Code and completed this entire journey?<br>
Well, your adventure is both done and also just beginning.<br>
Congratulations, there's so much more code you can write so many more projects and things you can start will all the experience you've gained in this course and I hope you do so and I hope you share it with us on social media.<br>
We love to hear about our students being successful.
|
|
|
show
|
1:21 |
Now, let's just take a moment and reflect upon what you've learned what you've gotten in this course.<br>
If you've done every one of the 100 Days' projects you have done an incredible amount.<br>
And it's easy to think well, these are just small little things little tiny projects.<br>
But, that's really the secret of software development is it's just the sum of many, many small projects.<br>
It's not this grand skill that somehow you acquire eventually.<br>
Rather it's, well, what 50 little things do I actually need to know in order to build this website or that mobile app or, this other IoT thing, whatever it is you want to build.<br>
I think you've learned so many little things that are going to add up to be really, really powerful for you.<br>
And I just want you to keep this ethos this.<br>
I'm going to learn one little thing every day going.<br>
Because one little thing every day continuously it will put you right at the top of the software industry and that's a super fun place to be.<br>
But you have learned so much I don't really want to go through all the details and call them out but, you work with databases web sites, APIs, and so on, and so on.<br>
So just take a moment and reflect upon how far you've come and how many things you have gained but most importantly, just keep learning one thing a day and it'll do amazing things for you.
|
|
|
show
|
0:29 |
By now, you're certainly familiar with the GitHub repository.<br>
That's where all the instructions and the starter code, and the data and whatnot has been for all of the 100 Days projects.<br>
But I just want to emphasize one more time maybe you haven't starred, maybe you haven't forked this.<br>
I want you to at least go to GitHub and star it, probably fork it so you have a permanent history of this.<br>
You've done 100 Days, you've gone on this entire journey.<br>
Make sure you take the source code with you.<br>
I'm sure you'll find it useful down the line.
|
|
|
show
|
1:08 |
Now that you're just about to complete this class I want to give you a couple of resources to help you dig deeper and connect further with the community.<br>
First of all, the Talk Python To Me Podcast.<br>
You probably know this podcast, maybe you subscribe to it but if you don't, head over to talkpython.fm and check out the podcast.<br>
You will hear the stories and the people behind so many of the projects that you worked with.<br>
You want to hear about SQLAlchemy?<br>
Well, I had Mike Bayer on the show who is the guy who created it and continues to maintain it.<br>
Want to learn about contributing to open source?<br>
I did a whole panel on that.<br>
Looking to get your first job in Python?<br>
I actually did a two-episode, 12-person panel both people who just got their jobs and who are hiring managers.<br>
Whatever it is you want to dig deeper into in Python and the community you can probably find it over here.<br>
Also stay up on the latest news check out my other podcast, Python Bytes.<br>
Over at Python Bytes, Brian Okken and I share the latest headlines and news and what's hot and what's happening in the Python space a great way to keep on new packages and libraries that maybe you haven't heard of.
|
|
|
show
|
1:10 |
Finishing the 100 Days of Python is both an ending and a start of a great Python journey.<br>
We encourage you to go to PyBites and subscribe to our monthly newsletter and keep an eye on the articles, new, and code challenges we launch on our website.<br>
We're here to teach you Python.<br>
Of course we are learning Python ourselves.<br>
It's a never-ending journey and we're super passionate about it and we are not planning to stop anytime soon.<br>
So we hope to salute you at PyBites.<br>
Additionally, we launched code challenges where we integrated a year of block challenges and we also launched a new line of Bites of Py which as smaller exercises you can code up in a browser.<br>
We're stoked about this platform.<br>
It's not only teaching you programming in Python it also shows how to do it in a most Pythonic way.<br>
And we are rapidly expanding this platform adding bites and code challenges.<br>
So this is a great way to keep up the momentum you gained throughout this course by keeping calm and code in Python every single day.<br>
Good luck.<br>
And we hope to see you there.
|
|
|
show
|
1:11 |
You made it to the end, congratulations.<br>
I hope you had as much and inspiration as we had preparing the course and that you got practice on a lot of different topics which you can now take to the next level.<br>
And I hope that you keep using Python in your daily work.<br>
Feel free to reach out on Twitter and share what you're working on and good luck in your further Python adventure.<br>
Congratulations on completing the 100 Days of Code.<br>
This is a huge milestone and a huge achievement so you should be very proud.<br>
It's important, though, to continue coding.<br>
Don't let this be the end.<br>
Make sure, just like with any other skill you keep practicing, you keep coding and you keep working on it and you'll only get better.<br>
So, we look forward to seeing all the cool things you come up with going forward.<br>
Make sure to ping us on Twitter and Facebook and wherever else you can think to message us.<br>
As I've said in the course Keep calm and code in Python.<br>
Thank you for taking our course.<br>
It was a pleasure to put it together for you.<br>
We hope you accomplish amazing things with what you've learned here.<br>
If you enjoyed the course please share it with your co-workers and friends on social media.<br>
Thanks, and good-bye.<br>
Thanks, and good-bye.<br>
Thanks, and good-bye.
|
|
|
|
46:01 |
|
|
show
|
1:15 |
One of the unique concepts in Python is to minimize the number of symbols and control structures in the language.<br>
For example, in C and C-based languages like C# and JavaScript, you have lots of curly braces, and variable declarations and so on, to define structures and blocks.<br>
In Python, it's all about the white space, and indentation.<br>
So here we have two particular methods, one called main and one called run and they both define a code block and the way you do that is you say define the method, (colon), and then you indent four spaces.<br>
So the purple blocks here these are also code blocks and they are defined because they are indented four spaces the "if" and the "else" statement.<br>
But within that "if" statement, we have a colon ending it, and then more indentation, and that defines the part that runs in the "if" case, and then we have the "else" unindented, so that's another piece, another code suite or block, and then we indent again to define what happens when it's not the case that the argument is batch or whatever that means.<br>
And we saw that these are spaces, the convention is to use four spaces for each level of indentation, it's generally discouraged to use tabs.<br>
Now, if you have a smart editor that deeply understands Python, like PyCharm or Sublime text or something like that, it will manage this indentation and those spaces for you, so it's much, much easier in practice than it sounds before you actually get your hands on it.
|
|
|
show
|
0:51 |
Variables are the heart of all programming languages.<br>
And variables in Python are no nonsense.<br>
Let's look at the top one, I am declaring a name variable and assigning it the value of Michael, and age variable and assigning it the variable of 42.<br>
Some languages you have to put type descriptors in the front like you might say string name, integer age, you might put semicolons at the end, things like that.<br>
None of that happens in Python, it's about as simple as it possibly can be.<br>
So we can declare them and assign them to constant values, we can increment their value in this case of the birthday and we can assign them to complex values like the hobby, which is really the list or array of strings, the hobbies that we have.<br>
So we assign these on creation, and we can even take the return values of functions and assign them to these variables, like so.
|
|
|
show
|
1:47 |
Any interesting program has conditional tests and various branching control structures in it.<br>
And many of these control structures you have to pass some kind of test, a boolean, a True or False value.<br>
Go down this path, or don't.<br>
Continue looping through this loop or stop.<br>
Let's talk for a moment about this general idea of True and False in Python; and I am referring to it as truthiness, because in Python all objects are imbued with either a True value or a False value.<br>
And the easiest way to understand this is to think of the list of things that are False, they are clearly spelled out, it's right here- False, the keyword False, the boolean keyword False is false obviously.<br>
But things that might not be so obvious to that are False, are as well, for example any empty sequence, so an empty list, an empty dictionary, an empty set, empty strings.<br>
All of these things are False, even though they point to a real life object.<br>
We also have the zero values being False, so integer zero and floating point zero - False.<br>
Finally, if you have some kind of pointer and it points to nothing, so the keyword none, that is also considered to be False.<br>
Now, there is this small addition where you can overwrite certain methods in your custom types to define False, but outside of this list, and those implementations, everything else is true.<br>
So if it's not in this list and it's not a custom implementation of a magic method that describes the truthiness of an object, you pretty much know the way it works.<br>
Now, in Python, we often leverage this truthiness or falseness of objects, so we might do an "if" test just on a list to see if it's empty, rather than testing for the length of the list to be greater than zero, things like that.<br>
So you'll run into this all the time and it's really important to keep in mind what's True and what's False.
|
|
|
show
|
1:24 |
The most common control flow structure in programming has to be the "if" statement.<br>
Let's see how we do "if" statements in Python.<br>
Here we have a simple console program, probably this bit of code is running in some kind of a loop or something like that, and we are asking the user for input saying "what is your command?", either list the items by typing L or exit from the program by hitting x.<br>
And we capture that string and we say "if", so simple keyword "if"...<br>
some boolean test, so in this case the command is == 'L' so that means is the command equal to L: (colon) and then define what we are going to do in that case.<br>
In this case we are going to list the items, we could do multiple lines, we are just doing one here.<br>
Now we don't say "else if", in Python we say "elif", for short, but then we just have another test, so if it's not L and the command happens to be x, then we are going to exit.<br>
And those are the two options that we are expecting, but if we get something that we don't expect, like "hello there", or empty enter or something like that, we'll be in this final bit here where it says "Sorry, that wasn't understood".<br>
So we start with "if" some kind of boolean expression, and remember, we could just say "if" command: and leverage the truthiness of that value, and that would run if they provided some kind of input at all, but if we want to test for else, we say if command == 'L', we have these additional as many as you want "else if" tests and there is a final optional "else" clause.
|
|
|
show
|
1:31 |
Sometimes within a control structure like if or while loops, things like that, we need to have complex tests tests against more than one variable and negations, things like that.<br>
So, here is a pretty comprehensive example of testing for both multiple values as well as taking over the precedence by using parenthesis and negation using not.<br>
many languages use symbols for this combination, like the C-based languages use double ampersand for and, and exclamation mark for not, those kinds of things.<br>
Python is more verbose and uses the English words.<br>
So here we are going to test for two conditions that both have to be True, it's not the case that x is truthy so x has to be falsie, from the previous discussions, so an empty sequence, None, zero, are False, something like that, and the combination of one of two things- z is not equal to two or y itself is falsie.<br>
So, using this as an example, you should be able to come up with pretty comprehensive conditional statements.<br>
Now, one final note is Python is a short circuiting conditional evaluation language, for example, if x was True, the stuff to the right and the end would not be evaluated.<br>
You might wonder why that matters, a lot of times it doesn't, in this case, nothing really would happen.<br>
Sometimes you want to work with like sub values of an object, so you might test that x is not None, so you would say "if x and x.is_registered" or something like that.<br>
Whereas if you just said x.is_registered, x was None, your app of course would crash.
|
|
|
show
|
1:41 |
In Python we have a fantastically simple way to work with collections and sequences.<br>
It's called the "for...in" loop and it looks like this.<br>
You just say for some variable name in some collection, so here we have "for item in items" and that creates the variable called item and we are looping over the collection items, it just goes through them one at a time, so here it will go through this loop three times, first time it will print the item is "cat", the second time it will print the item is "hat" and then finally the item is "mat".<br>
And then it will just keep going, it will break out the loop and continue on.<br>
Some languages have numerical "for" loops, or things like that, in Python there is no numerical "for" loop, there is only these for in loops working with iterables and sequences.<br>
Because you don't have to worry about indexes and checking links and possible off-by-one errors, you know, is it less than or less than or equal to, it goes in the test in the normal "for" loop.<br>
This is a very safe and natural way to process a collection.<br>
Now, there may be times when you actually need the number, if you want to say the first item is "cat", the second item is "hat", the third item is "mat", this makes it a little bit challenging.<br>
Technically, you could do it by creating an outside variable, and incrementing, but that would not be the proper Pythonic way.<br>
The Pythonic way is to use this enumerate function, which takes a collection and converts it into a sequence of tuples where the first element in the tuple is this idx value, that's the index, the number.<br>
And the second item is the same value that you had above.<br>
So first time through its index is zero, item is cat; second time through, index is one, item is hat, and so on.<br>
So these are the two primary ways to loop over collections in Python.<br>
Remember, if you need to get the index back, don't sneak some variable in there, just use enumerate.
|
|
|
show
|
0:59 |
Functions are reusable blocks of functionality.<br>
And of course, they play an absolutely central role in Python.<br>
Now, in Python we can have functions that are just stand alone, isolated functions, and these are quite common, or we can have functions bound to classes and objects that bind together specific data about an object along with those behaviors, we call those methods.<br>
The way we define them, interact with them, is basically the same, regardless whether they are functions or methods.<br>
Here you can see we have a main method, we want to call it, it takes no parameters, and returns nothing or nothing that we care about, so we just say main open close parenthese, like so, we can also call functions that take arguments, here is a function called input, and it gathers input from the user, on the consoles, it will give them a prompt, and this argument we are passing here is a string, and this is the prompt to share to the user, pauses the input on the console and waits for them to type something and hit enter, when they do, the return value comes back and is stored in this new variable called "saying".
|
|
|
show
|
1:33 |
You just saw how to call functions.<br>
Now let's really quickly cover how to create functions.<br>
Now, I should say right when we get started that there is a lot of flexibility, more than most languages in Python functions and methods, and so we are just going to scratch the surface here, and not really get into all the details.<br>
So the keyword to define functions is def.<br>
We always start with def and then some function name and regardless whether these are methods in classes or standalone functions, def is the keyword and then we say the name, and then we have a variety of arguments or if we have no arguments, we can just leave this empty.<br>
But here we have two positional required arguments, we could also make these optional by specifying default values, we can create what are called named arguments where you have to say the name of the argument to pass the value instead of using the position.<br>
We can also take additional extra arguments that the method was not necessarily designed for, but, like I said, we are not going to dive too deeply into those, here is the basic way to define the method- def, name, parenthesis arguments and then colon to define the block that is the method.<br>
Here we would probably do something like validate the arguments like throw some kind of ValueError or something, if name is None or email is None, something like that.<br>
Then we are going to do our actual logic of the function, create it using the database and here we are going to somehow get that information back and to this db_user, maybe we want to tell whoever called create_user the id of the new user that was just created, so we'll use a return value and we'll return the id that was the database generated id for when we create this user.
|
|
|
show
|
1:20 |
Working with files in Python, especially text files is something that you are likely to need in your application.<br>
So let's take a really simple example.<br>
Here we are going to create a file, we have three items in our data structure we want to save on the three separate lines, so we have cat, hat, mat and a list, and these are just strings.<br>
We are going to use the "open" method, and the "open" method takes a file name and a modifier, and then this "open" method, the open string that comes back can be used as a context manager, so we are putting into a "with" block, and naming the variable fout for file output, and this automatically closes the file stream, as soon as we leave this with block.<br>
So that's really nice and safe, makes sure we flush, it close it, all those kinds of things.<br>
Once we get the file open, we are going to loop over each item and we are just going to say "fout.write" and pass it the item, so cat, hat or mat.<br>
Now, write does not append a new line, it just writes characters to the file, so we want to say "\n" to append a new line, so each one of these items up here is on a separate line in the file.<br>
And notice this "w" modifier, this means write only and truncate the file if it exists.<br>
We could also say "a" for append, "a+" for create an append or "r" if we just wanted to read from the file but not write to it.<br>
There is also a "b" modifier for binary files, but you'll use that less often.
|
|
|
show
|
1:59 |
Packages and modules must be imported in Python before they can be used.<br>
It doesn't matter if it's in external package of the package index, in module from the standard library or even a module or package you yourself have created, you have to import it.<br>
So code as it's written right here likely will not work, you will get some kind of NameError, "os doesn't exist, path doesn't exist".<br>
That's because the os module and the path method contained within it have not been imported.<br>
So we have to write one of two statements above, don't write them both, one or the other.<br>
So, the top one lets us import the module and retains the namespace, so that we can write style one below, so here we would say os.path.exist so you know that the path method is coming out of the os module.<br>
Alternatively, if you don't want to continue repeat os.this, os.that, and you just want to say "path", you can do that by saying this other style, from os import path.<br>
And then you don't have to use the namespace, you might do this for method used very commonly whereas you might use style one for methods that are less frequently used.<br>
Now, there is the third style here, where we could write "from os import *", that means just like the line above, where we are importing path, but in fact, import everything in the os module.<br>
You are strongly advised to stay away from this format unless you really know what you are doing, this style will import and replace anything in your current namespace that happens to come out of the os.<br>
So for example, if you had some function that was called register, and maybe there is a register method inside os module, this import might erase your implementation, depending where it comes from.<br>
So, modules must be imported before you use them, I would say prefer to use the namespace style, it's more explicit on where path actually comes from, you are certain that this is the path from the os module, not a different method that you wrote somewhere else and it just happens to have the same name.<br>
Style two also works well, style three- not so much.
|
|
|
show
|
1:54 |
You'll hear it frequently said that Python is an ecosystem or a language that comes with batteries included, and what that means is you don't have to start with a little bit of Python and pull in a bunch of different pieces from here and there and implement your own version of this algorithm or that feature.<br>
Oftentimes, the things you need are built already into Python.<br>
You should think this batteries included is kind of like an onion with many layers, so at the core, the language itself is quite functional and does many things for us, the next shell out is the standard library, and in the standard library we have file io, regular expressions, HTTP capabilities, things like that.<br>
In the next shell outside of that are all of the packages and external projects written for and in Python, so for example when we want to add credit card capabilities to our website, we are going to reach out and grab the stripe Python package.<br>
The web framework we are using itself, is built around many packages, centered around Pyramid, the database access layer is SQLAlchemy.<br>
Everything I just named does not come included in Python, but is in the broader ecosystem.<br>
If it's in the broader ecosystem and it is a package or library for Python developers to use, chances are extremely high you will find it in this place called the Python Package Index, which you can find at pypi.org.<br>
Notice that there are over 88 thousand packages at PyPi.<br>
This means, you can go on and type something in that search box, and there is a very good chance that what you are looking for will return a bunch of results that you can then grab one of them, install into your environment and then use in your project.<br>
So here is what you do- when you think you need some piece of functionality or some library, before you go to start and write that yourself, do yourself a favor and do a few searches at pypi.org, and see if there is already a really great open source project or package that supports it.
|
|
|
show
|
2:26 |
Now that we saw there is over 88 thousand packages at pypi.org, we can just grab and bring into our projects and add great functionality HTTP processing, web services, web frameworks, database access, you name it, the question becomes how do we get those form pypi into our system or, any distributable package even if we actually just have a zip file of the contents, and the answer is pip.<br>
pip knows about the Python Package Index and when we type "pip install" a package, here we are typing "pip install requests", one of the most popular packages in Python, which is an HTTP client, pip will go and look in a certain location on the Python Package Index.<br>
And here you can see it found it, it downloaded version 2.9.1 and it unzipped it, installed it in the right location, cleaned everything up, beautiful.<br>
So, this is how we install something on the command line, if you need to install it machine-wide, you will likely have to do "sudo pip install requests" or alternatively on Windows, you will have to running in a command line that is running as administrator.<br>
Now, be aware, you really want to minimize doing this because when you install one of these things it runs the setup.py file that comes with the package that thing can have anything at once in it, and it could do anything that that package want to do to your machine, really, you are running as admin some sort of untrusted code, so be aware and try to install it locally, but if you've got to install it machine-wide, this is how you do it.<br>
If you have Python 3.3 or earlier, you probably don't have pip.<br>
Some of the new versions of Python 2 do have it, but most of the versions of Python 2 also don't have pip, so if you need to get pip, just follow this link and install it, then you carry on in exactly the same way.<br>
All the newer versions, Python 3.4, and later come with pip included, which is excellent.<br>
If you are using PyCharm, PyCharm has a really great support for pip as well, here you can see under the preferences tab, we found the project interpreter and you can see it's listing a bunch of packages, a version and the latest version, some of them have little blue arrows, indicating that we are using an older version rather than a newer version.<br>
So we could actually upgrade it.<br>
The little up arrow in the bottom left, once you select something will let you upgrade it and the plus will pull up a listing like a little search box that you can explore all those 88 thousand packages and more.<br>
So if you are using PyCharm, there is a really nice way to see what packages are installed in your active environment and manage them.
|
|
|
show
|
3:53 |
One of the challenges of installing packages globally has to do with the versioning.<br>
The other really has to do with managing deployments and dependencies.<br>
Let's talk about the versioning part first.<br>
Suppose my web application I am working on right now requires version 2.9 of requests.<br>
But somebody else's project required an older version with older behavior, version 2.6 let's say.<br>
I don't think those are actually incompatible, but let's just imagine that they were.<br>
How would I install via pip version 2.6 and version 2.9 and keep juggling those, how would I run those two applications on my machine without continually reconfiguring it- the answer is virtual environments.<br>
And, virtual environments are built into Python 3 and are also available through a virtual env package that you can install for Python 2 and the idea is this- we can crate basically a copy, change our paths and things like that around so that when, you ask for Python or this looks for Python packages, it looks in this little local environment, we create one of these small environments just for a given application, so we would create one for our web app that uses request 2.9 and another one for the one that uses request 2.6 and we would just activate those two depending on which project we are trying to run, and they would live happily side by side.<br>
The other challenge you can run into is if you look at what you have installed on your machine, and you run some Python application and it works, how do you know what listed in your environment is actually required to run your app, if you need to deploy it or you need to give it to someone else, that could be very challenging.<br>
So with virtual environments we can install just the things a given application requires to run and be deployed so when we do something like "pip list", it will actually show us exactly what we need to set up and use for our app to run in production.<br>
Typically we tie virtual environments one to one to a given application.<br>
So how do we create one?<br>
This example uses virtual env which we would have to install via pip, you could also use venv, just change virtual env to venv in Python 3 and it will have the same effect, but this works, like I said in Python 2 and 3, so here you go.<br>
So we are going to run Python 3 and we are going to say run the module, virtual env, and create a new environment into ./localenv.<br>
Here you can see it creates a copy from Python 3.5.<br>
Then we go into that environment, there is a bin directory and there is an activate program that we can run and notice, we'll use the .<br>
(dot) to apply that to this shell and not to create a new separate shell environment for that when it runs because we wanted to modify our shell environment, not a temporary one.<br>
So we say .<br>
activate and that will actually change our environment, you can see the prompt change, if we say "pip", we get the local pip, if we ask "which Python", you'll see it's this one that is in my user profile not the one in the system.<br>
Now, few changes for Windows, if I did exactly the same thing in Windows, I would have .\localenv of course, I might not use Python 3, I just say Python and make sure I have the right path to Python 3 because that is not a feature in the Python 3 that comes on Windows, and I wouldn't use the source activate you don't need to do that in Windows, but you would call activate.bat, otherwise, it's pretty much the same.<br>
Also, the "which" command doesn't exist on Windows, use "where" and it gives you the same functionality.<br>
So we can create one of these virtual environments in the terminal, but you might suspect that PyCharm has something for us as well, and PyCharm actually has the ability to create and manage virtual environments for us, basically it does what you just saw on the screen there.<br>
So here we give it a name, we give it a location here, we say blue_yellow_Python, this is going to be for a Blue / Yellow band web application, we are going to base this on Python 3.5.1 and we are going to put into my Python environments and under this name.<br>
Then I just say OK and boom, off it goes, set it as the active interpreter and manage it just the same as before in PyCharm using its ability to install packages and see what is listed and so on.
|
|
|
show
|
2:53 |
Python has this really interesting concept called slicing.<br>
It lets us work with things like lists, here in interesting ways.<br>
It lets us pull out subsets and subsequences if you will, but it doesn't just apply to lists, this is a more general concept that can be applied in really interesting way, for example some of the database access libraries, when you do a query what you pulled back, you can actually apply this slicing concept for eliminating the results as well as paging and things like that.<br>
So let's look at slicing.<br>
We can index into this list of numbers like so, we just go to nums list and we say bracket and we give the index, and in Python these are zero-based, so the first one is zero, the second one is one and so on.<br>
This is standard across almost every language.<br>
However, in Python, you can also have reverse indexes so if I want the last one, I can say minus one.<br>
So this is not slicing, this is just accessing the values.<br>
But we can take this concept and push it a little farther.<br>
So if I want the first four, I could say 0:4 and that will say start at the 0th and go up to but not including the one at index 4.<br>
So we get 2, 3, 5, 7, out of our list.<br>
Now, when you are doing these slices, any time you are starting at the beginning or finishing at the end, you can omit that, so here we could achieve the same goal by just saying :4, assuming zero for the starting point.<br>
So, slicing is like array access but it works for ranges instead of for just individual elements.<br>
Now if we want to get the middle, we can of course say we want to go from the fourth item, so index 3, remember zero-based, so 3 and then we want to go up to but not including the sixth index value, we could say 3:6 and that gives us 7, 11 and 13.<br>
If we want to access items at the end of the list, it's very much like the beginning, we could say we want to go from the sixth element so zero-based, that would be 5 up to the end, so 5:9 and it would be 13, 17, 19, 23, but like I said, when you are either starting at the beginning or ending at the end, you can omit that number, which means you don't have to compute it, that's great, so we could say 5: and then it'll get the last one.<br>
But you still need to know where that starts, if we actually wanted 4, so there is a little bit of math there, if you just want to think of it starting at the end and give me a certain number of items, just like where we got the last prime and that came back as 23 when we gave it a minus one, we can do something similar for slicing and we could say I'd like to go start 4 in from the back, so negative 4 and then go to the end.<br>
So that's the idea of slicing, it's all about working with subsets of our collection here, the example I gave you is about a list, but like I said we could apply this to a database query, we could apply this to many things in Python and you can write classes that extend this concept and make it mean whatever you want, so you'll find this is a very useful and common thing to do in Python.
|
|
|
show
|
1:43 |
Tuples are a lightweight, immutable data structure in Python that's kind of like a list but that can't be changed once you create them.<br>
And you'll see many very cool techniques that make Python readable and easy to use are actually clever applications of tuples.<br>
On the first line here, we are defining a tuple m, the way you define a tuple is you list out the values and you separate them by commas.<br>
When you look at it, it appears like the parenthesis are part of the definition, and when you print tuples you'll see that the parenthesis do appear but it's not actually the parenthesis that create them, it's the commas.<br>
We want to get the value out over here we want to get the temperature, which is the first value, we would say m[0], so zero-based index into them.<br>
If we want the last value, the fourth one, we would say m[3], that's the quality of the measurements.<br>
Notice below we are redefining m, this time without the parentheses, just the commas and we print it out and we get exactly the same thing again, so like I said, it's the commas that define the tuple not the parentheses, there is a few edge cases where you will actually need to put the parentheses but for the most part, commas.<br>
Finally, tuples can be unpacked, or assigned to a group of variables that contain the individual values.<br>
So down here you can see we have a "t" for temperature, "la" for latitude "lo" for longitude, and "q" for quality, and those are the four measurements in our tuple, we want to assign those and instead of doing like we did above where you index each item out and assign them individually, we can do this all in one shot, so here we can say variable, four variables separated by commas equals the tuple, and that reverses the assignment so you can see "t" has the right value of 22, latitude 44, longitude 19 and the quality is strong.
|
|
|
show
|
1:44 |
In the previous section we discussed tuples, and how they are useful.<br>
Sometimes these anonymous tuples that we discussed are exactly what you need, but oftentimes, it's very unclear what values are stored in them, especially as you evolve the software over time.<br>
On the second line here, we have "m", a measurement we are defining this time it's something called a named tuple and just looking at that definition there on what we are instantiating the measurement, it's not entirely clear the first value is the temperature, the second value is the latitude, this third value is a longitude, and so on.<br>
And we can't access it using code that would treat it like a plain tuple, here we say the temperature is "m" of zero which is not clear at all unless you deeply understand this and you don't change this code, but because we define this as a named tuple, here at the top we define the type by saying measurement is a collections.namedtuple, and it's going to be called a measurement, for error purposes and printing purposes and so on, and then you define a string which contains all the names for the values.<br>
So over here you are going to say this type of tuple temperature's first, then latitude, then longitude, then quality, and what that lets us do is access those values by name.<br>
So instead of saying "m" of zero temperature, we say m.temp is the temperature, and the quality is m.quality.<br>
Named tuples make it much easier to consume these results if you are going to start processing them and sharing them across methods and things like that.<br>
Additionally, when you print out a named tuple it actually prints a friendlier version here at the bottom you see measurement of temperature, latitude, longitude, and quality.<br>
So most of the time if you are thinking about creating a tuple, chances are you should make a named tuple.<br>
There is a very small performance overhead but it's generally worth it.
|
|
|
show
|
2:01 |
Classes and object-oriented programming are very important parts of modern programming languages and in Python, they play a key role.<br>
Here we are creating a class that we can use in some kind of game or something that works with creatures.<br>
So to create a creature class, you start with the keyword class, and then you name the type and you say colon and everything indented into that block or that code suite to do with the class is a member of the class.<br>
Most classes need some kind of initialization to get them started, that's why you create a class, we want them to start up all ready to go and bundled up with their data and then combine that with their methods, their behaviors and they make powerful building blocks in programming.<br>
So most classes will have an initializer, and the initializer is where you create the variables and validate that the class is getting setup in correct way, for example making sure the name is not empty, the level is greater than zero, but less than a 100, something like that.<br>
Now this is often refered to as __init__ sometimes just init, or even a constructor and these dunder methods because they have double underscores at the beginning and at the end, they are part of the Python data model which lets us control many things about classes, so you'll see a lot of methods like this but the __init__ method is probably the most common on classes.<br>
If you want to create behaviors with your class, and if you have a class that's almost certainly part of what you are going to do, you are going to define methods just like functions that are standalone, methods or functions that are parts of classes and you define them in exactly the same way, the only difference is typically they take a self parameter, the self parameter is passed explicitly everywhere when you are defining the class, some languages have a "this" pointer, that's sort of implicit but in Python, we call this self and it refers to the particular instance of the creature that exists, you might have many creatures but the self is the one that you are working with currently.<br>
So just be aware you have to pass that explicitly everywhere unless you have what is called a class method or a static method.
|
|
|
show
|
1:44 |
When you are new to object-oriented programming, the idea of classes and objects often can seem interchangeable and some people use them interchangeably; that's not really correct and so let's take just a moment and really clarify the relationship and differences between classes and objects.<br>
So here we have a Creature class, you can it has an initializer and a walk method, and notice that the walk method does something different if the creature is powerful, if its power is greater than 10 versus if it's lower.<br>
This class is a blueprint for creating creatures.<br>
We could create a squirrel, we could create a dragon, we could create a tiger, and those would all be specific objects or instances of the Creature class.<br>
So down here we’re going to create a squirrel and a dragon, and notice the squirrel is created with power 7, the dragon is created with power 50.<br>
Now these are both creatures, but they are now distinct things in memory.<br>
Objects are created via classes and the squirrel object is somewhere in memory and it has a power 7 and it has this walk behavior it gets from its class, but all of its variables are specific to it.<br>
We have also the dragon creature, with its own variables, so it's power is 50 and if we change its power, it won't change the squirrel or any other creature, just the dragon.<br>
And when we call squirrel.walk(), the squirrel is going to walk in some specific way based on its own power.<br>
So you can see the Creature class test is a power greater than 10 or less than 10 and if it's greater than 10, it does something special, maybe it walks in a powerful way versus a non-powerful way, who knows, but that will mean the squirrel walks in one way and the dragon walks in another way, even though they are both instances of the Creature class.<br>
So I hope that clears up the relationship between classes and objects.
|
|
|
show
|
1:30 |
A key design feature for working with classes and object-oriented programming is modeling and layers, going from the most general to the most specific.<br>
So, we started with a creature class, and a creature class has a name and a level and it's just a generic creature, it could be anything, so it could be a squirrel as we saw, it could be a dragon, it could be a toad.<br>
Any kind of creature we can think of, we could model with the original creature class, and that's great because it's very applicable but there are differences between a dragon and a toad, for example, maybe the dragon breathes fire, not too many toads breed fire, and so we can use inheritance to add additional specializations to our more specific types, so we can have a specific dragon class, which can stand in for a creature, it is a creature but it also has more behaviors and more variables.<br>
Here we have our initializer, the __init__ and you see we take the required parameters and data to pass along to the creature class, in order to create a creature, in order for the dragon to be a creature, it has to supply a name and a level, so we can get to the creature's initializer saying super().__init__ and pass name and level and that allows the creature to do whatever sort of setup it does when it gets created, but we also want to have a scale thickness for our dragon, so we create another field specific only to dragons, and we say self.scale_thickness = whatever they passed in.<br>
So in addition to having name and level we get from Creature, we also have a scale thickness, so that adds more data we can also add additional behaviors, here we have added a breed_fire method.<br>
So the way we create a derived type in Python, is we just say class, because it is a class, the name of the class, Dragon, and in parenthesis the name of the base type.<br>
And then, other than that, and using "super", this is basically the same as creating any other class.
|
|
|
show
|
0:53 |
By leveraging inheritance, we can crate a wide range of types that model our world very well, in this example on the screen we have a wizard and the wizard knows how to battle a variety of creatures, we have small animals that are easier to defeat, we have standard creatures, we have dragons, we have wizards.<br>
All of these types are derived from the creature type.<br>
Now, the wizard class, you can see, can attack any of these creatures, and the reason the wizard class can attack them is it's built, it's programmed to understand what a creature is and attack it and any of the derived classes can be used interchangeably.<br>
So this means we can continue to evolve and generate new and interesting creature derived types and we don't have to change our wizard code to understand how to battle them.<br>
That's great, polymorphism is essential in any object-oriented language, and that's absolutely true in Python as well.
|
|
|
show
|
2:30 |
Dictionaries are essential in Python.<br>
A dictionary is a data structure that very efficiently stores and can rapidly look up and retrieve items by some kind of key.<br>
You can think of this as kind of a primary key in a database or some other unique element representing the thing that you want to look up.<br>
Dictionaries come in a couple of forms, the form you see on the screen here we put multiple related pieces of information together that we can lookup, so here maybe we have the age of a person and their current location.<br>
Other types of dictionaries are maybe long lists of homogeneous data maybe a list of a hundred thousand customers and you can look them up by key which is say their email address, which is unique in your system.<br>
Whichever type you are working with, the way they function is the same.<br>
We can create dictionaries in many ways, three of them here are on the screen; the first block we initialize a dictionary by name and then we set the value for age to 42, we set the location to Italy.<br>
We can do this in one line by calling the dict initializer and pass the key value argument, we can say dict age and location or we can use the language syntax version, if you will, with curly braces and then key colon value, and it turns out all three of these are equivalent, and you can use whichever one makes the most sense for your situation, so here the created and then populated, here created via the name and keyword arguments or here created via the language structures.<br>
The fact that this is so built-in to the language to tell you dictionaries are pretty important.<br>
Now, if we want to access an item, from the dictionary, we just use this index [ ] and then we pass the key whatever the key is.<br>
In this case, we are using the location or the name of the property we are trying to look up so we are asking for the location.<br>
My other example if we had a dictionary populated with a hundred thousand customer objects, and the keyword is the email address, you would put in the email for the specific customer you are looking for.<br>
Now, if we ask for something that doesn't exist, this will crash with a KeyError exception, so for example if I said "info['height']", there is no height, so it will crash.<br>
there is a wide range of ways in which we can get the value out or check for the existence of a value, but the most straightforward is to use it in this "in" operator, so here we can test whether age is in this info object we can say "if age in info" and then it's safe to use info of age.<br>
So this is just scratching the surface of dictionaries, you'll see that they appear in many places and they play a central role to many of the internal implementations in Python, so be sure to get familiar with them.
|
|
|
show
|
2:38 |
The primary way error handling is done in Python is exceptions.<br>
Exceptions interrupt the regular flow, execution of your methods and your code, and unwind and stop executing a code until they find what's called an except clause, that is the explicit error handling that you've written, or if they never find one, your application just crashes.<br>
That's not amazing, so let's talk about error handling.<br>
Here we have three methods on the screen, method one, two and three, and maybe there are potentially error-prone, something can go wrong, maybe work with the file system, a web service, a database, things that are not always well known or can't rely on them always working.<br>
It could even just be that someone's input incorrect data and there is going to be a problem there as well.<br>
So if we want to make sure that when we run these bits of code, we can catch and handle those errors, we have to put this into what's called a "try...except" block.<br>
So we put a "try:", we indent the code, so it is part of the try block, then we add the error handling the except block and it could just be except: an empty catch-all, which is not really recommended.<br>
In this case, we are going to catch a particular type of exception, one of the most based types that we'll catch many of the errors that we might not expect, so we'll just say "Exception as x".<br>
We say as x then we can get a hold of the actual object that is the exception and ask it what went wrong.<br>
So, look at the error message, if this is a custom database error, maybe it has the record id that caused the problem, or something like that, who knows.<br>
It depends on the type of exception that you get.<br>
So here is a general one, but we're only handling errors in a general way, we can't handle say database exceptions differently than web service exceptions, so we can have multiple except blocks with multiple exception types, and Python will find the most specific one, so if we want to make sure that we can catch when we have a connection error, trying to talk to a web service or something on the network, and it won't connect, we might want to handle that differently than say the users typed in something incorrect.<br>
So we would add another except clause with the more specific type.<br>
The order of these except blocks is really important, the way it works, is Python will try to run the code, if an exception comes up, it will just go through and ask does this exception object derived from the first thing it finds, and the next, and the next, and if the first one answers yes to, it will just stop and that's the error handling at run.<br>
So if we switch these, almost everything including connection error derives from exception, so it would run the code, throw the exception and ask, hey, does this exception derive from exception, yes, boom handle the general error and it will never make it to the connection error so it has to go from most specific error handling to least or most general error handling.
|
|
|
show
|
2:09 |
In Python, functions are first class citizens, and what that means is they are represented by a class instances of them, particular functions are objects they can be passed around just like other custom types you create just like built-in types, like strings and numbers.<br>
So we are going to leverage that fact in a simple little bit of code I have here called find significant numbers.<br>
Now, maybe we want to look for all even numbers, all odd numbers, all prime numbers, any of those sorts of things.<br>
But this function is written to allow you to specify what it means for a number to be significant, so you can reuse this finding functionality but what determines significance is variable, it could be specified by multiple functions being passed in and that's what we are calling predicate because this ability to pass functions around and create and use them in different ways especially as parameters or parts of expressions, Python has this concept of lambdas.<br>
So let's explore this by starting with some numbers, here we have the Fibonacci numbers and maybe we want to find just the odd Fibonacci numbers.<br>
So we can start with the sequence and we can use this "find significant numbers" thing along with the special test method we can write the checks for odd numbers.<br>
So, in Python we can write this like so, and we can say the significant numbers we are looking for is...<br>
call the function, pass the number set we want to filter on and then we can write this lambda expression instead of creating the whole new function.<br>
So instead of above having the def and a separate block and all that kind of stuff, we can just inline a little bit of code, so we indicate this by saying lambda and then we say the parameters, there can be zero, one or many parameters, here we just have one called x, and we say colon to define the block that we want to run, and we set the expression that we are going to return when this function is called, we don't use the return keyword we just say when you call this function here is the thing that it does in return, so we are doing a little test, True or False, and we ask "if x % 2 == 1" that's all the odd numbers, not the even ones, so when we run this code it loops over all the Fibonacci numbers runs a test for oddness and it pulls out as you can see below just the odd ones, for example 8 is not in there.
|
|
|
show
|
2:57 |
Python has a great declarative way to process a set of items and either turn it into a list, a dictionary, a set or a generator.<br>
Let's look at the list version through an example.<br>
Here we have some get_active_customers method, maybe it goes to a database, maybe it just goes to some data structure, it doesn't really matter, but it comes back with an iterable set of users, so we could loop over all of the users, using a "for...in" loop to find the users who have paid today and get their usernames and put that into a list.<br>
So what we do is we create a list, some name paying usernames and we'd "for...in" over those to loop over all of them and then we do a test, we'd say if that particular user's last purchase was today then append to their username to this paying usernames list.<br>
And then in the end, we'd have a list, which is all the usernames of the customers you bought something from us today.<br>
This would be an imperative users' search, an imperative style of programming, where you explicitly say all the steps, let's see how we could do this instead with the list comprehension.<br>
Here you'll see many of the same elements, and it looks like we are declaring a list, so [ ] in Python means declare an empty list, but there is stuff in the middle.<br>
The way you read this you kind of got to piece it together, maybe top to bottom is not necessarily the best way to put this all together but let's go top to bottom for a minute and then I'll pull out the pieces for you.<br>
So, we are going to get the name of the user, and we are going to later introduce a variable called "u", which is the individual user for the set we are going through, so we'd say u.name, that's like our projection that we want, and there is a "for...in" statement, like we had before, where we get the active customers and we are going to process them, and then there is some kind of test whether or not that particular user should be in this set.<br>
So, we set the source, that's going to be out get_active_customers and we are going to express that we are iterating over that for "u" in that set and "u" declares the local variable that we are going to work with, we are going to filter on that with an "if" test, and finally we are going to do some kind of projection, we could just say "u" to get all the users, here we want all the usernames so we say u.name.<br>
Now, there are multiple structures like this in Python, we could have parenthesis that would generate a generator, but as I said before, [ ] represents list, and so when you have the [ ] here, you know what is going to come out is a list, and this is a list comprehension.<br>
Once you get used to it, you'll find this style of programming is a little cleaner and a little more concise.<br>
It's also different in another important way, because this can be just part of a larger expression, this could be say in inline argument to a method you are calling.<br>
Or, you could chain it together with other comprehensions, or other types of processing.<br>
The imperative style of programming required separate language structures that required their own blocks, so you can't really compose "for...in" loops but you can compose these comprehensions which makes then really useful in places the "for...in" loop wouldn't be.
|
|
|
show
|
0:46 |
So you've reached the end of the Python refresher and reference, if you feel like you still need more help getting started with Python, you want to practice more, dig much more into the language features that we just talked about, then please consider my Python Jumpstart By Building Ten Apps course.<br>
You can find it at talkpython.fm/course, and it covers almost exactly the same set of topics that we covered in the refresher as well as more, but it does it by building ten applications, seeing them in action, writing tons of code and it's done over seven hours, rather than packing just the concepts into a quick refresher.<br>
So, check out the Jumpstart Course, if you want to go deeper into Python the language and its features so that you can get the most out of this course.
|