|
|
|
6:42 |
|
|
transcript
|
0:51 |
Hello, and welcome to Effective PyCharm. I'm so excited to have you as part of our course. This is the third edition of Effective PyCharm. If you're looking to get the most out of PyCharm and become incredibly comfortable and productive with it, this is the course for you. I've had a previous student say something to the effect of, ""I thought I was using most of the features of PyCharm."" After taking the Effective PyCharm course, I realized it's well less than 20%. By the end of this course, you're going to be very comfortable using most of the features of PyCharm, the ones that you really need, and you'll know what's available when you might need those later. I'm really excited to have you in the course. We're going to have a great time. Let's get started.
|
|
|
transcript
|
1:47 |
When choosing an editor or an IDE, you have to decide how much support you want and how much just pure text writing you want. I'm a fan of having my tools help as much as possible, and I imagine most of you are as well. But these editors, they exist on a spectrum. On one far end, we have things like Emacs and Vim. They are what I consider kind of the least common denominator or lowest common denominator type of editors. People choose these sometimes because they like simplicity, but often they'll say, well, if I'm going to have to log into a server and edit my code, I want to have the same experience as if I'm editing locally. Probably shouldn't be editing code on a server, really, but, you know, I guess you can do that. So I think you can do better than Emacs and Vim and so on. So what else? We have some that are somewhat more helpful, like VS Code. It is helpful, but it does not understand your projects as well as PyCharm. It doesn't bring all the features together. You can cobble together something using some of its extensions. That's pretty good. But you'll see it's still lacking the polish on many of its features that PyCharm has. And at the other end, the opposite of Emacs and Vim, I would call the IDEs, the tools that are integrated development environments. They bring together most of the tools that you're going to need. They'll bring together source control, performance testing, code coverage, unit testing, all of these things in one excellent package. And that's what PyCharm is. Very polished and complete tool set for building your Python and beyond applications. questions.
|
|
|
transcript
|
1:25 |
Before we dive in and start using PyCharm, I want to break a little bit of a misconception here. So often I hear people say, oh, I chose Visual Studio Code because I'm doing more than Python. I'm not doing just Python. I'm doing JavaScript too. I'm doing TypeScript. Well, guess what? PyCharm is more than just Python itself. When you think of the way that JetBrains builds their tools, we have PyCharm, yes. But all of these IDEs are built upon the IntelliJ platform. And IntelliJ and its derivative IDEs like WebStorm, DataGrip, and a bunch of others bring all of these tools to bear upon things like JavaScript, TypeScript, databases, C++, Rust, and so on. And when you think about what is PyCharm, you should really think, well, it's built upon WebStorm and DataGrip and IntelliJ and a lot of the other things that are coming together. So it has almost every single feature of WebStorm, which is a full JavaScript front-end framework IDE and DataGrip and so on. This picture is probably not exactly what you need, though. There's probably a better picture here. Maybe we should think of it kind of like this. Like PyCharm has all of these contained within it. If you've got a bunch of different types of code you need to work on, good chance that PyCharm will work on them.
|
|
|
transcript
|
1:06 |
The final important thing to know as we begin our journey for PyCharm here is that there are actually two editions. There's what is called the professional edition and the community edition. The community edition is the foundational version. It's free, open source. You can do whatever you want with it. And then there's a higher tier, a professional version that costs something like $8 a month or so. And with this version, you get many more tools. You get extra data science tools. You get extra web tools like better support for Django and Flask and a whole bunch of other things that we'll talk about on the way. But you do need to decide, am I going to use the community edition or the professional edition? And I'll try as we go through this course to point out if something is requiring the professional edition. You can go through the course with community for the most part, but you're going to miss just a couple of features along the way. For me, programming is my job. PyCharm Professional is an easy choice to make because it adds so much to my productivity. But you can make that decision for yourself.
|
|
|
transcript
|
0:46 |
Everything you see me create and do during this course will be available to you on the GitHub repository. Over at Talk Python, when you're taking the course, you can just click the GitHub repository button anytime, and it will take you there in the player or on the course page. But the URL here is at the bottom, and you can just save that and bookmark it as well if you like. What I encourage you to do as you get started in this course is both star it and consider forking it if you want to make changes. But star it and check it out. So either, if you're experienced with Git, you can just Git clone this repo, or if you'd rather not mess with that, click on the green code button. There's a download the code as a zip file, and you'll get a snapshot in time of the source code for the course.
|
|
|
transcript
|
0:47 |
Finally, as we're kicking off our journey here, I want to introduce myself. I'm Michael Kennedy. You can find my writing, my essays, and a lot of things that I do over at mkennedy.codes. I'm the creator and host of the Talk Python To Me podcast, a very popular podcast in the Python space. I also co-host the Python Bytes podcast, which is a news in the Python space every week show. And I'm the founder and one of the principal authors here at Talk Python Training. We're taking this course. Finally, I'm a Python Software Foundation fellow, which is an award given by the community for people that do a lot with Python. So nice to meet you. I'm really, really honored that you're taking my course. We're going to have an awesome time.
|
|
|
|
54:29 |
|
|
transcript
|
1:07 |
With the preliminaries and introductions out of the way, it's time to fire up PyCharm, start writing some code and exploring some of the really core features. Now you might think what is more central to PyCharm than the editor? Well, yes, the editor is actually my favorite place to be, but it's not the place that we need to start. The place we're going to start is with projects, creating a new project, linking files together as a project, because when we're working in PyCharm, it really encourages us to treat a set of Python files as a project. Now, some of you may think, oh, I just want to write one file. But in practice, when you're writing professional real applications, you should not put them into just one file. You should spread them out so that related code is grouped together and it's very easy to find and navigate. So in my opinion, it's a really good thing that PyCharm is doing, but we're not going to start with the editor. We're going to start with projects, editor after that.
|
|
|
transcript
|
3:07 |
All right, let's get going. Let's fire up PyCharm. Here it is in my doc. Bring it to life. Here you can see some of the recent projects that I've worked on. The HTMX course here at Talk Python, an open source project. I have a couple that I've released recently and that sort of thing. We're not going to worry about those now. We'll come back to that kind of stuff later. Right now, I want to talk about creating a new project. So there's different ways in which we can do this. And I'll show you my recommended way, which may change over time. So we can start by clicking here and saying new project. And I would just say, let's put this onto the desk, put it onto the desktop. Maybe we'll call it first project. That would be great. Maybe we'll create a welcome script. So we already have something to run out of there. Now it says, do you want to use a virtual environment? Yes. You want to use a virtual environment. Remember, anytime you're going to add external dependencies, you're going to want to use a virtual environment for isolation, versioning, that sort of thing. Now, this is a new project. We're not going to select an existing one. We want one dedicated to our new project. So we'll say generate new. And PyCharm is coming with more and more options here. And this is great. So we have virtual EMV built into Python, which is great. Poetry is also a good option. And ta-da! uv, the amazing new way to manage your dependencies. It's been around for, gosh, going on almost two years now, I would imagine. uv is great. So I want to use uv for this project. However, notice when I click here, at the moment, this may be improved. And if this is improved, here's your way to do it. But at the moment, notice the very, notice the very latest version I have available to even download and install is Python 3.11. This is from two or three years ago. This is not what I want. I want the latest one. uv can install the very latest, which at the time of this very recording is 3.13.2. So a couple years later. And I don't know why PyCharm doesn't list all the versions available to uv or the latest version or anything like that. So until it does, I recommend that we take a little bit of a step back here. But before we do, I'm going to show you that if you're creating a more complex project, maybe a FastAPI or a flask or a Django, something along those lines, you got a bunch of great options over here. And it'll create a whole project skeleton for you. You also have, as I spoke about before, things like Bootstrap or React, React Native, a Node.js, a view project, right? These are things coming out of WebStorm and other tooling like that. Okay, but we want just a plain Python Python project in our first project. And I would love to create a virtual environment for it using PyCharm. And I'm sure someday it's going to be pulling in the new details. This uv support is very, very new. So we're going to go and create this virtual environment manually and then get started with PyCharm.
|
|
|
transcript
|
2:51 |
So let's go over here and create a new folder called first project. And I'm going to open this up in my preferred terminal, which is warp. And in here, I'm going to run the create new virtual environment with uv. I'm just going to say uv venv and hit enter. And notice, sure enough, it used the proper one that we expected. Now we want to open this in PyCharm. There's multiple ways we can do that. In macOS, I could actually drag and drop this onto there and that would open it. But I'll just say open here and then I'll drag it here to make macOS find it. Let me jump to the other side. And you can see right away that this first project virtual environment we created. And right away, we can notice that our virtual environment is here. Nothing else, but check out the color of the virtual environment. This brownish color. It means like this is not one of our files. It shouldn't be managed in version control and it shouldn't be indexed for files that we might go to look for to open and those kinds of things. It's just present, but kind of ignored. Okay. So what we want to do is we want to create our first app.py. So right-click on a project, new, and you get a bunch of choices, Python file. So here's our first app. And PyCharm automatically, out of the box, comes configured to run it. So if I click this, notice it's running using the virtual environment, this file with no output. But if I print, hello world, run it again. Bingo. Easy peasy. Everything's set up, ready to roll. So that's great. So we have our project set up. We have our virtual environment that got detected that we created with uv. And I think for our very first project here, we're going to want to see how pieces fit together. And we'll write a simple little program. Let's say we want to write a little program that interacts with Talk Python. So if we fire up the web browser, Zen browser, my case right now, and we go over to Talk Python, notice we'll have different episodes. And let's go, this one's simple. This 492, this is great tables. So, but what I would like to do is write a program that I could just enter the episode number and get just the title. So if you say 400, what is the title of that? You say 404, what is the title of that? It's not found, by the way. That would be fun, but it's not. So what would, what could we do if we wanted to write a little application to do that? That'll let us exercise a couple of cool features. So we're going to take this and we're going to use our virtual environment and some other features about tying files together as a project to build that basic application. Given a podcast episode number, what is its title?
|
|
|
transcript
|
3:30 |
So for our program that is going to be given a number, an episode number at Talk Python, what is the title? We're going to need to make a web request over to the website and do something interesting with it, right? Promise it's going to be very easy, much easier than you think. But we do need to make that web request. Python has built-in tools for that. Not recommended. Not recommended. I recommend that you use one of the really good third-party HTTP clients. That's probably requests. If you do not care about async programming, or if you want something a little more modern, HTTPX. I'm a huge fan of HTTPX because once you start working with it, it's like requests. But if you need to do async stuff, it's already capable of doing that. In order to use that, I could. There's different ways in which I can add this dependency. So PyCharm has a really cool thing that lets me explore packages. And I can search PyPI. And as you notice, let me make this a little larger for you. I can click around and see all the HTTPX related things. Apparently, there are 64 of them on PyPI. And this is the one I can install. So I could click install here. But what I'm going to do instead is I want to have a little more structure to my program. I want a requirements.txt file. So I might write requirements.txt. But one more step here. I would like to have this pin the version of my dependencies for my project. And in order to do that, I also might want to have a file that just says, these are my dependencies and another one that says, these are the current versions of them. So what I'm going to do is I'm going to create a file called pip-tools. You can call this whatever you want. But uv, the thing that we're managing our dependencies with, has a really cool feature that it borrows from pip-tools. So if I come over here and I were to write in what I need, like HTTPX, I can come down to the amazing terminal, the new terminal here in PyCharm, and I can run a command. uv pip compile requirement.pip-tools and tell it to upgrade if there's any options. But create my requirements.txt for me. So not required for you to go through this. You can just create the requirements.txt as you want. But check out what we get if we go a little bit further than just typing this into a txt file. We get really nice statements of, look, you're going to need anyio, and you're going to need certifi, and you're going to need HTTP core. Why? Because that comes from HTTPX. And then why do you have certifi? Well, that comes from HTTP core and HTTPX and so on. A really nice trackable pinned version but upgradable version of our requirements. So what I want to do now is do pip install-requirements.txt. And we're going to run this. Why are we using uv and not just pip? Watch how fast this is. That's why we're using uv. Because it's amazing. It has all these tools built in. And now if we go uv pip list, you can see that we've got all those installed in the virtual environment, which PyCharm automatically activated. So now we have our dependencies for our project that we'll be able to use to create our first little app here.
|
|
|
transcript
|
7:38 |
So we've got our requirements set up in our project. And if we go over here to our Python package, we can see we have HTTPX installed and PyCharm has found that here. Okay, very cool. And it notices that maybe there's even a version we could update if we wanted to go to the beta. We don't right now. So let's write this program. How are we going to do it? Is it going to be complex? No. Because over here, if you go to any URL, any episode URL at Talk Python, and you just put .title on the end, you get the title. There's other fun things you can put like for you can put VTT, and it will give you the web VTT transcript for it. Okay. But we just want .title given an episode number. Okay. So let's get started. Now, I could just start writing the code inline vertically, but I want to have a little bit more structure. Let's go over here and we can type. If we type out main, you can see it says if dunder name equals main, this is a PyCharm live template. We'll talk more about them later. But it gives us the ability to say run this function. When this program is being run or the script is being run as a program. I'm going to create a function called main. So up here, we'll just say def main. And we want to write that. We just put main there and hit run. You can see sure enough, main is there. By the way, how am I running that? Well, if we hover over this little play button, it says control R. PyCharm, although it is a GUI is extremely hot key friendly and configurable. So I recommend that you take some time to like, well, how do I debug? How do I run? How do I edit? How do I refactor all these things? Anytime it shows a shortcut, pay attention to that. Okay. If I run this, just control R. So we have our program here and now we need to use our library. We'll say import HTTPX like so. And we'll print out a little statement. An incredible application, the talk Python title finder. So we'll put a little star across here, maybe 60 characters wide and there. And I will print. Excellent. We'll run this. The title finder is looking better. It's coming together. Now I want to create a separate function and we'll have maybe a couple of functions, get number, get title. Sure. I could just inline it probably better to have small functions. So let's go down here. We'll talk about all the stuff we can do with the editor later, but we'll say def get number return int of input, enter the number So we're going to do input, give a little prompt. We'll type it in and it'll come in as text. We'll parse that to an integer. No error handling right now. We'll get into that kind of stuff later. And we're going to return that. So the number will come here and we're going to need to pass that over to get the title. This is where the fun happens and then get title def, get title. So given an episode number, we want to get the title. Now let's go back and look at this real quick. I'm going to copy and paste a little example URL. I'm going to play with that. Okay. So given this number, what are we going to do? Well, we want to use and get a response from HTTPX. Now it's already imported the top. That's great. We can do a get of the URL. So let's set the URL to something. It's going to be an F string. And we want to make sure this works. So we'll say raise for status. This will raise an exception. If it's not a 200 to one, that sort of thing. We'll return resp.text.strip. There might be some extra white space. I don't know how well formatted that response is. But if we strip out the white space and new lines, we should be pretty good. So let's put this down here. And one trick, nobody knows this, I'm sure. But you put any title here or any text here. It doesn't matter as long as there's something to match the route. And the title goes on the end to make it return just the title. And then the number goes here. So we can show you a really fun trick while we're at it. We can come down here and say, what we want to do is we want to put the episode number. Now notice this is not an F string until I choose enter. Now it's an F string. PyCharm is amazing. So we're going to do this and then we'll just print out the title for episode. We'll do the same trick. And you watch the F string up here. Num is title. I feel like we should be able to run this program. What do you think? Let's give it a go. Here's the episode finder. What is it? 404. I'm just curious. I don't even remember what the title of 404 was. The title for episode 404 is clean code in Python. What was 492, I believe was the one for great tables. The title for 492 was great tables. And so on. What about 100? This was Guido Van Rossum helps celebrate episode 100 of Talk Python. Python past, present, and future with Guido Van Rossum. Okay. Awesome. So notice, let's do one more thing really quick. What if I wanted to import Colorama? Like this. PyCharm says, oh, there's a problem. And we can go and click here, find the button and click it. Or of course you can hit the hockey. Alt enter. And it says, you're trying to use a thing in this project. For the virtual environment, we have active. That's not there. And we install it. And it's good to go. But now we get another warning. And it says, you need to add this to your requirements. Change that to pip-tools real quick. And notice over here, we have pip-tools. Though I am displeased with it adding on. I should have unchecked those. And then we have to set the version. And then we have to set the version. And then we have to set the version. So, excellent. Because PyCharm understands all the pieces of the project, it can bring them together. Like, hey, here's the library you want to use. And we're going to need to make sure we add it to the requirements to make sure everything hangs together. By the way, it's not here. Let's go here and do the uv thing. Like this. Run it one more time. And now, uv. If I run, here's a command I ran. It says, go find that file. Update and create a new one. If anything's changed. And you'll see now Colorama is specified as an explicit requirement. Excellent, excellent. I guess let's go ahead and use Colorama here. We can specify some colors. And what do we want for the title? We can do yellow. Now, if I run it and I say 404, here we go. The title for episode 404 is Clean Code in Python. Not as vibrant of a color as I would like, but a really cool way to work with this project. So that's how we work with projects in PyCharm.
|
|
|
transcript
|
7:23 |
That first little project we created was pretty awesome. However, let's play with something a little bit more complicated. So we're gonna check out one of my open source projects over here, Jinja Partials. What does Jinja Partials do? Well, it allows you to write code that basically treats HTML blocks like functions within Jinja. So here's a little example. Maybe you wanna reuse this bit of code in different places and it's called video, something like that. And here you can call render partials, video image and pass in the data that's needed. I came up with the stuff to work with HTMX, which often has you render the full page, but then also process partial requests. It's really cool library. I use it a lot. Used on Talk Python and Talk Python training, by the way. So you kind of already used it. Anyway, let's use this library to build some of the fun. So I'm just gonna fire up warp or any terminal. And let's check it out. We wanna open this in PyCharm again, different ways. We could hit open and browse to it. But before we do, let's go create a virtual environment. We have it brand new virtual environment at dot VE and V. Now we can open it like this on macOS, as I said, or you can say open here and then trigger your native file browser to go to wherever it is. And we'll say open. And if I show all the files, you'll see there's the VE and V that we've already created. So PyCharm is pretty smart. But it's not always right. So what we'll do is say, Sources,"" mark that as a ""sources"" root. And what that means, as far as PyCharm is concerned, is this is its own self-contained unit. So if this thing says, inside of app, we say, ""From views import home, if it was the top of our project, that wouldn't work. But because it says, Well, we're going to focus our attention here. And when you say import views, it means go to that folder, and sure enough, there's a home. So we can mark this portion as its own kind of isolated little sub-app. The other thing is, this is a web project. And we want to say, Here are where the templates live, as in HTML and Jinja templates and so on. So we can go over here and right-click and say, Mark directory as template folder. That's why it was purple. I'm going to go over here and suppose, Do we have any images or anything? We've got some CSS. So we can go over here and see what we can do here. Hey, I want to have a style sheet. And notice if I say href, when you go to the link here, you want to say /static/css/site. Now, I believe because of this sources route, PyTermine is already finding it. But you really want to go here and also mark this as a resource route. So when you say it's also a resource route, you'll say /static/css/site. So we can mark these directories as different things here. Now, just to be clear, this is still a sources route. It can be both a sources route and resource route. You can undo it or you could exclude it like we have for our virtual environment. I don't know if this is explicitly excluded here, but... I don't know if this is a source route. We can make it even more excluded than it was before. Okay, so we can control and work with these much more complex structures. I realize that this is not that much more complex, but it's way more complex than one file. These much more complex directory structures, monorepos and so on, by opening the whole thing and marking portions of it as sources route, resource route, templates. Or alternatively, you could simply open up a sub portion of it in PyCharm. There's a lot of flexibility here and a lot of power in working with real projects that have many files that are related together. You also saw that a little bit when we're over here on how PyCharm knows, hey, this index, this actually refers to this index.html. It allows you to bounce around between them because PyCharm understands all the moving pieces of your project.
|
|
|
transcript
|
2:20 |
Let's do a quick concept review on working with large directory structures. This is our very first one of these. So I want to just give you a little meta conversation about it real quick. Yes, you just saw me go through talking about how we can categorize and organize the different parts of our project using Mark Directory as and other things. So why are we talking about it now? One, for review. Review is awesome. We'll do it super quick. Two, more importantly, is these little concept reviews are awesome reference material. So if you want to come back and get a reminder about Mark Directory as, you don't have to watch me do a five minute demo and find the little bit you're interested in. Jump straight to the concept review. You got it. All right, here we go. Let's dive in. When we're working with large projects, monorepos, and so on, we need to categorize and group little subsections of it so we can use Mark Directory as. And we can say as a sources root, as excluded, as a test sources root, many other things. So for sources root, these roots contain the actual source files and resources. So PyCharm uses the source roots as the starting point for resolving imports. The files under the source roots are interpreted according to their type, and PyCharm can parse, inspect, and all those kinds of things. Basically, it treats that as the top level lookup when you do imports. Resource roots are intended for resources mostly for web applications. Images, JavaScript files, style sheets, and so on. And so this means when you're in a HTML template, like a Jinja template, you get both autocomplete for that folder, as well as PyCharm won't complain that it can't find some static file that really when you run it will come into play because of the resource root. You can exclude things that you don't care about. It almost ignores them. It contains files and folders that you don't want involved in indexing, searching, opening, and so on. So that's virtual environments. If you've got some huge data directory, you don't want to be able to search or have it slow down, you can add it as an excluded folder. And finally, template folders. These are for your HTML templates, Jinja, Chameleon, and so on for your web applications.
|
|
|
transcript
|
5:59 |
PyCharm does a bunch of cool things to help reduce the complexity and allow you to cut through the UI. For example, one of the things you can do is called search everywhere. So if you hit that little magnifying glass in the top right, that little search icon, it'll pull up this dialog. And if you type, for example, in this case, load, you will see all sorts of stuff show up. So load of name, this is a function. There's also load file, which is interesting. But look at the third one, load context. That's actually a menu icon. Update loaded classes on debugger stop. That's a toggle that you can turn deep inside of a preference dialog. Reload from disk, that apparently comes from somewhere, but maybe a context menu, not a proper menu because it doesn't show the menu navigation. And so on. You can see down, it's finding text in a readme like install Python. Here's how you do it. The journal dot load function being called the definition of that load function. Amazing. So you should really use this all over the place. We'll play with it in a second. You can also focus this in on classes, symbols, files, actions, and so on. You really want to get used to this because it allows you to go very quickly using hotkeys to jump around into all the different aspects of your editor. You can hit shift two times quickly to pull this up instead of clicking on the icon. And it even lets you, for example, as I talked about it here, type a couple of keystrokes and then toggle settings deep within dialog navigation. So you really want to make sure that you remember to use this all the time. And we'll be doing it, of course, throughout the course. Back in our Jinja partials project here, we'll search for some stuff. Let's go and actually kind of have an idea of where we're going to go. So over in the Jinja partials library here, there's a section called register starlight extensions. Okay. Our goal is to not be in this file, but to somehow find register starlight extensions. So there's a couple of things we can do. Notice it already right at the top here says search everywhere. Double shift or go to file shift command O. These are both in the same dialog, but different tabs are focused. So click here. We can have something or as it says, if I hit shift twice quickly, pulls it up. You can see it's focused on all. Or if I want to think about files, like maybe I knew that was in __init__(). And that would be good enough for me. I could hit shift command O and I could say init. And like, okay, there it is. And look, PyCharm remembers where I was actually remembers the selection and position of my cursor when I was there. But let's suppose that we weren't just there, but we want to find it. Register starlight extensions. Remember, double shift. I could type starlight. That's something. Oh, there's starlight render partial. Oh, there it is. Register. And we get to enter. And again, it takes us back. Remembering the context. But we could do a little bit better. I could hit this. Now, we saw the hotkey for command shift O or control shift O. If you're on Windows or Linux. Here, what I'm really looking for is not a file, but a symbol. Right? So alt command or control O. So I can come here in alt command O. And now I can find a symbol. So what was it? Register starlight extensions. Look at that. Because it understands snake casing, I can just type RSE. Boom. And we're back. I use this all the time. All the time. I don't want to type out the whole thing. RSE. Register starlight extensions. Very different thing. There might be a ton of registers. There might be a ton of things to do with starlight. But register starlight extension might be very unique. Finally, one more of these. If we're in all, we can do the same thing. Register starlight extension. And navigate this around here. Let's type again, register starlight extension. We'd have to go down a couple to get to it. Right? This also allows us to do actions. over here. Maybe there's all sorts of jankiness in our document. And we know that there's some kind of way to clean up the HTML. We don't remember what it is. Command Alt L or Control Alt L. We'll talk about that. But suppose I'm like, I know there's a command that will clean this up. So I could hit either double shift or Command Alt A to pull up actions. And I could just say format. And I could just say format. Reformat code. Enter. Boom. All of that fixed. That's excellent, right? Really, really excellent. So again, this search anywhere. It's not just for files. It's not just for text. It's for symbols, register starlight extensions. It's for actions, format, reformat code, or whatever it is. You can't find it somewhere in the navigation. So this is a super important way to do really cool stuff with searching around and interacting with all the capabilities and aspects of your project without going, oh boy, I don't like UIs because I got to do this and then this and this. No, you don't have to do that. Don't do that. A couple keystrokes, a couple letters. You're good to go.
|
|
|
transcript
|
3:45 |
We saw that we could search through and navigate using the names of objects, but there's other ways to navigate as well. Let's go over to our partials project again. As I've been saying throughout this whole chapter, one of the really awesome benefits of PyCharm is not that it lets me edit Python code in a single file, but it understands how all of these things click together, not just Python files, but CSS files, HTML files, JavaScript files, external packages, internal packages in the case here, and so on. And it really keeps those together. So this navigation allows you to leverage those relationships all over the place. For example, I'm here over in the app. What can I do? I'm like, well, there's this home.blueprint here, and I want to know where it comes from. Obviously, views, from views, import home, but that's, you know, kind of complicated over here. I want to just jump to it. So I can right-click and say, go to implementation or type declaration or super or whatever it is, right? Declaration or usage is probably what I want here, actually. Command B or Control B for you non-command folks. But there's a better way. If I just hold down the command button, everything becomes basically a hyperlink force here. So tune to partials. Where is that? App. Where is it from? If I click it, oh, it's right there. And blueprint. Click that. Where is this? That's in the home file. There's this blueprint. That's how we import it. If we go register extension, that takes us over here. Oh, and it's used in some places, isn't it? We can click right here and see the different places. It's used in the test. It's used in rendering. It's used in the app. Oh, that's right. It's used right back where we were. Amazing, amazing stuff. I can go over here and right-click and say find usages, and I'll get the more explicit find dialog that shows you more context about where it's actually used. So for me, I will either hold down command or control if you don't have a command, and everything becomes a hyperlink, which is pretty awesome. Or if I'm in full keyboard mode, I'll just come over here and hit command. Again, control B for a lot of folks. Command B, and boom, it takes me right there. All right, so navigation is amazing. It doesn't just work with code. We can jump over here to this section and see here's a CSS file. We hit command B, or we hold down command on it, right? This will take me to the directory. It even says it's a directory. This will take me to the file. Amazing. You can see we have CSS definitions as well. Let's see if we can find any of those. Like here's a CSS class. Presumably it comes from here, but who knows where it comes from, right? So I can go over here, again, navigate to this. You can look at that. It tells me it's a class selector, .video, insight.css. But I can hit command B to navigate to it, and it takes me right to its primary use case. And we've got these three right there. So navigation, navigation, navigation. This is why you care about things like IDEs. They bring all this stuff together, and the more complex things get, combinatorially, the more beneficial they are, to you, right? As stuff gets more complex, it just says, not a problem. These are basically hyperlinks. Jump around, do what you need to do. You can even go over here and find usages on your CSS. Remember, I told you PyCharm is not just for Python. Like this is awesome web dev stuff. It's a web storm and all that sort of integrated, combined IDE magic.
|
|
|
transcript
|
1:00 |
Quick concept review on navigation. When you're working with stuff in the editor or many different parts of PyCharm, they become highly linked and navigable. So in this case, if we hold down the command or control button, you're on Mac or Windows, your mouse, everything basically becomes a hyperlink. So here, if I hold down command on macOS and I hover over create from dict, you can see this thing now turns blue. If I click it, it will jump to the definition of that function. Right over here like this. So if you're in hotkey mode, you can do command or control B. And if you're browsing around, just hold command or control down. And like I said, everything becomes a hyperlink. You can also find usages. And often those are listed right by the definition. In the top left here, we have load file, file name. It says one usage. You click that, it'll show you the thing down here below. In fact, if it's a one, I think it jumps right to it. If it's multiple, then it gives you a list to pick from.
|
|
|
transcript
|
3:35 |
Now, if you're going, okay, Michael, this is great. I'm seeing a ton of value here, but I just can't take all the stuff on the screen. It's so distracting. You're coming from a simple UI or simple editor like Emacs or Vim. You're like, there's stuff everywhere. I can't focus on my code. Maybe you're a bit of a minimalist. Well, PyCharm has your back. So let's come over here. You can see there's a decent amount of stuff on the screen. Maybe we could even have some stuff about databases. We don't have them going, but maybe we've got the Python console going down here, which is amazing. I can import stuff from the libraries I'm working on, like Jinja partials, right? Get autocomplete. So much better than the real Python console. I can see the variables and all the stuff that's there and so on. But there is a lot on the screen. For me, I find value in it. For example, I'm in this file. I'm like, where the heck is this again? I can click here. Ah, that's right. It's right here related to these. But for a lot of people, I know you might not want it. So I want to introduce you to the distraction free zone. And everything I've already shown you is what you need to be productive in distraction free zone. So I can come over here and I can just type distract and enter distraction free mode. Or I can go over here and like that. Doesn't really matter how you do it. We click this. Ooh, ooh, look at that. We can even full screen it. Look at how insanely simple it is. This might be simpler than Emacs because Emacs has that little bar to tell you what to do at the bottom. There's nothing to tell you what to do. But you know what? If you think about it for a minute, you know what to do. Well, maybe I want to get to this home blueprint. Hold down Command and click it or Command B when you're on there. Now you're over there. You've opened up a few files. You want to maybe go to them. You can hit Command or Control again when you're not on a Mac. Command E. And this shows you the recent ones you worked with. So you can jump back and forth. You can Control Tab it like you would in a browser. You can also say, I'm looking for some other thing. Instead of looking for the file by using the UI over here, I can just go up here and Shift-Command-O and then type the name. Are you looking for the app.py? There you go. Well, we're already there. Are you looking for the home views? You can spell home. Very tricky. There you go. Now you're over in the views. And again, if we wanted to find a symbol, we could come over here and type Register Starlette Extensions. There we go. Now we're back over here. So if you want a distraction-free environment, you definitely, definitely want to check out, embrace using Search Everywhere, some of the other hotkeys. And then you just enter this distraction-free zone. And to be honest, it is actually kind of appealing to me. It's really, really pretty to just see the code just glow on the screen here with nothing else. And I want to point out, I'm not trimming my desktop so that you only see the editor. This is what my entire screen looks like. It's pretty neat, actually. So use all the hotkeys. You search everywhere. Hit Shift two times. And you can jump around and navigate it. Or you can even exit Distraction-free mode and get back to the normal way of using PyCharm.
|
|
|
transcript
|
3:26 |
We've talked a little bit about requirements, but I want to give you a good well-rounded picture of them. So if we have a requirements.txt and we don't have those requirements installed in the active virtual environment, or if you go mad and you don't have a virtual environment, the system Python, but don't put it there. PyCharm will let you know. For example, when we created the requirements.txt using uv pip compile, it had all those squigglies on the projects, and so we installed them. If we'd highlight it, it'll say, do you want to install package Pydantic, or do you want to install all of the missing packages? It knows, hey, you want these things, but they're not currently in your project. We can take care of that for you. Also, even if you don't have the requirements.txt file open, when you're in any source file, any Python file, you'll see this little golden warning sign across the top saying, hey, this project as a whole is declaring that it needs these requirements from the requirements.txt. They're not satisfied. Do you want to install them? Also, if their versions are pinned, like if it's HTTPX 1.2 and you have 1.1, you'll also see that warning with the version shown, like HTTPX 1.2 is missing. Do you want to update or upgrade to it? And if you're creating a brand new project, you can start typing package names that you know exist out there, but you have not yet installed, if you want to do it this way. So, for example, if I just say typer.run, PyCharm knows, well, there's no typer. We could try to import it, or we could install and import the package, because it knows it's actually not in the virtual environment yet. If we choose import, it'll write it at the top and say, well, you still need to install it before you can keep going. So you do. And once you've installed it, that's great, but that's not reproducible, right? You check it out again. New virtual environment won't work. Someone else tries to work with it on your team. They don't know they need typer until they open up this individual file, or they try to run it and it fails. So PyCharm says, hey, you should add typer to your requirements.txt or your pyproject.toml or however you're managing these things. And finally, this is a pro tip. I guess as if a lot of them are not pro tips yet, but this is a double pro tip, a super secret pro tip that's amazing. By default, PyCharm will store those files in the requirements.txt file. Maybe you've got a production version, a minimal set of requirements you need, but also stuff that you have for local, like to be able to run pytest or other things, like maybe a Jupyter notebook analysis thing that's not in production, but you want for your project. You can tell PyCharm through its settings, go to Python integrated tools, packaging, and you can say, this is what I call my top level requirements file. So for example, if I only install Jupyter in development in dev mode, PyCharm will start complaining that it's not put into the requirements file, but you've specified it in the dev requirements file. So you can override what PyCharm is using and maybe pick something further down the pipeline, like a requirements.dev or something along those lines.
|
|
|
transcript
|
2:18 |
Let's go back and see that requirements thing in action because it's really, really useful. So if we go over to our first project, not the more complicated one. Remember, when I added this Colorama and I talked about PyCharm, it put it here and I was able to use uv to put it there. What's that cool feature about PyCharm saying, here's something that should be in your requirements file. Well, in this case, what I'm doing is I want to type my top level, what I consider my requirements to be here into this file, but use the uv pip compile behavior to actually generate a comprehensive transitive closure list of my real requirements with pinned versions, as you can see here, right? I've specified this and this, but all these others are around with specific versions here. I don't want PyCharm to put it into my requirements.txt. I want to put it here if it sees me explicitly typing it out at the top of the file. So what I can do is I can go over here to tools, to Python integrated tools and say, my source of truth for my requirements is requirements.piptools and this requirements.txt thing, I'm managing through uv, not through you. Check this out. So if I go over here and say import bs4 and I just do x equals bs4 just to make the silly, it's unused warning go away. Look at this. Add imported packages to requirements. Good idea. Do not specify a version. You definitely don't want to do that for your uv file. Look at that. Where did it put it? It put it into requirement.piptools. Not over here, but here. And it knows when I'm ready to go type my uv pip compile command here. Now it's added it. Okay. So very, very cool feature. Regardless of how you keep track of your requirements, there's a lot of flexibility on how you make that happen and you can still leverage PyCharm's really cool features like make sure your requirements are specified in your project without breaking your specific workflow.
|
|
|
transcript
|
4:19 |
The final thing I want to talk about is run configurations. These are ways in which you can control what part of your app or what scripts or module gets run when you say run or debug something in PyCharm. What we've seen so far is kind of the simple, hey, just run the current file. That seems easy and amazing. Look, and then a number of the episode, 404. Works super. It works for simple little projects like this. But even in this simple one, if I'm over here and I want to run, what, why can't I run this? Dang it. There's literally one file that can be run and it won't let me run it because I'm in, I gotta go, is that the right one? No, no. Ah, yes, now I can run it again. What we can do is create a run configuration. You can do that by going here and say edit configuration, add new, and there are options, folks. There are options, let me tell you. Many, many options. I almost never do it that way. Sometimes I do, but almost never. So what is much easier is to right click and say run or debug or profile or create a concurrency diagram or any of these will do it. Run this and it runs it just like before. I don't know what 99 was, a more path. I'm not sure that's still around, but it could be. But now it's creating, you can see it doesn't say current file. It says Python app first app. So even if I'm over here, I can click run or debug or whatever I want to do. Okay. And if I want to control more about it, I can come down and say, this is a script or a module. And if I wanted to pass truth to it, I could do a --truth. It has no effect, but you'll see that it will do something. I can change the working directory, add environment files. And if I click more options, I can allow it multiple of them to run. I can redirect inputs. I can change Python options. I can specify log files. I can run something before like compile TypeScript stuff. There is a lot we can do here. Most of it is far beyond what you need for our simple little app. But notice I put this little --truth in at the top. We can just print. We can print out the arguments. And when I run it, you can see sure enough, it's getting that passed to it. And it will remember that for as long as I want, because I've set it up as a run configuration. We can bump over to our Jinja partials here. And do even more again, current file doesn't make a lot of sense. So maybe one of the things I want to do is run. This where it just says app, that's great. But I'm going to go and change its name. I'll call this example web app. So when I look up here, I see that makes more sense. And then maybe over in the test section, I want to run tests, run Python tests. And for some reason, it's all about running the unit test one, which is not what I want. It says default test runner, auto detect for unit tests. No, pytest. pytest is the one we want. And I'm not sure if that'll stay. So let's take this one out. And now if we say run, run pytest and tests. And we have no pytest because of course we don't. Sure enough. Ooh, look at that. All of the tests pass. And then that way we can switch between running the example app or debugging it or running the tests and so on. We have a lot of control there. And this pytest here is actually running the pytest project, not running just our example script like this. So super, super cool. These run configurations are very powerful and you should certainly leverage them as soon as you start to get a little bit more complicated application.
|
|
|
transcript
|
2:11 |
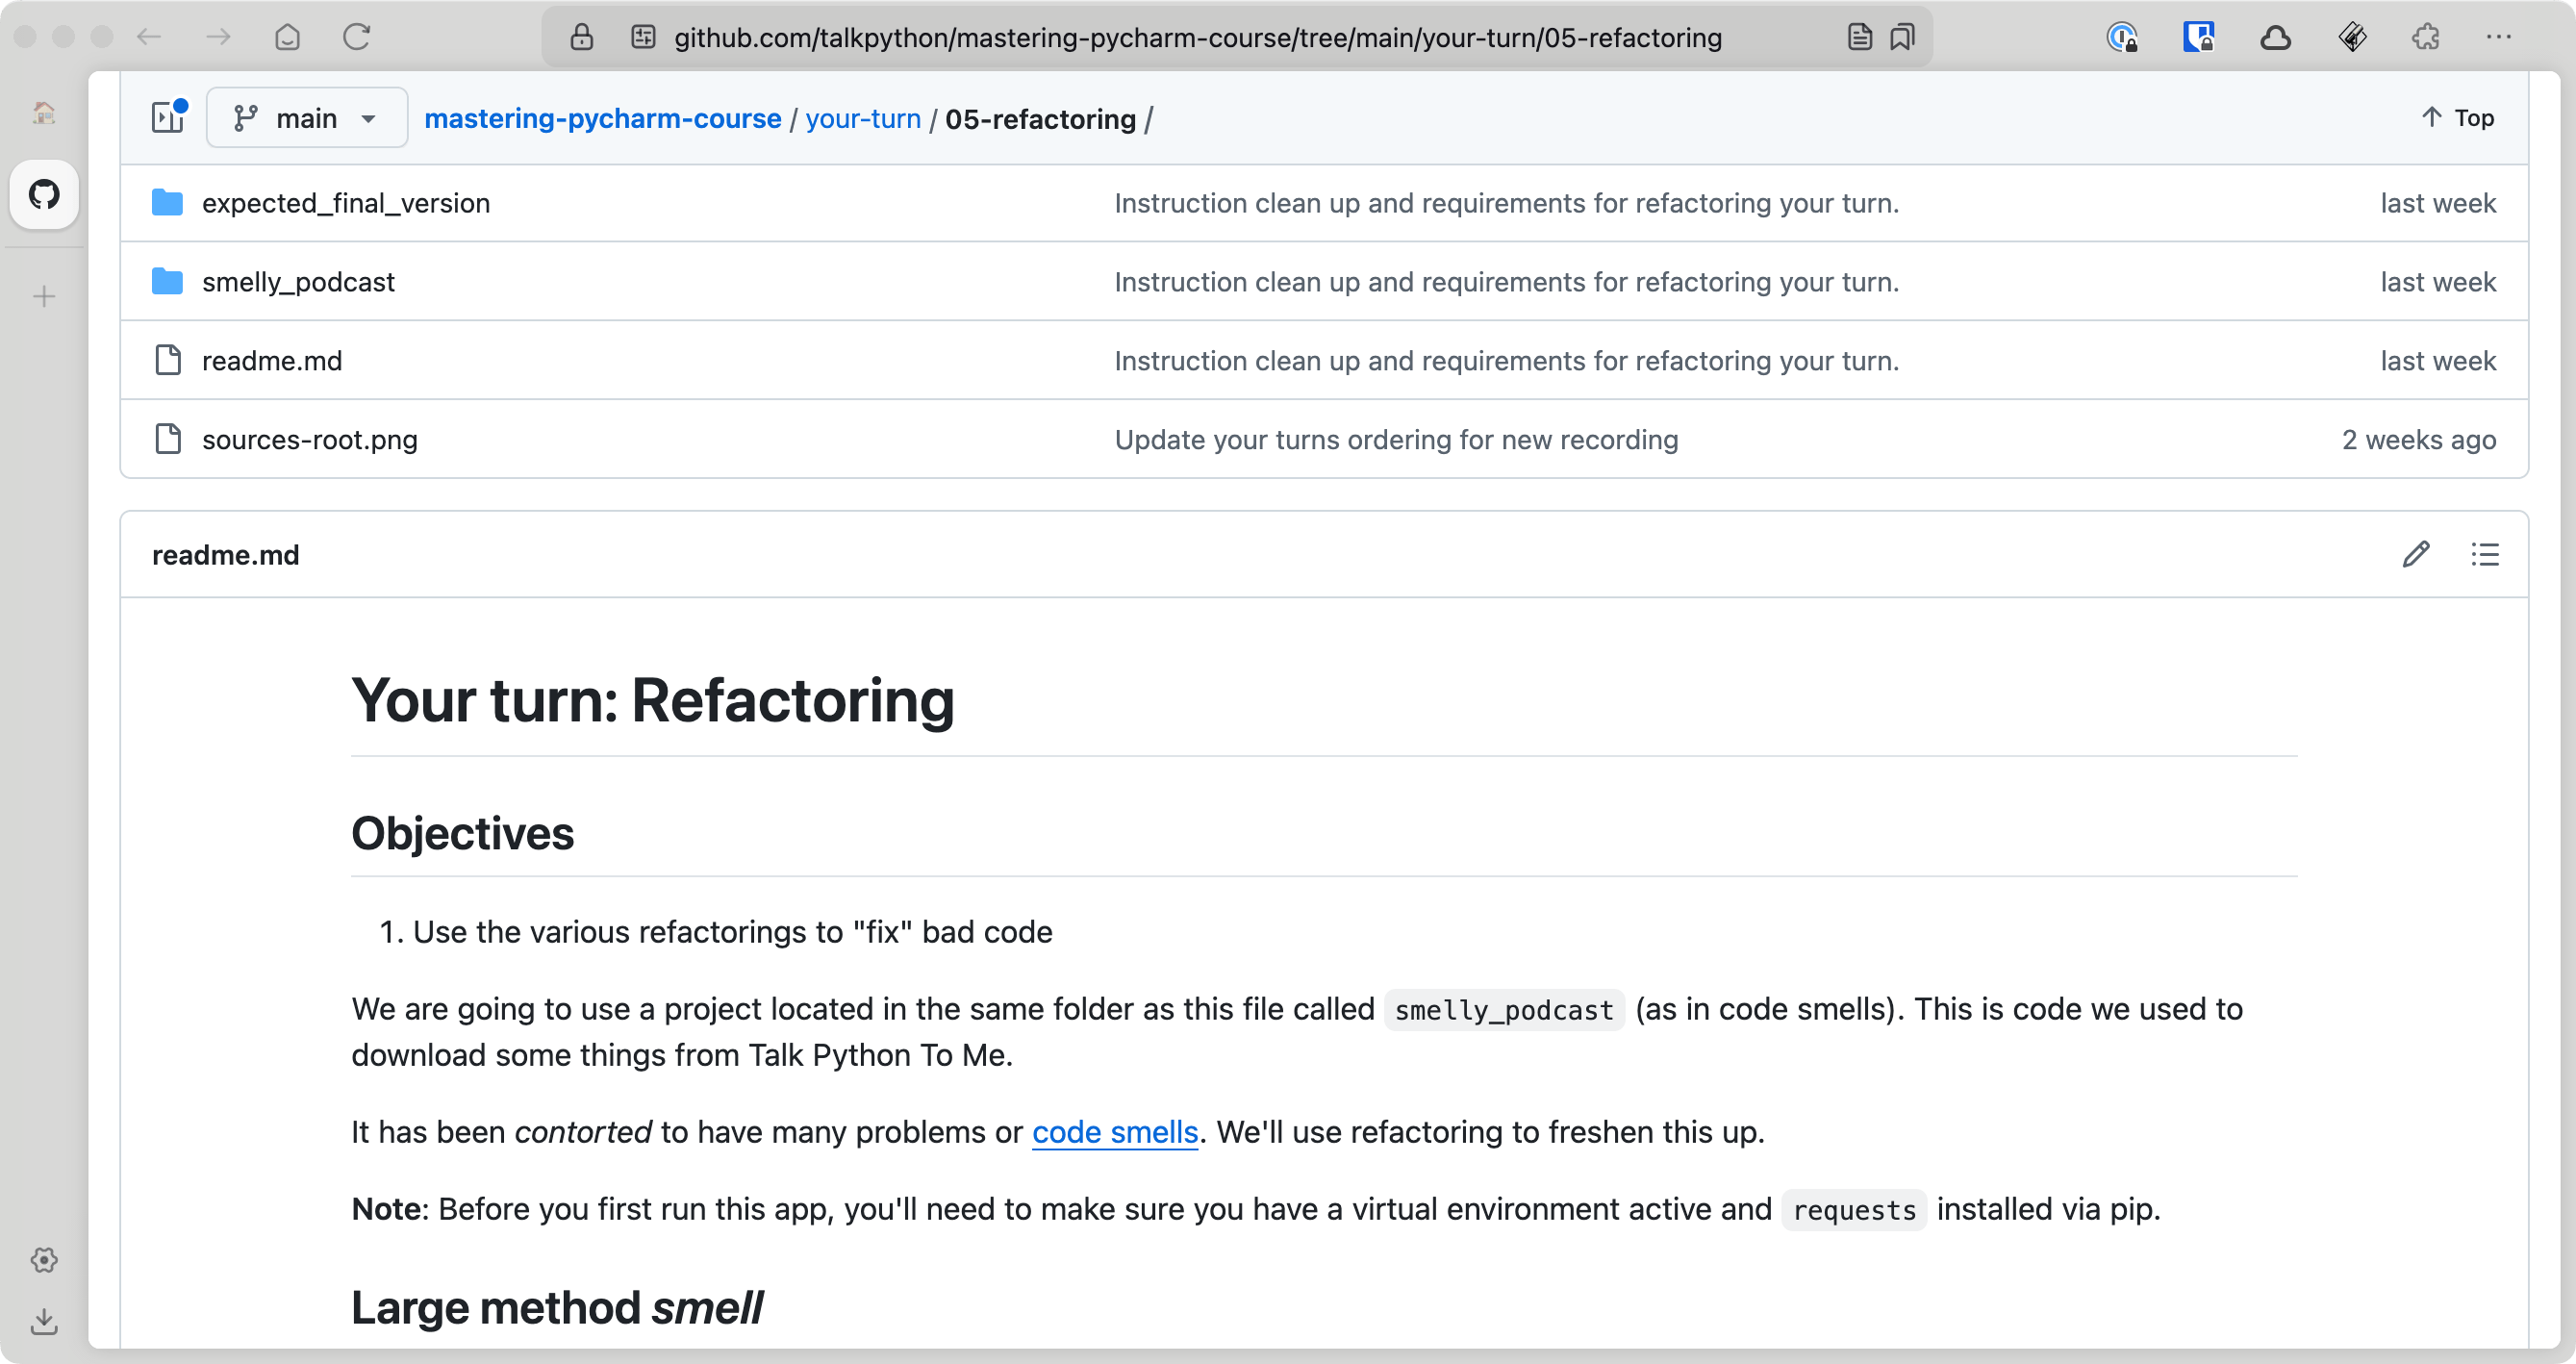
Well, we're done with the project chapter. And that turned out to be a pretty long and involved one because we talked about so many things, but that means we don't need to talk about them later. I really hope you've come away with the feeling that these projects in PyCharm are really important and very powerful. It's not just, hey, that's a cool text editor that has better autocomplete. It's something that really deeply understands Python, regular applications and web applications and keeps them together in ways that are super productive and error checking, bounds checking for you to make sure you're doing everything right. For example, putting your requirements that you said you're importing into your requirements file, the right requirements file. Now, as we close out this chapter and as we do for most chapters in this course, we're going to have what I'm calling a your turn. It's awesome to see me play around with it. And I'm sure you're learning a ton from that. But you'll learn even more if you reinforce that with a little bit of hands-on experimentation. So in the GitHub repo, again, you'll get this link from the course page, from the intro video, from the video player. You can click that and just jump right here. If you go to the your turn folder, every chapter has a your turn. For example, the projects one right here. And if you go into this, it has a readme and potentially sometimes it even has files that you might need. In this case, it just has pictures that you're going to use to basically generate the readme. So it says in this one, hey, we're going to create some new projects and we're going to play around with a more complex one. So it has a bunch of stops and it talks about how to use uv to get started and how to do more interesting things with complex ones. So I encourage you to go through at the end of this chapter and play around with this 01 projects your turn. And remember to do that for each chapter. I'll remind you, but this is the only time I'm going to go into detail talking about it and walking you through it. But I do want to make sure you're aware of it as this is the start of the course and the first one that we've seen.
|
|
|
|
55:14 |
|
|
transcript
|
0:31 |
You've seen PyCharm in action with the various projects that we've worked on so far, and you've seen the editor doing a bunch of cool things, but we haven't really focused on those features. So in this chapter, we're going to look specifically at the editor, how to control its features and how to get the most out of it. It's going to be really awesome because PyCharm does have an amazing Python and other code type editor.
|
|
|
transcript
|
2:34 |
Let's start with how code looks. Here's how I have my editor configured to highlight code and show it to me. I think this looks wonderful. It stands out from the screen. It's a little bit bolder in the keywords and a little bit darker in the background. So there's a little bit more contrast. Maybe that's helpful because I'm getting older. My eyes are getting older. Also, I do this because I think it helps the readability when I'm recording videos and you can look at the videos to see how they look and so on. But there's a lot of flexibility in how we can control how PyCharm highlights the different aspects of our code. If we go to the settings, to appearance right at the top, you can see that there's a light theme and a dark theme. So you can see my dark theme here or you can see the light theme, how that looks. And there's just something about looking at code in light that is not as good as looking in the dark. I think you need all the different colors to pop out as much as possible to indicate string, keyword value, constant, etc. Anyway, you can pick whichever one you like. Or if you don't like either ones that come out of it, you can actually choose to completely customize it. Here you can see how the code looks in the bottom right if you did nothing and just chose the Darcula theme. But notice, we can go to the color scheme, we can click on Python, and then there's a bunch of different things. Keywords, decorators, line comments, built-in names, class definitions. And then on the right, there is a way to choose the exact color. So for example, by default, the color of the class is D9EBFF. You want it to be bright yellow? Go ahead and change it. This one is actually inheriting from some more general definition of classes across different languages. So you can click on the classes-classes name and set its color or override it and set just Python classes to have a color. So I encourage you to set this up to be exactly the way that you like it. And once you have it in a way that you like, you can use that little gear at the top next to where it says Darkula and import or export your settings. So you can have it the same across your system. I always export my particular theme, save it somewhere in Dropbox, and if I get a new computer, like I did last week actually, go and fire up PyCharm and then just import the old settings and keep them in sync that way.
|
|
|
transcript
|
1:35 |
Let's talk about autocomplete. Autocomplete is incredibly important for being productive. Don't be fooled. You need this to work really, really well. Some editors do some kind of weird autocomplete where they're like, if I've seen this word before, then maybe I'll try to suggest that you just type it again, you know, even if it shows up out of context. But PyCharm understands the structure of your code. You're going to hear me say that over and over. And by doing so, it can look at what you're working with and say, this, in this case, we're creating a wizard object from a wizard class. And the wizard class has features like the name and the level. And it has actions it can take, like attack or get defensive role. You can see some of these come from a different part of the object hierarchy, like the name comes from the creature base class, whereas the attack and get, the attack part comes from the wizard aspect or the wizard class in the class hierarchy. So the autocomplete is extra good. You saw that we can use little sub portions of the word, like RSE was register starlet extension when we were playing with the navigation before. Remember that? So autocomplete is really, really great. There are things you can do in your code to make it better. And there's a bunch of new features in autocomplete we're going to dive into right after this video. So right here on the right, you can see where PyCharm believes this information comes from and why it's suggesting it to you.
|
|
|
transcript
|
2:54 |
We can also use Python type hints, which were introduced in Python 3 to make our editor much smarter. If you're not using Python type hints, I encourage you to consider them, if for no other reason than what you're going to see right here. So sometimes PyCharm can actually figure out, well, here you created an object which was a wizard, and then you returned it over here, and this value over here is the return value, is the value that came from that function that originated by creating a wizard, so it will automatically get autocomplete with that rich data that we saw above. Previously, we did know type hints, but it was so obvious for PyCharm to infer it that it wasn't really necessary. Sometimes it is. A lot of times if you're getting data out of an ORM, or a cache, or a dictionary, or something else that it's not clear what the type is, then specifying a type hint will dramatically improve the autocomplete, enhance your productivity in the editor. Here's an example. Data.findUserByEmail. This thing is using something like SQLAlchemy to return a user object, but SQLAlchemy has this weird executing and expression type of thing, and it's completely disconnected from what it seems like the object is that comes back from those commands. So when we say user.dot, we get nothing, basically. Like, just these are kind of keywords and useless stuff. There's not a real return expression on a user. I don't know why that's even there. Anyway, this is useless. The type information has fallen down, and so we're in trouble. But that's because we just wrote traditional Python. If you will find user by email, it's an address. And that's kind of like a string, I guess. We don't really know. And we're doing some kind of query here. All right, if we just add type information to that function, and particularly the return value, we get much, much better. So here, if we add optional user as the return type, we don't even have to specify the email address coming in, although setting that to be a string would be helpful. If we just add a little information here and there, look how much more proactive our editor becomes. So this is really, really great. And one of the main reasons that I use Python type hints is because when I type object dot or return value function dot, I want PyCharm to just give me all the information,
|
|
|
transcript
|
1:36 |
Until recently, PyCharm had autocomplete. It had one way of telling you what your code could do and giving you help, like we just saw in that previous pair of videos. However, we live in a fast-changing and unbelievable time where there are many, many more levels of assistance for software developers. So PyCharm now has, I believe you would consider it maybe three different levels of autocomplete that you can turn on and configure per language. So we're going to dive into that in this video at the different levels. At the base level, you get the kind of core structure of the files, just the information autocomplete. So if I have a wizard object, the wizard has a name and a level. And so we're going to show you that. The second level that we're going to be able to work with is a local LLM that looks at the code and maybe does full line completion. So it says, I see that you're working with the wizard, but it looks like you're trying to print out the name and the level, and it probably should be done as an F string. So wham, here's the entire complete statement for printing out something with an F string involving the wizard's properties. So we're going to explore all three of those now.
|
|
|
transcript
|
5:04 |
All right, let's jump in and see how we can configure, enable, or disable the different levels of autocomplete in PyCharm. So we're going to jump over to the settings. On macOS, you can get to settings on almost any app by hitting command comma. The rest of you all use PyCharm settings. Now, what we can do is we can go over to the editor, to general, and code completion. And you might think, awesome, here are the code completion settings. Or half the code completion settings. So we can see things about match case. You know, when I typed register Starlette extensions, RSE, I did lowercase. If I had done an uppercase, that wouldn't have matched because those were all lowercase letters in that function name. So you can control how that works and use case sensitivity to help narrow things down further. So you can look through the settings. They're pretty standard, like automatically and parentheses, show suggestions. As you type. I recommend having that on, but it's up to you. It also has settings for HTML. And then we get to, I'll come back to that one. We have our Python settings, our JavaScript settings, information about parameters. If you hover over it, stuff for SQL, that sort of thing. Okay. But the part I skipped over is the machine learning assisted completion. So there's B level two, I suppose. So here we can have the machine learning assisted completion. And we can have it turned on to say, when you suggest something to me, don't just put them in alphabetical order, but instead think about what I might use next. So I might get a database object back and an active record design pattern, make some changes to it and then call save on it. And if I say dot, it might suggest save as the option. This type of autocomplete is really, really nice. So this is part one in the editor general code completion, but you can see the inline completion settings page. We jump over to that, which is down here. We get more things. Now, this is really nice to have the full line. I actually really dig the full line completion suggestions here. They're not always right, but they're often quite good. And you can see I have them for Python. And if I opened up a CSS file or an HTML file and start messing with it, PyCharm might pop up a dialogue and say, would you like to download the machine learning model for CSS or for JavaScript or whatever? And you got choices here, automatically, manually. Let's just go ahead and get some of these download in here. And it'll say download starts after settings close. Fine. So this is level two. This is what comes with PyCharm, period. You get the straight traditional autocomplete we first talked about. You get this single line completion with LLM if you want it, right? You could uncheck it here and turn it off if you don't like it. So that's really nice that that's an option. The third level is cloud completion suggestions using their AI. This little purple swirly thing. This is their AI model. Let's just close this real quick. And I'll open up any project here. And notice over here, by default, when you open up this window, this is the AI system that's built into JetBrains IDEs. So by default, this says, please log in and purchase it. So what we've seen so far, what we've discussed so far is free and included. This is an additional service that comes with PyCharm that you have to purchase. So down here, you can treat it like ChatGPT. You can ask it standard ChatGPT things like, how would I connect to a SQLite DB using SQLAlchemy. And you can see it's kind of a ChatGPT experience. This deal here is the same thing that powers that third level of autocomplete. So when you see down here, enable cloud suggestions, it'll, let me turn that on. And it says, it'll help you for things like CSS, Python, SQL, why not? And universal completion. Who knows? Maybe that's markdown tables or something. I don't know. You can also tell it how constrained versus creative do you want it to be? Let's say it's going to be balanced. That seems reasonable. And when it's doing completion, you'll get a little icon that sort of shows you a thinking. You can even turn on automatic completion on typing. In multi-line suggestions, the more it suggests, the more it could potentially get it wrong. But there you have it. So we're going to have those settings all there like that.
|
|
|
transcript
|
2:48 |
One of the cool things about the PyCharm editor is that it doesn't just let you write code, and it doesn't just give you autocomplete, but it actually understands certain things need to be done, and it will do them for you. For example, if you're in the flow of working with some function, you're going to create a new function here, and you're using other parts of your application, you might say, okay, we're going to import the data. That's where this module is I'm working with. And we'll say find user by email. And then I want to do something. You're like data.changeemail. Oh, there is no change email. One option would be to stop, go find user by email, figure out where in there you can add some code, and then write the function change email and come back. Alternatively, what you can do is you can just keep typing as if it were there, and you get this little yellow light bulb. And the yellow light bulb says, hey, we can fix something for you. We think this is the problem. We can make it better. We have a light bulb moment. And in this case, what we can do is just hit Alt, Enter, and it will suggest to create the function with this signature over in the data module. Right? So you can kind of stay in the flow a little bit more. We could have also done that for the import data at the top. If we just typed user equals data dot, and it doesn't show up. You just hit Alt, Enter, import data, keep typing. Okay? So you can stay a little more focused where you are in the flow. So this is also helpful for that distraction free mode I was talking about. You don't have to move around so much. You keep working and let PyCharm do the coordination for you. So if I hit Alt, Enter, what I get is this option, create function, change email in module data dot py, or stop complaining, basically. Okay? So really nice that it's going to do that for us. Just hit Enter, and it takes you right through it. Comes down here and says, all right, as soon as you choose that, it goes, we're going to create a change email, and it's guesses at the parameter names and so on. But, of course, you can type through them, and it navigates you to the pieces that need attention. What can you use this for? Well, you can create from usage. That's what we just saw, like create a method or property or something. Quick fixes. Hey, you tried to use a module. It wasn't imported. Should we put import module at the time? Yes, please. Micro refactorings, renames, that sort of thing. Dead code. This code is unused. Just remove it. Okay. Let's remove it.
|
|
|
transcript
|
3:19 |
Let's drop in on our first project again and see if we can mess it up a little bit and make some changes and that sort of thing. So for example, before I had this import beautiful soup and I typed this code to get the warning about it to go away. But notice it's grayed out. Why is it grayed out? It's grayed out because it doesn't actually apply. It's not being used. And if I had a private function also not being used, it might get grayed out as well. So we can come over here and here's our light bulb moment and we hit Alt-Enter and it says optimize imports or run AI actions on this. We don't need any fancy AI right now. We can just say optimize that. Boom. It knows that it didn't need that one. If there were many, many imports, they would all be gone. We get fixed. What are some other ones that we could do? Well, one of the things that I like is to use single quotes, not double quotes for my strings. And you can see up here, we actually have this mixed mode, like single, single, double, double, single, single, and so on. So notice if I put the caret there, it says, what do you want to do? Well, let's convert double to single. Perfect. Really nice stuff. Now, if we call this function again, you'll see the title is unused. This is the remove dead code. So we could either remove the whole statement or just remove the assignment there. I don't really want to do that. So we'll take that away. We could also come in and say, add a type hint. It's a string. Why does it know it's a string? Because the function said it returned a string. So that must be a string. We could do this here as well. And it's an integer. Interestingly, this does not specify a return type. But PyCharm has determined, through its wisdom, that it must be returning an integer here. So it's as if we had already written, even though we didn't write that. So there's all sorts of cool things. Down here, we're using HTTPX. If up at the top, we forgot all those pieces. You can see there's a bunch of reds. Like, you know what? How do we fix this? We just import that. If we can now go to the top, it's back. This one, import sys. We could import Colorama. Or you could go further. You could do things like this. And you could say, import Colorama.4 from Colorama import 4. Keep it a little clean. So it can do different styles. Like it can look inside the modules and so on. You'll see, as we work through our application and the different pieces of code we write, we'll see these code intentions showing up all over the place. Another one that we saw earlier is if we don't have something specified in our core requirements file. Up here, it says, hey, you really should add that to your requirements. And it knows requirements.pivtool. Don't specify a version. And it puts it like that. If I want spaces in it, probably not. Do I want it alphabetical? Probably. But we can deal with that later. It puts it in there for us, which is pretty excellent. So there are many, many different things that these code intentions will do for you. And I encourage you to be on the lookout for these little code intentions. Could ignore it, but we don't need to. Because we've already added it.
|
|
|
transcript
|
1:46 |
Let's talk about hotkeys. I've already mentioned PyCharm is very friendly and capable to be setting up hotkeys for it. We can run different actions by just typing command or control shift A and then typing it. That's one way to pull up complex and less used ones. But we can also go and configure the key mappings. And some of these don't even have hotkeys unless you add them explicitly. So for example, we go to the settings, go to the key map. And what I recommend is you create your own key map based on whichever one you like, IntelliJ, IDE Classic, or whatever it is you want to use. And then you can go through and customize all the hotkeys as you see fit. So for example, this quick type definition doesn't have a hotkey, but if you click right there, you can then enter a hotkey or multiple hotkeys, which is really great. And that would assign one for it. So you can go and customize the heck out of it this way. If you want to go broader, you're like, hey, I really wish it was just like VS Code in terms of all the hotkeys that I press. Or I wish it was like Vim or regular old Visual Studio or whatever. you can come over here to the plugins in your settings and search for key map. And there's a bunch. NetBeans if you want to go way back and do Java type hotkeys. Whatever. I think probably the VS Code and the Vim key map are probably the two that most people will gravitate towards. I'm happy with the way it is. But if you want something that you're coming from somewhere else, give this a look. It might help you get used to it and get going quicker.
|
|
|
transcript
|
3:32 |
Let's talk about code formatting. At the base, we've all agreed in the Python community that there's a core set of standards in terms of how Python should be formatted that we all try to follow, and this is called PEP 8 Python Enhancement Proposal No. 8. And it specifies a limited set of constraints about how your code should be put together, like line spaces. And here we say email equals address. Should there be white space on either side of that equal sign, or should there not? Shouldn't be, by the way. Here you can see that PyCharm is finding a PEP 8 violation. E302 expected two blank lines, found one. So by convention, you have top-level functions. There should be two lines between them, not one. For some reason, it's one line for classes, two lines for top-level functions. But that's what PEP 8 says, so that's what it is. And PyCharm tells you these types of things. Says, look, this is not right. You can install additional tools like Ruff and others that will do better linting, but by default, this comes out of the box. And we can have PyCharm automatically fix most of these formatting errors. So for example, we can just run Command or Control Alt L, and then whoosh, that error is gone. We now have two spaces. And you saw me do that with HTML as well. It'll fix a bunch of different things. Like if there was spaces around that equal sign, it would also fix that. We can control how this happens. Not everybody wants exactly the same code formatting style. Although sticking close to standard is a good idea, you can change it. So if you go into Editor, Code Style, and then pick your language, there's a lot of options. Some of them are turned off, like ensure right margin is not exceeded. That one's off. But Align when Multiline, that one's on. So you can turn them on, and then you can also go and set their values. Notice up here at the top, there's tabs and addents, spaces, wrapping and braces. There's a bunch of other sections. Also notice that you can create different schemes and import and export them. This is really cool because then you can share these code styles with your team because if everyone has different code styles, it's just going to be back and forth, back and forth, back and forth. It's not going to be great. It's going to cause a bunch of conflicts for no reason. So right here, you can click on this and say Export. And Export, you know, probably has an XML file or whatever you want. You can also copy it into the project, which then you theoretically could commit to source control so that the settings are embedded into the project and someone else checks it out. They don't have to know to import your settings. Also, that's really cool because if you have an open source project with one standard and you've got your work project with another standard, it will automatically pick that up and you won't have to remember to switch it, which I'm sure is not going to happen very often, right? It's just going to be funky with warnings all over. So put it into projects if it varies by project. You could also click on the IDE section and it'll say, is it stored in project or is it stored as a machine-wide setting? So a lot of options on code formatting. Make sure you take a little time and adjust this to the way you all work so you're not fighting against the editor, but it's there to support you and help you write code the way you want.
|
|
|
transcript
|
1:05 |
Here's a quick one, lens mode. If you're working in a large file, something with hundreds of lines, you might be in one portion. You're like, well, what is down below? Or a real common thing for me when I see this is there might be some warning or notification, and that shows up actually in the scroll bar there. So you can see just a little ways down, there's a little green mark at the bottom of the scroll bar. Something's being indicated there. Something's happening. But you might not want to leave where you are and go to it. You can just hover where the scroll bar goes without touching it. Just hover your mouse there, and you can see this little pop-up window showing, well, this is what code is right there, this announce function down on line 110, even though we're only seeing like 1 to 35 or something in our open editor. So this lens mode is really, really nice in that it allows you to sort of skip around without losing your context, especially when you see little indicators in the margin or in the scroll bar like you see in this case.
|
|
|
transcript
|
2:40 |
Python's relationship with object-oriented programming is interesting. In some ways, it doesn't need classes and objects as much as other languages because modules, Python files, basically act a little bit like a static class type of thing. But classes are still widely used in Python, and I think object-oriented programming is pretty awesome. It certainly brings interesting things to the table, if sometimes it is also overused. So there's some really cool features in the editor that you can use to understand relationships. We already saw this in autocomplete, how it shows the object hierarchy for different aspects of our wizard. But notice here, there's these little blue double-circle bullseye-looking things. Some of them have down arrows that are white. Others have up arrows that are red. So you can see, like, here, here, here. All of these down arrow ones mean this creature, the base class, has given some functions or defined some functions, and they are being overridden by derived classes. So, for example, the wizard might override the initializer. The small animal might override the initializer, and so on. On the other hand, the ones that are pointing up that are red, it says, this is overriding something. So here, here, and here. For example, the small animal is overriding creature's get defensive role. So it gives you a really quick view of how is this function being used? Is this overriding something in the class hierarchy? Is it being used by derived classes? So in this case, you can see this one overrides one. And if I hover over it, this is the hidden by the tooltip, unfortunately, but it's the dunder repper. It says this dunder repper overrides the one that comes from object. But here in dragon, this is get defensive role. It says this overrides the one from creature. If I'm in the creature and I hover over its get defensive role, it says these classes, small animal and dragon, are overriding get defensive role, which is pretty cool. And if I actually click on it, I get a navigation menu that will let me jump to dragon or jump to small animal where it is doing the overriding. So there's a lot of cool navigation and hover information. So if you hover, it shows you how it's being used and what override versus being overridden means. And if I click it, it becomes navigational. you
|
|
|
transcript
|
2:16 |
Something fairly new in PyCharm is it now starts to show the parameter names as if you were using named or keyword parameters or arguments, but you're not. So in this case, check it out. This game loop, we're creating creatures, which is a list of creature objects, and we're adding derived classes to it. A small animal, a creature, another small animal, a dragon, and a wizard. The different derived versions have different constructors or initializers. And the small animal takes a name and a level, but the dragon takes a name level scaliness and whether or not it breathes fire. How do I know that just looking at this code? Well, because it's specifying the parameter names there. It's not actually saying name equals dragon, level equals 50. It's just dragon 50 and so on. But PyCharm shows these to help you understand how the code's working better. If for some reason you don't like it, you can go and actually turn this feature off. So positional parameters don't have the parameter name next to them. Takes some getting used to, but I think I'm a fan, more or less. It's a neat feature. Something that can happen is sometimes you forget what all of the parameters are. In this case, we have it all written out. So it's pretty obvious. But if we just said drag in parentheses and specified the name, it's not clear what the next parameter should be, how many there are, what they are, and so on. So you can come over here and hit control or command P anywhere inside the function, and it'll pull up the full parameter list for you. In this case, it says dragon. Well, it takes a self parameter, but you don't specify that in Python. It's kind of weird that it even says that. But it takes a name, a level, and scaliness, and scaliness is bolded because you're in that position in the parameter list. Once you type it out, you get this little autocomplete, or this little named parameter tag on it, I guess you call it. But before that, it's really handy. And if it says there's some parameter missing because you haven't specified enough, it's also really nice to pull up. So command P to pull up the parameter list while you're within it.
|
|
|
transcript
|
5:24 |
All right, let's do something fun here. Let's go back to our first project that we've been playing with. And the most important function, remember this thing is only 37 lines in total. And is that formatted? Yeah. So, but the most important function here is this get title. Now, if I hover over get title right now, it says it's the get title. And you can go over here and show the parameter and it's episode number and so on. I can hit F1 and show the quick documentation again, which is what I get when I hover, right? It is nice that it shows the type information, which is what we specified down here. See this, we specify that. So it helps a little. Wouldn't it be nice to know a little bit better what this does? I know it's simple, follow me here. So we can come over here and PyCharm has different levels of helping you write documentation. So in Python, we add documentation by adding what's called a doc string. It starts with three quotes here, and then, don't be so helpful yet, like this. And then we type information about a description. This is what it does. We might say param, and then episode number. Nice that we get autocomplete there. That's pretty cool, right? If we come back over here and hover over it, it'll say this is what it does, and has a parameter, episode number. Hmm. It's even listed down here. That's kind of cool. But you saw it was trying to help me. So let's start over. I can just type quote, quote, quote, quote, enter. And it already writes the parameter, episode number, which I missed the final deal there. So this will be the show number for the episode. Okay. This will be the title of the episode if found. All right. So that's cool. And then we could say, get the title by show number from the website. This is better. Let's go hover over it again. Look at that. Okay. Get the title by show number from the website. Parameters, episode number, show number. And what is it? It's not moving. Why does it return? The title of the episode if found. All of these are great. I mean, the fact that it generated the skeleton, it gave me auto complete on episode number. All that's great. If you have the AI subscription, right? The one over here, the AI assistant, and you do this again, you might have noticed it said generate with AI assistant. Let's just click this and see what happens. Woo. That is a way more thorough than what Michael does. Way more thorough. This fetches the title of the episode from the Talk Python website. This function constructs a URL to the episode using the provided episode number, sends a HTTP get request to fetch the webpage and extracts the title of the episode by processing the response content. It specifies the episode number and its type, which is cool. So the return type and its return type. This is nice. It's looked at HTTPX, probably here really, to figure out, well, what kind of errors or exceptions could it raise? And it describes, it states what they are and it describes when and how they happen. Woo. That's pretty dope. Let's hover over and see what we get now. Look at this. I'm not going to read it again because it's the same, but you can see all the details that it gives us. I'm impressed. This is actually impressive. I'm going to leave it. This is pretty good. However you do it. However you do it. It's nice to have doc strings for some of your more important and public facing functions. And even without the AI, PyCharm gave us a lot of support. And with it, well, it gave us a ton of support. Now, one final thing I want to talk about with these doc strings is the format. So this format, I don't know, I'm not a fan of it. It's fine, but it's verbose and it's yucky. It's restructured text. And in a world where Markdown exists and other things exist, I'm not sure we need it. But this is the default for Python, right? So check this out though. If we go to the settings and we type doc string, go to the Python integrated tools, check this out. We can go down here and say, we can use something else. We can use plain or numpy style or Google. If we do this, let's see what happens. If I take this away and generate it again, generate it with AI, we get a similar output, but the actual style here is different. To me, this is a little bit cleaner. Then have that, you know, here's the argument and here's the argument type. Here's the return and here's the return type. I'm going to do it one more time. I guess, what do you think? Plain? Let's give plain a style. Give plain a go here. It's nice about the AI is you don't have to actually know. So plain is pretty similar to the Google one. So really, really neat that we can get it to not just generate the doc strings, but give us it in the style that we want.
|
|
|
transcript
|
4:32 |
Next, let's talk about live templates. We've seen one and only one of them in action so far. So this right here, when we generated this, we had an empty file and I said main, and it gave us this live template right there, which is awesome, or it would let us choose the function now that that exists. And by the way, it's notable that I could run it by just clicking that or debug it or profile it with coverage, you know, whatever. So that's pretty cool. But we actually have a bunch of things we can do. Let's go up here where it'll let me write some more code. And I'll say numbers equals one, two, and five. And I can type iter for looping over an iterable. Here you can see a four I in there. Or if I wanted to enumerate it, let's do that. It's a little more interesting. So what do we want in numbers or number in I? Look how it even figures that out. So we could print the ith number is number and title is number like this. And we could just loop over it. Let's run and I'll put one. It's looping over. Oh, whoops. That's not numbers. That's number singular. Let's try it. Let's go. I want to get it for 10. I got to give it something. Here you can see the zeroth number is one and the title is Eve. The first is two. And it's Python and Mongo and three and so on. Okay. So those are the titles for episode one, two, and five. Right? One, two, and five right there. Very cool. So this, these live templates let you expand out that code. So all I typed was it her inner E for inner enumerate. Boom. I've got it. Taking me through all the code there. There's actually a ton of these. So if we go into our settings and editor live templates, you can see there's stuff for angular, for Django, for flask. And if you expand it, you can see there's one. If I just type route or route for my British friends, it will actually generate all of this. So I don't know if it'll work here because I'm not sure if it feels it's in the flask mode. But if I type route and this is going to be a home and you can see it's combining those two things together. Really awesome. Right? There's a bunch of these. So here's the route one. We have them for HTML, LaTeX, Python is probably most relevant. Here's the iter. You can see what it was working with here. And this is the description. And here's the main that we talked about. What's cool though is I can actually add my own live template. Suppose I want to be able to create a print statement with an F string. So I'll say PF. Print F. Like that. Something like that. And what we want to do is we'll just say print F. What's the deal like here. And then I can paste in this dollar and dollar. Now you need to define a context. So for example, the one that we used before, it's context with Python, classes, top level, and Django. I feel like this is pretty broadly open. So I can just go down to anywhere that Python does stuff and just say same basic thing. So I should be able to come down here and say PF tab. And notice because of the end, cursor lands right there and go, this is fun. And print the title. So we can run one more time and say, I don't know, five. This is fun. SQLAlchemy. Awesome, right? So these live templates are really great. And I don't think people take very much advantage of them. I don't think they use them very much. Definitely, I don't think they create them. But you saw how incredibly easy that is. So here is my challenge to you or my encouragement to you. Go through that list. Take a minute and read the live templates for the context that you care about. If you don't care about Django, don't read them. If you care about Flask, read that section. Read the Python ones. Look at some examples and it'll give you ideas on how to create new ones. And when you find yourself doing the same thing over and over and over again, maybe go ahead and come up with a live template that you use for yourself.
|
|
|
transcript
|
1:35 |
We're going to close out this chapter on the editor by talking about a really cool feature called Code With Me. If you've done collaborative work with Google Docs, you'll have a sense of what this is like. The idea is I can create a session that allows other users to connect to my local instance of PyCharm, including all of my local files, my local database servers, my Docker containers, my virtual environments, everything as I have it on my machine. So if I'm having trouble or I want to do pair programming and the setup is complicated, well, here's a great way to do that. So what we're going to do is we can click this little plus here on the right and hit Start Session. Creates a session. You give different levels of permission, view, edit, or full control. You can hit this copy link, share it with somebody. They don't even have that PyCharm installed. You get kind of a lightweight shell PyCharm to use. Once the thing fires up, it connects, and you both, once you let them in, they join, and you can collaboratively edit together. So now we're over here. You can see that I'm actually following some version of myself, following Mike C. Kennedy, something like that. And you can see that it's green because when I logged in, my icon got a green logo, and you can even see my cursor. Like I said, just like Google Docs. It's pretty awesome. But you really should see this in action. So the next video is going to be me and Paul Everitt working together to solve a simple programming problem. But it'll be a lot of fun, a lot of jokes, and you're going to enjoy it.
|
|
|
transcript
|
11:37 |
So I'm here working on this app, and it seems like it should be fine. The idea is to go and download the Talk Python episodes and print out the ID and the title. However, when I run it, I just can't get it to work. It says, hey, welcome to Code With Me, the Talk Python info downloader. Super creative name. And it says, here's all the episodes. I know on the website. There are over 490 episodes, and yet working with a total of zero episodes. I've been trying this. The service app here has all these, you know, it downloads the RSS, and it seems like it does that right. But I'm really stuck. So I'm going to call my friend, Paul Everitt, who I know is an XML and RSS expert. He loves it. And he also happens to be pretty good with PyCharm. So we're going to give him, I'm going to start up one of these Code With Me sessions. And it starts by saying, well, how much access do you want to give them? How much do you trust Paul? I trust Paul a lot. So I'm going to give him, imagine he's my coworker or something like that, right? Not a random person. I'm going to allow, I could give him edit files, or I could just give him full access, which I'm going to do. So I'll hit start session, and I must agree to the terms, because that's the first time I've done that on this computer. So it's creating a join link right now. And now it's going, I'm going to copy the link, and I'm going to send this to Paul through Instant Messenger, through Discord, through Slack, whatever. And we'll be right back. And he is going through setting it up on this machine. And Paul, could you describe, hello, Paul. Could you describe what happened for you to get this accept message to pop up here? What did you do? It's pretty cool. You click on the link, and you go to this crazy thing called the web. And because I have JetBrains Toolbox installed for managing all my IDEs, it's like, hey, do you want me to just go ahead and open this thing in Toolbox? So that's how I get to the IDE launching. But then I've got to get connected to you. So I see this thing on my screen saying, waiting for host approval. It's got a little number in there that we could swap to make sure. If I really am unsure about this, what is your number? 2875. 2875. Confirmed. Okay. So we're in. We're in. Obviously, if you see Paul Everitt's joined right after you sent Paul Everitt a link, chances are good, but it's always good to verify as well. All right. And Paul, just before we do this, you don't actually have to already have PyCharm set up to go through this process, do you? That's correct. It's the kind of thing where you're like pairing with someone and you want them on your computer. Well, what if they don't have PyCharm? Well, they're going to download something that lets them connect to your PyCharm in your environment. Previously, I've done this with Zoom or VNC or even remote desktops. Like, hey, log into this machine or we'll both log into the machine and we'll see the same thing. And this is way better, though, because you're on your machine and I'm on my machine, but you get to use local tools, basically, which is great. And we share the same, literally the same project and environment. Like, my virtual environment is your virtual environment, as they say. All right. Paul has joined. And you can see Paul is over in the service file. He's in the same place I am because you probably just dropped into there. So, Paul, let me describe. You're right in the correct location. Let me describe what's happening. So, we're downloading the RSS feed here. And I'm using requests and I'm calling raise for status. So, there's no errors. It's a 200 category status code. So, things are all right. And I'm parsing the DOM element. And if that wasn't valid XML, it would have a moment. This is the XML element tree. But then I get no items. I'm going to, here, why don't I just print out? Let's try that. We'll just print len of items. We already know that that's zero, but that's not great, right? So, I'm kind of stuck here. I know the RSS has, like, the RSS document that has a channel, then it has items. But I don't know what's going on here. So, it's nice because I'm able to see you moving around and your recording. So, you can see me moving around, right? Right, exactly. I can go in and I can put in a comment saying, probably right here. Smell, smell. Indeed. Oh, you forgot a comma, by the way. The grammar checker. Sure, yes. Thanks for the spell checking. So, what do you think is wrong? What am I doing wrong? I already set you up as an XML expert. Sure. And it's all about hierarchies. It's almost always that you have in your mind what the node tree is supposed to be, but it's been 100,000 years since you looked at it. So, some node is not where it's supposed to be. How about we run this maybe under the debugger? Yeah, let's do it. Yeah, let's do it. Kind of stop on the line where you've got items and let's poke around and see what we got. Yeah. Can you do it or should I? I'll put a break point on line 20. That's probably a good spot. Sure. Sure. Can you debug it or do I have to? Run this under the debugger? Look at that. No hands, folks. And it started anyway. So, that's me initiating that. No hands on Michael's side. And on my side, I get the PyCharm debugger and I can poke around and do things like, I think I'll do the DOM find all to go grab channel. Folks, always be debugging. Uncle Paul says, always be debugging. The debugger is your friend. It's super fast. So, I'm going to make a new variable called channel that finds the channel item. And so, what does channel look like? I'm going to expand, poke around a little bit. It found a channel, Michael. Okay. Okay. Excellent. So, what's going on here that might be the problem? I could go poke around at the children and stuff and look and see what's in there. But I could just do kind of a Hail Mary and see, you know. Probably not the plural. Channel's probably the container. It probably doesn't have a child container holding the items. So, I'm going to go issue that request. And look at that, Michael. We have a 494 item result. All right. I'm going to take away that and I'm going to restart the debugger. All right. A little 200 response. Episode count 494. How about that? Awesome. Thank you, Paul. So, let's let it go. And look. Here's all the values. There does seem to be a little bit of funkiness here. Notice at the bottom here it says episode number 492 is actually 494. So, somewhere in here. Somewhere in here I'm doing something wrong. I think this might be over in. And for your viewers, what I just did on my side was I clicked the button to follow you. So, instead of working independently, I'm now walking around with you as you go through the code. Indeed. And here we have over here. I think this might be the problem where it says, let me wrap this around. I think Ruff put it out of, wrapped it to the, off the screen. So, it says the episode count minus the index minus one. I think we might need, what do you think if we change that to plus one, Paul? It's the off by one, right? Oh, it's off by one in two directions. There we go. Now you can see the index 494 goes to episode 494. Perfect. Okay. I have one more problem, Paul. And you just follow me, okay? Sure. I know you are following me. So, there's nothing to it. But this right here, if I run this, if you actually scroll back in the output, there's actually 494 listings. And I don't really want. That's a lot of output. I know. I've been at this for almost 10 years. It's going to leave a trail. So, maybe we could just get the last 20. So, is there something, you know, like help me out. Like, what do you think about getting the last 20 there? Just go ahead and type away in the editor for me. Okay. Instead of starting at zero, what do you think? Yeah. So, since I'm seeing the same thing as you, as you type, I might redefine the start. So, go ahead and start typing start again. And let's have it as kind of a product, so to speak, of the episode count minus some certain number as the starting point. Let's say. Like the length, so it's the total amount or something. Yeah. Let's say one year. Okay. All right. There we go. Oh, yeah. That's a lot less. All right. Yeah. We did the end of year crossover was one going back a year there. Okay. Very cool. It's fun to look at all of these. Yeah, it is. Though, this, what if this was general code working for like a general podcast? I could change, I could go up here and change the URL or the service and it might only have 47 episodes or something like that. Sure. So, then you're in a case where you've hardwired in a number that might not work. So, you probably want to index relative to the total size or something. Yeah. How about a, I always love a good max statement. Like the maximum. I thought for the win. So, I want it to be one. I don't want it to be negative 12. So, I could just say max of one and then the subtraction. Okay. What do you think? Yeah. All right. You're guaranteed to get something. All right. Awesome. Well, that looks like my program is both working and better. So, thank you, Paul, for dropping in. And, you know, I can see up here in the program, you've got a little P, so I can see that you're up there. And if I wanted, I could, you know, inversely follow you around as well, right? Indeed, and I've used this with pair programming for hours and hours. And sometimes you come back together. Sometimes you go independently in your own directions, looking at things. And this being JetBrains, we think about how all this fits together. And so, from a version control perspective, it actually keeps your changes and my changes separate in different change lists. So, you can then decide how you want to accept or reject my changes. Well, yeah. Let's look at it over here. So, I'm looking at my Git commit log. And it has changes by Paul. Paul fixed. You added the smell and you fixed the plural. And then you coached me through the other things about changing the plus to a minus and so on. So, I'll say, Michael's fixes for code with me errors. You know what I'm going to do with the other one, Paul? I'm going to ask the AI. I'm going to ask the AI what you did. Ah. You fixed incorrect XML path for items in RSS feed parsing. You updated the XPath query to be non-plural. Perfect. That is exactly right. And that's a lot of typing. That's a lot of help. It was a lot of help. It was a lot of help. All right. Well, thank you so much for taking the time and going through this with me. It's code with me. It's a really cool feature. And, yeah, it's fun to do it. Happy XML parsing.
|
|
|
transcript
|
0:26 |
That's it for the chapter. Now it's your turn. Don't forget to do the your turn. So jump over to the GitHub repository and this is the editor chapter. So be sure to come here and check it out. It has you go through and create a class, deal with some styles, do some code intention magic, add documentation and so on. So check this out and give everything we just talked about a try.
|
|
|
|
26:17 |
|
|
transcript
|
0:43 |
When I think of why would I recommend or why do I use PyCharm, I would say debugging on the debugger is probably one of the top three reasons for sure. Debugger in PyCharm is incredibly powerful. It goes way beyond just pressing the debug button and pausing at a breakpoint. There are many really nice usability features and a bunch of advanced features that I think a lot of people maybe don't even know exist. Well, guess what? You're going to find out about them if you didn't know before. We're going to have a lot of fun playing with the debugger because it's an awesome tool and it can really level up your game for solving those hard problems.
|
|
|
transcript
|
3:01 |
To begin exploring the debugger, I want to use a more interactive application. And I have a really good one from the Python Jumpstart course over at Talk Python. And you can get that here, just the GitHub repository is public. So I'm going to go over here. I'm going to grab the URL and clone it. You can see I've already done that here. So just save you some time. And I've created a virtual environment. I do want to show you one more way that you can start PyCharm in a project, which it could either have been pre-configured like this one or not at all. If you've installed the JetBrains toolbox, which I highly recommend as the way you manage your JetBrains tools, it's free and so on. We go to settings here. You can see under tools, you can check off this generate shell scripts into this location and then put that into your path. If you do that and you're in your terminal somewhere, right here for example on this one, instead of going and going to PyCharm, find it, drag and drop it on top to it or something like that, you can just simply type PyCharm dot for PyCharm in this directory and it opens up to here, to the project we're working on, to this jumpstart one right on the desktop where I went. So that's a really cool way to just quickly get access to any folder and open that folder as a project if you set up the path correctly there. All right, in this project, we're going to work with what's called the wizard battle. I think you might have seen a few screenshots from some of this code here in the graphics so far. But we're going to run this final. single item. So in order to do that, I'm going to go as we've already discussed and say mark directory as sources root. So we can come over here and we want to run this program here. So we run it. That'll create a run configuration. You can see that it shows this little fun ASCII art. I couldn't resist put it in here. It's the wizard battle app. And it allows you to do things like look around and see what creatures there are. Well, there's a toad of level one, a tiger of level 12, and a tiger has appeared. We can attack it. There's a chance we'll beat that one. I would say we've out rolled it. When you say we've handily triumphed over it. A bat appears and run away from the bat. Keep running away until something appears that maybe a dragon. We don't want to mess with the dragon. All right. So we can just exit out of there. Now, one more thing, just to emphasize run configurations. Maybe we want to edit this and give it a better name. We'll call this wizard battle because there's lots of things named program here. But now we can see it's called wizard battle. Okay. So we have our app set up. We've got it downloaded. We're going to, what we're going to do is we're going to debug the interaction of this wizard with all the creatures in this forest.
|
|
|
transcript
|
8:18 |
All right, let's play with our wizard game using the debugger here. So first of all, there's a lot of stuff going on here. Like that ASCII art is amazing, but it's also a little busy. So I can come over here and I can go to code folding. Of course, these have hotkeys. And I can say collapse recursively, say collapse all, and collapse these. And you can see, okay, well, there's the main, there's the game loop. Really, we want a game loop here and there's a while true. So we can sort of look at it a little more condensed, which I kind of like that. Now, what I want to do is we'll see that we're going to create a hero and we'll have our creatures here like this. And every time through the loop, it randomly picks one of the creatures that's still available. And by available, the wizard hasn't killed it. And then it asks you what you want to do. And based on things like what you say, it'll tell you, do you want to attack? Or do you want to run away or so on? So let's put a break point right here and we'll go and run this. Now we already have a run configuration and you can debug almost any run configuration. You can debug a regular app run like this. If you're doing something like starting a web framework where instead you pass a config file to the web framework to start it, that still will work just fine. Unit test is very, very common. And also do it from down here like this. Remember we saw we could press debug. You press control shift D for that. Or this one is just control D at any time. Okay. But we're going to set a break point by clicking on the numbers in the gutter here. And then we'll click go. And it's pretty huge because the way I put it up before. But there's two aspects to the debugger down here. One is this is a interactive terminal app where it shows output. And I have to tell it things like I want to say attack or run away or something. And there's the threads and variables while it's running right now. It's it's running. We haven't hit the break point yet. It's waiting on this line, not because the debugger, but because of input is waiting for input. So it doesn't have any information yet. It's waiting for us to do something. So let's say we want to attack. Now notice it's given us Python things. We can come down here and we can type hero. And it'll actually show us the hero and other variables that it has so far, right? Because the hero exists right here. So when you're in this console, see, unfortunately, I made it a little small. There we go. This thing can be turned on and we can turn this off. So notice it's got like kind of the repper sort of thing, the repl. So we can turn that off. And then down here, I can just type the letter A. Well, first I have to let it run. It doesn't like that I gave it the hero. All right, let's run again. Okay. So turn off the console and go back to regular input for now. We'll hit A and it's taken us down to this level, this line 58, where we've set our break point. And we can see straight away a lot of controls. We'll talk about them. We can see that there's the active creature. That's the one that was generated by random.choice. And we got our hero and we got our list of creatures. All right. Here's our hero. We can expand out the hero and we can even inspect it and pop it up like that. You can see it's level 75 named Gandalf. All right. So we can interact with that. We can drill down into our creatures in our list. We can see that the active creature is an evil wizard of level 1000. We should probably run away. But there it is. So we can see all these values, which is great. But I want to point out something that kind of goes beyond regular debuggers, I think, here. We can also put expressions here before we look at that. We could say like hero.level. Notice the autocomplete is greater than active creature.level. We enter false. Now, this result won't update unless you press watch. And then this will now stay here over and it will automatically update. So you can run little expressions here and get instant answers or you can pin an expression that you want to watch. Given the level of this evil wizard, you know, pretty much if this is ever false, we should run away. But we should especially run away right now. Now look up here at this. There's a few other things if I make a little more space on the screen. Check this out. You can actually see by every variable. Here by this hero, it says this is the hero, Gandalf of level 75. And I can drill down into it in the editor. Here's this wizard. I can drill down into that. Here's the command. There's nothing to see about a string really. But I can do things like set its value right here. Like suppose I said a. Actually, I did say a. I said attack. Not good. We're going to change that with the debugger. Okay. So we could come in here and interact with all the stuff kind of on the surface of the code instead of in this other weird window that talks about the way the code is. And this is so valuable. So let's do this. Let's go. Hey, you know what? We've chosen poorly. We've chosen poorly. And this should be run away. Don't autocomplete. Just let me set it. Let me set it. You might have noticed this was gray before. And now it's golden. And that means something. That's not just that, oh, hey, it has a color because it has a value. It has a value. The colors when it's gray, that means it's unchanged. When it's golden like this, that means it has recently changed. Okay. So if we go back to our debug window and we tell it to step forward, right? It's going to do this check. And even though we entered A, you can see right there, right there. Even though we entered A, we use the debugger to say, actually, we want to change the path that it's flowing. We're going to use this to be an R. So let's step over and say, okay, oh, what happens when we do an R? Well, we just do this print. Now we can let it continue to run to the next break point, which now it's asking for a question. Let's see. We've got a dragon. We could attack that. And let's just use the step in behavior. So notice this has changed again over here. So let's go. And now we want to step one step. And it says, oh, if hero attack creature, that means the attack was successful. Otherwise, they have to run away and take a little timeout. So we can step down here. Actually, let's run in again. Hold on. I've been defeated. The dragon rolled 16,000. Yeah, I would say we've been defeated. Let's attack again. And come down here. We want to actually go into this code. So instead of step over, we can say step in. This is step into every bit of code, third-party libraries, Python, and so on. This is just our code. This is usually what you want. We'll step in. And now we can see we're inside the wizard. So it prints out what it's doing. It's going in to get its defensive role. We can see how it's computing that. 12-sided dice, time at its level. Step out of that. You can see right there the role. The return value. That function comes out. The creature's role. Oh, we're going to have a bad time. We're going to have a bad time. And it's all good. Looks like we know what's going to happen here. But you can see there's really a lot of cool things. And notice we're seeing all these values come in. We're able to explore them and change them without actually going into this. This is a fine little section with the call stack and the ability to see all the variables. But often this is more efficient and you don't really need it. You need to go into the other thing. So we'll go and let it run. See what happens. The wizard has been defeated by the dragon. All right. There's a quick introduction to the debugger for the standard use case. We'll come back and look at some of the more advanced ones next. But I want to talk about a few concepts first.
|
|
|
transcript
|
3:39 |
Let's talk about debug sessions real quick. How do you start them? Well, we saw there's multiple ways, but primarily either using the hotkey control D or press the little bug button. You're looking for a bug, you want to debug it, right? So click right there. That'll fire up the debugger on the active run configuration. Once it gets going, you'll see a UI like this instead of the traditional run UI. And it's really split into two sections, the threads and variables view and the console view. So in the threads and variables view, you can see all the variables if you're paused and you can add watches or evaluate expressions. And you can also switch over to the console if you want to see print statements or in the case of our game, the input and output ask us what to do and so on. Now, there are a bunch of buttons down here and it takes a little while to get used to them and some of them are hidden. So down here, we can step over. This is just go straight down the file line by line. Don't go into other code that that file is calling. And that can be kind of non-obvious. Even things like properties to be able to pass them to a function that you actually care about might step into that code. So you might want to just step over things in this case. So step over, just go down, straight down. Step into, we'll get, see, there's any code being called as part of that line, go into that. If a function's being called, go in there. If you're accessing a property, go into the property. This will go into your code, but it will also go into the built-ins. It will go into third-party libraries and so on. Sometimes you want that. Usually, I would say you don't. Usually, you're trying to understand your program, not somebody's library. So in that case, hit the more obvious blue one that says step into my code. And once you've gone into some code, you're like, ah, this part, I don't need to see any more about it. Let's go back to equivalent of, if I had done step over, you can hit this and it'll step up one level. Right below all these arrows that point in at it is what's called the call stack. So you can see that we've got the module program, then ran main, then ran the game loop on line 58. So you can also jump up and down in the call stack that way. You can evaluate an expression, as we saw. Is the hero's level greater than the attacking creature's level? And if you're just like, I messed something up. Let's try again. You can hit this start over. You know, maybe you missed a break point or you went too far or something. Click start over here. And if you are on a break point and you want to keep going, then you hit this resume. So the difference is start over restarts the program while resume just continues. Usually you want resume, but sometimes start over works. And here are the hidden magic ones. If you hit the triple dot, you can see we have Force Step Over, Force Step Into, Smart Step Into, Run to Cursor. This one is really useful for me. I'm like, I don't really want to set a break point, but I just run through all that stuff and get to here. So I'll put the cursor somewhere below and say run to cursor. You see all these have hotkeys. You can say show the execution point. So if you're paused somewhere and you've sort of moved around a lot, you're like, where in the heck am I? Show the execution point will take you to where it's paused. And you can evaluate an expression kind of like in the bottom, but just in a pop-up calculator looking thing. So there you go. That's what this little dashboard of debugging widgets means. And it takes a little getting used to if you're new to it, but it's super powerful.
|
|
|
transcript
|
3:56 |
Let's talk about breakpoints. You've seen breakpoints. They're easy. You click on this point. Then if the code hits there, it stops. Duh, what do we need to talk about? No, there's actually a whole lot more, and it's really interesting. Let's suppose we're trying to solve a problem here, that when we try to attack a creature, if the creature is a higher level than us, there's one path that's taken, and if it's lower, there's maybe not a problem. We think the bug only appears when the creature is a higher level than the hero. What do you do? We already saw that we can put a watch expression down in the debugger, and you could go through it and go through it and look at that expression, and when it switches to true, you're like, ""Yes, all right, now let's step into. That's like level one of debugging. We can do better. Check this out. If we right-click on the breakpoint, see it says right-click to edit? Yeah, we're going to edit. So we can do all sorts of cool stuff. We can disable it so it's not completely gone, but for right now, I just don't want to see it. Like, let's just skip over that for now, but I need to remember that it may be here. Do you want to just stop this thread, or do you want to stop all threads? This, though, is what I was hinting at is this condition. Watch this. What if we say, look at this, autocomplete. We'll hope we say hero.level is less than or equal to active creature, AC, dot level. Done. Notice, now it has a little question mark on it. That means it's not a regular breakpoint, but it's conditional. It's asking a question before it does the breakpoint. Let's run. So now, we'll go up here and we'll see, what are we? We're Gandalf level 75, which you can see up here, right there in line 48. And we're going to say attack, but this is a toad, no, a tiger, of level 12. We are stronger than it, and I don't want this, I don't want to do a debug session. I just want to enter the input that the app needs me to enter. Oh, come here. There we go. So I'm going to say attack, but it's not the breakpoint situation. So it should just run. Ooh, we handily triumphed over the tiger. And we're going to attack the frog, dragon of level 50. The dragon is tough. It has a lot of extra powers, even though it's level is not that high. Here we go. This is the one that should hit the breakpoint. We have an evil wizard of level 1000. And when we try to attack it, our breakpoint will consider whether it should break. And the hero level of 75 is way less than 1000. So that should be true. This should be the first time we hit the breakpoint. Attack. Boom. How awesome is that? This is so good. Have you ever written code like this? I'll tell you, I've written it all the time. I'll say, okay, I'm trying to solve this problem. All right. Print. Hero.level. Print. ActiveCreature.level. If Hero.level is less than ActiveCreature.level. X equals one. And then I'll put a breakpoint here just for like some meaningless statement, just so like I can say, all right, now in this particular case, this is the kind of case that I'm trying to catch. And I don't want to have to keep stepping through. There's like a thousand cases through here that are fine. And there's the one or two that are broken. Ah, so you write code like this. None of that is necessary. You'll see. No, no, well, let's, let's, let's take it apart by two things. This is not necessary because this conditional breakpoint does that thing. All right. So super cool. We can come in here and we can just pause for exactly the case that we want. Okay. That's pretty awesome, isn't it?
|
|
|
transcript
|
4:55 |
Okay, so we're doing pretty well here. We've got our conditional breakpoint working here. Let me just add another one in case where we actually lose. We just want a regular breakpoint to figure out what happens when we lose. And we might have these in other parts of our program as well. I could have one. I don't really necessarily want to set one, so we've got to deal with it. But, you know, we could have them in other files. We can manage them kind of like we were like right-clicking here. If we go over here to run view breakpoints, then we can see all of them. Here we have stop on any error. And these are the two we wrote. But look, we can go, for example, this one. We can even see the condition that's set for over there. We can disable it. Look at this. Remove it once hit. That's pretty cool. There's a bunch of interesting things that we can do here. So you can go to this view breakpoints. That's pretty excellent. But the thing I wanted to solve is kind of this print statement. Let's make this print statement a little bit nicer. I'll do it in sort of inline. But let's suppose it said, the hero is about to attack a creature of this level or something along those lines, right? So instead of having those print statements, we can also go and edit this breakpoint. Or let's see. Let's just put it right here. Right after the command was entered. So we can do it as two separate things. Notice looks the same. Looks like we've done all we can do, except there's more. And it pops open that same dialog I just showed you. So we can have a condition. We already dealt with that. But remember, we have to say, like, oh, we're going to do the print statements to figure out what's going on. Look at this. Log when a breakpoint is hit. Okay. Well, what do you want to log? I'm going to say, let's do an f string. An f string. We're going to say chosen command. All right. Look at that autocomplete for all the relevant variables at the point. Against active creature. All right. Let's see if this works. So now, when I run this, it comes up and it says, actually, I can't run it. We've got to debug it. So now we'll turn off this sort of type into Python thing and let us just use our app. Okay. So we can come in here. We can say, what do you want to do? I want to know a dragon. We're going to run away because we've never defeated the dragon. We know how tough they are. So we're hitting this flat breakpoint here. Let's go and make a change to it real quick because we don't want it to stop. We just want it to print. So let it go again. Now notice this right here. How awesome that our player has chosen R against creature dragon of level 50. And then it runs away. Now we could go and we could attack the creature here. And look, no pause. And by the way, yellow, because it's not a suspending breakpoint. When we attacked the toad of level one, well, that was fine. Our player has chosen command A against creature, toad, and so on. So this one right here is sort of the debugging print statements. So you just get that history mixed in of what was going on. And this one only stops on the exact case that we're looking for. When the hero is weaker than the creature, it's attacking. Not all the cases. You see how we can take these and adapt them to really solve problems that are pretty advanced. Allows us to not just press next, next, next, next, next, next in the debugger. But you can set it up just the way that you need if you know the case you're looking for. In this yellow one, this allows us to not put a bunch of print debug statements where you end up changing your code. Maybe it gets into version control and looks like a diff when it's not really important. But also, I don't know if this ever happened to you. It has me. One of those print statements sneaks into production. And then your log is filled with a bunch of useless stuff. You're like, wow, why is this log so full of, oh, it was that debugging thing. Yeah. So you can avoid messing with the code at all, but still get the effect of putting print statements in it using there. And if you don't want the print statement anymore, you can just go run your breakpoints and just disable it. Now it's a little hollow thing there. All right, we run it again. Debug it again. Turn off the terminal thing. Do something. Oh, apparently the wizard was defeated. But we should not have any print statements. And we don't. Super cool. So hopefully this shows you a little bit of what's possible with breakpoints. And really digging into taking full advantage of them, not just stop, start.
|
|
|
transcript
|
1:21 |
Quick concept review for conditional breakpoints. Breakpoints don't have to just be stop or start. You can set a condition here. In this case, when the command is run away, then we want to stop. But for any other command, just pretend the breakpoint's not there. Don't stop, just keep going. We can view all the details about all the breakpoints by pulling up the breakpoints window. And when you select them, you can go and set the condition. You can do logging, all these different things. They look different. They don't just have the red circle. In this case, a conditional one has a question mark, like it's unsure if it's going to stop. It's going to ask the question of the data when it runs. Looks like that right there. We can also do logging instead of stopping. These are kind of like the print statements that you would normally put in for debugging. You can put those into breakpoints if you want. And notice in this one, I'm using the Colorama library to actually give the print statement a special color, so it stands out from regular inputs as well, which is fun, right? When we run it, you can see real clearly where those debugger log statements pop out into the code. So I actually recommend using something like Colorama or Rich or one of these libraries.
|
|
|
transcript
|
0:24 |
Here we are at the end of the chapter again, and it is your turn. So you get to go and play with the debugger and try a bunch of these ideas, some advanced breakpoints, some logging breakpoints, altering the flow of your code in the debugger, all those kinds of things. So be sure to check out the Your Turn and the course repo.
|
|
|
|
20:59 |
|
|
transcript
|
1:08 |
Source control is for everyone. Even if you work entirely by yourself on a hobby project, you should probably have a GitHub repository or some other repository to store your code, and you should be checking it into there. Because source control equals freedom. If you have your stuff saved in source control, you can go crazy with it. You can try wild refactorings. You can try to change out the database or completely change things around. And if you don't like it, you push a button and it just goes right back. Of course, if you work in a team, it's not just something you should have, it's something you must have. That's how we collaborate these days using software and source code and all those things. PyCharm is awesome for source control. It's totally integrated. It's completely seamless. And it's really easy to use. So we're going to look at all the different ways in which source control appears in projects, in files, in the editor, things like that in this chapter.
|
|
|
transcript
|
1:11 |
PyCharm supports a wide variety of source control systems. It used to be, actually, there were a bunch of different kinds. People would talk about using Subversion or CVS or Perforce or all those kinds of things. SourceSafe. Remember SourceSafe? Well, PyCharm supports a bunch of them. By far, the most important one today is Git. Git has really taken over the world. It's not the only one people use, but I guess it's well into 90% of what people are using for their projects. So the Git support in PyCharm is, of course, amazing, but it also supports Subversion, Mercurial, Perforce, CVS, and probably others that I'm not even listing here that I didn't even think the check of it supported. So it supports a bunch of different source control systems, but most importantly, its Git support is really, really good. It even has special extended support for GitHub, which is awesome because there's a bunch of cool source control adjacent type of behaviors that are really, really powerful over there, like pull requests and forks and so on. You'll see support for them as well.
|
|
|
transcript
|
2:35 |
PyCharm understands the type of source control system that its active project is open under, and it will automatically detect that. In this case, this project comes from GitHub and is a Git-based source control system. So you can see we have this Git menu at the top. And here is the place that probably has the most comprehensive gathering of all the behaviors you can do for source control. But it's not just through this dialog, of course, or this menu drop-down. It's throughout PyCharm. I'll show you all the different places you can do cool stuff with source control. But you can obviously do branch-like things, commit, push, pull, fetch, merge, rebase, play with the branches, tag them. You can also look at the Git log for history, see uncommitted changes, work with patches, current file behaviors. Also, like I pointed out, there's GitHub here. So because this came from GitHub and not just some other Git server, we can do things like open our web browser to the root of the GitHub repository that has to do with this project. By the way, this is my FastAPI Chameleon open source project that allows you just the Chameleon template very easily with FastAPI using decorators. You can check it out if you want. It doesn't really matter other than it's on GitHub and it's managed by Git. We can also do things like sync forks, view or create pull requests, and so on. So a lot of cool features here. The other place you'll see a lot of the behaviors are this thing up here at the top says main. It says main because we currently have the main branch checked out. So whatever the name of the branch is will show up here. So you can quickly look and see what branch you're on. In case you're working on a feature branch, you want to make sure you're over there, not on the main production and messing things up, something like that. So you hit this, you get the drop down. You can search for other branches and actions, but there's a few that are highlighted here, made most obvious here. Update project, like do a pull. Commit the changes to your local Git repository without syncing or merging them with the remote. And if you do want to merge them to the remote, you do a push. You can also get a new branch or tag a current branch or check it out. And you have a list of recent branches. These are the ones we've recently worked with here on this machine. Then we have local. These are all the checked out ones locally. And then remote. Those are the ones that are on GitHub that we may or may not have checked out. So you can really explore all the branch details here. But most importantly probably is you can just look up and see what branch are you on.
|
|
|
transcript
|
3:09 |
As you think about the life cycle of your app, one of the things I try to do all the time, even if I'm working on a project by myself, is when I open it, I always do a git pull or in the nomenclature of PyCharm, an update project. The reason is I've got two Mac minis and I've got a MacBook Air and I do work on all of them. It really drives me crazy. I'll do work on one and then I'll go work on the other. Like, oh, I forgot to pull that in and I messed with the same file. I'm probably going to get some merge conflict. So you can do that easily by hitting Command T or Control T when you open up the project. The very first time it will ask you, how do you like to have your project updated? Do you want to do a merge when the changes come in or do you want to rebase on top of those changes? The default is merge. Pick one of these, whatever makes sense for you, and then click don't show again and it won't bother you. Okay, so this way it'll just let you hit the hotkey, Command T or whatever, and you'll just get updates. Now, when you've made some changes and you're ready to push them back, there's some really cool UI here as well. So you can see there's three files that are changed. They're on the left. I can uncheck some of them to commit only some, maybe the miscellaneous.xml file. I don't want to commit that in the same commit. Who knows? So I could uncheck it, right? And then I can go and write the commit message in the bottom. And if you have the AI assistant subscription, you can push a button and say, AI, write my commit message. It does a really good job, actually. And if you double-click one of these, it'll show you the get, the diff details that it's going to commit to get. So for example, apparently on line 23, we've removed the redundant or not useful F string. So there was an F string, but there was no variables being used. So we took that away. And we added this check for the template object. The specified template folder doesn't exist check. All right. So there's a little bit more checking going on here. So we can see those changes. And there's a checkbox on my version. See on line 23 and 26, I can commit only parts of the file. If I made two changes to the same file, and I'm like, well, this really should be categorized as this. The other should be categorized as that. I can actually uncheck part of it, commit some of the changes, come back again and check the new ones or the omitted ones on and commit them again. There is a ton of flexibility here. You also can edit in this thing and make some changes in your version as well with kind of editor support and so on. So really, really cool. the ability to explore what you're going to commit and select what you're going to commit or skip for a particular commit. Finally, at the bottom, you can hit commit,
|
|
|
transcript
|
5:49 |
So you know that big dropdown that said Git that had all of those features? I almost never use it. Almost never. I would say probably the only thing that I do over there is I'll actually use it to get back to the GitHub repository. For some reason, it's a hassle to pull up that URL. But I do get stuff, source control stuff, all day, almost every day. So how is that? Well, that's because most of the features you need day to day are built into where you're already working in an ambient way. So we see at least four things happening here on the screen that talk about the state of source control. Over here in our project file explorer, we can see that there are some files that have colors. There are four different colors here. There's white, gray, let's call it white, but it's probably off-white. That means those files are committed to source control, not ignored, and that they are unchanged. Then we have blue. Blue means this file previously has been committed to source control, but something about it has changed. We have red. That means this file exists here, but is not committed to get at all. It's not ignored, but it's not committed either. So it's kind of in the state of it's new. What do you want to do with it? And the green means new, but added to get. So as in git add utils.py type of command. So it has been added, whereas the settings.json has been created, but get doesn't know anything about it. It just knows it's in that folder. I guess there's one other color here that is not in my box, but is like golden. See build and dist. Those are ignored by the git ignore. That's why they got this golden color. And the venv is also ignored by the git ignore, but it has a golden band on it because it's excluded in the mark directory as as well. It doesn't exactly have to do with source control, but if something's excluded, then it won't show up as a file to be added. I'm pretty sure. So a lot of stuff you can tell right there. I don't need to go and get a listing of files that how they might have been changed because I can just look there and see them on big projects. You know, the folders could be collapsible. You just go to the commit thing on the left, just right below the folder, that little arrow with a circle in it or line with a circle. Other places we can see things here are up there. The same thing about the colors in the project explorer apply here. So engine previously committed something about it's changed settings. It's brand new. Git doesn't know about it. Utils is brand new, but it's already been git added to the project. Right above that, we have the main, which you've the main branching drop down thing. We're not going to talk about it again, but it's up there for you to see. And finally, here there's three things that happened and we're in the engine file. There's three things that happened in engine that you can actually see line by line what's happened. The colors mean basically the same thing. So line 21 to 25, I don't know what, but something about them has changed because it's blue in the margin there. And since it's blue, that means this section has changed. The part that says this appears green since it's new, this comment, that's new. That's new. Line 28 and 29 is completely new. I just added that comment out of the blue. So that's green, whereas the previous lines were changed. And then between 18 and 19, there's like a little gray blob. Something was deleted there. There used to be more content there and it got deleted. So it's kind of the same color as unchanged and the rest, which is annoying. I don't know. I'd like a different color, but whatever. You can see over there in that section, something has been removed. So you can see why you don't need those tools that frequently. As you work with the files, it's like over and over incredibly obvious what's happening in the files. And then you can use that little Git commit dialog or source control commit dialog, the second icon on the left there. Now it goes further. That part that's changed here, this blue part that we talked about. If you click the blue line, the thing on the left, that actual blue line, you get this little pop-up here. You can see up arrow, down arrow, revert arrow, diff arrow. So you can click on that and you see actually below it. It's really hard to tell from the UI here being static, but as you use it, it's pretty obvious. The part that says message equals F, the template folder, that is the old version and the new version is shown above. So you can see actually the F, remember that redundant F string because it wasn't used. It's even highlighting the character. It says this F is how it changed. And you can see like a little thin line above on line 21. And then in the drop down, you can see the F is highlighted. So you can actually see what's changed there. You can do a bigger diff and copy the changes. And you can even hit the little arrow that goes like that to just say revert to what we had in source control before for this section 21 to 25. Super, super cool. So you click here. This little thing pops up and shows you kind of an inline diff for that section. You navigate the diffs this way. If there's multiple diffs, you can go up and down with those. You roll back. You can open them into the full size diff window and copy the original.
|
|
|
transcript
|
1:47 |
Let's talk about branch operations real quick in a little bit more depth. Basically, merging and comparing and so on. This actually took me a little bit when I first started with PyCharm to figure out where it was. So let's suppose here that I have the main branch checked out, which you can see from this top little drop-down name. And I've already done some work in both PT and HTML extensions. These are the extensions that are common for chameleon template types. If I want to take the changes from both PT and then merge it into my local working copy, I go to the recent branch, I find the branch in the drop-down, wherever it happens to be, and then I expand it out and I say merge that branch into my active branch. So here's how you do merges in PyCharm. You open up the branch you want to merge into, then you go find the one you want to merge from, and you choose merge that thing into your current working branch. Then those merges come in as pending changes or potentially unpushed changes, but they could be applied to your system. It depends on if there's any conflicts or things like that. So then you go to this little section up here where it's the line with the circle in it, and you can see all the changes that have resulted here, or you can hit the push, command shift K or control shift K, and it'll pull up the push dialog or even just do it here. And it'll show you all the changes that have been merged in that will then be pushed up to the remote whenever you push them to the origin. That's how you do merging in PyCharm.
|
|
|
transcript
|
2:03 |
What's your Git philosophy? Are you every little change gets checked into Git? Or do you like to do tons of work? And when it's finally ready, a carefully crafted commit, representing days worth of work, gets pushed into Git and stored there. Well, me, I'm the let commit as if we're hitting the save button, basically. But I know other people like to wait longer. Regardless of how you work, there might be times when you've made changes that you didn't save to source control. Maybe you're unsure if you want to save it or not. You've been fooling around with it and then something happens. You delete that section or you've moved past what you worked on. I wish I could get back to the way it was. You're in luck because PyCharm has an awesome feature called local history. Consider it like a hidden second layer of source control. So here's the deal. Periodically, all the files that you work on get saved, kind of like they're going into source control. And you can go in and you can open up what's called local history. And then you can see all of the changes. The first one says modify engine.py. Another one's create Python script utils, creating this particular file. And you can actually go back in time and it will show you how all the files in your project have changed over time. And look at how frequently this is happening. We have it at 738 a.m., 738 a.m., 738 a.m., 739 a.m., 740 a.m., 741, 743. Frequently changes. Even my obsessive checking in to get doesn't go that quickly. It doesn't go that quickly. So this is really awesome. It's like a super fine-grained history of all of your changes. So if you ever thought, oh, no, I didn't check that into source control, but I need to roll it back. Check out your local history. It's super cool. It'll definitely save you.
|
|
|
transcript
|
2:45 |
Let's close this chapter out by talking about some of the GitHub specific features. In order to work with GitHub from a commit perspective for public repositories or even a checkout perspective from private ones, you're going to need to log in and tell PyCharm about your GitHub account. So you can go to your settings here, version control, GitHub, and then you can hit the little plus to add your account. And basically it opens up a web browser and uses OAuth to somehow tie you back to PyCharm here. And then it remembers your account and uses the OAuth token. So once you've done that, anything you do in Git will be associated with your account. So it knows what credentials to use for a commit or if you create a pull request, who to associate that with and so on. Speaking of pull requests, here we are in the FastAPI Chameleon project. And I don't think there are any open pull requests at the moment, but there were a bunch of closed ones. So you can see that I've checked the closed pull request feature here, because if you just pull it up, I think it's open, it's empty. So there's not much to see. But here, if you look at the closed ones, you'll see some historical ones. For example, this guy, Patrick Kissek, said he wanted to add more generic error reporting behaviors. So wrote a nice message, created a pull request, and committed it. And then he asked for a review from me. So then I went and checked it out and then approved it and merged it. But what you can do here is you can actually go and say, I want to check out this pull request. You don't have to go to their fork, check that out, switch to their branch that they were working on and have a look at it. You can just go, show me the pull request, let me get that code, and try to run the test locally, or try to exercise the code that they've written, or just see what the heck happens. So really, really cool feature here if you do a lot of pull requests and you want to review them quick and easy on your machine. Final thing is you can quickly create a GitHub gist. If you're not familiar with the GitHub gist, it's just kind of a snapshot of code that you can then share and have a conversation about. Like if you say, hey, I want to show you how to check if a function that's passed in is actually callable or something like that. You can highlight those four lines of code and then go and say create gist. And it'll go and create it on GitHub under the account you've already associated. And I don't think I show it in the graphics here, but when you hit create gist, it says do you want it to be public or private? So you get a chance to decide how you want to share your gist. Is it a public one or a private one? And then it'll take you to it in the web browser.
|
|
|
transcript
|
0:32 |
Well, that's it for our source control coverage. It's your turn. So like usual, you're probably getting to be pretty good at this. Jump over to the GitHub repository and check out the your turn for source control. You get to play with Git. You get to play with local history. And instead of having you actually create GitHub accounts and so on, it just creates a local Git repository using Git init. And then you can mess around with it without worrying about services and permissions and all that kind of stuff. So go do this your turn and have a good time.
|
|
|
|
18:25 |
|
|
transcript
|
1:59 |
Refactoring, what an exciting topic. I'm really thrilled to be covering this one with you. Why is it so exciting to me? Well, the idea of refactoring is about taking existing code and making it better without actually changing its behavior very much. And to me, that's a really cool idea. Like we've written this thing, but let's work on it to make it better, nicer, more extendable, easier to maintain. The other reason I'm really excited about it is I see so many people get frozen in what I call analysis paralysis. They're like, I got to start this project, but it's a little bit bigger and it's really important that we get it just right because it's going to be a foundational product or it's going to be a complex app that has to be long lived. So we really got to think it through. We can't just start writing code like a crazy person. No, this is important. We're going to plan and plan and plan. And do you know what happens? They come up with a plan after a long time. They finally get started. And what it turns out is not actually really that the plan and the plan wasn't that great in the first place. What is better? What is better than analysis paralysis? Doing a little bit of planning, thinking a bit about the project and just starting, just take action. Get started. And what happens if it goes wrong? You change it. How do you change it? You refactor your code. And that doesn't just mean rewriting. That doesn't mean just hacking away on it. You'll see the tools in PyCharm very specifically change our code in well-known, well-structured, and safe ways. So we can say, I need to make this change. And instead of just going and rewriting the code and hoping it works, we'll use PyCharm, what understands all the different linked together pieces to make that change. It's a really empowering technology, and PyCharm is really good at it. So I'm excited to talk about it with you. And let's get started.
|
|
|
transcript
|
1:24 |
Before we get started writing code and actually using PyCharm to do refactoring, I want to nail down two core concepts, two core ideas. First, a definition of refactoring. Some of you may know this like old hat, but I think a lot of people perceive the concept of refactoring as just change. We're going to refactor the code to have this new feature. We're going to refactor the code to do some other thing, use a different database. I'm not sure that's really refactoring. It's maybe the second, certainly not the first where we're adding a feature. Refactoring has a very specific meaning, very specific definition. So let me read that to you. Refactoring is the process of restructuring existing computer code, changing the factoring without changing its external behavior. Typically, refactoring applies a series of standardized basic micro refactorings, each of which is usually a tiny change in the source code that either preserves the behavior of the software, or at least does not modify its conformance to functional requirements. Improving, changing, but not changing the behavior, changing the structure. Maybe you make it easier to add a plugin system and move some of the functionality into that plugin system, but you're not actually changing the functionality. You're not necessarily adding new plugins in this refactoring stage. You're just making plugins possible, for example.
|
|
|
transcript
|
3:32 |
The second thing I want to talk about before we dive in is code smells. It's a fascinating idea. It's really, really wonderful. I believe it originates from Martin Fowler, who was also one of the founders of this refactoring concept in the late 90s. And what is a code smell? A code smell talks about code that maybe needs to be refactored. And it's a really cool idea because the code works. It's not that it doesn't run. It doesn't do the feature or the thing that it's supposed to do. But when you look at it, you're just like, your nose just curls up. You're like, whoa, that's bad. Who wrote this? This is bad. But it works. So if you apply refactoring to it to make it nicer internally without changing its functionality, it'll still work. But you'll smile when you look at it. You won't brown or hold your nose metaphorically. So what is this idea of a code smell? So a code smell is a surface indication that usually corresponds to a deeper problem in the system. So some of the common ones, you can see them all on Wikipedia here at this link. But the common ones, duplicate code. You don't find a great way to reuse a piece of code. So you copy, copy, copy, copy, copy, and you end up with five copies, which become hard to maintain. If you need to make a change, you got to remember the five places. Surely one will get forgotten. It's a problem. A large class or a large function, kind of the same category of problems. It's taking on too many responsibilities. If a function is a thousand lines long, it's probably doing too many things. At a minimum, it should be broken up into smaller pieces to make it more understandable. Not too small. Don't go crazy, but smaller. Lazy class, a class that doesn't do anything, right? It's like, why does this even exist? Do we really need this extra symbol in our code? Or too many parameters? You got a function that takes 20 parameters and maybe a star args and a star star kw args for a good measure on top of it, right? Those are hard. Let me throw out one final idea or thought here. If a code smell is something that makes you go, ugh, this is bad when you look at it. Like, eh, this is not right. Then code comments can often be seen as deodorant for code smells. Let me elaborate. So you've got some nasty method or some really badly, poorly written thing. And you're like, oh, this is bad. I know I wrote it. I still know it's bad. So I'm going to put a comment here to explain. You see, I know it's bad, but here's the complexity and here's the problem and here's how it got to be so bad. And so here's how you understand it. And here's really why it is the way it is and so on. And that's trying to paper over or put a better scent over top of this nasty code smell. Like, look, I know it's bad, but the reason it's like this, so you understand it won't feel so bad when you understand the details. If you find yourself writing code, writing code comments to cover up one of these smells, stop for a minute and think, should I add this comment or should I refactor the code so it doesn't need a comment to explain it? It doesn't need a comment to apologize for it. Maybe it could just be nice code. That's very, it's so legible with good names, well factored that people can just read it. They don't need a comment to explain why it sucks. So not all comments are bad, but code comments can often be seen as deodorant for code smells. And they're another indicator. You should probably apply some of the tools we're talking about in this chapter.
|
|
|
transcript
|
2:36 |
PyCharm comes with many well-known refactorings. If you go back to the original refactoring book by Martin Fowler, he'll talk about a bunch of refactorings, and here are the 10 mechanical steps that you take to do a move method or whatever it is you're doing. We don't have to do any of that stuff because our tools have automated that for us. We just have to know when and how to use the tools. Maybe understanding is good, but we don't have to do it by hand. So if you just hit the refactoring method, the refactoring menu, you see the drop-down here, you can see the jumping-off point is called refactor this. And so Control-T, let's just stop there. That's all you need to know. You highlight something, Control-T, and then it'll apply. It'll do a little context menu for the rest of these things. But just so you know what's available, we have rename. Rename is really awesome. Come up with a name for a function. You realize, oh, it's not a good name or I have to have something too similar, so maybe I'll make the name a little more specific or descriptive. So you can rename it. You can change the signature of a function. You can extract or introduce things. You can create variables out of inline expressions. You can create a constant out of a magic number or value. You can create a field in a class, a parameter in a method. You can create a method out of a block of code. And you can create a super class out of a base class. You can also inline things, which is kind of the opposite of extract. I've created a separate variable, but we'll just put it back into the expression. I've created a method. We'll just put that code back here inline and so on. You can move and copy files. You can safe delete. You can say, I think this code is dead, but let me delete it in a way that will check that it's not being used somewhere. That's really handy. You can pull members up and down in terms of classes. Like there's a function. I want it in the base class instead of this derived class. So it can be shared by other derived classes and so on. Invert Boolean. This one is awesome for creating what are called guarding clauses. If you have a, if this, if this, if this, if this finally do the thing. And it's like starts on column 50, that's a problem. You can invert those and make it much more straight up and down. You don't have to like think about the depth of all those things and create guarding clauses using this invert Boolean, which is great. You can convert to a package or the inverse convert to a module. And you can even create a Jupyter notebook, which is an interesting new refactoring. One that Martin Fowler tell you never had in mind when he originally came up with the idea. So this is the suite of refactorings that we have to work with in PyCharm.
|
|
|
transcript
|
8:21 |
Let's jump back here and play with this project, this wizard game that we were just playing with. It's got some interesting things. I'm going to take away the breakpoints just because I don't really need them. We're not going to debug things. So here we have our game loop and you saw that we collapsed it down into these various little pieces like this one and maybe we want this bit to be one bit of code. This could be and there's not a whole lot going on there. This could be a function I suppose. This could be expanded. So one thing we could do is we could turn those into functions. So let's try to do that first and see what we can get. We can right click and say refactor and here's that list here that we talked about a minute ago or we can hit ctrl t as I recommend and hey guess what it's still the same here and you can type. It's not obvious you can type here but you can type so I could just start typing method or it shows you could do alt command m I would imagine alt ctrl m on the others. Let's make a method here. I'll call this do attack and notice it's showing that all these variables are being passed over the creatures, active creature and hero because apparently it interacts with all those and there's no return value. So we hit that and then downward here somewhere we now have this new do attack and let's go and let's do that for the other pieces. I know there's really not much here but this will just just for parody we'll put this here in case we want to expand it later. We'll say method do run away and then this one as well. What do we want to do? This will be do list look I believe this one as well. All right and then this one we can just do getting these ones that just do prints I don't know but I kind of want the parody of I just look at this and I see that there are four actions based on this and in fact this now opens us up to potentially interesting new ways where we could kind of maybe do a dictionary thing right. A dictionary has this function that this key has this function we're going to call and so on. But this looks a little more legible now we can come down here and see what's going on okay. Do goodbye easy do look around and you can see over here that it's starting to look pretty nice let's see. Also we have a format statement those are fun but f-strings the way these days so let's f-string away that that's not technically a refactoring under the refactoring menu but I would say that that is absolutely a refactoring as is this right here right same deal convert to f-string right so there's a little more refactoring for us let's say. Excellent right we can see that our code is a little bit cleaner remember it just had one huge game loop and now let's say it's a little bit nicer maybe we want to add some more prepare to add more functionality like maybe these creatures we want to be able to read this out of a game json file and parse it so we could have another method here create creatures or characters or something like that and notice it has the return value no parameters and then down here we have this so over here it's time to use another refactoring like we're creating this and then we're returning it do we really need to inspect it or see it separately or anything probably not so what we can say is we can inline this variable so let's say here we can go and I'll just type inline it says what do you want to inline inline the variable so instead of having the variable we can just straight return it like this not a huge improvement but I would call that an improvement a little cleaner right okay another refactoring that we can do is I added a little bit of behavior here that before the wizard looks around we can express are they happy are they apprehensive just give a little bit of a mood to it right and let me put this into a list here like that so right now we have these two choices what if we want to make it possible to pass in arguments here for the emotion so we could go to this and say introduce parameter and up here we'll just say emotions notice the refactor rename built into it as well and now we're passing these in it's a little concerning that it's mutable but we could change this to a tuple because it doesn't really matter what it is and then we get those spelling is hard now I could change it here and here or I could just say rename you've misspelled it emotions no not like that emotions there we go perfect so now if I run it you'll see if I look around the wizard looks around the wizard is apprehensive and off looks around but now we've refactored it in a way that we can pass in these variables from the outside again extending the behavior without actually changing it let's let's change one more thing here okay so let's go over here when a hero attacks now in the when the wizard attacks it's going to do a get a defensive role and the creature being attacked does a get defensive role so if we jump to that definition notice right here that it's actually using like 12 1 to 12 options times the level this is kind of let's say it's like a 12 sided die okay so what I can do is I can do introduce I could actually introduce a constant and say call this dice sides or something like that and look up at the top we have a DICE_SIDES when it's all caps in python the convention is that it's a constant but it's not really a constant but what I can do is I can add the type typing dot final so let me take this away for a second just show you if I go down here and I say equals seven oh yeah that's not really an error we'll just print DICE_SIDES just to show that hey it's being used you know what I mean but if I go over here and say that this is typing dot a final all right there we go now check it out it says hey this is a constant you can't reassign it well we are reassigning because python can't stop us but at least it's now a warning okay so PyCharm team would love it love it love it if when we said constant you would add that so it's enforced at least by the type checkers but nonetheless it's still even without it's cool it said hey it's down here we'll make it a constant of the module and you can add that bit on yourself there you have it a lot of things we can do we let's say we have a method here that's unique to the small animal def small things it's very important and we could push this down refactor push members down by down i mean up and we could put that into the creature class and there was a more interesting hierarchy it would be there so we do that this is now gone from here but it's now appeared over into the creature making it available to the broader object hierarchy so we've got those o things honestly i don't think i've ever used that productively but the others i use all the time one final one just to show here is we can rename obviously i'll just say level like that if you wish okay amazing amazing i encourage you to take advantage of PyCharm's refactoring features they will help you with analysis paralysis they will help you build code that is lacking or has way way fewer code smells across the board it's good stuff make sure you use it
|
|
|
transcript
|
0:33 |
Well, now it's your turn to write some code and more importantly refactor some code. So see the URL at the bottom, jump into this your turn and you're going to be fixing bad code, fixing code smells, all these different things. So just go wild, have a lot of fun. You're not going to hurt anything. It's just a demo app, but see what you can get PyCharm to do. There's a lot of features. Some of them we haven't even covered so far in this chapter. They're a little more niche, but they're also fun to play with. So have at it and try it out for yourself and enjoy refactoring.
|
|
|
|
22:59 |
|
|
transcript
|
1:37 |
Hello, data science friends. Let's talk Jupyter Notebooks. Now, I'm a little conflicted here because I have a huge respect for Jupyter Notebooks. I think they're awesome and what they've accomplished in science and in particular in the Python community of bringing people from the outside into Python is incredible. But even today, Jupyter Notebooks are quite limited in how much they help you from a software development perspective. Autocomplete? Eh, probably not. Unless you hit some particular key and then we'll give you like kind of useless autocomplete anyway. Refactoring? No. No refactoring. Built-in source control? No. No source control. What else are we missing? There's a bunch of things going on here that could be better. So what we're going to talk about in this chapter is PyCharm's support for working with Jupyter Notebooks. All of the awesome tools that you can apply for your regular Python code that we've talked about so far and we'll continue to talk about like debugging, breakpoints, refactoring, autocomplete, and much more. All of that kind of stuff will appear in Jupyter Notebooks even though you're still working with IPYNB files. So super exciting chapter if you do anything with Notebooks. And if you don't, it's okay. Feel free to skip it. If you literally could care less about Notebooks, just remember this chapter is here and you can come back. But if you do, I think you're going to love it.
|
|
|
transcript
|
3:46 |
Let's look at the Jupyter Notebook sides of things real quickly before we dive into PyCharm support. As I pointed out in the intro, I kind of wanted to show you the challenges because I know a lot of folks are like, Jupyter is awesome. Why do we need something other than our web browser? Well, there are a ton of advantages as we'll see. And so let's start by seeing the state of the art with Jupyter. Now I've created a new project called ADV Analysis Project. We're going to talk about what the whole project is about shortly. But just know that this is where things are. We have a virtual environment and I've already pip installed Jupyter, Pandas and Matplotlib. All right. So we can just say Jupyter Lab if we want to have the fancy one, or we could just say Jupyter Notebook if we want the more single file focus. Let's do Jupyter Lab. And here we are. We have this one right here. Let's open it up. And it says exploring via notebooks. Now there's a bunch of modules in here. I might want to import them. What if I say, what do we want? Pandas? Huh. Why is this not helping me? Pandas? Let's run it. Oh. Oh, I mistyped it because there's no autocomplete. I can hit tab and it will give me a list here. I guess these are, yeah, I guess these are pretty, pretty relevant here. And so we do want pandas. Great. So I can hit that. And let's do Matplotlib while we're at it. And let's do Matplotlib. I think those are good. We'll probably want to tweak this. Like for the, typically this is as PD. People use PD and data science instead of using the full name. I would venture to propose. I would propose that the reason that these little short names are so common in data science is the tools don't give you very good autocomplete. You can type P and it knows it's pandas. It's one thing. If you have to keep typing out PD, PD, PD, PD, you might want it shorter. Just a thought. Let's rerun that. Okay, great. Everything's here. So I can come down here and print. Okay. There's a function. All right. Great. And let's create a variable. X equals one. And I'll just print. The value of X is, well, is there, there's some stuff here. None of it really applies. But we can say X and then we can print it. Of course, this will not print what you expect because we forgot the F string and so on. Right? So there's just, run it again. Now the value of X is one. If I want to change the value of X and I suppose it's not just used on this one, these two lines next to each other, it's used throughout the notebook. Can we factor, rename it? No, no. It's a great platform and it's good for visualizing stuff. You can see we had a cool little markdown things up here and we got some code and we could easily build some plots. We'll be doing that shortly. But at the same time, it still, for whatever reason, leaves a ton to be desired in terms of support. Right? Do you see what's changed in Git? No. Do you see whether it's even included in Git? Do you get refactoring? Do you get autocomplete? Do you get linting? No, no. And still no. So if we use tools like PyCharm that have all that support, we'll get a similar experience, but we'll get much better tooling to accompany it. Right? Full computer science-y type of stuff like knowing that X and the X below is related and you can work with them as a single entity. Right?
|
|
|
transcript
|
0:53 |
All right, let's try that again, but this time in PyCharm. So to create a new Jupyter Notebook and get started with this type of flow, you just say have some kind of project with a virtual environment, and you just say File New Jupyter Notebook. Off it goes. But Jupyter Notebooks typically process data and visualize things and do cool stuff along those lines. They're answering kind of data questions. So let's focus on a particular question. I don't know, some of you may know, but a lot of you probably don't. I'm really into off-road motorcycle riding, in particular dual-sport adventure riding, that kind of stuff. Here in the Pacific Northwest, we have amazing places not too far from my house. So what we're going to do is we're going to analyze the types of motorcycles that you might ride in some of these environments here. It's going to be a ton of fun.
|
|
|
transcript
|
4:07 |
So down here we have our ADV Analysis Projects. And now you know the ADV stands for Adventure Motorcycles. Let's drop that on here again, File Open Projects. If you're not on a macOS, you can drop files, but not folders on Windows, I believe. All right, so here we have it. It's pulling in a bunch of stuff, we'll let it get sorted. All right, PyCharm has found a bunch of stuff. It's loaded our virtual environment I created. I'm going to exclude this checkpoints thing. I don't think we want to save that either. Now here's that notebook that I created in Jupyter. Check it out. It looks really good. It took just a second to realize, hey, that was a markdown thing, let's render that. But it looks great. So we've got our import pandas as PD, and let's clean this up a little bit here. First of all, look at that. As I type dot, guess what? Magically, it understands our code. Can you believe it? We're going to import matplotlib.pyplot as PLT, because that's the standard, and I put them on separate lines, import pandas as PD. Now, notice also that this is gray. We have code intentions. Code intentions. We also have AI, by the way. But we have code intentions, which will say, these are not used. You can just remove them. That's kind of cool, right? So we want to go ahead and run that and see that Jupyter server is set to auto start. It has not run yet, but let's run it. Start in Jupyter server, and it's just running there. If I want, I can actually click this and open up and see. So we'll kind of leave that hanging around in the background. So the thing is running, but you can see it took 662 milliseconds to basically load up all those modules and get Jupyter and Python started and so on. We can run this not terribly useful thing. But we can, you know, see it's doing its thing there. We probably don't want that. And so the typical hot keys that you would have in Jupyter are fine. So if I'm down here editing this, right? And I want to say, oh, I'd actually like to delete the cell. How do you do that in Jupyter? You hit escape to get out of it. Then you hit D two times. It's out. You want another one below? You hit B. So all of your Jupyter feelings, all your Jupyter intuition still works here. But you get code intentions, autocomplete, et cetera, et cetera. Now here's a bunch of data and CSV format that has to do with typical adventure motorcycles. So what I want to do is I want to load this. How do you go about loading a CSV into a pandas data frame? Well, we'll say data frame equals P D dot something about CVS CSV. Oh, that's right. It's read CSV. What if I type that in Jupyter? Tab. Nothing. Nothing. What if I thought it was load CSV? Nope, nothing. But even, right? It's just, what a hassle. Hopefully I didn't break it. Edit it in two places here. Okay, we're going to say read CSV as one does. And then we're going to say ADV. Look at that. Autocomplete even in the file system. And then let's just put the data frame out as, so we'll do data frame dot head for a second. So here you can see we get a real similar experience, actually a better experience as we'll see momentarily. But even so, much, much, much more supportive, efficient, correct way of writing code. And by correct, I mean, it will tell us if we're doing something wrong. If I put PDD there, it's like, nope, that's wrong. Oh, it's pandas, right? You get all the sort of support that you expect from a professional software development tool, but the same experience as Jupyter. Primo, I love it.
|
|
|
transcript
|
3:05 |
So we can see our data frame here. It got loaded up as df. And I said df.head, but let's go back and just show the whole thing again. And it comes down. It doesn't actually show that much more. It still shows a truncated thing. We can say just show all of them and you can see all 49 rows if you want. But by default, it's kind of like df.head, even if you just show it, but there's a big advantage to showing this. Now in Jupyter, you just get to see the table here, but check this out. If we go here, we can sort it like it's all BMW. W and stuff. Let's sort by model type. So here we have our KTMs because it's 1190 and 1290 and then 390 and so on. And then we have Africa Twin. If we sort in reverse, we get the ones that start with X and then V and then T and so on. We can sort by category. So heavyweight or middleweight, unfortunately it's lightweight, heavyweight, middleweight. And alphabetically, it's kind of weird. We could put a number to let us sort. We could also sort by the engine size. So we've got our zero or electric motorcycle and then we have the smaller lightweight adventure bikes. And then it kind of goes up from there to what, it's kind of ridiculous, but you know, define what you want. Some of these things are really big. Now, so that's cool that this is a sortable sort of thing. So fun. Let's go over here and check this out. Look, we can also graph this. So what do we get? Well, index versus engine size. I mean, I guess that's useful. You can kind of see the different engine sizes as something. Something here. Let's do a little bit better. Let's go over here and say on the X axis, let's say I'm going to add a group and we're going to group by category. That's very cool. And on the Y axis, we're going to have the engine size. Let's say show points as well. There we go. So put that away. And now we've got the heavyweight motorcycles. You can see their engine size. And this is the zero. It's a super heavy motorcycle, but it has no combustion. So it has a zero size. And then we've got the middleweight ones and the lightweight ones. This is really cool, right? And we can actually interact with it and, you know, zoom in, do other different types of things. And if you have the AI assistant, you can click on this and it'll generate a visualization, but it, let's see. Did it put it down here? No, it pretty much came up with the same thing. We were having like, you know what? You're doing fine. Keep going. So this is really nice that we can just go and explore our data frame without actually going, doing plots and all those kinds of things. We can pick different graphs. It's got kind of an Excel feel. So we could come down here and do a plot.show. It's not super psyched about what we have, but right. If we wanted, we could write the code to go and make this happen, but we don't need that with PyCharm. Not necessarily. If you just are exploring, right? If you're going to save it so you can present it, you probably do want to use a proper plotting, let's say with matplotlib or something like that, which we'll do soon.
|
|
|
transcript
|
5:48 |
All right, next, I want to do some more analysis, come up with things like what is the average engine size per category, heavyweight, middleweight, and so on. But first, the name of this is wrong. Let's fix this markdown here. So we'll call it adventure motorcycle segment instead of playing around. So next over here, I want to create, I want to get from our data frame, the average engine size by category. Let's see if I can get AI to do that for us. Look at that. That was quick. And group by category, accept and run. And what do we get? And maybe I want this to be integers, not a floating point. So I'm going to dot as type. That right? Oh, look at that. I got it right. Super cool. So here we've got apparently heavyweight motorcycles while skewed because of the zero, still have pretty big engines. Lightweight is 457 and middleweight is 779. Excellent. Now let's go and make this markdown. And we'll say, we'll visualize our data a bit. We'll come up here and we can get rid of them. Well, that is like a comment, but let's make it markdown. Let's see if we can get AI to create us a matplotlib plot of this data. We'll give it something like this. Please plot the data frame. Oh, here we go. Here we go. All right. It says you want to accept and run it. No. I want to try again. With more information. Tell it to use matplotlib. There we go. Let's accept and run that and see what we get. Well, it looks pretty good. Pretty good. I actually happen to have a little bit better version. I'm going to paste in because there's a lot going on here. But you can see we can use the AI assistant to get partly down the path here. And it'll get better and better. We can ask it more questions if we want. Or if you're super good at matplotlib, you just write it out. Here's a more involved one that I wrote ahead of time. So heavyweight is red. Middleweight is blue. Lightweight is green. We'll get the colors over here. We'll set the color as a new column. Set the figure size. Give it engine CC size for X. And we'll set a scaling factor. Use the color. Set the alpha. Iterate over it. Let's run this. There we go. I think that looks a lot better. We've got our Multistrada 1100. Our BMW GS 1250. What else? We got the Yamaha Tenere. The Tiger 800. KTM Adventure 390. Perfect. And you get a real good sense. We already saw this though kind of in our visualization up here. Remember this? We looked at this. We said group by category. See those? Kind of perceive a little graph. There's come down to this other one. You kind of see the same wavy graph in here. But see those pictures. There's dots. But the great thing is that if we share this with somebody else, if they go over here and they reload it, they'll see actual analysis, right? Because we don't want to assume that they can just go ad hoc explore this, right? We want to create the report that's saved and reproducible. And so there it is. Super, super cool. Let's do one more thing real quick while we're in this notebook and then we'll call it good. So let's visualize engine size by category. Remember our little group thing we did? Where we grouped by category and took the mean? Well, I've got a little bit of code that expands on that using color. And what we're going to create is like a histogram plot. So let's run this. And there you have it. Heavyweight, lightweight, middleweight. And these are the engine sizes, which is just visualizing this bit of data right here. But if this is nice, I think this is nicer. So we can make it a little bit shorter by putting that at four. Potentially make it fit on the screen a little better. There we go. I like that better. So you can see you get pretty much the same Jupyter experience in terms of how you work with the cells and run the code and all the hot keys and so on. But you want to rename these colors? There's your refactor rename. Let's go for it. All the amazing stuff that you could do in PyCharm for regular code. Well, now you can do it for Jupyter code as well. I'm definitely a fan. You can come over here and not this one. That's the wrong button. You hit this button as well to pop you over to open up the Jupyter notebook. In this case, it's the notebook, not lab, but basically same pictures we got going on right here. So really, really nice integration. And you can always fall back to traditional Jupyter notebook style for anything you need.
|
|
|
transcript
|
1:11 |
Let's do one more thing. This is a pretty simple notebook, right? It's not entirely short, but there's not a lot going on here. And for sort of saving stuff, you might even do it like this, where you don't show that big bit. Then it makes it actually quite a bit shorter. So maybe though we have a big one and I want to know, I'd be able to move around it without doing command or control F to find stuff and hunting in that way. So when you are working in PyCharm, it uses the markdown headings. So here you can see we have like heading one, one hash. And here we have heading, let me in, heading two. This is heading three and then so on down here. If you go to this section, the structure and you click it, notice that we've got all of those things and we can jump around the notebook. Super cool. So if you put a little effort into thinking about the structure, the categories, how you describe stuff, it's useful for the people reading, but it also becomes very useful as a navigational table of contents that's automatically generated for you too. That's pretty awesome.
|
|
|
transcript
|
1:34 |
When you're working in your Jupyter notebook, it's usually for exploratory data and you're visualizing things and so on. But there may come a time when you feel like, okay, it's ready. I need to convert this into a real program that I can run on a server without using something like Papermill, but just a straight Python file that I can run. Let's check this out. If we go over to our notebook here and we scroll down, there's either export notebook, which is fun. I can do markdown, HTML, LaTeX, whatever, or convert to Python file. So here we'll just call it ADV notebook.py. Save it right there and we'll open it up. And now you've got more traditional Python file version of it. But notice it still has the concept of running each block. It's using these cell separators, I guess you would call them, type of thing. So we can go run our imports down here. And it opens up in, I believe this is the IPython terminal. So we can run this and we can say things like df.head still down here. And it becomes sort of a terminal CLI type of thing, which is pretty cool. Let's do our group by. Or plot. And then the plots show up here on the right-hand side as these figures in this figure section. So if you'd rather work in even more code focus perspective, you can do it this way as well.
|
|
|
transcript
|
0:58 |
Well, analyzing adventure motorcycles was pretty awesome. Hey, I'm always looking for a reason or an excuse to talk about motorcycling. But you know what else is cool? Space. So in your turn, what you get to do is you're going to take a data set from NASA, the history of meteorites, impacts on the Earth, and records of that, and the size and locations and all those things. And in the end, you're going to draw this picture. This is a picture where the color represents the size of the meteorite. And then the dots on this map here locate where on the map they actually impacted on the globe. I'm sure there's a whole bunch that hit the ocean that nobody knows about, right? But these are the ones we were able to record. So we're going to take this NASA data set and explore it in different ways using the Jupyter capabilities of PyCharm. It's going to be super fun. So be sure to jump over there and do this your turn when you get a chance.
|
|
|
|
42:47 |
|
|
transcript
|
0:39 |
Web apps, how exciting. This is the area that I spend most of my time writing software for is web apps, web APIs, databases, all of those kinds of things. And so over the next few chapters, we're going to dive into PyCharm's support for these. And spoiler, it's really good. Not just Python, but HTML, CSS, JavaScript, TypeScript, etc. So you're going to get a ton out of this if you do build or plan on building web apps at any point.
|
|
|
transcript
|
0:54 |
We talked about this at the very beginning of this course, but maybe you're jumping around or it's just been a while. PyCharm is way more than just Python code. It understands a bunch of different types of projects, and this is on display with web apps more than anywhere else, I would say. So when we think about, say, maybe having a server-side web framework like Flask, the Flask part is done by PyCharm. But down here, we have WebStorm, which is a complete IDE focus primarily on JavaScript and front-end frameworks like React and CSS and all that. And as we saw, PyCharm has all of these things bundled within it in terms of capabilities. So it's both a great front-end and back-end framework or IDE that we can bring together to help us work on our web apps.
|
|
|
transcript
|
0:28 |
Now we're going to talk about building server side projects. So we just go to PyCharm, say new project. And then down here we can choose Django, FastAPI, Flask, Pyramid, or a bunch of other primarily front end projects like Vite or React or Express. For the example I have in mind for us, we're going to do a Flask based web app. It's going to be fun. It'll be simple because we don't have much time to work on it, but it's going to be fun to work on.
|
|
|
transcript
|
5:05 |
All right, here we are back in PyCharm. There's a bunch of options at the top. We want the new project one for this one. There's different ways that we can create new projects. We can just go and create a folder and start writing. That's great if you have just a real simple or from the ground up kind of idea. If you want a little more structure, especially if you're new to this, having a little more structure in place, I think this new project is pretty helpful. So we're going to use that. Now, I don't want to put it here. I want to put this on the desktop and we'll call this podcast collector. Okay, this is going to be a real, real simple app, kind of the Yahoo of podcast or something like that. Now, a couple of things we get to choose here. Now, by default, when you open this up, it probably looks like this. You can expand it out and see that you can choose Jinja templates or no templates. If you want chameleon templates, you can use my open source library for that. But it doesn't show up here, does it? Okay, so it says where are we going to put the templates? This is the template folder, so that would be great. There's no reason to change that. So it's not really much of a reason to mess with those, but just they're down there so you can see with them. Other frameworks like Pyramid and Django may have more options. Pyramid absolutely has more options. So we want to create this project on my desktop for now. And I'll move it into the shared repository for a course. I'm going to use uv because uv is awesome. We're going to absolutely need a virtual environment. Unfortunately, there's no good choice here, right? Like I said, we already talked about this. This is years old as of the latest option. I don't know why it won't give us the new option. If PyCharm offers you the latest version, just pick it here. You're good to go. But we're going to need to account for this. Just, you know, let's pick the least bad option for now. Actually, I'm going to pick the one that's downloaded so it doesn't download more stuff. So here we go. We're going to go and create this. We don't need a git repository because I'm going to put it into a larger one in a minute. All right, so let's see. We don't need to run ruff. Thank you. So over here, we've got a virtual environment. And we can go and see what version it is by saying Python-V. And it's 3.9. We'll address that in a minute. But it's already created the basic layout for our page here. It's got kind of the starter project for Flask. It also has support for static files and support for Jinja templates. So we've got a main, which we can just, I don't really know why this is here. I guess it's a little support thing. But what we care about is that. I'm actually going to delete the main because we don't care about that. Now in the pyproject.toml, you can see that we have requirements for Flask and Jinja. And it's using the uv project style. So if we need to add a dependency, like let's suppose we need HTTPX for calling APIs. So we would say uv add HTTPX. And it will add this, put it into the lock file, install it, and so on. So you can work this way if you like. This is not how I typically do it. As you saw, I'm more of a pip-tools, pip compile requirement sort of guy. But this is totally fine. And I think it's great. So let's go ahead and run it and just see what happens. It's already set up up here to be run. What happens if I press go? That seems happy. So we can open it up and it should just say hello or something. What is it? What do we got going on here? Hello world is what it should say. And sure enough, we have been, the world has been greeted. Here we go. So very, very cool. This is the foundation starter for our Flask app. One thing worth noting is that it's using a Flask run configuration, a Flask server, where it says, here's the app. But it'll let you set things like Flask environment modes and other things along those lines. So this is pretty nice. The one thing I do want to do is I do want to address the fact that it's terribly out of date, this project. So we're going to say rm -r .venv. And then we'll just say uv venv. And we don't want to ask the AI. We'll say uv sync to install everything. And then PyCharm won't redetect it unless you shut it down and start it back up. Now you can see our Python version is 3.13.12. And it's been updated down here. If I scooch the other side, you can see that it's updated down here in the virtual environment. So it's not a big deal. I just basically recreate the virtual environment through the terminal here and we're good to go. So this is the base version of our Flask app. It's time to write some code, isn't it? Make it look pretty cool. Thank you.
|
|
|
transcript
|
4:53 |
Well, it is super fun to greet the world with hello world as a string. Not the best for the web apps. So I could go and look at the Jinja documentation and come up with this or look at the flask documentation. But I'm just gonna see if I can get the AI to actually generate the shared layout page that's used across different pages. So it has the same CSS, HTML, nav, footer and all that. And then one that uses it. Let's see what happens if I press go there. Well, sure enough, it looks like it made one. That's pretty cool. Let's see if I can get it to push that. You know, that's not where I wanted to add the file. And look at that, it put it in the, I'm kind of impressed there. Okay, I'm impressed it found the right space for it. So let's add that one in as well, which should show up over here. I'm not a huge fan of the names, but let's go and see what we got. It's should have been called layout for this one. But still, hey, I will take a little renaming. And by the way, rename is kind of a, just a simple refactoring type of behavior here. And this one is going to be index. And so let's see if we can go over here and just say flask. There's, it's not imported. There's, it's not imported. So we want to import it at the top because it decided to do it this way. And I would rather have flask dot. There we go. We'll give it a template. And because the way this works, it knows that that's the template folder. So we just have to say index dot HTML and see what happens. Hello, welcome to your flask app. And in fact, welcome to the homepage. This is the main page of our flask app. Feel free to explore. We can open it up and it will show you, hey, look, here's all the head where the styles go. And here's your, your, your content piece. Here's the content piece right there that will be injected. So very cool. It also used semantic markup, which is kind of interesting, you know, main and header and stuff like that instead of just, you know, plain, plain stuff. So there's our app. And one more thing while we're at it, I want to add a CSS framework so that it doesn't look horrible. I have become a really big fan of Bulma. If you've heard of Tailwind and how cool and beautiful that is, Bulma is like it, but a much simpler version. Not simpler in programming, but simpler in tool chain. So Tailwind requires all these build steps and other funkiness, whereas Bulma requires that you simply include a CSS file. So let's go and download that. And really, all I care about is this. So what I want to do is I'm going to put this into the static folder. CSS, I'll kind of group it and then we'll make a Bulma. You need that much hierarchy? I don't know, maybe. So we can put that in there. And the one other thing that's missing here is that I think it might be a default. Let's, let's see what we can do. So if we go to our layout page, we're going to add a style sheet. It's going to be, check this out, autocomplete, static, CSS, Bulma. Which one do you want? Might as well go for the min. Perfect. Perfect. And then let's just see if we get any. Let's see if there's any difference. This should. It's still running down here. We do. Not a request there. Oh, are we not setting dev mode? Let's see. We are not setting dev mode here. So it didn't restyle. So we can say debug equals true. Oh, whoops. This will not help us here. Neither will reordering it badly. Because it's running as a Flask app, we got to set a configuration up here and then turn on Flask debug. Right there. Come back here. I didn't mean to close you all the way. So if we turn on Flask debug and we run this, we make any change. You can see that it's reloading it. Which is great because if I can just type here, hit save, and then the changes go into effect. So not what I meant to show you, but it's definitely something I do want to show you there. So let's see how we're doing here on this. We've got our CSS. We notice a change. Oh, yes, we do. Yes, we do. All the styles are kind of reset because that's how Bulma works. Awesome. Awesome. So we've got our CSS. We've got our CSS in place. And we've got our template in place. So I think we're ready to start adding features to our app.
|
|
|
transcript
|
2:35 |
All right, well, first, let's add a little bit of a nav bar. It looks, I don't know, it looks a little empty without us. We come down here and go to components. And there's a nav bar here. So let's just scroll down. And do we get an example for this? We do with like that little thing. So let's get anything better. So we'll just come down here and copy this code. And if everything goes well, we can put it at the top above the header. And do it like this. We don't want to have we can leave home documentation more. We don't definitely know what this drop down. This is way over the top. We don't want to sign up. I'll leave it there just for for looks. We don't need a little path, you know, I'll leave it there just for the heck of it. But what we do need, is we need some sort of text, I guess they don't have any text, we'll just put podcast collector, and we'll take these out. It's our little brand element. We don't have a real brand, but we should be able to go over here and refresh unless something goes terribly wrong. It's not running. So that would make it hard to refresh. There we go. Notice we got our little brand thing. It doesn't pop open because we're not doing the JavaScript. And I think that's okay. We will go and use a little Balma styles on this. You don't have to know this. Just I thought I'd do a little of the web design for you just to make it fun. We use size five that makes a little bit bigger and has text centered. has text text bold. There we go. So a little bit nicer for our nav bar. We can collapse that way. And then actually, let's do one more thing. Let's do a close to that little tight margin bottom three. Move that stuff down a little. And then in our main area, we want to put this is how you do it with Balma. You say, says padding for so everything gets to come in a little bit. We don't think we want to have this in the layout up here, this header, right? That's weird. When a different h1 per page, I don't know why it would look like that. But here we go. We got our page there and I guess we can put the same padding on the footer. Just if you put the space so we can have a little room there. All right. Well, not incredible yet, but what we need to do is I want to come up with some kind of data to put into this page, which is what we'll do next.
|
|
|
transcript
|
5:55 |
Let's add the data. So normally this would be a database. I'd use MongoDB, a lot of people might use Postgres. You can choose your ORM or not to ORM if you will. But for this example, we're using something incredibly simple, simpler than SQLite, we're using JSON. So I'm gonna just make a little DB here and then we'll use a JSON file. Now I can create a JavaScript file, but that's not what I want. So you just do new file, just call this data.json. And in here, we're gonna have podcasts like this. And then we'll put in a couple of things here. We'll just put title, can't do single quotes in JavaScript, title, every podcast comes with like poster image. That's what you see when you look at it in a podcast player. And we need three of these. So I can hit command D three times or control D maybe. Check it out. 100% sure on Windows for the duplicate there, but duplicate code, you just duplicate selection, see whatever that is. Okay. So for the first title, we'll do talk Python to me. And we'll do my other show Python bytes. And let's throw in the old real Python podcast too, just to give it a little variety here. And for these, I pulled them up. We've got the URL for this one. This one is similar. And then we need the image. The image actually comes from the RSS. So we just go to RSS here and you'll find it under iTunes image here. So that big bad boy right there is the talk Python one. Put Python bytes. You know, I'm not sure why you would do that for me. Why are you so mean? Okay. RSS. I guess it just wants to download it. There we go. That goes here and then real Python podcasts. I pulled that up. It'd be there. And do they have the RSS? Well, they do. And then there's their image. And in order to make this easier to get to, let's go create a Python file. We'll just call it a database. Not really, but it'll have just some data, which will be a dictionary, which is nothing. And we'll have a function load data or something like that. So let's use path here from path lab and we'll just give it the current file. And we want to ask for its directory. And so that would be db file. It's going to be that. And we can use the path syntax here. And this will be data.json. I've got to set this to be global. So we can say read text. And then from there, we can say json.load. I'll read text or whatever. Oops. And then down at the end, let's just say load data, which will load it on start. We should be able to just ask for, let's call these podcasts. I'll rename it podcasts like that. And in fact, remember if you look at the data, this is a piece of data, which has that in a list. I really want just that. And so last thing we could do is .get podcasts like that. And then that would make this a list of dictionary. Perfect. Which obviously is not that. So this will load it up and we should be good to go. Let's see if we can get this to just show up in our index.html. So in our app, in this sort of thing here, we're going to need to just go podcasts equal. We just start typing database and then alt enter. And it'll import our relative thing there. And then we have podcasts. And then we just set podcasts equals podcasts. Over here, we should be able to do a loop. All right, let's see if we can get it to show the title. It's still running. So our saves should have just reloaded it, which is great. And if we refresh it, bingo. Look at that. Right there they are. How cool. So we haven't got our whole design yet, but that's our web app. Pulling these things together. Notice when I went to do these elements here, I got complete completion for, or I could even auto complete all that out, which I should have done using a live template. Very cool, right? So sure, I could just show you a finished web app, but I thought it'd be fun to kind of go through the process of building them to show you all the ways that all the stuff is brought together. So let's do this here. Like when I did the class, right? Like this, we can say class is size. And well, we used five for the H1. So let's do H size four here. But notice it's giving us auto complete, showing where that's coming from. It's giving us our live templates. It's a thing of beauty. Home of my flask app. Let's call this podcast collector. And we've collected through podcasts, which is pretty excellent. There we go. This, we don't really need this, but we are just about done building it out. But I think we've got a few more things to go to get our podcast to show up. And then I think we'll call it.
|
|
|
transcript
|
3:33 |
This view of the podcast is super fun, but not super useful, is it? So let's put a little bit of style on these things. First, I'm going to give it some space between them. I'm going to have margin three all the way around. So that gives them some space there. And this one, margin bottom three as well. Bring it down. Next, I want to not just do the title, but I want to put more stuff in here. So let's put an image. We won't go full BOMA on this. I don't want to spend all that time on it, but we want to get the image from here. So this will be the image. And let's just try that and see how that works. Oh, there they are. There they are. Fantastic. Let's go and just say, let's do this for now. We'll say max width is 128 px. See what that does for us. Oh, that's starting to look good. We can also come down here and put a little BOMA on this. Some class we can say has radius rounded. Not that rounded. Has radius normal is what I want. There we go. Gives a little bit of a nice look there. And let's do down here. We'll say, whoops, not source up here. We'll say border 1px solid hash aaa. Something like that to give like dark, but make Python bytes stand out. There we go. Maybe straight D. I think that's pretty good right there. So that's great. And then we also want to have on the right of this, we want to have the title and make the title link. And let's just put it below it. Let's just put it below it. We'll have a hyperlink here. And the hyperlink is going to go to p.url. And in here, we're going to have p.title. So hyperlink, go to the URL, show the title. How's it look? Sure enough, there it is. And we also want to have this whole section align stuff in the center. So it has text centered. Notice we can type HTC just like you could for code. We can do that for CSS. Perfect. Now, what else do we want to do? Maybe we could do one more thing. We could say inline block and get them to go a little bit like that. Maybe we want to set maybe more margin on these. We'll say margin five is pretty big. That gives it some more space. How about that? We've got a pretty good looking site here. And let me just do one more thing on this, just so it makes our life a tad easier. We'll say target blank. And when I click this, let's click that one. Bingo. Go to that one. Just this. Awesome. How cool is that? And let's go to the home page. And you know what? It can fix that with a code intention as well. Simple little app. But a lot of fun to build, I think.
|
|
|
transcript
|
4:47 |
There's a few more things I want to add here just to show you some of the features that are not entirely obvious. Let's first of all make a new embedded page. I'll just call this about and we need to just quickly clean this up. We'll say about podcast collector and I'll remove the other stuff. Doesn't much matter what's in here or just take these away for a sec. But while we're here, let's suppose I wanted to have an unordered list of three things where each list item contained a hyperlink and the hyperlink had a particular class in it. Well, Michael, the autocomplete is pretty good. So I can start typing LI and then I can type A and then yes, that's not bad. Call it link or something like that. And we can duplicate that. Then we can go start filling in. It's already cool, already good. But we can also use what's called Zen coding or Emmet. So let's suppose I know kind of how I would express this as a CSS selector. So how would you do it? You would say there's a UL and immediately contained within it. There's an LI. And inside that there's a hyperlink and the hyperlink has the class link. And let's suppose I want to have three of them. And then we can add this. If I hit tab, bam. How amazing is that? That is so, so cool. And look, it even has the class, right? Like I said, the dot link. Super, super cool. Another thing I could show you is what if this was, I wanted that to be an ordered list, not an unordered list. How do you do it? The bad way? You change OL, UL to OL here. And you click here and you hope you can find where the other one is and you go down and you don't mess up your HTML. But that's not how you do it in PyCharm. You just type what you want. You want that to be a div? You type div. You want it to be an ordered list? You type OL and it changes. Let me put some more space here so you can see it. Whatever you type here will be matched. So very, very cool that we have that. I love, love that you can do that. So anytime you want to change something, you just type where you want and it gets fixed. So that's a super awesome thing. The other thing has to do with navigation. Maybe I can have enough over in this one. Let's see. We don't have a ton of things going on here, but let me make this real big so I can scroll a little bit. So in terms of navigation, do you see how there's these vertical lines, which is already great. There's nothing connected to the image because it stops right there. But this line right here, you can kind of follow it up and it goes to the div. If you go up here, you can see this goes to the loop and that goes to the h1. If we're in a bigger div, we would see more of it. Let's put this into a div. I'll set a class outer just so you can see outer as we scroll. Let's do a little cleanup. Now, when I scroll this, check this out. If I'm right here, what am I in? What is the style of it? Give me more scroll, please. So if I click right here, notice it shows me, it sort of pins this outer piece. If I scroll a little bit more, it pins this inner div. And so no matter how far I scroll down I am, I can see right now I'm in the div and here's it's line for outer. I'm in the div for this class thing, which goes right there. This one in the middle, you don't see is the for loop, I believe. So, cause it doesn't, it doesn't pin, it pins HTML, doesn't pin Jinja. But this is a really cool navigation here and you can just double click and get to it. So super, super cool. And also, by the way, while we're here, you can jump around at the sort of breadcrumb thing on the bottom and navigate from about to index and so on. Let's give it a little cleanup. I don't really need all that space, do we? That's just so we could scroll. There we go. Put it back. And I think I had the div in the wrong spot or something like that, but that's okay. It's all good now. Let's just make sure it runs. Sure enough, it's unchanged, but we should be able to see our outer in here somewhere. Right there. Yes, indeed. It is all updated. So looking really good to me. There's a bunch of little cool subtle features here in PyCharm for working with web apps. So when people tell you, well, I work with HTML and JavaScript and stuff, I haven't shown you the JavaScript features, but they're very similar to the web stuff here. Awesome. It's full on WebStorm, which is specifically built for JavaScript and TypeScript and things like that. So it's primo.
|
|
|
transcript
|
4:59 |
Let's look at one more feature and this one's pretty new. It's called endpoints. And I'm gonna sort of wrap that together with just navigation of the URLs of this app. So for example, up here in the top, you can see we're in index.html. So that should take us to the function that renders index.html. And we could go over here and say, oh yeah, it's in app and somewhere it's in there. Really, we should be using Blueprints, but we're not. Anyway, I can click this and it'll jump me over to here. And I really wanna call this index, so it has a name. Or I can jump to the code over there, the HTML code that is. So you can cycle between these using that. And it basically detects that we're calling render template and it figures out what the template is, what the template folder is, and then it goes and finds it here. I don't need to be told to put my app code there. I know what that is. Okay. There's a few other things. I also notice this. I can say, hey, you can do certain things with this web endpoint, this view, or you can just go up and see kind of where is its parent. In this case, take me to the app definition. But more interesting is I can say, let's add one more function here. Remember I added that about, let's go slash about, about needs no data. So we can go ahead and take that out. And then a real quick in our layout, let's go to our nav bar, which is hiding, collapsed. So I want to go and actually let's put this up at the top. We don't need documentation. No, no, no, no, no. What's there? So we can put our about up here and I want to make this a link. I want to show you something super cool. So this is a hyperlink. This is an A tag. So I can do href. Now look what I get. It says you can link to the HTML file, which is not really reasonable. You can do straight this. But if I type, I type slash about notice, I get this flask route right here. And it shows me these are the actual logical routes defined over here, like this. That is super, super cool. So we can pull that back up again and put that there. Now sure you could type it, but in a large application, it's really cool to know like these are kind of get logical completion for the URL structure of your site. Really, really like that. So let's just see. Can we go there? So we sure can. And here's our Zen coding created thing. Okay. So when you're looking at this, you have these endpoints. You can actually pull them both up and see for more complicated, more complicated setups, what they are. So we've got our overall app here, app.app. App is the name of the module and then app is the variable. And it says that thing defines a get right here in and about. And you can double click it and it'll take you back and forth. You can also see there's not a lot here because it's not an API, but it shows you the open API documentation. You can get an example of what it would look like if you were to run it or if you were to use JavaScript to get it, more helpful if you're doing APIs. But look at this. I can even make a call to it. And if I make that a little bit bigger, it'll show me, you know, how did that go? It saves it to a file. It gives me the status code. Go up to the top. You can see this. Like it's also the status code. You can see the headers, Werkzeug, content length, connection close, and all those kinds of things. Very cool, right? So I can open this up in an editor and I can see more about it. Run it again. There's actually a ton of stuff. If I go over here and make a minor change, an exclamation point there. Run it again. I can diff it, compare it with a previous one. And notice it says, how did this response change? The response changed because, look at that, it used to say this and now it has the exclamation point there. This is really cool. It's cool for like looking at JSON documents that come back from APIs or for some reason, if you're trying to understand what changed about this. I see it more as an API thing generally, but you know what? Really, really cool. We're going to go into these .http files quite a bit in the next chapter. So I don't want to go too deep, but, you know, they blend together with like testing API endpoints and those kinds of things, as well as this navigation here, right? Like I said, you can go to your endpoints and you can make more room for them and use them for navigation. Use them to understand where different parts of your app are coming from and so on.
|
|
|
transcript
|
4:24 |
We saw that PyCharm understands HTML really well. So if you do things like type A and hit tab, it'll build out the entire A tag, right? It'll do the tag bit, the open and closing, it'll create an href. If you just type angle bracket div and you close it, it'll close off the div, all those kind of table stakes type things. But it also has really good support for the higher level programming languages like Jinja and Chameleon and so on. So for example, in here, in this particular piece, we wanna use a for loop in Jinja to loop over items and show them on the page or something like that. We did this for our podcasts. In our example, we created a bunch of podcasts and we said, let's give the list of podcasts to the template and then show them in a stylized way. This is how we could do it. This is the live template. We just type for and hit tab and boom, this whole thing comes up. Amazing. Maybe even more amazing is live templates that understand the interconnectedness between different pages. So for example, the wrapping page, the overall layout page that has a nav and stuff, the one we used had one spot where the content went. But in real applications, you might have two or three or four different places for the wrapped page to inject stuff back into the main page. It might need to include a file. But the way you do that is you say, I wanna have a block named exactly what the other file has. In this case, additional JS. And those names have to line up or at best, it doesn't work. At worst, it crashes. So what's awesome is PyCharm even gives you auto complete on the available slots in the other page. It's pretty amazing. We saw that if you need to create a big hierarchy of HTML and you can imagine how that might be as a CSS selector. And here's a div. It's got class menu. It contains an unordered list that has a menu list ID. And then it contains a bunch of list items, five of them. We can just do this, hit tab at the end and boom, down it comes. This is super, super neat. I often forget to use it and I'm like halfway through like, oh, I should have Zen coded that. If you can remember, hit it. It's great. Another thing I use all the time is changing types, tag types. So here's a div. I want it to be a span. Do I just go and type in one spot, find the other and go fix it? No, that's incredibly error prone. HTML, you know, like there goes closed div, closed div, closed div, closed div. Well, which of the closed divs should become the span? Sometimes that's a problem, but you don't do that in PyCharm. You just highlight the div and type and it will find the corresponding closing tag and fix it for you. Adjust it. We saw there's awesome autocomplete across all of our CSS files. I threw in Bulma. So we used the Bulma features and it was really easy for me to do that because I could just use the super nice autocomplete like type by type BD. I would get button danger and button dark in this example here, which is not Bulma, but same basic idea with the autocomplete, right? We also get autocomplete on our static files, including CSS files. Last thing in this section. Let's talk about navigation. When you have a really large HTML file, it can be super hard to find what piece goes with what other piece. So two pieces of advice here. One, always format your document. So you format your document using PyCharm's reformat document and it will align stuff. And if the alignment is broken or a piece is missing, pretty easy to see that something is like misaligned after you've reformatted the document. So that's really helpful. The other is you can use this navigation section. As you scroll down, whatever part of the page you're on, where your cursor is, or really the top of the page, I think, it will show kind of the object, the DOM hierarchy of this. So the part we're in at the top of the page is contained within content details, which is within hero, which is within row, which is within active releases. And then you start to see the HTML. So that's really awesome to keep in mind what part of the page you're in. And you can also double click on those pieces to navigate back to them.
|
|
|
transcript
|
1:38 |
A couple of cool things to keep in mind for static files is PyCharm will help you out, but you need to make sure you can help it help you, I guess is the way to put it. So over here on the left, notice I've got chapter 15 and then final and then pypi.org. And in there we have our static files. So PyCharm is like, I looked at the top of this project, there is no static folder. This thing static CSS site.css doesn't exist and I don't know what you're after. But if we go and mark pypi.org as a resource route here, it has a little database looking icon, I guess, or something like that. Then PyCharm says, when you say forward slash static, I'm going to go to the resource route pypi.org and then look for some folder called static. And sure enough, there it is. And within it has a CSS and then it has, you can see listed all there. It's now giving you auto complete, not warning you at all. There's one other squiggly on the screen here, the one to do with bootstrap. This one is coming off a CDN. And so it can't really give you auto complete. And it's saying warning, you're using a CSS file, but I'm not even going to be able to give you auto complete support because I can't look at it. It's over on that other place. So if you highlight it and do the code intention, Alt+Enter, it'll say, let me download a copy of this and store it somewhere in like a temp file. And then it can start giving auto complete off of stuff out of the CDN. And so if you see those squigglies, go ahead and tell this download it. It'll, it'll help you get more, more out of the static resources there.
|
|
|
transcript
|
1:41 |
So you want to minify your CSS. You want to compile your TypeScript. You want to do all these different things. So that's pretty common in web apps. I actually work hard to try to avoid needing these things. But if you do need them, you can come over to your run configuration and hit the little modify options or Alt-M in the Mac case. You can see what the hotkey that's shown there in the top right on your OS and choose add before launch task. And so these are things that can just run before it starts your web app, minifying code or things like that. Once we choose that, you can see things like we could launch a web browser. This is relevant if you're just doing static front-end stuff and there's not an app server to run. You could run an external tool on the command prompt. That's pretty wide open. You could run file watchers. You could run another configuration, which is kind of cool. So you could have a Python tool that does something to prepare your web app to be run. Maybe make sure that the database is preloaded with starter data. Like here's all the states are loaded or here's all of our products are loaded before people start working with it. You can run a remote external tool, which is pretty awesome. Run grunt, gulp, or npm. These are pretty common things you do when you're trying to prepare your web stack. If you're doing tailwind, for example, you can run an npm script. You can compile TypeScript or disconnect the data source. So there's a lot of options that you can set up and add these to be run to make sure that your app is ready to go when it starts running your Python web app.
|
|
|
transcript
|
1:16 |
Well, I hope you are excited about PyCharm's web development tools. They are one of my favorite aspects of this editor. The Python editing plus CSS, JavaScript, HTML, and beyond makes a really potent combination for building web apps. In fact, it's exactly what we use to build Talk Python training, Talk Python, Python bytes, all the APIs, many, many things that you've interacted with that has to do with Talk Python were built in just this way. So now it is your turn. And in this your turn, you're going to create a Flask web app, add a view method to it, get some data with a fake little database, but still something effectively like a database that you would get from using a real ORM or ODM. And then we're going to use that to drive a Jinja template and use a shared layout, not just for the same look and feel, but to make sure we get structural things like CSS and JavaScript delivered exactly the same way and defined only in one place. So there's a bunch of steps here that you can follow and they'll be fun to play with. But I encourage you, once you get those working, to play around with different ideas and just have a bunch of fun. All right, off you go to your turn.
|
|
|
|
12:39 |
|
|
transcript
|
1:35 |
How do you test your web app? How do you make sure it's working? You can write unit tests. That's one way. But that doesn't actually test the whole web app. What that does is it runs some portion of your web app that you wrote the unit test for. Some people use tools like Postman or those types of things where you can create an app that will make an HTTP request and parse it. Or others will use curl or HTTPIE, which is a cool command line app that you can use. But you're already in PyCharm. Did you know that PyCharm has support for this structured, memorable, external testing? Probably not. It's something that I haven't used very much and I'm just starting to use because I originally started using PyCharm when it wasn't there. There's a ton of features coming. You don't always see them as relevant to you when they get introduced, right? But this is a really, really cool feature. You've seen it just a little bit when we talked about the navigation in the web app section. In this chapter, I want to focus specifically on testing web applications and web APIs in a repeatable way and understanding deep details about the request. for example, is a caching header set on this particular request or not? Is there an e-tag? All of those kinds of things. So really, really cool chapter. It won't be super long, but I think you'll find a lot of value in these features.
|
|
|
transcript
|
0:29 |
There are multiple ways to get started, but probably the most structured and permanent way will be to go and create what's called an HTTP file in PyCharm. So just like all the other files we're creating, you go right click where you want it to exist, say new, scroll down to HTTP request, and we'll have a file that we can start working with. So let's take our brand new web app that we just built, our podcast collector, and take it for a spin.
|
|
|
transcript
|
4:40 |
So here we are. Let's jump over and open up our podcast collector and we can go ahead and run it. It's going to need to be running in the background for this, so we won't need to touch it potentially. So if we're in our app, you can see right here, we could go and click generate an HTTP request in HTTP client. I get to this URL. Great. But that just lets us run it in the little sidebar. What if we want to save it and reuse it and make this part of, say, continuous integration or something like that? Well, then let's go over and say file new HTTP requests. And I'll call this collector tests.http. If you don't put anything, it'll put the extension for you. And I moved this over into the Git repository. So now it's asking, do you want to add it to Git? Yes. Yes, I do. Well, it gives us an example. And look at this. We can run it. This is just a pure text file. We can write whatever we want. And we separate. We have multiple requests. We separate them with three comments. One comment is not enough. See how this kind of gives a title up there? If I take it away, it just becomes like a comment, but not a block. So I could run this. And sure enough, it went and did some stuff over at one of the JetBrains URLs. And I could see actually what this file is and would open it or whatever. Don't really need to go into that. But, you know, here's actually, there's where it opened. Here's the details of what was happening, right? So let's do this instead. Let's say, no, we don't want to do that. We want to do HTTP, go down and borrow our URL here. We want to do just that against forward slash. We'll just do get homepage. We'll add some more stuff to test in a second. So we run it. And sure enough, here's the color coded. Very nice. Syntax highlighted response. We can see what headers came back from the server. You can see that it's the response type is text, HTML, UTF-8. It's this long. It closed. It was based on Werkzeug in this version of Python that we said. All those things. We can pass additional information like query strings or whatever. But let's do another one. Let's go over here and say get about page. We could do a get. And then, knows that. And then, look, we can get the about. Or will it give us both? No. It'll give us about. And we could run this one. You can see the tests are passing down there. And here's the output. Somewhere it should say about podcast collector. Perfect. So these are pretty fun. But what's nice is maybe we could call an API. So let's add a real quick API. And I'll just do add app.route. Slash API. Slash podcasts. Plural. And then we'll see def. API podcasts. And what do we want to do? Let's just return database.podcasts. Will this work? Will this work? I'm actually not sure. I know if we return JSON it will. What if I return API slash podcasts? Sure enough. It sure enough returns it as that. Okay. Perfect. So we want this to be our API. This will be our endpoint here. So let's go over to this and see if we can add one more. Get podcasts API. Now there's something that's starting to bother me a lot here is this URL. So look at this. We got about. We can get API or we can get API podcasts. And let's run this one and see what we get. Perfect. It gives us all that data there just like we expected. And it saved the response file which we can then go and look at the JSON. Awesome. And remember you can do diffs on those kinds of things. We can also run all of them like that. And then we get this test runner thing here which is really great. You build up these HTTP requests and then you're going to run them to make sure everything is hanging on. And you can actually evaluate the request response for each of them. Right. Okay. Very, very cool that we can create these and test them. What is bothering me is what about if I move to production or QA? Do I have to rewrite this every time? No. No, no, no. We don't have to do that yet. We'll do that in the next video.
|
|
|
transcript
|
1:22 |
All right, very, very cool what we got going on here with our requests, our tests. But this, this is not cool, right? This, what server is it on? What port is it on? We might want to run these against production for certain things, or maybe some QA environment or something like that. So notice it says run with environment. We don't have any environments. Otherwise, it would show us something other than no environment. But we can choose, like, is there a private file? Maybe we want to exclude this from Git, and it's just a per machine configuration. Or do we want to make this shared? I'm going to go, I'll make it shared. Why not? So we get httpclient.env.json. And in here, we can put values. And notice the top level bit is the environment, dev. And then the values are the things we're going to work at. So I'll do base URL. Here we can put that. Okay. So then back here, we can say run with dev. And instead of this, we can sort of Jinja style, say base URL, autocomplete. So glorious. So now we can put this. And if we rerun this one again, sure enough, we'll get the same data. Well, because the web app hasn't changed. But it still works.
|
|
|
transcript
|
3:49 |
Now, you may wonder, what am I supposed to type here? I can do, let's put a little divider here. I can do a get, I can do a post, connect head patch, trace, web socket. There are some things that you could kind of discover. But what I recommend is you check out this example section because it's one thing to say, does the request return a value without crashing? It's another to say, does it return a value you expected? So instead of making our web app super complicated, I'll just show you some of these examples here that are pretty neat. So you can come down here and it'll show you how do you make a get request? Well, here's a bunch of different ways you could do it. Here's how you specify that the request should accept JSON as a response rather than HTML. So notice when we separate with the three comment separated things, you can put more header stuff down here. I can't edit it because it's a fixed example. But you can come down here and say, we could write accept. And it'll tell you like, hey, I'm looking for GraphQL. Or I could do cache control, etc. All the stuff that you want to pass that you might do as a request header, you can put there. This one's interesting. It says when this comes in, I want you to save it to this particular file. What's another one down here? Post is very interesting. So if you want to post to an API endpoint, you need to send the JSON body. Well, you just write the JSON body right there. And as long as it's before the triple comment thingy, that's good. Let's do some more tests. You can do loops. You can say for each thing in this list of data, I would like you to do a post using JSON and generate the request body or post body out of that. That's super cool. And probably the most relevant is the one with tests. So here I can do a get against here and say I would like to make sure it worked okay, first of all. But then assert that the response code is 200 and then give an error message if it's not. Or down here that the return type, the content type that was returned, the MIME type, was application/json. And if it wasn't, that's a problem. Or that there's some headers. So there's a bunch of cool ways you can add logic to verify that what happened worked well. And you can also do includes. So if you have multiple HTTP files, you can have one for a certain API, one for another API, one, you know, think of how you might break up all the different parts of your web app you're going to test. And then you can just import all of them. And then... run them. So that's pretty cool. It allows you to kind of partition these so there's not one huge file. All right. There you have it. We've looked at a bunch of examples. We've written a few ourselves for our limited web app. and we created a testing environment named Dev where we can specify the server name so that we don't have to worry about trying to rewrite that file when we move environments. One more thing that might be worth looking at here is requests with authorization. So if you've got some website or some part of your site that requires a user to log in, you can come down here and it'll show you like how to use an API token or how to use basic authentication and so on. So look through the examples. And usually there's something for the use case you're trying to reach for here. But these are really cool features, these endpoint features. They're more than just navigation and autocomplete. They also are structured repeatable tests for your web app.
|
|
|
transcript
|
0:44 |
You've seen me doing some really cool testing and exploration with these HTTP client files and the HTTP client. So now it's your turn to give that a try. So jump over here to the your turn section at the GitHub repo, and we have a HTTP endpoint testing your turn. So we're going to work with a couple of different types of endpoints. We're going to work with a website, some things with redirects or just working with headers directly. We'll also work with APIs in different ways, both get and post to create things at that API. It's going to be a lot of fun, and it'll give you a good foundation going forward for testing your own web apps and APIs.
|
|
|
|
29:32 |
|
|
transcript
|
0:57 |
Doing how to work effectively with databases is an incredible skill to have. Think about all the websites you visit on the internet. You go hit a link and it just spins and spins and spins. Three and four seconds later, comes up with an answer. Is that website swamped with users? Sometimes. Most of the time, though, there's some slow, janky database on the back end. And it's slow and janky because the people don't know how to work with it. They've never considered adding the right indexes or even checking for them. And often that's because they have poor tooling, poor tool support. So in this chapter, we're going to spend some time talking about PyCharm's excellent support for databases. Hopefully, the sites that you build will be fast and impressive.
|
|
|
transcript
|
1:15 |
So why is working with relational data and relational databases so hard? Well, I would contend that it's broken or suboptimal tools. You're just talking to your database over the command line running select statements. You're missing out on some amazing visualizations and understanding and validation. Well, broken tools and migrations. Migrations are a hassle. Oh, yeah. And object relational impedance mismatch too. I can't fix those other two for you. But broken tools, let's talk about the tools that PyCharm has that will help you do better with databases. So remember when we said that PyCharm is more than just Python that has all these amazing tools? Well, almost all of the features in this chapter are going to come from DataGrip. DataGrip is their specialized IDE focused specifically on working with databases, primarily relational databases. But I believe they also support some others like MongoDB and things like that. So this is built into PyCharm, but it's a dedicated tool for databases, not just some functionality layered on at the end.
|
|
|
transcript
|
1:37 |
Let's talk about adding a data source. Then we'll jump over to PyCharm, do the same, and really dive into it. So there's this database tool window you can see here on the right. It looks a little bit like a traditional relational database diagram, the cylinder type thing. And you can click plus add a data source or hit the create data source or even hit command N. There's a lot of ways to do it. Once you choose the data source, you can see this partial list of them here is quite extensive. We have MySQL, Amazon Redshift, Apache Hive, BigQuery, ClickHouse, CockroachDB, the globally distributed one that apparently is hard to kill. I don't really know. DynamoDB, which is kind of like MongoDB for AWS, I believe. MariaDB, MongoDB for real, Oracle, Redis, which is kind of like a cache, but kind of like a database, Snowflake for data science. And we're going to play with SQLite in our example. Now, when you click add a database or add a data source, you're going to get some kind of UI. Here's what you get for SQLite. It's going to vary by database, of course. And what you will see here is you'll see that very likely you don't have the driver files for PyCharm to connect and understand that particular database. So see right here where it says download missing drivers? Before you can go any farther, click download missing drivers and wait a second for it to work. And then you can browse to the file, which is how SQLite connections work, or enter a database connection string if you're connecting to something like Postgres or whatever.
|
|
|
transcript
|
1:52 |
For this chapter, I want to use a already existing pre-populated database. So what we're going to do is we're going to go over to our data-driven web apps with Flask, and you can clone that repository, or I've actually already included it here in the PyCharm demos folder, so you can get to it. It's a thinned down version with just one version instead of a bunch of different versions of the app. So let's go over here and just run it real quick so you can see what this data is about. This is from our full Flask course that teaches databases and SQLAlchemy and that kind of thing, but it uses a SQLite database that's already pre-populated, so we can just use that. So over here, you can see it has a limited subset of data. I put the top 100 projects from PyPI at the time of writing. So here you can see the popular ones like Bodo or AWS CLI. This is like peak AWS, I suppose, when I took these snapshots. But here you go. It looks a little bit like standard PyPI, right? Go over to the repo and all those things. So this comes with a database, which we'll have right here. And so what I want to do is explore this database. And again, look at where this file is right here. PyCharm course, demos, data-driven web apps, app, that one, right? This is the whole link to that repo that you already have from the course. That's where you'll find the file here. So you don't have to go and do any extra working. Just take this and go with it. All right, so what I want to do is try to understand this and work with it more than just with Python and using SQLAlchemy, but actually using the database tools from PyCharm to analyze it, visualize it, and even change it.
|
|
|
transcript
|
4:16 |
So we have our database, let's go over and try to add it as a data source. And I don't think I've used a SQLite database connection for PyCharm on this computer, but I could be wrong. Let's see what happens when I hit add data source. And here, notice there's a bunch and we can even go to other. And there's a whole bunch more look at how amazing that is. But this is the one we want SQLite. And sure enough, download missing drivers is where we're at. So let's do that. So those are gone. I've noticed that sometimes it doesn't always download it. So you can hit this download drivers a second time. I don't know why, but then that warning will go away. But I also want to show another thing here. It says default SQL dialect. So when we work with the SQL tools, I don't know how familiar you are with SQL, the query language, but it's annoyingly almost the same, but not the same across databases. For example, with Microsoft SQL server, you can do parameterized queries. And with SQL light, you can do parameterized queries, but how you express those parameters in the queries differs. So let's say that in SQL light, like SQL server, it's been a really long time since I've done this. But I believe you say at parameter name, like at page count. Whereas with SQL light, I believe it's just question mark. And then that's just a positional parameter that you pass to the query. So what this statement here about default SQL dialect means is you will get support and corrections and so on for the flavor of SQL that you choose. So let's hit configure. And it would let me click here and just set SQL light, or I can choose one of these things, Microsoft SQL server or SQL light. As I said, you can set it globally as a default, and then you can actually go or just for this one. So I'll just set it like so. So now we don't need to worry about that warning anymore because it should be happy when we're messing with queries. So now let's go back over here. And notice if I expand this out, it looks like it doesn't work because it doesn't have any settings. But if we go to properties, now this download drivers that I downloaded twice are fixed. So what we can do is here, I can just go here to the file actually, browse to it. And luckily we're close, not exactly the same. But we're close, we can browse over to the file, you know, which is still pretty nested. But you know, there we go. And all the stuff gets sort of pulled in together. And notice it's set the name to PyPI SQL light, which is based on the file name, whereas before it was identifier or something like that. Notice it did a little spinning spin. And now it understands stuff, we can go and open this up and it's have nine tables. Amazing. We can go open up packages and see we have 11 columns, one key and five indexes because our database won't spin like a fool. We could even do things like say, quickly do a little diagram pop up. And you'll see, well, that's a little smaller than one I would hope for probably. But it gives you a little visualization of that table. And while that isn't amazing, I could go and say I'm interested in packages, releases and maintainers. And I want a diagram pop up for them. And there we go. That starts to get to be a little bit more interesting how you can see these fit together. So there's a lot of tools we're going to talk about that we can work with for our database. But it all starts by adding this connection, downloading the drivers. For some reason, it feels like the last couple of times I've done this, I've had to say download drivers. I exit, it says I can't download them, but click here, then it does download them. Then it's good to go. You only have to do this once your machine. It's not a big deal, but I'm only pointing it out so that you don't get hung up on that. And then we have this nice visualization of all of our tables and functions, things like that. Very cool.
|
|
|
transcript
|
4:36 |
Let's start by exploring the diagrams. I gave you a little bit of a sense there, but we can get a more formal proper view of our database setup. This is really nice, you can add new tables as they show up and so on. So if I select a couple of these, I can say create a diagram or I can just go over here and say diagram and instead of pop up, I can create a file that we could save potentially if we wanted. Now we got it to fit just a little bit better. Now I told you about the SQL lite here. We don't need this admin thing. It's not part of our data or anything like that. And if we want a better layout than this, I don't like this big and tall one. We can go to layout and say orthogonal, compact, and that will bump it around and make a different one. It's a little better layout. Let's go for orthogonal, hierarchical groups. There we go. That's actually, that's pretty decent. I'll try one more. I'll do radial, circular. Okay. Yeah, this is my favorite so far. Actually, it's not perfect, but we could take these and we could put them up there and then fit this. There you go. So now you can see our database and you could play around with these diagrams. Notice if I hover over one, let's hover over one up a little higher here. Let's hover over downloads. I hover over a little top bar bit of it. It actually gives me the create script for that table. That's pretty awesome. That's pretty awesome. Not just the table schema, but also the indexes. That's hard. Let me see if I get over. There we go. So you hear, you can see the creep. I got to move slowly here or fast. You got this section. And then we've got the create table for the table structure, but here's the three indexes, created date, package ID, and release ID, where we might be doing joins and that kind of thing. And then if you saw, you hover over like the release ID here, it shows us just how to add this particular field, right? And see there's a constraint on it, not null, but also notice the blue. See these little blue, created date, package ID and release ID. Well, those, I just trick it. Those are the indexes. So the ones that have the blue left margin, that means there's an index on that thing. And the one that is the ID, that's actually the primary key. So you can see it's a key right there. Okay. And then of course, these are the foreign key constraints right there from one to the other. So there's a lot you can learn right here. And if you don't want this table, like if we decided, you know what languages doesn't matter. Take that one out, maybe auditing and licenses. Whoops. Easy now. Licenses don't matter. We can take that out and maybe we'll do another, another way. Let's do an organic net and see how that comes up. Hmm. Not that different. Let's go back to our radial node circular. So there we have it. I'll put this up here. So this is our diagram. You can also go over here and you can right click and say like, I want a new column or a new index or a new virtual foreign key. You can even do refactor like modifying table or rename, which is pretty awesome for database tools. Right? So if you want to save this. So if you want to save this, you can say I want to export a diagram as an image to a file. There's a bunch of different visualizations. and an editor and an editor and graph is online. And then you can also use this. So I want to use this. I want to use this. I want to use this. I think there's different stages. When you're building out a new project, it's nice to kind of have the diagram to understand like, oh yeah. Okay. This is what I'm creating. Oh, and why is there not a relationship between maintainers and downloads? There should be. Maybe we're missing a foreign key or maybe we're missing an index that we should be using for our foreign key, things like that. Right? So it can help you understand the structure as you get started. But I think one of the best ways is, are you joining a new project? Are you coming back to an app that you haven't worked on for a year? You can quickly fire up a database diagram and get a reminder of what the data model looks like. So all of this comes from going to the database, right clicking diagram, show diagram. that's it
|
|
|
transcript
|
4:55 |
Understanding the structure of your data is really important, but actually seeing the data and working with the data itself also important. So this is our diagram, but what we can do is click on this thing that looks like a little terminal, and it says jump to query console. If I hit this, I could pick default or new, I'll just go with a new one and let's push that off to the side here. So check this out. Again, why is working with databases hard? Well, the same reason that writing code can be hard when you use bad tools. Don't use bad tools, use good tools. So watch this. Select, okay, awesome. What do you want to say? Well, let's just say star for a minute because we don't know where. Queries are always written the wrong order. Should say from this location, do these things because then you could get autocomplete. But we'll say select star for now. Go from and check that out. Auditing, downloads, these are our tables, aren't they? Let's go with packages. That's the most interesting and full-featured thing in this. We could say where. Look at that. Autocomplete on our table using our schema. But better, you can see that author email has an index. Author name does not have an index. So if I were to run this query, it would be fast. This query could be potentially slow. I can see that right here. Okay. So let's say author email. I'll do a like and let's just do a substring search. What are we going to put here? I'll put RE. And now if I run it, hit command enter. You can see down here. Look at that. We've got actors, pyyaml and so on. And notice this one certifi comes from Kenneth Reitz, very well known as the author of requests, if you put right there. So if we put a little bit more in there that we can see just his two packages that appear in the top. This is pretty amazing, right? Already pretty cool. But if we go back now to this and say, well, we don't want all that stuff. What do you want? Now that I've said from, I can now get autocomplete on what? So I want the name, author email. And what else do we want? This is the homepage for the package, not for the person. Let's do, we'll put the summary in there. Now, I'm going to enter to run it again and we just get author name, which apparently I didn't set when I imported this data from PyPI's API, which is fine. The email is me@kennethreitz.com or org. I don't know which is really preferred, but Python HTTP for humans, because that's the package name. We could go and put ID, which is the package name as a string. So requests, Python HTTP for humans, certifi, Python package for providing Mozilla's CA bundle. Super cool. Super cool. But look how amazing these tools are, right? As I work with it, it tells me what's here. If I put blah, blah, blah. And this notice it says, there is no blah, blah, blah. You're a fool. Please don't select that. So that's pretty cool, right? That's part of the help you write better code by understanding the structure of what you're working with. So this allows us to query data. Let's see if we can get the AI to do something fun as well. So I'll say, please write a query to join the packages and releases table. Sort by the packages have the most releases. Do I want to attach my schema to the AI assistance? It would be way better if it knew. You know what? It's fine. I don't care. This is not a bank that I work for. Look at that. I'll tell you there's a couple of things that I really enjoy AI for. Writing queries and regular expressions. So let's go and run this. Let's accept all of it because it looks fine to me. Which one do we want to run? This one. There we go. And so we've got the AWS CLI. And look at that. It has 543 releases. And then look at that. Perfect. It's perfect. Now, of course, this is a subset of real data, but it's perfect. So could I write this? Yeah, probably. With some work. It's been a while. I'm doing a lot of NoSQL stuff these days. But I could write it. But this is really, really nicely done. And notice right here, it shows the one to zero to N, one to many relationship right there that we're joining on. So excellent, excellent stuff. This query editor is awesome.
|
|
|
transcript
|
4:57 |
Let's look a little bit at some of the output. I don't think we're going to get as much here with this one. So let's run this top one. And notice you can right-click and just execute just that one. Or you can even execute the output to a file, which is cool. So let's suppose I want to put, let's put the name back. I'll just put star for now. And here we'll do a select star. We can execute that one. Where we get all of them. And let's suppose we want to make a change here. Let's say, you know what, Kenneth? I'm sorry, man. We'll put your name in here. Now notice there's something different about that column. That cell, I guess. Here, than the others. Notice this dark purpley blue is like the selected thing. The rest are, the selected row is a very, very light, very, very dark gray. But this one has like a bluish gray. And what that means is this is an unsaved change. So if I go over here and rerun this again, Kenneth is going away. Right? But if I want to save it, then notice right here, we can preview the pending changes or just apply them. So here it says, we're going to update packages. Check this out. We're going to update packages. I'm going to set author name to Kenneth Reitz where the ID is the one that we edited. And we can submit that. And notice now it's back to like the regular color. And if we rerun this, now it sticks. Right? Isn't that cool? So what else can we do with this little thing here? Right? We saw the preview changes and I could put, maybe we got two Z's there. Oh, oh. I could revert the selected. If I select it, go, oh, don't do that. We don't want that anymore. Roll it back. You can reload it. I believe you can set it to auto reload. You can turn it into a graph, kind of like we saw with Jupyter. We can insert a row. So if I click this, it'll let me type in a whole new section, which will then be inserted as a new one. Or I could do a delete statement here. This is super cool. The data definition language. So if we pull this down, it will basically show you the create statement for packages, including its indexes. Okay? That's pretty awesome. So that's what that thing does there. Let's go back up. We can run a little local filter. Put it up a bit higher. But here, check this out. We can do data extractors. So what I can do is say, I would like the data here. Let's go ahead and maybe get all the data. The console, instead of where, just do a little semicolon there. We can run this one. Or we get all of them. And say, I want to generate that as a CSV. And let's save it. And so over here, we get our CSV file, which is, I don't even know how it wraps that out. Let's do inserts. So here, you can see insert into packages, where all these values equal this. And it's doing a parameterized query. Or no, it's not. It's doing straight inserts. But it's passing the values that you're going to need. The problem is all these have like new lines, which makes it tricky. Here's another insert. So it will say, these are all the inserts to kind of restore the database. Okay. That's pretty cool. Updates. If you want to make the same changes, you could export it to Excel, CSV, markdown, multi-row statements, and so on. So this is a bunch of cool things you can do to get data out. Or you can go and insert as well. Yes, we want to lose our data. And you can even come over here and say, show me the geo viewer or the aggregate view or view the query. Well, not a terribly interesting query, is it? But there it is. So super cool things we can do here. A lot of flexibility, a lot of stuff, right? Transactions and so on. So this is a really great tool. It kind of gives you a little bit like an Excel editor for your database. If you want, I guess it depends on what you're trying to do. Do you want to make changes this way? Do you want to write code to do it? Yeah, it totally depends. But I really like the generate the DDL, export to CSV and other formats. If you kind of want to export as a backup, or probably the most durable one is exported as SQL inserts or updates. Very cool. A lot you can do with this. Some of it's not entirely obvious. like I said, if you change this, for example, here, it looks like you changed it, but remember, you have to submit your changes before they stick.
|
|
|
transcript
|
1:19 |
All right, let's talk about modifying a table. So over here, I've got three columns, a key, a couple indexes, and so on. What if I want to add a column or rename a column or something? I can right-click and say Modify Table, and I get this visualizer here. So if I click on the columns, I come over here, and I can say a new column or a new uniqueness constraint or things like that. Let's just add a new column here. This will be, what are we going to call it? We're going to call it Fun Level, because who doesn't think auditing is fun? This is going to be an integer, and its default expression will be 7, because that's very fun. And I think that's about all we need. What do we want for this? We don't care about that. But here you can see it's setting up the SQL statement to modify the table structure, the DDL. And you see it's green as it's not really applied. We could add a bunch of other things. But let's just hit OK. And now in our column, we have four. And if we go and say, show me a quick diagram pop-up over here, you can see that we have the Fun Level, which is an integer that we've added. So really easy to add and modify these tables using this editor and the tooling there, if you want.
|
|
|
transcript
|
2:51 |
Okay, this last one, you might have seen the ones coming so far, but this last one, I'm not sure that you will see this coming unless you literally know it exists. Because it caught me off guard in a delightful way. So let's just do this. Let's go over to a view. Now, you should never, ever, ever write a SQL statement in the views. This should be down in services, data layers, etc. But let's just write it here just for the heck of it. Okay. So let's suppose I want to have a query here. And we'll just call it query or whatever. It doesn't matter. And I'm going to say, well, let me go and find the packages. Let's suppose that there's a name passed in here, like this. It'd be about, we're going to have to roll this back. Well, let's suppose I want to find the thing with the name. So what would I type? I would type select star from, wait a minute. Wait a minute. Packages. Now, how did I get that list? I hit command, sorry, control space, which is just the show me the autocomplete for now. But look at this. Packages. And look, now it's turned into a query. So maybe I want summary, email. That means author email. And notice I can see that it's using an index. Amazing. From packages. Where author email. Equal. What was it? Me at KennethWrites.org. Something like that. The results of the query don't really matter. What blows my mind is you get error checking, right? Blah, blah, blah. Doesn't exist. You get autocomplete. All of that in a SQL string embedded in a Python file. So good. Why did this happen? This happened solely because we created a database connection to a database. Could have been SQLite, but it could have been Postgres. It could have been something else. And then PyCharm understood that schema and said, once I typed enough select from, et cetera, it's like, okay, that's a database query. Database tools, activate. And here it goes. So to me, this is just delightful. Delightful. That even inside of your regular code, you get support for SQL queries, autocomplete, everything. Mind blown.
|
|
|
transcript
|
0:57 |
Now it is your turn to play around these ideas. If you have a database laying around, you might want to just connect to that and play with it. You already know the data and so on. But if you are totally new and you don't have a database to play with, well then follow along here. In this one, you're going to be able to grab some database and it's called the yellowblue.sqlite. So you can take that and play with it very much like we did. So it'll walk you through all the steps. And remember that this chapter requires PyCharm Professional. So the database data group support is one of the features of PyCharm that is a professional or paid feature. So if you have the community edition, unfortunately you won't be able to use this to explore your database project or whatever. If you do have a pro though, have a go at this your turn. It'll be a lot of fun.
|
|
|
|
19:04 |
|
|
transcript
|
1:06 |
Let's talk about building reliable software. There are many, many different philosophies how you should use unit testing or how you should not use unit testing to help verify your code. In this chapter, we're going to see how to make PyCharm do the unit testing thing. I don't want to get tied down into going too deep into test first development or behavior driven development or any of these things. What I'm going to show you applies to all of those. I'm going to show you the cool tools that we have to discover tests, write tests, run tests, check them for coverage, all of those kinds of things. And then you want to do that first, then you're doing test first. If you want to do it later, well, then maybe you're doing plain unit testing. You want to point that as tools against integrated things more than units, then you're doing more integration tests. All of these are valuable and I'm not here to tell you which one to use, but I'm here to show you some awesome tools that can do it.
|
|
|
transcript
|
1:12 |
Now, as we get started here, I do want to give you two quotes. One from a famous person who writes a lot about software quality and has done a ton of studying of it. And another, anonymous. So I don't know their credentials, but their quote is pretty cool. So initially, the first quote I want to talk about is from Stephen McConnell. He's written Code Complete, I believe was the name of his book. Some really great books around software quality with hard data to back it up. And his quote was, the problem with quick and dirty, as opposed to using testing, the problem with quick and dirty is that the dirty remains long after the quick has been forgotten. I know that's for true. That is certainly true for software, regardless of whether this applies to testing or just taking your time to build it right, refactor the code to be really nice instead of just getting it to work and calling it done. So, yeah, don't let the dirty remain. Take the time to write well-crafted software. Testing can be an important part of that. And the bitterness of poor quality remains long after the sweetness of meeting the schedule has been forgotten. Anonymous. So keep these in mind as you're building software and think about how testing might play a role in preventing or alleviating these issues.
|
|
|
transcript
|
0:48 |
Now PyCharm supports many different test frameworks, and I suspect if there are additional ones, you probably could get them to run, although the reporting tools might not be there for it. So if you go to add a new run configuration, you can see there's a whole category for testing. We have auto-detect the tests. We have pytest, NoseTest, Twisted, UnitTest, Doctest, all right there. And we also have Tox, which creates different environments, different versions for Python, use the virtual environment, and then runs your code in again and again to make sure that it works on, let's say, 3.9, 3.10, 3.11, and so on. So you can go and create a run configuration this way. That's not how we're going to do it. I'll show you how to just run the test directly.
|
|
|
transcript
|
2:45 |
All right, let's play with some of the tests and some test code that I put into the project. Here you can see the URL PyCharm course is the root. We have demos table test app. So if we open this up, there's not a lot going on here. There's a simple program that we'll run. And the idea of this, let's just run the program real quick and see what it does. It's like OpenTable or something. You can say, hey, I'm looking for this type of restaurant. Please book me a table. So I'm feeling like Thai food right now. It says, oh, there's three and we have Thai roses. And let's book that second table. That one's by the window, maybe, who knows? So it's booked and says, you book this table at such and such time. All right, and now if we look at Thai, let's see there's only one left at Thai roses because we booked one of them. All right, so that's how this app is supposed to work. But we don't care so much about working with the app. We want to test it. So what we're going to do is we're going to have a virtual environment. And in our virtual environment, we're going to have pytest installed so that we can use it. And what you can do, instead of going to that run configuration, you just right click and say run test. But do you see how it says run pytest here, not just unit test? That's because I went over here to tools, Python integrated tools, and I moved it from auto detect to pytest. So it doesn't try to run unit test or something else that's not right. Like pytest. pytest is by far the most popular these days. So definitely consider just setting that as the default. Then what I can do is I can go and run these tests. Hey, they all work. However, they're not all as good as you would think, as we'll see in a minute. Okay. So we have our pytest in test.py. And notice it's giving us some decent output here. We can do things like install pytest-clarity and other extensions if you prefer to change how it looks. And notice, here are our tests. And PyCharm has discovered that, hey, here's a test I could run. This one is not yet written. We're going to write that next. But in addition to running it this way or right-clicking it running that way, we can do all the standard things like run pytest for tests, debug it, and so on, profile it. So if you really wanted to set a breakpoint here, you could go and debug it and have PyCharm walk you through your unit test, which is incredibly helpful if you're trying to track down a bug or figure out why a test is not passing. So we found a table. And sure enough, it passes. There we go. But notice that that sets it to run a singular one, not all of them,
|
|
|
transcript
|
3:47 |
Just for completeness sake, let's actually write a couple of tests. Okay, so here's this test that a table can be booked. If you're new to how pytest works, the way that it understands what to do is if a function starts with test underscore, it will be discovered by pytest and run, and tests being in the name of the file also lets it get discovered. Okay, so let's go over here, and I put some notes just to remind myself what the heck we're up to here. So I'm going to say a table, and notice there's this core layer that we can test. I'm always a fan of having nice separation. So we can say all tables, bracket zero, that'll give us a table. We're going to book that table, passing its table ID, and what we get back is a booked table. So this actually returns a booked table. Is it the same object? Did it get set in the database and returned as a query? Doesn't really matter, but we're going to want to work with both of those. So we're going to get a table, we booked it, and now we can verify two things. First, we want to verify that the table itself, the one that we got, is booked. So we'll check here. We'll say assert, this is how pytest works. We put some Boolean expression. Assert table is booked. Right? That's the first thing. And assert table ID is the same as the book table dot table ID. Okay. So we can run this again, make sure all of our tests are passing. And if we actually went over here and just made a change, like what would happen if we didn't book the table? Would our tests still pass? You want to make sure you're testing something for real. Indeed, if we don't set that value and we're not actually getting this set the way you would expect. So put it back. Works. A little bit of flavor of test-driven development there, but not too much. And then for the final one here, not that side, the final one here, what we want to know is we cannot book a booked table. We're going to find a table by category 2. That's like Thai or burgers or whatever. And then we're going to book that table. I'm going to get the first one. And we're going to book this one. That should work. That's basically the same thing we did in our test before. But now we want to assert that if we try to book it again, that it's an error. Well, let's try to run that. Hmm, we've got an exception. Okay, not ideal. The exception is that the table is unavailable error because it's already booked. But that's what we want. We want it to be an error if we try to do the wrong thing. We're testing the edge cases here. So what we can actually do is we can say with pytest.raises, we give it this exception, which I guess we could probably put as core. And then we run it. It's testing for this error's existence. It says if you do not throw this exception and you go through this context block, this with block, that itself is an error. But if you do, that's what you're looking for. So we're trying to test the error handling here. We run this again. Sure enough, it throws the error. And if for some reason we don't run the code that throws the error, it says error. It did not raise the exception that you expected it to raise. So perfect. There we have a couple of tests written and running them and testing them with the pytest runner. You can do things like show the past ones, only show the failed ones or the ignored ones, all those kinds of things. So there's a lot of controls here and we'll dig into them a little bit more soon.
|
|
|
transcript
|
5:02 |
So you feel like you've tested your code, right? All of it? Now, how much code, how much test code you write and how much test coverage and how much of your program you actually feel need tested can vary a lot depending on the type of app, how complex that code is, how central it is to it. Do you need to test the about page on your web app or the about box in your desktop app? Probably not. But if it's core to your application, you should test it. So do you know how well that part that you really want to test is tested? Well, luckily, PyCharm can tell us using something called code coverage. Now, let me cover, let me cancel this out, comment this out here so that we're not using all of our tests. And then let's run our tests here. And do they pass? Well, how about that? They sure do pass. Amazing. But how much of our code in this core library is actually tested? So what we can do is we can come up here and we can run it, we can debug it as we saw, or we can click over here and hit run with coverage. And this will tell us what portions of our code is executed when the tests run, and what portions are not even touched ever. If you find a portion of code that is never ever run when you run all of the tests, you're not testing that part of code, are you? We can also do profiling, which is understanding the CPU and memory performance of our application. We're not going to do that now, although we could, but we want to focus on this answering this question of how much of our code is tested. Well, let's find out we run this. And it says, well, you're going to need coverage.py from a Ned Batchelder. You want to install it or enable the built in one. Let's see what happens if I click install. It says it failed. Why did it fail? Because it's done by uv and PyCharm. Although it supports uv, it supports uv somewhat. So uv pip install coverage. There we go. And let's try to run it again with coverage. Here we go. All right, it ran just the same. Perfect. And does it tell us stuff down here? Well, we wrote an XML report. You want a flashback? XML. There it is. We don't need to see that though. We don't care. PyCharm reads that and the other information. And then it just gives us pretty awesome reports here. Check this out. So, well, the tests, 100% of the tests were run when we ran 100% of the tests. Amazing. They theoretically could be conditionals and stuff, but you don't really care about that number. You want to look at your program. Well, the program itself is like a front end to it. We didn't test that. That's fine. 96% of our core library is covered. Well, that's pretty cool. What parts are covered and what parts aren't? So let's go over here and open this up. So, right, we've got this report over here on the left, which is really nice. We've got this specific report on the right, but let's just open this up in the editor and push that away for a minute. Notice we scroll through there's green, green, green gap, because that's just a space that doesn't really execute. But look at line 33 and 34, red. This line of code, this raised table error was never, ever executed. So we've done the test as the table booked. It's always been false. So we just carried on and done the thing. Let's see what else is here. All right. Well, it's just this one. What do we need to test this portion of code? Well, we need to give it an invalid table, a table that's unavailable, and try to book it. What test did I comment out? Well, well, well, test that you cannot book a booked table. Let's put this back and write, we're trying to book a table that we've already booked. And so that should trigger that error handling and that checking so that we don't double book anyone. Let's start in again, see if there's any difference. Do you want to display? Yes, let's replace it. So now we have a another test here, this one. And look at that. Our test coverage went from 96 or 97, whatever it was, up to 100%. And we go back to this line here, where we're doing our test, this portion, line 33 in particular, has now been executed. How awesome is that? So now, yes, every bit of code is tested. Every conceivable combination of possibilities tested. We don't know, probably not. But we know at least every bit of code has got some bit of execution during a test. And that's pretty excellent. So using code coverage is super, super simple. Just know you got to install it and then you run it. Coverage. That's it.
|
|
|
transcript
|
3:53 |
Last but not least, let's look at this test writer one more time. This time without coverage. You can see we have some tests that are all passing here. So that's great. Let's give a little bit more variety here. Let's go in and let's actually comment this out. So we have a failing test, right? We're no longer checking for an exception or no longer having an exception when we're trying to double book a table. So that gives us some failed tests and some succeeding tests. One failed, three passed, zero milliseconds. So over here, we've got a couple of commands. We can rerun all the tests. We can simply rerun the failed tests. In this case, it doesn't matter. But if you had slow tests or many, many tests and you're trying to debug it and you want to say, well, I put a break point in my code and different tests are calling into this and I really just want to test and debug this one section. just rerun the failing tests here. Okay. We can also rerun automatically. So that's on. And what if we go over here and we make a change? What if we go over here and say, if table booked, then do that. Hit a little save. You see, after a moment, it reran. I didn't hit any keys to make that happen. But now what if I go over here and I put this back and I hit save, hands off, and then I hit save. Test pass. Cool. And so anytime that there's some kind of change here, it will rerun, which is pretty awesome. You don't necessarily need that going now. But if you're really in test mode, you just want to have this maybe, especially if a second monitor, a really big monitor, you can pop this thing off, make it float over like this, and you could stick it on a second window, just leave it running and start editing your tests. So we'll kick it back over here because I have a very small monitor for recording so that it all fits on your screen nicely. So bringing this runner back, however, so we've got our rerun test automatically. You can turn that on. You can stop it if it's still going. You can show the past ones, show the failed ones. Let's rerun all of them so we can hide the passing ones. There's ignore ones. If you have ignore flags in your code here, you can sort it. You can import test results if you would like. And how do you export them? Well, over here, you can export test results. So if you want to be able to save these, look at them, understand them in your editor, and so on, you can come down here and we can set our runner settings, like basically this UI's settings, scroll to stack trace, show inline stats, navigate with single click, and so on. We can even modify the run configuration here, which is using pytest against this file right there. We don't need to change it, but if you wanted to, you could. So there you have it. There's a bunch of features down here that you might want to use. We could also navigate around, like I can see if there was output from one of these, like let's go over here and just say print testing our, pushing our luck. we rerun these and we go to this. You can see here, we get this output, but only from this particular test. So you can kind of look into the debugging and so on like that. If you double click it, it navigates you around to where the test is, which is pretty awesome. And you can do more settings as if you were there, even if it's not shown. Primarily jump to source this is probably what you want. Okay. So that's the test runner configuration and all the tools. A lot of options, really great test runner here in PyCharm. Be sure to make use of it.
|
|
|
transcript
|
0:31 |
Now it is your turn to play around with the unit test features of PyCharm. There's a project called YourTable, similar to the one we've been playing with. And it's in the same folder here as the YourTurn for this particular chapter. So we're going to do some pytest testing. We're going to play with the run configuration, do some code coverage, all of those things. So just play around, see what you can do with the test runner and have fun.
|
|
|
|
14:09 |
|
|
transcript
|
0:44 |
PyCharm has fantastic support for helping you use external packages in your project, as well as helping you create packages which will be used in other projects, either locally through some way of sharing them locally, or even uploading them to PyPI as a wheel and letting the world take advantage of your projects. So we're going to go through that lifecycle of things. Basically, how can we use external packages? We've seen a lot of this already with requirements.txt files and so on. And how do we create a package, a modern package, with PyCharm?
|
|
|
transcript
|
1:10 |
Now, first of all, if you open a PyCharm project with a virtual environment, PyCharm will look and say, what is specified in this project with a requirements.txt or requirements within a pyproject.toml or something along those lines, or even a setup.py, if you like to throw it back a few years. And it'll say, these things are not installed. Would you like to install them? And you can click install requirements and it'll go do basically a pip install behind the scenes. That's super cool. We've already seen that. And similarly, if you start using one, for example, using FastAPI on line six, and it's not in your requirements definition, whatever that may be, it will suggest that it will add that for you. So this is how PyCharm already works with, and we've already seen how this does this, works with using external packages inside of your project. And this happens to be also a package destined for PyPI. So it's kind of full circle, right? It's external packages that this package might need to do its job. So it'll put them into the package definition and requirements.
|
|
|
transcript
|
9:01 |
Now let's create a package. It's going to be completely silly and not really do anything. Think of it as kind of like rough or black or something like that, where it finds the errors. But we're not actually going to write it. I just want to play with the packaging tools. So I'm going to create a new folder called Zapify. So that's the fun name of our project. And I want to have a virtual environment that I can create with uv. So let's do it like this over here and we'll just say uv, venv. I actually have a better, I guess, a better alias that you can see. I'll say which venv. And you can see, I actually, when I typically create these, I'll do like specify Python, say that's only the ones managed by uv, not ones managed by say homebrew or the OS or whatever, put it into this folder .venv, and then automatically activate it as if, if you did dot or do the source that was trying to do there. V, and V, then activate like that. Now you can see our Zapify is active, not super relevant, but there it is. So we have this set up. And if I show hidden files, you can see the virtual environment there. And I could either drag it over to PyCharm or I could be in here and I could say PyCharm dot to open the local working directory. And sure enough, it grabs my, you can see here on the right, it grabs my Zapify virtual environment that I created. Very, very cool. So here we're going to have things like our PyProject dot Tommel and our readme. Maybe this will put a little readme. And I'll just say Zapify goodbye bugs. And by the way, PyCharm has this like render or half render, different things you can do to see readme. Although it's not super relevant. That's the kind of stuff that's going to go here. So the next thing I want to do is I want to actually have the package, right? So typically, if you haven't done this before, when you create a package destined for PyPI or a wheel in general, you've got all the files that like manage it like pyproject dot Tommel and readme and so on the license. And then you have another folder that has the actual source code. So I'm going to go over here and I'm going to say new Python package. What is a Python package? It's basically a directory with a name and a __init__() file in it. But let's just do it anyway. We'll call this Zapify. And sure enough, it's done all the hard work of creating a folder with a name with this in it. But notice it has a little icon of a dot. That means it's a sub package. So in here, I'm just going to put a version. And we'll do it like this. We'll do a version equals what else is it going to be? It's going to be ZeroVer. And we'll put that in there and we'll just give it one function. Def check. And would check if this thing was real. And that's it. So this is the entire implementation of our package. Now, there's different ways in which we can set up this project or prepare it for PyPI. So I could go over here and I could go to tools. And I could say create a setup.py. No. This is not really the way. This is not really the way. The way these days is pyproject.toml or something along those lines to build a wheel. So instead, what I want to do is I want a pyproject.toml. So say file. And let's go new. No. No pyproject.toml. No help for you. Or is there? Let's try this. Let's go over to AI assistant. Now, I realize this only works if you have the AI assistant. But we do. So let's try. So what I want to tell it is I'm creating a new Python library package named Zapify. And I want to create a pyproject.toml so it can be installed and built for pypi.org using the hatchling build backend. Can you do that? So sure, I could go to the internet and look this up and grab a cookie cutter or grab a template and mess with it. But let's just see what this does. It's thinking about it. It says, why sure, I can do this for you. Here's your build backend. Beautiful. Here's your project. And it looks like it's all on board with the ZeroVer. Right? It's all on board with the ZeroVer for doing x, y, z. And so let's say a Python package for. Oh, we don't want to edit it yet. Hold on just a second. So it looks plausible. Okay. What do we include? The Zapify folder right there. Yeah. Like this looks pretty good. Pretty good. Let's go ahead and, oh, hold on for the version. Did you see that? Yeah, that's right there. Excellent. So let's go and push this button and it will create a pyproject.toml. And we will add it to get, because sure, why not? And now it named it this. No, my project. .toml. It has to be named that. Come on now. Oh, what did it not copy that over? Well, let's just copy. And put all that here. So Zapify is good. Do you want the name to your capital? No Python package for your linting. We can do our readme. I guess it's lowercase the way I made it. MIT. This will be me. And it's got its different versions. MIT license is fine. Keywords, errors, linting. Let's just put that. For its dependencies, does it have anything? Well, not yet. But we could play with that for a second. It has the bug tracker. No. Put my name here, my username. And I think we're pretty good, of course. We're going to keep that lowercase. What do we include in our source distribution? And what do we include when we do a build? These are the things. So now we have this package. Can we build it? uv comes to the rescue again. Check that. uv build. Oh, it did it. So it created in the dist folder, it created a binary wheel and a or a source distribution, excuse me, and a pure source wheel. It was binary. But really, it means it can run anywhere because there's nothing in there that is platform specific, right? It's not like we have C or Rust or anything like that. Let's do one more thing here. Let's go over here and we'll just say we're going to import. Oh, like eight. So install, is that going to work? It did work. All right. In our pyproject.toml, we can say we have a dependency of flake eight like that. We don't really, but nothing doesn't do anything anyway. And hey, we have a new dependency. Let's bump the version two and we'll say uv build. Oh, we got to be super careful with this folks. So here's what the version is when you run it. So if we'd run this, what does it say? Nothing. We can do our live template and then just go check. Run it again. Hey, version two. But if we go to our pyproject.toml, it's not reading that. We could set it up to do different stuff, but we have it. Let's just do our uv build again. And now we're getting version two that we can upload to the PyPI. We would just do uv publish. And it says, great. What is your username and password underscore, double dunder token and your API key, by the way? I do not want that on my PyPI account. I've got real stuff up there. I'm going to leave that there. Anyway, this is really fun. This is creating a project, the entire life cycle here using PyCharm. And we even got our pyproject.toml using the AI assistant instead of going out and searching for it.
|
|
|
transcript
|
2:12 |
Let's talk about building a real package from scratch using PyCharm. We can create a project where we have some file name, ideally probably the same as the package, but it can be whatever you want, where it's going to store the package management files like the readme, the license, pyproject.toml, and so on. And then in there you click on it and say, create a new Python package, which really creates just the structure for getting started. That is a directory with a __init__.py in there. We want to make this installable. And there's a bunch of settings that pip and uv and others need to install Python packages and really to put them on pypi.org in the first place. Traditionally, this has been a setup.py and PyCharm comes with a feature to create a setup.py. Now, setup.py is discouraged because using setup.py means when other people install your code, they literally run setup.py on your machine. You are probably trustworthy, but people should be suspicious about this because it's effectively means when you pip install something, you're running arbitrary code off of the internet. Not the best. So instead we want to use pyproject.toml. This allows us to build wheels with metadata that does not need to execute to install it. Here we can read about pyproject.toml on packaging.python.org, what it is, why you should use it, all of those kinds of things. So we could go here and learn the format, and then we can do that. Or we could just type it into the AI and say, Hey, AI, I would like you to help me create the pyproject.toml for this project using hatchling or whatever you want for your build back in. Please do that. And it does quite well, actually. And then there's this little plus added to a file button. And if you don't have something just selected, but you just press it, it will actually create the whole file over for you in the correct location. Fill in the details where it says your details here. Off it goes. The tools are pretty excellent. And with a little help from uv, AKA uv build, uv publish, it's really easy to get these up on PyPI.
|
|
|
transcript
|
1:02 |
Have you ever dreamed of creating a package and publishing on PyPI? Or maybe you already have, but you're looking for better tools. Well, you can check out this Your Turn for the packaging chapter. Here we are at the Your Turn, and you can see you'll go through the steps of creating a new different package. This one actually does something. A little bit. It has some form of functionality, at least for you. So we'll create a package. We'll add a feature to it. We'll create a pyproject.toml to allow us to build and publish it with uv or other build tools, if you like. And then we'll show how to install that locally into our virtual environment so we can use it. We won't publish it to PyPI because, well, only one person gets to do that, and we don't want to pollute PyPI with demo applications, right? So go over here. Check it out. It's a lot of fun to build your own packages. And once you have a real and useful idea, go through these steps and put it on PyPI and share it with the world.
|
|
|
|
13:30 |
|
|
transcript
|
2:32 |
Let's talk about measuring performance and focusing on the performance of your application. In many places, our intuition serves us well for developing software. I found that it is often, not always, but often bad for performance. Things that look complex seem like they should be slow because, wow, look at everything that's happening over there. Then maybe somewhere else there's a single function call, but deep down inside, complex things are happening. We don't see, or it just turns out to be computationally slow for that particular algorithm. So our intuition is not great. I have one experience in particular in my past where I was working on a project that had to be real time and it had to process all of this data 250 times a second. So 250 hertz. That means if it took more than four milliseconds to process that data, it was not going to be able to keep up and it was no good. When we first ran it, it was 16, 20 milliseconds. Oh no, it's not going to work. It is not going to be able to do this. We're going to have to rewrite everything. It had about 6,000 lines of complex math in it. It was a crazy scientific type of thing. And I looked at it and thought, there's no way we can rewrite that and optimize it without just completely breaking the math. So before we gave up though, I ran it through a profiler, which we're going to talk about in this chapter. And it turned out a single data structure was the problem. We were using a list instead of a dictionary. I changed it to a dictionary. It ran five, six times faster, easily within the window of that four milliseconds per loop. Done. 6,000 lines of math code that we wrote. One line of some dictionary lookup or list lookup. And it was that one line. I would have never, never in a thousand years found it if it weren't for the performance tools and the profiler that I use. So keep that experience or keep that story in mind as we go through this chapter. And as you think about performance of your applications, don't guess. We have tools. They come with PyCharm Professional and they're super awesome and easy to use.
|
|
|
transcript
|
1:01 |
In this chapter, I'm just going to look through the features and talk you through it and then let you actually run the same program in the Your Turn. Okay. So we'll go through this kind of quick here because the analysis is deep, but the tools are pretty easy to run. So to start a profiling session, we've already seen this appear for other things. For example, when we talked about code coverage, we can go to the run menu and choose profile, whatever the name of your current run configuration is, or we go to the top right by the run and debug buttons and hit the dot, dot, dot and choose profile program. You can also go to the project menu, right click on a file that can be executed and say profile that. You can also go to the unit tests, a single one or all of them and right click and say profile this unit test. So there's a many different ways that we can kick these off. but once they get started, they're all basically the same.
|
|
|
transcript
|
5:42 |
Let's talk about the results. The profiler for PyCharm is really just the C-based profiler that's built into CPython itself. Python has two profilers. I think it's called Profile and C Profile, one being pure Python and one being C-based. The C-based one is way faster, and we'll talk about why that matters later, but it's the preferable one of the two. So PyCharm isn't really doing any sort of special magic on its own in terms of executing the profiler. It's running the one that comes with Python, and then it's grabbing all of the results and giving you a great visualization on top of it. So when you start it up, you'll see, oh, here is the starting of the C-profiler, and then your program runs. There are five different ways in which you can look at your results. You can have a flame graph. You can have a call tree. You can have a method list. You can have statistics. You can have a call graph. My two favorite are the statistics and call graph, but flame graph is also pretty cool. So, for example, here, we've run this, and we know there's a couple of functions that are particularly recognizable or interesting to us. The first thing that I always do is sort descending by aggregate time. So there's two ways in which the time is measured. You can say, how much time did you spend in this function exclusively? Or how much time did you spend in this function as it being a part of the call graph? Or another way to think of it is when I have a function, if it calls into another function, like it does a loop 10 times and it calls requests to do a download. Maybe the time it actually spends in that function is relatively very short, but each call to request takes a long time. I think it's useful to consider all of that as one thing. Say, okay, this is the area of the program that we're actually spending a lot of time in. We're calling requests 10 times and that adds up. So this is what this particular sort does. If you want to say, I only want to see the time you're in this function, not counting function calls it makes to do its job, then look at own time. That's the default when it comes up. I don't think it's the best default time MS. That's the way to go. So when you pull up this view, what you should do is look for functions that look familiar to you. There might be some like time.sleep. Well, that's something we're doing somewhere in the code technically, but maybe it's not our code. Maybe we can't really deal with that. But we know that we're calling search and we thought that that might be a slow portion. And we're calling compute analytics. There's another one called get results or something like that, but it's actually off the screen. It's faster than these other two. So you can look at this like compute analytics is taking 58% of the time of the execution. And search is taking 28. Together, that's a good chunk of our program. It's over 75%. So this is pretty good. This is a pretty good way to look at it. But the call graph, I think, is maybe a little bit better. So we can dive into these using this call graph. Kind of got to zoom in and move around. Start at the bottom. And it says, okay, we ran program. Program did the dunder name, dunder main thing and called the main function, which took 99.6% of the time. So what is main doing? Well, main is calling go. Okay. And this is super interesting. That's a follow up. My point, dive into my point from before. Look, go is using one millisecond of its own time. But it represents, in total, 99.6% of all execution time. This own time, it would just be like, oh, this is instant. What are we worried about? Like, no. Go is the ringleader of all the stuff that's being kicked off that's causing trouble. Or doing work. However you want to think about it. Now, you can see it sort of fans out a little bit. So we're calling compute analytics. Okay. And that's taking 58% of the time. We want to figure out what's happening there. Calling get records. Which is 13%. And it's calling search, which is 28%. Notice the color. Red. Really dominating the execution time. Golden. Significant. Over 50% of the time. Green. Maybe not completely okay. But it's a lot less than the others. So the color has a meaning here as you look at this as well. And this is how you read this graph, this call graph here. So again, color matters. Green. Green. Fast enough maybe. Don't necessarily start there. Medium. Mm-hmm. 50% of the time. Red. Slow. All right. So color matters. Now, you can also navigate between these two particular views. So here in the statistics view, I can say show on call graph or navigate to source. So like, just show me the code. What is happening with this thing? Why is it slow? So if I want to go to navigate between the views, though, I can say show on call graph here. And then when I see it on the call graph, I can right click on it and say navigate to source as well. So you can kind of navigate around on these things. That's how you generate, run the profiler and then inspect the results. It takes a while to get good at really understanding what it's telling you, when it matters, when you can ignore stuff, when it's out of your control, when it is within your control, all those things. But play around with it. There's a lot of visualizations and tools to help you understand.
|
|
|
transcript
|
3:20 |
Before we finish this chapter, I want to give you a warning. I gave you a warning about how our intuition fails at the beginning and how these tools can help. Now I want to give you a warning about how they can deceive you and how they can cause problems. So to answer the profiling questions and understand what part of code is doing what, when, where, with what other functions and all these things, the profiler has to put a bunch of extra steps of code in each little part of what your code is doing. So, for example, it might have a bit of code that says, we're entering this function, doing some work. Now we're exiting that function and record the state of how long we were in there. You know, save when we entered, save when we exited, update the statistics. And depending on different parts of code and what is being profiled and what is not, that can be very, very significant. I have this atom on the screen. Why did I choose that graphic? It's a little bit like quantum mechanics and the Heisenberg uncertainty principle. You can know certain things about it, but if you measure it, then you have the inability to know other things about it. Basically, by measuring stuff, you're changing it. All right. Debuggers also have this effect, but less so. And profilers are trying to answer the question of what part is fast and what part is slow. Whereas debuggers are just talking about like, well, what is happening? So the influence matters less. So here the problem is certain parts of code get disproportionately disadvantaged by profilers. For example, if I have one function that calls into, let's say, pandas or some C-based or Rust-based library, one function call, well, the profiler says, we went in here, we called this thing, we waited for it to finish because it's not profiling the C or Rust code, and it took this long. So the overhead is kind of like 1x of however much overhead it adds for one function. On the other hand, if I have another function that says, for one to a million, call into this other function of ours, right? Well, there's a million measurements of start recording this function, start, stop recording that function, record how long that was, update the statistics. So these kind of chatty, very busy functions get penalized more than the not so busy ones, the ones that are calling databases and APIs and external code that is native and not being tracked by Python, those kinds of things. So you can say, well, look at this one, it's so much slower than the other one. When in reality, it has so much more profiler overhead than the other one that maybe they were even, but it looks 10x worse. I don't know, I'm just making up numbers here. But that'll give you a sense of, it's awesome, this information it gives you, but do take it with a grain of salt and realize the act of measuring all this stuff with a profiler will alter the performance, which is the exact thing that you're trying to measure. Think quantum mechanics. It's a little bit like that. You measure it, you might change it.
|
|
|
transcript
|
0:55 |
So you saw me play with these tools and you saw the diagrams of all the kind of data you can experience. So I want you to take this app called PerfApp and run it through the profiler in PyCharm and see what you can do. Explore it. See if you can figure out what parts are slow. Why is it slow? Now, before you dive into this, I do just want to point out it's a little bit of a contrived app. It's supposed to do a little bit of data science, a little database, a little bit of database and a little bit of external APIs. And it's supposed to be computational heavy in all three of those areas. But you're not sure which one is more computationally heavy than the other. Is it one is 10 times worse than the others or are they about the same? That's what you're supposed to find out in this your turn. So have fun playing around. Again, you have to have the PyCharm Professional Edition to get this profiler feature just so you know. All right, have fun.
|
|
|
|
4:25 |
|
|
transcript
|
2:51 |
There it is, the final stretch, the finish line. And you made it, well done. You now possess many of PyCharm's superpowers. Of course, a lot of stuff you see done in PyCharm you can do with other tools, like just the terminal in a lot of ways. However, these make you so much more productive when you use a proper IDE like PyCharm. So before we close out the course, let's just do a quick wrap up and chat about what you've done and what you should take with you on the way out of here. We talked about why IDEs were important, the spectrum of them, how PyCharm natively works with projects. And while that makes it a little tiny, tiny bit harder than just opening a single file to get started, in the end, it brings all these pieces together in much more structured ways that are truly powerful and gets better and better as your projects get bigger. The editor is something you live in all day when you're working in PyCharm, and it's really amazing with all of its integrations. and we didn't really even talk very much about all the plugins you can get to make it do even more. Source control is top-notch. We even saw the GitHub integration for working with PRs and issues. Refactoring is how you avoid analysis paralysis. You think it's going to be maybe like this, but you're not sure. You really got to get it right. Well, get started. Learn what you need to learn. Refactor and go in the true direction you should be going. Databases are super and we saw that PyCharm supports and integrates deeply with many different types of databases. Web applications are my specialty and PyCharm of course is great there, but don't forget that that also means WebStorm and the other tools, DataGrip, all those IDs that bring together things like TypeScript and CSS and so on. The debugger, always be debugging, as Uncle Paul told you, always be debugging. It's amazing. So really great way to understand how your programs work And if you have any bugs, well, awesome way to solve it. We used PyCharm to create a package with our pyproject.toml and theoretically build and publish it with uv. You wanna see why your program's slow? Our intuition is bad, use profilers. The test runners in PyCharm are excellent. You can even run tests for your HTTP endpoints. Jupyter, if you're in data science, is core to your day-to-day work and PyCharm has amazing support for Jupyter notebooks. Remember, Jupyter Notebooks in their pure web form have very bad support for linting, reformatting, refactoring, error checking, highlighting, all of these things, right? Everything that the PyCharm editor does, if you use it in PyCharm, use Jupyter Notebooks in PyCharm, you get all that for free. And there's a bunch of additional tools that we touched on throughout the course.
|
|
|
transcript
|
0:28 |
Don't forget to take the source code with you. There's a bunch of projects in here that we've worked on in the demo section and the code section we started with, as well as the UR-turns. These are gonna be great resources for you. So please follow this URL, go over to GitHub, start considering forking it, and that way you'll have it for keeps. If you don't do GitHub or Git, just click on the green code button. There's a download a zip file. Save it so you got it as a reference.
|
|
|
transcript
|
0:26 |
And finally, you may have gotten really busy, not had a chance to do all the your turns. If there are some of these you have not done and you are enjoying them, go back and work your way through them. They're pretty much standalone. I try to put enough information in the instructions that you don't have to have active memory of what we just built in the video before they're useful. So try to finish these up if you didn't have the time to go through them at the end of the videos.
|
|
|
transcript
|
0:40 |
And with that, thank you, thank you for taking my course. I'm really glad you did and congratulations on making it all the way to the end. I think at this point you've seen an amazing set of features from PyCharm and I'm sure you're gonna get much more out of it because you have gone through the course now follow me on the various places that you might be interested in. If you wanna stay in touch, mkennedy.codes is my website, blog, you can subscribe to the RSS there, follow the Talk Python To Me podcast, subscribe to it in your podcast players, same thing for Python Bytes, and well, consider taking another course here on Talk Python Training. With that, thanks, goodbye.
|